
How to Choose Your Lifepath and Attributes in Cyberpunk 2077
Your journey through the neon-drenched streets of Night City begins not with a gun, but with a choice. In Cyberpunk 2077, the first and most defining decisions you make are selecting your Lifepath and allocating your starting Attribute points. This is the foundation of your V, shaping how you see the world and how you can interact with it. Let's break down these critical early choices so you can start your legend on the right foot.
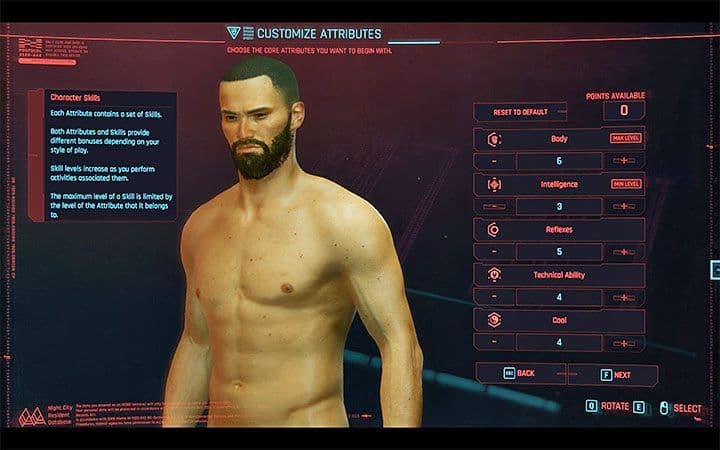
Allocating initial attribute points is a critical step in defining V's playstyle.
Choosing Your Lifepath: Where Did V Come From?
Your Lifepath isn't a rigid class, but a rich backstory that flavors your entire playthrough. It determines your unique prologue, provides special dialogue options throughout the game, and colors your perspective on the corporations and gangs of Night City.
- Nomad: You start in the Badlands, the desolate outskirts beyond the city lights. This combat-heavy intro throws you right into the action, making it a great, straightforward choice for newcomers. Your Nomad knowledge offers unique insights when dealing with the free-roaming clans outside the city.
- Street Kid: Your story begins in Heywood, a district pulsing with street-level life. This immersive urban intro grounds you in the city's slang and struggles from minute one. Street Kid dialogue options are the most widespread throughout Night City, giving you a natural "local" advantage in countless conversations.
- Corpo: Your origin is the glittering, cutthroat City Center, specifically within Arasaka Tower. This high-stakes intro plunges you into the world of corporate espionage and betrayal. It provides unique corporate insight and a cynical, insider's view of the powers that rule Night City.
Don't stress this choice too much. While each Lifepath offers a distinct 30-minute prologue and fantastic role-playing flavor, they all converge onto the same main story path. There's no "wrong" answer—choose the fantasy that appeals to you most.
Understanding Your Core Attributes
After the prologue, you'll distribute points among five core Attributes. These are permanent for your playthrough (you can only reset them once), so it's wise to have a plan. Think about how you want to play: do you want to talk your way in, hack the security, or smash through the wall? Your Attributes make that possible.
Here are the five pillars of your build:
- Body determines your raw physical power, health pool, and stamina. It's essential for wielding heavy weapons, forcing open doors, and surviving in the thick of a firefight. Reaching Body 15 unlocks the incredibly powerful Adrenaline Rush perk, which provides passive health regeneration during combat—a game-changer for survivability.
- Reflexes govern your agility, critical hit chance, and evasion. This tree is essential for Blade users and Assault rifle specialists, making you faster and deadlier. If you dream of being a cyber-ninja darting between enemies with a katana, this is your primary stat.
- Technical Ability is your engineering genius. It governs your armor rating, cyberware capacity (how many implants you can equip), and crafting prowess. For those who love tech weapons that shoot through walls or want to upgrade their iconic gear, this is key. Pushing this to Tech 20 unlocks the Edgerunner perk, allowing you to exceed your cyberware capacity at a cost.
- Intelligence is the domain of the Netrunner. It directly scales your quickhack damage and increases your RAM capacity, which is the resource used for hacking. If you want to disable enemies from across the street, fry their cyberware, or turn security systems against them, pour points here.
- Cool affects your composure, stealth efficiency, and precision damage. This Attribute is vital for silent assassins, snipers, and knife-throwers. It helps you stay undetected, land devastating critical hits from stealth, and withstand panic in tough fights.
⚠️ Watch out: A common mistake is spreading your points too thinly across all five Attributes. Specializing is powerful in Night City. Focus on leveling 2-3 core stats that support your desired playstyle to unlock their highest-tier perks and become a true master of your craft.
With your Lifepath chosen and a basic understanding of where to invest your Attributes, you've laid the perfect groundwork. Your V now has a past and a direction for their future. The rest is up to you.
Essential Controls and Navigation Tips for Night City Beginners
Night City is a sprawling, vertical maze of chrome and neon, and your first few hours in Cyberpunk 2077 can feel overwhelming. Before you dive into the story or pick a fight with a gang, mastering a few core navigation and interface mechanics will make your life infinitely easier. Let’s get you moving like a seasoned mercenary.
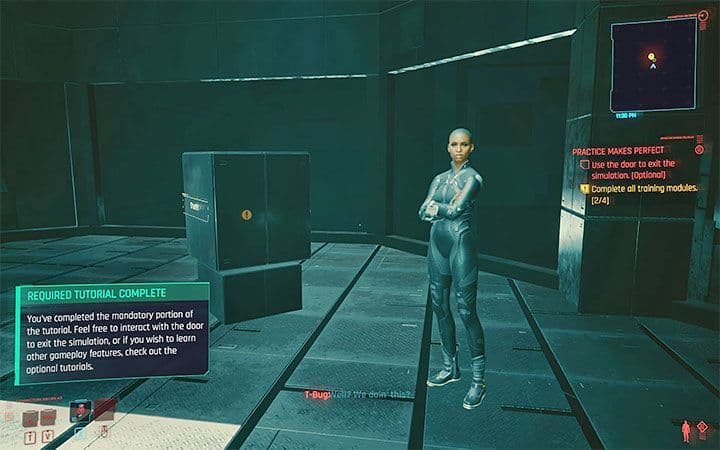
The VR tutorial is essential for learning basic movement and combat.
Your Home Base and Essential Tools
Your journey begins in Watson, specifically in the Little China area. This is where you’ll find V's Apartment, your personal sanctuary. Inside, you’ll find a Stash for storing weapons you want to keep but aren’t ready to use, and a Wardrobe for managing your outfits. Trust me, you’ll be visiting here often to offload loot.
Two of your most vital tools are tied to simple button holds. First, get in the habit of holding [L1/LB] to activate your Environment Scanning. This highlights all lootable containers, enemy outlines, and hackable objects in a bright orange glow. Use it constantly when entering a new area—it turns hidden mines and valuable gear from secrets into obvious targets.
Scan a room after a fight. It makes looting every corpse and container a breeze, ensuring you never miss a valuable component or eddie.
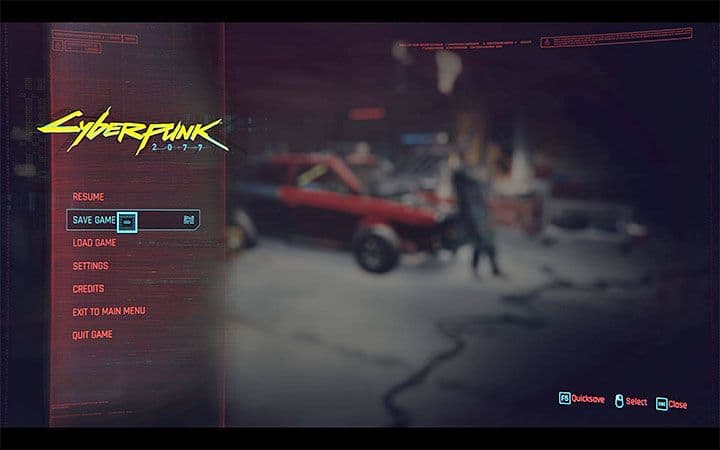
Your other lifesaver is Manual Saving. Don’t rely on autosaves. Get into the rhythm of opening the Pause Menu and pressing [Square/X] for a Quick Save before risky conversations, entering combat zones, or attempting a tricky hack. For major milestones, use the [Options] menu to create a dedicated manual save. This habit saves you from losing hours of progress to a bad decision or an unexpected glitch.
Getting Around Night City
Navigating the city’s vast districts is key. Fast Travel points are unlocked simply by walking near their terminals, which appear as blue hologram icons on your map and in the world outside mailboxes. While they’re convenient, don’t overuse them early on—driving reveals hidden gigs and world details you’d otherwise miss.
When you do drive, tap [Right D-pad] to toggle Third-Person Driving. This camera gives you vastly better visibility of oncoming traffic and your surroundings, making navigating Night City’s chaotic streets much safer than the first-person view.
Sometimes, a fixer will tell you to wait for a call. Instead of actually waiting, open your Pause Menu, select Skip Time, and fast-forward 24 hours. The call will come through instantly, letting you progress without the frustrating downtime.
Putting It All Into Practice
Here’s how this flows in a real scenario: Before heading out from your apartment in Little China, do a quick save. Hop in your car, switch to third-person view, and drive toward your objective instead of fast-traveling. When you arrive, hold scan to survey the area for enemies and loot before engaging. After clearing the location, scan again to clean up, then quick save before moving on. This loop will keep you prepared, wealthy, and alive.
With these essential controls under your belt, you’re no longer a tourist—you’re ready to navigate Night City’s chaos with purpose. Let’s go.
Best Beginner Builds for Cyberpunk 2077 Update 2.0
The moment you step into Night City, you’re a blank slate—but the choices you make now define your power fantasy. In Cyberpunk 2077, your build is your identity, and the 2.0 Update has refined the archetypes into distinct, powerful paths. Don’t stress about getting it perfect; perks can be reset anytime, but your core attribute choices are your foundation. Let’s break down the best beginner-friendly builds to get you started strong.

The revamped perk system in Update 2.0 allows for more distinct build archetypes.
The Unstoppable Solo
If you want to walk into a room and leave no one standing, the Solo build is your ticket. This archetype focuses on raw power and survivability, perfect for players who prefer direct action over subtlety.
You’ll want to prioritize Body and Reflexes as your main attributes. Body unlocks perks like Adrenaline Rush (available at Body 15), which provides passive health regeneration in combat—a literal lifesaver. Pair this with the Berserk cyberware operating system for a temporary damage and armor boost when things get hairy. Your weapons of choice are shotguns for devastating close-range blasts or iconic cyberware like Gorilla Arms for brutal melee finishers. This build is all about enduring punishment and dishing it back tenfold.
Start by clearing the Watson district. It’s your tutorial area, packed with manageable NCPD scanner hustles to level up your Body and Reflexes quickly.
The Ghostly Netrunner
Prefer to solve problems without ever being seen? The Netrunner build turns you into a digital phantom. This playstyle revolves around Intelligence and Cool, using a Cyberdeck and Quickhacks to disable, manipulate, or eliminate enemies from the safety of a shadow.
High Intelligence increases your RAM capacity and quickhack damage, letting you upload daemons like Short Circuit for instant kills or Contagion to poison entire groups. Cool enhances your stealth capabilities, making it easier to stay hidden while your hacks do the work. You can clear entire strongholds without firing a single bullet, which is incredibly satisfying—and safe.
⚠️ Watch out: Enemy Netrunners can hack you back. If you see glitches and a red progress bar, use your scanner to find their trace line and eliminate them fast.
The Tactical Techie
For the player who loves gadgets, ingenuity, and having an answer for every situation, the Techie build is excellent for beginners. It centers on the Technical Ability attribute, which governs crafting, tech weapon proficiency, and your Cyberware Capacity.
The star of this build is the Tech Weapon. By holding the charge shot, you can fire rounds that penetrate solid walls and cover, letting you safely pick off enemies from impossible angles. Technical Ability also lets you craft and upgrade your gear, including iconic weapons, ensuring you’re never behind the curve. This build offers a powerful, flexible playstyle that feels clever and dominant.
The Blur: Sandevistan Katana Build
Want to feel like an anime protagonist? The Sandevistan Katana build delivers that iconic, time-slowing action. Focus on Reflexes for blade damage and attack speed, and Cool for critical hits and stealth bonuses.
The core of this build is the Sandevistan cyberware, which, when activated, slows time by 50-85% for a few seconds. The QianT Mk.4 version, sold by Fingers in Japantown (if you don’t punch him during Automatic Love), has a stellar 15-second cooldown. During these slowed moments, you can dart between enemies, landing multiple katana strikes before they can react. It’s a high-speed, high-risk, high-reward playstyle that’s pure adrenaline.
Remember, you’re not locked into your first choices. In the Character Menu, you can press [Triangle/Y] on any purchased perk to refund its points for free, allowing endless experimentation. Find what feels right—whether that’s being an immovable object, a ghost in the net, a tactical genius, or a lightning-fast samurai. With these foundations, you’re ready to carve your own legend in Night City.
How to Master Combat and Quickhacking in the First Hours
Welcome to the concrete jungle, where every firefight is a puzzle and every enemy is a walking computer. In Cyberpunk 2077, mastering combat is more than just good aim—it's about understanding the tactical layers that turn a chaotic shootout into a controlled takedown. Let's break down the systems that will make you a legend in Night City.
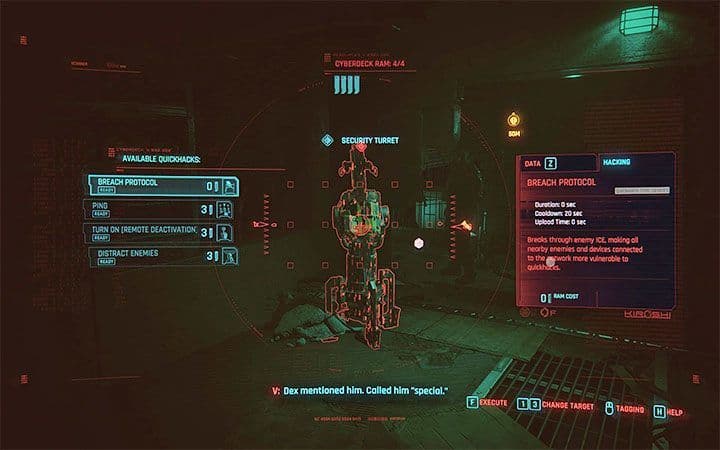
Quickhacking environmental objects is a core tactical layer beyond shooting.
The Art of Quickhacking
Your first superpower is Quickhacking. This isn't just a fancy skill; it's a remote-control toolkit for dismantling threats before they see you. The flow is simple: hold [L1/LB] to scan your environment, target an enemy or device, and press [X/A] to select a hack. Each hack consumes RAM, a resource that recharges over time. Two early-game hacks are your bread and butter.
- Short Circuit deals massive electrical damage and is devastating against drones and mechs.
- Contagion is your crowd-control specialist, spreading poison between clustered enemies. With high Intelligence, it can wipe entire groups silently.
Use Contagion on a group, then follow up with Short Circuit on the toughest target. The combo damage is brutal and often ends fights before they start.
Mastering Movement and Defense
Standing still is a death sentence. Cyberpunk 2077 rewards fluid, aggressive movement. Press [Circle/B] to perform a quick Dodge, essential for avoiding grenades and sniper fire. While sprinting, hold [Circle/B] to Slide into cover or close distance for a melee strike. This isn't just for style—it breaks enemy aim and lets you control the engagement.
Healing has changed, too. Press [Up D-pad] to use a healing item like MaxDoc or Bounce Back. These now operate on cooldowns instead of consumable stacks, so you can't spam them. Watch the recharge bar and time your heals wisely; pushing too hard without a heal ready is the fastest way to a game over screen.
Know Your Enemy: Netrunners and Tactics
The streets are full of Enemy Netrunners who can hack you just like you hack them. You'll know it's happening when a red progress bar appears on your HUD, warning of an incoming attack that can blind you, set you on fire, or disable your cyberware. Don't panic—activate your scanner immediately. You'll see a yellow trace line leading back to the hacker. Follow it, locate them (they're often hiding in the back), and eliminate them to break the connection.
This is the core combat loop of Cyberpunk 2077: scan to identify threats, use quickhacks to weaken or control the battlefield, and employ tactical movement to engage on your terms. It can feel overwhelming at first, but once these systems click, you'll move through Night City not as a tourist with a gun, but as a true mercenary in control.
How to Find the Best Early Cyberware and Vehicles
Your first hours in Cyberpunk 2077 are about survival, but your next big leap is about power—specifically, the cyberware in your limbs and the horsepower at your feet. Here’s how to find the best upgrades and free rides that will transform how you navigate Night City.
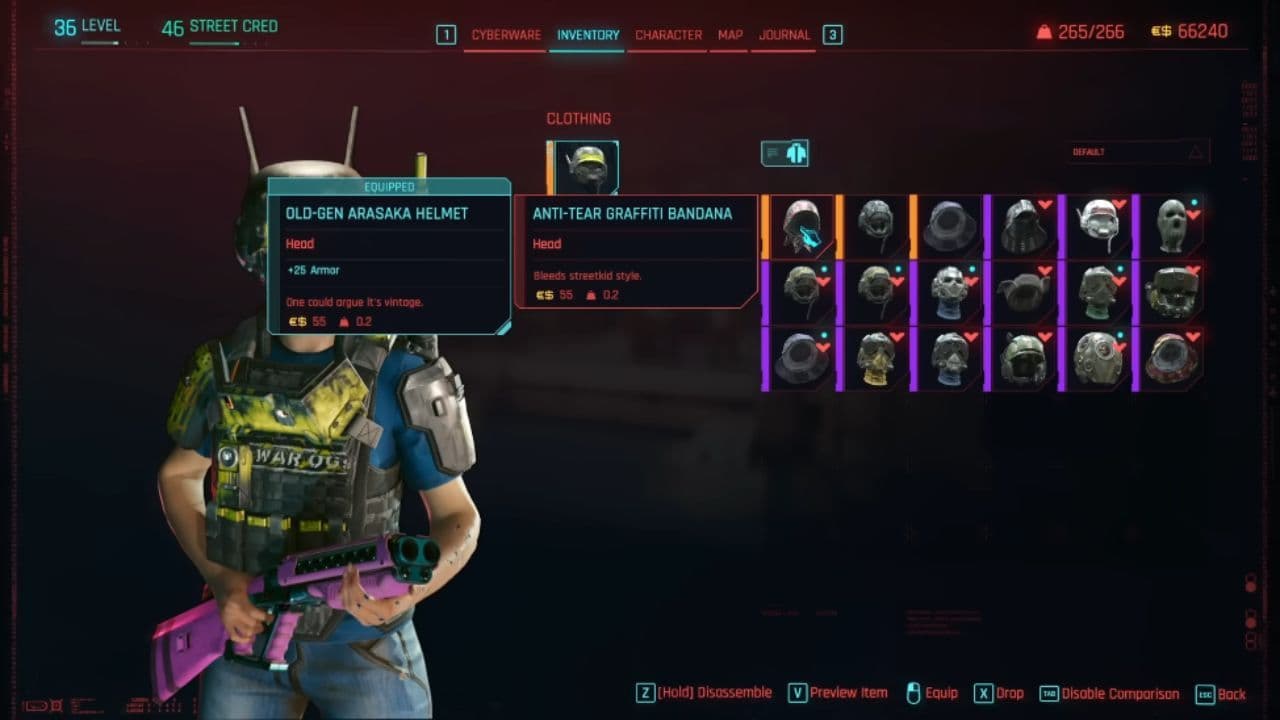
Ripperdocs are essential for upgrading V's early-game cyberware and armor.
Essential Early Cyberware
Before you splurge on fancy guns, invest in your body. The right cyberware is a game-changer, and your first major stop should be Viktor Vektor, your personal ripperdoc in Watson’s Little China. You owe him 21,000 Eddies from your initial chrome; paying him back unlocks his full inventory. It’s a steep but mandatory fee—trust me, he’s your most convenient source for critical early upgrades.
Two implants are worth saving for immediately. First, the Kerenzikov for your Nervous System slot. This cyberware slows time briefly when you dodge or dash while aiming, letting you reposition in a firefight or line up a perfect headshot. It’s a lifesaver against tough early bosses.
The ultimate mobility upgrade, however, is the Reinforced Tendons for your Legs slot. For roughly 45,000 Eddies, it grants a Double Jump. This isn’t just for style—it unlocks the verticality of Night City, letting you scale buildings, escape tight spots, and reach loot-filled rooftops you’d otherwise miss.
Loot everything and complete NCPD Scanner Hustles in Watson to quickly amass the 45k Eddies for the Reinforced Tendons. The double jump pays for itself by opening up countless shortcuts and secret areas.
A Must-Have Weapon and a Vendor Warning
While building your body, keep an eye out for an iconic weapon. During the early Panam questline in Watson, you’ll assault Nash's hideout. Loot his body to obtain the Widow Maker, an iconic tech precision rifle. Its charged shots can penetrate walls, making it devastating for a Techie build or anyone who likes to shoot from cover.
When you later head to Westbrook for the main quest Automatic Love, you’ll meet Fingers, a ripperdoc in Japantown. This is critical: do not punch him, no matter how slimy he seems. If you attack him, you permanently lose access to his unique shop, which includes some of the best early Sandevistan cyberware in the game. Keep your cool to keep your options open.
Claim Your Free Supercar
You don’t need to buy vehicles; the game gives you great ones. After completing the main mission Ghost Town with Panam, return to the Badlands. Head to the cave north of the Sunset Motel (the same area from the mission). Inside, you’ll find a blue shipping container illuminated by a lamp. Parked within is the Rayfield Caliburn, the fastest car in Cyberpunk 2077, yours for the taking with no strings attached. It handles like a dream and makes crossing the Badlands a joy.
With these key upgrades—mobility from your chrome, firepower from your stash, and speed in your garage—you’re no longer just surviving Night City. You’re starting to own it.
Cyberpunk 2077 Beginner Mistakes to Avoid
Night City is a brutal teacher, and Cyberpunk 2077 is unforgiving of rookie mistakes. This final guide is your cheat sheet to bypass the most common frustrations, saving you from wasted Eddies, bricked builds, and untimely deaths at the hands of the NCPD.
Always keep manual saves to prevent losing progress.
Save Your Iconic Weapons
The moment you see a weapon with a yellow background and a unique name, treat it like a family heirloom. These are Iconic weapons, and they are one-of-a-kind. You can upgrade them through crafting tiers as you level, turning an early-game favorite into a late-game powerhouse. The single biggest mistake you can make is selling or disassembling them. If your inventory gets full, stash them in your apartment’s Stash or at any Drop Point. Trust me, you’ll want that Widow Maker or Lizzie later on.
Commit to a Build Early
Trying to be a jack-of-all-trades is the fastest way to become a master of none in Night City. The attribute system in Cyberpunk 2077 rewards deep specialization. Avoid spreading your attribute points thinly across all five stats. Instead, focus on 2-3 stats to unlock the powerful Tier 4 Edgerunner perks at 20 attribute points. A focused Solo (Body/Reflexes) will steamroll enemies that a scattered character would barely scratch. Remember, you can respec perks anytime, but attributes can only be reset once per playthrough, so choose your core stats wisely and stick with them.
Don’t Buy Cars, Earn Them
Fixers will flood your phone with offers for overpriced rides. Ignore them. Save your Eddies for Cyberware, not chrome-plated status symbols. You get a free car after Act 1, and Jackie's Arch motorcycle becomes available after The Heist by calling Mama Welles. Some of the best vehicles, like the hypercar Rayfield Caliburn, are free rewards from specific side quests. Your wallet will thank you when you’re standing in front of a Ripperdoc with 45,000 Eddies ready for those Reinforced Tendons.
Respect the Danger Meter
This isn’t a suggestion—it’s a survival tip. Before charging into a gig or side job, open your map and hover over the icon to see its danger level. If it says ‘Very High’ or you see enemies marked with a skull icon, turn around. You are not ready. These missions are designed for higher-level characters with better gear. Attempting them early is a quick reload. Start with Low or Moderate risk gigs in Watson to build your Street Cred and arsenal safely.
Loot everything, but don’t just sell it all. Hold [Triangle/Y] in your inventory to disassemble common gear into Crafting Components. These are often more valuable for upgrading your Iconic weapons and crafting ammo than the paltry Eddies you’d get from a vendor.
Fear MaxTac, Don’t Fight Them
Getting a wanted level in Night City is easy; surviving one is not. If you commit crimes in front of the NCPD, your wanted level will climb. At Wanted Level 5, you don’t get more cops—you get MaxTac. These elite special forces arrive via dropship and are essentially unkillable at low levels. Your only option is to escape by hiding immediately. Break line of sight and get out of the search zone. Trying to stand your ground is a guaranteed trip to the loading screen.
If you take only one thing from this guide, let it be this: Night City rewards the patient, the prepared, and the focused. Save your unique gear, specialize your build, invest in your body over your garage, know your limits, and know when to run. Do that, and you’ll not just survive the streets—you’ll own them.
