How to Reach Takemura's Hideout in Cyberpunk 2077
This is where it all comes together—or falls apart. In Cyberpunk 2077, the mission "Search and Destroy" is your ticket to one of the game's most significant endings, but reaching it safely requires navigating a dangerous meeting. Your goal is to get to Goro Takemura without triggering a trap, and it all starts once you've wrapped up the previous act.
Look for these blue graffiti markers to find the correct path.
First, ensure you've completed the main job "Playing it Safe". This mission serves as the Act 2 finale and is the direct prerequisite. Once it's done, you'll receive the call to meet Takemura, kicking off "Search and Destroy."
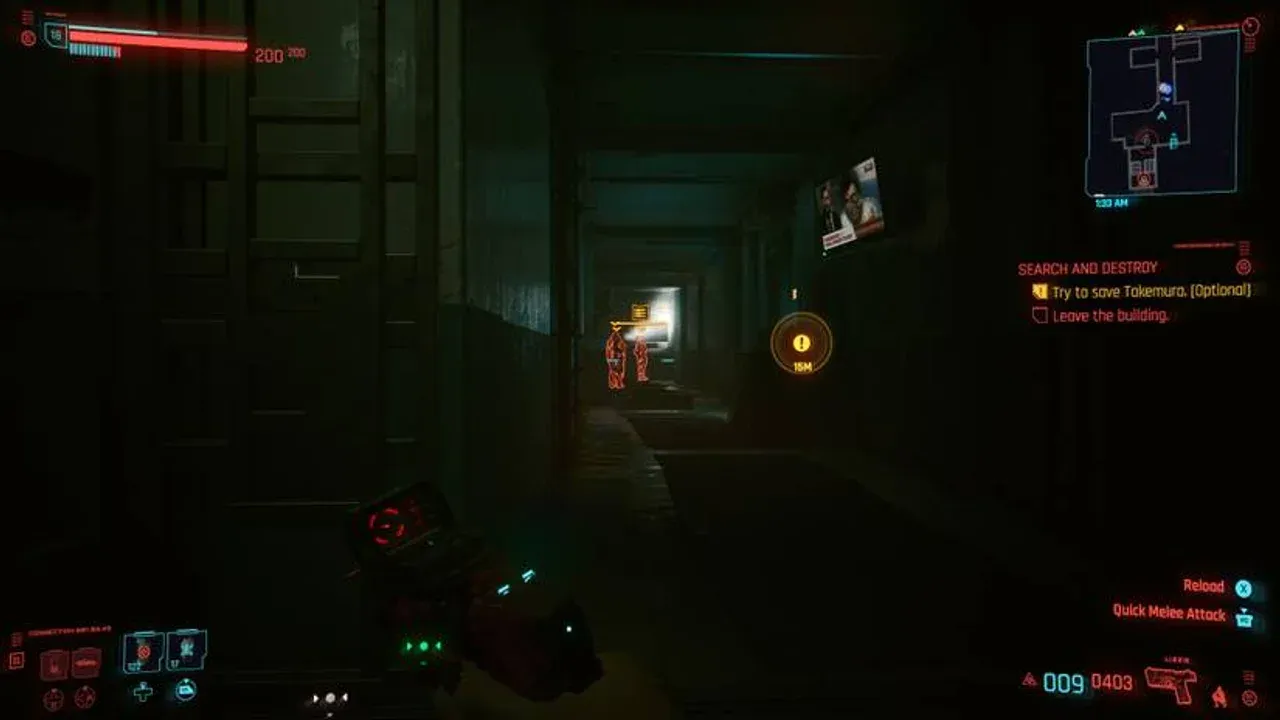
Your destination is his Japantown Hideout, an abandoned apartment building in the Westbrook district. Head to the marker in Japantown and make your way to the third floor. Here’s where you need to be precise: you’re looking for Room 303. When you arrive at the door, press [F] to knock. You must knock exactly four times. Trust me, this isn't a suggestion—it disarms a trap, and getting it wrong means a nasty, explosive welcome.
Inside Room 303, you'll find Goro Takemura, the former Arasaka bodyguard who's been your reluctant ally. He's holed up here, planning a risky move against the corporates. The dialogue here is largely for flavor and doesn't lock you out of any major paths, so you can choose what feels right for your V.
Make a manual save right before you enter the building. This meeting is a major branching point, and having a save lets you explore different choices later without replaying hours of content.
With Takemura briefed and the stage set, you're ready for the next, far more chaotic phase of the mission. You've made it to the hideout safely—now the real test begins.
Search and Destroy: The Arasaka Ambush and Floor Collapse
You’ve made it to the hideout and knocked four times—now the real conversation begins. In Cyberpunk 2077, this tense meeting is where your story collides head-on with Arasaka’s power struggle, and it all kicks off with a scripted betrayal you can’t avoid.
The floor collapse following the Arasaka assault.
Inside Room 303 at the Japantown Hideout, you’ll first speak briefly with Goro Takemura—your dialogue choices here don’t change what happens next, so feel free to roleplay. The critical audience is Hanako Arasaka, Saburo’s daughter and heir, who appears via hologram. She’s listening from Room 303 to hear you recount the events of “The Heist” to prove your innocence in her father’s murder. Lay out the truth as you know it; your testimony is what she needs to act.
Pay attention during this chat—Hanako’s belief in your story is what sets the entire final act in motion, regardless of the immediate chaos that follows.
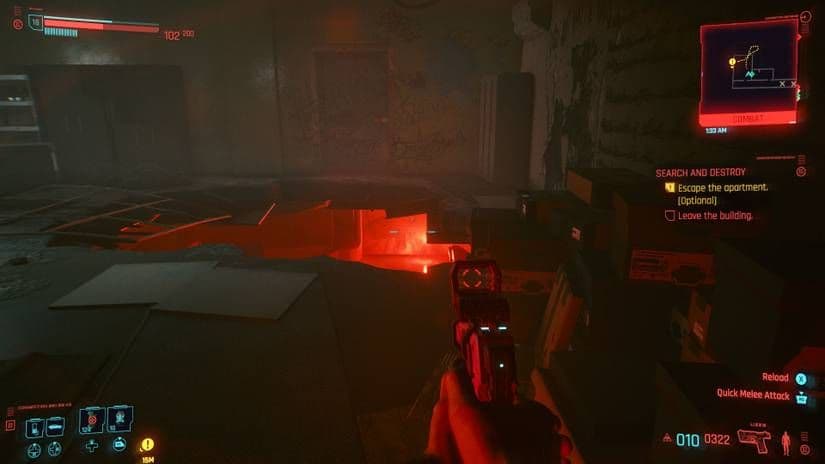
Just as you’re making your case, the ambush hits. It’s a scripted event: Arasaka’s Assault Squad storms the building, and a grenade detonates, causing the floor to collapse. You’ll plummet to the ground floor, stunned but alive. As you come to, Johnny Silverhand materializes beside you. Press [F] to talk to him, and he’ll urgently tell you Takemura is a lost cause, pushing you to flee immediately. The game’s objective marker will update, pointing you toward the exit.
This is the moment for the critical choice. On the ground floor, you must consciously ignore the ‘Escape the Building’ waypoint if you want any chance of saving Takemura. Johnny’s advice and the glaring objective are designed to steer you out—but turning away from that exit is the only way to unlock the rescue path and, eventually, “The Devil” ending. If you follow the marker, you leave him for dead.
Don’t panic. The building is compromised, but your next move defines the mission. Whether you choose to fight for an ally or save your own skin, the next few minutes are pure, chaotic Cyberpunk 2077.
How to Find the Hidden Path to Save Takemura in Cyberpunk 2077
This is the moment that defines your loyalty in Cyberpunk 2077. Johnny's screaming in your ear to abandon Goro, and the objective marker is pointing toward the exit—but trust me, you need to ignore both. Finding the secret path back up is your only chance to save Takemura, and it’s cleverly hidden in plain sight.
Official gameplay screenshot.
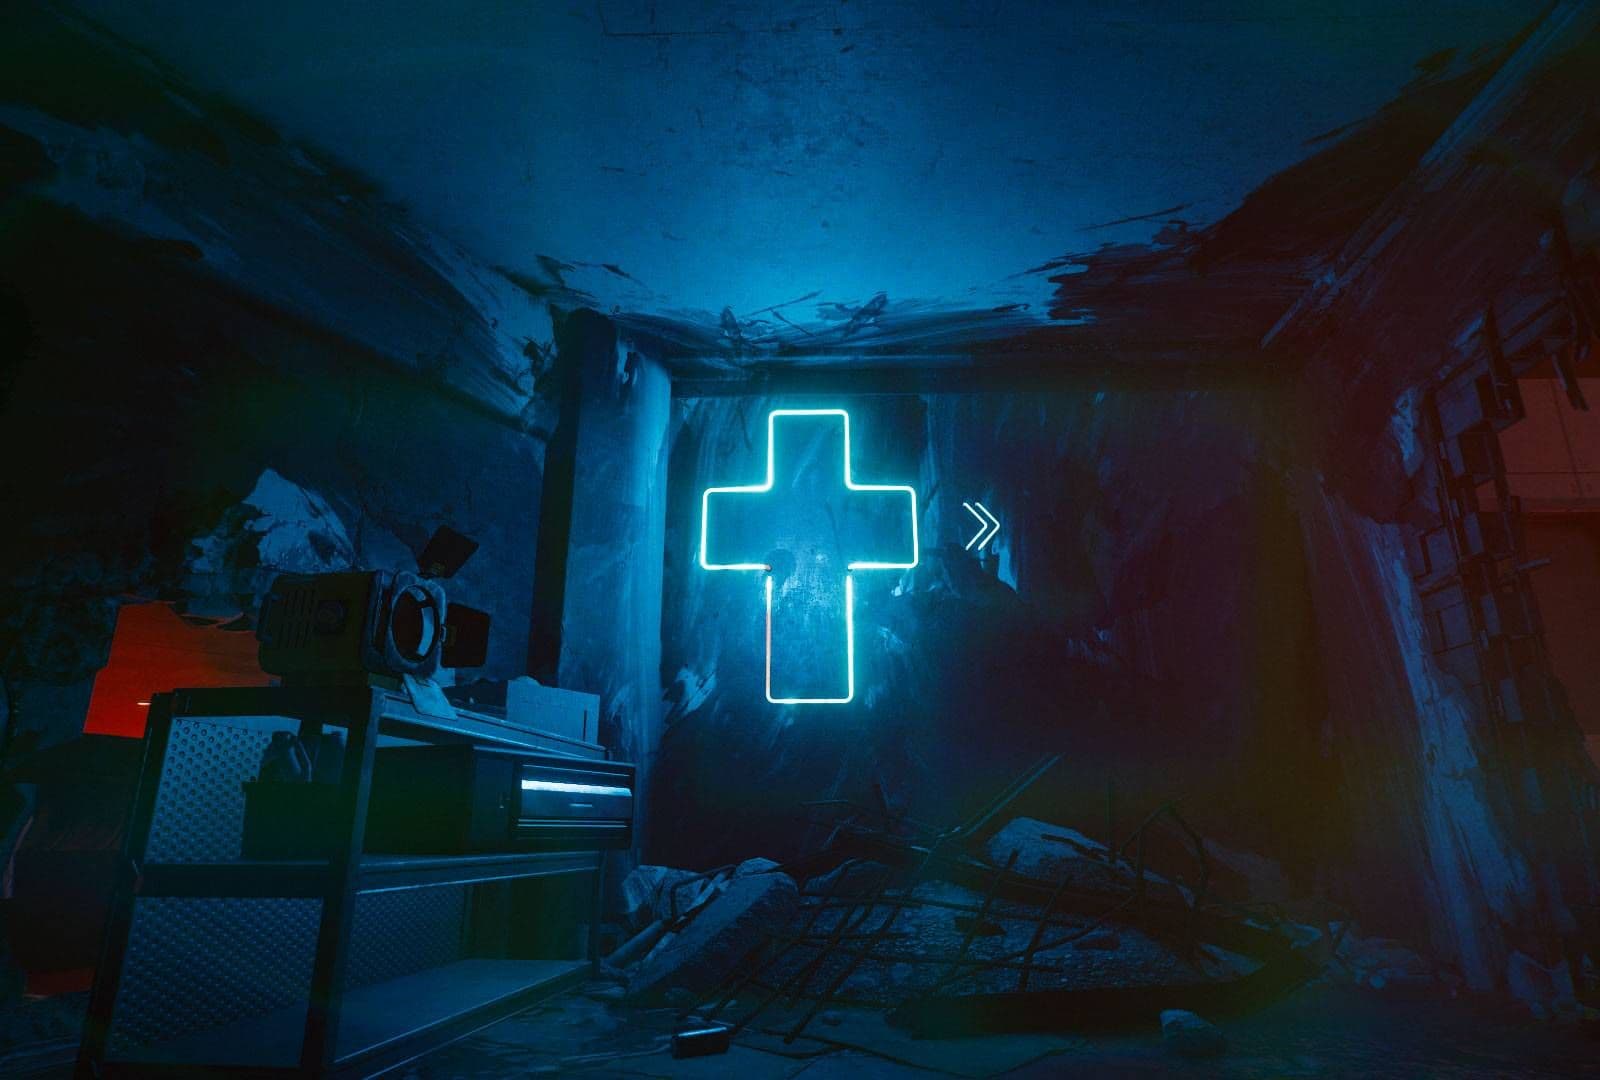
After the floor collapse, you'll regain control on the ground floor. Head down the hallway directly ahead of you to find the Blue Cross Room, identifiable by the large, glowing neon cross on the wall. This is the game's first big misdirection. The main "Escape the Building" waypoint will urge you to turn right here. Don't. Instead, look to the left side of this room.
Here's the trick most guides miss: on the left wall, you'll see a Red Gap Wall. Crouch and move through this small hole to enter a cluttered adjacent room. This is your point of no return—once you're through, you're committed to the rescue.
Inside this new room, you have two options for Vertical Navigation. The most straightforward path is to head to the back of the room and find a set of stairs. Climb them to trigger the optional "Try to Save Takemura" objective. Alternatively, if you have the Jump Augmentation cyberware (like Reinforced Tendons or Fortified Ankles), you can use it as a shortcut. Look up at the hole you fell through earlier, press [Space] to jump, and boost yourself right back up to the third-floor hallway you came from.
Even if you have the jump cyberware, taking the stairs is often safer and less disorienting. The path is linear, and it ensures you don't miss the ambush trigger.
With the hidden route revealed, you're now on the right track. Ignore Johnny's continued protests and get ready for a fight—the stairwell ahead leads straight back into the heart of the Arasaka ambush.
Search and Destroy Walkthrough: Rescuing Takemura Upstairs
This is it—the final push to save Goro Takemura. You’ve found the hidden path, ignored Johnny’s advice, and fought your way upstairs. Now, in Cyberpunk 2077, you’re on the third floor and the optional objective Try to Save Takemura is live. Don’t let your guard down; Arasaka’s best are waiting to finish the job.
Engaging enemies in close-quarters combat.
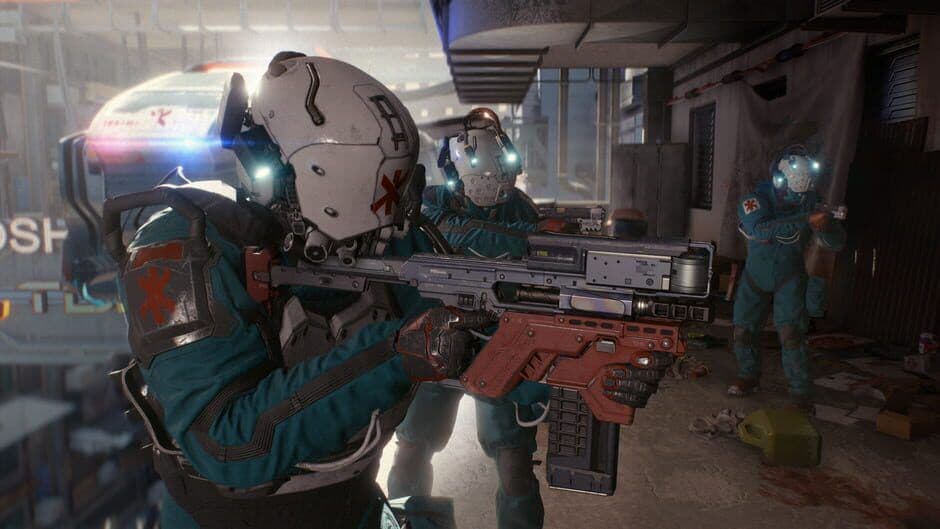
Clearing the Hallway Ambush
As you reach the top of the stairs, a large group of Arasaka soldiers will ambush you in the hallway leading to room 303. This next part can feel overwhelming—don’t panic. The smoke and flashing lights can make targeting difficult, but here's a trick most guides miss. If you have a weapon with a night vision/thermal scope, like the SPT32 Grad Power Sniper Rifle equipped with an E305 Prospecta Scope, you can see through the visual clutter and pick off targets with ease. If you don't have that specific setup, use grenades or tech weapons that can shoot through cover to thin the herd before pushing forward.
If the ambush is giving you trouble, fall back to the stairwell. The enemies will funnel towards you, making them easier to manage one by one.
Defending Takemura in Room 303
Once you clear the hallway, rush into room 303 on the third floor. Inside, you’ll find Takemura pinned down, surrounded by five or more Arasaka soldiers. Your goal is to eliminate all hostiles in the room. Takemura will assist in the fight, but the priority is keeping the heat off him. Focus on the enemies targeting him first. With the room secured, a brief dialogue will trigger, and Takemura will be ready to move.
The Escort to Safety
Your final task is the escort sequence. Lead Takemura back out into the third-floor hallway. You’ll face another wave of reinforcements, but together you can clear them. Keep moving—your exit is ahead. You’ll come to a room with a large hole in the floor. This is your way down. Approach the edge and press [Space] to jump down to the ground floor. Takemura will follow. From there, simply follow the waypoint out of the building. If you’ve wiped here before, you’re not alone—this chaotic run to the exit trips up everyone. Just keep moving and shooting.
As you burst outside, a cutscene will play. If you’ve succeeded, you’ll see Takemura escape alongside you—your confirmation that he’s safe. With Takemura rescued, you’ve secured the crucial path to one of Cyberpunk 2077’s most significant endings. Now, it’s time to deal with the consequences of the Relic and plan your next move.
How Saving Takemura Impacts The Devil Ending in Cyberpunk 2077
This is the moment your choice truly matters—that frantic decision to turn back for Goro Takemura in Cyberpunk 2077 has long-term consequences that shape one of the game's most significant endings. Saving him isn't just about feeling heroic; it unlocks a specific narrative path and a highly missable achievement.
Saving Takemura requires fighting through elite Arasaka soldiers.
The Direct Path to "The Devil" Achievement
Your actions in Search and Destroy directly enable the The Devil achievement. To secure it, you must do two things: first, successfully rescue Takemura during the ambush (as covered in previous sections), and second, later choose the corporate-aligned ending.
When you reach the pivotal rooftop conversation in the Nocturne Op55N1 mission, you must select the dialogue option: "Think trusting Arasaka’s risky, but worth it." Follow this by agreeing to "Take omega-blockers." This commits you to Hanako Arasaka's plan, setting you on the linear path for The Devil Ending.
⚠️ Pro tip: This is a point of no return. If you're aiming to experience multiple endings, create a manual save on the rooftop outside Embers before sitting down to talk with Misty and Johnny.
The Epilogue & Your Final Choice
The ending missions (Last Caress, Totalimmortal, and Where Is My Mind?) will play out. If you saved Takemura, he will be present in the epilogue aboard the Arasaka space station, offering a final conversation that provides closure to his storyline. If you did not save him, Anders Hellman will appear in his place during these scenes.
Your final meaningful choice comes when Hellman (or Takemura) presents you with a contract. You can either "[Sign Contract] I want to live" to have your consciousness engrammed, or "[Refuse to Sign] I'm going back to Earth" to return to your doomed body. Both are variations of The Devil Ending.
The The Devil achievement itself unlocks at a very specific moment: immediately after you take the elevator following your encounter with Yorinobu Arasaka. Keep an eye out for The Rubik's Cube in your room during the epilogue; interacting with it to break it open reveals the screaming devil imagery that gives the achievement its name.
Why It Matters
Saving Takemura transforms this ending from a purely corporate transaction into a slightly more personal conclusion, providing a thread of loyalty in a bleak finale. While you can still access The Devil Ending without him, you'll miss his unique dialogue, the achievement, and the satisfaction of knowing you didn't abandon an ally when he needed you most.
With Takemura at your side and the right choice on the rooftop, you're set to confront the ultimate cost of survival in Night City.
Search and Destroy Rewards and Mission Conclusion
You've escaped the burning apartment, but the Relic malfunction has left you reeling. Now, at the Sunset Motel on the Badlands outskirts, you have a moment to breathe—but trust me, it won’t last.
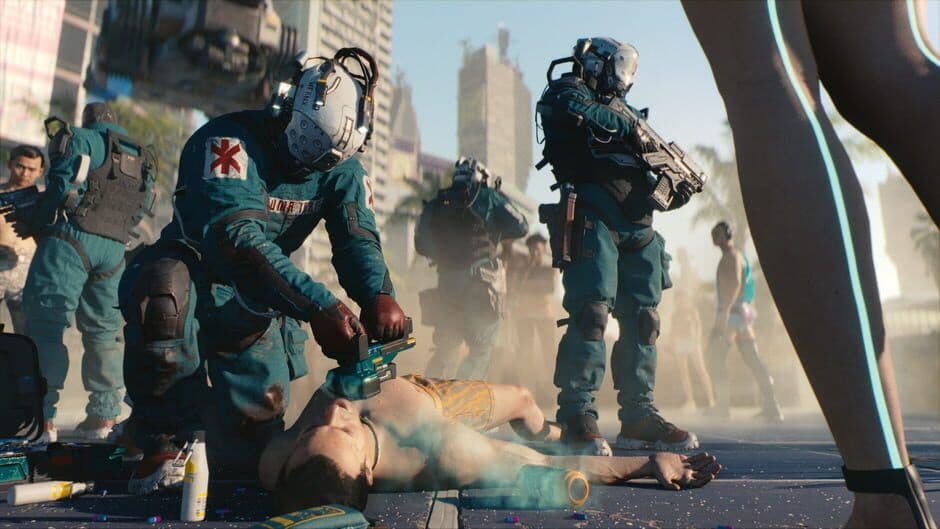
Interacting with the world during mission conclusions.
After the escape cutscene, V wakes up in a motel room, shotgun in hand and Johnny Silverhand arguing in your head. This conversation doesn't affect the mission outcome, so feel free to vent. Eventually, a car pulls up outside. Despite Johnny's warning, open the door. You’ll find a Proxy Doll waiting—a sleek, automated messenger sent by Hanako Arasaka. It delivers her message directly: she believes your story about Saburo's death and wants justice for her father. With that, the doll leaves, and your paranoia can finally settle.
Before the Proxy Doll arrives, take a moment to sort through your inventory. You likely picked up some high-level weapons and clothing from looting Arasaka soldiers during the escape, which can give you a nice edge for what's coming next.
With the message delivered, the "Search and Destroy" mission concludes. A final, brief chat with Johnny plays out, and then you're free to leave the room. The next job, "I Walk the Line," will automatically appear in your journal. This mission kicks off the next major chapter of your story in Cyberpunk 2077, so when you're ready, step outside and answer the call.
Mission Complete: Your Takeaway
You’ve navigated the ambush, made the critical choice to save (or leave) Takemura, and received Hanako's offer. Whether you're gunning for The Devil achievement or just surviving another day in Night City, you’ve secured a powerful ally—or at least, a powerful option. Stock up, save your game, and get ready. The real fight for your life is just beginning.
