
This guide follows Cyberpunk 2077's post-Update 2.0 perk tree. Body has four useful thresholds: 4 opens the sustain tools, 9 forces a weapon decision, 15 unlocks Adrenaline Rush, and 20 offers capstones for specialists. The efficient route is to stop at the threshold that matches your combat loop instead of treating 20 Body as the default finish line.
Stop at Body 4 for sustain without a weapon commitment
At 4 Body, take Painkiller first if you want a general defensive dip. It unlocks slow Health regeneration during combat, which helps you survive the seconds between using a Health Item and reaching cover. Add Comeback Kid when you regularly fight below full Health; it increases Health regeneration as your Health falls. If you already use Blood Pump cyberware or Health Items to start aggressive pushes, Dorph-Head gives 100% Mitigation Chance for two seconds after that activation.
This is the complete Body route for a build that does not use shotguns, machine guns, or blunt weapons. It buys combat sustain without spending later perk points on a weapon branch. The attribute can also open physical dialogue and force-based interactions, but those are side benefits; the 4-Body decision is about whether you want in-combat recovery.
At Body 9, choose the weapon loop before buying perks
Body's weapon perks are divided by behavior, not just damage type:
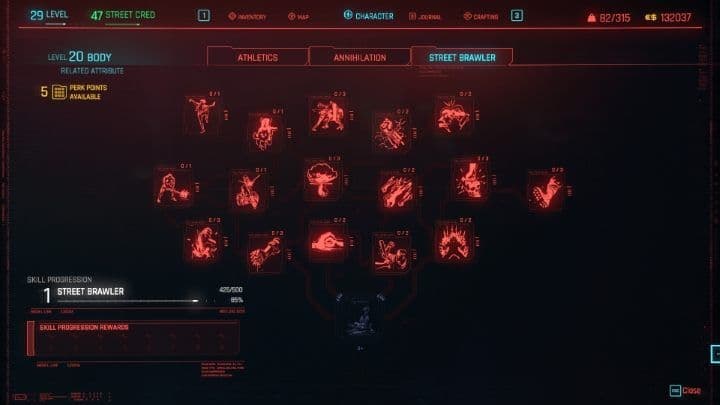
The Street Brawler tree supports blocks, counters, and blunt-weapon control.
| Your combat loop | Buy at 9 Body | Buy at 15 Body |
|---|---|---|
| Shotgun, LMG, or HMG pressure | Die! Die! Die! and Like a Feather | Spontaneous Obliteration, then Adrenaline Rush |
| Blunt weapons or Gorilla Arms | Wrecking Ball and Kinetic Absorption | Quake for control, or Adrenaline Rush for durability |
For shotguns and machine guns, Die! Die! Die! reduces recoil at low Stamina and increases fire rate as Stamina falls. Like a Feather removes the movement-speed penalty from these weapons, so you can keep advancing while the weapon is heavy. At 15, Spontaneous Obliteration adds damage against nearby enemies and unlocks Obliterate, which can dismember low-Health targets. This is a pressure loop: spend Stamina to stay close, then convert the close-range fight into faster fire and dismemberments.
For blunt weapons, Wrecking Ball lets you barrel into enemies while sprinting and blocking, while Kinetic Absorption rewards a successful block with Stamina and blunt-weapon damage. At 15, Quake gives you a ground slam that damages and staggers nearby enemies, including a midair version. This route is strongest when you deliberately block, stun, and counter; it is not a slower version of the shotgun branch.
Do not split your first weapon perks across both lanes. If your weapon is a shotgun, LMG, or HMG, complete the ranged Body route first. If your plan is Gorilla Arms or another blunt weapon, complete the block-and-stun route first. The shared survivability branch can wait until the weapon action you perform every fight is online.
Take Body 15 for Adrenaline Rush after your weapon branch
At 15 Body, Adrenaline Rush is the reason to keep investing after your weapon perks. Its three ranks give you:
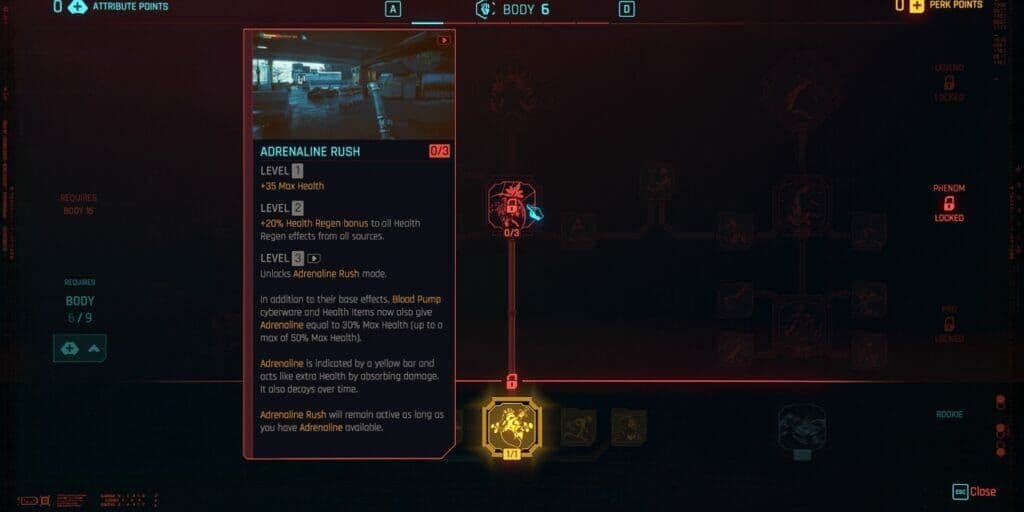
The Adrenaline Rush perk in the Body tree.
- Rank 1: +35 max Health.
- Rank 2: +20% to Health regeneration effects from all sources.
- Rank 3: Blood Pump cyberware and Health Items also grant Adrenaline equal to 30% of your max Health, up to 50% of max Health.
Adrenaline appears as a yellow bar, absorbs damage, and decays over time. Treat healing as a pre-push tool once this mode is active: trigger a Health Item or Blood Pump, then use the buffer to cross a doorway, reload a shotgun, or finish a stunned enemy before the bar disappears. Juggernaut adds movement speed and damage while Adrenaline Rush is active; Calm Mind gives you three more seconds before Adrenaline starts to decay.
For the shotgun route, take Spontaneous Obliteration first at the 15 threshold if you need more close-range finishing power, then take Adrenaline Rush when your fights are ending with your healing charges unused or your health collapsing during a push. For the blunt route, take Quake first when groups are the problem; take Adrenaline Rush first when incoming damage, not crowd control, is ending your attacks. That is the meaningful choice at 15: better control or a reusable damage buffer.
Only take Body 20 for a matching capstone
Body 20 is worth the attribute points only when one capstone completes the loadout you already use:
- Shotgun plus quick melee: take Rip and Tear. A shotgun hit makes the next Quick Melee Attack deal 100% more damage, and a Quick Melee Attack does the same for the next shotgun shot.
- LMG: take Onslaught. Neutralizing an enemy refills 20% of the magazine, which directly addresses the weapon's reload pressure.
- Blunt weapon: take Finisher: Savage Sling. It restores 20% Health and lets you throw a finished enemy into others.
- Adrenaline-focused build: take Pain to Gain only if you are already keeping Adrenaline Rush active; it speeds Health Item recharge after a neutralization while the mode is active.
If none of those descriptions matches the way you actually fight, stop at 15 Body. The 20-point capstones are not a universal damage upgrade: each one pays for a specific loop. Your next attribute point should go elsewhere until you have a clear reason to return to Body.