
How to Set Up Your Free Fire Account and Interface
Before you can chase your first Booyah, you need to get your bearings in the world of Free Fire. Think of this section as your pre-flight checklist—we're going to get your account secured and make sure you can read the dashboard before you ever hit the ground. Trust me, taking these ten minutes now will save you from a world of frustration later.
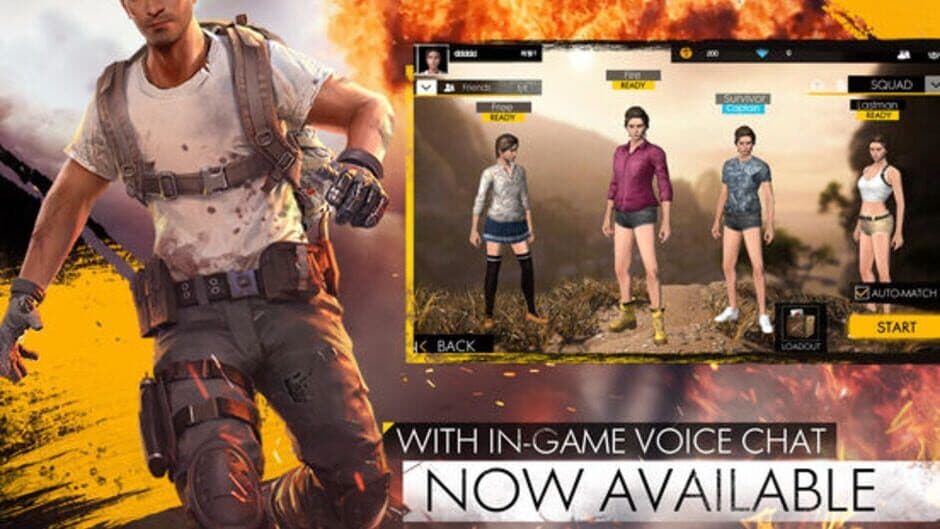
Navigating the combat interface.
Your first step is all about securing your progress. When you launch Free Fire and reach the Main Menu, you'll be prompted to log in. Do not use a Guest account. Instead, link your profile to either Facebook or Google. This is your safety net—it prevents you from losing all your hard-earned characters, skins, and progress if you ever switch devices or reinstall the game.
Next, you'll be asked to select a server region. This choice is more important than it seems. On the Main Menu, pick the India server if you're located there, or choose the region geographically closest to you. This minimizes your ping, which is the delay between your action and the game's response. Lower ping means smoother gameplay and a fairer shot in those split-second firefights.
Once you're in, let's break down the essentials of your Heads-Up Display (HUD)—your cockpit for survival. Everything you need to know is right on the screen:
- Top Left: Your Vital Stats. Keep an eye on the Health Bar. The red portion is your HP (hit points), and the yellow bar beneath it represents your Armor durability. When the red hits zero, you're out.
- Top Left Corner: Your Navigator. The Mini-Map is your best friend. It shows your position, the ever-important Safe Zone boundaries (the white circle), and nearby gunfire indicators. Glance at it constantly.
- Bottom Left: Movement. The Movement Joystick is your primary control. Simply [L-Thumb] drag this virtual stick in any direction to walk or run. Getting comfortable with this is step one to not being a stationary target.
- Bottom Right: Actions. This cluster of Action Buttons is how you interact with the world. You'll [Tap] these icons to Jump, Crouch, Shoot, Aim down sights, and Reload your weapon. Spend a moment in the lobby just tapping each to see what they do.
Head into the Settings menu from the lobby to customize your HUD layout. You can move and resize every button. Make your Shoot and Aim buttons large and easy to reach for your thumbs—this small tweak can dramatically improve your reaction time in a fight.
With your account secured and a solid understanding of your interface, you've built the foundation. You're no longer just pressing buttons; you're reading vital information. Now you're ready to make your first jump.
Best Landing Strategies for Beginners in Free Fire
The first minute in Free Fire is make-or-break. A bad drop means scrambling for a pistol while someone else finds a shotgun, and your match ends before it even begins. Let’s make sure you survive the landing and get geared up for the fight ahead.

Defending your landing zone from early attackers.
Your most important decision happens before you even jump: picking the right spot. The map is filled with hot drop zones like Pochinok, Rim Nam Village, and Peak. These are popular, loot-rich areas that attract experienced players looking for quick action. As a beginner, you want to avoid these at all costs. Instead, look for safe drop zones on the map edges or in small towns and isolated buildings. Landing here gives you the precious time you need to loot without getting ambushed the moment you touch down.
Here’s how to execute a perfect landing. First, watch the plane route on your map. The goal is to jump when the plane is near the end of its path, allowing you to land at the far end of the route away from the main crowd. When you’re ready, tap the eject button and immediately tilt your movement joystick forward to dive straight down, gaining speed. Aim for the roofs of buildings—landing on top lets you loot from the top floor down, which is much faster than running between houses. If you have the Falcon Pet equipped in your loadout, its ability will increase your gliding speed, getting you to the ground even faster and securing that crucial first weapon.
If you see another player landing on the same building as you, don’t fight over it. Immediately change direction and glide to the next closest structure. A building to yourself with basic loot is always better than a fight you might lose.
Once you’ve mastered where and how to land, the early game becomes your playground. You’ll have space to breathe, learn the controls, and gather a proper kit. Remember, the goal of the first 60 seconds isn’t to get the most kills—it’s to get the gear that lets you survive the next five minutes. With this strategy, you’ll stop being an easy target and start every match on your own terms.
How to Loot Efficiently in Free Fire
Touch down, grab a gun, and get ready to fight—the first 60 seconds in Free Fire can make or break your entire match. Looting efficiently isn't about hoarding everything you see; it's about knowing exactly what you need to survive the next fight. Let’s get you combat-ready with a clear, prioritized checklist.
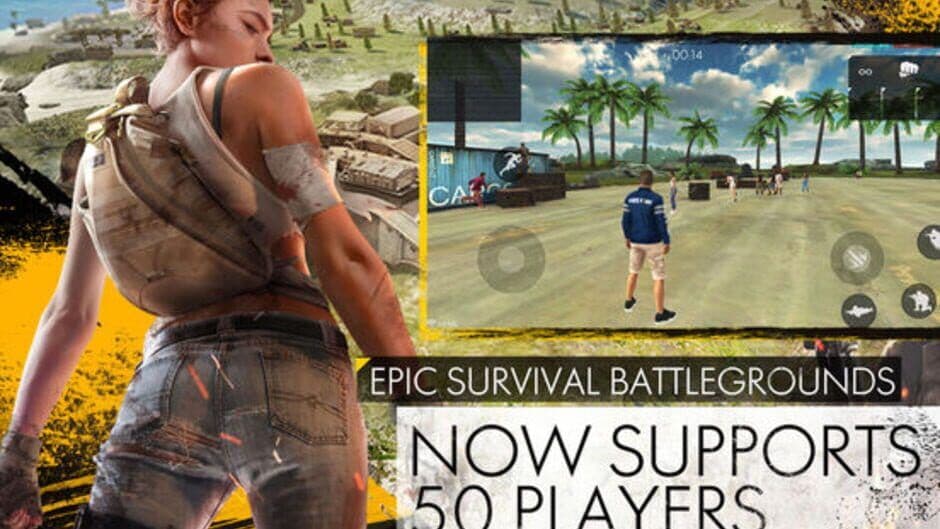
Efficient looting requires quick decision-making on item priority.
The Essential Looting Priority List
The moment your boots hit the ground, your brain should be running a simple scan: Weapon, Ammo, Armor, Heals, Bag. Stick to this order, and you’ll be geared up faster than most players scrambling around you.
- Any Gun: Your first and only goal is to find a Weapon. Don’t be picky—even a Pistol is better than your fists. Grab the first firearm you see to defend yourself immediately.
- Matching Ammo: A gun is useless without bullets. Once armed, prioritize finding the correct Ammo Types. Match 5.56mm or 7.62mm for Assault Rifles (ARs), 9mm for SMGs, 12 Gauge for Shotguns, and .50 ACP for Snipers.
- Armor (Vest & Helmet): Next, look for Armor. You’ll find three levels: Level 1 (White), Level 2 (Blue), and the best, Level 3 (Gold). Higher levels provide significantly more damage reduction, so always upgrade when you see a better one.
- Medkits & Bandages: You will take damage. Always carry at least 2-3 Medkits to restore your HP after a skirmish. Bandages are fine for topping up, but Medkits are your lifeline in a pinch.
- Backpack: Finally, grab a Backpack to increase your inventory capacity. This lets you carry more ammo, heals, and utility items without constantly managing space.
- The Melee Pan: Here’s a trick most guides miss: if you see a Melee Pan, equip it. It automatically protects your back from stray bullets, often causing shots to bounce off harmlessly. It’s a free, passive defense boost.
⚠️ Watch out: Looting a downed enemy’s crate is tempting, but always check your surroundings first. Rushing to grab their loot makes you an easy target for third-party players.
Smart Looting Habits
With your core gear secured, a few smart habits will keep you alive longer. First, dive into your Settings and turn ON the Auto-Pickup option for Ammo and Medkits. This saves precious seconds and lets you focus on scanning for threats instead of tapping on every item.
Second, manage your inventory. Avoid carrying duplicate weapons or too many throwables early on. A simple, effective loadout is one gun for close range (like an SMG or Shotgun) and one for mid-to-long range (like an AR). Once you have your two primary guns, 40-60 ammo for each, your armor, and a few heals, you’re set. It’s time to stop looting and start moving or fighting.
This next part can feel overwhelming—don’t panic. If you’ve ever been caught with a great gun but no ammo, you know the frustration. By sticking to this priority list, you’ll eliminate that problem. You’ll have the tools you need, organized and ready, turning those chaotic early minutes into a confident start. Now you’re not just surviving the drop; you’re preparing to win.
Combat Basics and Survival Tactics in Free Fire
Alright, this is where the real action begins. You’ve got your loot, you’re on the island—now it’s time to win those gunfights. In Free Fire, surviving isn't just about hiding; it's about mastering a few core combat rules that will keep you alive while you send others back to the lobby.
Winning Your First Gunfights
Your heart’s pounding, you spot an enemy, and your first instinct is to hold down the fire button and pray. Don’t. Let’s break down how to fight smart.
First, movement and positioning are everything. The single biggest mistake is running in the open. Strategy: Using Cover is non-negotiable. Always move from one piece of cover to the next—behind trees, rocks, or the corners of buildings. Never cross a field without a plan. If you get caught out, your new best friend is the Gloo Wall. This lifesaving Item lets you [Tap] the Gloo Wall icon and then [Tap] Fire to create instant, portable cover right where you stand. Use it to block sniper sightlines, shield yourself while healing, or create an escape route.
Once you’re in a fight, how you shoot matters more than what you shoot. Strategy: Tap Firing is key. Instead of holding the trigger and spraying bullets wildly (which makes your aim go everywhere), [Tap] the Shoot button in controlled, short bursts. This helps you manage recoil and keeps your shots on target. For even greater stability, combine this with Strategy: Crouch Shooting. [Tap] the Crouch button while firing. This shrinks your hit-box, making you a harder target to hit, and significantly improves your weapon’s accuracy.
In close-range chaos, don’t forget to move! Strafe left and right while crouch-tapping. It makes you incredibly difficult to hit and lets you control the fight.
Your aim has one primary goal: the Mechanic: Headshots. Landing shots on an enemy’s head deals 2x damage, dramatically speeding up eliminations. This is why controlling your spray with tap firing is so important—it gives you the precision to aim for that critical hitbox. It takes practice, but aiming for the upper chest/head area will win you fights you’d otherwise lose.
The Unseen Advantage: Sound
Half the battle happens with your ears, not your eyes. Strategy: Audio Awareness is a massive skill gap between beginners and experienced players. If you can, always use headphones. They allow you to pinpoint the direction of enemy footsteps, hear the distinct clicks of a reload, or catch the distant roar of a vehicle. This free intel lets you prepare for an attack, track a hiding enemy, or decide to avoid a fight entirely. Trust me, playing without sound is like fighting with one hand tied behind your back.
Putting it all together: Use cover to approach, sound to anticipate, Gloo Walls for emergencies, and controlled bursts aimed high to secure the win. Master these basics, and you’ll stop being easy prey and start being the hunter. Let’s go get that Booyah.
How to Navigate the Shrinking Safe Zone in Free Fire
In Free Fire, the map isn't just your battlefield—it’s your enemy. The shrinking Safe Zone is the game's clock, forcing every survivor into a tighter and tighter arena. Mastering its rhythm is what separates those who panic from those who claim the Booyah.
Your lifeline is the white circle on your mini-map. This is the Safe Zone where you're safe from environmental damage. Outside of it is the blue danger zone, a deadly area that continuously drains your HP over time. The countdown to chaos is always visible in the top center of your screen on the Zone Timer. When it hits zero, the white circle shrinks, and the blue zone expands, dealing increasing damage with each new phase. Ignoring this timer is the fastest way to lose a match without ever seeing an enemy.
Don't just watch the timer—act on it. Start moving toward the next safe zone with at least 30-45 seconds left. This gives you time to deal with unexpected fights or find a vehicle.
Your positioning within the safe zone is crucial. A smart strategy is edge playing. Instead of rushing to the very center of the circle, try to stay near its outer edge. This way, you only have to worry about enemies coming from one direction—in front of you—rather than being surrounded in the middle. It lets you control the chaos and "third-party" fights already happening ahead of you.
When you do need to move, your rotation speed matters. If the next zone is far, switch to your Fists or a Melee weapon like the pan while running. You move significantly faster unarmed than with a heavy assault rifle in your hands, which can mean the difference between making it safely or getting caught in the damaging blue zone. If you absolutely need a vehicle, use it cautiously—they’re loud and draw every eye on the map.
Here’s the trick most guides miss: the blue zone isn't just a wall of death; it's a tactical tool. You can use it to cover your back in the late game, knowing no enemy can be rotating from behind it. Pay attention to the mini-map’s next safe zone preview and plan a route that uses natural cover like ridges and compounds. If you've ever died to the zone while looting, you're not alone—it’s a universal rookie mistake. The fix is simple: prioritize survival over that one last chest.
With these strategies, you stop reacting to the map and start controlling it. Watch that timer, play the edge, and rotate smart. The zone is coming for everyone—make sure you're always one step ahead.
Best Beginner Characters and Skills in Free Fire
Your character in Free Fire isn’t just a skin—it’s your key to a crucial, game-changing advantage. While mastering guns and positioning is vital, picking the right character can forgive early mistakes and give you the edge you need to secure your first Booyah. Let’s break down the best beginner-friendly picks that focus on survival and simplicity.
Top Picks for New Players
Forget complex timing or risky active abilities. The best beginner characters in Free Fire offer passive buffs or straightforward skills that work automatically, letting you focus on learning the core game.
- DJ Alok: Found in the Character Menu, DJ Alok is arguably the most forgiving pick for a new player. His active ability, ‘Drop the Beat’, creates a 5-meter aura that heals you and allies while also boosting movement speed. It’s a perfect safety net for recovering during a fight or escaping a bad situation.
- Kelly: Also in the Character Menu, Kelly is fantastic for learning map movement. Her passive ability, ‘Dash’, permanently increases your sprinting speed. This lets you rotate to the safe zone faster, escape unfavorable fights, and reposition quickly without any button presses.
- Andrew: Unlock Andrew from the Character Menu for better durability. His passive skill, ‘Armor Specialist’, reduces the rate at which your armor durability is lost. Since beginners often take stray shots, this means your vest and helmet will last much longer, giving you more room for error.
- Moco: Available in the Character Menu, Moco solves a common beginner problem: losing track of enemies in a fight. Her ability, ‘Hacker’s Eye’, marks any enemy you hit for a short duration, revealing their position even behind cover. This intel is priceless for making smarter decisions mid-combat.
- Leon: Another great option from the Character Menu is Leon. His passive skill, ‘Buzzer Beater’, regenerates a portion of your HP after you survive a combat encounter. This reward for disengaging or winning a fight helps you stay healthy for the next engagement without using as many medkits.
Don’t feel pressured to buy characters immediately. Play several matches with the default character to get a feel for the game. Once you know your playstyle—like if you tend to get caught in the open (Kelly) or take lots of damage (Andrew/Alok)—invest in a character that complements it.
How to Use Your Character’s Edge
Simply owning a character isn’t enough; you need to play to their strengths. If you’re using DJ Alok, remember to activate his healing aura before you push into a fight or when you’re behind cover to recover. With Moco, her marking ability means you should confidently take a few shots at a distant enemy to tag them, making them easier for your squad to track.
Trust me, integrating these abilities into your gameplay will feel natural quickly. The goal is to let these skills become second nature, turning what were once panic moments into controlled opportunities.
With the right character backing you up, you’re not just another player on the island—you’re a survivor with a built-in advantage. Now, let’s explore all the ways you can practice and apply these skills across Free Fire’s various game modes.
Free Fire Game Modes and Training for Success
You’ve learned the landing, the looting, and the combat—now it’s time to put it all into practice without the pressure of a ranked match. In Free Fire, knowing where to train is just as important as knowing how to fight. This final section will guide you to the best game modes for building your skills safely and confidently.
Your first and most important stop is the Training Ground, accessible from the Main Menu under Mode Selection. This is your personal sandbox with zero risk—no enemies, no shrinking zone, just you and the tools. Here, you can practice shooting at moving targets, experiment with different weapons to learn their recoil, and, most importantly, fine-tune your HUD controls until they feel perfect. Spend 10 minutes here before you play each day; it’s the fastest way to build muscle memory for aiming, switching weapons, and placing Gloo Walls.
Once you feel comfortable with the controls, jump into Squad Mode, also found in the Mode Selection. Playing with three others provides a crucial safety net: if you get knocked down, your teammates can revive you. This mode is fantastic for learning because it lets you observe how more experienced players move, loot, and engage. Stick close to your squad, communicate, and don’t be afraid to ask for help—you’re there to learn as a team.
For focused combat practice, queue up for Clash Squad. This fast-paced 4v4 mode is ideal for honing your close-quarters combat skills. Matches are short, action is constant, and you’ll get valuable repetitions in gunfights, using grenades, and managing resources under pressure. It’s the perfect bridge between the peaceful Training Ground and the chaos of a full Battle Royale.
Use Clash Squad to test different character abilities in a combat setting. See how DJ Alok’s healing aura feels in a firefight or if Kelly’s speed boost helps you dodge bullets. It’s low-stakes experimentation.
Finally, there’s Solo Mode, the classic 1 vs 49 battle. We only recommend diving into this after you’ve mastered basic looting and shooting in the other modes. Here, there are no revives and every decision is yours alone. It’s the ultimate test of everything you’ve learned, from landing strategy to final circle positioning. Start by playing Solo with the sole goal of surviving longer each time, not necessarily winning.
With the Training Ground for fundamentals, Squad Mode for team-based learning, Clash Squad for combat drills, and Solo Mode for the final exam, you have a complete practice toolkit. Your journey in Free Fire is built on consistent, smart practice—now get out there and turn those lessons into your first Booyah.