
How to Configure Settings for Fast Gloo Wall Deployment in Free Fire
In Free Fire, the milliseconds between taking fire and getting cover often decide who wins the fight. The difference between a rank-up and a frustrating elimination frequently comes down to how quickly you can get your Gloo Wall up. This section is your pre-fight checklist—we're optimizing the game's interface and controls to shave off those critical delays, ensuring your walls deploy the instant you need them.

In-game action and UI elements.
Think of your HUD layout as your cockpit; every button needs to be within effortless reach. The most impactful change you can make is in Settings > Controls. Here, you’ll customize your Custom HUD layout. Drag the Gloo Wall button to the left side of your screen, within natural thumb reach of your movement controls, and enlarge it to 80% or higher. This bigger, better-placed target means you’ll hit it faster under pressure without fumbling.
Place the Gloo Wall button just above or beside your fire button. Your thumb naturally rests there during combat, making the transition from shooting to covering seamless.
Next, head into the same control settings and find the Smart Throw option. Trust me, you’ll want to disable this. While it might seem helpful, the targeting delay it introduces can get you killed. With it off, your manual wall placement becomes instantaneous, giving you full control over exactly where your cover lands without any game-assisted lag.
To make those quick camera flicks for 360-degree coverage or to snap to a new angle, your sensitivity needs to be dialed in. Navigate to Settings > Sensitivity and set your General sensitivity between 90-95. This range allows for rapid camera rotation to assess threats and place walls in any direction without feeling too slippery for precise aiming.
Finally, if you’re playing on a lower-end device, consistent frames are non-negotiable for reactive play. A stutter during deployment is a death sentence. Go to Settings > Display and enable Smooth Graphics Mode. This reduces visual clutter and frame drops, ensuring your screen responds the moment your brain tells your finger to tap that wall button.
With these four settings locked in—your HUD optimized, Smart Throw disabled, sensitivity calibrated, and graphics smoothed—you’ve built the foundation. Your reactions are now hardware-ready. Let’s move on to mastering the techniques that turn this fast deployment into a winning strategy.
Mastering Basic Gloo Wall Placement Techniques in Free Fire
Now that your settings are dialed in for speed, it’s time to translate that reaction time into survival. In Free Fire, a Gloo Wall placed in the wrong spot is almost as bad as no wall at all. This section breaks down the four foundational placement techniques that will turn your instant cover into a genuine lifeline.
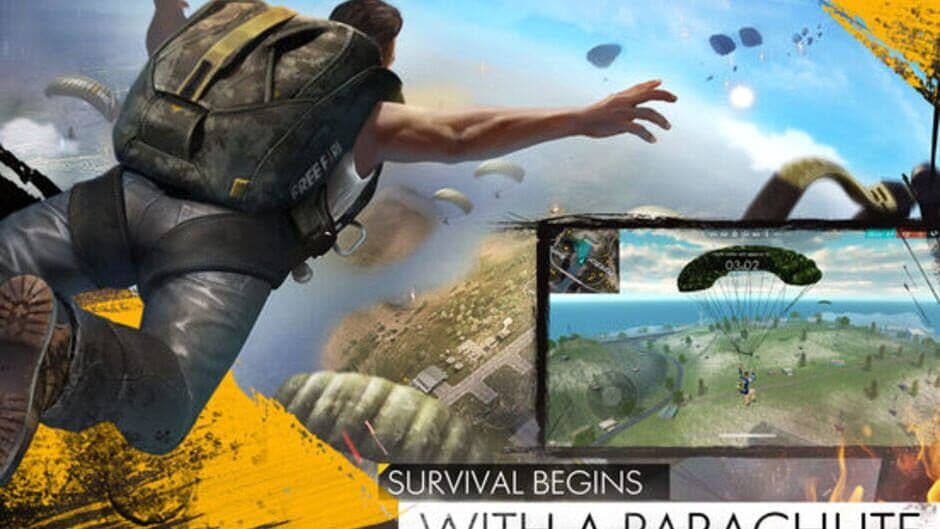
Free Fire battle royale environment.
The Crouch-Place Combo: Your First Line of Defense
The most common mistake is standing tall and placing a wall far in front of you. This creates a gap enemies can shoot through and makes your head position predictable. Instead, master the Crouch-Place Combo. When you need cover in the open, tap [Crouch] and immediately tap your Gloo Wall button. This deploys the wall much closer to your body, giving you tighter cover that’s harder to shoot around. It’s essential for quick heals, reloads, or preparing to counter-attack without giving away an easy headshot.
Practice crouch-placing while moving. The goal is to make this a single, fluid motion so you’re never a stationary target.
The Fast Front Wall: Surviving the Ambush
You’re rotating and suddenly take fire from an unseen angle—this is where panic gets players killed. The Fast Front Wall technique is your reset button. Don’t just tap the button randomly. As soon as you’re hit, pre-aim the ground slightly ahead of your movement path, deploy the wall, and instantly strafe to one edge. This stops the incoming damage, breaks the enemy's line of sight, and repositions you to an unpredictable spot behind the cover. The key is to use the wall to reset the fight, not to hide behind it forever.
Mastering Placement with the Hip-Fire Crosshair Method
Ever had a Gloo Wall fail to deploy on uneven ground or stick to a weird angle? The game’s placement engine uses a ray cast from your character to find a surface. To make it consistent, use the Hip-Fire Crosshair Method. Avoid placing walls while aiming down sights (ADS). Instead, keep your view at hip-fire height. This ensures the game’s targeting ray hits the walkable ground right in front of you and aligns the wall’s facing with your movement direction, giving you reliable cover exactly where you need it.
The Jump-Place Surprise: Aggressive High Cover
For a more aggressive twist, use the Jump-Place Surprise. When pushing or caught in a close-quarters duel, hit [Jump] and tap your Gloo Wall button mid-air. This creates an instant, high-profile shield that can block shots at chest or even head level, depending on the terrain. It’s incredibly disorienting for an enemy tracking you, as the wall appears suddenly at an unexpected height, buying you a critical moment to land, reposition, or return fire.
Master these four core techniques—crouching for safety, placing forward to reset, aiming correctly for consistency, and jumping for aggression—and you’ll have the foundational skills to survive nearly any sudden engagement Free Fire throws at you.
Advanced Defensive Formations and Movement Loops
Alright, this is where your Gloo Wall game goes from decent to dangerous. In Free Fire, basic walls keep you alive, but advanced formations and the movement to back them up are what let you dominate. This section is about building smart and moving smarter, turning your cover into an active weapon.

Advanced Defensive Formations and Movement Loops
When the final circle is closing and you’re caught in the open, a single wall won’t cut it. This is where your knowledge of formations needs to shine. The most critical one to master is the Triangle Defense. This isn't about hiding—it's about creating a temporary command post. You place a front wall, then a back wall, and finally a side wall to eliminate all exposed gaps. This 360-degree bunker gives you precious seconds to heal, revive a teammate, or simply listen and pinpoint enemy positions in the chaos. Don't stay in it too long—it's a reset tool, not a permanent home, as skilled players will flank or use grenades.
Against players with high-DPS weapons like the Evo Gun, a single wall can vanish instantly. For that, you need the Double-Layer Wall. Deploy two walls in rapid succession. The first absorbs the initial burst, and the second buys you the extra half-second to finish a medkit or reposition. Here’s the trick most guides miss: place the second wall with a slight offset from the first. This prevents enemies from pre-aiming the exact break point, forcing them to readjust their crosshair and giving you another split-second advantage.
Practice building your Triangle Defense in Training Island. The goal isn't just speed, but making the triangle tight enough to block bullets yet wide enough to let you crouch and move inside without getting stuck.
Formations are static; your movement brings them to life. The core of advanced combat is the Movement Loop. It sounds simple, but executing it under fire is what separates ranks. Here’s the cycle: Peek from cover, Fire a short burst, and if the trade is unfavorable, instantly [Tap] a Gloo Wall. Now, don’t just stand there—Shift to a new edge of that wall and Re-peek from an unexpected angle. This loop breaks the enemy’s aim tracking and turns a defensive play into an offensive opportunity. It’s more valuable than any fancy jiggle-peek.
To execute these techniques flawlessly, your deployment speed must be second nature. For mobile players, the Slide + Tap Flick is a game-changer. Instead of mashing the button, slide your thumb quickly across the Gloo Wall button in one motion. This leverages the game’s auto-repeat feature to trigger 2–3 walls in under a second, letting you build a full Triangle Defense or a Double-Layer Wall almost instantly. It’s the secret behind those "instant" builds you see from top players.
Master these formations and marry them to that relentless movement loop. You’ll stop just surviving fights and start controlling them.
Offensive Gloo Wall Strategies and Psychological Tactics
Think of a Gloo Wall in Free Fire as more than just a shield—it's your greatest psychological weapon. This is where you stop reacting and start controlling the fight, turning your cover into a trap, a bluff, or a deadly springboard for aggression. It’s the mindset shift that separates a good player from a true tactician.

Late-game survival tactics.
Turning Defense into Offense: The Peek Wall Advantage
The most direct way to use a wall offensively is the Peek Wall. This isn't about hiding; it's about creating a perfect, one-sided shooting gallery. Place your wall at a slight angle to the enemy, not directly between you. This allows you to use its edge to minimize body exposure while you shoot. You peek out for a split second, deliver a burst of damage, and duck back to safety while your opponent is left shooting at a wall. This forces them to expose their entire body to return fire, giving you a massive advantage in every damage trade.
Practice this in the Training Ground. The goal is to make your "expose-shoot-retreat" motion so fast that you're almost impossible to hit.
The Walking Fortress: Forward Pressure Wall
When you need to close the distance or push a camper, the Forward Pressure Wall (or Walking Wall) is your go-to move. This is pure, controlled aggression. The sequence is simple but devastating: place a wall forward, advance behind it, shoot, then immediately place your next wall to close the gap further. This creates a moving "fortress" that lets you safely cross dangerous open ground, break enemy sightlines, and get into your ideal close-range combat zone. It’s especially effective against snipers, as it completely disrupts their rhythm.
The Ultimate Mind Game: Fake Wall Bait
This is where you play with your opponent’s expectations. The Fake Wall Bait is a psychological trick best used in Solo Ranked. Here’s how it works: place a wall in an obvious spot, then briefly show one edge to sell the illusion that you’re healing or peeking from there. Instead of staying, immediately rotate to the opposite edge. A predictable enemy will push or pre-aim the spot they just saw you, walking right into your waiting crosshair as you peek from the unexpected side. It’s a simple way to turn cover into a lure.
Controlling the Battlefield: Maze and Trap Walls
Your walls aren't just for you—they're for dictating where the enemy can and cannot go. Indoors or at key chokepoints, use Maze or Trap Walls to funnel opponents. Block doorways or stairs completely. This forces enemies into a difficult choice: waste time and ammo breaking the wall (giving you audio cues and time to prepare), or take a slower, predictable alternate route. By controlling their path, you funnel them directly into your squad’s pre-aimed kill zones, turning their push into a slaughter.
Mastering these four strategies changes everything. You’re no longer just surviving engagements; you’re designing them. Start implementing one tactic per match, and watch as you begin to dictate the flow of every fight.
Best Character and Pet Synergies for Gloo Wall Combat
This is where your Gloo Wall play evolves from reactive to dominant. In Free Fire, the right character and pet combination doesn't just enhance your walls—it fundamentally changes how you can use them. These synergies turn your temporary cover into a durable asset, a psychological weapon, or even a renewable resource, giving you a decisive edge in every fight.
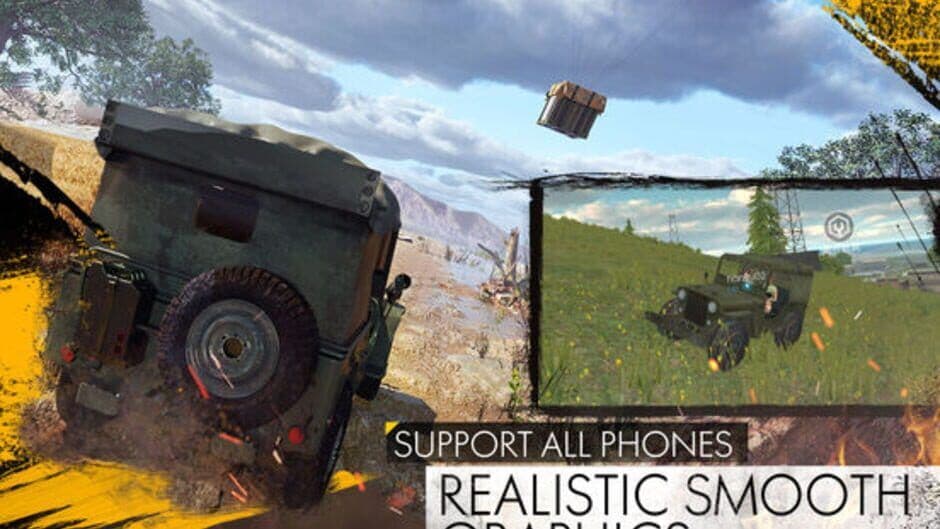
Character ability usage during matches.
The Ultimate Gloo Wall Specialists
These characters have abilities designed to interact directly with your cover, making them the cornerstone of any wall-focused loadout.
Nairi is the undisputed master of fortification. Her Ice Iron ability is a game-changer for defensive holds. It actively restores 30% of your deployed Gloo Wall's durability every second, dramatically extending its lifespan against focused fire. This turns a single wall into a persistent shield, perfect for locking down a lane during a squad push or creating an unbreakable pocket for a safe revive. The nearby healing it provides is just the cherry on top, letting you recover while your walls hold the line.
Skyler flips the script, making Gloo Walls an offensive tool. His Riptide Rhythm ability lets you release a sonic wave that can destroy up to 5 enemy walls within 50m. The genius part? You get healed for every wall you deploy after using it. The strategy is clear: use his active skill to shatter an opponent's bunker, then immediately throw up your own cover to push in safely while recovering HP. Facing a Skyler? You need to respect his cooldown and always carry a backup plan—or a second wall.
Xayne is the aggressive wall-breaker. When you activate Xtreme Encounter, it increases the damage you deal to Gloo Walls and other barriers (like Chrono's shield) while granting you temporary HP and a movement speed boost. This makes her the perfect character for initiating a hard push against a fortified position. You can rush in, melt the enemy's cover with your buff active, and win the ensuing close-quarters fight with your extra survivability.
Pair Xayne with an SMG or shotgun when you plan to use her ability. The increased wall damage lets you breach quickly, and the temporary HP lets you survive the chaotic fight that follows.
Essential Support Synergies
While not wall-specific, these picks provide the sustain and utility that make prolonged Gloo Wall engagements possible.
Dimitri creates a healing zone where you and your squad can recover HP. Dropping his Healing Heartbeat inside a Triangle Defense formation creates an almost impenetrable recovery station for your entire team in the final circle. Thiva is the revive expert; his Vital Vibes makes reviving teammates behind your Gloo Wall significantly faster and restores more of their HP, turning a risky maneuver into a swift reset. For pure survivability, K (Captain Booyah) is a top-tier choice. His ability to convert EP to HP allows for sustained peeking and regeneration from behind your walls without constantly using medkits.
Your Pet: The Wall Factory
No loadout is complete without the right pet, and one stands above the rest for Gloo Wall economy.
Mr. Waggor is non-negotiable for serious wall play. His Smooth Gloo ability passively generates a free Gloo Wall grenade for you every 100-120 seconds, but only if you have fewer than two in your inventory. This creates a powerful resource loop: use your walls aggressively, and Mr. Waggor will quietly restock you. In long, drawn-out matches or Clash Squad rounds, this free wall can be the difference between having cover in the final fight or being caught exposed. He effectively increases your total available walls for the match, allowing for more aggressive plays without the fear of running dry.
With Nairi fortifying your position, Skyler shattering the enemy's, or Mr. Waggor ensuring you never run out of cover, you're not just placing walls—you're controlling the entire geometry of the fight. This is the loadout knowledge that separates a good player from a zone-controlling force in Free Fire.
How to Counter Gloo Walls in Free Fire Ranked Matches
So you’ve mastered placing your own Gloo Walls in Free Fire—now it’s time to learn how to dismantle your opponent’s fortress. In ranked matches, the player who can effectively counter walls controls the fight. This isn’t just about brute force; it’s about smart positioning, using the right tools, and exploiting enemy habits. If you’ve ever felt stuck trying to push a well-defended position, these strategies will turn the tables.
Exploit High Ground with Vertical Flanking
The most straightforward way to bypass a Gloo Wall is to simply go over it. The Vertical Flanking strategy involves climbing to high ground—like the roof of a nearby building—to get an angle over the top of enemy cover. This forces them out of their safe pocket and makes their wall useless. Even in open areas, you can sometimes use the terrain, like a hill or rock formation, to achieve the same effect. The key is to always be aware of elevation opportunities before committing to a frontal assault.
Bring the Right Breaching Tools
When you can’t go around or over, you must go through. Certain weapons and items are designed to dismantle defensive setups.
The M82B Sniper Rifle is a premier anti-wall tool because its shots can pierce Gloo Walls, dealing damage directly to players hiding behind them. This applies constant pressure and can flush an enemy into the open.
For coordinated squad play, nothing beats Frag Grenades. While a single grenade might not destroy a wall, coordinating multiple throws with teammates can instantly shatter an entire wall cluster, especially effective against formations like the Triangle Defense. The blast can also finish off weakened opponents.
When using grenades, cook them for a second before throwing to reduce the enemy’s time to react and flee from their cover.
Leverage Character Abilities and Map Control
Smart counter-play involves more than just your inventory. Character abilities can completely negate the enemy’s defensive strategy. Skyler’s Riptide Rhythm remains the gold standard for destroying walls at range. Meanwhile, Nero’s Anti-Wall Zone creates a temporary area where Gloo Walls cannot be deployed, which is perfect for shutting down a revive attempt or forcing an enemy out of a fortified spot.
You also need to respect the map’s geometry. Be wary of trying to counter walls in known problem spots like Bermuda’s Peak railings or Kalahari’s Command Post rubble, where your own walls might fail to place. Sometimes, the best counter is to avoid the engagement entirely, using the wall as a signal to rotate to a more advantageous position.
The Psychological Counter: Bait and Punish
Finally, use their walls against them. Many players develop predictable habits, like always peeking from the right side of their wall. Use a Fake Push Wall—place one of your own walls aggressively to make them think you’re committing, then flank from a different angle using natural cover. If an enemy is spamming walls, they’re likely low on resources and panicking. A patient, calculated push after their walls break will often catch them off-guard.
With these tools—vertical flanking for height, the M82B and Frag Grenades for destruction, and smart ability usage—you’re equipped to dismantle any defensive setup. In Free Fire, the best defense is a good, well-informed offense. Now go break some walls.
Gloo Wall Resource Management and Training Drills
Your Gloo Walls are your lifeline in Free Fire, but they’re a finite resource. This final section is where smart management and deliberate practice turn those walls from panic buttons into a controlled, reliable advantage. Let’s lock in your resource discipline and drill the muscle memory so you can execute flawlessly under pressure.
Mastering Gloo Economics and Your Training Routine
Think of your Gloo Wall inventory as your most valuable currency. Wasting it early leaves you defenseless when it matters most. The core principle of Gloo Economics is simple: carry 2-4 walls for mid-game and prioritize them over other throwables, especially as you approach the final circles. Every wall you save is a future reposition, a clutch revive, or the cover that lets you win a forced 1v1. Don’t be the player who has nothing left when the zone shrinks to an open field.
To make every wall count, you need a reliable Revive Pocket technique. When a teammate is down, your first move is to place a single wall to block the angle of the known shooter. Before you hit revive, do a quick flank check—don’t get ambushed while you’re locked in the animation. Only add a second wall if enemies can attack from a different direction. This conserves your resources while maximizing your squad’s survival.
⚠️ Watch your terrain: Placement can be tricky on certain maps. Avoid complex spots like Bermuda’s Peak railings and Kalahari’s Refinery catwalks where walls often fail to clip properly. Assume a 15-20% failure chance in these areas and have a backup plan.
The Five-Minute Gloo Wall Drill Routine
Consistency beats raw talent. Before jumping into ranked, spend five minutes in the Training Island honing the core actions. Treat it like a sport’s warm-up.
- Minute 1: Panic Walls. Sprint in the open, then suddenly stop, crouch, and deploy a wall. Practice resetting your aim behind it. Goal: reaction without thought.
- Minute 2: Forward Chains. Pick a point 50 meters away and “walk” toward it using the Walking Wall technique. Place a wall, advance behind it, place the next. Build the rhythm of an aggressive push.
- Minute 3: Revive Pocket. Use a stationary target (like a bot or a marked spot) to practice the full sequence: place wall, check flanks, “revive,” then immediately place a second wall covering a new angle.
This routine builds the muscle memory so that in a real match, placing a Triangle Defense for a last-zone heal or executing a perfect Revive Pocket feels instinctual, not frantic.
You’ve now configured your settings, mastered placements from basic to advanced, learned offensive tricks and counters, synergized with characters, and drilled your resource management. In Free Fire, the player who controls space controls the fight. With your Gloo Walls mastered, you create that space anywhere, anytime. Go secure that Booyah.