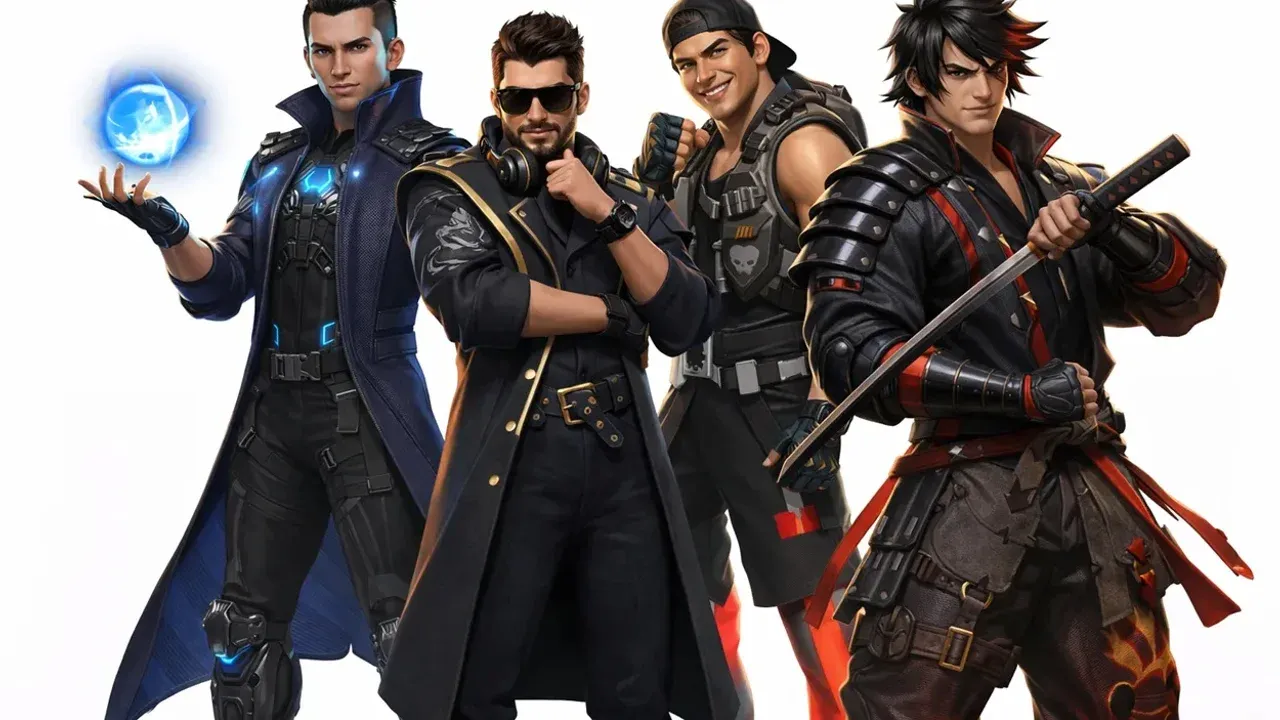
Free Fire Meta Overview: Chrono vs. Skyler vs. K in 2026
Welcome to the 2026 meta. The battlegrounds of Free Fire have evolved, and the game is now dominated by a powerful Support Meta where survival and team utility trump all. The recent patches have shaken things up, with buffs to characters like Alok and Dimitri while reigning champions like Chrono have seen significant nerfs. This guide cuts through the noise to focus on three characters who define the current strategic landscape: Chrono, Skyler, and K.

Free Fire Character Roster
Think of this as your playbook for the new era. We're not just listing abilities—we're breaking down the exact roles these powerhouses play in a winning squad. Whether you're pushing for Booyah in ranked or dominating Clash Squad, understanding the core identity of each character is your first step to victory.
Let's meet the contenders.
First up is Chrono, the defensive anchor. His role as a Support/Tank is defined by his [Active] Time Turner ability, which creates a powerful force field. This is your ultimate "get out of jail free" card for emergency cover during a bad rotation or a third-party attack. While recent nerfs have increased his cooldown, a well-timed shield can still single-handedly reset a losing fight.
For aggressive players who hate campers, Skyler is your answer. As a Balanced/Aggressive character, his [Active] Riptide Rhythm is a game-changer. This sonic wave shreds enemy Gloo Walls, turning fortified positions into vulnerable targets. He’s not just about destruction; breaking walls also fuels your HP recovery, making him the perfect spearhead for any coordinated push.
Finally, we have the sustain king, K (also known as Captain Booyah). His Support/Sustain role is all about endurance. His [Active] Master of All skill lets you manage your EP/HP conversion like a pro. In the long, resource-starved fights that decide late-game circles, K’s ability to heal up from EP can make your squad outlast everyone else. He’s the backbone of any team built for patience and punishing trades.
Don't just chase the newest character. The 2026 meta rewards mastering a character's specific role. A well-played Skyler breaking a key wall is often more valuable than a poorly timed Chrono shield.
This overview sets the stage. In the sections ahead, we’ll dive deep into mastering each character's unique playbook, from build setups to clutch scenarios. By the end, you'll know exactly which legend fits your style and how to lead your squad to the top. Let's get started.
How to Master K (Master of All) for High-Tier Ranked Play
Think of K, also known as Captain Booyah, as your secret weapon for outlasting the competition. In the 2026 Free Fire meta, where fights are decided by who runs out of resources first, K isn't just a healer—he’s a tempo controller. While others burn through medkits, you'll be converting Energy Points (EP) into health, turning long-range pokes and drawn-out fights into your greatest strength.
Understanding Master of All
K’s power comes from his active ability, Master of All. This isn't a one-click panic button; it's a strategic tool with two distinct modes you must manage. Tapping the ability button switches between them, so mastering the toggle is key.
- Jiu-Jitsu Mode: This is your squad's lifeline. When active, it creates a 6-meter radius aura that provides a massive 500% EP to HP conversion rate for you and any allies inside it. This turns every bit of your EP pool into rapid health recovery during a tense standoff.
- Psychology Mode: Your default state for between fights. In this mode, you passively restore 3 EP every 2 seconds, up to a maximum of 250 EP. This constant trickle is what fuels your entire strategy.
The genius of K is the synergy: you use Psychology Mode to safely regenerate EP, then switch to Jiu-Jitsu Mode to convert that stockpile into health when the bullets start flying. The mode switch has a cooldown, so you can't flip-flop endlessly—smart timing is everything.
Always start a match in Psychology Mode to begin building your EP reserve immediately. Switch to Jiu-Jitsu Mode only when you’re about to take damage or are setting up for a team fight.
The Ranked BR Playstyle: EP Pre-loading
Your success with K in ranked Battle Royale hinges on one core philosophy: EP pre-loading. This means treating your EP bar as a second health pool that you fill before you need it.
Here’s how to execute it:
- Loot and Build: Your first goal after landing isn’t just to find guns, but to grab mushrooms and energy drinks. Prioritize these items to max out your EP early.
- Avoid Bad Peeks: This is crucial. Don’t take unnecessary chip damage from long-range snipers or random sprays. Your health is a resource to be protected until you’re ready to commit to a fight with your EP advantage.
- Force Medium Fights: K excels in engagements that last longer than a quick spray-down. Use cover, shoulder-peek to bait shots, and disengage briefly to let your EP conversion work. You win by making the enemy waste their healing items while you regenerate for "free."
This playstyle makes you a nightmare in the final circles, where medkits are scarce and every point of health matters. You’re not just surviving; you’re draining the enemy's resources.
Optimal Builds for K
K is a fantastic anchor, but he needs the right supporting cast to truly shine. Here are two powerful setups for different modes:
For Solo/Duo Battle Royale (The Sustain King):
- K (Active): Your core sustain engine.
- Jota (Passive): Provides instant HP on SMG/shotgun kills, perfect for securing a knock and getting back in the fight.
- Hayato (Passive): Gives you increased armor penetration as your HP gets lower, rewarding you for staying in risky fights that you can out-heal.
- Kelly (Passive): The extra sprint speed is invaluable for rotating safely and chasing down weakened enemies.
For Clash Squad (The Hold-and-Trade):
- K (Active): For sustaining through repeated round engagements.
- D-Bee (Passive): Boosts your movement speed and accuracy while strafing and firing, winning you those crucial close-range duels.
- Hayato (Passive): Same as above, for clutch low-HP moments.
- Leon (Passive): Automatically recovers HP after surviving combat, complementing K’s sustain between rounds.
Common Mistakes to Avoid
- Playing Like a Rusher: K is not Alok or Tatsuya. Don’t use his ability to push aggressively into unknown territory. His power is in resetting and out-sustaining, not initiating.
- Empty EP Bar: Letting your EP hit zero is the biggest mistake you can make. It completely negates your character's purpose. Always be conscious of your EP level.
- Ignoring Mode Management: Forget to switch back to Psychology Mode after a fight, and you’ll be stuck with a long cooldown when you need to heal next. Make the switch part of your post-fight routine.
Mastering K is about shifting your mindset from seeking quick kills to winning wars of attrition. In Free Fire, the player who manages their resources best often takes the Booyah. With K, that player is you.
How to Use Skyler (Riptide Rhythm) to Break Gloo Wall Setups
In Free Fire, there’s nothing more frustrating than getting pinned down by a squad turtled up behind a fortress of Gloo Walls. This is where Skyler shines—he’s not just a character; he’s your personal demolition crew. His Riptide Rhythm ability lets you dismantle defensive setups and heal yourself in the process, turning a frustrating stalemate into an aggressive opportunity.
Mastering Riptide Rhythm
Skyler’s active ability, Riptide Rhythm, is your primary tool. Hold the skill button to aim and release to send a sonic wave that destroys up to 5 enemy Gloo Walls within a massive 100m range. This is your key to breaking sieges and flushing out campers.
The OB32 update made this ability even deadlier. Hold the skill button to precisely target the specific wall an enemy is hiding behind. Don’t just fire it in the general direction—aim for the exact wall to maximize the shock factor and expose your target instantly.
The real genius of Skyler lies in his passive Wall Recovery mechanic. Every time you place a Gloo Wall, Skyler restores HP, starting at 4 points per wall. This makes him incredibly self-sufficient. In a prolonged fight, you can use your own walls for cover and get a small health top-up, reducing your reliance on medkits and keeping you in the fight longer.
Executing the Aggressive Rush
Using Skyler effectively is all about tempo. The moment you break a wall with Riptide Rhythm, the enemy is vulnerable. Your goal is to capitalize on that split-second of panic.
Here’s the sequence for a perfect Aggressive Rush, especially potent in Clash Squad:
- Identify the camp. Spot the main wall your target is using for cover.
- Aim and destroy. Use Riptide Rhythm to shatter that wall and any others in the chain.
- Push immediately. The second the wall breaks, sprint to close the distance while your enemy is exposed and likely repositioning.
- Finish the fight. Use an SMG or shotgun to win the now-unprotected duel.
This strategy punishes passive play and forces engagements on your terms. If you’ve ever felt stuck outside a building, this is your answer.
Synergy and Mindset
While his best builds are covered in a later section, remember that Skyler thrives with teammates who can capitalize on the chaos he creates. Pair him with characters who excel in close-quarters combat to clean up after your wall breaks.
Don’t just use Riptide Rhythm on cooldown. Save it for the right moment—when you need to breach a final-circle compound or stop a squad from reviving behind cover. The 60-second cooldown is forgiving, but strategic use wins rounds.
With Skyler in your squad, you control the pace of any fight that involves cover. Break their walls, heal from your own, and push with confidence. The defensive meta doesn’t stand a chance.
How to Deploy Chrono (Time Turner) for Defensive Resets
Alright, time for a breather—but not for you, because the circle is closing and you’re caught in the open. This is the moment in Free Fire where Chrono earns his keep. His Time Turner ability is your ultimate panic button, a bubble of pure "not right now" that can reset a fight or save a squad wipe. While he's taken a few nerfs, his shield mechanics are still a cornerstone of defensive play.
Think of Time Turner as your emergency ejector seat. When you activate it, Chrono creates an impenetrable force field that blocks up to 800 HP of damage from all directions. For 4 seconds, you and any teammates inside are safe from bullets flying in or out. The real kicker? It also grants a 15% movement speed boost to everyone in the bubble. This isn't just for hiding—it's for making a tactical retreat or pushing through a deadly choke point you'd otherwise never survive.
Use the speed boost aggressively. Pop the shield to safely cross an open field or push up to a squad camping behind a rock. The movement advantage lets you reposition for a better angle the moment the shield drops.
Now, here’s the catch that changes everything: cooldown management. After the OB54 update, Time Turner has a 45-second cooldown. It’s not the 180s monster it once was, but it’s still a long wait. This means you absolutely cannot waste it. In Ranked Mode, treat it as a one-per-major-fight resource. The best use cases are for third-party escapes (when you’re getting shot from an unknown angle) or for securing safe revivals when a teammate is down in a dangerous spot.
The Defensive Reset Playbook
So when do you hit that button? Save Time Turner for two specific Ranked BR scenarios:
- The Exposed Fight: You’re caught in the open with no natural cover and bullets start flying. This is a pure survival play—activate, find cover, and reset.
- The Clutch Revival: A teammate gets knocked in a bad spot. Drop the shield on them, use it as mobile cover to get the revive off, and use the speed boost to drag them both to safety.
Trust me, the temptation to use it early is real, but that long cooldown means a mistimed shield leaves you vulnerable for the next critical engagement. Wait for the moment where it truly turns the tide.
While his shield has been adjusted over the years, Chrono’s core value remains: he gives you a tool to say "no" to losing a fight on someone else's terms. With disciplined timing, you can use that 800 HP force field to control the pace of the battle, protect your squad, and live to fight another circle. Master this, and you’ve mastered the art of the defensive reset.
Side-by-Side Comparison: Cooldowns and Team Utility
So you've got the big three in your sights—K, Chrono, and Skyler. Each one can dominate a match, but they play entirely different games. One is your slow-burn sustain engine, another is your panic button for a hail of bullets, and the last is the key to turning a fortified bunker into a free kill. The difference between a clutch win and a frustrating loss often comes down to understanding their tempo: the long cooldowns that demand patience and the instant utility that lets you push the pace.
Let's break down the numbers and see who brings what to the squad.
Cooldown Management: The Tempo of Battle
This is where your playstyle gets defined. Your character's cooldown dictates your fight rhythm—whether you're playing a patient, long-game or forcing windows of opportunity.
- Chrono – The Strategic Reset (180s): Chrono's Time Turner is the ultimate "get out of jail free" card, but it comes with the longest cooldown in the game at a staggering 180 seconds. This isn't a skill you spam. In Free Fire, using this shield frivolously means you won't have it for the critical third-party attack or the final circle push. You're playing around a single, fight-defining moment every three minutes.
- Skyler – The Aggressive Timer (60s): Skyler's Riptide Rhythm sits at a much more manageable 60-second cooldown. This allows you to use it to initiate a fight, and if you survive the engagement and rotate, it will often be ready or nearly ready for the next clash. It enables a consistent, pressure-heavy playstyle where you can threaten enemy Gloo Walls multiple times in a longer match.
- K – The Constant Engine (3s Mode Switch): K operates on a completely different axis. His Master of All mode switch has a mere 3-second cooldown. His power isn't in a burst cooldown, but in constant, passive value. You're managing a resource (EP) in real-time, toggling between Psychology Mode for regeneration and Jiu-Jitsu Mode for rapid healing. His "tempo" is your own awareness and EP management.
Think of cooldowns as your engagement timer. If you use Chrono's shield, play extra safe for the next three minutes. If Skyler's sonic wave is down, you're on defense. With K, you're always "on"—just make sure your EP bar isn't empty.
Team Utility: What Do You Bring to the Squad?
Beyond cooldowns, your choice signals your role in the team's composition. Are you the sustain, the shield, or the siege breaker?
- K: The Resource Sustain King. K is your squad's endurance machine. He solves the problem of attrition. In prolonged poke fights or when healing items are scarce, his ability to convert EP to HP for himself and allies within 6m in Jiu-Jitsu Mode is invaluable. He lets your team stay healthy through chip damage and outlast opponents in resource-starved final circles. He’s the backbone of any team planning for long, drawn-out fights.
- Chrono: The Emergency Cover. Chrono provides pure, immediate safety. His Time Turner force field blocks damage and gives a movement speed boost, creating a safe zone for revives, a bunker for healing in the open, or a protective bubble to push through a chokepoint. In the Free Fire pro scene, he's the clutch character for surviving impossible situations and enabling risky, game-winning plays.
- Skyler: The Entry Pressure Specialist. Skyler is the key to offensive plays. His utility is direct and disruptive: destroying up to five Gloo Walls with Riptide Rhythm. He doesn't just break cover; he punishes campers and creates instant openings for your team to rush. In a meta where positioning behind walls is everything, Skyler denies that safety and forces enemies into the open.
The Wild Card: Skill Disruption
Before you commit to your pick, remember there's a hard counter in the lobby. A124's Thrill of Battle ability creates a field that blocks all three active skills for 20s. If you see an A124 on the enemy team, your entire game plan needs to shift. Pushing with Skyler's wave? It's disabled. Relying on Chrono's shield for a revive? It won't deploy. This is the ultimate check against ability-reliant teams and a big reason why raw gunplay and positioning never go out of style.
The Verdict: There's no single "best" choice—only the right tool for the job. K for the marathon, Chrono for the emergency escape, and Skyler for the door-kicking entry. Master their timings, and you dictate the pace of every Free Fire match you enter.
Best Build for K: The Solo BR Sustain Setup
When you're pushing rank in Free Fire solo, the late-game circle can feel like a pressure cooker—every bit of chip damage matters, and finding a safe moment to heal can be impossible. This is where K's Master of All ability transforms from a useful tool into your lifeline. The goal isn't to out-damage everyone instantly; it's to outlast them, turning every point of Energy into survival and winning the war of attrition.
The Solo BR Sustain Build
This setup is engineered for one purpose: surviving the grueling mid-to-late game of a Battle Royale match where resources are thin and third-parties are constant. It turns K from a support character into a self-sufficient engine.
The core of this strategy is the Sustain King skill combo: K [Active] + Jota + Hayato + Kelly. Here’s how each piece works together to create an unstoppable survival machine:
- K [Active] - Master of All: This is your anchor. Use Psychology Mode while looting and rotating to keep your EP bar maxed out. Before or during a fight, switch to Jiu-Jitsu Mode to convert that EP into HP at a 500% rate. This constant, in-combat healing is what lets you re-peek after taking damage when your opponent can't.
- Jota (Passive: Sustained Raids): This is your fight-finisher. After you secure a knockdown or elimination with an SMG or Shotgun, Jota instantly restores 40 HP. This reward for aggressive play keeps your momentum going and saves precious medkits for later.
- Hayato (Passive: Bushido): This is your clutch factor. Hayato grants you 5% armor penetration for every 13% HP missing. When you're in a desperate, low-health duel—a common scenario in final circles—this bonus can be the difference between breaking an enemy's vest and losing.
- Kelly (Passive: Deadly Velocity): This is your mobility. Kelly's 6% increased sprinting speed might seem simple, but it's vital. It helps you rotate faster to safer positions, chase down wounded enemies, or disengage from a bad fight to let K's healing kick in.
Don't wait until you're in a fight to build EP. While rotating or looting a cleared area, stay in Psychology Mode. Enter every potential engagement with a full or nearly full EP bar so you can sustain through the initial trade.
Playstyle & Weapon Synergy
This build rewards a calculated, medium-range playstyle. You want to engage in fights where you can use cover effectively—trade shots, duck back to let K's EP conversion heal you, then re-peek. Avoid reckless, all-in rushes; that’s not where this setup shines.
Weapon choice is crucial to activate Jota's healing. Pair a reliable mid-range AR like the SCAR or M4A1 with a close-range SMG like the MP40 or UMP. Use the AR for poking and initial damage, then swap to the SMG for the push or to finish a weakened enemy, triggering that precious 40 HP heal.
Trust me, the first time you win a fight because you healed back 50 HP while your opponent was scrambling for a medkit, you’ll understand the power of this build. It turns stressful endgames into controlled victories.
With K's endless sustain, Jota's reward for aggression, Hayato's low-HP power spike, and Kelly's rotational speed, you're not just playing for the next kill—you're playing for the final Booyah. Go out there and outlast them all.
Best Build for Skyler: The Aggressive Rusher Setup
This is it—the aggressive rusher's dream. In Free Fire, you're not just playing for picks; you're playing to shatter defenses, close the gap, and finish the fight before the enemy can even react. If your playstyle is all about speed, wall pressure, and close-quarters dominance, then this build is your new best friend.
The Wall Breaker Loadout
Your core philosophy here is simple: break their cover, rush them down, and win the duel. This isn't about sustained poke fights; it's about decisive, explosive engagements, especially in Clash Squad where rounds are fast and trades are brutal.
The perfect skill combo for this is Skyler [Active] + D-bee + Jota + Caroline.
- Skyler is your entry key. Use his Riptide Rhythm to blast open their defensive Gloo Walls and create an immediate opening. The HP recovery from his passive is just the icing on the cake.
- D-bee is your gunfight engine. His passive Bullet Beats grants a massive 30% movement speed and 60% accuracy increase while moving and firing. This lets you strafe circles around a stationary enemy after you've breached their cover.
- Jota is your sustain. His Sustained Raids passive restores 40 HP after every SMG or shotgun kill. In a rush build, this gives you the health to chain multiple close-range takedowns without stopping to heal.
- Caroline is your mobility specialist. Her Agility passive gives you increased movement speed when wielding shotguns, making you a lightning-fast threat the moment you pull out your close-range weapon of choice.
Activate Skyler's sonic wave just before you push. The visual and audio disruption can mask your initial movement, giving you a split-second advantage as you close in.
Gear and Execution
Your weapon choice is critical. For maximum burst damage after breaking cover, the M1887 shotgun is king. Its high damage per shot can instantly delete an enemy caught out of position. Pair it with an SMG like the MP40 for versatility.
The execution loop is clean:
- Identify the camp. Spot enemies hiding behind Gloo Walls.
- Break and push. Use Skyler's ability, then immediately sprint in with D-bee's speed boost active.
- Finish the fight. Use your shotgun (with Caroline's speed) or SMG to secure the knock, triggering Jota's heal to keep you in the fight.
Trust me, this setup feels overwhelming to play against. You're not just rushing—you're rushing with better accuracy, more speed, and built-in recovery. Once you get the rhythm down, you'll control the pace of every close-quarters encounter in Free Fire.
With this Wall Breaker build mastered, you're not just playing aggressively—you're playing dominantly. Let's go.
Best Build for Chrono: The Defensive Tank Setup
When the circle is closing and bullets are flying from every direction, you need a character who can stand his ground and keep the team alive. In Free Fire, that's Chrono. This build transforms him from a simple shield-bearer into an unbreakable Iron Fortress, focused on maximizing your team's armor and survivability through prolonged, punishing engagements.
The Iron Fortress Loadout
This setup is all about layering defensive and sustain bonuses to create a squad that’s incredibly difficult to knock down. The core combo is Chrono [Active] + Andrew + Kapella + Maxim. Each passive skill reinforces the others, creating a synergy that makes your team resilient against both burst damage and the attrition of long fights.
Chrono is your active anchor. His Time Turner force field is your ultimate "oh no" button for blocking pushes, securing revives, or escaping a bad rotation. The key is to use it proactively to control the pace of a fight, not just as a last-second panic save.
Andrew provides the foundational armor durability with his passive, Wolf Pack. This skill reduces vest durability loss, meaning your team's precious armor lasts significantly longer in every firefight. In a meta where armor can be the difference between life and death, Andrew’s value is immense.
Kapella amplifies all your healing. Her passive, Healing Song, increases healing item effects by 20% and healing skills by 10%. This makes every med kit, inhaler, or even Chrono's own survival more effective, turning standard recovery into a supercharged reset.
Maxim rounds out the sustain engine with Gluttony, which allows for 25% faster med kit and mushroom use. In the heat of battle, getting back to full health a few seconds faster can mean the difference between holding an angle and getting rushed while you’re still vulnerable.
This build thrives in disciplined, position-holding play. Use Chrono’s shield to fortify a key building or high ground, then let your enhanced healing and durable armor win the war of attrition against any squad trying to dislodge you.
Playstyle and Execution
This isn't a build for lone wolves or aggressive rushers. Your role is the team's anchor. Position yourself where you can protect your support players and use Time Turner to create safe spaces for looting, reviving, or waiting out an enemy's push. Your goal is to make every engagement costly for the opponent, draining their resources while your team stays topped up thanks to Kapella and Maxim.
Trust me, the patience this build requires pays off in the final circles. When other squads are scrambling with broken armor and no heals, your team will be fortified, healed, and ready to claim the Booyah.
With the Iron Fortress setup, you’re not just playing to win the fight—you’re playing to outlast everyone else on the island.
Specific Scenarios: When to Pick Each Character
Knowing which character to pick in Free Fire can feel overwhelming, but here’s the secret: your choice shouldn't be about who's "best," but about who solves the specific problem in front of you. Think of your squad as a toolkit—you need the right tool for the job.
For Late-Zone Chaos and Poke Fights
When the final circles close and resources are thin, K outclasses others when resources are low and poke damage is constant. His Master of All ability turns your EP pool into a lifeline, converting it to HP to survive chip damage that would force other players to burn their last medkits. This is where his tempo shines—you can trade shots from cover, disengage briefly to heal with EP, and re-engage while your opponent is still vulnerable. If your team’s strategy involves holding positions and winning wars of attrition, K is your anchor.
In these drawn-out fights, activate Psychology Mode between skirmishes to rapidly refill your EP bar, ensuring you always have fuel for the next trade.
For Breaking Defensive Campers
When an enemy squad has dug in behind layers of cover, you need a battering ram. Skyler outclasses others when enemies are camping behind multiple Gloo Walls. His Riptide Rhythm sonic wave can shatter up to five walls in one use, instantly stripping away the enemy's primary defense. The moment their walls vanish, they’re exposed and panicked—perfect for a coordinated squad rush. This makes him non-negotiable for Building Sieges and any Clash Squad round where you expect a fortified defense.
For Surviving Exposed Rotations
We’ve all been caught in a bad position. When you’re pinched in an open field with sniper fire coming in, Chrono outclasses others when caught in the open without natural cover. Pop his Time Turner force field. It blocks all incoming damage, giving you and your teammates crucial seconds to sprint to safety or to return fire from a protected position. It’s the ultimate "get out of jail free" card for those brutal mid-game rotations where the zone is not on your side.
For Smart Clash Squad Engagements
Clash Squad is about winning rounds, not just fights. A key Strategy here is to play Second Contact. Let your more aggressive teammates reveal enemy positions first. Then, you can swing in to clean up. This is where [Active] K for trade recovery is perfect. By entering the fight second, you can use K’s sustain to heal up from any damage taken during the trade, ensuring you’re healthy if a third enemy appears. It’s a disciplined approach that turns short cooldown rounds into consistent wins.
Trust me, once you start picking characters based on the scenario instead of habit, your win rate will climb. Match the problem to the solution, and you’ll dominate.
Free Fire Character Rewards and Unlock Methods
Alright, you’ve got the meta builds and strategies down—now it’s time to make them yours. Here’s exactly how to unlock the top characters in Free Fire and build a versatile roster for the 2026 season.
How to Unlock Meta Characters in Free Fire
Your path to unlocking powerhouses like K, Chrono, and Skyler starts in the in-game shop using Diamonds. This premium currency is the primary key to purchasing character vouchers or bundles directly. For a chance at limited-time skins or even characters, head to the Luck Royale menu—it’s the game’s gacha-style draw system where luck can land you exclusive items.
Save your Diamonds for direct character purchases during sales. Relying solely on the Luck Royale can be costly and unpredictable for securing specific meta picks.
Once you’re in a match, keep an eye out for the Coin Machine. This in-match resource, tied to characters like Suzy who places bounties, lets you spend earned currency for tactical advantages like armor or ammo. It’ s a great way to leverage your in-match economy if you’re running a support or intel-focused setup.
Finally, for the ultimate wildcard in your roster, unlock A-Patroa. This special character doesn’t have a fixed ability; instead, she mimics any other character’s skill that you’ve already unlocked. She offers maximum versatility, allowing you to adapt your team’s strategy on the fly to counter any opponent’s composition.
With your core roster secured through the shop, events, and smart resource management, you’re not just collecting characters—you’re building a tactical arsenal ready for any ranked challenge. Let’s go.