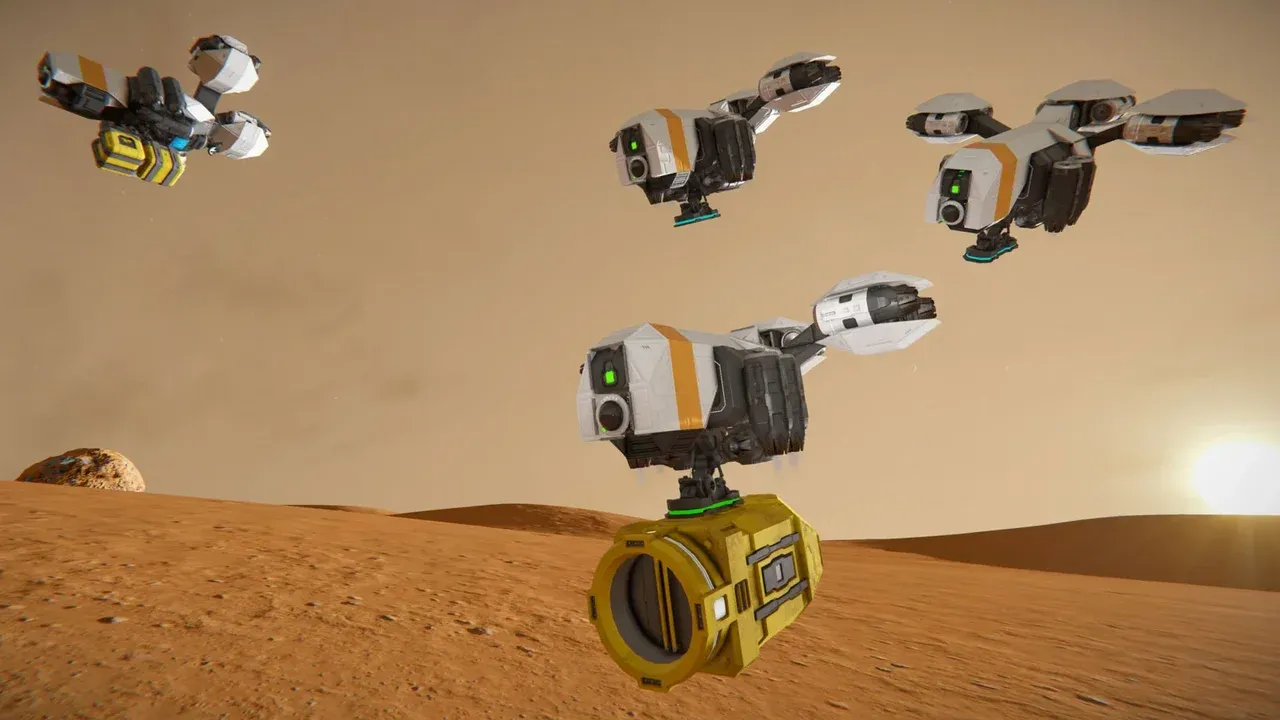
The Programmable Block has been sitting in your G-menu since you unlocked it, and you have probably drawn the same conclusion everyone draws: automating a station in Space Engineers means learning C#. The game's own documentation disagrees, and it is unusually blunt about it. The official wiki's Programmable Block page carries a section headed "When NOT to use PBs?" that tells you to check whether an Autopilot, an Event Controller or an Automaton can do the job "in a simpler way" first, and calls a Programmable Block "overkill" when millisecond speed and precise value-setting are not essential.
That is not false modesty from a developer hiding a hard feature. In April 2023, Update 1.202 "Automatons" added the Event Controller — a free, vanilla, one-block-cube addition that Keen Software House built as, in its own words, "an easy to use and easy to understand block", and that the official wiki credits with exposing "a lot of functionality to the vanilla game that was formerly accessible only through scripting and modding." It runs on Xbox and PlayStation, where in-game scripts have never run and still do not.
So the logic system in Space Engineers is a ladder, not a wall. Timer Blocks replay a stored set of actions on command. Event Controllers give a grid senses about its own state and branch on what they find. Programmable Blocks add arbitrary computation in C# on top of both. Each rung clears a ceiling the one below it cannot, and the job you actually want automated — the airlock you cycle by hand every session, the reactors you flip on when the batteries sag, the drone you undock manually because the sequence never quite works — almost certainly lives lower on that ladder than you think. What follows is how each rung works, where each one breaks, and how to tell which one your job needs before you spend an evening on the wrong one.
Space Engineers' Logic Blocks All Do One Thing: Press Your Toolbar Buttons for You
Before that ladder can help you, the rungs have to stop looking like four unrelated technologies. Strip the interfaces away and every logic block in the game is doing one small thing: pressing buttons you could have pressed yourself.
That is a rule, not a metaphor. The wiki's definition of what a Timer Block, a Sensor or an Event Controller is allowed to trigger is exact — it must be an action available on the Tool Bar for a block on the same grid, or on a grid connected to it. It is the same menu you get when you drag a block into a toolbar slot in your cockpit, and it varies by block: Open and Close on a door, Lock and Unlock on a connector, On and Off on a light, Stockpile on a tank, Extend and Reverse on a piston. The logic layer has no private vocabulary and no hidden commands. Everything it can do to your base is something the terminal already lets you do by hand, which means you have already learned half of every automation you will ever build.
Take the hangar door you open manually at the end of every mining run. Sitting in the cockpit, you press the toolbar slot holding its Open action. Now give that identical action to a Timer Block: it stores Open and replays it whenever something sets it running. Give it to a Sensor instead: Open fires when your ship enters the volume it is watching. Give it to an Event Controller pointed at the connector your ship docks to: Open fires when the connector reports itself connected. Four different builds, one action, one terminal entry. Nothing about what happens to the door has changed — only the reason the door hears about it.
That is the shift worth making tonight. You are not shopping for a block, you are shopping for a trigger. Any chore you can describe as "I press these switches when this happens" is already half-specified: the switch list is the part you know, and choosing a logic block is only choosing who notices the "when".
The toolbar model also explains, without any hand-waving, where this whole layer stops. The documented limits are not arbitrary gaps in the feature set; they are things a toolbar action cannot express. A Timer cannot steer a ship, use a handheld tool, aim a handheld weapon, place a block, or keep time below a second — none of those is an action sitting in a block's terminal, and the first three belong to entirely different blocks. Nor can it reach a block through the remote terminal: "same or connected grid" means physically joined, so a station across the sky from your cockpit is out of range no matter what your antenna can see. Even a connection you have made yourself can lapse — actions you assign to blocks on a subgrid joined through a connector execute only while that connector is actually connected, which is why an undock sequence that worked on the pad quietly does nothing in flight.
The vocabulary of actions, meanwhile, keeps growing on its own. Update 1.208 in November 2025 added a batch of new set-value actions across blocks including Antennas, Beacons, Gyroscopes, Gravity Generators and Wheel Suspensions — the logic blocks themselves were untouched, but everything they can say to the rest of your grid got longer.
So why does this layer have a reputation for being programmers-only? Because for the first eight years it genuinely was. The Programmable Block arrived on 1 January 2015, in Update 01.063, and Keen were explicit at the time that programming had become "an integral part of the gameplay." For most of the game's life it was the only rung on this ladder, which is why so much still-circulating advice — forum answers, old video guides, half the results you will find searching for your exact problem — opens with "you'll need a script for that." Much of it was true when it was written.
The other assumption worth dropping is that any of this is behind a paywall. All four blocks are 1×1×1 on both grid sizes, so they cost you one cube of space each. A Timer Block draws 0.1 W, a figure so small the wiki works it out for you: a small battery can power 500,000 Timers for an hour. With Progression on they unlock early too — building any light unlocks the Timer Block, and a basic Assembler plus a lighting block unlocks the Event Controller. There is a paid Automatons Pack, and it is worth being precise about what it sells: an Emotion Controller, saddle cockpits, decorative pipework, and cosmetic Automaton skins for the Programmable Block, Timer Block and Sensor. Skins. The functional blocks underneath them, and the Event Controller alongside them, are free vanilla content.
Nor is this legacy machinery you are dusting off. The newest Space Engineers update, 1.210 "Prosperity" in July 2026, still ships Event Controller fixes — an improved Distance to Locked Target calculation, a Detailed Info sync fix for dedicated servers, a fix for a tracked Merge Block firing on recolour. One boundary is worth setting before you go searching, though: Space Engineers 2 is a separate game, and it got its own Event Controller with a different condition list and no Programmable Block at all. If a guide you find lists conditions like mass or atmosphere percentage, it is not describing this game.
Which leaves exactly one question. If they all press the same buttons, the only thing left to decide is which one you build for a given job — and that turns on the two things these blocks do not share.
Pick the Lowest Rung That Does the Job: What Each Logic Block Can Compute and How Far It Can Reach
The two things are these: what a block can work out, and how far it can notice. Every choice in this system reduces to those two ladders, and both are short enough to hold in your head while you stand in your base looking at the job you are tired of doing by hand.
Take capability first, because it is the ladder that decides whether you ever need to write code. A Timer Block replays a fixed list of switch-flips. A Sensor notices something nearby. An Event Controller notices something about your own grid and reacts with one branch for true and another for false. A Programmable Block reads, calculates and writes any value it can reach. Four sentences, four rungs — and only the last step between them is expensive.
The wiki draws that last line at one word: value. A Timer can switch blocks on and off — lights, thrusters, power, turrets — and it can increase and decrease a small handful of values in fixed intervals, things like wheel suspension height, rotor, piston and hinge reverse, or thruster override. That is stepping, not setting. You can tell a Timer to nudge a value; you cannot tell it to land on a number. A script has no such restriction: it can read, calculate and write any value a block exposes. The wiki's own three examples are the clearest statement of the difference anywhere in the documentation — dim a light's colour from white to red, turn a rotor, piston or hinge to any position you name, set a thruster to any speed.
The same split shows up on the reading side. A Sensor detects proximity, full stop; it knows that something is inside its volume and nothing else about it. A script can read any state information a block or grid exposes and react to it — the contents of inventories, wheel steering settings, damage state, positions, speed, ownership. The Event Controller lives explicitly in between, and the wiki says so in as many words: it is easier to use than a script, but supports only a subset of what scripts can do. That subset is the whole question. If the subset covers your job, the rest of the climb buys you nothing.
The second ladder is reach, and it is worth separating carefully from something you already know. The same-or-connected-grid rule from a moment ago governs what a logic block can act on. This ladder governs what it can notice, and the numbers are quite different:
- Event Controller — its own grid, plus anything connected or merged to it. It reacts to things happening to itself.
- Sensor — up to 50 metres of the world around it. This is the block that reacts to external things: other grids, meteorites, players.
- Automaton and turret AI blocks — other grids up to 2–2.5 km away.
- Action Relay — as far as your antenna reaches.
The Event Controller's ceiling here is a genuine wall rather than a setting you can raise, and it is the reason a Sensor is not made redundant by a controller that watches twenty different grid states. An Event Controller cannot tell you a ship is approaching. It can only tell you that something has happened to your station. The Action Relay sits on this ladder for a different reason again: it does not sense anything at all, it carries a trigger across a grid boundary that nothing else in this layer can cross. And one boundary while we are here — the Automaton and turret AI blocks in that third tier are a different subsystem with a different job. They steer and they fight. The logic blocks switch and sequence. They share a range table and very little else.
Put the two ladders together and the rule falls out on its own: climb to the lowest rung that clears your job, and stop. This is not a stylistic preference, it is the game's documented advice. The Programmable Block page's own guidance on steering a drone is to consider first whether the standard Autopilot, an Event Controller or an Automaton can do what you need in a simpler way — and its verdict on the general case is blunt. If millisecond speed and precise calculation and setting of values are not essential, a Programmable Block is overkill, and you should use less resource-heavy methods first. That "resource-heavy" is doing real work in the sentence; the recommendation is framed as a cost argument, not an aesthetic one, and the arithmetic behind it comes later. The top rung also carries requirements the other three do not, which is a whole section of its own further down.
So take three jobs and run them down the ladders.
"Open the hangar door when my ship gets close." The trigger is proximity and nothing else. That is the entire definition of what a Sensor does, and 50 metres is more than a hangar approach needs. There is no value to compute and no grid state to inspect. Climbing higher here buys you a more complicated version of a solved problem.
"Switch the reactors on when the batteries drop below 20 %." Proximity is irrelevant, so a Sensor cannot help. The thing being watched is a state of your own grid — stored power — and the reaction has two halves: turn the reactors on when it falls, turn them off when it recovers. A true branch and a false branch, watching your own station. That is an Event Controller's exact shape, and most of what you currently do by hand looks like this.
"Hold a thruster at an exact output while the ship climbs out of gravity." Now the ladder bites. A Timer can step the thruster override up or down in fixed increments, but it cannot put it at 43 %, because the number is not a switch position. Only a script can read the ship's speed and position, work out the figure it wants, and write that figure to the block. The job is defined by needing a value rather than a state, and that is the one boundary nothing below the top rung crosses.
That last distinction is the useful one to carry around, because you can apply it to your own backlog right now, before you build anything. Walk the list of chores you repeat every session and ask of each one: does this need a number, or does it just need a switch thrown when something is true? Airlocks, hangar doors, reactor triage, gas production, docking, drone recall — nearly all of it is the second kind. Most of what people assume is a scripting problem is a middle-rung problem that has been left undone because the middle rung did not exist for the first eight years the Programmable Block was in the game.
Which means the sensible place to start is not at the top of the ladder but at the bottom of it — with the block already sitting in your G-menu, and the one that every rung above it ends up handing its work to anyway.
Timer Blocks: A Recorded Set of Button Presses You Can Replay on Command
The Timer Block is the oldest and plainest thing in this article, and the wiki teaches it with a metaphor worth borrowing: actions are songs, and a Timer is a playlist. You load it with button presses, and later it plays them back — on command, or after a wait. That is the entire concept. What lifts it above an egg timer is how much fits on one playlist, and how many different things are allowed to press play.

Start with capacity, because it is the part people underestimate and the reason a Timer is a real primitive rather than a convenience. Its toolbar works exactly like the one in your cockpit: nine slots on the page in front of you, and nine pages behind it, reached with ctrl+1 through ctrl+9. Nine toolbars of nine actions — and the detail that makes them worth having is that the pages are not alternatives you choose between. Every page fires together, every time the Timer runs.
There is one restriction that turns out to be a feature: you can assign a given action only once per toolbar. That is why the wiki's own example is to put "increase propulsion override" once on each of the nine pages — nine copies of one step, fired in a single press, is how a Timer nudges a value nine notches at once instead of one.
In front of that action set sits a single number: the delay, typed as hours:minutes:seconds. It runs from 0:00:01 to 1:00:00 — one second at the floor, one hour at the ceiling. Those bounds are worth knowing before you design around them. You cannot ask a Timer to fire a third of a second from now, and one Timer cannot hold a wait longer than an hour.
Then there are the three controls on the block itself. Trigger Now skips the delay and plays the actions immediately. Start counts the delay down and plays them at the end of it. Stop halts the actions the Timer is running.
Those three are easier to feel than to read about, so build the block. Call it Undock. Onto its toolbar go the three things you currently do by hand in sequence every time you leave the pad: unlock the connector, release the landing gear, switch the thrusters on. Set the delay to 0:00:10.
You now have one block with two behaviours, and you choose between them at the moment you press. Start gives you ten seconds — time to get clear of the pad and settle into the seat — and then all three actions fire together. Trigger Now, on the same block, with the same three actions and the same ten-second delay still sitting in the field, fires all three the instant you touch it. Nothing about the block changed. The delay is simply not consulted.
And because those three controls are themselves toolbar actions, they are not yours alone to press. A button panel mounted by the hangar door can hold Undock's Start. Another Timer can press any of the three from across the grid. Other blocks can press them too, for reasons of their own — which is the next few sections' business.
This is the part readers skim on the way to the more interesting blocks, so it is worth saying flatly: any job you can describe as "flip these switches, all at once" is already solved. Not with a condition, not with a script — one cube, a list of actions you already know how to fire by hand, and a name you will still recognise in a toolbar six months from now. Hangar lights, door and beacon in one press. The whole reactor bank on. Every drill, conveyor and light on the mining rig off when you log out. You can build three of those tonight and never think about them again.
The ceiling is not how much a Timer holds. It is what a Timer is: one moment. Everything on those nine pages happens at the same instant, ten seconds after you asked or the moment you asked, and then the block is finished. The instant a job has a second step that has to happen after the first has run its course, one Timer stops being enough — and the second one brings a question the first never raised.
Chaining Timers Into Sequences and Loops — and Why a Timer Never Checks That the Last Step Worked
The second Timer exists because of a rule the first one hides. The actions inside a single Timer do not wait for each other. They all fire in the same instant, and then the block is finished — whether the hangar door they opened takes two seconds to finish sliding or twenty. So the moment your procedure has a step that must happen after something else has run its course, you cannot solve it by adding another action to the same page. The wiki is blunt about this: if you are automating a sequence of longer actions, you have to enforce the pauses yourself, and the only thing in this layer that holds a pause is another Timer.
That gives you the pattern the whole no-code side of Space Engineers is built on. Each step of the procedure gets its own Timer. That Timer's delay is your estimate of how long the previous step needs. Its last action starts the next Timer in the line, which counts its own delay down, fires its own actions, and starts the one after it. Step, wait, step, wait — a chain of single-purpose blocks, each one handing off.
This is also why the wiki's answer to "how many Timers will I need?" is, in full, "Lots. :-)". One Timer per set of actions that happen together, and a separate block whenever two sets are mutually exclusive, whenever they only happen together some of the time, whenever they need a pause between them, or whenever one action has to wait for another to complete. If you find yourself trying to be clever with one Timer, you are almost always looking at two.
Build the docking sequence and you will feel the shape of it immediately. Dock-1-Open holds one action: open the hangar door. Its second action starts Dock-2-Secure, whose delay is 0:00:20 — long enough for the door to finish and for you to fly the last stretch in — and whose actions lock the connector, close the door behind you and switch the hangar lights to their docked state. Press one button on the way in and the bay opens, waits, takes your ship and shuts itself. Two blocks, no conditions, nothing that resembles code.
Now put a lump of debris in the door's track.
Dock-1-Open fires the Open action exactly as instructed. The door strains against the obstruction and stays shut. Twenty seconds later, entirely on schedule, Dock-2-Secure locks a connector with nothing on it, closes a door that never opened, and sets the lights to say you are safely docked — while your ship sits outside a sealed hangar. Nothing errored. Both blocks did precisely what you built them to do.
That is the honest ceiling of this rung, and it is worth stating without softening: a delay is not a check. Timers, in the wiki's own words, "just literally wait the number of seconds you tell them" and never confirm that the previous action truly completed. A door that is blocked rather than closed does not report back. The chain simply carries on to the next step and quietly falls out of step with reality.
Two smaller inaccuracies ride along with it. Timers are not precise about their delays either, which is why the standard advice is to add a little extra time rather than to time the step exactly; and they cannot do anything below a second at all, so genuinely fine coordination — the wiki's example is the joints of a walking machine — is outside the block's range no matter how you arrange the chain.
Slack absorbs some of this. If your door takes eight seconds, give the next Timer twelve. But be honest about what you have done: you have not verified anything, you have guessed generously, and a guess only holds while conditions stay normal.
Loops are the other half of the pattern, and they come from one small permission. Starting and stopping a Timer is itself a toolbar action, which means a Timer can start or stop another Timer — including itself. A block whose last action restarts itself runs forever on its own delay. That single trick turns the chain into a cycle, and it is how automated shuttles run their (un)docking rounds, how patrolling drones get restocked, how a 3D printer progresses and resets.
When a build has several cycles running at different rates, you can put a conductor Timer above them: one block whose only job is to start and stop the others, with a long delay of its own and a last action that restarts itself.
Two practical notes go with all of it. Ending a loop means triggering the Stop action on every looping block, not just the one you were watching. And when the delays start feeling too complicated to hold in your head, the wiki's advice is the unglamorous one — draw boxes and arrows on paper until the order, the timings and the groupings are visible.
Do not mistake this for a stopwatch with extra steps. The wiki's own party trick is a working randomiser with no code in it at all: SurpriseTimer holds some event you would rather not predict — say arming and igniting a warhead — and ToggleTimer, on a three-second self-restarting loop, does nothing but flip SurpriseTimer on and off, over and over. A Sensor watching the doorway switches ToggleTimer off the moment somebody walks in, freezing SurpriseTimer in whichever state it happened to be. Press the button and it is a coin flip. Two Timers, one Sensor, and a genuine random branch.
Which brings us to the block you should build before any of that: the RESET.
A chain that can desynchronise needs a way back to a known state, because the states pile up faster than you think. A working grid is carrying propulsion settings, remote-control directions, precision mode, collision avoidance, battery mode, mechanical rotation, and steps it is still waiting on. Start it from the wrong combination of those and, as the wiki puts it, it "may get lost, stall, or total itself."
So build one Timer that puts everything back: mechanical blocks to their extend limits, starting angles, velocities and directions; the grid back at its safe docking spot; thrusters, dampers, gyroscopes and flight control back to their defaults. Name it consistently — RESET or RESTART on every grid you build — and leave yourself a note on a small text panel about anything you have to set by hand first, like waypoints or antenna names.
It is the block you will use most and think about least. It is also the repair procedure: when a damaged piston has thrown a mechanical sequence out of order, the fix after welding is to stop all the timers, reset, and restart them in the right order.
The RESET brings one more discipline with it, and it is the difference between a logic system you can debug in a year and one you rebuild instead. Do not scatter complicated action sets across the trigger slots of individual sensors, controllers and button panels around your base. Point every one of those at a named Timer, and put the real work there. Then Timers are the only thing you maintain, and there is exactly one place to look when a sequence misbehaves.
So: single-purpose Timers, descriptive names, one RESET, generous slack on every delay, and a diagram when it grows. That is as far as this rung goes, and for a great deal of station work it is far enough. But notice what the slack is actually doing. It is standing in for a fact you do not have — whether the last step finished. If a delay cannot tell you the door really closed, something else has to notice on your behalf. The odd thing is that several blocks already bolted to your station have been noticing all along, with both of their trigger slots sitting empty.
Sensors and the Dozen Other Blocks That Already Fire Events for You
Those empty slots are not a figure of speech. A trigger toolbar is standard equipment on a surprising number of blocks you have already bolted to the station for entirely different reasons, and nothing in the terminal points this out — the slots simply sit there, unused, on hardware you paid for years ago. Before you build anything new, it is worth knowing what is already watching. Start with the one block on that list you would build deliberately: the Sensor.

The Sensor's job is to notice things that are not part of your grid — the wiki's own list of uses is drone behaviour, opening airlocks and hangar doors, motion-triggered lights, security tripwires and traps, and, memorably, keeping players from walking into a running grinder. What it gives you is a box, and the box is yours to shape. The detection field is set separately in six directions — left, right, top, bottom, back and front — and each of those runs from the minimum, a 0.1 metre cube hugging the block, out to 50 metres. Because the six numbers are independent, the shape is the real design decision: a thin slab lying across a doorway, a shallow strip down one wall of a corridor, a tall column standing over a landing pad. Switch on Show on HUD while you configure it and the volume is drawn for you in the world, so you can confirm that the box you imagined is the box you actually set.
What counts as a detection is itemised just as finely, and you tick the combination you want: players, filtered by relation — owner, friendly, neutral, enemy; small ships and small blocks; large ships and large blocks; stations, bases and platforms; floating objects, which covers scrap, ores, dropped tools, ammunition and loose materials; subgrids; and asteroids and voxel ground on planets. That last pair reads as an oddity until you are building a drill rig or a lander that needs to know it is about to meet dirt. The relation filter is the one worth noticing tonight, because it does work you might otherwise try to build: "enemy players, and nothing else" is a checkbox, not a contraption.
Where the Sensor departs sharply from the Timer is its toolbar. It has exactly two action slots — the left one fires when a target enters the field, the right one when a target leaves it. There are nine pages of those, ctrl+1 through ctrl+9, but every page gives you the same two moments; there is no third kind of thing a Sensor can notice. That constraint quietly decides the shape of every sensor build you will ever make. The moment your reaction is more than a switch or two, the slot should not hold the reaction at all. It should hold the Start of a Timer that holds the reaction.
So build the intruder alarm, and build it that way. Put a Sensor on the corridor between your hangar and the rest of the base, set the field to cover the width of the passage and nothing beyond it, and set the targets to enemy players only. In the enter slot, put one action: start a Timer called AlarmOn. In the leave slot, one action: start AlarmOff. AlarmOn is where the actual alarm lives — switch on a Beacon you have labelled with something a faction mate can read at a glance, fire a Broadcast Controller to push a message into chat so people who are not in the room find out, flip the corridor lights to their warning state. AlarmOff puts all three back. One Sensor holding two actions, two Timers holding as many as the job needs, and the whole alarm is editable in one place if you later decide it should also close a door.
Now the failure that makes this alarm worth understanding rather than copying. Players seated in a cockpit, a cryopod, or any other seat are not detected as players at all. The boarder who walks down your corridor trips the alarm exactly as designed; the boarder who walks down your corridor and sits down in a seat is, to the Sensor, no longer there. Nothing errors, nothing warns you, and the beacon stays dark. It is the same blind spot from the other side that makes a Sensor unreliable for headcounts: it answers "did something cross this line" far better than it answers "is anyone in this room right now." Build tripwires with it, and be careful about building presence checks.
And the Sensor is only the most conspicuous block on the list. A whole set of blocks already on your grid expose their own event toolbars, with no controller involved:
- Air Vent — the room became pressurised, or is no longer depressurised. This is the classic airlock partner, and the reason is that it reports something real rather than something scheduled.
- Button Panel — a player pressed the button.
- Timer Block — the countdown reached zero. That is the chain you built in the last section, seen from the trigger side.
- Action Relay — a signal arrived.
- Cockpits and Remote Controls — this grid has been locked onto by something, and is no longer locked onto; the wiki's suggested reaction is deploying decoys.
- AI Basic, AI Recorder and Remote Control — a waypoint was reached.
- AI Offensive and AI Defensive — the first enemy was detected, and there are no more enemies; flee, launch drones, wake the turrets.
- Custom Turret Controller — the turret came into alignment with its target, or lost alignment.
- Target Dummy — the dummy was hit or destroyed, which is how people build a scoring range.
Read that list as an inventory question rather than a menu. Before you design a new trigger for a job, look at what is physically involved in the job and check whether one of those blocks is already sitting in it, already noticing, with both of its slots empty. A hangar with a Button Panel by the door and an Air Vent in the ceiling is a hangar that can already tell you two things about itself for free.
The other thing to take from the list is that every block on it shares the Sensor's shape: a small number of slots, holding a small number of actions, on a block whose main job is something else entirely. That shape is exactly why the last section's discipline applies to all of them: point each one at a named Timer and keep the real work there.
What none of them will tell you is the state of your own station. A Sensor answers "is something out there?" — brilliantly, out to 50 metres, in a box you drew yourself. It cannot answer "is my hydrogen running low, is that cargo container full, did the door I told to close actually finish closing." Those are questions about the grid asking them, and for eight years the only thing in the game that could answer them was a script. Then Keen shipped a block whose entire purpose is that second kind of question.
Event Controllers Give a Grid Senses About Itself
That block is the Event Controller, and the wiki's own description of it is the most useful sentence in this guide: it gives your grids "senses" for their own blocks. It monitors block states on your behalf, and when a value changes, it reacts by triggering toolbar actions you chose. Keen shipped it in April 2023, in Update 1.202 "Automatons", as free base-game content alongside the five AI blocks — so it has been sitting one cube wide in your G-menu for three years, under a name that sounds considerably more technical than the thing it does. What it does is ask one question about your station, continuously, and act on the answer both ways round.
Both ways round is the part that matters, and it is where the block departs from everything covered so far. Open one and you find two action slots, and they are not the Sensor's two. A Sensor's slots are fixed by the world: something entered, something left. An Event Controller's first slot fires when the condition you wrote becomes true, and its second fires when that condition becomes false. Because you define the condition, you define both branches — the reaction and the reset — and you define them in the same block, at the same time, looking at the same threshold. "Batteries below twenty per cent" gives you the reactor start-up in slot one and the reactor shutdown in slot two, and neither can drift away from the other, because there is only one number involved.
Nine toolbar pages sit behind each slot, exactly as they do on a Timer, so a slot can carry as many actions as the job needs. One quirk is worth knowing before it confuses you: if you want the same action in both slots, it has to go on different pages, so put the true copy on page one and the false copy on page two.
What you can ask about is a fixed menu, and it is longer than most players realise — more than twenty distinct event types, each with its own value range. Percentage events run 0 to 100 %, and they are the ones that cover most station work: Stored Power %, Power Output %, Gas Tank Filled %, Cargo Filled %, Piston Position %, Block Integrity %, Thrust %. Alongside them sit the plain state changes with no threshold at all — Door Opened, Connector Connected, Connector Ready to Lock, Landing Gear Locked, Merge Block Merged, Rotor/Hinge Attached, Cockpit Occupied, Block On/Off Switched, Block Added/Removed — where slot one takes the first state and slot two takes its opposite. Then a handful of measurements about the grid itself, each with a hard ceiling: Altitude from 1 to 50,000 m, Distance to Locked Target from 1 to 2,500 m, Grid Speed from 0 to 100 m/s, Natural Gravity from 0 to 10 g, and Angle Changed across the full −360 to +360°.
Two details in that catalogue will bite you if nobody mentions them. The first is that both comparison choices include equal: the condition is "equal or greater than" or "equal or less than", never a bare greater-than. So on a threshold of 20, an exact reading of 20 satisfies the true side, and the false action is never the one that fires at precisely your number. Set a threshold expecting a strict inequality and the branch you get is the other one. The second concerns Altitude specifically: it is measured against the planet's original surface heightmap, which means dug holes, boulders and grids are ignored. A lander told to drop its gear at 20 m is measuring from the terrain as the game generated it, not from the pit you excavated or the pad you welded down there.
The other structural rule is that one Event Controller watches one event. You are not configuring a rule engine; you are choosing a single question and wiring its two answers.
So build the pair that keeps a station alive while you are not looking at it, and build them the way the block expects. Place an Event Controller, open its Control Panel screen, and work down the settings in order:
- Event — Stored Power %.
- Condition — value is equal or less than the threshold.
- Threshold — 20.
- Available Blocks — because this is a block event rather than a grid measurement, you now pick what it watches. Search your grid, select your battery bank, and click Add Blocks.
- Selected Blocks — anything you added wrongly comes back out here, through Remove Blocks.
- Select Actions — slot one is how to react, slot two is how to undo it.
(There is also an AND Gate toggle at the bottom of that screen. Leave it alone for now — it is the next section's subject.)
Into those two slots go exactly two actions, and neither is a reactor. Slot one starts a Timer called Power-Reserve-On, which is where the real work lives — switch the reactor bank on, flip the corridor warning lights to amber, and anything else you decide low power should mean. Slot two starts Power-Reserve-Off, which puts all of it back. This is the same discipline from the last two sections and it pays off faster here than anywhere else, because a power rule is a rule you will edit: the day you decide low power should also shut down the refinery, you edit one Timer instead of hunting through controllers. Name the controller Power-Low while you are at it, because in six months you will be reading its name, not its settings.
A second controller finishes the power story from the other end. Point it at Power Output %, watching your solar panels or wind turbines, and let it switch the fuelled sources off when the renewables are carrying the load — the wiki's own phrasing for the pattern. Now your reactors come on when the batteries sag and go quiet when the sun is doing the work, and nothing about it involved a line of code.
Gas is the identical shape with a different question. A third controller on Gas Tank Filled % can watch an Oxygen Tank, a Hydrogen Tank or a Hydrogen Engine. Set the condition to equal or less than, the threshold to something that gives you slack — say 30 — and select the hydrogen tank. Slot one starts H2-Produce: switch the O2/H2 Generator on and flip a tank to Stockpile so it fills rather than feeds. Slot two starts H2-Idle, which switches the generator off and takes the tank out of Stockpile once you are comfortable again. The wiki states the whole loop in a sentence — if hydrogen runs low, then produce more and switch a hydrogen tank to Stockpile — and that sentence is now a permanent feature of your base rather than a thing you remember to do before a long flight.
Once you have built two of these, the rest of the catalogue reads differently, because every entry in it is the same three-step configuration pointed at a different question. Cargo Filled % is the wiki's own if-this-then-that example: a mining drone set to return to base at 80 % full stops needing you to watch its inventory.
Piston Position % stops an elevator at a floor and opens the doors — with the useful subtlety that the percentage is measured within that piston's own minimum and maximum, so 50 % means halfway through the travel you configured, not halfway to the piston's absolute limit. Block Integrity % and Block Added/Removed turn a station into something that repairs itself: when essential blocks are destroyed, switch on the self-projectors and the welders, and let the rig weld the hole shut while you are still working out what hit you.
And Connector Connected is the one that makes docking feel finished — slot one extends the walkway and opens the doors the moment the connector reports itself locked, slot two retracts and seals them when you leave, with a second controller on Connector Ready to Lock handling the lock itself as you drift into position.
Look at that list against your own backlog and the pattern is hard to miss. Power, gas, cargo, damage, doors, connectors, lifts, docking — the chores you repeat every session are nearly all one value crossing one line, in one direction or the other. That is precisely the observation Keen acted on. The Event Controller was built to expose in the vanilla game a body of functionality that had previously been reachable only through scripting and modding, and it did so on purpose, in a block designed to be understood rather than programmed. The consequence is worth spelling out for the reader it was aimed at: everything in this section works on Xbox and PlayStation. There is no world setting to change, no mode to switch on, nothing to ask a server admin for, and no line of C# anywhere in it. If you play on a console, this is not a preview of the real tool — it is the tool, and it covers most of the job.
Which is why the honest shape of most station automation is smaller than it sounds: one Event Controller watching one value, and two named Timers doing the work. Build that tonight for the reactor bank and you will have automated a chore you have done a hundred times.
One controller watching one block is simple. It stays simple right up until you point it at several blocks at once, or hand it an action that toggles a state rather than setting one — and those are the two traps that break most real builds.
One Event Per Controller: AND Gates, Double-Firing, and Why Your Real Actions Belong in Timers
Both traps come from the same gap. An Event Controller is a simpler machine than the sentence you say out loud when you describe what you want, and it will implement the rule you configured rather than the rule you meant. "Fire when the doors are shut" and "fire when a door shuts" are different instructions. "Lock that connector" and "flip that connector's lock" are different instructions. One checkbox and one careless action choice account for most of the builds that half-work.

The checkbox first. Down at the bottom of the configuration screen, below the blocks you selected, sits AND Gate. It appears only for block events — a grid measurement like Altitude or Grid Speed has nothing to aggregate — and with a single block selected it changes nothing at all, which is why it is easy to meet it for the first time on the day you add a second block and your build stops behaving. It decides how several watched blocks are boiled down into one true-or-false answer, and the two settings are not mirror images of each other:
- AND Gate off. Slot 1 fires when any one of the chosen blocks meets the condition. Slot 2 fires when no chosen block does.
- AND Gate on. Slot 1 fires when all the chosen blocks meet the condition. Slot 2 fires when some or none of them do.
Read those two slot-2 lines twice, because that is where the difference lives. With the gate off, the false branch is an all-clear: not one of the watched blocks is in the state you asked about. With the gate on, the false branch fires the moment the set stops being unanimous — which can easily mean "three of the four are still in that state."
The official wiki teaches the choice with three questions rather than a rule, and they are better than a rule because they force you to answer for your own base. Switch the reactors on when any one tank or battery is empty, or only when all of them are? Sound an alarm when any weapon block is damaged, or only when all of them are? Repressurise the room when any of its doors get closed, or when all its doors have been closed? Say each version out loud and one of them is obviously the base you want to live on. Neither setting is the safe default; they are two different rules and you have to pick.
Take the last of those and build it both ways, on the same pair of doors either side of a small chamber. One Event Controller, event Door Opened, both doors added under Available Blocks.
With AND Gate off, slot 1 fires the instant either door reports itself fully open, and slot 2 fires only when neither one is — that is, when the last door of the pair finishes closing. Slot 2 is a genuine "the chamber is sealed" signal, and it will not fire early no matter which door you use or in what order.
Switch AND Gate on and the same controller behaves like a different block. Slot 1 now waits until both doors are open at once, which is a perfectly reasonable thing to want if you are lighting a through-passage or letting a rover drive straight through. But slot 2 now fires the moment the set stops being unanimous — close one door and the false branch runs while the other still stands wide open.
So the question that actually decides the setting is not "is my rule an AND or an OR". It is: which branch is carrying the action I need to be sure about? Put a safety-critical action in slot 2 and you want the gate off, because off is the setting whose false branch means "not one of them". Put it in slot 1 and you want the gate on, because on is the setting whose true branch means "every one of them".
That distinction — reacting to the state of a set of blocks versus reacting to an event that just happened to one of them — has some history attached, and it is worth knowing because it still shows up in old builds. Before Update 1.203 "Warfare Evolution" in August 2023, an Event Controller with the AND Gate disabled did not evaluate the aggregate state at all. It reacted to events in the moment they occurred, and the wiki's own worked illustration of the result is memorable: both doors closed, so slot 2. Door A opens, so slot 1. Door B opens, so slot 1 again. Then door A closes — and slot 2 fires, even though door B is still standing open. Situations two and four were physically identical, one door open and one closed, and the block reported them differently.
Update 1.203's changelog line is one sentence: added functionality to make a proper AND/OR gate. That is the behaviour described above, and it is not buggy today. But a setup you blueprinted before August 2023, or a guide written before it, may have been built around the old behaviour and may need revisiting.
The second trap is the one nobody warns you about, because it produces no error and leaves no trace. The Event Controller sometimes triggers twice on the same slot. Whether that matters depends entirely on the kind of action you put there. Some actions set a value — "unlock", "on", "off", "open". Fire one of those twice and the second firing changes nothing, because the block is already in the state being demanded. Other actions toggle the current state — "switch lock" is the wiki's own example. Fire that twice and the connector locks, then unlocks. Your controller did exactly what you asked, twice, and your ship is now sitting on an unlocked pad with a build that tests perfectly every time you watch it and fails the night you do not.
You cannot see this happening by looking at the base. Lights, emissives and LCDs cannot show a repeat, because a light told to turn on twice looks precisely like a light told to turn on once. The documented way to catch it is to put a Broadcast Controller in each slot with a different message in each, and watch chat while you exercise the condition. Two "slot 1" lines in a row and you have found your fault.
The clean fix is not to fix it at all — it is to stop using toggles. "Unlock" in slot 1 and "lock" in slot 2 does the same job as "switch lock" in both, and it is immune to repeats by construction. When you genuinely cannot avoid a toggle, there are two documented shapes that absorb the double-fire for you.
The first spends a second controller. The first Event Controller carries no real actions at all: slot 1 switches some block with an on/off state on, and slot 2 switches it off. Those are set-value actions, so repeats are harmless. A second Event Controller then watches that block's on-state and carries the actual work.
The second spends two Timers, and it is the version worth building because it uses the discipline you already have. The Event Controller's slot 1 does one thing: Trigger Now on a Timer called Dock-Lock. Slot 2 does one thing: Trigger Now on Dock-Release. Then each Timer's own toolbar starts by switching itself off and switching the other Timer on, before running the real actions — locking the connector, extending the walkway, opening the doors; or unlocking, retracting, sealing. A repeat now lands on a block that has already switched itself off and is not listening, so the second firing does nothing. The rig arms and disarms itself, one side at a time.
That does mean half your Timer rack sits red at any moment, and red on a Timer means switched off or unpowered — which here is correct, not a fault. The controllers themselves read the same way at a glance: red for off or unpowered, green for powered but nothing fired yet, cyan when slot 1 fired last, blue when slot 2 did. One caveat saves an evening of confusion: neither cyan nor blue appears if that slot is empty on every page. A controller whose slot 2 you deliberately left blank will never show blue, and there is nothing wrong with it.
Which brings us to what a real station's logic actually looks like, because it is not one clever controller. Expect one or two Event Controllers for basic automation and considerably more for chains. Every "if this value goes past that number, then do this, otherwise do that" statement in your head is one Event Controller and one or two Timers on the wall, and the wiki does not soften the picture: in the end, your bridge will look like a mainframe server room and your drone will have a big brain in its skull. Name every one of them for what it does, because in six months the names are the only documentation you will have. If the rack starts eating your station's floor space, build the whole cluster out of small-grid Event Controllers and Timers and attach it to the large grid through a locked rotor — same logic, a fraction of the room and the components.
The 3D printer is what that rack looks like when it is finished doing something impressive. A projector on a rotor on pistons, welders on their own pistons, and behind them a bank of Event Controllers each answering exactly one physical question about the rig: has the Merge Block merged, has the rotor or hinge attached or detached, has Block Integrity reached the value that means this print is complete. Every movement itself lives in a Timer. Nobody designed that as one system; it was assembled one question and one movement at a time, which is precisely why it can be debugged when a print stalls halfway.
So: prefer actions that set a value over actions that flip one, and reserve toggles for the two shapes above. Decide ANY or ALL deliberately every time a controller watches more than one block, by asking which branch you are trusting. Keep the real work in named Timers so there is one place to edit and one place to look. And stop expecting a tidy build — a station that automates a dozen chores looks like a rack of cheap cubes, and that is the shape that stays diagnosable.
Every trap so far has been inside one grid. The single thing this entire layer genuinely could not do — reach across to a different grid — was not a trap at all. It was a hard limit, and one block fixed it in 2024.
When the Thing You Want to Trigger Sits on Another Grid: The Action Relay
The block is the Action Relay, and it arrived in Update 1.204 "Signal" in May 2024. The wiki records the boundary it removed in a parenthetical worth reading slowly: before the Action Relay, it was — "save for scripts or glitches" — possible to trigger actions only on the same grid. That is the whole reason the honest answer to "can I open the station's hangar door from the cockpit of my ship?" used to be a script. The job was never computationally hard. Nothing in the toolbar layer could simply cross a grid boundary, so the only tool that could reach across one was the one that ignored the layer entirely.
The wiki's own comparison for the fix is a garage door opener, or a TV remote. You press something here and something over there responds. Mechanically it is two blocks, one on each grid, talking over the antenna network — which means the first requirement is not the relay at all. Each grid needs an antenna with enough range to cover the gap, and that antenna's range is the relay's reach.
The settings are few enough to list. Channel is a number from 1 to 100, default 1, and it has to match at both ends — that is the entire addressing scheme. Accept Signal From is owner, faction or all, and the wiki's advice is to allow only yourself or your faction; a relay set to accept from all is a button anyone with a relay and a guess at your channel is entitled to press. Set Up Actions holds what happens when a signal lands, and there is a Send Signal button on the block for firing one by hand. The relay also works in both directions rather than being a dedicated transmitter or receiver: the same block can receive a signal and trigger actions on its own grid, or send one that triggers actions on another grid's relay.
The one constraint that shapes your build is capacity. Each Action Relay stores one set of actions and listens to one channel, so you need one relay for each set of actions — and the wiki's own note is that those actions can live in Timer Blocks, which is the same discipline you have been applying since the Sensor. The relay is a doorbell, not a control room.
So build the remote hangar door. On the station, an Action Relay named Hangar-Remote-Open, channel 7, Accept Signal From set to faction, and a single action in its set: Trigger Now on a named Timer called Hangar-Open that raises the door, brings up the bay lights and does anything else arriving should mean. Because one relay carries one action set, closing up again is a second relay — Hangar-Remote-Close on channel 8, pointing at Hangar-Close. On the ship, a matching relay on each channel, with their Send Signal available to you from the cockpit or parked in a Timer alongside the rest of your approach sequence. Both grids need an antenna with the range to reach across the distance you actually fly. That is the whole build: four cheap cubes, two antennas you already had, and two Timers of the kind you have been naming since the docking chain.
Then note what that same job looked like before May 2024. Identical hangar, identical door, identical Timer — and the only way to fire it from the ship was a Programmable Block, a script somebody had written, and a world that permitted scripts to run.
The same shape covers everything the wiki lists the block for, all of it recognisably station work: switching off your own turrets before towing a captured wreck into the bay, recalling drones to dock, dispatching defence drones while you are away, calling a drone for help, or bringing a solar array or a laser-antenna satellite back in. In every one of them the difficult-sounding part is not the action — it is that the thing acting and the thing deciding are on separate grids.
Which is the check worth making before you conclude that a job needs code. Ask what is actually making it hard. If the answer is that you need an exact number computed and written, that is genuinely a higher rung. But if the answer is only that the trigger is over here and the machinery is over there, the gap is a grid boundary, and a grid boundary now costs two blocks and an antenna.
That closes the last thing this layer could not do. From here, scripting no longer inherits any job by default — it has to earn its place on its own terms, and the first of those terms is whether you can run a script at all.
Before Any C#: The Access Gate, and How to Load Someone Else's Script
Every block in this guide so far has asked one thing of you: the components to build it. The Programmable Block is the first that also asks for permission. Four requirements sit in front of any in-game script, and only the last of them lives inside the block:
- Scripts run only on PC — Steam or the Microsoft Store — and on Dedicated Servers. Not on consoles.
- Scripts run only if Experimental mode is enabled in the Options.
- Scripts run only if in-game scripts are enabled in the World Settings.
- A Programmable Block runs a script only while it has power.
Three settings and a fuse. On your own PC none of them is hard to satisfy, but they stack in a particular order, and the order is why so many players conclude the feature is missing rather than switched off.
Experimental mode is the first switch because it is the one that makes the second switch visible. You set it from the main screen, under Options > Game > General, and it is global — a property of your installation, not of a save. If it is greyed out when you go looking, that is not a bug and not a permission problem: you have a world running, and you need to save it and return to the main screen before the option can be changed. Only once Experimental mode is on does the in-game scripts entry appear among a world's advanced settings; before that, you are hunting for a control the game has not drawn.
The part worth pausing on is that this decision does not fully undo. You can toggle Experimental mode back off later — but any world you created while it was active will work only in Experimental mode, permanently. Switching it on to try a script is cheap; starting a brand-new save while it is on commits that save to Experimental for the rest of its life. You will also get a persistent in-game warning while the mode is active, which can be silenced in the warning options but is otherwise a standing reminder that you are outside the default configuration. If you want to test scripting without that commitment, do it in a world that already exists.
The power requirement sounds too obvious to state until the evening it costs you an hour. A Programmable Block whose grid section has gone dark is not an erroring block, it is a silent one. When a script that worked yesterday does nothing today and the gate has not changed, check the block has power before you check anything else.
On someone else's server, two more gates appear, and neither is a setting you own. The first is the scripter role — a rank permission an admin grants — and its symptom is precise: the Edit button on the Programmable Block is greyed out rather than absent. The second is simply the admin's policy, because an admin may disallow some scripts or all of them. The wiki's warning about this is blunter than anything else on the page: many multiplayer server admins will "punish or outright ban" players running performance-intensive scripts, and it asks you to be considerate of the other players you are sharing the server with. The reason is performance — every script on that server is spending something the whole server shares, and the arithmetic behind it is a section of its own further down. The practical consequence for now is the wiki's own advice: do not lean on scripts outside your single-player games, because the permission can be withdrawn and the job you built around it stops.
Then there is the platform line, and it is worth being direct about who it excludes. Space Engineers came to PlayStation 4 and 5 in May 2023; those players have never been able to run an in-game script in a world they host, and neither can Xbox players. There is one escape hatch, and it is real: the restriction is on console-hosted worlds. A console player can join a dedicated server that has in-game scripts enabled and play in a world where scripts are running. What a console player cannot do is switch this on in their own save. Which is precisely why the Event Controller mattered so much three sections ago — everything in that rung runs on your console with none of this in front of it.
One piece of advice you will find in circulation deserves a correction before it wastes your time. Update 1.206 "Fieldwork", in April 2025, genuinely did remove the Experimental requirement — for mods. Since that update you can install mods in a normal Safe-mode world. Scripts were not part of that change, and the Programmable Block is still sitting in the game's own list of experimental features. So when you find a post saying the Experimental gate is gone, read the next word carefully: if it says mods, it is correct and it is not about you.
Clear all of that and the day-to-day reality of using scripts is anticlimactic, because most people who run scripts do not write them. Start on the Steam Workshop, and filter by Type: InGameScript. This matters more than it sounds — there is a separate "Mod category: Script" filter, and the wiki calls the confusion out by name, because that one returns mods, which are a different thing loaded a different way and cannot be pasted into a block. Subscribe to what you want.
In game, you reach the editor two ways: right-click the Programmable Block's interface in the world, or press F while facing it — or open the grid's Terminal and click Edit on the Control Panel screen. The editor opens on an empty default script with the basic hooks already in it. From there:
- Browse Scripts — pick one of your subscribed scripts.
- Copy to Editor — it goes into the editor in front of you.
- Change any lines the script's description told you to change.
- Check Code — it either reports "Compilation successful" or points you at the error.
- OK — this saves it.
- Custom Data — if the script takes configuration, type the values in and confirm.
- Recompile — the block does not pick up custom data until you do.
- Argument — if the script takes one, type it into this field.
- Run. Whatever the script has to tell you appears in the bottom-right corner of your screen.
Expect that description to ask for something. Workshop scripts routinely require you to edit certain lines, enter certain arguments, rename certain blocks on your grid, or enter certain keywords as custom data. The renaming requirement is the one people skip and then report as a broken script: if the author's instructions say your cargo containers need a particular word in their names, the script will do nothing useful until they have it. Reading the description is part of installing the script, not optional context around it.
Which brings us to the two problem reports every scripting player eventually files, because they look identical from the outside and have nothing in common.
"The Edit button is missing or greyed out." This is always the gate, and you diagnose it by walking the gate backwards. Greyed out specifically, on a server, means the scripter role — ask an admin. Missing altogether, in your own world, means in-game scripts are off in the World Settings; and if you cannot find that setting to turn it on, it is because Experimental mode is off and the game is not displaying it. On a console, in a console-hosted world, no setting anywhere fixes it, because there is nothing to fix.
"My inventory script stopped seeing my new cargo containers." This has nothing to do with permissions and produces no error at all. Adding blocks, removing blocks, renaming blocks, and adding or removing block groups are not detected by most scripts. The script is still working from the picture of your grid it had when it was last compiled, and your refit happened after that. Click Recompile and it looks again. This is why a script that ran flawlessly for six months "breaks" the evening after you extend the cargo bay — and why Recompile deserves to be the first thing you try, not the last.
One failure is permission and one is staleness, and neither one announces itself. So make both checks habits. Before you plan any part of a base around a script, confirm you can actually run it — especially on somebody else's server, where the answer can be no, and where it is a much cheaper question to ask before you build the grid than after. And after any significant change to a ship or station carrying a script, press Recompile as reflex, before you go looking for a fault that is not there.
That is the whole cost of admission, and for a PC player in their own world it comes to two settings and a paste. Which leaves the more interesting question for anyone who has just dropped a hundred lines of somebody else's C# into a block and pressed Run: what is actually in there, and what can a script reach that nothing further down this ladder can?
What a Programmable Block Script Actually Looks Like — and What It Can Reach
Open the editor on a Programmable Block you have just placed and it is not blank. Strip the comments out of what the game puts there and you are left with three methods:
public Program()
{
}

public void Save()
{
}

public void Main(string argument)
{
}
That is the frame. The hundred lines you pasted a moment ago are somebody's work filled in around it, and every in-game script in existence — the inventory managers, the solar aligners, the vector-thrust flight systems — sits inside those same three entry points. Two of them you can delete.
public Program() is the constructor. It is for one-time initialization, and it runs once every time your script is instantiated, which in practice means once after your game loads and once after you press Recompile. That is the same Recompile from the last section, seen from the inside: clicking it does not nudge a running script, it builds a fresh instance and runs this method again from the top. Optional.
public void Save() is called whenever the game is saved, or right before you recompile. It is where you store anything that has to survive between play sessions. Also optional, and most short scripts do not have one.
public void Main(string argument) is the required one — the main entry point, called many times during a script's lifetime. The argument is passed from the game depending on your toolbar setup. When you drag the Programmable Block onto a button panel, sensor or timer toolbar and choose Run, you are given an input box, and whatever you type into it arrives here as that string. It is passed verbatim: no trimming, no case-folding, no interpretation. If the script's instructions say the argument is reset and you type Reset , you have handed it a different word.
What you never see is the class those three methods live in. A script class is always named Program and always inherits from MyGridProgram; Space Engineers wraps your code in namespace IngameScript { partial class Program : MyGridProgram { ... } } behind the scenes, and only the parts inside that class are actually your script. The wrapper is not bookkeeping. It is where GridTerminalSystem and Echo come from — you inherit them, which is why they work in a file that never declares them and why pasting a snippet into a plain C# project outside the game gets you nothing. (This is also the surface people mix up: the Modding API and the Visual Script Editor are C# too, and neither one is what a Programmable Block runs.)
The wiki's own first script uses almost all of the above at once:
public void Main()
{
    IMyInteriorLight light;

    light = GridTerminalSystem.GetBlockWithName("That Important Light") as IMyInteriorLight;
    if (light == null)
    {
        Echo("Oh my! I couldn't find that block...");
        return;
    }

    light.Enabled = !light.Enabled;
    Echo("I have toggled the button!");
}
Read it in order. GetBlockWithName asks the Grid Terminal System for one block by its custom name — the name in the terminal, exactly as typed. as IMyInteriorLight is a safe cast: if the block it found is not an interior light, you do not get an error, you get null. Then the guard, which exists because the lookup can quietly fail, and Echo, which writes diagnostic text into the Programmable Block's own detail panel — it is the script's only way to talk to you. Finally light.Enabled = !light.Enabled inverts whatever state the light was in.
The procedure that goes with it is worth doing once, because it takes two minutes. Place an interior light and a Programmable Block. Rename the light to exactly That Important Light — spacing matters. Open the editor, paste, click Check code, then Remember & Exit, then press Run. The light responds after roughly a second.
Now break it on purpose: put one extra space in the light's name. The script still compiles, still runs, and now prints "Oh my! I couldn't find that block…" forever. GetBlockWithName is exact, case-sensitive and spacing-sensitive, and returns null when nothing matches. That is the single most common reason a Workshop script "stops working" after a refit, and it is the same fragility that made Recompile necessary a section ago — scripts address your base by name, and names are yours to break.
There are gentler lookups when you want them. SearchBlocksOfName matches every block whose name merely contains the text, case-insensitively, which is why so many scripts ask you to put a tag word in your container names. GetBlocksOfType<T> fills a list with everything of a given type and clears that list first, and it takes an optional filter — GetBlocksOfType(lights, light => light.Enabled) collects only the lights that are currently on. Alongside those sit GetBlockGroupWithName (exact and case-sensitive, like its single-block cousin), GetBlockWithId for a block's entity ID, and CanAccess, which reports false if a block has been destroyed, disconnected, or has had its ownership changed underneath the script.
That last one hints at the boundary of the whole system, and the boundary is more specific than you would guess. The Grid Terminal System provides access to all blocks on the same grid the Programmable Block is on, plus any grids connected via rotors, pistons or connectors — not landing gears — and only for as long as those blocks share the same ownership as the running Programmable Block. Two lines of that deserve underlining. A landing gear is a perfectly good mechanical join that the Grid Terminal System does not see through, so a rig that works while docked on a connector goes blind when you clamp it instead. And ownership is a live condition, not a one-time check: blocks belonging to someone else are not in the script's world at all, which is why a captured enemy grid does not simply fall under your script when you weld a connector to it.
The second thing a script does that nothing below it can is schedule itself. Runtime.UpdateFrequency lets a Programmable Block run on its own with no Timer Block anywhere in the build. It takes Once (next frame, then it stops), Update1 (every tick), Update10, Update100, or None, which is the default and the reason a fresh block sits still until you press Run. Set it in the constructor. It is a flag enum, so the values combine bitwise — UpdateFrequency.Once | UpdateFrequency.Update100 asks for an immediate first pass and then a steady rhythm.
Be honest about what the rhythm is worth, though, because the documentation is. Setting these flags does not guarantee the interval you asked for; the wiki calls them "a polite suggestion more than an order," and in a rare worst case the gap could stretch to nearly double what you requested. Update1 and Once are the exceptions and are pretty much guaranteed — which is exactly the option to be careful with, for reasons the next section deals with. For sizing all this: a tick is one sixtieth of a second, roughly 16.667 ms, and for scripting purposes you can assume 60 ticks a second whatever your sim-speed is doing.
Once a block can be started by a button, a timer, another script and its own schedule, it needs to know which of those just happened. That is the second form of the entry point:
public void Main(string argument, UpdateType updateType)
{
  if ((updateType & (UpdateType.Trigger | UpdateType.Terminal)) != 0)
    RunCommand(argument);

  if ((updateType & UpdateType.Update100) != 0)
    RunContinuousLogic();
}
UpdateType reports why this run happened. Trigger means a button, timer, sensor or other simple trigger. Script means another programmable block. Terminal means you, by hand, through the terminal. Mod means a mod called it. IGC means a message arrived through the antenna communication system. And Once, Update1, Update10 and Update100 are the automatic calls from the matching UpdateFrequency.
The & is not stylistic. More than one flag can be set on the same call — if you have both Update1 and Update100 enabled and they land on the same tick, the parameter carries both — so a simple switch cannot classify it. You test the bits. (updateType.HasFlag exists and does the same job, but it has a significant performance impact and is not recommended.) Note also that the flag you test has to be the frequency you actually asked for in the constructor; the two lines are a pair, and a mismatched sample is a script whose loop never runs.
That little block is the concrete moment a script stops sitting on top of the ladder and starts replacing rungs of it. The top half handles you pressing a button; the bottom half is the loop — and the loop is not a chain of Timers restarting each other on estimated delays, it is the block asking the game to call it again. The whole conductor-Timer arrangement from earlier, with its boxes-and-arrows diagram, collapses into one line in a constructor.
One trap comes with it, and it catches people who have just discovered arguments. An argument is passed to Main() only for that single invocation. If the script keeps running afterwards through UpdateFrequency, those automatic calls receive an empty string. The command you typed does not persist into the loop; if the loop needs to remember it, the script has to store it deliberately.
So you can now read a script you did not write. You can see, in the first twenty lines, whether it wants exact block names or tagged ones, whether it schedules itself or waits to be told, and which of your blocks it will simply never find. More usefully, you can tell whether a job in front of you actually needs one. Two things up here are genuinely unavailable below: writing an exact value, and running on a schedule the game maintains for you. If your job needs neither — and most station jobs need neither — what you are looking at is a middle-rung job wearing a lab coat.
Which raises the obvious question about a block that can ask to be called sixty times a second, on every grid, in a world full of other people's blocks doing the same. Somebody is paying for that, and the answer to who is why the top rung carries a social cost the others do not.
Why Server Admins Ban Scripts: The 16.667-Millisecond Budget You Are Spending
Everyone is. That is the whole answer, and the arithmetic behind it is short enough to check yourself.
You already have the number from a moment ago: a tick is one sixtieth of a second, roughly 16.667 ms. What that number is measuring is worth spelling out, because it is not a budget for scripts. It is the budget for the entire game. Inside each of those windows Space Engineers has to run its game logic, handle networking, simulate physics, run whatever mod code is loaded and run every programmable block in the world — and it has to do all of that in sequence, because it is one thread. A Programmable Block does not get a lane of its own. It runs on the main thread, in the same queue as the physics holding your station together. When the total time for a tick goes over 16.667 ms, the game does not get the tick back; it falls behind. That is what low sim-speed is, seen from the inside.
Then the wiki supplies the scale, and the scale is the part that reframes everything: "for context 1 ms is very slow." One millisecond. A sixteenth of the frame, for one script, on one grid.
Now do the multiplication, because this is the bit nobody does before pressing Run. Your program is not one block. A script is a thing you paste, so it gets pasted — into the Programmable Block in your base, the one in the mining rig, the one in each of the drones, and into your faction mates' grids after you tell them it is good. If one copy of it takes 1 ms, ten Programmable Blocks running it take 10 ms of a 16.667 ms tick, and the server runs all of them. Nothing has gone wrong at that point. No script has crashed, no limit has been exceeded, nobody has written anything malicious. Ten people each installed one useful inventory sorter and between them they ate most of the frame, and the sim-speed drop lands on everyone equally — including the players who have never opened a Programmable Block in their lives.
That is the ban, explained. It is not gatekeeping and it is not a judgement about who deserves the tool. It is one person deciding how to spend something that is not theirs alone.
There is a number for your own script, and it is worth knowing where it lives. Runtime.LastRunTimeMs gives you the real time, in fractional milliseconds, that the last run of Main took — it exists specifically so you can measure execution time rather than guess at it. Print it with Echo and you can watch your own contribution to the frame, in the units the frame is denominated in.
What will not tell you that, despite looking exactly like it should, is the instruction counter — and this is the single most common misreading of the documented limits, so it is worth being precise about what those limits are and what they are for. There are three of them. No script may be longer than 100,000 characters. No single run may pass 50,000 code junctions, where a junction means a method call, a switch, a conditional, a loop or something similar — simple statements like 1+1 do not count toward it. And a .NET whitelist restricts which parts of the framework you can reach at all, which is why a type like System.Threading.Thread is simply unavailable: there is no escaping to a thread of your own, because the whitelist does not let you ask.
The character cap and the whitelist are boundaries on what you can write. The instruction cap is something else entirely, and the wiki is unusually direct about it: the instruction limit is "simply a safeguard against infinite loops," and it "has no relevance to performance." It exists so that a script with a runaway loop gets stopped instead of freezing the world. It is a fuse, not a meter. CurrentInstructionCount and MaxInstructionCount are there to read — with the caveat that the count includes any other Programmable Blocks your script invoked directly — but the wiki tells you to use them only for debugging, and only if you have actually hit the "script too complex" exception.
Which means passing the check proves nothing at all. A script sitting at a comfortable fraction of 50,000 junctions can still be the thing making your server stutter, and a script nowhere near it can still be running sixty times a second on nine grids. The wiki's own reading of the number goes the other way entirely: if you are even remotely close to the instruction limit, your script is probably doing far too much. The limit is not a target to fill. It is a wall you should never come within sight of.
The real budget is the tick, and it is shared. Everything the documentation says to script authors follows from that one fact, and it is worth reading even if you never intend to write a line, because it doubles as a way to judge the scripts you paste:
- Cache your blocks; do not fetch them on every call. Retrieving a block is a time-consuming operation, and a script that looks up its lights every run is paying that cost sixty times a second for information that changed once. If the cache genuinely has to keep up with a grid people are still welding on, refresh it every few ticks —
Update100or slower — not constantly. - Reuse your lists. Initialise them once and keep them for the script's lifetime. Reallocating every run is, in the wiki's words, very slow.
- Do not allocate new objects in code that runs often, and design your own objects so that general runtime does not need to allocate at all. Every allocation is work now and garbage collection later.
- Avoid
staticfields and properties. They are a potential source of memory leaks; pass your instances around instead. Static methods are fine. - Prefer calling members directly from their interfaces over Terminal Properties and Actions. The direct route is orders of magnitude faster, and Terminal Properties and Actions are for when you have no other option.
- Remember where the script is going to run. A script in your own single-player world has far more time available than the same script on a multiplayer server, because on a server the other players are running scripts too, and all of you are drawing on the same 16.667 ms.
Set that against the two blocks the rest of this article has been pointing you at, and the comparison is not close. An Event Controller draws 500 W. A Timer Block draws 0.1 W. Those figures look like the same kind of cost as a script's millisecond, and they are not the same kind of cost at all — they are electrical draw, which is a currency you manufacture. If a station's logic rack is eating too much power, you weld on another solar panel and the problem is gone. Nobody else on the server is affected, and nothing about their frame rate changes.
Tick time cannot be generated. There is no block that makes more of it, no upgrade that adds a second thread, and no version of "I'll just add capacity" that works. The lower rungs of this ladder cost you something you can produce more of. The top rung costs everyone something nobody can. That is the entire asymmetry, and it is why the same server that never asks what your Timer Blocks are doing wants to know what your Programmable Block is doing.
So three things follow, and they are all things you can act on tonight.
Set Update100 rather than Update1 unless the job genuinely needs a decision on every single tick. Watching a battery, a gas tank, a cargo container or a door does not; those values do not meaningfully change in a sixtieth of a second, and running the check sixty times as often buys you nothing but sixty times the cost. Update1 is for control loops that are actually steering something.
Be able to say what each script on a shared server is for. Not defensively — just be able to answer it. A script that survives that question is one you can keep; a script you installed a year ago, that you have not thought about since, running on a grid you have half dismantled, is exactly the kind that gets someone banned without anyone acting in bad faith.
And read the wiki's "overkill" verdict from the very beginning of this guide as what it actually is: not a style note about elegance, but a performance claim, denominated in the same milliseconds as everything else in this section. The Event Controller and the pair of Timers that do your reactor triage cost the tick nothing. Doing the identical job with a script that polls every frame costs it something real, every frame, forever.
Which puts the whole ladder on the table with a price on each rung. So take one thing you do by hand every single session, the one you would notice most if it stopped needing you, and build it.
Automate One Airlock Tonight: The Same Job Built at Three Rungs of the Ladder
Make it the airlock. Almost everyone has one, almost nobody has automated it, and it is the job the documentation itself keeps reaching for. The Timer Block page uses an airlock cycle waiting for a room to depressurise as its worked example of enforcing pauses in a sequence. The Event Controller page's own list of what the block is for opens with a different sentence about the same chore: when someone passes through the airlock, automatically open the doors and preserve oxygen. Two parts of the official documentation picked the identical job and reached for different tools. That is not a contradiction to resolve. It is the choice you are about to make, and the airlock is the cleanest place in your base to make it, because the same hardware supports all three answers.

Fix the hardware first, because none of it changes between the builds: a chamber with an inner door to your base, an outer door to vacuum, an Air Vent in the chamber, and a Button Panel on each side. What changes below is only what starts the cycle, and — the part that actually decides this — what tells the second half of the cycle that the first half really happened.
Build one: four Timers and two buttons. Going out, Airlock-Out-1 holds three actions: close the inner door, set the Air Vent to depressurise, and start Airlock-Out-2. Airlock-Out-2 carries a delay of 0:00:10 and one action: open the outer door. Coming in is the mirror image — Airlock-In-1 closes the outer door, sets the vent to pressurise and starts Airlock-In-2, which waits its ten seconds and opens the inner door. The inside Button Panel holds Start on Airlock-Out-1; the outside panel holds Start on Airlock-In-1. Four cheap cubes and two panels, no conditions anywhere, and you can have it running before you finish your next ore run. Press a button, walk through a chamber that cycles itself, and stop hand-timing the doors forever.
Build two: the same doors, told by something that knows. Here the far door's Open comes off the delay entirely. The Air Vent has its own trigger toolbar, and its two slots are the room becoming pressurised and the room no longer being depressurised — one for each direction of a cycle. Put Trigger Now on a Timer called Airlock-In-Open in the pressurised slot, and let that Timer open the inner door and put the chamber lights green. Airlock-In-2's delay disappears from the build; the door now opens on the pressure itself. Add an Event Controller on Door Opened watching the inner door and you close the other half: slot 2, the fully-closed side, starts the depressurise and drops the chamber to red, so pumping never begins until the door has genuinely finished travelling; slot 1, fully opened, sets the lights back. If you want one controller watching both doors instead, that is where the AND Gate decision bites — and here the branch you are trusting is the false one, so the gate comes off.
Build three: stop pressing the button. Put a Sensor in the chamber, shape its field to the chamber and nothing beyond it, and set it to detect players. The enter slot gets Start on the cycle Timer; the leave slot gets Start on a reset Timer that puts the doors and lights back to their idle state. Note that this is an addition rather than a replacement: the wiki's own airlock advice is that one Timer can be started by several things, so the inside Button Panel keeps working alongside the Sensor. And carry the Sensor's blind spot into the design consciously. An engineer who rides into the chamber seated — in a rover's cockpit, in a seat you welded in there, in a cryopod — is not a player as far as the block is concerned. Sit down mid-cycle and the Sensor concludes the chamber emptied and runs your reset. The Sensor removes the button press. It does not remove the uncertainty.
Now run the three of them into the failure that sorts them, and it is not an exotic one. You have been out mining, the ice ran low while you were gone, and the oxygen tank feeding that vent is empty. You come home and press the outside button.
In build one, Airlock-In-1 closes the outer door and tells the vent to pressurise. The vent has nothing to work with. Ten seconds later — precisely on schedule, with no error, no warning and no colour change anywhere you are looking — Airlock-In-2 opens the inner door into a chamber that is still vacuum. Nothing malfunctioned. The chain did exactly what you specified, and what you specified was a wait, not a check. The wiki names this exact case in its own list of what a Timer sequence cannot catch: a room that cannot be pressurised because your tanks are empty.
In build two, the inner door does not open. Not late, not partially — not at all. The Open action is hanging off the vent's pressurised event, and that event never fires, because the pressure never arrives. The failure is still a failure; you are still standing in a chamber you cannot walk out of into your base. But it is now a visible one, on the safe side of the door, and it tells you exactly what is wrong: the room never came up. Build three, whichever half it is bolted to, changes nothing about any of this. It knows somebody is there. It does not know the room is safe.
That is the entire decision rule, and it is worth stating in the plainest terms available: the question is not how clever the job is, it is whether the job needs confirmation. A cycle that only has to fire a set of switches together does not — build it out of Timers tonight and enjoy it. A cycle where the second step is dangerous if the first one silently failed does, and the only things that can give you that confirmation are events that report a real state: the vent's pressure, the door's fully-closed, the connector's locked, the tank's fill percentage.
So build the version your failure mode deserves, not the most impressive one you can wire. Take the chore you named at the end of the last section — the one you would notice most if it stopped needing you — and put the Timer version of it on the wall this session, in named blocks, with generous slack. The day it lets you down, you will not be guessing at the fix: you will know precisely which step lied to the next one, and that step is where the event goes. And leave the top rung where the documentation leaves it. You climb to a script when the job needs an exact value written or a schedule the game itself maintains — not because the job felt complicated at the moment you were tired of doing it by hand.