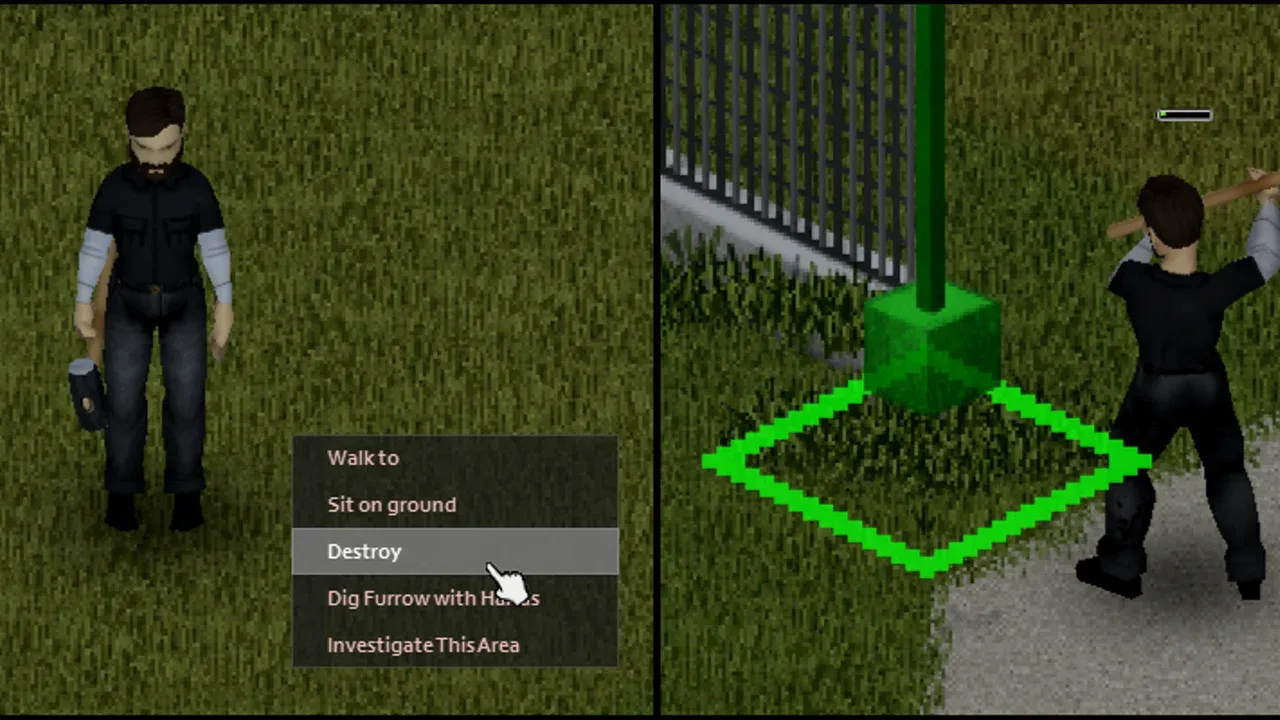
You need a sledgehammer for something specific. A hole through the back wall of a base that has only one door. The stairs you want gone so the second floor stops being a corridor. A sealed checkpoint or a firearms room behind grating that will not open any other way. So you have been clearing hardware stores, sheds and garages for a week of in-game time, and you have found nothing, and the natural conclusion is that you have been unlucky.
You have not been unlucky. You have been searching the wrong kind of container.
Project Zomboid publishes a loot distribution for every item, and the one for the sledgehammer says something a survivor would never guess from the shape of the world: it is a vehicle item. The best odds in the game sit in the seat and truck bed of a parked van, not on any shelf in any building. The hardware store — the answer that feels obviously correct, the answer other players will give you — sits in the lowest tier the table has, level with a bedroom crate and an attic box. That is the reversal this guide is built on, and it changes what you stop the car for.
But the distribution is not a treasure map, and this guide will not pretend otherwise. The single best container in the game belongs to a vehicle whose spawn locations nobody has published, so the honest instruction is to recognise it, not to go find it. And once you price how thin the whole tool's odds get in a save that is a few months old, the interesting question stops being where is a sledgehammer and becomes what else gets me one. That answer turns out to be sitting in the hardware store you already gave up on — not the tool, but half of it, at odds that are not close.
Every percentage below is drawn from the game's own distribution and item scripts as of the Build 42.18 files; where a figure comes from somewhere else — a Build 41 story page, a Build 42.20 server default, a specialist guide, a player thread — the text says so where it is used. It is ordered the way your search should be: what to open first, what you can actually drive toward, what an aging save has already taken from you, and how to make sure the sledgehammer you finally get is not wasted in a fight it should never have been in.
The Loot Table Puts Sledgehammers in Truck Beds, Not Tool Aisles
Start where the table starts, because the top of it is not close. The three highest effective chances published for a sledgehammer anywhere — any room, any container, any bag, any vehicle — all belong to a single distribution row labelled Police SWAT: 4.80% in the front seat, 4.80% in the rear seat, and 4.71% in the truck bed. Note the shape of that. The version of this fact players repeat says "the SWAT car seat", singular; the table has two seat rows, front and rear, carrying the identical figure.
Here is the whole vehicle side of the distribution, in descending order:
| Effective chance | Vehicle container |
|---|---|
| 4.80% | Police SWAT — front seat |
| 4.80% | Police SWAT — rear seat |
| 4.71% | Police SWAT — truck bed |
| 1.19% | Truck bed of fifteen types: Blacksmith, Carpenter, Construction Worker, Electrician, Fire, Fossoil, Locksmith Van, Mason, Mass Gen Fac, Mc Coy, Mechanic, Metal Welder, Plumber, Survivalist, Transit |
| 0.30% | Front seat of ten of those — Blacksmith, Carpenter, Construction Worker, Locksmith Van, Mason, Mass Gen Fac, Mechanic, Metal Welder, Plumber, Survivalist — plus the Survivalist rear seat |
Before you act on any of it, know exactly what those numbers are and are not. PZwiki's parser generates the table from the game's own distribution files, and the header attached to it defines an effective chance as the chance of "at least 1 of an item spawning in a specific room / container combination", calculated on Apocalypse loot settings. So 4.80% is not the chance that a SWAT vehicle contains a sledgehammer — it is the chance for one container in it, and the header also warns that not every container in a room carries the entry at all.
Two further limits matter. Every percentage in this guide is Build 42.18-era parser output; stable is Build 42.20, released 29 July 2026, and nobody has published a diff between them, so read these as Build 42 figures rather than 42.20 figures. And three finished item IDs share the display name Sledgehammer — Base.Sledgehammer, which is what this table is; Base.Sledgehammer2, the alternate model added in Build 41.12; and Base.SledgehammerForged, added in Build 42.0.0 — and the wiki's loot template renders no distribution table at all for the second and third. What follows is the published spawn list for the primary item ID, not a complete census of every sledgehammer in Knox County.
With that said, the tier you can actually build a habit around is the 1.19%. Fifteen trade and utility vehicle types carry it, in the truck bed, and the reason is structural rather than lucky: profession vehicles are designed to spawn profession-relevant loot, which is why a sledgehammer sits behind a mason's cab and not a taxi's. The seat tier at 0.30% covers only ten of those fifteen — Electrician, Fire, Fossoil, Mc Coy and Transit vehicles have a truck-bed entry and no seat entry at all. On those five, the cab is not a search, it is a delay. Check the bed and move on.
What makes this tier practical rather than theoretical is that a truck bed or trunk opens from the radial menu while you stand outside the vehicle. No key, no fuel, no working engine, no mechanics magazine, and no hotwiring — which would cost you Electrical 1 and Mechanics 2 that you do not need to spend. A dead plumber's van parked in a driveway is as lootable as a running one.
Now set that against the search you have been running. A crate in a toolstore is 0.02%. That is the same tier as warehouse, shed, garagestorage, construction, pawnshop, firestorage and gigamart — and the same tier as a bedroom crate, an attic cardboard box, a closet, a kitchen cardboard box and a living-room box. The Police SWAT front seat beats it by 240×. More usefully, an ordinary plumber's or mechanic's truck bed beats it by 59.5×, and that is a comparison you can act on, because trade vans are everywhere and the SWAT row is one line in a table. Outside the vehicle table, the whole distribution falls to 1.11% and lower.
Two independent checks agree with the ranking. A specialist Build 42.19 guide publishes raw distribution weights rather than effective chances — a different unit entirely — and lands in the same order: hardware and tool-store aisles, home garages and auto shops, warehouse crates, fire-station storage and big-box retail tool aisles all at 0.01, against 0.1 for industrial tool storage such as logging and rail-yard areas and melee-weapon crates. That 10× gap and PZwiki's own ordering are two different methods reaching the same verdict about the hardware store. (That guide's top band also lists army-hangar tool storage, which has no counterpart at any tier of PZwiki's own sledgehammer table — treat that one entry as unconfirmed.) The second check is behavioural rather than mechanical: in a long Build 42 player thread about exactly this problem, hardware stores were reported as the least productive place people searched despite being the obvious one, while the finds people did report came from work vans carrying construction tools, from logging-company storage crates, and from garage boxes. That is not evidence of a mechanic, but it is what the mechanic looks like from inside a save.
So price the change in behaviour. Suppose one drive past a construction lot, a plumber's van in a driveway, a mechanic's truck at a shop and two more trade vehicles on the road — five truck beds at 1.19% each, opened from outside for the cost of five stops. Treating those five rolls as independent, which no source actually states, that is a 5.81% chance of at least one sledgehammer on the drive: better than the single best truck bed in the game. It is still a small number. It is a small number you can repeat every time you drive anywhere, which the hardware store is not.
The practical version is one sentence long: change what you stop for. Open the truck bed of every trade and utility vehicle you pass, skip the cab on Electrician, Fire, Fossoil, Mc Coy and Transit, and demote the hardware aisle from a destination to something you check because you happen to be standing in it. That reordering is worth more than any amount of additional looting inside the buildings you were already searching.
Which leaves the row at the top of the table — the one worth just over four times a trade truck bed. It has a name, and naming it is precisely where the distribution stops being a route.
The 4.80% Container Is a SWAT Van Nobody Can Tell You How to Find
The row is the Louisville SWAT Chevalier Step Van — Base.StepVan_LouisvilleSWAT in the game files, a Heavy-Duty variant of the ordinary Chevalier Step Van. PZwiki's page for it is thorough in the way only a bot-generated page can be. Two seats. A trunk capacity of 160 and 210 units of storage across the whole vehicle, which is a lot of room to search and a lot of room to fill once you have searched it. A note that one of the key rings it can spawn with is the American Eagle. And the detail that matters most to you: the vehicle spawns with zombies in the Police SWAT outfit, which is how you identify one before you have opened a single container.
What that page does not have is a Location section. Not an empty one, not a vague one — the heading is simply not there. Overview, key rings, outfits, mechanics, parts, variants, see also. No location, and no loot-distribution section either.
Set that beside its parent and the gap becomes hard to look away from. The plain Chevalier Step Van page, on the same wiki, produced by the same bot from the same files, carries eleven parking-zone spawn chances, each with its own percentage, running from 3.20% at the top down to 0.80% at the bottom. The variant that holds the best sledgehammer odds in the game gets none of them. That is the whole situation in one line: the wiki knows this vehicle's weight, its trunk capacity, its key ring and the outfits its zombies wear, and it does not know where it parks.
Nothing else fills the hole in. The wiki's own vehicle-zones page is a Build 41 document that predates the zone names the parent van now uses, so it cannot answer a Build 42 question. Searching for it returns mods and the same page you started on. And the vehicle's name is a model name — it is not a Location section and it is not evidence of one. If you find a guide that hands you a district, a building type or a stretch of road for this van, ask it where the number came from, because there is no published figure behind it.
So the instruction changes shape. This is not a vehicle you go and find; it is a vehicle you recognise. A step van with SWAT-outfit corpses around it is a stop, whatever you were driving to, and it is worth the stop in a way almost nothing else in this article is. All three of its containers carry a sledgehammer entry — front seat 4.80%, rear seat 4.80%, truck bed 4.71% — so clear all three rather than glancing in the bed and moving on. If you treat the three rolls as independent, which again is an assumption the table does not make, one intact SWAT van works out to roughly a 13.6% chance of holding at least one sledgehammer. Call it one in seven, hold the assumption loosely, and note that it costs you very little: you already know the trunk opens from outside without a key.
The part that stings is what this does to planning. Four point eight percent is the highest effective chance the sledgehammer has anywhere, and it is the one number in the article you cannot build a route around. Every other source here can be turned into a decision about where to drive. This one can only be turned into a habit: know the silhouette, know the outfit, stop when you see both, search all three containers, and otherwise carry on with the plan you already had. A rare container you meet by accident is worth less than a common one you open constantly, and pretending otherwise is how people spend a season looking for a van.
Which raises the question the rest of your fuel actually depends on. If the best container in the game cannot be found on purpose, what can be — and the answer is not a building either.
Roadside Stories Are the One Sledgehammer Source You Can Drive Toward
It is a randomized story on a road. The sledgehammer's distribution page lists four of them by ID — RBBarn and RBBasic, both building stories, and RVSConstructionSite and RVSUtilityVehicle, both vehicle stories. The two building entries are names on a list and nothing more here; nothing published describes where inside them the tool would sit. The two vehicle stories are documented in detail, they only generate on roads, and they are the only sledgehammer source in this article that puts a visible landmark on the tarmac in front of you.

One version note before the details, because the two halves of this have different provenance. The story IDs come from the same current distribution data as every percentage so far. The descriptions — the spawn-chance figures, the footprints, the tool lists — come from wiki pages stamped Build 41.78.19. Build 42 has not been shown to change any of it, and the tool lists are corroborated by the current story IDs and by an independent Build 42.19 guide, but the numbers in the next two paragraphs are Build 41 figures that nobody has restated for Build 42.
The Construction Site story is the one players describe when they describe finding a sledgehammer. Some zombified roadworkers, most of them in construction-worker clothing with one Foreman among them in a foreman vest, a vehicle, and — the part you actually spot — an exposed manhole tile ringed with traffic cones. Its footprint is three tiles by three, so it can only generate on a road at least that wide. The wiki rates its spawn chance at 3 and calls it "quite rare". The detail that matters for how you search it: the tools "have a chance of spawning on the ground beside the vehicle". Not in the trunk, not in a crate. If you clear the zombies, grab whatever the vehicle holds and drive off without looking down, you can walk over the thing you stopped for.
The Utility Vehicle story is the same idea with the loot moved indoors and the frequency raised. A parked utility vehicle and its zombified drivers, eight tiles by nine, roads only, spawn chance 7 — "somewhat common" in the wiki's wording, and more than twice the Construction Site's 3 on the same scale. Here the tools sit in the trunk, which you already know costs you nothing to open from outside. The catch is that the vehicle is rolled: it can be police, fire department, park rangers, Fossoil, USPS, McCoy's, or the generic construction vehicle, and only the construction one carries the tool pool. A McCoy's vehicle instead holds carpentry loot — hammer, box of nails, plank, screwdriver, saw, wood glue. That is a perfectly good trunk to empty; it is not the trunk you detoured for, and recognising the difference from the vehicle's livery saves you the walk.
Now the number, and immediately after it, the reason it is not the number you want it to be. Both stories draw from the same tool pool, and that pool is eight entries with equal weight: Hammer, Lead Pipe, Pickaxe, Pipe Wrench, Shovel, Shovel2, Sledgehammer, Sledgehammer2. Two of those eight entries are sledgehammers — the base item and the alternate model. So any single tool roll a story makes is 25% sledgehammer, and that is a far richer pool than anything in the container tables; the best container in the entire game is a SWAT front seat at 4.80%.
Hold those two figures apart, though, because they are not the same measurement. The 4.80% is an effective chance: the odds that a specific container instance contains at least one sledgehammer. The 25% is a share of a pool, conditional on a roll happening at all — and how many tool rolls a story makes is not published anywhere. The wiki says only that these tools "have a chance of spawning". So there is no honest way to turn 25% into a per-story probability; a construction-site story does not have a 25% chance of holding a sledgehammer, and anyone who tells you it does has invented the missing number. What the 25% does tell you is real and useful: when a story does roll a tool, a sledgehammer is one of the likeliest single outcomes on the list, which is not remotely true of a shelf in a shop.
That is why a manhole cover is worth a detour, and it is the whole practical case for this section. Everything else in this guide is a container you have to be standing next to before the odds even start — and the best of those containers, as the last section established, belongs to a vehicle nobody can route you to. A roadside story is the inverse: an intact landmark, sitting on a road you can choose to drive down, drawn from a tool pool where a quarter of any roll is the thing you want, with the more common of the two stories being the one that keeps its tools in a trunk. It is the only entry in this article where "go looking" is a coherent instruction.
Player experience points the same direction, for whatever a forum thread is worth — which is corroboration and not mechanics. In a long Build 42 discussion by people who could not find a sledgehammer, the finds that did get reported named roadwork events with exposed manhole covers and traffic cones first. That is not evidence of a spawn rate. It is what a rich tool pool on a visible landmark looks like from inside a save.
So change the route, not just the container list. Traffic cones around an open manhole, or a utility vehicle parked on an open stretch of road with bodies around it, is a mandatory stop rather than an "if I have time" stop. At a Construction Site story, kill the roadworkers and the Foreman and then search the ground tiles around the vehicle, one at a time, before you leave. At a Utility Vehicle story, check the livery first: if it is the generic construction vehicle, open the trunk; if it is McCoy's, take the carpentry haul if you want it and do not spend a second longer than that looking for a sledgehammer that is not in the pool. And accept the limit honestly — you are not owed a tool by stopping. You are buying a roll on a list where a quarter of the entries are the tool — a share of a pool rather than a container's chance, and worth the stop on that composition alone.
Roads are finite, though, and most of a survivor's time is spent indoors anyway. So what about the buildings you are clearing regardless? Inside them, the correct order is not the one you would guess.
Inside Buildings, the Best Odds Belong to a Golf Bag and a Rail Yard
The highest entry on the non-vehicle side of the table is 1.11%, and it is not a room. It is not a shelf, a crate or a tool cabinet either. It is a Golf Bag, filed under the building "Any" — which is the table's way of saying this container belongs to no room type at all.
That distinction is the whole reason the "no building container above 1.11%" line misleads people. A golf bag is a wearable container, worn on the back in the same slot as a set of shoulder pads, 18 units of capacity at a 65% weight reduction, and it is worth putting on for that alone. But it is a bag. No room list can point you toward one, and there is no aisle to walk down. You find it wherever bags are found, which is a different activity from searching a room. The only other "Any" container in the entire sledgehammer distribution is a Duffel Bag at 0.01% — a hundredth of the golf bag's figure — so this is not a general lesson about bags. It is one bag.
More precisely, it is one variant of one bag. The ordinary Base.Bag_GolfBag is exactly what it sounds like: golf tees at 58.01%, clubs and balls at 52.12%, a notepad, a pencil, a visor, a cap. There is no sledgehammer anywhere in that table. The 1.11% traces to Base.Bag_GolfBag_Melee, the survivor-stashed weapon variant, and its contents read like somebody's emergency loadout — five bats and sticks at 39.46% each, a wooden spear and a Crowbar at 21.58%, a Machete at 13.42% with a shovel and a firefighter axe beside it, and, well down the list, Sledgehammer at 1.17%, listed twice, once per item ID.
Keep those two figures separate. The 1.11% is the item-side effective chance the sledgehammer's own distribution publishes for the Golf Bag container, calculated the same way as every other percentage in this guide. The 1.17% is a row inside the bag's own contents table, computed from the other direction — the bag's chance of carrying that item. They are two different calculations of two related things, and the fact that they land close together is not a licence to quote them as one number or to add the melee bag's two rows together. What both of them tell you is the same instruction, and it is a cheap one: open every golf bag you come across. If it is full of tees and balls, you found the other variant and you have lost nothing.
A container you cannot go looking for is not a search plan, though, and you asked which rooms to open. For that you need the fixed tier — and the fixed tier tops out at 0.24%. That is the best room-and-container combination in the entire game for this item, and here is all of it:
| Room ID | Containers carrying the 0.24% entry |
|---|---|
railroadrepair |
cardboard box, counter, crate, metal shelves, small box, tool cabinet |
railroadstorage |
crate, small box |
loggingfactory |
crate, metal shelves |
loggingwarehouse |
crate, small box |
catwalk |
crate, metal shelves, small box |
SafehouseLoot, SafehouseLoot_Mid, SafehouseLoot_Late |
cardboard box, counter, crate, metal shelves, small box, wardrobe |
SurvivorCache1, SurvivorCache2, SurvivorCacheBigBuilding |
counter |
Two details put the rail yard at the head of that list rather than merely on it. railroadrepair is the only room in the whole table where every container the room definition provides carries the sledgehammer entry — so once you are inside one, nothing you open is a wasted click, which is not true of a single other room here. And within that 0.24% tier it is the only room that carries the entry on a tool cabinet at all.
Now set that against the rooms that feel correct. warehouse and shed — the two you have been clearing on instinct, along with the tool store — sit at 0.02%. The rail-yard repair room beats them by twelve times. It is not a glamorous multiplier and it will not feel like one while you are standing in an empty rail yard, but it is the difference between searching the room the loot table actually favours and searching the room your intuition nominated. A logging factory or logging warehouse crate, a catwalk metal shelf, a survivor safehouse wardrobe and a survivor cache counter all sit on the same 0.24% line and belong on the same shortlist.
One practical note about turning those room IDs into places. On PZwiki's rendered loot table, each room name is a link out to the community map's item filter, in the form map.projectzomboid.com/?item=<container>~<room> — ?item=crate~railroadrepair, for instance. That is the table's own mechanism for converting a room ID into map locations, and it is worth knowing it exists. Treat it as a lead rather than a verified tool: those link targets were read off the rendered table, not opened and confirmed.
Then accept what 0.24% actually is. It is one in roughly 417. Treat each container as an independent roll — the same unstated assumption as the five-truck-bed drive earlier — and a hundred of those containers works out to about a 21% chance of a sledgehammer. You need somewhere near 290 before it is a coin flip. That is not an afternoon in a rail yard; that is a fixed-location search measured in hundreds of containers, and it is why this list belongs in second place: work it while you are already inside a building you were clearing anyway, and do not build the week around it.
And every number on that list, like every number above it, describes a world nobody has walked through yet. Almost nobody reads a guide like this on day zero.
Why an Older Save Makes These Odds Worse, and the Buildings It Skips Entirely
Four months in, you are somewhere around day 120, and PZwiki's loot table has a line about you. Sitting in the same header that defines effective chance is a sentence most readers skim past: loot spawns diminish over time, reducing effective chance as time progresses in game. Every percentage in this guide so far — the 4.80% seat, the 1.19% truck beds, the 1.11% golf bag, the 0.24% rail yard, the 0.02% tool store — is the day-zero version of itself. The table does not publish the aged version, because the aged version depends on your settings and your calendar.

So it is worth knowing exactly which dial has been eating your odds, because Build 42 runs two separate decay systems with separate settings, and the one players blame is the weaker of the two.
The first is pre-looted buildings: MaximumLooted at 25, ramping over DaysUntilMaximumLooted at 90 days, with RuralLooted at 0.5 and MaximumLootedBuildingRooms at 50. The second is diminished loot: MaximumDiminishedLoot at 20, over DaysUntilMaximumDiminishedLoot at 3,650 days. Those are the shipped defaults, and if you have not deliberately changed them, they are yours.
Now the correction that makes the rest of this section work, because it is easy to get backwards. MaximumLooted is not a percentage of containers already emptied. The game's own description of the field is that it is the chance that any building will already be looted when found. It is a dice roll made per building, at the building level, when you find one — not a quarter of the drawers in Knox County quietly emptying themselves. That distinction changes what you do with the number: it is not a tax spread evenly across your search, it is a coin the game flips on the front door before you open it.
Priced on shipped defaults, here is what four months has actually cost you. The pre-looted ramp reaches its maximum at day 90 — that is what DaysUntilMaximumLooted means — so at day 120 you are past the ramp and standing on the published endpoint: roughly 25% of the non-rural, sub-50-room buildings you have not yet walked into have already been rolled as looted. Over those same 120 days, diminished loot has removed on the order of 0.66% of loot quantity, because it is scaled to reach its 20% maximum only after 3,650 days — ten in-game years — and 120/3650 × 20 is 0.658%. That is a gap of about 38× between the two systems, and it is the pre-looted system doing essentially all of the damage.
Two honesty notes on those figures. The 25% is a published endpoint. The 0.66% is not: it assumes the diminished-loot ramp is linear, and the game does not publish the shape of either curve. The same assumption sits behind the follow-up, which is worth stating anyway because it settles the question permanently — solve 20·d/3650 = 25 and you get roughly 4,563 days, past the setting's own 3,650-day maximum. On the defaults, and assuming linear ramps, diminished loot never overtakes pre-looting. It is a decade-scale dial, and you are four months in.
Which brings us to the part of the ranking the calendar does not touch. MaximumLootedBuildingRooms = 50 reads, in the game's own words: if a building has more than this amount of rooms, it will not be looted. Not "less likely" — not looted. Malls, factories and large warehouses sit outside the pre-looted system entirely, which quietly makes them the only structures in your search whose odds are the same on day 400 as on day 1. Rural buildings are not exempt, but RuralLooted multiplies their chance by 0.5, so a farmhouse is half as likely to be pre-looted as its equivalent in town.
Be careful about how far you carry that. What these two settings describe are buildings. Nothing published says what they do — or do not do — to a truck bed or a roadside story, and the table header's general warning about diminishing spawns covers every figure in this article regardless. Treat the large-building and rural exemptions as real and specific, and do not talk yourself into believing vehicles are somehow outside the weather.
The other half of an aged save is that nothing comes back. Apocalypse ships HoursForLootRespawn = 0 — no loot respawn at all. Even switched on, containers holding five or more items are excluded, and so are buildings you have barricaded or built in, plus any claimed safehouse. What you cleared stays cleared, and the rail yard you swept in month two is a rail yard you have already spent. Nor did the world start against you: TimeSinceApo ships at value 1, which maps to zero months, so a default save does not begin with the clock pre-aged. Every day of decay on your world is a day you played.
And no, you cannot patch it now. A Build 42.19 loot-settings breakdown states it twice, in two different places: changing loot settings does not refill already-visited cells, and sandbox loot changes do not retroactively refill looted containers. Turning the multipliers up today changes what spawns in ground you have not walked on yet, and nothing else. (Those multipliers are worth one line of context: every published figure in this article already has Apocalypse's twenty-one loot categories baked in, most of which default to 0.6. Which category governs the sledgehammer is not established — its display category is ToolWeapon and its item category is base:blunt, and ToolLootNew and WeaponLootNew both default to 0.6, so the answer would not move a single number here. The full sandbox loot-depletion picture is a separate subject with its own article on this site; this is the sledgehammer-shaped slice of it.)
So two things change about the plan. Weight what remains of your building search toward the structures the pre-looted roll skips — anything over fifty rooms, which in practice means malls, factories and the big warehouses — and toward rural buildings, which decay at half the rate. And stop measuring your luck against a fresh world. You are running a search that was already measured in hundreds of containers, against a building population a quarter of which was rolled as stripped before you touched the door, on a map where the good rooms you have already cleared will never refill.
That is the honest read on the ranking, and it is not a comfortable one. If the whole tool is a fraction of a percent per container on day zero and worse than that now, the way out is not a better route to it. It is to stop looking for the whole tool.
The Tool Store Has Half a Sledgehammer in It, at 53.56%
So go back into the hardware store you gave up on and look at the same crate again.
The chance that crate holds a sledgehammer is 0.02%. The chance it holds a Large Handle is 53.56%. Same crate, same room ID, same generated table — roughly 2,700 times likelier to hand you half the tool than the whole one. The tool store was never a sledgehammer source. It is a handle source, and it has been one the whole time you were walking past the shelves looking for something else.
That single ratio is the article's turn, because the other half is not rare either. A Sledgehammer Head — its own item, Base.SledgehammerHead, added in Build 42.0.0 — drops at 0.39% from a Garbage Bag in any building. And joining a head to a handle is AssembleLongImplement: Maintenance 1, no recipe knowledge required, on any crafting surface. Not Blacksmithing 8. Not a forge. Maintenance 1.
Take the handle first, because it is the easy half and it stops being a search almost immediately.
| Effective chance | Where |
|---|---|
| 53.56% | toolstore → crate, metal shelves, shelves |
| 31.01% | toolstore → the same three containers, a second entry |
| 21.93% | factory → cardboard box, crate, metal shelves |
| 17.86% | garagestorage and shed → counters, metal shelves, shelves |
| 9.26% | Survivor safehouse loot, and a Carpenter truck bed |
Two of those lines deserve a second look. The tool store carries the handle twice, at 53.56% and again at 31.01% — two separate entries on the same containers, which is not a licence to add them together, but is a fair signal of how densely the room is stocked with the thing. And the Carpenter truck bed at 9.26% is the handle's only vehicle entry in the entire table, which means the truck-bed habit you picked up two sections ago quietly doubles as a handle route. The handle also turns up in the RBBarn building story — one of the two building stories the sledgehammer itself is listed in, and the only place in this guide where those barn entries pay for themselves.
Even that understates it, because the handle does not have to be found at all. CarveLongHandle takes one Plank or one Large Branch, a sharp knife or meat cleaver that is not dull, and any crafting surface, at Carving 3, with no recipe knowledge needed and +30 Carving XP for the trouble. A plank and a knife. If a tool store somehow fails you on a 53.56% container, the woods behind it will not.
Which leaves the head as the actual scarce half, and this is where the search pattern changes shape. That 0.39% garbage-bag figure is 19.5× a tool-store crate for the whole tool, and 1.625× the 0.24% you were offered by the best fixed room-and-container in the game — the rail yard, the logging crates, the survivor caches. Be precise about what it is not, though: it does not beat the melee golf bag's 1.11%, which remains the highest non-vehicle number published for the whole sledgehammer. What separates them is not the arithmetic but the search: the 0.24% entries are fixed addresses you can route yourself to, while a golf bag turns up wherever bags turn up. Compare the head against the rooms you can walk into, and keep the bag in a column of its own. The head is not a jackpot. It is the best figure the head has anywhere, it beats every fixed room-and-container the whole sledgehammer has, and it sits inside a container type you have been emptying for food and rags since day one.
Below the garbage bag, the head sits at 0.03% — and the list of where is worth reading, because it is a route nobody walks:
- Bins in bars, bar kitchens and bar storage; in fire garages and fire storage; in hospital hallways and hospital rooms and
medical; in Jay's Chicken dining rooms and kitchens; in Spiffo's dining rooms and kitchens. - "Other" containers in
derelictandderelict_steelfactorybuildings. - Counters and overhead containers in drug labs; counters, crates and small boxes in drug shacks.
Notice what that is. Every fixed location in this guide so far has been a shelf, a crate or a cabinet in a room you cleared for tools. This is a bin route through restaurants, bars and hospital corridors — rooms most survivors walk through on a food run and never search for hardware. It is a 0.03% line and you should not plan a day around it, but it costs nothing to add to a stop you were already making.
There is a third source, and it wants careful wording. Both items are forageable at skill level 0. The head sits at a foraging table weight of 5 across eight nature biomes — Vegetation, Farmland, Birch Forest, Primary Forest, Deep Forest, Forest, Acidic Forest and Organic Forest — while the whole sledgehammer sits at weight 1 across ten biomes that do include Road and Urban Area. Five times the table weight is not five times as likely; these are weights inside a pool, not probabilities, and the pool's size is not something the wiki publishes. What they do tell you is a direction: the head is a woodland find and the whole tool is not fussy, so a forage run through a forest zone is a head hunt, and a forage run down a road is not. (That road entry also carries a rider the head's does not — OtherLootNew modifies foraging in Town and Road zones, so the whole tool's urban foraging is exposed to a sandbox multiplier the woodland head is not.)
Players describe exactly this shape, and the thread caveat from earlier still holds: corroboration, not a mechanic. In the same Build 42 discussion where hardware stores were named the least productive search anyone ran, one player mentioned finding worn sledgehammer heads in garbage bags and having no idea what they were for. That is the whole problem in one sentence. The route is being walked past by people who are actively looking for the tool.
So here is the recipe you have been failing to reach the long way round. AssembleLongImplement takes one head — the family accepts an Axe, Pick Axe, Sledgehammer, Wood Axe or Firefighter Axe head — plus one Large Handle. Tools: one of a hammer, club hammer or mallet, and a sharp knife that is not dull. Both are kept, and both can degrade. Workstation: any crafting surface. Skill: Maintenance 1. Recipe knowledge required: none. There is one wrinkle worth naming rather than hiding — the Sledgehammer page also lists this recipe among things researchable from a sledgehammer, while the recipe's own knowledge column reads "none". The recipe table is the more specific source and it says none, so treat the recipe as available; if your save disagrees, the research path exists and starts from a head you would be holding anyway. The output is a working sledgehammer.
Which makes the practical version of this section a change to your loot filter rather than your route:
- Pick up every sledgehammer head you see, whatever state it is in. The published recipe asks for a head and a handle and says nothing else about the head. It is the scarce half. Be aware of the cost, though: a head weighs 6, exactly what the finished sledgehammer weighs, against 2 for the handle. That is a real bite out of your carry weight on a run, and it is worth taking anyway.
- Open garbage bags in every building, and bins in bars, restaurants, fire stations and hospitals. That covers the garbage bag and most of the 0.03% line; the derelict and drug-room containers listed above sit on the same tier.
- Take the handle from the first tool store, factory, shed or garage storage you enter — or carve one from a plank at Carving 3 if you would rather not walk.
- Finish it at any crafting surface at Maintenance 1, with a hammer and a knife you are already carrying.
And stop reading the hardware store as a failure. It is not step one and never was. It is step two, it succeeds at better than one crate in two, and the thing that makes it useful is a garbage bag in a house you already looted.
That is the acquisition problem solved — with parts, not luck. What is left is the reason you wanted the thing in the first place: the one job this tool does that nothing else in the game will do for you, and the setting that can quietly take it away.
What the Destroy Function Buys You, and the Server Setting That Can Take It Away
The action itself is undramatic. Equip the sledgehammer, right-click a tile, choose Destroy, and a highlighted box drops over the target to show you what is about to stop existing. PZwiki describes what that box can cover as walls, doors and "other miscellaneous objects", with stairs named explicitly among the things it is good for — and it describes the whole capability as a function exclusive to the sledgehammer. Not best performed by. Exclusive.
That is the entire reason the last six sections were worth your time, and it is worth being concrete about which locked doors it opens. The Exclusion Zone border checkpoints on Louisville Road and Ernest Cooper Road are completely fenced from the Valley Station side, and welding tools or a sledgehammer are what get you through — the approach and what is inside are covered in full in this site's checkpoints guide, so treat that as the motivation and go read the route there. The same is true of Louisville's army surplus stores, Ready Prep and Stars & Stripes, which leave the storefront and storage open but put the firearms room behind metal shutters or reinforced grating that wants the same two answers, and which the border-camp guide covers as a destination in its own right. In both cases the tool is the price of admission, not the plan.
So the substitution question is the right one to ask, and it has three answers rather than one.
The club hammer is the swap most players reach for, because it looks like a sledgehammer that fits in a bag. The specialist Build 42.19 guide that supplied the raw weight ranking earlier in this article states flatly that it does not work: wall and door destruction, it says, accepts only a real sledgehammer — the forged and alternate models included — and a club hammer will not open that action at all. That is one source, and not the wiki, so hold it as a specific and plausible claim rather than a verified mechanic. It is also the only source in this article that addresses the question directly, which tells you how rarely it gets asked and how often it gets assumed.
The pickaxe is the closer test, because it is very nearly a control group: two-handed, filed as a tool and a weapon, and it picked up a forged twin in Build 42 exactly the way the sledgehammer did. Its PZwiki page documents no destroy capability anywhere — not a limited version, not a slower version, nothing. That is absence of evidence on a single page rather than a positive statement of exclusion, so it is support for the wiki's claim, not an independent confirmation of it. Two sources looking from different directions and neither finding a second tool is about as much as the published material offers.
The axe and the crowbar are the third answer, and they are a different thing entirely: they do not destroy tiles, they break doors by hitting them. On that narrower job the numbers are close. A sledgehammer deals 40 damage to a door, an axe 35, a crowbar 8 — five times the crowbar, but only about a seventh more than the axe. And the sledgehammer's real advantage on a door is not the 40 at all; it is that Destroy removes the door outright instead of chewing through it. Which sets up the only real decision this section asks of you: an ordinary interior door is an axe's job, because 35 against 40 is not a reason to draw the heavy tool. Save the Destroy action for the work that has no alternative — a hole through a wall that has no door in it, a staircase taken out to cut a floor off from the one below, a sealed structure with no other way in.
All of which is true on your own save. On somebody else's, the function has an off switch — two of them, in fact. Multiplayer server configs carry AllowDestructionBySledgehammer, described in the config file as allowing players to destroy world objects with sledgehammers and shipping as true, and SledgehammerOnlyInSafehouse, which restricts that destruction to a player's own safehouse, ships as false, and only does anything if the first setting is on. Both defaults are the permissive ones, so an unmodified server behaves like single-player. A configured one may not.
Notice what those two lines are, structurally. No other tool in the game has a server setting named after it — not the axe, not the crowbar. Server admins needed a switch for exactly one item, which is the closest thing to independent corroboration of the exclusivity claim that this article has found. It is also a genuine trap. If you play on someone else's server, read those two settings before the search, not after it: with AllowDestructionBySledgehammer=false the tool you spent a season hunting is just a very heavy blunt weapon, and with SledgehammerOnlyInSafehouse=true it works only inside the base you have already claimed — which is precisely backwards, since the walls you wanted opened are somewhere else by definition. Asking the server's admins costs you nothing. A week of looting garbage bags for a head that turns out to be inert costs you a week.
Nothing else in the game does that job. And that is exactly the argument for not spending the tool on jobs anything else could do.
The Swing Budget: a 4.0 Endurance Modifier and the Exhausted Lockout
That is a harder rule to follow than it reads, because on paper the sledgehammer is also one of the best weapons in the game. PZwiki's own summary of it as a weapon is that it has one of the highest average and maximum damage figures of anything you can swing, with a very slow attack speed as the stated trade. The script backs that up: AlwaysKnockdown = true, a knockdown modifier of 3.0, and a MaxHitcount of 3, which puts it among the few weapons that can strike three zombies where a baseball bat strikes two. Everything about that profile says "stop carrying the axe."
The same script says otherwise, one line further down.
EnduranceMod = 4.0. What makes that number worth stopping on is not its size but its company: the sledgehammer is one of the few weapons in the game that declares an endurance multiplier at all. The crowbar's script has no such field. Neither does the pickaxe's — the two-handed tool-weapon that is otherwise its closest relative in this article. Neither does the Large Handle's. The field exists, the sledgehammer sets it, and almost nothing you would compare it against does. The wiki's own drawbacks list for the tool is written in the same key: it "will quickly exhaust the user", it "cannot be used once the character is exhausted", and a second or third melee weapon is advised for exactly that reason.
It is also worth knowing that 4.0 is the reduced figure. The modifier was 6 until Build 41.12, which cut it to 4 — the same patch that halved the swing time from 4 to 2 and added AlwaysKnockdown. What you are reading is already the softened version of this weapon's endurance cost.
Here is what that cost buys you, on the way down. Exertion in Project Zomboid is a four-step ladder, and each rung is a share of your total endurance spent:
| Moodle | Endurance spent | Melee damage | Attack speed | Movement | Also |
|---|---|---|---|---|---|
| Out of Breath | 25% | −50% | −7% | −19% | fence-trip chance +10%, tall-fence climb −5%, block −2% |
| High Exertion | 50% | −80% | −14% | −37% | sprinting disabled; trip +20%, climb −10%, block −4% |
| Excessive Exertion | 75% | −90% | −21% | −56% | running and power-walking disabled; trip +30%, climb −15%, block −6% |
| Exhausted | 90% | −95% | −28% | −75% | the sledgehammer will not swing; trip +40%, climb −20%, block −8% |
Read the first row before the last one, because the first row is the one that actually catches people. At Out of Breath — a quarter of your endurance, one moodle, the level most players treat as background noise — you are already doing half damage. One of the highest-damage weapons in the game, at 50%. Everything that made you draw it is gone before the icon looks serious, and the 7% speed penalty on a weapon whose whole weakness is speed is not helping either.
The bottom rung is not a penalty at all. It is a stop. At Exhausted, 90% of your endurance spent, PZwiki states that the character "will no longer be able to swing the sledgehammer", and the item script carries the flag that enforces it: CantAttackWithLowestEndurance = true. This is not the generic damage falloff that every weapon suffers. It is a property the sledgehammer declares about itself, and the game reads it literally. You will be standing in front of something, holding the heaviest thing you own, with the attack doing nothing.
Two mechanics compound to make that likelier than it sounds. The MaxHitcount = 3 that looked like the sledgehammer's crowd answer only applies with multi-hit enabled — and Build 42.20 ships MultiHitZombies = false on the Apocalypse and Extinction presets. On a default Apocalypse save that 3 collapses to 1. (Weapon Multi-Hit has its own guide on this site; the only part that matters here is which way the switch ships.) So the weapon whose case for fighting a group was that it hits three of them is, on the preset most readers are playing, killing a group one zombie at a time — each one costing a full swing at the sledgehammer's endurance price. The crowd does not get shorter. The bar does.
Recovery does not rescue you mid-fight either. Endurance comes back slowly while you are idle and no longer taking penalties, and faster if you sit on the ground, sit in a vehicle, rest on furniture, eat ginseng, or have levelled Fitness. Walking or sneaking sharply reduces recovery or nullifies it outright — so backing away on foot, which is the instinctive response to being winded, is close to the worst way to get the bar back. And exertion and tiredness feed each other in both directions: being tired greatly slows endurance recovery and can halt it entirely, while exertion accelerates drowsiness enough to cut the time to full fatigue by roughly 70%. A long fight with this thing does not just cost you the fight. It costs you the rest of the day.
Then there is the other budget, the one that does not refill. Condition maximum is 10 and the chance of losing a point is 1 in 40, which works out to an expected 400 hits before the tool breaks at level 0 in both Maintenance and Long Blunt. Treat that as an average rather than a promise — it is a per-swing roll, and a run of bad luck is a shorter tool. Two things move it. The formula is 1 in (40 + maintenanceMod × 2), with the modifier derived from Long Blunt and Maintenance, so those skills stretch the budget as they rise. And the comparison is unflattering: a crowbar's 15 condition at 1-in-70 works out to about 1,050 expected hits, roughly two and a half times the sledgehammer's, on a tool you can find at 21.58% inside a single melee golf bag. Spending sledgehammer swings on zombies is spending the scarcest durability in your inventory on the job the commonest tool does better.
So carry two weapons, and mean it. Treat the sledgehammer the way you would treat a fuel can: something you equip for a specific task and put away the moment the task is done. Clear the room with the axe or the crowbar, then swap, then open the wall — not the other way round, because arriving at the wall at High Exertion means arriving at 20% damage and no sprint, and arriving at Exhausted means arriving with a tool that will not move. If the bar has climbed, sit down or get in a car; do not try to walk it off. And keep the 400 in your head as a real ceiling, because on the odds this guide has already put in front of you, every swing you spend on a zombie is a swing you are unlikely to be able to replace.
Four hundred hits is a ceiling, though, not a cliff. In Build 42, a sledgehammer that is nearly dead is still most of a new one.
Dismantle It Before It Breaks, and Why You Cannot Forge Your First One
Because Build 42 did not take anything away from this weapon. The sledgehammer's last mechanically meaningful stat change was Build 41.32, which cut MaxRange from 1.9 to 1.35. Everything Build 42 did to it was additive: a Sledgehammer Head as its own item, a forged twin, a HeadCondition of 10 tracked separately from the tool's own condition, an OnBreak behaviour, and a set of researchable recipes hanging off the item. The tool did not get worse. It got parts — and parts are why a nearly dead sledgehammer is still most of a new one.
The forged twin is the headline addition and the least useful of them, so deal with it first. Base.SledgehammerForged arrived in Build 42.0.0, and the reason to stop expecting anything from it is that its item script is the same script. Weight 6.0. Condition maximum 10, condition loss 1 in 40. EnduranceMod 4.0 — yes, the forged one exhausts you exactly as fast. Damage 2.0 to 3.0, MaxHitcount 3, DoorDamage 40, KnockdownMod 3.0, MetalValue 120, HeadCondition 10, the same swing times, the same ranges. It is identical on every combat and durability field to the sledgehammer you have been hunting for eight sections. The differences are the sprite and icon fields, and one extra tag — base:hasmetal — that the plain item's script does not carry. What that tag does for a sledgehammer is not something the published material establishes, so treat it as a flag on a spreadsheet and nothing more. The forged variant is not an upgrade, and finding out it is not an upgrade should be a relief rather than a disappointment, because it means the loot you already have is the good version.
On where it comes from, the sources part company and neither can close the other out. PZwiki lists Base.SledgehammerForged as the product of exactly one recipe — AssembleLongImplement — and its loot template renders no distribution table for that item ID at all. The specialist Build 42.19 guide says otherwise: it puts the forged variant at a 0.01 weight in pawn-shop tool stock and in old warehouse crates, the same weight band it gives hardware aisles for the ordinary one. That is a real disagreement between a generated wiki table and an independent reading, and this guide is not in a position to settle it. The wiki's position is the one to plan around, and it says the forged sledgehammer is something you make. If one turns up in a pawn shop anyway, you have a sledgehammer, which was the point.
Now notice which recipe that was. AssembleLongImplement is the same recipe from the head-and-handle route — one head, one Large Handle, a hammer and a knife, any crafting surface, Maintenance 1. So the working sledgehammer you build out of a garbage-bag head and a tool-store handle is the forged variant. You do not need a forge to own a forged sledgehammer, and most players who follow the route in this guide will end up carrying one without ever standing next to a blacksmithing station. So the entire "just forge one" question narrows down to a single object: the head.
Here is what forging that head actually costs. Forge_Sledgehammer_Head takes 9× charcoal-tagged fuel and 1× Steel Ingot (Pierced). Tools: a ball-peen hammer, tongs, a metalworking punch and a metalworking chisel — all kept, all able to degrade. Workstation: an Advanced Forge. Skill: Blacksmithing 8. Output: one Sledgehammer Head, and +90 Blacksmithing XP for it. Two independent sources publish those numbers identically, so the recipe itself is not in doubt. The Advanced Forge sitting in the middle of it is a gate before any of the rest applies — it is a construction project with a materials bill of its own, and that bill has its own guide on this site rather than a paragraph here.
Then read how you learn the recipe, because that is where the route folds in half. Three ways in: the Magazine: Blunt Forge; auto-learn at Blacksmithing 9, which is one full level above the recipe's own floor of 8; or research it from a Club Hammer, Club Hammer Head, Sledgehammer, Sledgehammer Head, Stone Maul or Stone Maul Head. (The pzfans guide adds the Blacksmith trait and the Metalworker profession to that list, saying both grant the recipe among their forge lists — that is a single source and worth holding loosely.) Look at those six research items from where you are standing. Two of them are a sledgehammer and a sledgehammer head: the thing you cannot find and the part you would already be assembling if you had it. The other four are club-hammer and stone-maul items this guide has not sourced, so nothing here says you can count on holding one.
Which is the whole verdict on the forge path. To forge your first sledgehammer head you need a specific magazine or Blacksmithing 9, plus Blacksmithing 8, plus an Advanced Forge, plus a pierced steel ingot — or you need a sledgehammer head, in which case you never needed the recipe, because a head plus a handle is Maintenance 1 and a crafting surface. The forge is a renewal system for a blacksmith who is already equipped. It is not an acquisition route, and any guide that offers it as one is quietly assuming the hardest step is already done.
The recipe that genuinely changes your position runs the other way, and it is almost embarrassingly cheap. DismantleLongImplement turns a sledgehammer back into a Sledgehammer Head. No skill requirement. No recipe knowledge required. A crafting surface, and a hammer, club hammer or mallet — the same tool you were already carrying to assemble one. The head survives the tool. One caution: the published recipe says nothing about what condition the head comes out in, and Build 42 tracks head condition separately from item condition, so do not assume a dismantled head is a fresh one. Players who have found loose heads describe them as worn. The head coming back at all is the win; its condition is not something the sources price.
Before you get there, repair it while repairing is cheap. Seven recipes accept a sledgehammer, and the specialist guide lays out what each one costs: duct tape (2×, no skill) and wood glue (2×, Woodwork 2) at the better fix tier; epoxy with fibreglass tape at Maintenance 3, keeping scissors or a sharp knife, at the best tier of all; and adhesive tape (3× scotch tape), zipties (1×, Maintenance 1), glue (2×) and epoxy with two ripped sheets or denim strips (Maintenance 4) at the basic tier, that last one being the cheap way to stretch scarce epoxy. Success, the condition restored and the damage on a failure all scale with Maintenance and the recipe's tier — and every one of these recipes can fail and damage the item. That is the argument for repairing at 7 or 6 condition rather than at 2. A failed roll on a tool with room to spare is an annoyance. A failed roll on your last point is the end of the tool.
So make the decision one point early, deliberately, while you still have a choice. Build 42 gave the sledgehammer an OnBreak behaviour, and what that behaviour actually does is not something the published material describes — which is exactly the wrong thing to discover at 1 condition with no head in reserve. Take your worn-out sledgehammer to a crafting surface, dismantle it, and pocket the head. It is the only acquisition step in this entire guide with no percentage attached to it: no room, no container, no roll, no skill floor, no recipe to learn. It costs you the handle — and the handle is the half of this tool that the world is full of.