
Essential Recruitment Rules for Baldur's Gate 3 Act 1
Your adventure in Boldur's Gate III begins not just with a quest for a cure, but with the equally important task of building a party of allies. The companions you recruit in Act 1 will shape your entire journey, but the game’s systems have some crucial, and sometimes punishing, rules you need to know upfront. Understanding these mechanics before you make any major story decisions will save you from heartache and ensure you don't accidentally play through the whole game missing your favorite characters.
Managing your party at the camp.
Party Management Fundamentals
First, let's talk logistics. Your active party can only have a maximum of 4 characters, including your protagonist. When you want to swap someone out, you must go to your Camp (press [M] to open the map and travel there), speak to the companion you wish to bench, and select the 'Wait here' dialogue option. This opens a slot for a new recruit. The good news is that companions waiting at Camp still gain Shared Experience, staying perfectly leveled with your active squad, so you can rotate them freely without penalty.
Before heading to a new recruitment location, always double-check you have an open party slot. If you show up with a full team, the new companion won’t even initiate conversation, and you’ll have to trek all the way back to camp to make room.
The Approval System: Your Reputation Meter
Every companion judges your actions through a hidden Approval System. You can view your standing with each character in their Character Sheet under Detailed View. It’s a numerical range spanning from Very Low (-40) to Very High (60+). Major story choices, dialogue responses, and even how you treat NPCs in front of your companions will swing this meter. High approval unlocks deeper personal stories and romance options, while low approval can lead to companions leaving you for good.
The Major Choice: Grove vs. Goblins
Act 1 centers on a massive conflict at the Emerald Grove, and your choice here has the most severe consequences for your roster. This is the single biggest "point of no return" for companion availability.
If you side with the Druids and Tieflings to defend the grove, you’ll lock yourself out of recruiting the drow paladin Minthara through normal means (though a special method exists, covered later). However, if you take the evil path and side with the Goblins to raid the grove, you will permanently lock out Wyll, Karlach, and Halsin. They will either leave your party in disgust or become hostile. There’s no talking your way out of this one.
Navigating the Points of No Return
Speaking of locks, Baldur's Gate III has clear warnings for when you're about to leave an area for good. The two main exits from Act 1 are the Mountain Pass and the entrance to the Shadow-Cursed Lands. When you approach these transitions, the game will explicitly warn you to tie up loose ends. Heed this warning! Once you pass through, many Act 1 quests and companion opportunities vanish forever. Make sure you’ve explored every corner, finished every personal quest you care about, and recruited everyone you want before moving on.
Here’s the golden rule for Act 1 recruitment: explore thoroughly, recruit early, and save often before any major story decision. With these essential rules in mind, you’re ready to start filling your camp with a legendary band of allies. Let’s find them.
How to Find and Recruit Shadowheart in Baldur's Gate 3
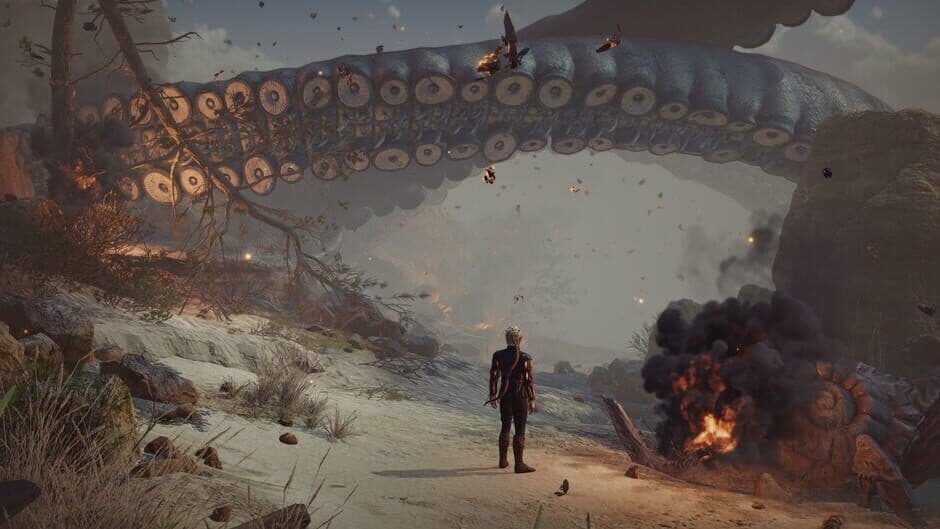
Your adventure in Baldur’s Gate III begins in chaos—the Nautiloid is crashing, and a mysterious cleric is trapped. Shadowheart, the High Half-Elf Cleric, is your first potential companion, and securing her early is crucial for her story and your party’s healing power.

Shadowheart during a conversation
You can recruit her in two ways: during the prologue or immediately after the crash. Here’s how to ensure she joins you.
Freeing Shadowheart on the Nautiloid
The most direct path is freeing her on the ship. After the initial combat tutorial, you’ll find Shadowheart unconscious in a pod within the Nautiloid’s Pod Room.
To free her:
- Search the room adjacent to her pod for a corpse holding an Eldritch Rune.
- Insert the rune into the console beside her pod.
- Use your Illithid Wisdom ability on the pod’s controls to release her.
Freeing her here guarantees her immediate recruitment and grants unique early dialogue about the artefact she carries. If you miss this, don’t worry—she’ll find you later.
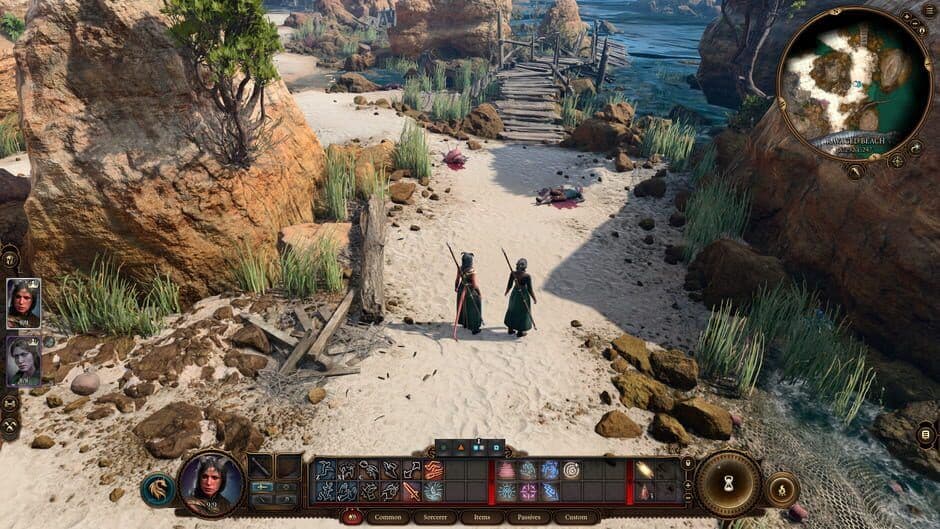
If you free her, she’ll be waiting for you on the Ravaged Beach at coordinates roughly X:175 Y:265 after the crash. Simply speak to her to add her to your party.
Finding Shadowheart After the Crash
If you didn’t free her on the Nautiloid or simply ran past, you’ll need to find her in the wilderness. Her first post-crash location is north of the beach at the Dank Crypt Entrance.
Head north from the wreckage, and you’ll find her near the stone door leading into the crypt, arguing with herself about her lost artefact. Approach and speak to her. She’ll be hesitant, but agreeing to work together to survive will secure her as a companion.
If you somehow miss her at the crypt, your final chance in early Act 1 is at the Druid Grove. She can be found near the main gate or inside the Hollow, still searching for a way to remove the tadpole.
Why Recruit Shadowheart Early?
As a Trickery Domain Cleric, Shadowheart provides essential healing, buffs like Bless, and unique stealth spells. More importantly, recruiting her early locks in her personal quest, The Chosen of Shar, which is woven deeply into the game’s main narrative. Delaying her recruitment risks missing early approval opportunities and context for her story.
With Shadowheart at your side, you have a reliable healer and a companion whose secrets will shape your journey. Let’s move on.
How to Find and Recruit Astarion and Gale
After securing Shadowheart on the beach, your Baldur's Gate III party is still missing a few key roles. Your next two targets are a silver-tongued vampire and a wizard stuck in a portal—both are essential for rounding out your team’s skills.

Forming your party with early-game companions.
Recruiting Astarion, the High Elf Rogue
Your first stop is the Ravaged Beach east of the crash site. Here, you’ll find Astarion, a High Elf Rogue with a Noble background. He’s not waiting politely—as you approach the coordinates X:190 Y:280, be ready for an ambush. You’ll get a [Perception] check to notice him hiding; succeeding lets you call him out and avoid a knife to your throat.
Use a character with high Wisdom for the best chance at that Perception check. If you fail and he attacks, don’t panic—you can still talk your way out of a fight.
The key to recruiting him is to stay calm and use diplomatic dialogue. If you attack him outright, you’ll permanently lose his rogue skills and his fascinating vampire-related story. Choose options that de-escalate, and he’ll quickly realize you’re a useful ally against the mind flayer threat, joining your party on the spot.
Finding Gale, the Human Wizard
Next, head north from the beach to the Roadside Cliffs waypoint. Just northwest of here, at X:225 Y:325, you’ll see a swirling, unstable magical portal sticking out of a rock face. Interact with it, and a hand will emerge—this is Gale, a Human Wizard with a Sage background.
You’ll need to pull him free. The game will prompt you for a [Strength] or [Arcana] check. Either works, so use whichever your party is best at. Succeed, and the charming (and slightly pompous) wizard will join your cause, grateful for the rescue.
Gale brings a crucial feature to your party: Arcane Recovery. You can find this in his spellbook (press [K] to open it). This ability lets him restore some spell slots outside of combat, which is a game-changer for managing resources during long dungeon dives.
⚠️ Watch out: Don’t just walk past this portal! Some players assume he’ll show up later, but this is your only chance to recruit Gale in Act 1.
With Astarion’s stealth and lockpicking and Gale’s arcane firepower now at your disposal, your party’s versatility just skyrocketed. You’re perfectly set up to tackle the mysteries and dangers waiting beyond the beach.
How to Find and Recruit Lae'zel in Act 1
This is where things get tricky—you've already met the fierce Lae'zel on the Nautiloid, but after the crash, she's nowhere to be found. Don't worry; she's alive, but she's in a bind, and rescuing her requires a bit of negotiation and a steady aim. In Baldur's Gate III, this Githyanki Fighter is a powerhouse worth having on your side.

Finding Lae'zel near the crash site
Head north from the Roadside Cliffs waypoint, following the path toward the mountain pass. You'll soon come across two Tieflings, Damays and Nymessa, standing by the roadside. They’ve captured Lae'zel and have her trapped in a hanging cage. This is your moment.
Approach them, and they'll accuse Lae'zel of being a threat. To get her down without a fight, you'll need to talk your way through. A [Persuasion] or [Deception] check (DC 10) to convince them to leave is your cleanest option. Succeed, and they'll walk away, grumbling but unharmed. Fail, and you'll have to fight them to free your future companion.
If you have a character with high Charisma or a spell like Friends active, this check becomes much easier. It's worth a reload if you fail, as fighting the Tieflings can sour your reputation with other refugees later.
Once the area is clear, look up at the cage. You can't simply pull a lever; you need to break her out. Target the bottom of the cage with any ranged weapon or attack by holding [ZR] to aim. A single shot will shatter the ropes, and Lae'zel will come crashing down—unharmed and ready to join you.
If you've struggled to find her, you're not alone—her cage is easy to miss if you stick strictly to the main path. With Lae'zel now in your party, you've secured a formidable frontline warrior who brings unique Githyanki perspectives and abilities to your journey. Let's go.
How to Find and Recruit Wyll in the Druid Grove
You’ve gathered a party of survivors on the beach, but if you’re looking for a hero with a flair for the dramatic, you’ll need to visit the refugee camp. In Baldur's Gate III, your next recruit is the self-proclaimed Blade of Frontiers, and he’s holding court in the heart of the Emerald Grove.
Wyll's character profile after joining the party.
After the initial gate battle, head into the Emerald Grove and make your way to the central area known as The Hollow. At coordinates X:200 Y:415, you’ll find Wyll, a Human Warlock, in the training grounds. He’s the one effortlessly schooling a group of Tiefling children in swordplay. Speak to him, and he’ll introduce himself with a story about hunting a devil—this begins his personal quest, The Blade of Frontiers. Agree to help him track his quarry, and he’ll eagerly join your cause.
Wyll is one of the easiest companions to recruit. Simply approach him after the grove’s initial defense, express interest in his devil-hunting mission, and he’ll join on the spot. No skill checks required.
While Wyll is available for most of Act 1, his loyalty has a hard limit. His story is deeply tied to the fate of the grove. If you choose to side with the goblins and raid the Grove with Minthara, Wyll will view this as an unforgivable betrayal and will permanently leave your party. You cannot recruit him on a path where you attack the Tieflings.
Wyll brings a fantastic mix of charisma for dialogue and potent warlock magic to your party. With him by your side, you’re one step closer to a full roster and ready to take on the dangers of the wilderness.
How to Find and Recruit Karlach on the Risen Road
The Risen Road holds a fiery secret—Karlach, the Asmodeus Tiefling Barbarian, is waiting for you. She’s one of Baldur's Gate III's most beloved companions, but her recruitment is tied to a major moral choice that can permanently lock her out. Here’s the fastest route and the exact dialogue you need to bring this powerhouse into your camp.
Navigating to the Risen Road
Locating Karlach on the Risen Road
Your target is the riverbank past the Toll House ruins on the Risen Road. Her exact spawn coordinates are X:110 Y:505. You can get there by following the coastal trail east from the crash beach, but there’s a much faster shortcut.
From the Emerald Grove, head to the northern cliffs near Zevlor's chamber. Look for a gap you can jump across the river to the north. The drop is about 6 meters, so cast Feather Fall on your party to avoid damage, or carefully descend a narrow, climbable slope on the western cliff face. This shortcut cuts travel time by 60%, getting you to Karlach in minutes instead of fighting through wolf packs.
When you approach the coordinates, you’ll find Karlach wounded by the water. The encounter triggers automatically as you get within 10 meters, starting the quest Hunt the Devil.
The "Hunt the Devil" Choice and Combat
This is the pivotal moment. Karlach will explain she’s being hunted by Paladins of Tyr, led by a man named Anders, who are stationed at the nearby Toll House. You must choose to side with her.
Do NOT go to the Toll House and kill the "Paladins" before talking to Karlach. If you eliminate Anders first, she will be flagged as hostile and you’ll skip her recruitment dialogue entirely.
Head to the Toll House to confront Anders. He’s a fake Paladin, and siding with Karlach here is the only way to recruit her. During the dialogue, choose options that support Karlach’s innocence. This grants +5 to +8 approval points with her and locks in her loyalty.
The fight can be tough at low levels. Anders has 27 HP—focus him down first, as his death often causes the remaining enemies to flee. Use area-control spells like Thunderwave or Faerie Fire to manage the other three Paladins. After the battle, loot Anders' body for a Soul Coin before speaking to Karlach; having this item triggers unique camp dialogue later.
Securing Karlach’s Loyalty and Next Steps
With the Paladins defeated, return to Karlach by the river. She’ll gratefully agree to join your cause, provided you have an open party slot (remember the four-character limit, including your protagonist). If your party is full, you’ll need to dismiss someone to camp first.
Her personal quest involves the Infernal Engine in her chest. This is a narrative mechanic, not a combat debuff. To progress it (and unlock her romance arc), you need Infernal Iron. One piece can be found in the Blighted Village blacksmith’s basement. Take it to Dammon, the Tiefling smith at the Emerald Grove (or later at the Last Light Inn in Act 2), for the first repair.
⚠️ Watch out: If you’ve already progressed Wyll’s quest to the "Mizora's Warning" cutscene, he may initially conflict with recruiting Karlach. You can persuade him to stand down, allowing both to join. Also, siding with the Goblins to raid the Grove will cause Karlach to leave permanently.
With Karlach at your side, you gain a relentless frontline Barbarian and a companion with a deeply personal story. Secure that Infernal Iron, earn her approval by choosing aggressive dialogue options, and you’ll have a fiercely loyal ally for the battles ahead.
How to Find and Recruit Halsin in the Goblin Camp
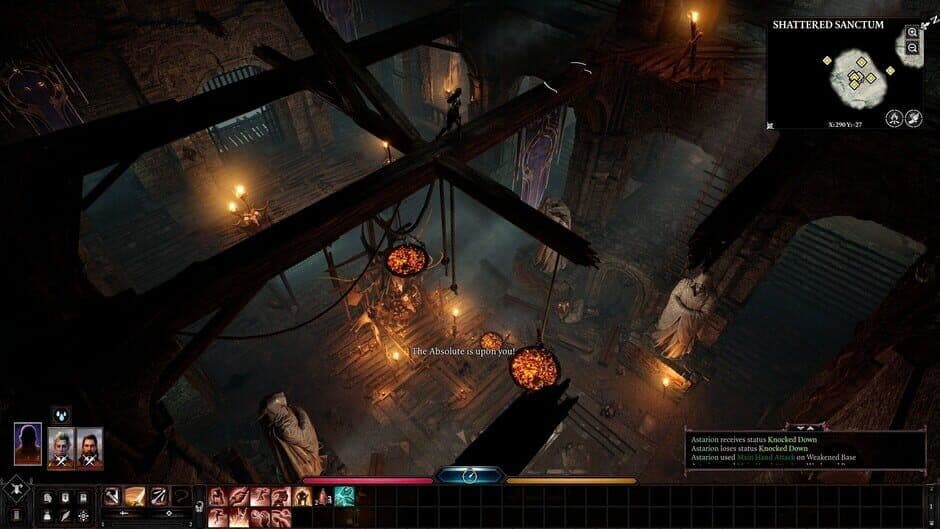
The Druid Grove is under siege, and its First Druid is nowhere to be found. To secure the grove’s future—and unlock a powerful ally—you’ll need to infiltrate the heart of the goblin army. In Baldur's Gate III, rescuing Halsin is a multi-step quest that defines the major conflict of Act 1, and it all begins in the Goblin Camp.

Managing your party members.
Your journey leads to the Shattered Sanctum, the main temple within the Goblin Camp. Make your way to the northeast section to find the Worg Pens. Here, after dealing with the goblin guards, you’ll find a lone bear in a cage. This is Halsin, a Wood Elf Druid, trapped in his Wild Shape form. Speak with him, and he’ll reveal his identity and the deal: he’ll join your cause if you eliminate the three leaders holding his grove hostage.
If you’ve already started causing trouble in the camp, the goblins in the Worg Pens might be instantly hostile. Clear them out first, then you can speak to the bear in peace.
Your new objective is clear: take out Dror Ragzlin, Priestess Gut, and Minthara. These three leaders are all within the Shattered Sanctum, and dealing with them is the core of the Save the First Druid quest. You can confront them in any order, using combat, stealth, or clever dialogue to pick them off. Just be aware that killing one may put the entire camp on alert.
Once all three leaders are dead, return to Halsin in the Worg Pens. He’ll thank you, promise to meet you at your camp, and suggest you regroup at the Emerald Grove for a celebration. Head back to the grove and complete the tiefling party to formally solidify his recruitment. After the festivities, Halsin will be a permanent resident at your camp, ready to join your active party and help you navigate the dangers of the Shadow-Cursed Lands in Act 2.
⚠️ Watch out: Siding with Minthara and the goblins to raid the grove will permanently lock you out of recruiting Halsin, Wyll, and Karlach. This is the defining “good vs. evil” choice of Act 1.
With Halsin rescued and the grove secured, you’ve not only gained a steadfast companion but also shaped the fate of the region. You’re now ready to pursue a cure with the strength of the grove behind you.
How to Recruit Minthara (Good and Evil Paths)
Recruiting Minthara, the ruthless Drow Paladin, is Baldur’s Gate III’s most infamous choice—a decision that traditionally locks you into a villainous path. But thanks to a game-changing update, you can now bring her into the fold without torching your conscience or your party. Here’s how to navigate both the classic evil route and the new “good” path.

Minthara at Moonrise Towers
The Classic Evil Path: Raid the Grove
To recruit Minthara the traditional way, you must fully embrace the dark side. Find her in the Shattered Sanctum at coordinates X:330 Y:40, where she stands as a Goblin leader planning the assault on the Emerald Grove.
Your mission is clear: during your dialogue with her, you must give Minthara the Grove’s location. This commits you to leading the Goblin raid. After the battle, she’ll instruct you to meet her at Moonrise Towers in Act 2, where she’ll officially join your party.
⚠️ The Cost: This is the point of no return. Choosing this path means recruiting Minthara usually results in losing Halsin, Wyll, and Karlach. Halsin will refuse to help, and Wyll and Karlach will permanently leave your camp if they witness you attacking their home.
The Patch 5 "Good" Path: Knock Her Out
Here’s the trick most guides missed—since Patch 5, you can recruit Minthara without slaughtering the Tieflings. The key is to never give her the Grove’s location and to use a specific combat mechanic.
When you confront her in the Shattered Sanctum, you must toggle 'Non-Lethal Attacks' in your character’s passive abilities menu (the icon looks like a crossed sword and club). With this active, use melee attacks to knock Minthara unconscious instead of killing her. She’ll appear “Temporarily Hostile” and will drop to 1 HP, playing a knocked-out animation.
Make absolutely sure Non-Lethal Attacks is on. Spells, ranged weapons, and environmental damage will still kill her. Stick to basic melee swings.
After dealing with the other Goblin leaders, you can proceed to Act 2. If you knocked her out correctly, you’ll find a captured Minthara at Moonrise Towers, where you can free and recruit her. This allows you to gain both her and Halsin in the same playthrough—a previously impossible feat.
Making Your Choice
This decision defines your playthrough. The evil path offers a straightforward, power-hungry narrative with a potent Paladin by your side. The new “good” path, while more forgiving, requires precise steps and forgoes the dramatic raid sequence. Whichever you choose, you’re adding one of Baldur’s Gate III’s most complex and compelling companions to your roster.
How to Recruit Camp Followers: Scratch and Withers
Your camp in Baldur's Gate III isn't just for your battle-hardened companions—it’s a sanctuary that can attract a few helpful (and adorable) permanent residents. While they won't join your active party, these camp followers provide unique services and charming interactions that make your journey richer. Here’s how to welcome them.

Meeting new allies in the wild
How to Befriend Scratch the Dog
On your travels north of the Blighted Village, you’ll find a heart-wrenching scene: a white dog named Scratch mourning his fallen owner. Approach him with the Speak with Animals spell or potion active. Choose compassionate dialogue, then select the option to [A] pet him. Let him smell your scent to earn his trust. He’ll eventually trot off, but after your next long rest, you’ll find him waiting patiently at your camp.
Once Scratch is at camp, you can use the Throw command to play fetch with him. It’s a great way to pass the time and see a very good boy in action.
Scratch isn't just for morale. He can occasionally find and bring you useful items, and he’ll happily accompany you as a non-combatant if you use the Summon Scratch ability from your hotbar.
Recruiting Withers, Your Camp’s Skeleton Butler
Early on, you’ll want to explore the Overgrown Ruins and the Dank Crypt within. Fight through the traps and undead to reach the final chamber. Inside a large sarcophagus, you’ll find Withers, a mysterious skeletal NPC. A brief dialogue ensues, and regardless of your choices, he will appear at your camp shortly thereafter.
Withers offers two invaluable services for a modest gold fee:
- Respec: Change any character’s class, subclass, and ability scores.
- Hirelings: Recruit generic adventurers of any class to fill a party slot.
⚠️ Watch out: You can find Withers at any point in Act 1, but it’s best to seek him out early. Having the ability to respec your build after seeing how combat works is a game-changer for new players.
Rescuing Volo for Camp Commentary
During your infiltration of the Goblin Camp, head to the coordinates X: -108 Y: 435. You’ll find the flamboyant bard Volo locked in a cage, surrounded by goblins. You can persuade the goblins to leave, pick the lock, or simply eliminate them. Free Volo and he’ll promise to meet you later.
True to his word, Volo will turn up at your camp, offering his unique brand of “research” into your tadpole problem. Trust me, his methods are… memorable, and lead to a permanent character buff if you’re brave enough to see his procedure through.
With Scratch, Withers, and Volo at your camp, you’ve secured the essential non-companion allies who provide utility, flexibility, and no small amount of quirky charm for the rest of your Baldur's Gate III adventure.
Baldur's Gate 3 Act 1 Companion Rewards and Synergies
You’ve assembled your crew, and now the real adventure begins. In Baldur's Gate III, your party is more than just extra swords—it’s a living, breathing system of skills, stories, and synergies that will define your journey. This final section will help you understand the rewards of a full camp and craft a party that can handle anything Act 1 throws at you.

Testing party synergies in early combat.
Building Your Foundation: The Balanced Party
Think of your party as a four-pillar foundation: you need someone to take hits, someone to heal, someone to control the battlefield, and someone to handle the unexpected. For beginners, the most forgiving and effective setup is a classic Balanced Party Comp built around Protagonist + Lae'zel/Karlach for Tank + Shadowheart for Healer + Gale for Caster.
- Your Protagonist: This is your chance to fill any gaps. A Charisma-based class like Bard or Sorcerer makes you the party’s face for crucial dialogue checks. A Dexterity-based Rogue can handle lockpicking and traps if you’re not using Astarion.
- The Tank (Lae'zel or Karlach): You need a durable frontline to draw enemy attention. Lae'zel, the Githyanki Fighter, excels with high armor class and consistent damage. Karlach, the Tiefling Barbarian, brings reckless, high-damage fury. Both will keep enemies off your softer party members.
- The Healer & Support (Shadowheart): As a Trickery Domain Cleric, Shadowheart is indispensable. She provides essential healing spells, buffs like Bless, and utility spells such as Guidance for skill checks. Don’t leave camp without her.
- The Caster (Gale): The Gale’s wizardry covers area damage and crowd control. Spells like Sleep or Thunderwave can trivialize early encounters, and his Arcane Recovery feature lets him restore spell slots outside of combat, extending your party’s endurance.
This composition gives you a sturdy frontline, reliable healing, potent magic, and a protagonist who can lead conversations—effectively covering combat, exploration, and social pillars of the game.
Beyond Combat: The Rewards of Companionship
Your companions offer benefits that extend far beyond their combat roles. Two key systems will make your journey smoother: Inspiration and personal quests.
Mechanic: Inspiration Points
Each companion’s background (like Astarion’s Noble or Gale’s Sage) ties into the game’s Inspiration system. When you perform actions that align with a companion’s background story—such as persuading someone with noble grace or uncovering ancient magical lore—you’ll earn Inspiration Points. These points are banked and can be spent to reroll failed ability checks, giving you a crucial safety net in dialogue, lockpicking, or perception. It pays to have a diverse crew; their varied backgrounds mean you’ll earn inspiration from a wider range of actions.
Reward: Companion Quests
The true depth of Baldur's Gate III lies in these stories. Open your Journal with [J] to track each companion’s personal quest, like Shadowheart’s The Chosen of Shar or Wyll’s The Blade of Frontiers. Completing even the early steps of these quests doesn’t just deepen your bond—it often grants unique gear, powerful abilities, and significant approval boosts. Investing time in these stories transforms your companions from hired hands into trusted allies with their own compelling arcs.
Don’t be afraid to swap party members at camp for specific tasks. Bring Astarion along to pick a difficult lock, or take Wyll to a social encounter where his warlock insights might help. A flexible roster is a powerful one.
Final Takeaway: Your Journey, Your Party
Your first foray into Baldur's Gate III can feel overwhelming, but with a balanced party covering the essential roles, you’re setting yourself up for success. Remember, there’s no single “correct” team—the best party is one that complements your playstyle and the stories you want to explore. Whether you stick with the balanced core or experiment with magic-heavy or stealth-focused comps, you now have the foundation to make informed choices. Gather your allies, tend to their stories, and step forward. Faerûn awaits.