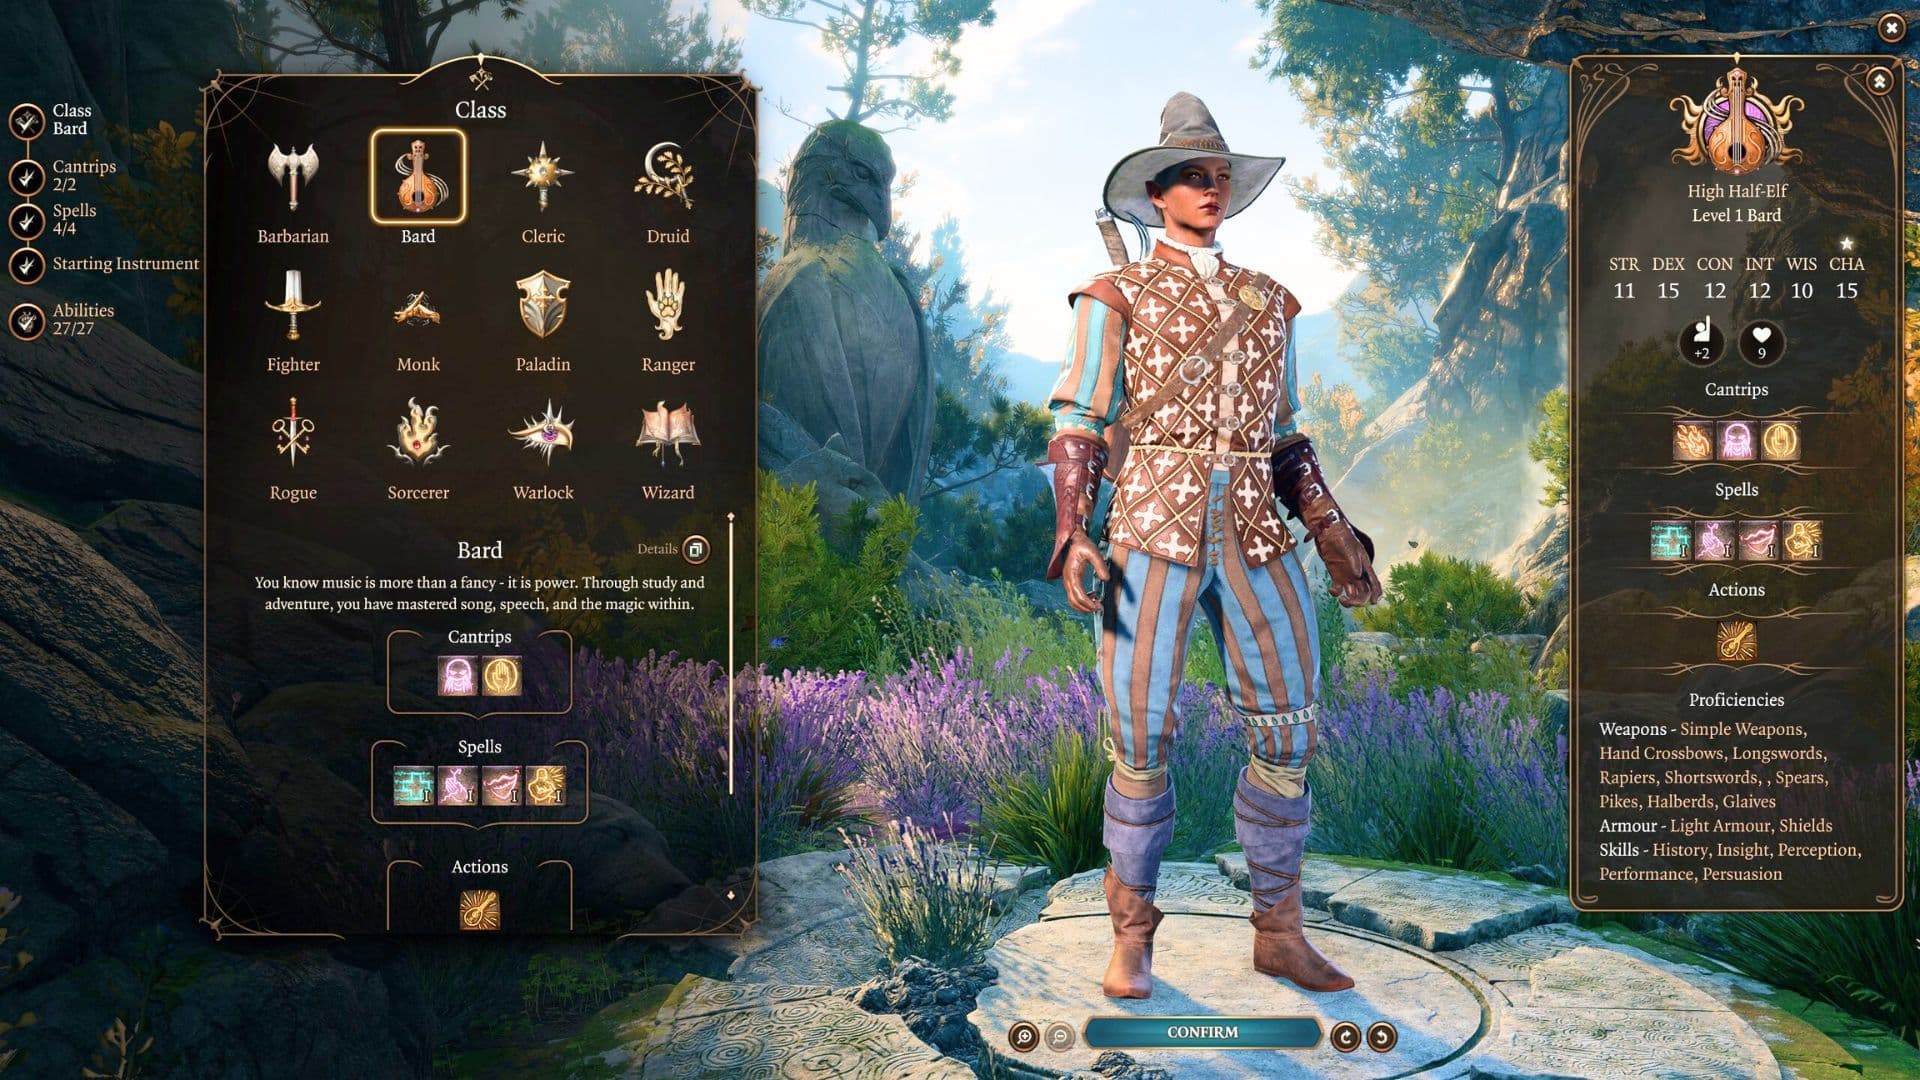
Baldur's Gate 3 Character Creation and Difficulty Settings
Your journey through Faerûn begins not on the Nautiloid, but in the character creator and difficulty selection screen. These initial choices are the most important meta-decisions you'll make, framing your entire experience. They dictate how much the dice will challenge you, how forgiving the world will be, and the very tools you'll have to navigate its vertical landscapes. Let's break down these foundational settings so you can start your adventure on the right foot.
Difficulty Settings: Picking Your Personal D&D Table
Baldur's Gate 3 offers five distinct difficulty modes, each representing a different style of Dungeons & Dragons campaign. Unlike many RPGs where difficulty is a simple slider, these modes fundamentally alter game mechanics, enemy behavior, and resource management. You can change between Explorer, Balanced, and Tactician at any time via the pause menu, but Honour and certain Custom mode settings lock you in.
Why it's here: This is your first and most critical choice. It determines whether you're here for a cinematic story, a faithful D&D challenge, or a brutal test of tactical mastery.
Explorer Mode is your story-focused, low-friction experience. Think of it as a D&D campaign where the Dungeon Master is heavily invested in your party's success. Key features include a +2 bonus to all proficiency rolls (making you significantly more competent in skills and attacks), a 100% HP increase for your party, and enemies with 30% less HP. Merchants offer a 20% discount, and the game disables multiclassing. This is the ideal choice for newcomers to CRPGs or D&D rules, or anyone who wants to prioritize narrative over punishing combat.
Balanced Mode is the default, intended experience—the "rules as written" 5th Edition D&D campaign. There are no artificial buffs or debuffs; your party and enemies operate on standard HP and proficiency scales. Combat is challenging but fair, demanding tactical thinking without being overly punitive. This mode fully enables mechanics like multiclassing. If you want the authentic Baldur's Gate 3 experience as the developers envisioned, offering a satisfying blend of story and strategic combat, Balanced is your go-to.
Tactician Mode is for veterans who crave a ruthless challenge. Here, the DM is out for blood. Enemies gain 20-30% more HP (bosses get even more), and they receive a +2 bonus to their attack rolls and spell save DCs. Their AI becomes brutally intelligent, actively targeting spellcasters, shoving characters off ledges, and finishing off downed party members. Resources are tighter, with Long Rest costs doubled to 80 camp supplies and merchant prices increased. Completing the game on Tactician unlocks the "Critical Hit" achievement. Choose this only if you're deeply familiar with D&D 5e mechanics and relish overcoming stacked odds through perfect strategy.
Honour Mode, introduced in Patch 5, is the ultimate test. It incorporates all the punishing changes of Tactician mode and then layers on over 30 boss fight tweaks, most notably granting bosses powerful Legendary Actions they can use on other creatures' turns. Its defining, nerve-wracking feature is the single, constantly-overwritten save file. If your entire party dies, you are given a choice: continue in a stripped-down Custom mode or delete the campaign forever. Victory, however, is prestigious, rewarding you with the "Foehammer" achievement and the coveted golden 'Shining Honour' D20 dice skin. This is for the absolute elite seeking the pinnacle of risk and reward.
Custom Mode is your "session zero" toolbox, allowing you to mix and match rules to create a truly personal experience. You can enable the brutal Honour ruleset (with boss Legendary Actions) without the permadeath single save, or grant yourself a massive Proficiency Bonus boost while also making enemies hyper-aggressive. You can tweak everything from camp supply costs (from 0.5x to 3x the normal amount) to merchant price multipliers, and toggle options like hiding NPC health or disabling enemy critical hits. It's perfect for tailoring the game after you understand your preferences.
Essential Exploration Controls: Your Toolkit for a Vertical World
Baldur's Gate 3's world is designed with immense verticality. Larian Studios' signature environmental interactivity means getting from point A to point B is rarely a simple walk. Mastering three basic actions outside of combat will save you from frustration and unlock hidden paths.
Why it's here: These are not combat commands; they are fundamental verbs for interacting with the world. Ignoring them is like playing a platformer without knowing how to jump.
Jump (Default: Spacebar on PC): This is your primary tool for traversal. Need to cross a gap, scale a short cliff, or reach a balcony? You'll be jumping. Every character can jump a distance based on their Strength score, making a high-Strength character or a spell like Enhanced Leap invaluable for the party. It consumes a portion of your movement for the turn, both in and out of combat, so plan your path accordingly.
Shove (Found under the "Common Actions" radial menu): A deceptively simple action with immense tactical utility. In exploration, you can shove heavy objects blocking doors or paths. In combat, its primary use is environmental elimination: pushing an enemy off a high ledge for instant, massive fall damage (and likely death). Be warned, enemies on Tactician and Honour mode are keenly aware of this tactic and will use it against you just as readily. Strength affects the chance of a successful shove against a resistant target.
Hide (Default: Shift+C for "Hide Party" / C for "Hide" on PC): Stealth is not just for Rogues. The Hide action allows any character to attempt to become obscured, entering a stealth state. While hiding, you can avoid enemy patrols during exploration, set up devastating ambushes to start combat with a surprise round, or reposition during a fight without provoking opportunity attacks. Success is based on a Stealth skill check versus enemies' Passive Perception. Breaking line of sight with objects or terrain is crucial. This is how you scout ahead, avoid unnecessary fights, and gain a decisive upper hand.
Takeaway: Your adventure's tone is set before you even roll your first stat. Choose Explorer to enjoy the story, Balanced for the true experience, Tactician for a grueling challenge, or Honour for legendary bragging rights. Then, embrace the game's physicality by constantly using Jump, Shove, and Hide to overcome obstacles and control engagements. This foundational knowledge separates those who merely play Baldur's Gate 3 from those who truly conquer it.
All 7 Origin Characters and Recruitment Options
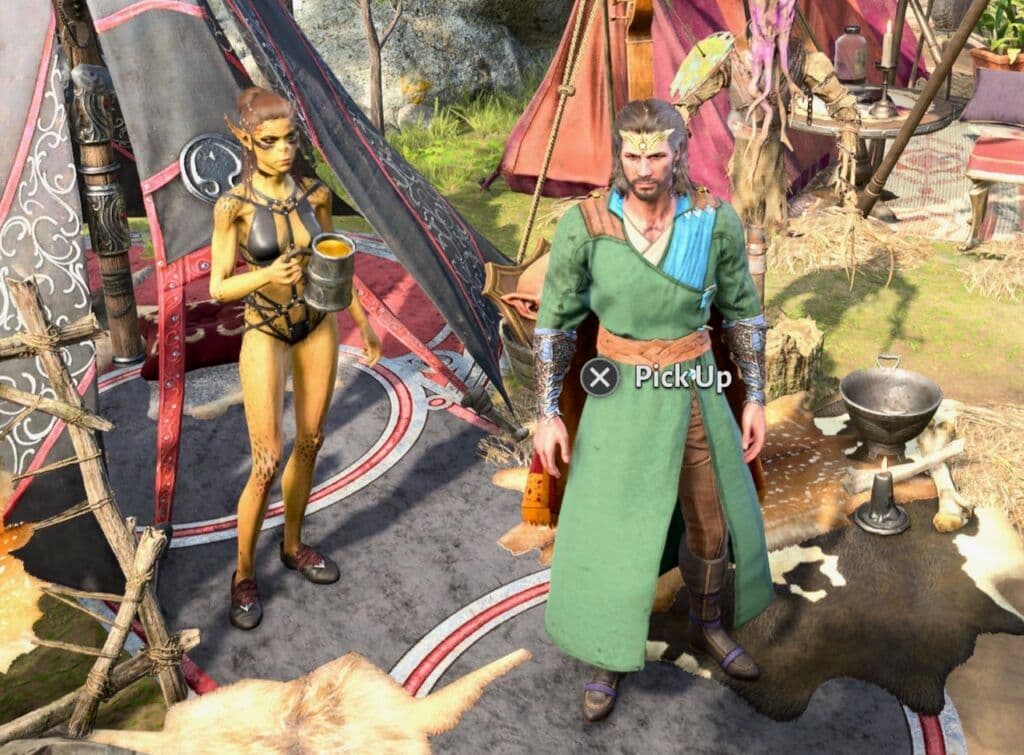
Playing as an Origin character like Gale changes how you interact with other companions.
All 7 Origin Characters and Recruitment Options
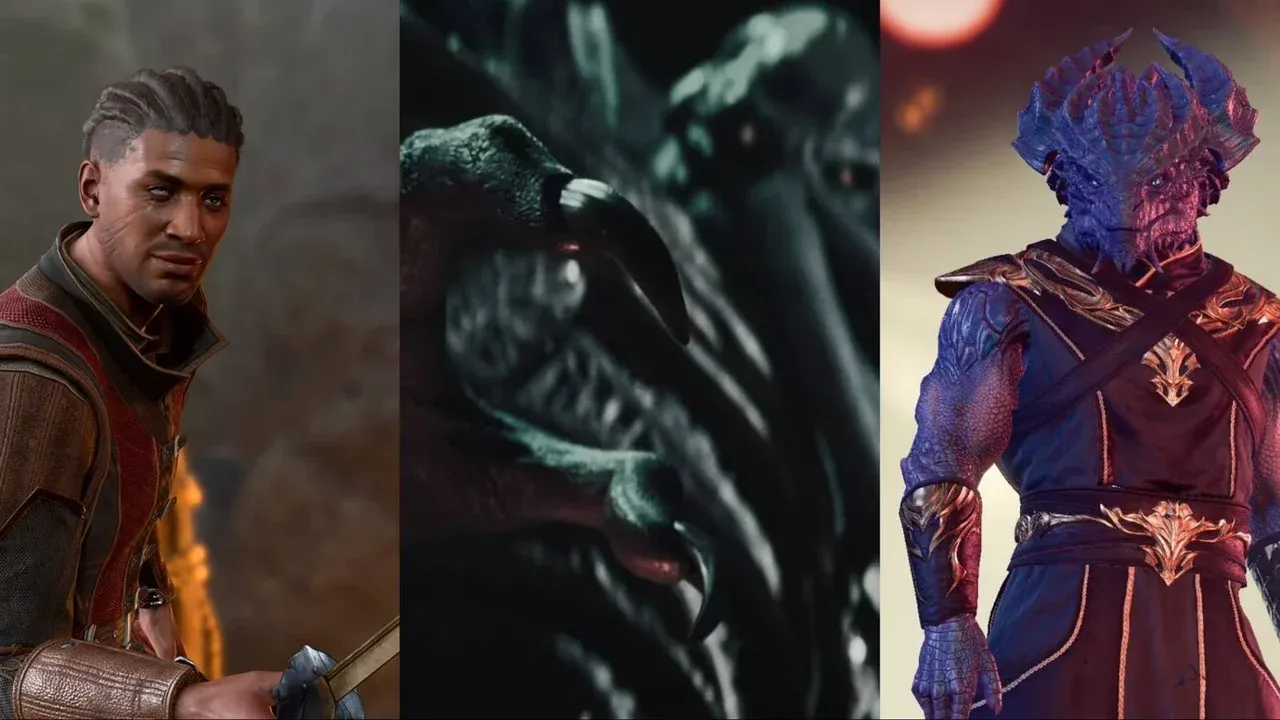
Baldur's Gate III offers a masterclass in role-playing depth through its seven Origin characters. These aren't just pre-made party members; they are fully realized protagonists with their own cinematic backstories, personal quests, and world-shaping choices. The central decision for every player is whether to play as one of these Origins, making their story the main narrative, or to recruit them as companions to witness their journeys from an outside perspective. This choice fundamentally alters your experience, offering either an intimate, first-person dive into a specific character's trauma and triumph, or a more traditional party-leader role managing a group of complex individuals.
Why This Distinction Matters: Choosing an Origin as your player character locks in their race, appearance, gender, and name (with the exception of The Dark Urge). You experience their unique dialogue options, internal monologues, and story beats directly. Recruiting them, however, leaves these elements intact while giving you, as a Custom or Dark Urge character, the agency to influence their fate. You cannot have both; selecting Gale as your avatar means you will not find him on the beach to recruit later. This makes your initial Origin choice one of the most consequential in the game.
Astarion (High Elf Rogue)
The charming, cynical vampire spawn is here because he represents a story of abuse, freedom, and the price of power. His quest to overcome his master, Cazador, is a gothic thriller woven into the campaign. Play as Astarion to experience his fear and self-loathing firsthand, including haunting dreams of his past and the constant struggle to hide his condition. Recruit Astarion to have a masterful Scout and skill-monkey in your party, whose loyalty can be earned (or exploited) as you help him navigate his bloody destiny. His story is best for players who enjoy themes of predation, survival, and moral ambiguity.
Gale (Human Wizard)
The bombastic wizard with a Netherese orb in his chest is here because his personal crisis is a ticking time bomb that ties directly into the lore of gods and magic. Play as Gale to wrestle with his hubris and desperation, enjoy visits from his Tressym familiar Tara at camp, and gain unique power-ups like consuming Shadow Weave. Recruit Gale to secure one of the game's most powerful arcane casters early on, whose personal quest offers high-risk, high-reward choices that can dramatically alter the endgame. He’s the ideal choice for players fascinated by D&D’s magical cosmology and who don’t mind managing a companion who needs to occasionally consume magical gear.
Lae’zel (Githyanki Fighter)
The fierce, pragmatic warrior is here because she provides the most direct lens into the Mind Flayer conflict and the alien, militaristic culture of the Githyanki. Play as Lae’zel to fully embody a creature of ruthless discipline, gaining unique interactions with other Githyanki and a deeper understanding of her people's dogma and rebellion. Recruit Lae’zel to add a brutally effective front-line fighter to your party, whose unwavering certainty (or eventual disillusionment) provides a compelling counterpoint to other companions' moral quandaries. She is essential for players who want the campaign’s central lore unpacked from an insider’s perspective.
Shadowheart (Half-Elf Cleric of Shar)
The secretive cleric with wiped memories is here because her journey of faith, deception, and self-discovery is one of the game’s most emotionally resonant arcs. Play as Shadowheart to feel the isolation and pain of her mysterious wound directly, and to navigate the tension between her indoctrination and latent identity entirely from within. Recruit Shadowheart to gain a versatile support caster and let her story unfold as a mystery for you to solve, where your choices can lead her toward darkness or redemption. Her narrative is a must for players who enjoy stories about lost identity, religious trauma, and slow-burn character development.
Wyll (Human Warlock)
The heroic "Blade of Frontiers" bound by a fiendish pact is here because he embodies the classic trope of a good man in a bad deal, with all the dramatic irony that entails. Play as Wyll to experience the weight of his reputation and the private shame of his contract with Mizora, making his heroic posturing feel more poignant. Recruit Wyll to add a Charisma-based spellblade to your party and become the arbiter of his soul, deciding whether he remains a virtuous martyr or embraces a more pragmatic, self-serving path. He is perfect for players who enjoy stories of doomed heroism and complex patron relationships.
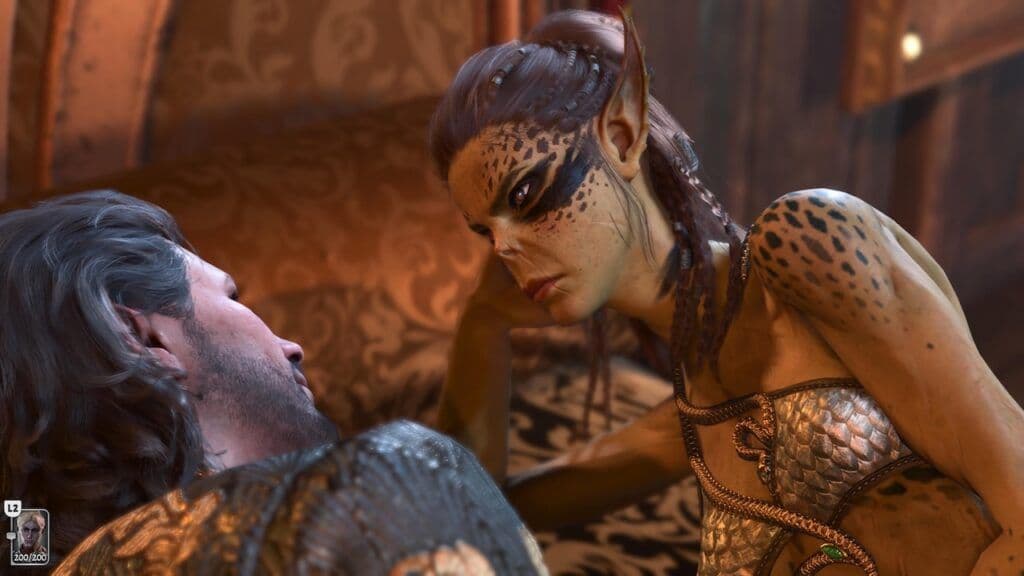
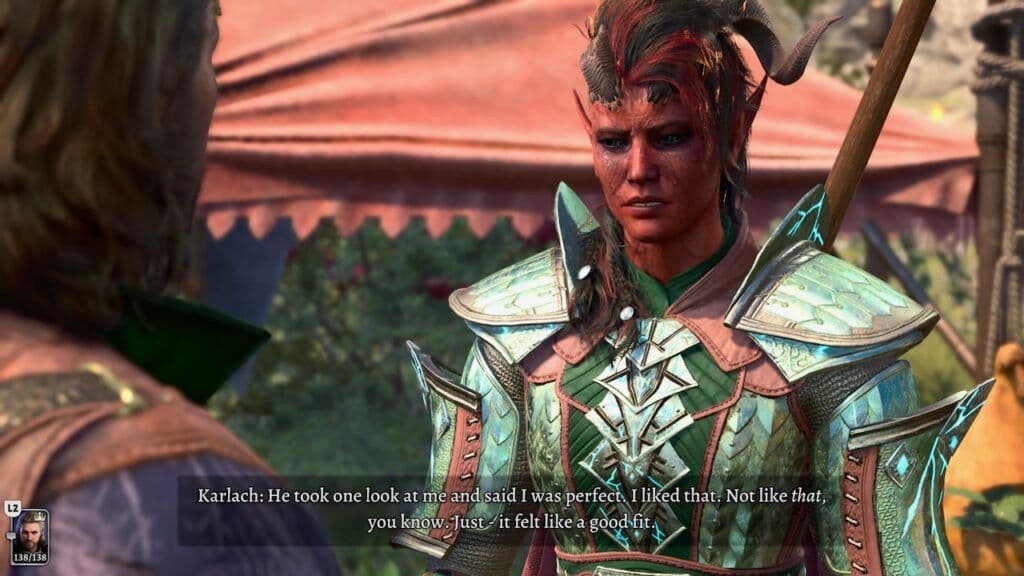
Karlach (Zariel Tiefling Barbarian)
The fiery-hearted refugee from the Hells is here because she brings unbridled passion, humor, and a visceral "live fast" urgency to the party. Play as Karlach to access her hilarious and heartfelt internal monologues, which offer a unique, unfiltered view of her personality that even her recruitment dialogue can't match. Recruit Karlach to add an incredibly durable and high-damage Barbarian to your ranks, and to guide her quest for revenge, repair, and simple joy in a world she’s been denied. She is the best choice for players seeking an emotionally uplifting companion amidst the game’s darker themes.
The Dark Urge (Customizable Race/Class)
The amnesiac with a blood-soaked past is here because it is the game's definitive "second playthrough" experience, offering a starkly different narrative from a standard custom character. Play as The Dark Urge to explore a storyline of inherent, compulsive violence, with unique scenes, items like the Deathstalker Mantle, and a profound ability to reshape the story through horrific acts or a hard-fought redemption. You cannot recruit The Dark Urge. This Origin exists solely as a protagonist, making it the purest form of a tailored, personal horror story within the Baldur’s Gate 3 framework. It is essential for players who have completed the game once and want to see how deeply the narrative can be twisted.
The Takeaway: Your choice between playing as or recruiting these characters defines your campaign’s perspective. For a first playthrough, recruiting them as a Custom character offers the broadest experience of the world and its inhabitants. For subsequent runs, playing as an Origin—especially The Dark Urge—unlocks unparalleled narrative depth and a completely fresh lens on Faerûn’s crises. Each Origin is a masterfully crafted story waiting to be either lived or witnessed.
Astarion, Gale, and Lae'zel: Starting Classes and Conditions
Origin characters like Gale and Lae'zel have complex personal questlines.
Astarion, Gale, and Lae'zel: Starting Classes and Conditions
These three companions are your first and most immediate recruitment options after the Nautiloid crash, forming the initial core of your party. Their starting classes are archetypal powerhouses—Rogue, Wizard, and Fighter—but each is shackled by a unique narrative condition that creates compelling gameplay burdens and story arcs. Understanding both their mechanical foundations and their personal curses is key to unlocking their potential and integrating them into your strategy.
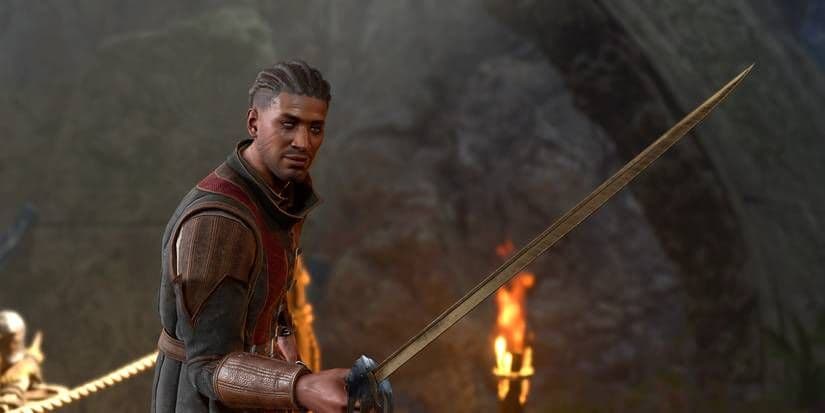
Astarion: The Vampire Spawn Rogue
Starting Class: Rogue (Arcane Trickster subclass).
Unique Condition: Vampire Spawn, requiring him to feed on blood to gain the "Happy" buff, which grants a +1 bonus to all Attack Rolls, Ability Checks, and Saving Throws. Conversely, if he doesn't feed, he gains the "Bloodless" debuff, imposing a -1 penalty to the same rolls.
Why He's Here: Astarion isn't just your standard scoundrel; he's a character whose core mechanic is a direct extension of his backstory. As a High Elf Rogue, his starting Dexterity of 17 makes him a stealth, lockpicking, and trap-disarming savant from the moment you meet him. However, his vampirism adds a layer of resource management that other characters lack. You must actively seek opportunities for him to feed (which can influence companion approval and open unique dialogue), balancing the powerful "Happy" buff against the potential social or moral consequences of his meals. This makes him a high-risk, high-reward companion whose optimal performance is tied to engaging with his dark needs, perfectly reflecting his narrative of desperate hunger for power and freedom.
Gale: The Wizard of Netherese Destruction
Starting Class: Wizard (Evocation subclass).
Unique Condition: The Netherese Destruction Orb embedded in his chest, which requires periodic infusion with magical artifacts to stabilize. Failure to feed it leads to a game-over sequence.
Why He's Here: Gale is your quintessential arcane artillery, starting with a formidable 17 Intelligence. He provides unmatched area-of-effect damage and utility spellcasting early on. Yet, his condition imposes the most direct and urgent mechanical burden of any origin character. He will periodically request you sacrifice powerful magical items—gear you might otherwise equip—to sate the orb. This creates a constant tension between empowering your party's gear and preventing a cataclysmic event. It transforms Gale from a simple caster into a strategic liability that must be actively managed, mirroring his story of ambition and the dangerous price of wielding power beyond mortal limits.
Lae'zel: The Githyanki Warrior
Starting Class: Fighter (Battle Master subclass).
Unique Condition: As a Githyanki, she is a stranger in a strange land, fiercely dedicated to a culture that views her current situation as a failure. Her personal quest is time-sensitive and deeply tied to the main plot.
Why She's Here: Lae'zel is your premier frontline tank and damage dealer from the get-go, boasting a starting Strength of 17 and proficiency in heavy armor. Her condition is less a debuff and more a narrative imperative that shapes her behavior and your priorities. Her Githyanki zealotry makes her intolerant and often abrasive, challenging your diplomatic choices. More mechanically, her personal quest to find a Crèche for purification is one of the most urgent paths in Act 1, pushing you toward challenging, high-level areas early. Her value is immense—offering reliable, resource-free damage and survivability—but she comes with a forceful personality and a storyline that demands immediate attention, reflecting her culture's ruthless, goal-oriented ethos.
Takeaway: Astarion, Gale, and Lae'zel provide a masterclass in how Baldur's Gate 3 blends mechanics with narrative. Astarion's need to feed, Gale's magical hunger, and Lae'zel's cultural mission aren't just backstory fluff; they are active gameplay systems that challenge your resource management, party composition, and quest priorities. They are powerful, but they come with strings attached—making them far more engaging than simple combat units.
Shadowheart, Wyll, Karlach, and The Dark Urge
Wyll is a noble Warlock known as the Blade of Frontiers.
Shadowheart, Wyll, Karlach, and The Dark Urge
This section completes our tour of Baldur's Gate 3’s seven Origin characters, focusing on the remaining four: the devoted cleric, the heroic warlock, the fiery barbarian, and the customizable amnesiac with a dark secret. While the previous section covered Astarion, Gale, and Lae'zel, these characters round out the core cast you’ll recruit in Act 1. Understanding their innate strengths and narrative hooks is key to deciding who to play as or bring into your party.
Shadowheart: The Secretive Cleric
- Primary Ability: Wisdom. This is the core stat for her Cleric class, governing her spellcasting power, spell save DC, and healing effectiveness. A high Wisdom score is non-negotiable for maximizing her divine potential.
- Background: Acolyte. As a devoted follower of Shar, the Goddess of Loss and Darkness, Shadowheart’s background grants her proficiency in Insight and Religion. This perfectly reflects her deep, if murky, connection to the divine and her knack for reading people and situations—skills that are constantly tested as her wiped memories begin to resurface. The Acolyte background also means she can earn Inspiration points by uncovering lost religious relics or navigating complex theological dilemmas.
- Why she’s here: Shadowheart is your go-to for divine magic and support from the moment you find her on the beach. Her high Wisdom makes her an excellent spellcaster, but her Acolyte background adds a crucial layer of role-playing depth. She’s not just a heal-bot; she’s a complex character whose skills in Insight and Religion will frequently unlock unique dialogue options and story paths, especially concerning the game’s many cults and deities. Compared to a custom Cleric, playing as Shadowheart offers a pre-woven, mysterious narrative that is central to the game’s main plot.
Wyll: The Blade of Frontiers
- Primary Ability: Charisma. As a Warlock, his power flows from his otherworldly Pact, and Charisma fuels his spellcasting, Eldritch Blast damage, and the effectiveness of his enchantments.
- Background: Folk Hero. Wyll’s reputation as a monster-hunting hero is baked into his mechanics. This background grants him proficiency in Animal Handling and Survival, reflecting his years of tracking beasts and surviving in the wilderness. More importantly, it defines how he earns Inspiration: by performing heroic deeds, protecting the innocent, and living up to his legendary moniker.
- Why he’s here: Wyll is the face of the party if you’re not playing a Charisma-based class yourself. His high starting Charisma makes him a formidable talker and a potent blaster. The Folk Hero background is a masterclass in integrated design—his skills and Inspiration conditions are a direct reflection of his in-game persona and personal quest. He’s the ideal choice for players who want a classic, morally-upbeat hero with a devilishly complicated secret (his pact with the cambion Mizora), offering a different flavor of drama compared to the more overtly tormented Astarion or Gale.
Karlach: The Fury of Avernus
- Primary Ability: Strength. This is the lifeblood of her Barbarian class, determining her melee attack accuracy, damage with heavy weapons, and the raw power of her Rages.
- Background: Outlander. Having escaped a decade in the hells, Karlach is a survivor accustomed to a harsh, untamed existence. Her Outlander background grants proficiency in Athletics and Survival, making her a powerhouse at shoving enemies, jumping gaps, and navigating the wilds. She earns Inspiration by embracing freedom, exploring uncharted territory, and overcoming the wilds—actions that directly counter her former life of infernal servitude.
- Why she’s here: Karlach is your premier frontline damage dealer. Her high Strength and Outlander skills make her the party’s powerhouse for both combat and environmental navigation. While Lae’zel is also a Strength-based fighter, Karlach’s Barbarian Rage offers a different, more reckless style of melee combat, and her Tiefling heritage and infernal engine create a unique blend of fury and pathos. Her Outlander background seamlessly supports her narrative of someone rediscovering the simple joys (and challenges) of the natural world after escaping a mechanized hell.
The Dark Urge: The Blank Slate of Violence
- Primary Ability: Variable (Class-Dependent). Unlike other Origins, The Dark Urge is fully customizable. You choose their Race, Class, and appearance. Therefore, their primary ability is whatever is most important for your chosen class (e.g., Strength for a Barbarian, Charisma for a Sorcerer).
- Background: Haunted One (Exclusive). This is the only Origin with a unique background. It grants proficiency in two of the following skills: Medicine, Intimidation, or Survival. More importantly, it’s the narrative engine for this Origin. The Haunted One is haunted by violent, amnesiac impulses and earns Inspiration by giving in to these dark urges, committing acts of cruelty, and uncovering bloody secrets. It cannot be selected by any other character.
- Why they’re here: The Dark Urge represents a unique narrative experience, sitting between a custom character and a defined Origin. You get full build flexibility, but with a deeply integrated, darkly compelling story that can dramatically alter the game’s events. Playing as The Dark Urge is for those who want to explore the extremes of the game’s morality system. It’s a more narrative-focused choice than a standard custom character, offering exclusive scenes and a constant internal struggle that can lead to some of the game’s most shocking moments. It’s the ultimate “what if?” scenario for a repeat playthrough.
Takeaway: Whether you seek divine mystery with Shadowheart, heroic drama with Wyll, unrestrained fury with Karlach, or a customizable descent into darkness with The Dark Urge, these four Origins provide powerful and distinct starting points. Their recommended ability scores are your guide to mechanical effectiveness, while their backgrounds are the key to role-playing them authentically and earning precious Inspiration points along the way.
Racial Features for All 11 Base Races
Your choice of race is the foundational layer of your character’s identity in Baldur’s Gate 3. It’s the only decision made at character creation that is truly permanent, as even the enigmatic Withers cannot change your ancestry. Beyond defining your character’s appearance and role-playing context, your race grants a suite of innate, passive bonuses known as Racial Features. These features can provide crucial advantages in exploration, social interaction, and combat. While any race can be paired with any class for a viable build, some racial traits synergize exceptionally well with certain playstyles. This section breaks down the unique features for all 11 base races, helping you understand the mechanical heart behind your character's heritage.
Dragonborn
Why it’s here: The most visually striking race, Dragonborn are defined by their elemental heritage and powerful, if situational, active ability. All Dragonborn share the Draconic Ancestry trait, which determines both their damage resistance and the type of their Breath Weapon—a powerful cone-shaped attack usable once per Short or Long Rest. This makes them naturally tanky against a specific element and gives them a reliable Area-of-Effect (AoE) option early on, a rarity for non-spellcasters. However, the Breath Weapon uses a full Action and does not scale significantly with level, making it less impactful in later acts compared to class abilities. Best for: Players who want a resilient martial character (Fighter, Paladin, Barbarian) with a built-in "oh no, I'm surrounded" button, or Charisma-based casters (Sorcerer, Warlock) who appreciate the added durability.
Drow
Why it’s here: The dark elves of the Underdark offer a potent mix of social notoriety and excellent innate spellcasting. All Drow possess Superior Darkvision (24m range), Fey Ancestry (advantage against being Charmed), and Drow Weapon Training (proficiency with rapiers, shortswords, and hand crossbows). Their standout feature is a suite of racial spells: the cantrip Dancing Lights, followed by Faerie Fire at level 3 and Darkness at level 5, each once per Long Rest. Faerie Fire grants advantage on attacks against revealed creatures, while Darkness is a supremely powerful tactical tool for controlling the battlefield. The subrace choice (Lolth-Sworn or Seldarine) primarily affects role-playing and NPC reactions, especially in Act 1. Best for: Charisma or Dexterity-based classes like Rogue, Sorcerer, or Warlock, where the weapon proficiencies and spells like Darkness can be exploited for massive advantage.
Dwarf
Why it’s here: Dwarves are the quintessential sturdy front-liner, trading some movement speed (7.5m) for exceptional durability. All Dwarves have Darkvision (12m), Dwarven Resilience (advantage on saves vs. Poison, resistance to Poison damage), and Dwarven Combat Training (proficiency with battleaxes, handaxes, light hammers, and warhammers). Their subraces specialize further: the Gold Dwarf gains Dwarven Toughness for bonus HP every level, the Shield Dwarf gets Dwarven Armour Training (Light & Medium Armor proficiency), and the Duergar (a subrace) gets Superior Darkvision, advantage against illusions/being Charmed/Paralyzed, and later, the incredibly useful spells Enlarge and Invisibility. Best for: Gold Dwarf for any front-line class wanting extra HP; Shield Dwarf for casters like Wizards or Sorcerers who want better armor without multiclassing; Duergar for any build that benefits from at-will Invisibility, such as Rogue or Fighter.
Elf
Why it’s here: Graceful and perceptive, Elves are a versatile choice with strong defensive and utility features. All Elves have Darkvision (12m), Fey Ancestry, Keen Senses (Perception proficiency), and Elven Weapon Training (Longsword, Shortsword, Longbow, Shortbow). The High Elf subrace adds a free cantrip from the Wizard spell list (like Fire Bolt or the utility-focused Friends), making it a fantastic dip for any character wanting a magical edge. The Wood Elf subrace gains Fleet of Foot (10.5m movement) and Mask of the Wild (Stealth proficiency), making them naturally faster and stealthier. Best for: High Elf is excellent for any class, as a free cantrip is always useful, particularly for Wizards or Fighters wanting a ranged option. Wood Elf is ideal for Rangers, Rogues, and Monks who live and die by mobility and stealth.
Githyanki
Why it’s here: Arguably the most mechanically powerful race, Githyanki are psionic warriors from the Astral Plane. They possess Martial Prodigy, granting proficiency with Light and Medium Armor and a selection of martial weapons (shortswords, longswords, greatswords). Their Astral Knowledge feature lets them choose a skill proficiency, which can be changed after each Long Rest, offering incredible flexibility. Most powerful are their innate psionic spells: Mage Hand from the start, Enhanced Leap at level 3, and Misty Step (a bonus-action teleport) at level 5. Best for: Almost any build, but particularly Fighters, Monks, and Wizards. The free Medium Armor proficiency alone is a game-changer for squishy spellcasters, and Misty Step is one of the best mobility spells in the game.
Gnome
Why it’s here: Small in stature but mighty in mind, Gnomes are the ultimate savers against debilitating magic. Their core feature, Gnome Cunning, grants advantage on all Intelligence, Wisdom, and Charisma saving throws. This makes them exceptionally resistant to a wide array of crowd-control and charm effects. Subraces add flavor: Deep Gnomes get Superior Darkvision and Stone Camouflage (advantage on Stealth checks); Forest Gnomes get Darkvision and the Speak with Animals spell; Rock Gnomes get Darkvision and Artificer's Lore (double proficiency on History checks). Best for: Spellcasting classes like Wizard, Sorcerer, or Cleric who want to maintain concentration and resist enemy spells. Deep Gnome is a top-tier choice for Rogues due to its stealth bonus.
Half-Elf
Why it’s here: Offering the best of both human and elven worlds, Half-Elves are a supremely flexible and popular choice. They inherit Darkvision and Fey Ancestry from their elven side. Critically, they also gain the Civil Militia feature from their human heritage, which grants proficiency with shields, spears, pikes, halberds, and glaives. This makes them the only non-human race with innate shield proficiency, a massive defensive boon for any class. Subraces determine their additional elven traits: High Half-Elf gets a Wizard cantrip; Wood Half-Elf gets increased movement and Stealth proficiency; Drow Half-Elf gets the Drow's racial spell progression (Dancing Lights, Faerie Fire, Darkness). Best for: Any class that doesn't natively get shield proficiency, especially Sorcerers, Wizards, and Warlocks. The Wood Half-Elf is also a top pick for martial classes due to its speed.
Half-Orc
Why it’s here: The premier race for brutal melee efficiency, Half-Orcs are engines of destruction. Their features are combat-focused: Darkvision, Menacing (Intimidation proficiency), Relentless Endurance (once per Long Rest, dropping to 1 HP instead of 0), and Savage Attacks (rolling additional weapon damage dice on a critical hit). Relentless Endurance is a phenomenal "get out of death free" card, while Savage Attacks synergizes perfectly with builds designed to score frequent critical hits. Best for: Melee powerhouses like Barbarians, Fighters, and Paladins. The survivability and enhanced critical damage make them a constant threat on the front lines.
Halfling
Why it’s here: Don't let their size fool you—Halflings are lucky survivors. Their iconic trait is Lucky, which allows them to reroll any natural 1 on an attack roll, ability check, or saving throw. This significantly reduces the chance of catastrophic failure. They are also Brave, giving them advantage on saving throws against being Frightened. Lightfoot Halflings gain Naturally Stealthy (Stealth proficiency), while Strongheart Halflings gain Strongheart Resilience (advantage on Poison saves, resistance to Poison damage). Best for: Any build where consistency is key. Rogues and Rangers love the stealth bonus of Lightfoot, while Strongheart is great for front-liners facing many poisonous foes. The Lucky trait is universally powerful.
Human
Why it’s here: Humans are the versatile jack-of-all-trades, though their features are often considered less flashy than other races. They gain Civil Militia (shield and polearm proficiency) and Human Versatility, which grants one extra skill proficiency of your choice. They also have a slightly increased carrying capacity. While they lack darkvision or innate spells, their bonus skill and weapon/armor proficiencies allow them to fill gaps in any party composition from level 1. Best for: Truly any class, but they shine when their extra skill and weapon proficiencies cover a weakness in your chosen class kit. A Human Wizard with a shield and extra skill can be surprisingly robust.
Tiefling
Why it’s here: Descended from devils, Tieflings are natural survivors with fiery magic and resistance. All Tieflings have Darkvision and Hellish Resistance (resistance to Fire damage). Their subrace determines their infernal lineage and spells: Asmodeus Tieflings get Produce Flame, Hellish Rebuke (a damage-dealing reaction), and Darkness; Mephistopheles Tieflings get Mage Hand, Burning Hands, and Flame Blade; Zariel Tieflings get Thaumaturgy, Searing Smite, and Branding Smite. The fire resistance is invaluable throughout the game, and the spell packages offer solid combat utility. Best for: Asmodeus is great for Charisma casters (Sorcerer, Warlock, Bard) thanks to Hellish Rebuke and Darkness. Zariel, with its smite spells, is a natural fit for Paladins or Fighters.
Advanced Character Mechanics: Respec and Multiclassing
The respec interface allows you to change your class, subclass, and abilities.
Advanced Character Mechanics: Respec and Multiclassing
Your initial character creation choices are not a life sentence. Baldur's Gate 3 provides two powerful, interconnected systems for build optimization and experimentation: respeccing via the NPC Withers, and multiclassing. Mastering these mechanics is the key to transforming a good party into a great one, allowing you to correct mistakes, adapt to challenges, and explore the immense combinatorial depth of the game's 12 classes and 46 subclasses.
Why it's here: This section moves beyond the basics of "what" your character is to the advanced "how" of refining them. While earlier sections covered starting classes and racial features, here we explain the tools that let you bend and reshape those foundations to your will. It's the bridge between initial setup and true build optimization.
The Key to All Changes: Finding Withers
Before you can reshape your party, you must recruit the unlikeliest of barbers: Withers, a skeletal NPC who becomes your camp's resident life coach (and un-life coach). You'll find him early in Act 1 within the Dank Crypt. The most direct path is near the Overgrown Ruins waypoint, where you can shoot a hanging stone block to collapse the floor and jump down. After a brief encounter, awaken him from a sarcophagus. He will soon appear at your camp, offering three core services: respeccing any character, reviving dead companions for 200 gold, and hiring generic "hirelings" for 100 gold each. His most transformative service, however, is the respec.
Why this matters: Withers is non-negotiable for advanced play. He is the single point of access for rebuilding characters, making his early recruitment a critical milestone. Unlike many RPGs that lock you into choices, his presence ensures you’re never permanently stuck with a build you dislike.
Respeccing: A Second Chance at Character Creation
For a flat fee of 100 gold, Withers will reset any character—your custom avatar or any companion—back to level 1. You then immediately re-level them to their current experience total, making all class, subclass, ability score, skill, and spell choices anew. You can do this an unlimited number of time
What You CAN Change:
- Class & Subclass: Turn Gale from a Wizard into a Barbarian, or respec Shadowheart from a Trickery Domain Cleric to the more potent Light or Life Domain.
- Ability Scores: Completely reallocate your 27-point buy. This is perfect for enabling a new multiclass combo or fixing a stat spread.
- Skill Proficiencies: Choose new skills upon re-leveling.
- Spells & Cantrips: Select an entirely different spellbook.
What You CANNOT Change:
- Race & Subrace: Your biological template is permanent.
- Background: This narrative choice and its two associated skill proficiencies are fixed.
- Story & Dialogue: A respec'd companion's personal quests and interactions remain tied to their origin. A Barbarian Wyll is still "The Blade of Frontiers" bound to Mizora.
Key Consideration: For Oathbreaker Paladins, you must first pay the Oathbreaker Knight at camp to restore your original oath before Withers will allow a respec.
Why respec belongs here: It is the foundational tool for optimization. It allows you to:
- Correct Mistakes: Misplaced a feat at level 4? Redo it.
- Experiment Freely: Test a subclass or spell list with zero long-term penalty.
- Optimize Companions: Tailor every party member to fill a precise role in your strategy, regardless of their default class.
Multiclassing: Combining Classes for Synergistic Power
Multiclassing is the practice of taking levels in more than one class as you level up, unlocking unique combinations and capabilities not available to a pure-class character. To begin multiclassing, simply click the "Multiclass" button in the upper-right corner of the level-up screen.
Core Rules & Limitations:
- Level Cap: The maximum character level is 12, but the sum of your class levels cannot exceed this. You could be a Fighter 7 / Wizard 5, for example.
- Ability Score Prerequisites: To take a level in a new class, your character must meet a minimum ability score (typically 13) in the key ability for that class and your current class. This prevents nonsensical combinations like a 8-Intelligence Wizard dip.
- Proficiency Scaling: You gain some, but not all, proficiencies from your new class. You typically get light armor and weapon proficiencies, but not medium/heavy armor or shields unless the new class explicitly grants them.
Strategic Reasons to Multiclass:
- Front-loaded Features: A one- or two-level "dip" can provide enormous value. A two-level dip into Fighter gives any martial character Action Surge (an extra action) and a Fighting Style.
- Spcasting Synergy: Classes that use the same primary ability can blend powerfully. A Sorcerer (Charisma) / Warlock (Charisma) can use the Warlock's short-rest-recharging spell slots to fuel Sorcerer metamagic.
- Filling Gaps: Add utility to a specialist. A level in Rogue can give any character Expertise in two skills, making them a superlative lockpicker or persuader.
Why multiclassing belongs here: It represents the pinnacle of mechanical customization. While respeccing lets you change your path, multiclassing lets you walk two paths at once. It’s for players who want to build a charismatic Paladin who can also sneak like a Rogue, or a hardy Ranger who can also cast potent Wizard spells. The system rewards deep system knowledge and planning.
The Powerful Synergy Between Respec and Multiclassing
These systems are designed to work together. The most effective way to plan and execute a complex multiclass build is to use Withers first. Here’s the optimal workflow:
- Respec your character back to level 1 for 100 gold.
- Re-allocate your ability scores to meet the prerequisites for all the classes you plan to combine (e.g., Str 13 for Fighter, Cha 13 for Paladin).
- Begin leveling up, taking your classes in the precise order you desire to ensure you get the right features at the right time.
This synergy removes the anxiety of "ruining" your build. You can theorycraft a potent combination like a Gloom Stalker Ranger 5 / Assassin Rogue 4 / Battle Master Fighter 3, use Withers to set the perfect starting stats, and then execute the leveling plan perfectly.
Final Takeaway: Do not view your initial class selection as final. Use Withers liberally as a 100-gold testing lab. Combine his services with multiclassing to craft uniquely powerful characters that transcend their origins. This freedom is what elevates Baldur's Gate 3 from a game with great character creation to a game with limitless character evolution.
Act 1 Survival: Early Game Tips and Resource Management
Navigating the opening hours of Baldur’s Gate 3 can feel like being thrown into the deep end of the Sword Coast. You’re low on resources, unfamiliar with the rules, and surrounded by threats. This section is your life raft, providing the essential strategies for surviving Act 1 and mastering the two most critical resources in the game: your health and your time. Forget complex builds for now; this is about the fundamentals of exploration, combat, and knowing when to rest.
Prioritize Exploration and Looting
Why it’s here: Your power in the early game comes from gear and gold, not levels.
The opening beach after the Nautiloid crash is a treasure trove disguised as a disaster site. Hold down the Alt key (or your platform’s equivalent) to highlight every interactable item. Loot everything: crates, corpses, and chests. Early gold is essential for purchasing vital supplies like healing potions, arrows, and spell scrolls from traders. More importantly, scouring every corner yields key survival tools. Find the Shovel north of the wreckage; without it, you cannot unearth buried treasure later. Pick up the Thieves’ Tools near the first locked chest—they are a finite resource early on and are crucial for Astarion or a Dexterity-based character to unlock doors and containers that hide better gear. This thorough approach turns the Ravaged Beach from a starting area into your first major resource hub.
Secure Early Power Spikes
Why it’s here: A few key actions can dramatically increase your party’s combat effectiveness within the first hour.
Two opportunities on the Nautiloid ship set the tone for your entire run. First, rescue Shadowheart from her pod. Having a Cleric with healing and support spells like Bless and Guiding Bolt immediately makes your party more durable and deadly. Second, consider the high-risk, high-reward play: defeating Commander Zhalk. He wields the Everburn Blade, a rare Greatsword that deals bonus fire damage. While challenging at level 1, taking him down provides a weapon that can carry a Strength-based character like Lae’zel through much of Act 1. If that fight seems too daunting, simply ensure you recruit Us, the Intellect Devourer, as a temporary ally; every extra action in early fights counts.
Master the Action Economy
Why it’s here: Winning fights at low levels is less about brute force and more about smart action usage.
In the D&D 5e ruleset, action economy is king. Use your environment: shove enemies off cliffs for instant kills, dip your weapon in a candle or brazier to add fire damage, and throw Grease bottles or Alchemist’s Fire to control the battlefield. Don’t just use the basic “Attack” action. Utilize Shove, Hide, and Jump to gain positional advantages. For spellcasters, remember that Cantrips like Fire Bolt and Ray of Frost are unlimited. Save your precious spell slots for critical moments. Also, use the free, once-per-short-rest abilities from your Background (like the Folk Hero’s Hearth’s Blessing)—they provide small but meaningful bonuses.
Manage Short Rests Aggressively
Why it’s here: This is your primary tool for sustaining your party between major battles without wasting camp supplies.
A Short Rest is a free action you can take twice per long rest cycle. It heals each character for a portion of their hit points and, crucially, recharges specific class abilities. For your Fighter (Lae’zel), it restores Action Surge and Second Wind. For your Warlock (Wyll), it gives back all spell slots. For your Wizard (Gale), it does nothing for slots, but it can heal him. Get into the rhythm of short-resting after any moderately difficult encounter. There is no penalty, and it ensures your frontline fighters and Warlocks are always operating at peak capacity. Think of it as a mandatory cooldown between skirmishes.
Be Strategic with Long Rests
Why it’s here: Long Rests are necessary but costly, and their timing impacts story progression.
A Long Rest at camp fully heals the party, restores all spell slots and class features, and allows you to consume Camp Supplies (food, drink, etc.) from your collective inventory. While vital, you must manage your supply stockpile. Early on, supplies can be scarce. Loot every Supply Pack, bottle of wine, and chunk of cheese you see to build a reserve. The key is to not long rest after every fight, but to use them strategically: before tackling a known boss (like the Goblin Camp leaders) or when your spellcasters are completely drained. Importantly, many companion story scenes and plot advancements are triggered at camp during Long Rests. Resting too infrequently can cause you to miss these sequences, so balance resource management with narrative progression.
Recruit Companions Early and Often
Why it’s here: A full, diverse party is your greatest survival asset.
You can have up to three companions with you. Do not wander the wilderness alone. Recruit Astarion, Gale, and Lae’zel as soon as you hit the beach. Seek out Wyll at the Druid Grove and Karlach on the Risen Road. A balanced party covering healing (Shadowheart), arcane magic (Gale), stealth and locks (Astarion), and frontline damage (Lae’zel) will handle far more challenges than a lopsided group. Furthermore, companions can use their unique skills to bypass obstacles—Astarion’s Sleight of Hand for traps, Lae’zel’s Athletics for jumps, Gale’s Intelligence for arcane knowledge—saving you resources and health.
Find Withers in the Dank Crypt
Why it’s here: This unlocks your safety net for build mistakes and character death.
Shortly after the crash site, explore the Overgrown Ruins along the coast to find the Dank Crypt. Inside, you’ll face some easy skeletons and find a sarcophagus. Opening it releases Withers, an undead NPC who will thereafter appear at your camp. His services are non-negotiable for survival. For a small gold fee, he can resurrect any dead companion, sparing you from a game over. He also allows you to Respec your character (and companions) for 100 gold, letting you reallocate ability scores, change classes, or fix poor early choices. This makes early experimentation much less punishing.
The Takeaway: Act 1 survival hinges on prudent resource cycling and thorough exploration. Hoard camp supplies, use Short Rests as your primary healing tool, and only Long Rest when necessary or to advance stories. Loot meticulously to fund your operations, and always travel with a full, balanced party. Master these fundamentals, and the terrors of the Wilderness will become manageable challenges.
Optimizing Your Build: Equipment and Inspiration
Choosing the right armor is essential for maximizing a Barbarian's performance.
Optimizing Your Build: Equipment and Inspiration
You’ve chosen your race, class, and background. You’ve navigated the early game. Now, it’s time to refine your character from a functional adventurer into a powerhouse. This final stage of optimization is where your build truly comes together, moving beyond core stats to leverage two of the most impactful systems in Baldur's Gate 3: your gear and your Inspiration. While previous sections covered the foundation, this guide focuses on the finishing touches that turn a good character into an unstoppable force, especially in the critical early-to-mid game.
Strategic Equipment Choices for Early Game Builds
Gear is more than just stat sticks; it’s the primary tool for amplifying your character’s strengths and covering their weaknesses. In the early game (Acts 1 and early Act 2), you’re limited in what you can find or afford, making targeted acquisition crucial.
Why it's here: The right equipment can effectively grant you extra feats, spell-like abilities, or massive statistical advantages long before you’d earn them through leveling. While you can’t plan for every legendary item, you can and should target gear that synergizes with your primary ability score and combat role.
- For Martial Powerhouses (Fighters, Barbarians, Paladins): Your goal is to increase your chance to hit and your damage per hit. Early on, this means finding any +1 weapon, which provides both a bonus to Attack Rolls and Damage Rolls. The Everburn Blade, acquired from Commander Zhalk on the Nautiloid, is a classic prize for melee builds due to its persistent fire damage. For defense, prioritize increasing your Armor Class (AC). A simple Chain Mail (AC 16) is a massive upgrade for any Strength-based character, while Scale Mail (AC 14 + Dex modifier, max +2) is ideal for Rangers or Dexterity-based Fighters. Don’t overlook shields; a +1 Shield is often better than a two-handed weapon if it keeps you alive.
- For Skilled Strikers (Rogues, Rangers, Monks): Your effectiveness hinges on landing powerful, precise attacks. Weapons that grant advantage on Attack Rolls, like the Sussur Dagger from the Underdark (which also silences on hit), are invaluable for ensuring your Sneak Attack or other single-strike abilities connect. Look for gear that boosts your key skills, such as Gloves of Thievery (which grant Advantage on Sleight of Hand checks) or the Graceful Cloth (which increases Dexterity and grants Advantage on Dexterity Saving Throws). For Monks, any item that increases your unarmed damage or grants bonus actions is a top priority.
- For Arcane Casters (Wizards, Sorcerers, Warlocks): Your primary concern is protecting your low HP and maintaining Concentration on spells. The Warped Headband of Intellect, found on the ogre Lump in the Blighted Village, instantly sets your Intelligence to 17—a game-changer for early-game Wizards. For defense, the Bracers of Defense (found in the Whispering Depths) grant +2 to AC when not wearing armor, perfect for mage armor users. The Pearl of Power (sold by several vendors) is arguably the best early-game item for any caster, granting a free 3rd-level spell slot recovery once per Long Rest.
- For Divine & Support Casters (Clerics, Druids, Bards): You need to bolster your allies and withstand enemy attention. The Shield of Devotion (+2 AC and an extra use of Shield of Faith) is excellent for front-line Clerics. For healers, the Hellrider's Pride gloves (bought from Zevlor in the Emerald Grove) cause any healing you provide to also grant Resistance to Bludgeoning, Piercing, and Slashing damage—dramatically increasing your healing efficiency. Any item that increases your Spell Save DC (like the Melf's First Staff) makes your control and debuff spells harder for enemies to resist.
The Takeaway: Don’t just equip the item with the highest gold value. Actively seek out gear that directly complements your class’s core function. A +1 weapon for a Fighter or a DC-increasing item for a Wizard will have a far greater impact on your combat performance than a marginally higher AC from a mismatched armor type.
Mastering Inspiration Point Mechanics
While equipment handles the numbers, Inspiration handles the narrative. This is your get-out-of-jail-free card for failed dice rolls, but its power is often misunderstood or underutilized.
Why it's here: Inspiration is a shared, renewable resource that gives you direct control over the narrative and skill-check outcomes. Unlike Bardic Inspiration (a class-specific combat buff), general Inspiration is earned through roleplaying and can be the difference between peacefully resolving a conflict and starting a bloody battle.
- Earning Inspiration: You earn Inspiration points by having a character in your party perform an action that aligns with their Background. Each background has a list of specific "Inspirational Events." For example, a Folk Hero might earn Inspiration for saving innocents, while a Sage earns it for uncovering ancient lore. These points are shared across the entire party, with a maximum cap of 4. If you earn Inspiration while at the cap, you still get the associated experience points, but you lose the Inspiration point itself. This makes it imperative to spend them regularly.
- Spending Inspiration: When you fail an Ability Check, Saving Throw, or even certain Attack Rolls that appear in the dice-rolling UI, you will be prompted to "Roll Again" by spending one Inspiration point. You can spend multiple points to re-roll a single check repeatedly. Crucially, all modifiers from your original roll (like Guidance, Advantage, or items) still apply to the re-roll. This makes Inspiration incredibly powerful when combined with buffs—it’s not just a second chance, it’s a second boosted chance.
- Strategic Use: The key is proactivity. Don’t hoard Inspiration until the final boss. Use it to:
- Pass critical story checks (e.g., persuading a major NPC, uncovering a hidden truth).
- Disarm deadly traps safely (using Inspiration to re-roll a failed Sleight of Hand check does not trigger the trap, unlike using another set of Thieves’ Tools).
- Secure rare loot by picking a difficult lock.
- Maintain party approval by succeeding on dialogue checks with companions.
The Takeaway: Inspiration is a core role-playing mechanic with direct gameplay benefits. Choose your character’s Background not just for its skill proficiencies, but for the type of actions that will reliably fuel your Inspiration engine. Play to your Background’s theme, spend your points wisely on high-stakes rolls, and never walk around with a full cap of 4—you’re wasting potential gains.
Synergy: Where Gear and Inspiration Meet
True optimization occurs at the intersection of these systems. A well-geared character creates more opportunities to earn Inspiration, and Inspiration ensures you don’t miss the checks to acquire that gear. For instance, a Rogue with the Gloves of Thievery has Advantage on lockpicking. If they still fail a check on a legendary chest, they can spend Inspiration for another roll with that same Advantage. Similarly, a high-Charisma character wearing the Silver Pendant (which grants Friends) can use the spell for Advantage on a Persuasion check, and then spend Inspiration if it fails, effectively getting three rolls to secure a vital vendor discount or quest reward.
Final Recommendation: Treat your equipment loadout as your character’s static, predictable power. Treat your Inspiration points as your dynamic, narrative-driven safety net. By the end of Act 1, you should have a clear equipment goal for each party member and a firm habit of playing into your Background to keep a reserve of 1-2 Inspiration points for emergencies. This combination of preparation and adaptability is the hallmark of a truly optimized adventurer ready for whatever the Sword Coast throws at you.