
How to Master the UI and Controls in Baldur's Gate 3
Before you can lead your party through the Forgotten Realms, you need to know how to navigate the world itself. Mastering the UI and controls in Baldur's Gate III is your first step from overwhelmed adventurer to confident commander. Let’s break down the essential shortcuts and interface tricks that’ll save you time and frustration from the very first click.
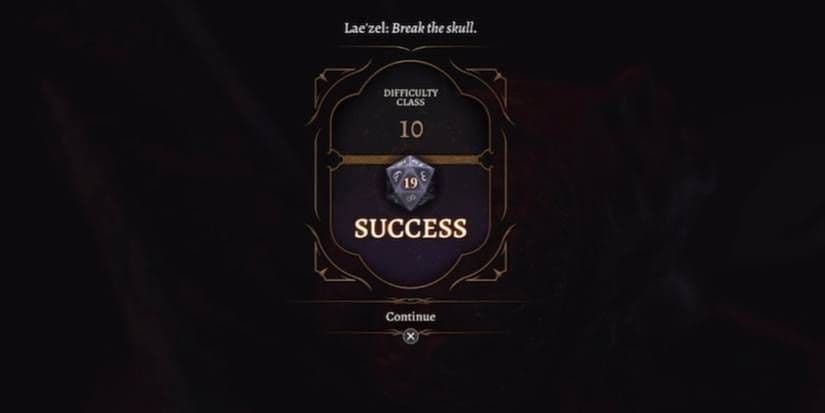
Understanding the Difficulty Class (DC) on the dice roll screen.
Essential World Navigation Shortcuts
Your screen is packed with information, but these four key commands cut through the clutter instantly. Trust me, making these second nature will change how you play.
First, never miss loot again. In the World view, hold [Alt] to highlight lootable bodies and items nearby. This brings up floating labels over every corpse, crate, and pouch, ensuring you don’t walk past a crucial potion or key. It’s the single best habit to form early.
Tap [Alt] frequently as you explore new areas. You’ll be shocked at how many secret stashes and hidden pouches you’d otherwise miss.
Second, situational awareness is everything. Also in the World view, press [~] (the Tilde key) to activate character highlighting. This outlines every entity through walls and doors: your party members glow blue, neutral NPCs appear yellow, and hostile NPCs shine red. It’s perfect for scouting ambushes, spotting patrols, or finding a hidden ally in a crowded room.
Third, control time itself. Outside of combat, press [Spacebar] to activate Turn-Based Mode. This freezes the world, letting you carefully position your party to avoid patrolling guards, synchronize a stealthy approach, or safely navigate a trapped hallway. It transforms chaotic environmental puzzles into manageable, tactical steps.
Finally, when you’re revisiting dialogue or just want to speed through a conversation you’ve seen, press [Spacebar] during Dialogue to skip lines. This is a lifesaver on subsequent playthroughs or when you’re eager to get back to the action.
Foundational Interface Habits
Beyond those core shortcuts, a few simple habits will make the UI work for you. Always keep an eye on the tooltips that appear below the minimap—they’re your real-time guide for new mechanics like jumping or shoving. When managing anything, remember that right-clicking almost always brings up a contextual menu with all your options, from inspecting items to initiating trades.
This might feel like a lot at first, but focus on just two things: holding [Alt] to find loot and using [~] to see threats. Once those are muscle memory, you’re not just playing Baldur’s Gate III—you’re mastering it. Let’s go.
How to Manage the Party and Inventory in Baldur's Gate III
Your adventure in Baldur's Gate III is a journey of epic proportions, but between the world-saving quests and dragon-slaying, you’ll be picking up a staggering amount of loot. Managing your party’s inventory and deciding who fights by your side can feel overwhelming. Trust me, with a few key habits, you can turn this chore into a seamless part of your strategy, letting you focus on the adventure.
Managing your four-person party is crucial for survival in Baldur's Gate 3.
Mastering Your Party’s Inventory
The key to staying organized is learning the game's built-in systems. First, get comfortable with the Consolidated Party View. Instead of clicking through each character individually, press [Tab] to open all four active party members' inventories at once. This bird’s-eye view is perfect for quickly transferring potions to your healer or moving that heavy armor onto your tank.
Once you're looking at your hoard, use the Item Sorting options. Click the 'Sort By' button at the top of any inventory screen to organize your items. Sorting by Latest shows what you just picked up, Value helps you find vendor trash, Weight is crucial for avoiding encumbrance, and Type groups all your potions, scrolls, and weapons together. This simple step cuts through the clutter instantly.
When you’re at a vendor, the Bulk Selling trick saves loads of time. In your inventory, hold [Left Ctrl] and [Left Click] to select multiple unwanted items, then right-click and choose 'Add to Wares'. When you open a trade window, all your wares are highlighted for a quick, one-click sell-off.
But what about all the stuff you want to keep but don't need right now? You have Infinite Carry Weight at your disposal. Simply right-click any item and select 'Send to Camp'. It’s whisked away to the Traveller's Chest at your camp, which has unlimited storage. This is your best friend for storing camp supplies, spare magic items, and crafting ingredients without weighing anyone down.
Finally, when you’re looking to upgrade your gear, don’t dig through every backpack. Use the Equipment Slot View. On your character sheet, click directly on an equipment slot—like your helmet or chest armor. A new window pops up showing you every piece of gear you own for that slot across your entire active party, making comparisons and swaps a breeze.
Building and Managing Your Four-Person Team
Baldur's Gate III is balanced for a party of four: your main character and three companions. While you’ll recruit more allies, only four can be active at a time. Sending others to wait at camp is fine—they still earn experience and can be swapped in anytime you visit.
A balanced team covers key roles: a durable Frontline (like Lae’zel or Karlach) to absorb hits, a Damage Dealer for consistent output, a Healer/Support (like Shadowheart) for healing and buffs, and a Utility expert for locks, traps, and skills. Think of your party as a toolkit; you need different tools for different challenges. Avoid stacking three warriors who all need the same magic sword—spread the love and the loot.
⚠️ Watch out: Companions have their own personalities and approval. Having Astarion the rogue and a lawful-good paladin in the same party might lead to some tense campfire conversations. Pay attention to those relationship indicators!
Managing their gear is just as important as your own. Use the Consolidated Party View ([Tab]) to ensure your frontline has the best armor, your spellcasters have their crucial components, and your rogue has a stock of arrows and trap-disarming kits. Distribute weight according to Strength scores; your 8-Strength wizard shouldn’t be carrying three sets of plate mail.
With these systems mastered, you’ll spend less time fussing with menus and more time enjoying the rich world of Baldur's Gate III. Organize your inventory, balance your team, and you’re ready for anything the Sword Coast throws at you. Let’s go.
Understanding the d20 Dice Roll System and Ability Scores
Every swing of your sword, every attempt at persuasion, and every sneaky lockpick in Baldur's Gate III boils down to one core system: the dice. Understanding the invisible d20 roll is the difference between a triumphant hero and a frustrated adventurer. Let's demystify the math that governs your fate.

Dialogue choices often trigger d20 ability checks.
At the heart of every action—from attacking a goblin to lying to a guard—is The d20 Roll. When you attempt an action, the game rolls a virtual 20-sided die. That result (1-20) is then added to your character's relevant Ability Modifier (based on their Strength, Dexterity, etc.) and, if they're proficient, their Proficiency Bonus. This total is compared against a hidden Difficulty Class (DC). Meet or beat the DC, and you succeed. This system is why a character with high Charisma feels like a silver-tongued diplomat, and a clumsy warrior struggles with stealth. It’s the universal language of success and failure.
Your character's power is built on their Ability Scores. Here’s a crucial tip most guides miss: when building or respeccing, always round scores to even numbers. Ability modifiers (the +1, +2, etc., added to your d20 rolls) increase only for every two points in a score. A 17 in Strength gives you the same +3 bonus as a 16—that 18th point is wasted. Use your early Ability Score Improvements or feats to bump those odd numbers up and maximize your efficiency.
If a string of bad luck has you questioning reality, check your Settings. The Karmic Dice option, when toggled on, subtly prevents long streaks of failure (or success) by nudging the RNG. It’s a great training wheel for new players.
Now for the community’s favorite (or most controversial) strategy: Save Scumming. This refers to saving your game right before a crucial ability check—like disarming a deadly trap or persuading a key NPC—and reloading if you fail the roll. It’s a powerful tool for controlling the narrative and ensuring you don’t miss content due to a single unlucky roll. While purists might avoid it, there’s no shame in using it to smooth over a brutally unlucky playthrough.
Master these foundational mechanics, and you’ll stop seeing unpredictable chaos and start seeing a game of calculated probabilities you can influence. You’re not at the mercy of the dice—you’re learning to roll with them.
Best Party Setup for Your First 10 Hours of Baldur's Gate 3
Your first hours in Baldur's Gate III can feel overwhelming, but the right party setup is your anchor—it transforms chaotic skirmishes into tactical victories and unlocks the rich stories of your companions. This early game team is built for reliability, using the companions you meet right away to cover every essential role.

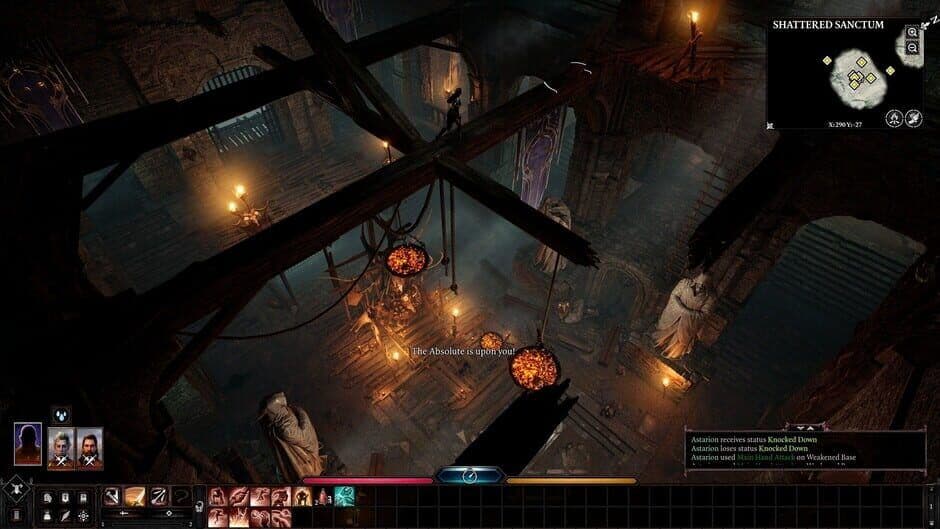
Coordinating companion abilities in combat.
The Balanced Early-Game Roster
For your first ten hours, you can't go wrong with this classic, well-rounded quartet. It follows the proven 1-1-2 Split strategy: one dedicated Tank, one Healer/Support, and two flexible slots for Damage or Utility. This structure ensures you have a frontline to hold the line, healing to sustain through fights, and enough damage and skills to handle any challenge the opening act throws at you.
NPC: Lae'zel is your indispensable frontline anchor. You'll find her on the Ravaged Beach, trapped in a hanging cage. As a Githyanki Fighter, she’s a natural Tank/Frontline with high starting Armor Class (AC) and access to Action Surge at level 2 for explosive damage bursts. Her job is simple: charge in, draw enemy attacks, and use her superior durability to control the battlefield.
NPC: Shadowheart is your sustain. Also found on the Ravaged Beach after the crash, she’s a Trickster Domain Cleric who excels as a Healer/Support. She provides crucial early-game spells like Bless (to boost your party's attack rolls) and Healing Word to pick up downed allies from a distance. She’s your safety net.
NPC: Gale brings the arcane firepower. Recruit him from the Roadside Cliffs waypoint by helping him out of a unstable portal. As a Wizard, he’s your AoE/Control specialist. While he starts with useful utility spells, he quickly gains access to game-changers like Fireball, allowing you to delete groups of enemies or shape encounters with crowd control.
NPC: Astarion completes the set. Encounter him on the Ravaged Beach pretending to need help. As a Rogue, he’s the ultimate Utility/DPS flex character. He’ll handle all your lockpicking and trap disarming needs, and his Sneak Attack feature lets him delete priority targets when positioned correctly. He’s the skill monkey who also brings serious single-target pain.
Don’t be afraid to respec! Visit Withers at your camp to change any companion's subclass for 100 gold. Many players prefer to respec Shadowheart to the Light Domain for more offensive spells like Fireball, making her an even stronger support.
Why This Party Works
This team covers every base. Lae'zel soaks damage, Shadowheart keeps everyone standing, Gale controls the battlefield and blows up clusters, and Astarion solves puzzles and picks off stragglers. It also gives you a great spread for skill checks: Astarion's Sleight of Hand, Gale's Arcana, Shadowheart's Religion, and Lae'zel's Intimidation.
Trust me, if you’ve felt underpowered in early fights, this setup will change everything. You have a clear frontline, reliable healing, explosive area damage, and unmatched utility. With these four companions by your side, you’re perfectly prepared to tackle the mysteries of the Emerald Grove, the threat of the goblin camp, and everything else the opening chapter of Baldur's Gate III has in store. Let's go.
Essential Combat Tactics and Environmental Interaction
Think Baldur's Gate III combat is just about rolling dice and swinging swords? Think again. The battlefield is your playground, filled with chandeliers to shoot, barrels to explode, and ledges to shove foes from. Mastering these environmental interactions is the key to turning a desperate struggle into a decisive victory.

Use the environment to gain a tactical advantage.
Your adventure starts here—the world of tactical advantage. Let’s dive in.
Work the Terrain and Use Your Actions Wisely
First, let’s talk about the single most important tactical rule: secure the high ground. When you position a ranged attacker on elevated terrain, you gain a permanent +2 bonus to Attack Rolls. This is a massive, consistent advantage. Always scan the battlefield for stairs, cliffs, and climbable surfaces. Your archer or spellcaster perched on a crate can be twice as effective.
Use your melee characters to block stairs or ladders. This prevents enemies from easily dislodging your ranged attackers from their superior positions.
Don’t underestimate the humble Shove action, either. It’s a [Bonus Action] that can push enemies off ledges for instant death or shove them away from your casters, breaking their concentration. A well-timed shove can eliminate a major threat without spending a spell slot.
Now, let’s get sneaky. Press [Shift+C] (or hold the D-pad down on controller) to activate Stealth/Group Hide, allowing your entire party to enter stealth simultaneously. This isn’t just for rogues. Setting up an ambush with your whole team lets you get the drop on enemies, granting everyone a free surprise attack and controlling the initial flow of battle.
Master Environmental Hazards and Combos
This is where the real magic happens. The world of Baldur's Gate III is littered with opportunities to outsmart your foes.
Look for explosive barrels (Firewine, Oil, or Smoke Powder). A single arrow can detonate them, dealing massive AoE damage. Even mundane objects like stalactites hanging from cave ceilings or wooden stockades can be shot down to crush enemies beneath them. This is free damage waiting to be claimed.
The most potent tactics, however, come from combining your party’s abilities. Think of it as a magical chemistry set:
- Cast Grease or throw an Oil barrel, then follow up with any fire spell or a tossed torch. You’ll create a persistent, burning ground that damages anyone who steps in it.
- Have a cleric or druid cast Create Water on a group, making them Wet. Then, hit them with a Lightning Bolt or Witch Bolt—the wet condition doubles their lightning damage vulnerability. The same applies to cold spells, which can freeze wet enemies solid.
⚠️ Watch out: These combos work both ways! Enemy spellcasters can and will use your own hazards against you. Position your party carefully to avoid getting caught in your own fiery or electrified trap.
With these tactics, you’re no longer just reacting to enemy turns—you’re shaping the battlefield to your advantage. Start every fight by looking for ledges, barrels, and high ground, and you’ll dominate encounters you thought were impossible. Let's go.
How to Use Rest Mechanics and Camp Resources
Don't treat your health bar and spell slots like they're permanent—in Baldur's Gate III, they're fleeting resources, carefully rationed between trips back to your campfire. Mastering when to rest, and how to manage the supplies for it, is the quiet backbone of your campaign, letting you push forward without fear of being tapped out for the next big fight.

The camp serves as a hub for recovery and relationship building.
Your two main recovery tools are the Short Rest and Long Rest. A Short Rest (found in your UI) can be used twice per day, letting your party catch their breath to recover 50% of their hit points and recharge short-rest abilities—most notably, a Warlock's spell slots. Use these liberally between skirmishes to top up without any resource cost.
When you need a full reset, you need to take a Long Rest. This consumes 40 Camp Supplies to fully restore everyone’s HP, spell slots, and class abilities. But it's more than just a resource dump; your camp is where companion stories unfold. Many pivotal conversations, romantic advances, and quest progressions only trigger after you've settled in for the night. So, if you're wondering why a party member's personal quest seems stalled, the solution is often to take a night off and chat with them at camp.
Don't hoard your camp supplies. Baldur's Gate III throws plenty at you, and a well-rested party breezes through content a struggling one would burn precious spell scrolls and potions on. If you have enough for a long rest, take it.
Managing those supplies is key. Scrounge food, wine, and other provisions from barrels and tables everywhere you go. Send them straight to your Camp Chest—which has infinite storage—to keep your active party's inventory light. For this, a Shovel is non-negotiable. Keep one in someone's inventory at all times. You'll find your first on the Ravaged Beach, and you’ll use it to dig up treasure from dirt mounds scattered across the world, which often contain more supplies or valuable loot.
Eventually, you might want to completely rework a character's build. For that, you need Withers. You’ll find this enigmatic skeleton in the Dank Crypt early on. Once recruited to your camp, he serves as a respec vendor for 100 gold, letting you change any character's class, subclass, or ability scores—a lifesaver if you realize your party setup is missing a crucial role.
With a handle on resting, resource gathering, and the flexibility to respec, you’ve mastered the rhythm of adventure in Baldur's Gate III. Rest often, loot everything, and don't be afraid to spend a little gold to perfect your party. You're ready to face anything Faerûn throws at you.