How to Master Initiative and Turn Order in Baldur's Gate 3
In Baldur's Gate III, combat can feel like a chaotic scramble the first time you dive in—enemies surround you, spells fly, and the order of operations isn't always clear. But it all starts with mastering a single concept: the turn order. Here’s how to take control of the chaos from the very first roll.
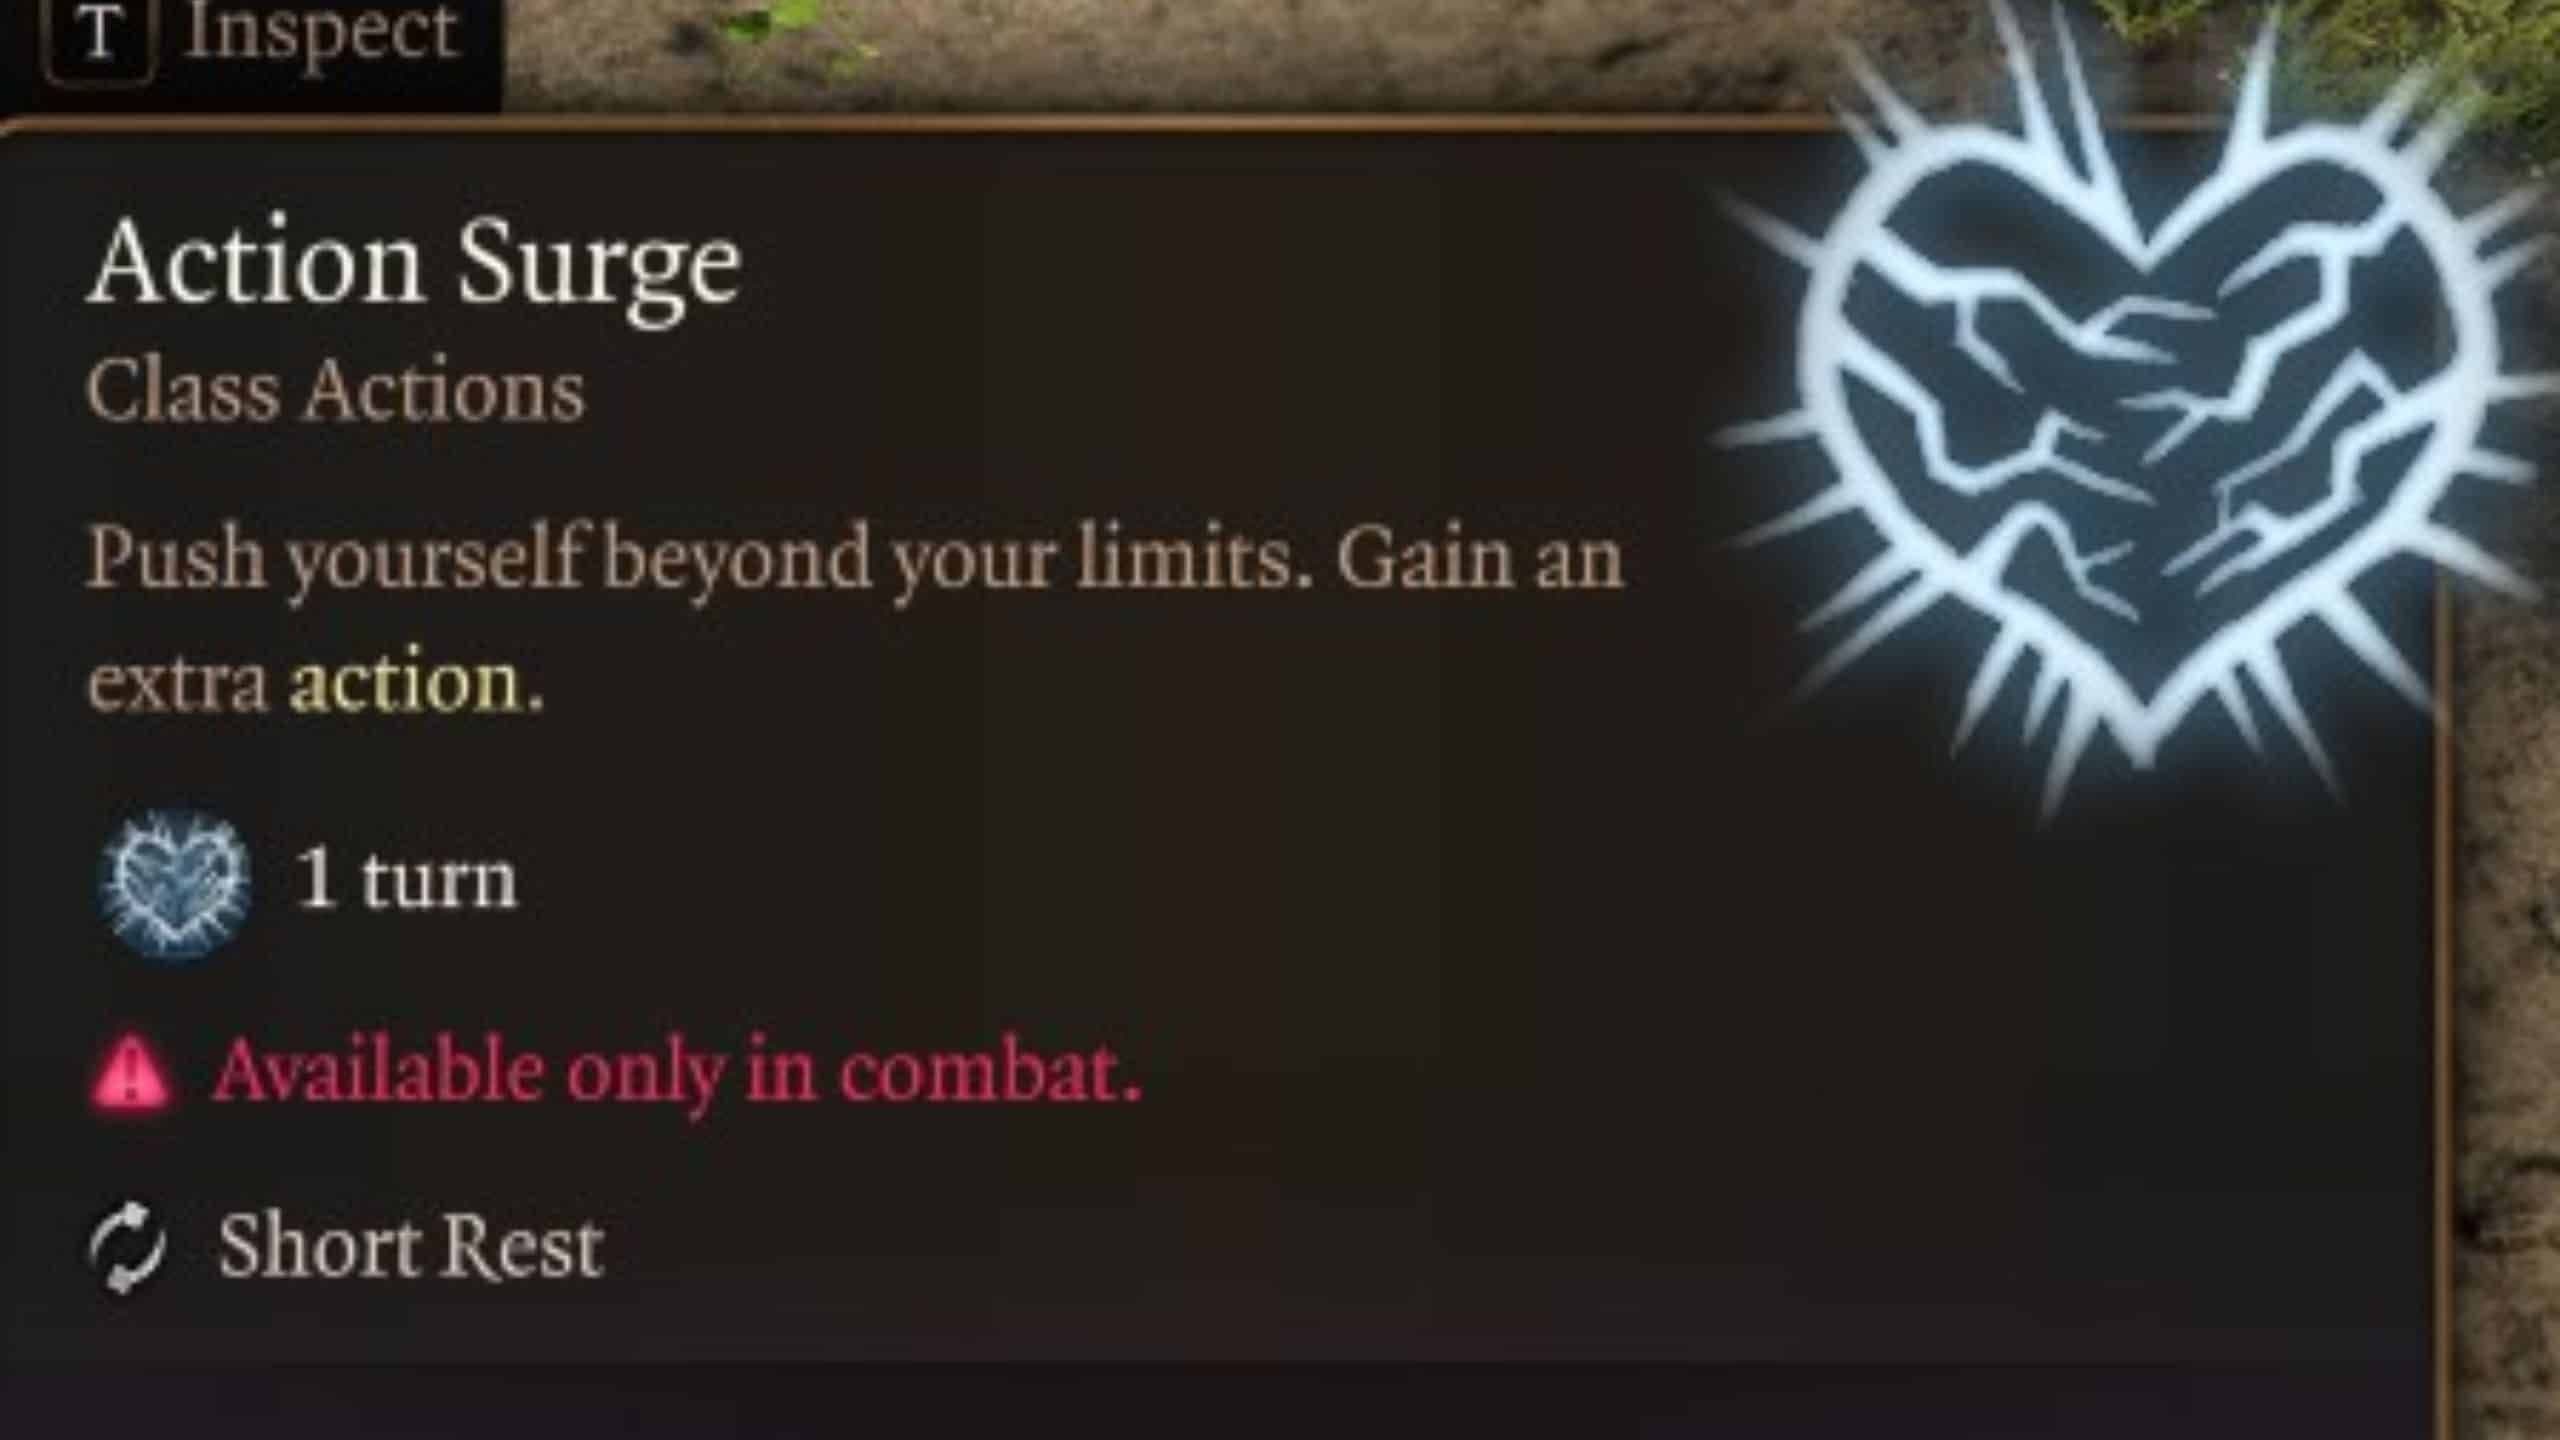
Action Surge is a powerful way to manipulate the action economy.
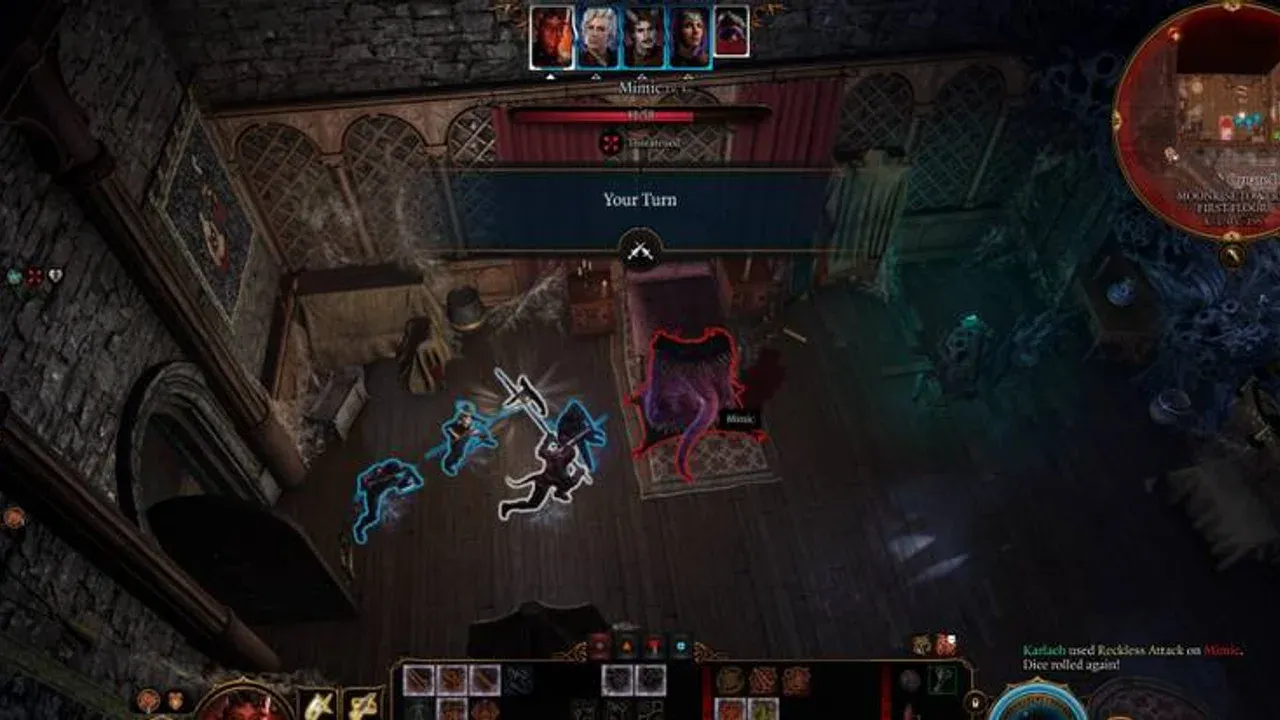
Every Combat Round lasts 6 real-time seconds—one full rotation where every combatant gets a chance to act. Within that round, the sequence is determined by your Initiative Roll. At the start of combat, each participant rolls a d20 and adds their Dexterity Bonus modifier; the highest total goes first.
A high Dexterity not only boosts your Armor Class but also gives you a crucial early-turn advantage. Consider it for more than just stealthy characters.
Here's where Baldur's Gate 3 adds a brilliant twist for teamwork. On the Initiative track at the top of the screen, you'll sometimes see your party members lined up consecutively. When they're adjacent, they act together in Simultaneous Turns. This lets you chain devastating combos—like a character throwing a Grease bottle with their Action, and their ally immediately igniting it with a Fire Bolt, all before an enemy can react.
At the Start of each turn, your character's resources fully refresh. You get all your Actions, Bonus Actions, and Movement points back, ready to spend. Unused resources don't carry over, so use them or lose them each round. This consistent refresh is the heartbeat of your strategy, allowing you to plan each turn as a fresh opportunity to change the fight.
Understanding this flow—the round, the roll, the shared turns, and the refresh—gives you the foundation to predict the battlefield and act decisively. With this knowledge, you're not just reacting to the game; you're starting every fight one step ahead.
Optimizing Standard Actions in Baldur's Gate 3 Combat
Your turn arrives in Baldur's Gate III, the green circle on your hotbar glowing with potential. This is your Standard Action—the single most powerful resource you have each turn. Mastering what to do with it separates a chaotic brawl from a decisive victory.
The standard Attack Action is the primary resource for high-impact maneuvers.
Think of your Standard Action as the main event of your turn. It's the heavy hitter, the spell that changes the battlefield, or the tactical move that flips the script. You get one per turn by default, and it's marked by that unmistakable green circle icon in the UI. Here’s what it can buy you:
- Main Hand Attack: The bread and butter. Click an enemy or press [A] to swing your weapon. This uses your Standard Action, and landing a hit is often your most reliable source of damage.
- Dash: Need to close a gap or escape a threat? The Dash action consumes your Standard Action to double your available Movement for that turn. It’s a lifesaver for reaching a distant enemy or getting your squishy wizard out of melee range.
- Disengage: Speaking of melee, moving away from an enemy usually triggers a punishing Opportunity Attack. Use the Disengage action instead. It spends your Standard Action to let you move freely without provoking those free swings—a must for repositioning frontline fighters.
- Help: An ally is downed, restrained, or otherwise in a bind. The Help action lets you use your Standard Action to assist them, getting them back on their feet or out of a nasty effect. It’s a tactical sacrifice that can turn the tide.
- Hide: Want to set up a devastating ambush or slip away? Use the Hide action, or press [C], to enter stealth. If you succeed, you’ll gain Advantage on your next attack roll, making it much more likely to hit and even score a critical. It uses your Standard Action, but the payoff can be huge.
- Throw: Got a strength-based character or a creative mind? The Throw action lets you use your Standard Action to hurl anything from a javelin to a nearby explosive barrel—or even a smaller enemy—based on your Strength. Environmental chaos is a valid strategy.
Don’t sleep on Dash and Disengage. In Baldur's Gate III, positioning is half the battle. Using an action to get to the perfect spot or safely retreat is almost always better than taking a sub-optimal, low-chance attack.
Here’s where Standard Actions get really powerful: scaling. For martial classes like the Fighter, reaching Level 5 unlocks the Extra Attack feature. This doesn’t give you an extra action—it lets you make multiple weapon attacks whenever you take the Attack action. That means one Standard Action can translate into two, or later even three, powerful swings. It’s a massive power spike that defines martial combat.
Remember, you can use your Standard Action, Bonus Action, and Movement in any order you like. You could Move, Attack, then use a Bonus Action. Or Hide to gain Advantage, then Move into position. This flexibility is key to mastering Baldur's Gate III's combat.
With a firm grasp on your green-circle options, you’re ready to make every turn count. Now let’s look at how to supplement that power with quick, efficient Bonus Actions.
How to Use Bonus Actions for Maximum Efficiency
Think of your Bonus Action in Baldur's Gate III as the secret sauce to a perfect combat turn—it’s the small but mighty move that elevates a good round into a great one. While your powerful Standard Action does the heavy lifting, your Bonus Action (marked by an orange triangle icon in the UI) is your tool for quick, tactical flourishes that can shift the entire momentum of a fight.
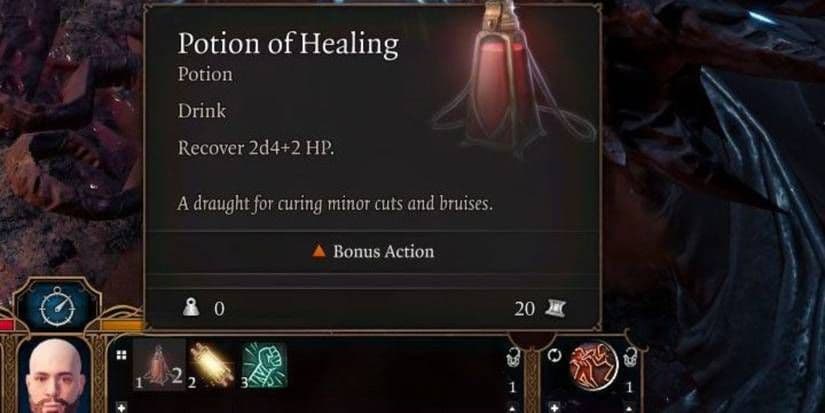
Consuming potions as a bonus action allows you to heal without sacrificing your main attack.
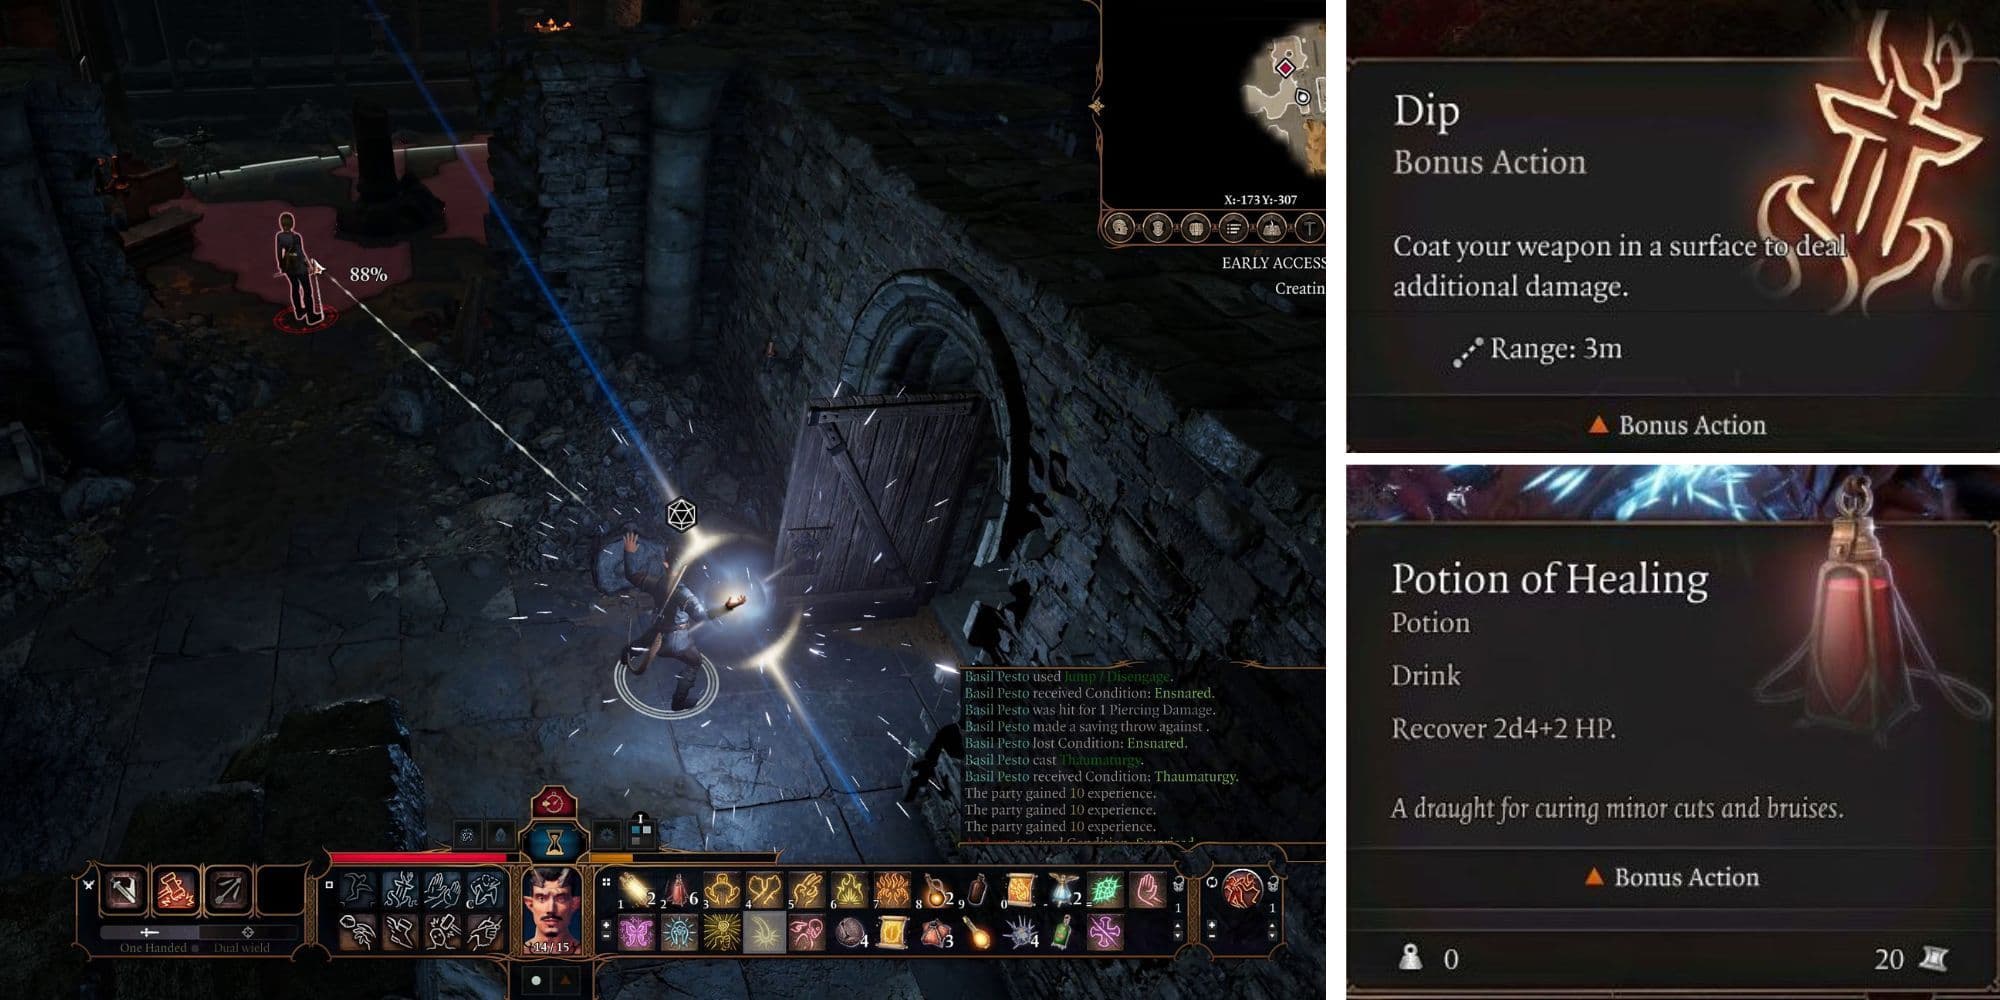
The beauty is flexibility: you can use your Bonus Action at any point during your turn, before, after, or even sandwiched between your other moves. This isn't just for spellcasters. Every character has access to universal options like Jump, which costs 3m of Movement to leap over hazards or reach high ground, and Shove, an Athletics check that can push an enemy away or, more satisfyingly, off a nearby cliff. Then there's Dip, a clever move that lets you coat your weapon in a nearby surface like fire, poison, or oil as a Bonus Action, adding extra damage to your next strike.
For many classes, their most iconic abilities live here. A Barbarian can enter a Rage as a Bonus Action, gaining damage resistance and a bonus to melee attacks. Spellcasters get incredibly efficient tools like Healing Word, a ranged heal that lets you still make a full Standard Action attack, and Shield of Faith, which boosts an ally's Armor Class. These spells are perfect for patching up a teammate or bolstering your front line without sacrificing your main offensive push.
⚠️ Watch out: There's a crucial rule here that trips up many new players. You generally cannot cast two Leveled Spells in one turn using an Action and a Bonus Action. So if you use your Bonus Action to cast Healing Word, you can't follow it up with a Standard Action fireball. Cantrips, however, are always free game.
Mastering this layer of the action economy is what separates reactive players from proactive tacticians. By weaving in these quick, powerful abilities, you maximize every single turn, turning your party into a well-oiled machine ready for anything Baldur's Gate III throws at you.
Mastering Movement and Positioning in Baldur's Gate 3
Think of Baldur’s Gate 3's combat like a deadly dance floor. In Baldur’s Gate 3, controlling the space between you and your enemies is often more decisive than the sword swing itself. Mastering movement and positioning turns chaotic brawls into elegant, controlled victories.
Managing movement speed and positioning is vital for tactical success.
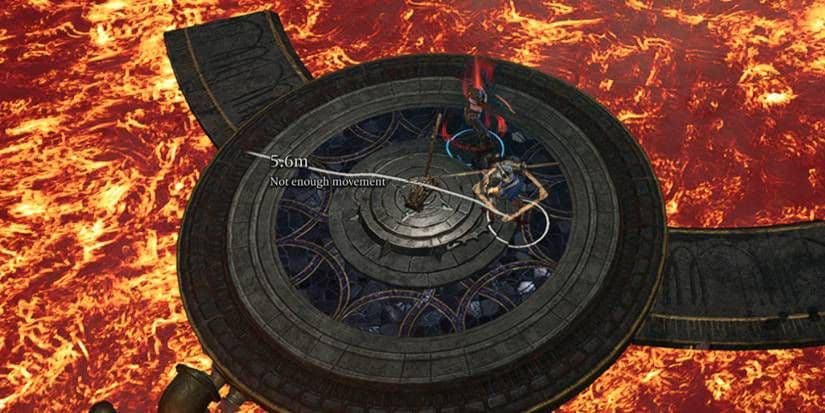
Your Movement Speed, dictated by your Race and Class, is your first key to positioning. You might have a base of 7.5m as a stout Dwarf or 10.5m as a nimble Wood Elf. This resource is tracked on the UI by a blue circle or yellow bar that depletes as you walk. The real magic isn't just running; it's knowing you can Split Movement. You can move a few meters, cast a spell with your Standard Action, and then use the rest of your movement to duck behind cover—all in one turn. This fluidity is your greatest tactical advantage.
Always move after attacking if you can. Stepping just out of an enemy's reach forces them to waste their own movement next turn, breaking their action economy.
The battlefield isn't a blank slate, though. Watch for Difficult Terrain, highlighted by red pathing on your movement line. Stepping into mud, webs, or fire not only slows you down but can inflict nasty conditions like Ensnared or Burning. Navigating these hazards carefully can mean the difference between reaching an ally with a healing spell and being stuck out in the open.
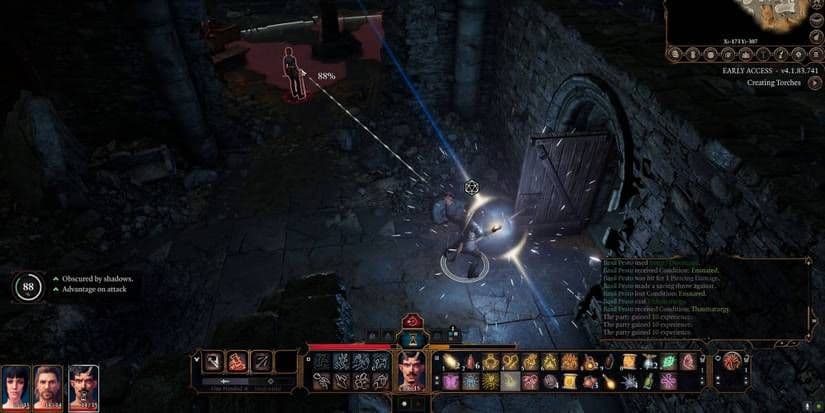
Which brings us to the zone of immediate danger: the Threatened State. Whenever you're adjacent to a hostile enemy, you're "Threatened." If you try to walk away without using the Disengage action, you'll provoke an Opportunity Attack. The game helpfully warns you with a Red Sword Indicator that flashes on the ground when you plot a move that will trigger one. Pay attention to this cue—it's the game telling you, "Hey, this move will get you smacked."
So, how do you dance in a Threatened zone? You have options. You can use your Action to Disengage, allowing a safe retreat. Or, you can accept the risk, eat the single attack, and reposition to a more advantageous spot—like higher ground for your archers. Sometimes, taking a hit to gain superior positioning for your entire party is the winning play.
⚠️ Watch out: Enemies use these same rules. Positioning your tank to "Threaten" multiple foes can lock them down, while leaving your squishy spellcaster exposed is an invitation for them to be surrounded.
With a firm grasp on your Movement Speed, the power of Split Movement, and a keen eye for Threatened zones and Difficult Terrain, you control the rhythm of every fight. You’re no longer just reacting; you're orchestrating the battlefield. Now, let's make them dance to your tune.
How to Manage Reactions and Free Actions in Baldur's Gate 3
You’ve mastered your turn—but in Baldur’s Gate III, the fight doesn’t stop when your icon disappears. The real chess match happens between turns with Reactions and Free Actions, the game’s out-of-turn mechanics that let you punish enemy mistakes or squeeze in extra value at zero cost. Mastering these is what separates good players from battlefield commanders.
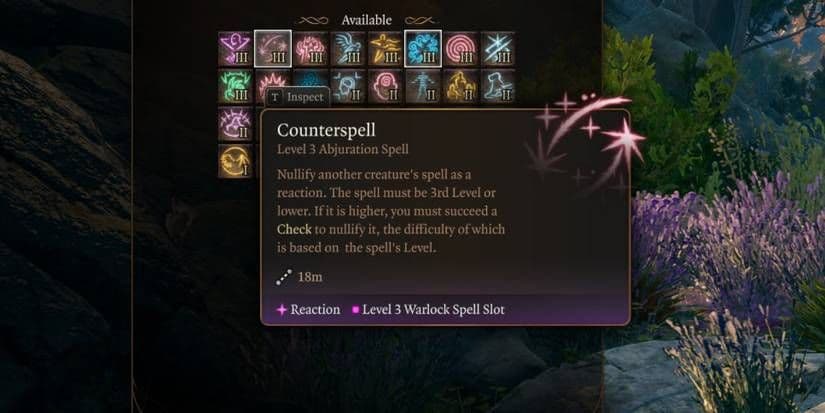
Counterspell is a powerful reaction that can disrupt enemy spellcasting.
Controlling Your Reactions
Reactions are your defensive and counter-attacking toolkit, marked by a purple star or pink sparkle icon. Every character gets just one Reaction per full combat round, so using it wisely is key.
The most common is the Opportunity Attack. When an enemy foolishly moves out of your melee range without using Disengage, you get a free melee strike. The game warns you with a red sword icon on their path—if you see it, they’re about to get hit.
But the real power lies in spell and class Reactions. Hellish Rebuke lets you pay back pain immediately: when you take damage, you can use a Reaction to blast the attacker with fire. Shield is a lifesaver; when an attack hits you, casting it as a Reaction adds +5 to your Armor Class, often turning a hit into a miss.
Class features add incredible depth. A Rogue’s Uncanny Dodge lets you use a Reaction to halve the damage from an attacker you can see. A Fighter with the Battle Master subclass can use Riposte to strike back at an enemy who just missed them.
Don’t leave Reactions on auto-pilot. Open your Spellbook, go to the Reactions Tab, and set key abilities like Shield or Counterspell to ‘Ask’. This prevents you from burning a precious spell slot on a minor attack and lets you save resources for the hits that really matter.
Leveraging Free Actions
Free Actions cost none of your main resources—no Action, no Bonus Action. They’re for minor interactions or specific combat tricks. You can always drop an item freely, which is perfect for setting up environmental combos or passing gear to an ally. Bards can use Perform to play their instrument without spending an action, sometimes even earning a bit of gold from listeners.
The combat-focused Free Actions are where the strategy shines. Brace (available for both Melee and Ranged) is a Free Action that costs 7.5 meters of your Movement Speed. In return, you gain Advantage on your next associated attack roll. Prepare is another Free Action, costing 6 meters of Movement Speed, which increases your melee damage for the round. The catch? These powerful skills are only available after a Short Rest, so plan your rests around big fights.
Think of your Reaction as your shield and sword between turns, and your Free Actions as the little adjustments that give you an edge. With these managed, you’re no longer just taking turns—you’re controlling the entire flow of battle.
Spell Slots and Resource Management Strategies
Your spellcasters are running on empty, and the next fight looms large. In Baldur's Gate III, magic is your most potent tool, but it’s a finite resource that demands careful stewardship. Managing your Spell Slots and class-specific resources is what separates a desperate scramble from a tactical triumph.
Managing spell slots and ability resources is key to winning difficult encounters.
Understanding Your Magical Fuel
The heart of resource management lies in your Spellbook. Here, you’ll see your Spell Slots—visually marked by blue squares in your UI. These slots are the currency for casting powerful leveled spells, and they’re divided by spell level. Casting a 3rd-level Fireball? That consumes one of your 3rd-level slots. Once a slot is used, it’s gone until you rest. This is why your Cantrips are so vital. These zero-cost spells, like Eldritch Blast or Sacred Flame, don’t consume any slots and are your reliable fallback when the big guns are on cooldown. Use them liberally to preserve your limited high-impact magic for when it truly matters.
Get in the habit of checking your remaining spell slots before a big dialogue or exploration sequence. Using a spell like Enhance Ability to pass a skill check feels great, but it burns a slot you might need for Counterspell in the next room.
Replenishing Your Resources
So, how do you get those precious blue squares back? Baldur's Gate III offers two primary methods, accessible via the Camp icon on your UI.
A Short Rest is a quick breather. It restores half your party’s hit points and, crucially, fully restores Warlock spell slots. It also refreshes certain class abilities. You get two of these per full adventuring day, so use them strategically after tough encounters to top up without committing to a full reset.
A Long Rest is your complete reset button. Returning to camp, spending supplies, and ending the day fully restores all Spell Slots, hit points, and most daily-use class features. This is your safety net, but don’t become overly reliant—some quests are time-sensitive, and camp supplies aren’t infinite. The key is balance: push your limits, but know when to call it a day.
Managing Unique Class Resources
Beyond universal spell slots, several classes operate on their own unique resource economies. These are just as critical to manage.
- Ki Points fuel the Monk’s signature techniques. You spend these points on abilities like Flurry of Blows for extra attacks or Step of the Wind for a super-powered Dash and Jump. They recharge on a Short Rest, making Monks exceptionally resilient throughout a long dungeon crawl.
- Superiority Dice are the domain of the Fighter’s Battle Master subclass. You expend these dice to power powerful Maneuvers, such as Trip Attack to knock a foe prone or Riposte for a counter-strike. Like Ki Points, they return after a Short Rest.
- Oath Charges are the Paladin’s divine resource. These charges are used for Channel Oath abilities, which can range from terrifying foes to bolstering allies. Their usage is more restricted, typically replenishing only after a Long Rest, so deploy them with purpose.
Here’s the trick most guides miss: resource management isn’t just about spells. It’s about synchronizing your party’s different refresh rates. Pair your Long Rest-dependent Wizard with a Short Rest-reliant Monk and Warlock. That way, after a minor skirmish, two of your characters can bounce back fully with a Short Rest, letting you save your Long Rest for when the whole party is truly spent.
With a firm grasp on your blue squares, cantrips, and class-specific pools, you can adventure with confidence, knowing exactly how much gas you have left in the tank—and when to refuel. Let’s go.
Best Combat Optimization Tips for Baldur's Gate 3
You've mastered the individual pieces of Baldur's Gate III combat—now, let's weave them together into a symphony of destruction. This final section is about transcending the basics and dominating the action economy through clever tactics that turn the tide of any fight.
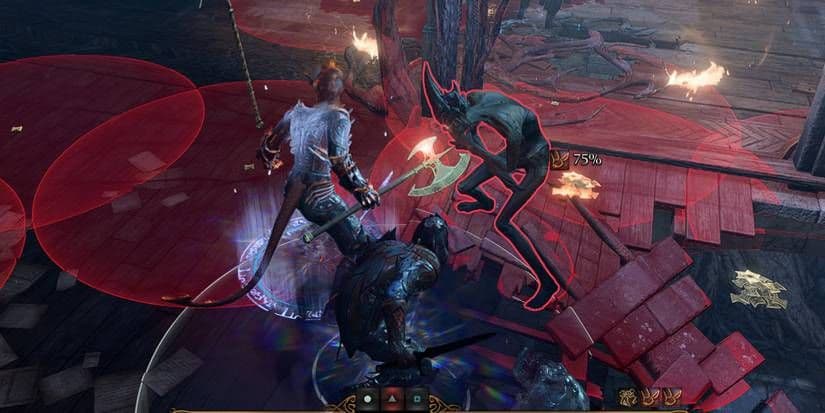
Utilizing standard actions like Sneak Attack effectively is key to combat dominance.
Leverage Buffs to Break the Economy
Your standard allotment of one Action, one Bonus Action, and Movement is just the baseline. The true masters of Baldur's Gate III know how to cheat this system. The most powerful way is through the Haste spell or a Potion of Speed. Both grant your character an extra Standard Action on every turn for their duration. This isn't just another attack—it's a game-changer. Use it to cast two leveled spells, make two powerful attacks, or combine a devastating spell with a strategic Dash to reposition. Just remember, when Haste ends, the target is Lethargic and loses a turn, so plan to finish the fight first.
Control the Battlefield
Your actions aren't limited to health bars. The environment is a weapon. A simple spell like Create Water, cast out of combat or as an action, can douse dangerous fires, create slippery surfaces to knock enemies Prone, or, most importantly, set the stage for elemental combos. A wet enemy takes double damage from Lightning and Cold spells and effects. This turns a regular Lightning Bolt into a fight-ending nuke. Always scan the arena for barrels, cliffs, and surfaces you can manipulate.
Seize the High Ground
Positioning is everything, especially for ranged characters. If you can get your archer or spellcaster onto elevated terrain, they gain a +2 bonus to Ranged Attack rolls. That's a massive increase to hit chance. Conversely, being below your target gives you a penalty. Before committing to your main action, use your Movement to climb a ladder, scale some crates, or jump to a balcony. That bonus could be the difference between a miss and a critical hit.
Start Fights on Your Terms
Don't just walk into every ambush. Before combat begins, press [Shift + C] to enter stealth mode and see enemy vision cones. Maneuver your party to avoid detection and position your heavy hitters. When you attack from the shadows, you can trigger a Surprise round. Surprised enemies are frozen for a full turn, allowing your entire party to act before they even roll Initiative. This free round of actions can eliminate key threats before the fight officially begins.
Knowledge is Power
Every enemy has secrets. In the heat of combat, take a moment to Right-Click (or press [T]) on a foe and select Examine. This window reveals their Resistances, Vulnerabilities, Immunities, and even their place in the Initiative order. Seeing that a demon is Resistant to fire but Vulnerable to cold will instantly change your spell choice. Knowing the brute with low Initiative is going last lets you focus fire on the faster, more dangerous mage first.
Make examining your first action in any tough fight. It’s a free action that pays for itself instantly by preventing wasted turns on immune enemies.
With these advanced tactics in your arsenal, you’re no longer just participating in Baldur's Gate III combat—you’re commanding it. Go forth and conquer.