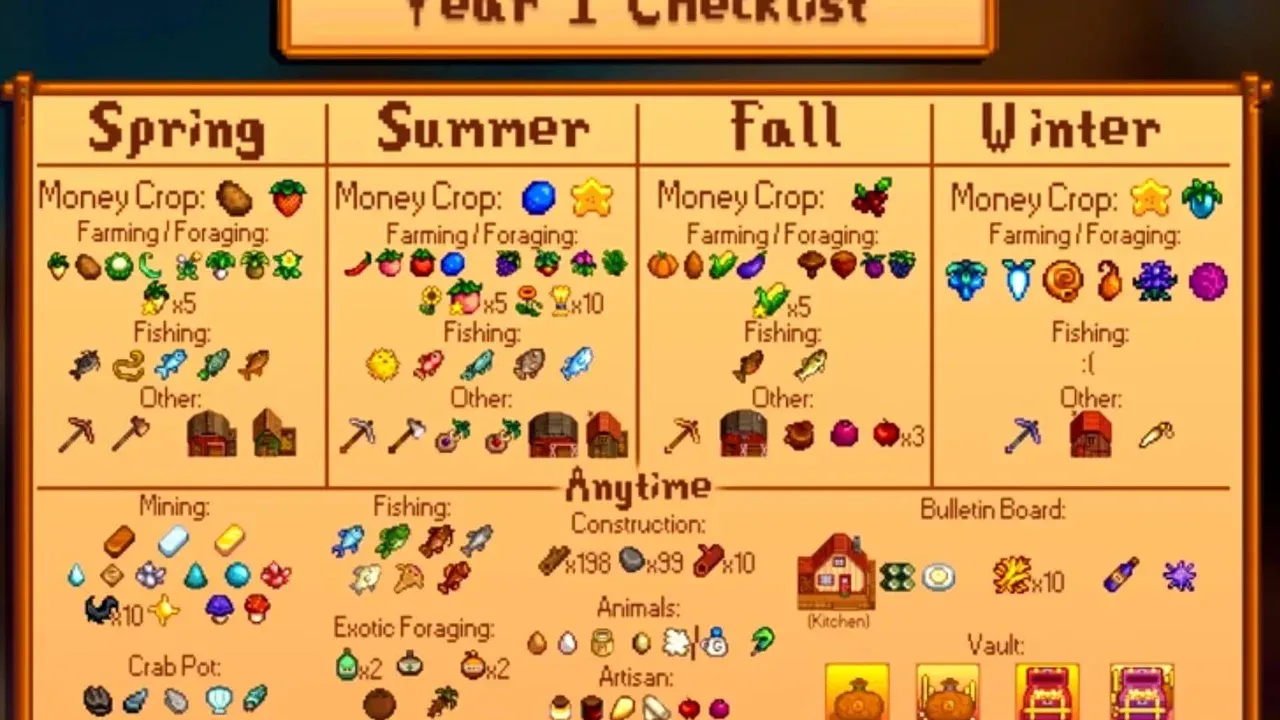
Mastering the Basics: Controls and Early Objectives
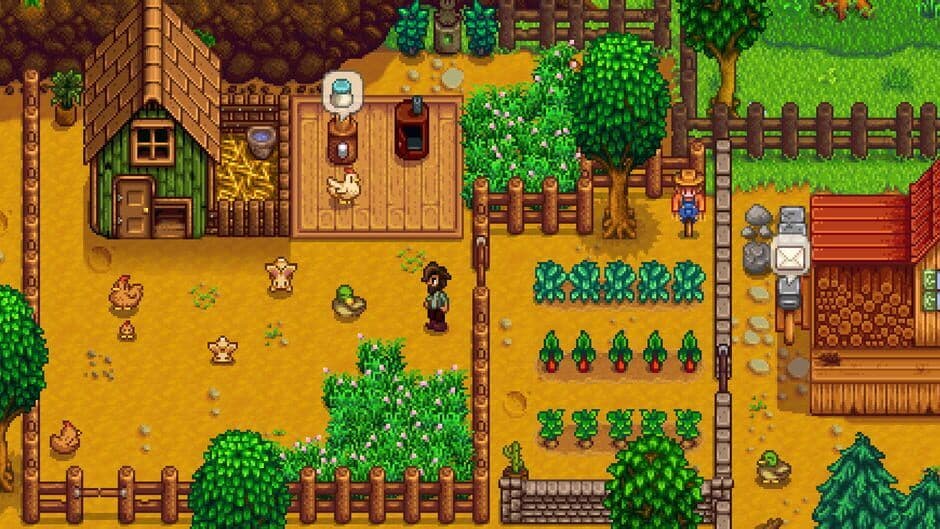
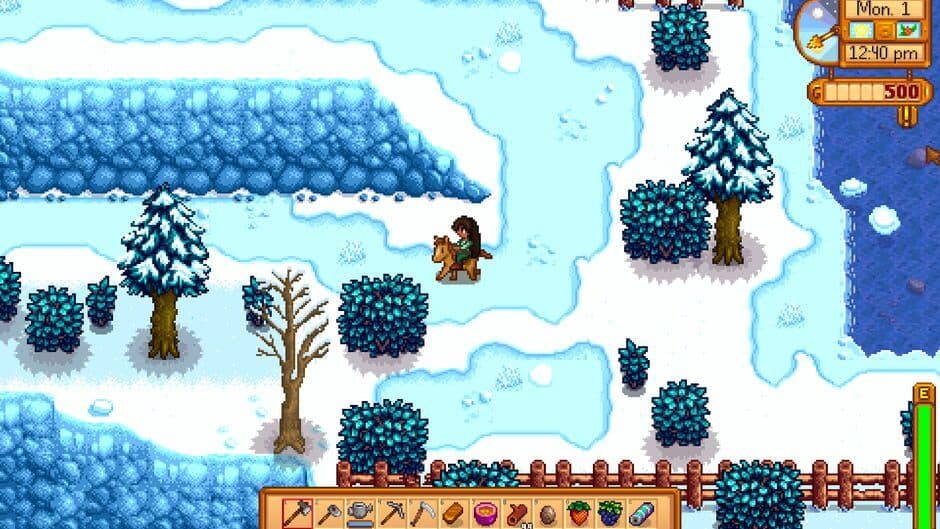
The standard game view provides essential information via the HUD.
Mastering the Basics: Controls and Early Objectives
Welcome to Stardew Valley, where your journey from a corporate drone to a master farmer begins. The first week can feel overwhelming, but the game’s genius lies in its gentle, low-consequence design. There’s no "Game Over" here. You can't permanently fail, so you're free to experiment, learn, and find your own rhythm. This section is your crash course on the fundamental interface and the immediate goals that will set you up for success, focusing on the three pillars of your first days: navigating the world, managing your stuff, and keeping your farmer alive and kicking.
Why it's here: Before you can master crop rotation or befriend reclusive villagers, you must become fluent in the language of the game itself. Understanding your controls, inventory, and the vital Energy/Health systems isn't just beginner advice—it's the non-negotiable foundation upon which every future strategy is built. A player who wastes half their day fumbling with the menu or collapsing from exhaustion is a player who will struggle to achieve anything else on this list.
1. Navigating Your New World: Controls & UI
Your first task is learning how to interact with Pelican Town. On PC, movement is handled with the classic W, A, S, D keys, while your mouse is used for selecting tools, interacting with objects, and navigating menus. Mobile players have several control schemes, with the default being Tap-to-Move & Auto-Attack, where you tap where you want to go and the game intelligently selects tools for basic actions. However, for precise tasks like gift-giving or decorating, switching to a Joystick & Buttons scheme in the options menu is highly recommended.
The User Interface (UI) is your dashboard. The top-right corner displays the essential Time, Day, Season, and Weather. An in-game day runs from 6 AM to 2 AM; staying out past 2 AM will cause you to pass out, potentially losing items and money. Your Stamina (Energy) bar is in the bottom right, and your Health bar sits above it—both critical resources we’ll cover shortly. Pressing E (or the menu button) opens your hub, granting access to your Inventory, Skills, Relationships map, and Crafting recipes. Two settings are crucial to enable immediately: "Auto Run" to save your thumbs and "Always Show Tool Hit Location" to see exactly where your hoe or axe will land. Also, consider adjusting the Zoom level to 75% for a much better strategic view of your farm and surroundings.
The Takeaway: Don't just accept the default controls. Spend five minutes in the Settings menu to tailor them to your style. A comfortable control scheme and a clear understanding of the UI turn chaotic button-mashing into intentional, efficient action.
2. Your Pocket Universe: Inventory Management
Your inventory is a 12-slot (initially) backpack that will perpetually feel too small. Hovering over any item reveals its name, description, and sell price. Organization is key: place your Axe, Pickaxe, Hoe, and Watering Can on your hotbar for quick access. Early on, you’ll be drowning in wood, stone, fiber, and foraged goods. The solution is the Chest, craftable for 50 Wood. Placing multiple chests near key areas (e.g., by your house, the mine entrance) is a game-changer.
A golden rule for the early game: Keep at least one of every item you find. That Common Mushroom, that piece of Quartz, that weird algae—they will almost certainly be needed for a Community Center bundle, a villager’s quest, or a crafting recipe later. Selling is tempting, but indiscriminate selling can set you back weeks. When you do sell, you have two options: place items in the Shipping Bin to the right of your house (money arrives overnight) or sell directly to Pierre at his store for instant, but identical, cash.
The Takeaway: Treat your inventory like a curated collection, not a junk drawer. Craft chests early and often, and resist the urge to sell every last foraged item. This disciplined hoarding pays massive dividends when you unlock quests and the Community Center.
3. The Currency of Action: Energy and Health Management
Energy is your most precious daily resource. Every swing of a tool (except the Scythe) drains the green bar in the bottom right. Run it to zero, and you’ll pass out on the spot, waking up the next day with reduced energy. Health (the red bar) is primarily depleted by taking damage in the mines. If it hits zero, you’ll be rescued, but at the cost of lost items and money.
Managing these stats defines your daily loop. Sleeping fully restores both. Therefore, your core objective each day is to expend your Energy on profitable tasks before you’re forced to sleep. Early energy sources are foraged Spring Onions in the forest south of your farm, Salmonberries (foraged in Spring 15-18), and Field Snacks (crafted from 1 each of Acorn, Maple Seed, and Pine Cone). Later, you’ll cook meals or buy Energy Tonic from Harvey’s Clinic for 1,000g—though befriending Pam can net you these as free gifts, a prime example of how social strategy (covered later) intersects with core resource management.
The Immediate Goal: Your first week's mission is clear: Clear a small plot of land, plant your 15 free Parsnip seeds, and water them daily. This simple cycle teaches you Energy management, introduces the growth timeline, and generates your first capital. When your energy is low, shift to zero-cost activities: foraging for items (the cursor shows a + sign when you can pick something up), talking to villagers, or organizing your chests.
The Takeaway: Energy is time. Plan your day around it. Push your limits with farming and clearing, then transition to low-energy tasks. Mastering this rhythm is more important than any single crop in your first season. It turns survival into sustainability.
The Art of Farming: Seasonal Crops and Soil Care

Optimizing crop layouts for seasonal growth.
The Art of Farming: Seasonal Crops and Soil Care
Your farm is more than just a plot of land; it’s a dynamic, seasonal engine for profit. Mastering the core loop of planting, watering, and harvesting is the difference between a subsistence homestead and a thriving agricultural empire. This section breaks down the essential farming mechanics, the strategic importance of seasonal crop rotation, and how to turn your hard work into gold via the Shipping Bin.
Why it’s here: While the basics get you started, this is where you learn to optimize. We’re moving from simple survival to strategic growth, focusing on maximizing your return on every square of tilled soil and every drop of energy spent watering.
The Core Farming Loop: Planting, Watering, Harvesting
The fundamental rhythm of Stardew Valley is deceptively simple: till soil, plant seeds, water daily, and collect the harvest. However, efficiency within this loop is everything. Your daily energy is a finite resource, especially early on. Prioritize upgrading your Watering Can (covered in Section 3) to reduce the time and energy spent on this chore. Planting in organized rows near a water source can also streamline your morning routine. Remember, crops do not grow on days they are not watered, so consistency is key to hitting profitable harvest windows before the season ends.
The Shipping Bin is the culmination of this loop. Anything placed in it is sold overnight, with the profits added to your ledger. This is your primary income source. There’s no need to haul goods to Pierre’s; the bin’s convenience allows you to focus on farming, not logistics. A crucial tip: while most crops go straight into the bin, always save at least one of each crop type. You’ll need them for Community Center bundles (Section 6) and cooking recipes.
Strategic Seasonal Crop Rotation
You cannot plant the same crops year-round. Each season offers a unique roster of seeds at Pierre’s, and your success hinges on choosing the right crop for the right time. The goal is to maximize your Gold per Day (GPD), which factors in seed cost, growth time, and sell price.
- Spring – The Foundation: Your first season is about building capital. While Parsnips (20g seeds, 35g sell) are the tutorial crop with a fast 4-day cycle, they have a low profit margin. For real early-game momentum, switch to Potatoes (50g seeds, 80g sell). They grow in 6 days and have a 25% chance to yield extra potatoes, significantly boosting their effective GPD. The true Spring king, however, is the Strawberry. Seeds are only sold for 100g at the Egg Festival on Spring 13. If planted immediately, they take 8 days to mature but then produce fruit every 4 days. This “regrow” mechanic offers one of the best returns on investment in the entire year. Always save some Strawberry seeds for next Spring Day 1 to capitalize on their full season potential.
- Summer – The Profit Explosion: With capital from Spring, you can invest in high-yield Summer crops. Blueberries are the workhorse: for an 80g seed, the plant yields 3 berries every 4 days after a 13-day initial growth. They are forgiving, profitable, and a perfect introduction to multi-harvest crops. For players who have repaired the bus to the Calico Desert, Starfruit (400g seeds, 750g sell) offers the highest raw profit per tile, but its long 13-day growth and high upfront cost require careful planning.
- Fall – The Harvest Bonanza: This season is a goldmine. Cranberries mirror Blueberries’ role: expensive seeds (240g) lead to plants that yield 2 berries every 5 days after a 7-day growth, providing steady, high-volume income. For a more hands-off approach with a big payoff, Pumpkins (100g seeds, 320g sell) are excellent. Their 13-day growth is ideal if you’re splitting time between farming and mining. Remember, multi-season crops like Corn (Summer & Fall) and Sunflowers (Summer & Fall) can be planted in Summer to carry over, saving you re-tilling and fertilizing costs.
- The Return on Investment (ROI) Mindset: Early on, when you can constantly expand your tilled land, focus on crops with high ROI rather than just high profit per plant. A Parsnip has a 335% ROI, meaning the profit from one harvest can buy more seeds than the profit from a Cauliflower (76% ROI). This snowball effect lets you scale your farm faster, even if individual plants are less valuable.
Soil Care and Long-Term Planning
Farming isn’t just about what you plant; it’s about preparing the ground. Using Fertilizer (Basic, Quality, or Deluxe) increases the chance to harvest silver, gold, or even iridium-quality crops, which sell for significantly more. Apply fertilizer before planting the seed. While watering is a daily task, investing in Sprinklers (covered in Section 3) is the ultimate quality-of-life upgrade, automating the most energy-intensive part of the loop and freeing you to explore, mine, or socialize.
As your first year concludes, transition your thinking from seasonal profits to perennial infrastructure. Use Winter to plan your farm layout, upgrade tools, and aim to unlock the Greenhouse. This building allows you to grow any crop in any season, breaking the seasonal rotation and enabling truly limitless, optimized farming. The crops you choose each season are the stepping stones to that goal.
Tools and Infrastructure: Upgrades and Storage
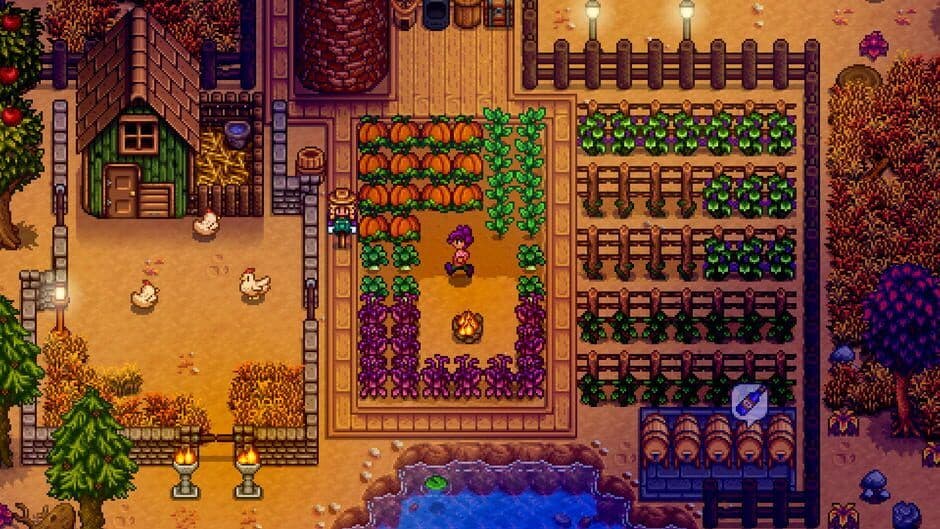
Advanced farm layouts require significant tool and building upgrades.
Tools and Infrastructure: Upgrades and Storage
Your starter tools are functional, but they are the single greatest bottleneck to your farm’s growth. This section is about transforming daily chores from a grueling energy drain into a streamlined, efficient operation. By strategically upgrading tools and building essential infrastructure, you reclaim hours of your day and unlock the true potential of your land.
The Tool Upgrade Ladder: From Copper to Iridium
Your journey to efficiency runs through Clint’s Blacksmith shop. Upgrades follow a strict, costly hierarchy: Copper (2,000g + 5 bars), Steel/Iron (5,000g + 5 bars), Gold (10,000g + 5 bars), and Iridium (25,000g + 5 bars), with each upgrade taking two full days. The order in which you tackle them is critical.
- First Priority: The Watering Can. This is your most-used tool until you automate with sprinklers. Upgrading it directly translates to more energy and time. A Copper Can waters three tiles in a line, a Steel Can does five, and the game-changing Gold Can waters a 3x3 area (9 tiles). Plan upgrades for the day before it rains or at the end of a season to avoid being without it during crucial watering times.
- Second Priority: The Pickaxe. A better Pickaxe is your key to the Mines. A Steel Pickaxe is required to break the boulders blocking your farm and mines copper nodes in fewer hits. Progressing to Gold and Iridium drastically speeds up ore collection, which fuels every other upgrade and crafting project.
- Third Priority: The Axe. A Copper Axe clears small stumps; a Steel Axe is required for the large logs blocking key areas. The Gold Axe chops a standard tree in just two hits, making wood collection for buildings and crafting trivial.
- Strategic Upgrades: The Hoe and Trash Can. Upgrading your Hoe follows a similar pattern to the Watering Can, letting you till large areas for planting quickly. The Trash Can upgrade is often overlooked but valuable; an Iridium Trash Can returns 60% of an item’s sale price when you discard it, turning inventory management errors into partial refunds.
Why it’s here: Tool upgrades are non-negotiable for scaling your farm. They convert finite daily energy into exponentially greater output. Prioritizing the Watering Can and Pickaxe first addresses your two biggest early-game constraints: crop capacity and resource acquisition.
The Silo: Your First and Most Critical Building
Before you build a Coop or Barn, you must build a Silo from Robin’s Carpenter’s Shop for 100g, 100 Stone, 10 Clay, and 5 Copper Bars. This humble structure is the cornerstone of animal husbandry. When you cut grass on your farm with a Scythe, a portion is automatically converted into Hay and stored in the Silo (up to 240 pieces per Silo). Without a Silo, cutting grass yields only fiber—you lose the vital fodder.
Why it’s here: The Silo is a passive resource generation system. It allows you to stockpile free animal feed through the spring, summer, and fall, creating a buffer for winter or rainy days. Building it early lets you clear your farm for planting while banking a crucial resource for your future livestock, saving thousands of gold on purchased hay from Marnie.
Beyond Basics: Enchantments and Specialized Tools
Once you’ve mastered the metal ladder, the endgame offers magical customization via the Volcano Forge. For 1 Prismatic Shard and 20 Cinder Shards, you can enchant a tool. While random, certain enchantments are transformative:
- Efficient: Removes energy cost for Axes, Hoes, Pickaxes, and Watering Cans. This is the ultimate quality-of-life enchantment.
- Reaching: Expands the area of effect for Hoes and Watering Cans to a massive 5x5 tile area, surpassing even the Iridium Can’s 6x3.
- Bottomless: Gives your Watering Can infinite water, making it the definitive upgrade.
Don’t forget specialized tools like the Auto-Grabber (25,000g from Marnie), which automatically collects animal products, and the Iridium Rod, which allows the use of bait and tackle for superior fishing. Your Backpack upgrades from Pierre’s (2,000g for 24 slots, 10,000g for 36 slots) are also essential infrastructure, as they determine how much you can accomplish on each mining or foraging run.
Why it’s here: Infrastructure isn’t just about buildings; it’s about permanently enhancing your capabilities. Enchantments and late-game tools remove the last vestiges of grind, while backpack upgrades are a direct investment in daily productivity. This progression turns you from a laborer into a farm director.
Takeaway: Do not delay tool upgrades or your first Silo. They are the engine of your farm’s efficiency. Follow the upgrade priority of Watering Can > Pickaxe > Axe, build a Silo before your first animal, and view enchantments as the final polish on a well-oiled machine. This investment pays for itself tenfold in saved time and energy.
Exploration and Gathering: Foraging and Mining
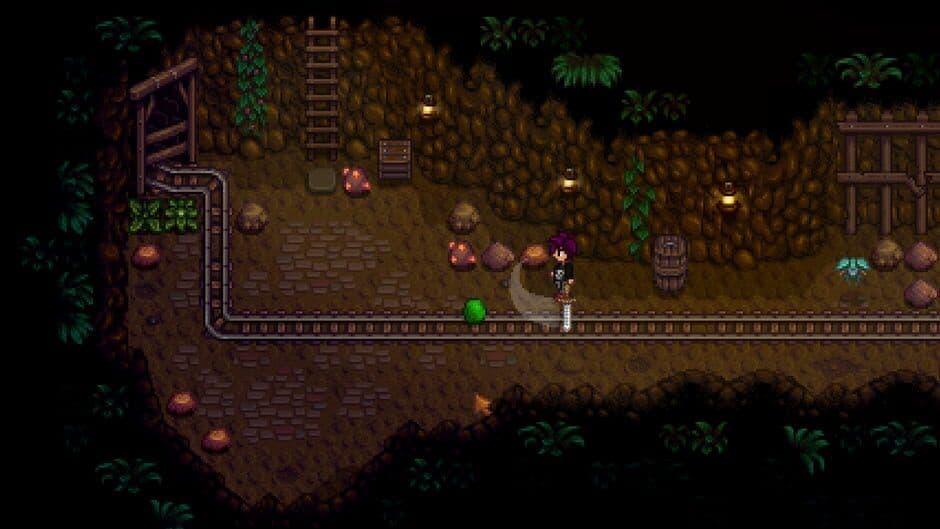
Gathering materials is essential for progression and farm upgrades.
Exploration and Gathering: Foraging and Mining
While your farm is your home base, Stardew Valley’s true depth is unlocked by venturing out. This section moves beyond your property lines to cover the essential skills of gathering resources from the wild and delving into the dangerous, monster-infested mines. Mastering these systems is non-negotiable for progressing your farm, completing the Community Center, and unlocking powerful crafting recipes.
Mining and Combat: Your Gateway to Progression
Why it’s here: The Mines are the primary source of metal ores, stone, and geodes, all critical for tool upgrades, crafting, and construction. However, they are also a hostile environment where your Combat skill becomes vital. Access opens on Day 5 after Joja clears the landslide. Combat experience is earned solely by defeating monsters, with tougher foes granting more XP. Each level increases your max HP by 5, but the real power spikes come at levels 5 and 10 when you choose a profession. The Fighter path (10% more damage, +15 HP at level 5) is generally superior for beginners over Scout (50% increased critical chance) because consistent, survivable damage is key when you’re under-geared. Understanding monster XP values helps prioritize targets: a Green Slime (3 XP) is trivial, but a Dust Sprite (2 XP) in large numbers is great for grinding, and a Ghost (15 XP) poses a significant threat but offers a worthwhile reward.
Key Strategy: Never enter the mines without a clear exit strategy (keep an eye on the time and your health) and a stocked inventory. Bring food for healing—Energy Tonic (restores 500 Energy, 225 Health) is ideal but expensive; foraged berries or cheap crops like Parsnips work early on. Your first major goal should be reaching the mine elevator checkpoints every 5 floors to enable quick return trips. Combat here isn’t just about survival; it’s the engine for acquiring the resources needed to transform your farm from humble beginnings to an industrial powerhouse.
Foraging and Crafting: The Free Profit Engine
Why it’s here: Foraging is the most accessible and risk-free source of early-game income and resources. Unlike farming, it requires no initial investment—just a keen eye while exploring the map. Each season offers unique forageables: Spring has Wild Horseradish, Daffodils, and Leeks; Summer has Sweet Peas and Spice Berries; Fall has Common Mushrooms, Wild Plums, and Hazelnuts; Winter has Winter Roots and Crystal Fruit. Leveling your Foraging skill increases the quality of foraged items and unlocks essential crafting recipes, like the Tapper (Foraging Level 3) for sustainable Maple Syrup, Oak Resin, and Pine Tar production.
The true power of foraging is realized through crafting. Turning common foraged items into higher-value goods is a cornerstone of early efficiency. For example, Wild Seeds for each season are crafted from foraged items and yield more forageables when planted, creating a virtuous cycle. As highlighted in the scout source, Caroline’s 2-heart Tea Sapling recipe (2 Wild Seeds, 5 Fiber, 5 Wood) is a game-changer. The resulting Tea Bushes produce daily leaves in late season, require no watering, survive winter, and the saplings themselves sell for a tidy profit. This exemplifies how foraging transitions from simple collection to a sophisticated, low-effort production line.
The Map and NPC Schedules: Timing Your Expeditions
Why it’s here: Efficient exploration requires more than just knowing where things are; it’s about knowing when to be there. The Stardew Valley map is divided into distinct areas (Forest, Mountain, Beach, etc.), each with unique forageables, fishing spots, and NPC paths. NPC schedules are critical because you can often combine resource-gathering trips with social tasks. For instance, heading to the Mountain to mine or forage for Leeks? Check the schedule—Linus is often there, and gifting him a foraged Dandelion or Spring Onion (both are Likes) progresses that valuable friendship. Planning a beachcombing run on a sunny day? You’ll likely find Haley taking photos or Elliott staring poetically at the sea, allowing for a quick gift drop-off.
Key Strategy: Use rainy days for focused mining or deep forest foraging, as most villagers will be indoors, simplifying their locations (often at the Saloon). Keep a mental or physical note of key forage spawn locations (like the secret woods for Hardwood or the beach for Coral) and align your visits with NPCs who frequent those areas. This integrated approach—mapping your resource goals onto the social and temporal layout of the valley—turns aimless wandering into a streamlined operation, saving precious in-game hours and energy.
Social Strategy: Befriending Villagers for Rewards
Building a network of friends unlocks helpful mail gifts and recipes.
Social Strategy: Befriending Villagers for Rewards
While romance might be your long-term goal, the most strategic early-game move in Stardew Valley is to cultivate friendships for their tangible, mechanical rewards. The social system isn't just about narrative; it's a resource engine. By understanding the Gifting system—where talking daily grants +20 points, loved gifts grant +80, and these values are multiplied on birthdays—you can efficiently unlock powerful recipes and gifts that accelerate your farm's growth. Prioritizing villagers with accessible favorite items and high-value rewards is the key to a stronger Year One. Here are the three essential early-game allies.
Pam: The Power Grid Patron
Why she's here: Pam is the quintessential example of a high-reward, low-investment friendship. Her most significant contribution is periodic mail gifts of Battery Packs. This item is a critical bottleneck for late-spring and summer progress, as it’s required to craft game-changing items like Iridium Sprinklers (for automated farming), Crystalariums (for gem duplication), and the Farm Computer. Normally, you'd need to craft Lightning Rods and wait for a thunderstorm (guaranteed on Summer 13 and Summer 26), a process that often pushes these crucial upgrades into Year Two. Pam's gifts bypass this entire wait. She also sends Beer (sellable for 200g) and Energy Tonics (restoring 500 Energy/225 Health), saving you 1,000g each versus buying from Harvey's Clinic.
How to befriend her: Pam’s Loved gift is Parsnip, a Spring crop that grows in just 4 days and costs only 20g from Pierre's. Her Liked gifts include Daffodils, abundant from Fall foraging. With such cheap, readily available options, you can rapidly build hearts without straining your early resources. The takeaway: Befriending Pam is an investment in your farm's infrastructure, providing rare components long before you could reliably produce them yourself.
Caroline: The Tea Tycoon
Why she's here: Caroline offers one of the most profitable and low-maintenance early-game unlocks. Upon reaching 2 hearts with her, she gives you the Tea Sapling recipe. The ingredients are trivial: 2 Wild Seeds (crafted from foraged items), 5 Fiber, and 5 Wood. The resulting Tea Bush is a powerhouse: it produces Tea Leaves daily during the last week of Spring, Summer, and Fall, requires no watering, survives Winter, and can even grow during the cold season. You can sell the raw leaves, but processing them in a Keg into Green Tea (140g as an Artisan good) or in a Preserves Jar into Pickled Tea (210g) is more profitable. Even simpler, crafting and selling the sapling itself yields a profit of 75g to 200g over its component costs.
How to befriend her: While her Loves (like Summer Spangle) are harder early on, Caroline Likes Daffodils and Wild Horseradish, both easily foraged in Spring. This makes her friendship grind straightforward. The takeaway: Caroline’s gift transforms foraged trash into a consistent, passive income stream and a valuable crafting ingredient, making her friendship a cornerstone of early financial stability.
Linus: The Forager's Friend
Why he's here: Linus is the most forgiving and rewarding friend for a new player. His mail gifts often include fish like Catfish and Largemouth Bass, which are needed for the Community Center Fish Tank bundles, saving you difficult fishing checks. His friendship milestones are even better: at 3 hearts, he gives the Sashimi recipe (any fish becomes a dish liked by most villagers and loved by Sebastian). At 4 hearts, he grants the exclusive Wild Bait recipe, which allows you to catch two fish at once—dramatically boosting early income and fulfilling special orders faster. It also reduces trash in Crab Pots.
How to befriend him: Linus is uniquely easy to please. While his Loved gifts are complex, he Likes nearly every foraged item—Dandelions, Leeks, Spring Onions, Wild Horseradish. Simply giving him the common weeds and flowers you pick up while exploring will steadily raise his heart level. The takeaway: Linus rewards the most basic gameplay loop (foraging) with recipes that enhance your fishing and cooking, making him an effortless and massively beneficial first friend.
Strategic Comparison: While other villagers like Shane (for Blue Chickens) or the Wizard (for magical buildings) offer cool late-game perks, Pam, Caroline, and Linus provide foundational advantages in your first season. Pam solves a late-summer resource crisis, Caroline establishes a year-round cash crop, and Linus enhances your fishing and foraging efficiency from the outset. Prioritize these three to build a robust economic and resource base, making all your subsequent goals—whether completing the Community Center or romancing anyone you like—much easier to achieve.
The Long Game: Fishing and Community Center Goals

Official artwork showcasing the community of Stardew Valley.
The Long Game: Fishing and Community Center Goals
While farming provides your daily bread and mining fuels your infrastructure, two systems define Stardew Valley’s true long-term progression: the intricate skill of fishing and the overarching mission of the Community Center. This section tackles the game’s most mechanically demanding activity and its primary narrative goal, explaining why mastery here separates seasonal farmers from valley legends.
Fishing: The Skill-Based Economy
Often a point of frustration for new players, fishing is a deep, rewarding, and highly profitable system that operates on entirely different rules than farming or mining. It’s not just about clicking at the right time; it’s a dynamic mini-game where your skill, gear, and knowledge directly influence your success and income.
Why it’s here: Fishing is the game's purest skill check. Your success isn't gated by daily energy or random ore drops, but by your own ability to manage the fishing bar. It offers an early, renewable source of high income independent of your farm's development. A day spent fishing can easily out-earn a day of watering parsnips, funding crucial early upgrades.
The core mechanic involves casting your line, waiting for a bite (indicated by an exclamation point and sound), and then playing a mini-game where you must keep a fish icon within a moving green bar until a progress meter fills. The fish move with different behaviors—some dart erratically, others sink or float predictably—making each catch a unique challenge. Your Fishing Skill Level, increased by catching fish or collecting from Crab Pots, is paramount. Each level increases the size of your green bar, making it easier to contain the fish, and unlocks new rods, bait, and tackle.
Gear progression is critical. You start with the free Bamboo Pole, but should quickly upgrade to the Fiberglass Rod (1,800g) at Fishing Level 2 to use Bait, which makes fish bite faster. The ultimate goal is the Iridium Rod (7,500g) at Level 6, which allows you to equip Tackle—special attachments that modify the mini-game. The Trap Bobber, for instance, makes the fish's escape meter drain slower when it's outside your bar, a lifesaver for difficult catches.
The real genius of fishing is its synergy with exploration and goals. Different fish appear in specific locations (ocean, river, lake, forest pond), during certain seasons, times of day, and weather conditions. Catching a Catfish, needed for a Community Center bundle, requires fishing in the river on a rainy Spring or Fall day. This turns fishing into a scavenger hunt across the valley's calendar.
Key Takeaway: Don't be intimidated by the mini-game. Invest in better rods and tackle as soon as possible, and use fishing as a reliable early-game cash infusion. Check the Collections tab to track which fish you've caught and their locations.
Community Center Bundles: The Valley's Restoration Project
The decaying Community Center in Pelican Town isn't just set dressing; it's the game's central progression path, presented as an alternative to simply buying a JojaMart membership. Restoring it by completing "Bundles" of specific items unlocks new areas, mechanics, and rewards, weaving every other game system—farming, foraging, mining, fishing, and animal husbandry—into a cohesive long-term goal.
Why it’s here: The Community Center provides structure and purpose. Without it, your first year can feel aimless beyond making money. The bundles give you a checklist that teaches you the game's rhythms: you'll learn you need a Red Cabbage for the Dye Bundle (a Year 2 crop unless you get lucky at the Traveling Cart), or that you must prepare to catch a Rabbit's Foot or Truffle much later. It's the game's gentle way of guiding you toward experiencing all it has to offer.
The Bundles are grouped into themed rooms. The Fish Tank, for example, requires specific fish like the Largemouth Bass (lake, any season) and Shad (river, rainy Spring/Fall). The Pantry focuses on farming, asking for high-quality crops, animal products, and artisan goods. The Bulletin Board contains more eclectic bundles, like the Chef's Bundle requiring a Maple Syrup, Fiddlehead Fern, Truffle, and Poppy, which encourages deep foraging and relationship building.
Completing a room's bundles grants a major reward. Finishing the Fish Tank instantly repairs the Bridge at the Beach, granting access to the Tide Pools where you can forage Coral, Sea Urchins, and find a powerful sword. The Pantry rewards you with a Greenhouse, allowing you to grow crops year-round, a game-changing unlock. The ultimate reward for restoring the entire Community Center is access to The Desert, opening up a vast new area with unique resources.
Key Takeaway: Check the Community Center bundles early and often. Use them as a planting and gathering guide. Some items, like the Catfish or Walleye, are season-specific, so plan ahead. Don't view the bundles as a chore, but as the valley's roadmap to prosperity.
The Synergy: Fishing for the Community Center
These two systems are deeply interconnected. The Fish Tank bundles are a primary driver for engaging with the fishing mechanic. You’ll need to learn where and when to catch a Tiger Trout (river, Fall/Winter) or an Eel (ocean, rainy night in Spring/Fall). Furthermore, befriending villagers like Linus (as detailed in our Social Strategy section) can directly aid this process, as he may mail you needed fish like Catfish or Largemouth Bass.
Fishing also supports other bundles. The Field Research Bundle in the Bulletin Board requires a Chub (river/lake), and the Specialty Fish Bundle asks for rare catches like the Sandfish (desert) or Woodskip (Secret Woods). The income from selling other fish funds the purchases needed for bundles in the Crafts Room (like ore for smelting) or the Vault (straight cash payments).
Final Recommendation: Embrace the fishing mini-game; it becomes satisfying with practice and is your fastest route to early wealth. Simultaneously, let the Community Center bundles dictate your seasonal to-do list. This dual focus—mastering a complex skill and working toward a grand, multi-faceted goal—is the heart of Stardew Valley’s enduring appeal and the definitive path to leaving your mark on the valley.