How to Master Core Mechanics in The Witcher 3: Wild Hunt
Welcome to the Northern Kingdoms, where your success as a witcher hinges on preparation and sharp instincts. Before you chase the Wild Hunt or track Yennefer, you need to master the fundamental survival loop of The Witcher 3: Wild Hunt. This opening section will transform you from a confused newcomer into a savvy monster hunter who knows how to navigate, prepare, and survive the brutal world.
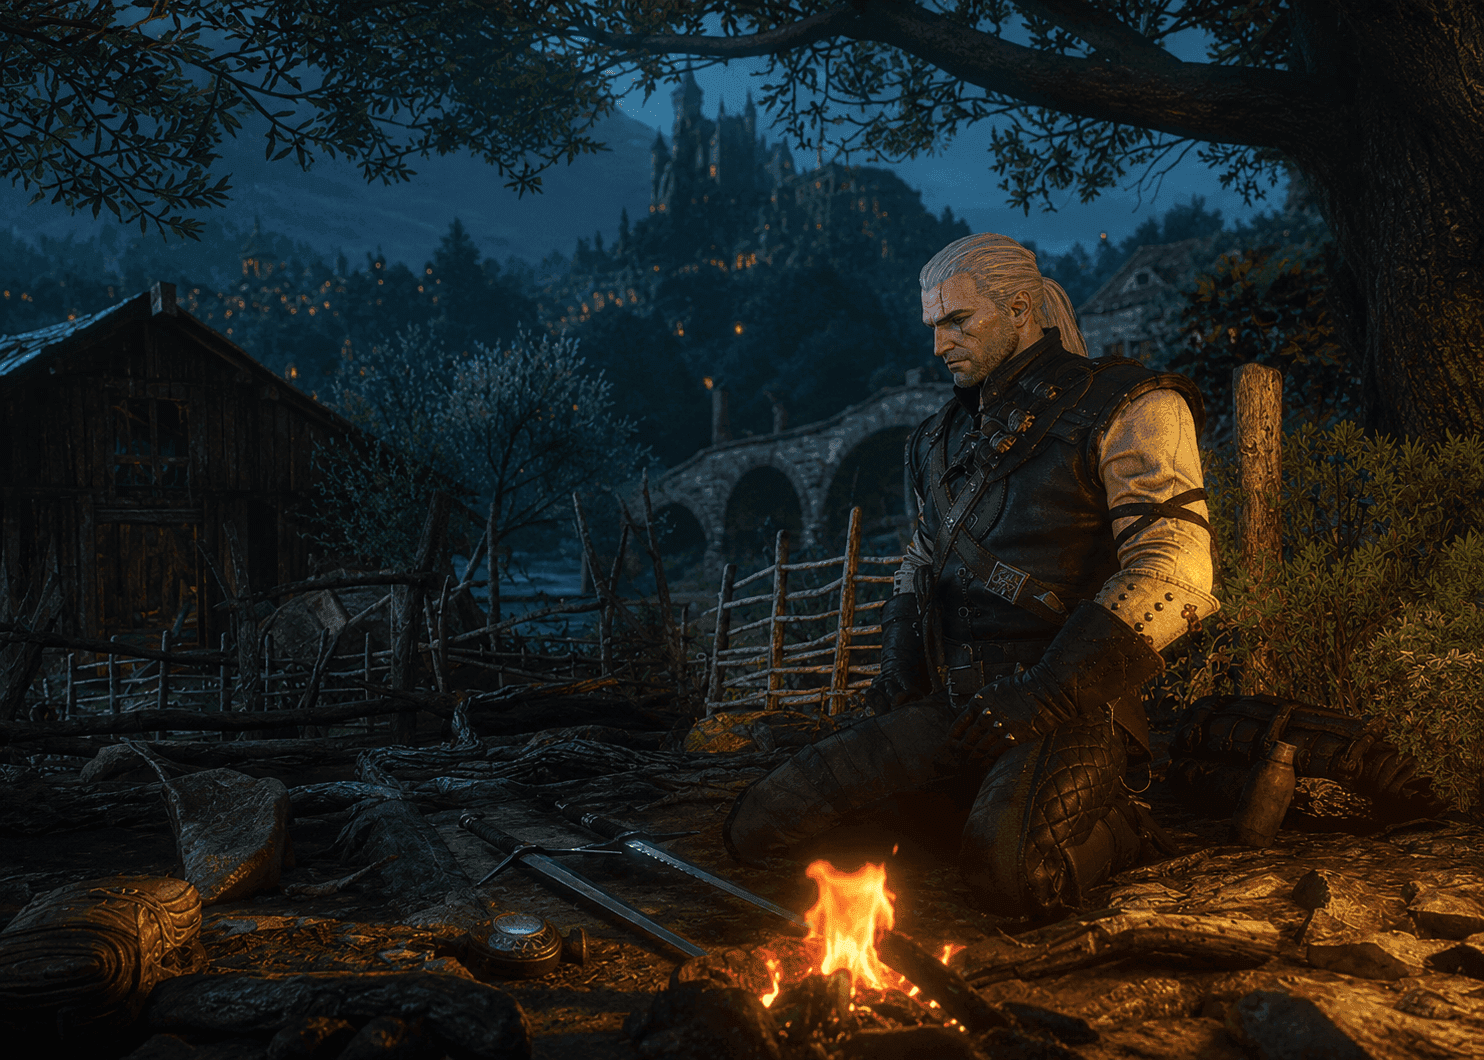
Meditating before combat refills your resources and restores health on lower difficulties.
Think of White Orchard as your training ground. While the main quest will push you forward, taking time here to understand the core mechanics pays off massively for the rest of your adventure. Let's break down the essentials.
The Foundation: Navigation and Investigation
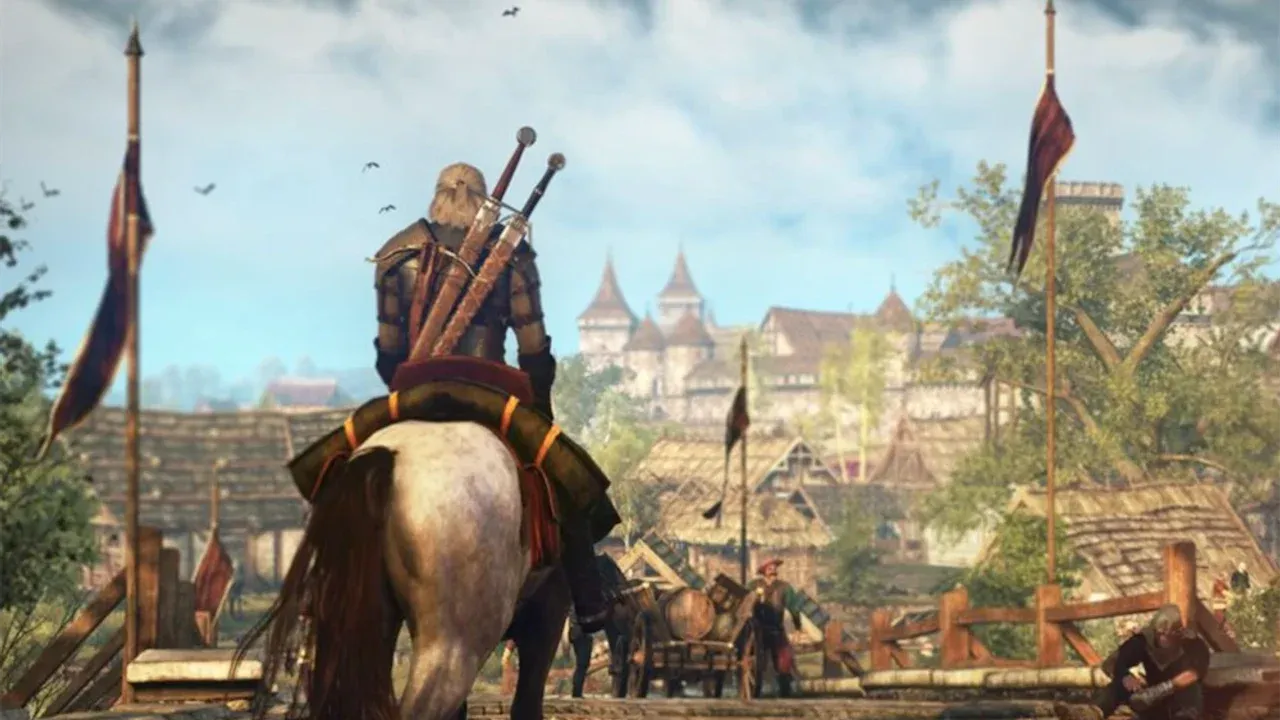
Your two most vital tools for exploration are Fast Travel and Witcher Senses. Scattered across the world are green Sign Posts. Interacting with one unlocks it, allowing you to travel instantly to any other discovered Sign Post from your map—this is how you’ll traverse the vast regions without endless horseback rides.
When you’re on foot and need to find clues, loot, or herbs, hold [L2/LT] to activate your Witcher Senses. This view highlights interactive objects: lootable containers glow yellow or red, key tracks shimmer, and plants you can pick stand out. Trust me, you’ll live in this mode while investigating contracts.
While using Witcher Senses, slow down and scan your surroundings thoroughly. Important clues are easy to miss if you’re rushing.
Knowledge is Power: The Bestiary and Looting
Every contract and random monster encounter becomes easier if you do your homework. Open your menu and navigate to Glossary > Bestiary. This is your encyclopedia of horrors, detailing each monster's weaknesses, which Oils to apply to your blades, and which Signs are most effective. Reading the entry before a tough fight isn’t cheating—it’s being a professional.
Speaking of preparation, get into the habit of Looting everything. In the open world, press [A] to interact with containers, corpses, and plants. Use your Witcher Senses ([L2/LT] hold) to make sure you don’t miss a single crate or barrel. Early on, loot provides crucial crafting components, alchemy ingredients, and vendor trash to sell for your first few Crowns.
Sustaining the Hunt: Meditation and Health
Geralt is a walking alchemy lab, and managing your resources is key. Open your menu and select Meditation, then press [X] to start. This passes time and has two critical functions:
- On lower difficulties, it restores Geralt’s health to full.
- On all difficulties, it replenishes all your crafted potions, bombs, and decoctions, as long as you have some form of Alcohol (like Alcohest) in your inventory. This means you only need to craft each alchemy item once.
This makes meditation your best friend before any known danger. Stock up on alcohol, meditate, and you’ll always face a fight with a full arsenal.
⚠️ Watch out: On the two highest difficulties, Blood and Broken Bones and Death March, meditation does not restore health. You’ll need to rely on food, drink, and the Swallow potion for healing.
Master these five core mechanics—Fast Travel, Witcher Senses, the Bestiary, Looting, and Meditation—and you’ve built the foundation for everything to come. You’re no longer just reacting to the world; you’re preparing for it, which is exactly what a Witcher should do. Now, let’s get you geared up and skilled for the battles ahead.
Best Early Game Skills and Character Build for The Witcher 3
Welcome to White Orchard—this starting zone in The Witcher 3: Wild Hunt isn't just a tutorial; it's your chance to build a Geralt who can survive anything the Continent throws at him. The early game can feel punishing, but with the right skills, you'll transform from a vulnerable witcher into a walking tank. Here’s the survival-focused character build that will carry you through the Royal Griffin and beyond.
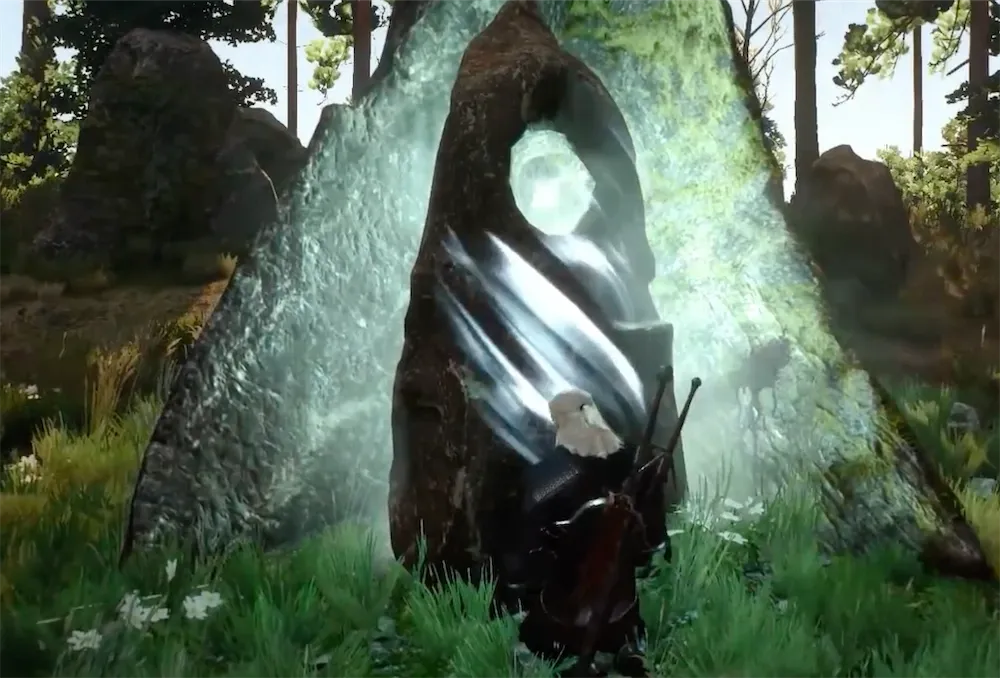
Visit Places of Power to earn free ability points for your build.
The core of this build revolves around two skills: Gourmet and Quen Sign. You'll find Gourmet in your Character Menu > General Tab. Invest a point here, and any food you eat will regenerate your health for a full 20 minutes of real-time play. Trust me, this single skill point saves you countless Swallow potions and meditation sessions, letting you stay in the fight longer. For your primary defense, head to the Character Menu > Combat/Signs and unlock Quen Sign. In combat, press [L1/LB] to select it, then [R2/RT] to cast. This creates a protective shield that absorbs the next hit you take, making it your best friend against any powerful enemy.
With Gourmet active, you can eat a single piece of cheap food and get nearly half an hour of steady health regen. Stock up on bread or meat from vendors—you'll thank yourself later.
Your first few Ability Points should go into enhancing Quen. Prioritize upgrading it to its explosive variant, which stuns enemies when the shield breaks. This not only protects you but creates a perfect opening for a counterattack. This setup, combined with Gourmet's constant healing, makes you incredibly durable. To round out your early toolkit, consider a point in Axii Sign (found in the Character Menu > Signs). Press [L1/LB] to select and [R2/RT] to cast in dialogue to charm NPCs for better rewards, or use it in combat to briefly stun a single foe. For raw damage, Igni Sign (same menu) is fantastic for burning enemies and dealing damage over time, while Aard Sign can knock back groups or destroy weak walls in the environment.
Here’s the trick most guides miss: you need Ability Points to buy these skills. Your first stop in White Orchard should be hunting down all six Places of Power. Each one grants you a free Ability Point the first time you meditate there, giving you more than enough to secure Gourmet and a strong Quen right away. They’re often guarded, so use your new Quen shield to stay safe while you claim your reward.
With Gourmet ensuring you’re always healing and Quen soaking up big hits, you’re ready to face the Royal Griffin or any other early threat with confidence. This build turns survival from a struggle into a strength. Let’s go.
How to Complete All White Orchard Side Quests and Contracts
White Orchard is your proving ground in The Witcher 3: Wild Hunt, a compact tutorial region packed with opportunities to earn extra coin, experience, and gear. While the main story pushes you toward the griffin, taking time to explore its side quests and contracts will make you significantly stronger for the journey ahead. Here's how to clear the board and leave no stone unturned.

The Viper School Gear is the best early-game equipment.
The Essential Notice Boards
Your first stop for optional work should always be a Notice Board. In White Orchard, you'll find them at key locations like the White Orchard Inn and the Nilfgaardian Garrison. Examining every notice (they have a yellow icon when new) will reveal map markers and, crucially, add quests to your journal. Trust me, checking these boards is the single best way to ensure you don't miss anything.
The Contracts & Side Quests
White Orchard features one official Witcher Contract and several side quests. Tackling them all before finishing the main quest "The Beast of White Orchard" is highly recommended, as some may become unavailable later.
Contract: Devil by the Well
This is your first real contract. Grab it from the Notice Board at the White Orchard Inn. You'll be asked to investigate a haunted well in the Abandoned Village. Use your Witcher Senses to examine the area, then consult your Bestiary to learn you'll need Specter Oil and the Yrden Sign to damage the Noonwraith. This fight teaches you to prepare for your prey—a core Witcher lesson.
Side Quest: Twisted Firestarter
Head to the forge in the village and speak with Blacksmith Willis. His shop was burned down, and he wants you to find the arsonist. Use your Witcher Senses to follow a trail of boot prints and tinderbox shavings from the forge, leading you to a cottage by the water. Inside, you'll find the culprit. This quest is a great early introduction to using your senses for investigation.
Side Quest: On Death's Bed
Visit Tomira at the Herbalist's Hut on the eastern side of the map. She'll ask you to help a sick woman named Lena. You can give her a Swallow potion (craft one if you don't have it) or refuse. Helping her yields solid experience and crowns. It's a quick, morally straightforward quest with a nice reward.
Side Quest: A Frying Pan, Spick and Span
An old woman near the river east of the inn will ask you to find her missing frying pan. The pan is inside a locked hut nearby. You can either pick the lock (requires the Delusion skill in the Axii Sign tree) or simply use the Aard Sign to blast the door open. Grab the pan and return it for a small reward and some warm dialogue.
Side Quest: Missing in Action
This quest can appear on the Notice Board near Woesong Bridge. You'll meet Dune Vildenvert at the Ransacked Village, who is searching for his brother, Bastien. Use your Witcher Senses to follow clues on the battlefield, which will lead you to a grim discovery and a choice about what to tell Dune.
Side Quest: Precious Cargo
On the road between the Sawmill and the Nilfgaardian Garrison, you'll find a distressed merchant whose cart was attacked. Track the cart's path using your senses into the swamp, where you'll find it ambushed. Investigate the scene to uncover the truth—the merchant isn't being entirely honest. How you resolve this confrontation is up to you.
Complete "On Death's Bed" and "Twisted Firestarter" early. The Herbalist Tomira and Blacksmith Willis become merchants you can sell to, giving you more options to offload junk and buy supplies.
Exploration & Hidden Rewards
Beyond the journal quests, White Orchard is dotted with points of interest. Clearing the six Bandit Camps and three Monster Nests (all inhabited by Ghouls) nets you decent loot and experience. Most importantly, seek out the six Places of Power. Meditating at each one grants a permanent Ability Point and a temporary buff to a specific Sign. These points are invaluable for powering up your build early on.
With these quests completed and the Points of Power claimed, you'll leave White Orchard flush with experience, ability points, and coin—a much stronger Witcher ready for the wider world of The Witcher 3: Wild Hunt.
Where to Find the Best Early Gear in White Orchard
Before you even think about leaving White Orchard in The Witcher 3: Wild Hunt, there’s a treasure trove of early-game power waiting to be claimed. This isn't just about surviving the Royal Griffin—it’s about building a foundation that will carry you through the bloody swamps of Velen. Your first big power spike comes from two sources: permanent stat boosts from mystical stones and a massive damage upgrade from Witcher-crafted swords.

Location of the Serpentine Steel Sword diagram.
Claim Your Free Ability Points at the Places of Power
Scattered across White Orchard are six Places of Power, mystical stones that glow with magical energy. Finding and interacting with each one is non-negotiable for a strong start. The first time you approach a stone and [X] hold to draw power, you’ll be rewarded with a permanent +1 Ability Point and a temporary 30-minute buff to a specific Witcher Sign. Here’s where to find all six:
- Southern White Orchard: East of the Abandoned Village, guarded by a tough level 6 bear. This stone boosts Yrden.
- Abandoned Village: Southwest of the village itself, unguarded. This one boosts Axii.
- Vulpine Woods: Northwest of Woesong Bridge, guarded by a level 6 Wraith. Another Axii boost.
- White Orchard Cemetery: North of the Mill, guarded by a formidable level 7 Wraith. This grants an Igni boost.
- Northern White Orchard: North of the Cemetery, near a monster nest with Ghouls. It’s unguarded and boosts Aard.
- Northeastern White Orchard: North of the main crossroads, near a large monster nest (approach from the west to avoid aggro). This final stone boosts Quen.
Tackle these early, even if you have to run from the higher-level guards. Six free Ability Points can be invested immediately into game-changers like the Gourmet skill or stronger Signs.
Hunt Down the Formidable Viper School Swords
While you’re exploring those Places of Power, you’ll naturally stumble upon the diagrams for the best early-game weapons: the Viper School Gear. This two-piece set will outclass any random sword drop you find for hours.
First, seek out the Diagram: Viper Steel Sword. It’s located in a Bandit Camp at Amavet Castle Ruins, east of the Ransacked Village. You’ll need to climb a collapsed wall to reach the ruins, where you’ll face a group of Deserters. Clear them out and loot the chest in the most intact section of stonework to find the diagram.
Next, find the Diagram: Viper Silver Sword. Head to the White Orchard Cemetery (you’ll already be there for the Place of Power). A level 7 Wraith guards the crypt here—use Specter Oil and the Yrden Sign to make the fight manageable. After dealing with the specter, use your Aard Sign to blast open the crypt's fragile southern doorway. Descend, defeat the Wraith that reappears inside, and loot Kolgrim’s corpse to find the diagram.
Finding either diagram starts the “Scavenger Hunt: Viper School Gear” quest and marks the other location on your map. Once you have both, visit the Quartermaster at the Nilfgaardian Garrison (he’s your best bet in White Orchard) to craft them. They require materials like Emerald Dust (dropped by Wraiths) and Silver Ingots, so you might need to do some looting or selling first.
Don't Miss These Other Key Rewards
While hunting for the big-ticket items, keep an eye out for these other valuable finds:
- Maribior Sword: During “The Beast of White Orchard” quest, you’re sent to find Buckthorn in the river north of the Garrison. While there, dive down to a wrecked boat to find a ‘Spoils of War’ treasure chest containing this solid early-game steel sword and some coin.
- Zoltan Chivay Gwent Card: At the Woesong Bridge Inn in White Orchard, you can challenge the Scholar sitting inside to a game of Gwent. Beating him awards you this valuable Neutral card, crucial for building your early deck.
- Clearing Abandoned Sites: Several locations in White Orchard, like the Abandoned Village, are overrun with enemies. Clearing them out not only grants good experience but often restores NPCs to the area, unlocking new Merchants to buy and sell from.
With six Ability Points banked, the Viper Swords on your hips, and your pockets full of useful loot, you’ll leave White Orchard feeling like a true veteran Witcher, not a rookie just stumbling out of the tutorial. This preparation makes the upcoming Royal Griffin fight feel far less daunting. Let’s go claim that contract.
The Beast of White Orchard: Preparing for the Royal Griffin
The first real test of your monster-hunting skills in The Witcher 3: Wild Hunt begins here. You’ve agreed to hunt the Griffin for the Nilfgaardians, but you can’t just walk into a field and shout at it—you need to understand your prey and set the perfect trap.

The Witcher 3: Wild Hunt official artwork.
Your first stop is the Hunter's Cottage in White Orchard, where you’ll meet Mislav, the local hunter. He’ll lead you to the site of the Nilfgaardian massacre. Use your Witcher Senses here to follow the red tracks up the hill to the Griffin's Nest in the southwest hills. This is a crucial piece of the puzzle: you’ll find a dead female Griffin, which explains the male’s vengeful and aggressive behavior. Now you know what you’re dealing with.
With the cause identified, you need the bait. The Nilfgaardian commander mentioned Buckthorn, a pungent herb. You can find it yourself by heading to the riverbed north of the Nilfgaardian Garrison. Dive down near the wrecked boat and use your Witcher Senses to spot the yellow-flowered plant underwater. Grabbing it now saves you a trip later.
While you're in the river, check the boat wreck for a "Spoils of War" treasure chest containing a Maribor Sword and some coin. It’s a nice early-game boost.
Alternatively, you can visit Tomira at the Herbalist's Hut. She’s the local expert on flora and can provide information on Buckthorn (and she’s also the quest-giver for the “On Death's Bed” side quest). Whether you forage it yourself or buy it from her, securing the Buckthorn is your key to luring the beast.
With the herb in your pocket, return to the Woesong Bridge Inn and brief your old friend, Vesemir. He’ll devise the plan: he’ll take the Buckthorn and lay the trap in a nearby field while you prepare. When you’re ready, meet him at the ambush site marked on your map.
This preparation phase is what separates a Witcher from a common soldier. You’ve tracked the monster, learned its motive, and gathered the tools needed to force it into a fight on your terms. With the trap set, you’re ready to face the Royal Griffin.
Royal Griffin Boss Guide: Combat Strategy and Rewards
This is it—the final confrontation in White Orchard. In The Witcher 3: Wild Hunt, the Royal Griffin is a skill-check boss, but with a solid strategy, you’ll turn its aerial aggression into a trophy for your saddle. Let’s break down the fight and claim your reward.
The Griffin Fight: Two-Phase Strategy
The battle takes place in two distinct phases. When you meet Vesemir at the ambush site, the Griffin will swoop in and the real fight begins.
Phase 1: The Initial Ambush
The Griffin loves to dive-bomb. Your first priority is to dodge sideways the moment it tucks its wings and plunges. Immediately after dodging, equip your crossbow (gained earlier in the quest). Press [L1/LB] to select it, then [R1/RB] to fire a bolt. A well-timed shot as it dives will knock it out of the air, giving you a crucial opening.
Once it’s grounded, this is your moment. Swig a Thunderbolt Potion from your inventory (use the [D-pad]) to significantly boost your attack power. Rush in and attack the Griffin’s flanks with your silver sword—it’s more vulnerable there than head-on. Keep Quen active for an extra layer of protection if you take a stray hit.
The crossbow has unlimited ammo in this fight. Don’t be shy—use it every time the Griffin takes to the air to bring it down faster.
Phase 2: The Pursuit to Mill Hill
When you whittle its health down to roughly 50%, the Griffin will flee. Don’t let it recover—quickly summon Roach and pursue it to the Mill Hill, the new location marked on your map.
The tactics here are identical to Phase 1: dodge the dives, shoot it down with the crossbow, drink Thunderbolt, and slash its sides. Stay mobile and patient; getting greedy will get you gutted by its talons. Once you land the final blow, you’ll be prompted to decapitate it for proof.
Rewards and Aftermath
Your spoils for victory are substantial. First, loot the Griffin Trophy from the beast’s body. You can equip this to Roach’s saddle for a permanent 10% chance to dismember human and nonhuman opponents—a small but satisfying bonus for future skirmishes.
Next, ride back to the Nilfgaardian Garrison and speak with the Commander. He’ll ask for the Griffin’s head. Here, you’ll get a timed dialogue choice about accepting your coin reward. The research confirms this particular choice doesn’t have a major story impact in The Witcher 3: Wild Hunt, so you can accept the Crowns without worry. Refusing is purely a roleplay decision. Completing this hand-in progresses the main story to “Lilac and Gooseberries.”
With the beast slain and White Orchard safe, you’ve cleared the prologue’s greatest challenge. You’re now battle-tested, better equipped, and ready to hunt down Yennefer and whatever the wider world throws at you. Let’s go.