Witcher Gear Ranking Criteria and Mechanics
Before we dive into the definitive ranking of every Witcher School gear set, we need to establish the rules of the game. The Witcher 3’s gear isn’t just about bigger numbers; it’s a complex system of interconnected mechanics that reward specialization and smart play. A set that’s “best” for one player’s style might be a poor fit for another. This section will lay out the universal criteria used to judge each set and explain the core systems that make Witcher gear so powerful.
The Ranking Criteria
Our rankings are based on four pillars, evaluated at the Grandmaster tier, the pinnacle of Witcher gear crafting available in the Blood and Wine expansion. This is the only fair comparison, as lower-tier sets are incomplete stepping stones.
- Specialization Synergy: How well do the set’s bonuses (from 3-piece and 6-piece Grandmaster perks) complement a specific playstyle? A perfect set creates a powerful, focused build.
- Build Versatility: Can the set’s bonuses be effectively leveraged by multiple approaches, or is it a one-trick pony? Versatility is a strength, especially for players who like to adapt.
- Stat Efficiency: Beyond the unique perks, what are the raw defensive and offensive stats? This includes resistances (monster, elemental), armor rating, and inherent bonuses on individual pieces (e.g., Sign Intensity, Critical Hit Damage).
- Aesthetic & Accessibility: While subjective, the visual design matters. Furthermore, how arduous is the scavenger hunt to find all the diagrams? A great set locked behind a frustrating quest chain loses points.
Core Mechanics: Adrenaline, Toxicity, and You
Two mechanics are crucial to understanding why Witcher gear dominates: Adrenaline Points and Toxicity.
Adrenaline Points (AP) are generated by dealing damage and lost by taking hits. They are a secondary resource pool that can dramatically boost your damage output. Many Witcher gear sets and skills directly interact with AP. For example, some sets increase damage per Adrenaline Point, while others grant bonuses when you have full AP bars. Managing your aggression and defense to build and maintain Adrenaline is key to high-level play.
Toxicity is the lifeblood of an Alchemy-focused Witcher. Drinking potions and decoctions fills a Toxicity meter. The genius of the system lies in the Synergy skill in the Alchemy tree, which grants bonus Critical Hit Damage and Chance based on your Toxicity level. Furthermore, the Acquired Tolerance skill lets you ingest more potions before hitting dangerous levels. Several top-tier Witcher gear sets are designed to maximize this synergy, allowing you to run multiple, powerful decoctions simultaneously while turning your toxicity into a massive offensive boost.
The Next-Gen Update: A New Baseline
The free Next-Gen Update (Patch 4.0) fundamentally changed the balance of power for some sets and fixed long-standing issues. Our ranking considers the game in its current, post-update state. Key changes include:
- Combat Rebalance: The update integrated a curated version of the popular Full Combat Rebalance mod. While the exact tweaks are subtle, the overall effect was a smoothing of difficulty curves and a re-evaluation of some damage values, making a wider variety of builds more viable.
- Critical Bug Fixes: Most importantly, the Grandmaster Wolven gear recipe was fixed. Pre-update, it incorrectly required Mastercrafted items to craft. Now, it properly requires only Superior items, making its upgrade path consistent with other schools and far more logical.
- The New Contender: The update added the Forgotten Wolven Gear via a new quest, "In The Eternal Fire’s Shadow." This Netflix-inspired set enters the meta as a direct competitor to other medium armor options, and its inclusion has been factored into our rankings.
The Grandmaster Tier: The True Test
All rankings are settled at the Grandmaster level. This is where each school’s identity is fully realized through powerful 3-piece and 6-piece set bonuses. Comparing a Mastercrafted set to a Grandmaster set is like comparing a sharpened steel sword to Aerondight; there’s simply no contest. The journey to Grandmaster status in Toussaint is the final exam for each gear set, separating the good from the legendary.
Takeaway: With this framework in mind—specialization, mechanics, modern balance, and top-tier performance—we can now definitively rank every Witcher School gear set. The following list isn’t just about which has the highest armor rating; it’s about which sets best harness the deep systems of The Witcher 3 to make Geralt an unstoppable force of nature.
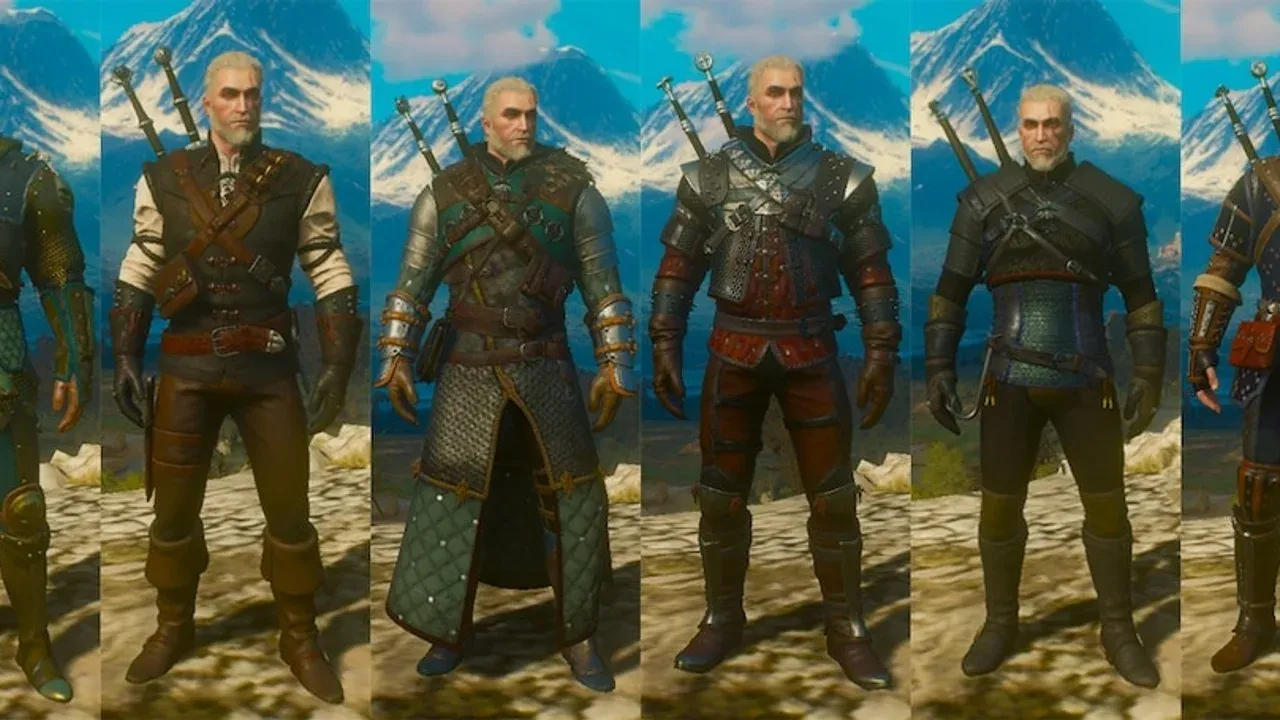
7. Viper School Gear
Why it's here: The Viper School gear is a unique and high-level set introduced in the Hearts of Stone expansion. It earns its place on this list not for its versatility or synergy, but for its potent, specialized identity. It is the definitive gear for a poison-themed playstyle and offers the best-in-slot defensive stats for its level, but it pays for this specialization by being the only Witcher set with no set bonuses whatsoever. This places it in a powerful yet narrow niche.
The Viper Set: A Specialist's Arsenal
The Viper gear is a Level 39 medium armor set, acquired exclusively through the Hearts of Stone storyline. Its acquisition is a multi-stage treasure hunt: the armor diagrams are purchased from Countess Mignole during the "Open Sesame!" quest, the Venomous Steel Sword diagram is found in Borsodi's vault, and the Venomous Silver Sword is a reward for choosing to help Olgierd von Everec at the expansion's conclusion. This late-game, quest-locked nature underscores its role as an endgame option for the base game and Hearts of Stone.
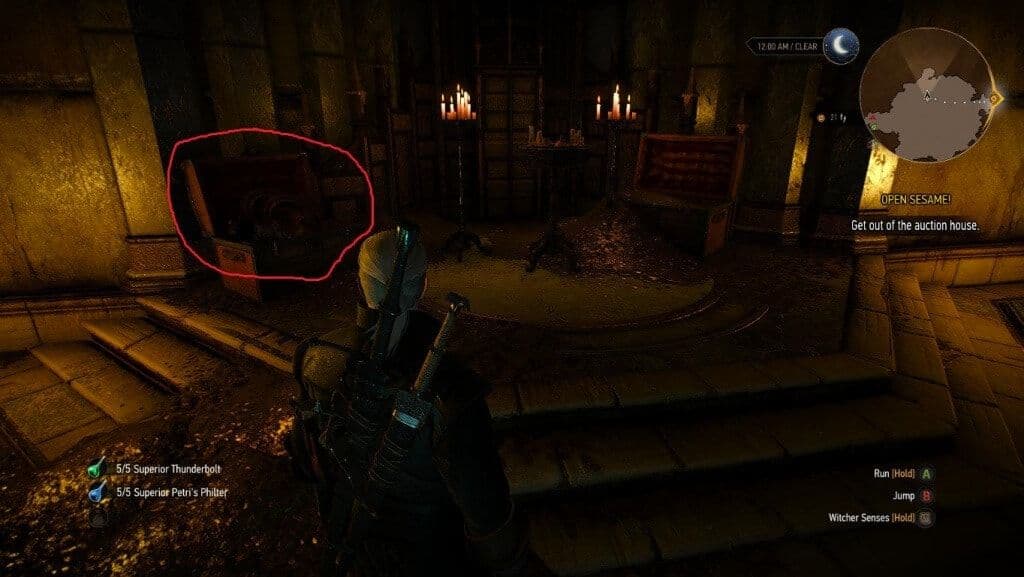
Finding the Viper diagrams requires exploring specific expansion locations.
Pros: Unmatched Defense and a Toxic Edge
The Viper set's strengths are immediately apparent in its raw statistics. It boasts the highest base armor rating of any non-Blood and Wine Witcher gear, providing exceptional damage mitigation. Its true defensive crown jewel, however, is its +100% Poison Resistance (granting total immunity), alongside robust resistances to piercing, slashing, elemental, and monster damage. This makes it incredibly tanky against a wide array of foes. Its swords complement this by offering a solid +15% chance to poison enemies on hit, alongside generous bonuses to Aard Sign Intensity (+25%), critical hit damage (+75%), and critical hit chance (+10%). When paired with the Superior Golden Oriole potion—which turns poison damage into healing—the wearer becomes nearly invincible in toxic environments or against venomous monsters.
Cons: The Cost of Specialization
The set's critical weakness is its lack of identity beyond its stats. Unlike every other school's gear, equipping multiple Viper pieces grants no set bonuses. You receive no escalating perks for wearing 3 or 6 items. This means you miss out on the powerful, build-defining bonuses that make other sets so transformative. Furthermore, while it has strong Aard bonuses on its swords, the armor itself provides no inherent Sign Intensity boost, making it a suboptimal choice for pure Sign builds compared to Griffin or even Wolven gear. Its role is purely that of a stat-stick: phenomenal defenses and a poison gimmick, but no deeper mechanical synergy.
Specific Use Case: The Poison Juggernaut
The Viper set is best for players who want to maximize survivability on higher difficulties while employing a fast-attack, critical-hit focused build that leverages poison. It excels in two specific scenarios:
- The Defensive Alchemist: A build focusing on the Euphoria mutation benefits immensely from Viper's high resistances. By applying the Levity glyphword to the chest armor, you can convert it to light armor and use Cat School Techniques for critical damage, creating a tankier, more resilient version of the classic Feline "glass cannon" build.
- The Toxic Duelist: A build centered on the Poisoned Blades and Crippling Strikes skills can maximize the swords' innate poison chance. Combining this with Piercing Cold (for Aard synergy) and Protective Coating creates a hybrid fighter who applies debilitating damage-over-time effects (poison and bleed) while being exceptionally durable. Morana Runestones in the swords can push the poison chance even higher.
The Verdict: The Viper School gear is for the specialist who values raw, uncompromising defense and a specific poison-aesthetic over flexible set bonuses. It’s not the gear you build a character around; it’s the powerful, resilient shell you build a character within. For players who love the look and want to feel impervious to harm while whittling down foes with toxic blades, it has no equal. For everyone else seeking deeper mechanical interplay, it sits at the bottom of the rankings—a powerful tool, but a one-trick pony.
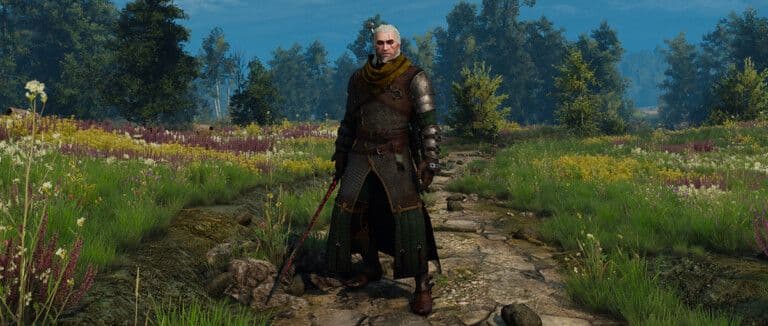
6. Manticore School Gear

Master the path of the alchemist with the legendary Manticore school gear.
6. Manticore School Gear
Why it’s here: The Manticore set earns its place for being the definitive Grandmaster-level alchemist’s armor, a unique addition from the Blood and Wine expansion that turns toxicity into your greatest asset. Unlike the other schools that focus on melee, signs, or defense, the Manticore gear is a masterclass in alchemical warfare.
Pros:
- Alchemy Powerhouse: The set bonuses are tailor-made for potion and bomb builds. The 3-piece bonus applies your critical hit chance and damage to bombs, turning Grapeshot and Dancing Star into devastating, high-crit explosives. The 6-piece bonus grants an extra charge to every alchemy item, meaning more potion uptime and more bombs per fight.
- Massive Toxicity Boost: Individual armor pieces provide a total of +30 Maximum Toxicity. This is a game-changer for alchemy-focused builds, particularly the infamous Euphoria mutation, which increases sword damage and sign intensity based on your current toxicity level. More toxicity headroom means you can run more decoctions simultaneously and maintain a higher, more damaging Euphoria buff.
- Strong Critical Focus: The armor and swords provide substantial bonuses to critical hit damage (+25% on armor pieces, +50% on swords) and critical hit chance (+5% on gauntlets and trousers). This synergizes perfectly with the bomb-focused set bonus and high-damage critical builds.
- No Upgrade Grind: As a Blood and Wine set, the Manticore gear is only available at the Grandmaster tier (Level 40). While this is a high barrier to entry, it means you craft it once and it’s immediately at its peak power—no hunting for Enhanced, Superior, and Mastercrafted diagrams.
Cons:
- Late-Game Exclusive: You cannot access or use this set until you are in Toussaint and at least Level 40. It’s purely an endgame option.
- Niche Application: Its power is heavily concentrated in alchemy. If you don’t invest in the Alchemy skill tree or use bombs and decoctions frequently, a significant portion of its potential is wasted. A pure sword or sign build will find better value in Cat, Wolf, or Griffin gear.
- Moderate Defenses: While it has solid resistances to piercing, slashing, and monster damage, it doesn’t offer the raw damage reduction of Ursine heavy armor or the high elemental resistance of Griffin gear. You’re trading some survivability for offensive alchemy power.
Specific Use Case:
The Manticore set is the best-in-slot armor for any Euphoria-based alchemy build. Here’s the ideal user:
- The Endgame Alchemist: You’ve unlocked the Euphoria mutation and have invested heavily in skills like Acquired Tolerance and Synergy. You run three or four decoctions at once (like Ekimmara for healing, Katakan for crit chance, Water Hag for damage) to keep your toxicity—and therefore your damage—sky-high.
- The Bombardier: You use bombs not just for crowd control, but as primary damage tools. With the set bonus, a well-placed bomb with high critical chance can wipe out groups or chunk boss health bars.
- The Player Who Values Efficiency: You want a powerful Grandmaster set without the chore of upgrading through four previous tiers. Craft the Manticore set once, and your gear hunt in Toussaint is complete.
Verdict: The Manticore School Gear isn’t for everyone, but for the player who embraces the alchemy system, it’s unparalleled. It transforms toxicity from a resource to manage into a devastating weapon, making it the cornerstone of some of the most overpowered endgame builds in The Witcher 3. If you’re in Toussaint and your playstyle revolves around potions, decoctions, and bombs, this is your armor.
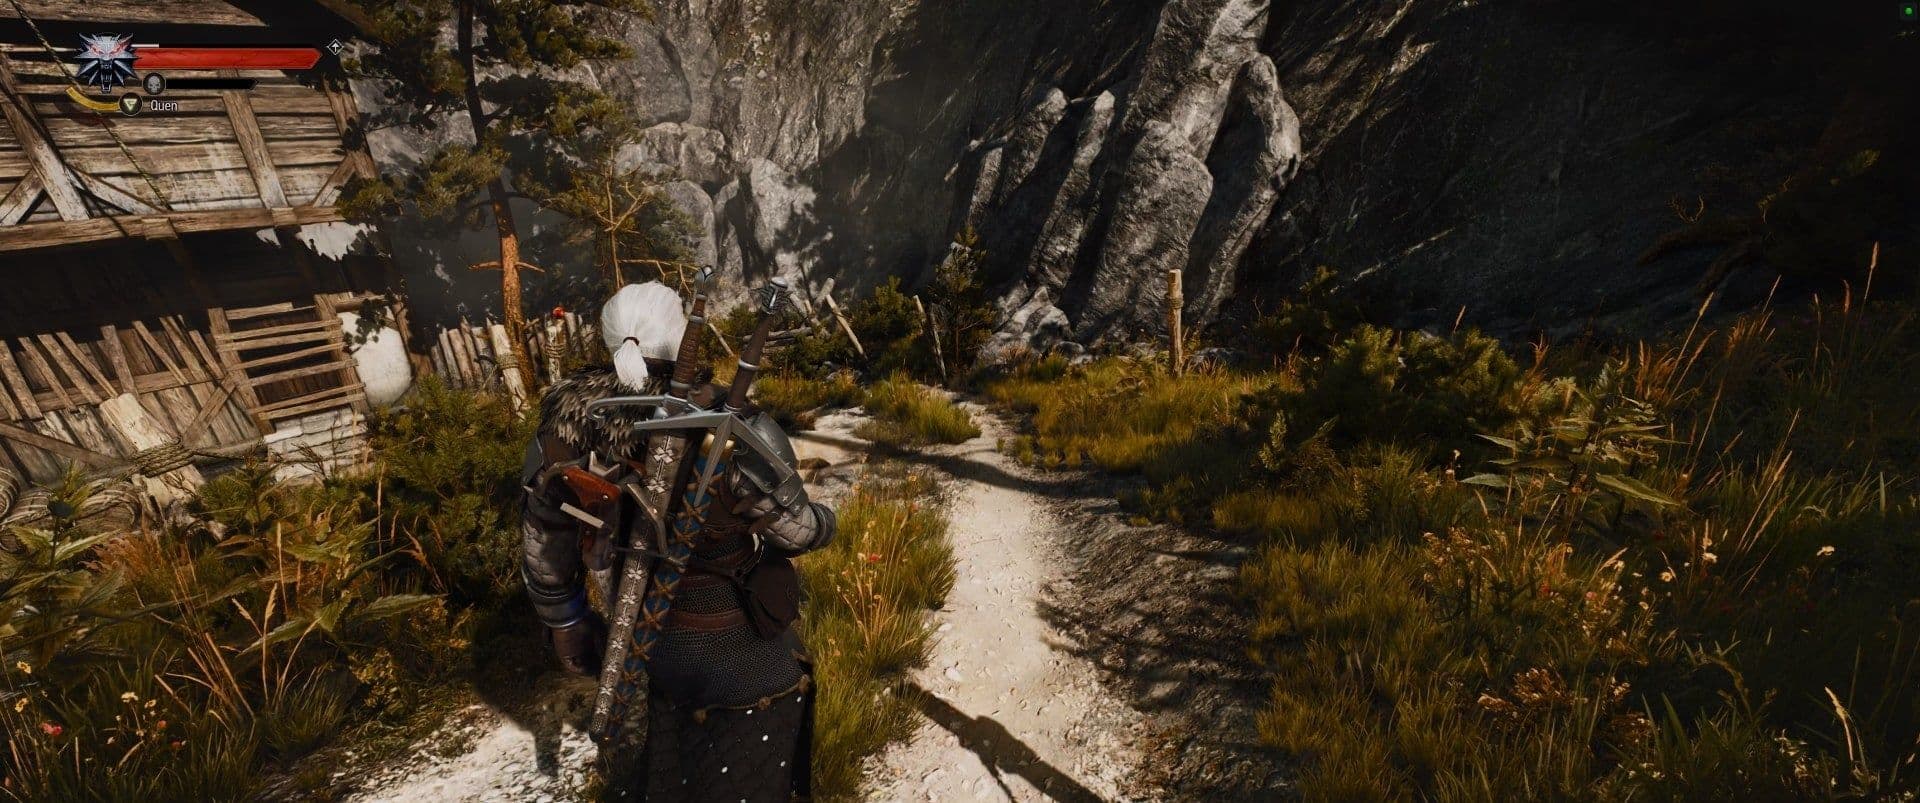
5. Wolf School Gear
High-tier school gear requires finding rare mastercrafted diagrams.
5. Wolf School Gear
Why it's here: In the middle of our ranking sits the quintessential "jack-of-all-trades" set. The Wolf School Gear is the embodiment of the classic Witcher philosophy: a balanced blend of swordplay, signs, and alchemical prowess. It’s Geralt’s own school’s armor, and it’s designed for the player who refuses to be pigeonholed into a single playstyle. It doesn’t excel in any one area like the specialized schools, but its unique strength lies in its unparalleled versatility and its role as a powerful platform for hybrid builds.
Pros and Cons:
- Pros: Offers a rare and valuable combination of bonuses to Attack Power, Sign Intensity, and Adrenaline Point gain simultaneously. Provides solid, well-rounded resistances to all damage types (monster, elemental, and human). As a medium armor set, it offers a good balance of protection and stamina regeneration. Its design is iconic and lore-friendly, directly tied to Kaer Morhen.
- Cons: Its "master of none" nature means it is objectively outperformed in raw damage by the Feline set, in sign potency by the Griffin set, and in pure survivability by the Ursine set. To unlock its full hybrid potential often requires significant investment in the Runewright to enchant it with Levity, adding to its cost and complexity.
Specific Use Case & Attack Power:
The Wolf set is the ultimate gear for a hybrid "Battlemage" Witcher. A player who wants to fluidly mix fast sword strikes with potent sign casts will find a perfect home here. The key to its power is the synergy between its Adrenaline gain bonuses and the General skill Flood of Anger, which consumes adrenaline to temporarily cast signs with massively increased intensity and all their upgrades active. This allows for tactical, high-impact sign usage woven directly into melee combos.
For attack power, the swords are competitive. The Mastercrafted Wolven Steel Sword deals 284-348 damage, matching the base damage of other top-tier steels, while adding a valuable +10% to Sign Intensity and Adrenaline Gain. The real story isn't in raw, singular stat dominance—it’s in the aggregate. A full set provides a significant boost to all three core combat attributes, a feat no other school's gear achieves. When enchanted with Levity to be treated as light armor, it can be combined with the Cat School Techniques skill for a further damage and critical hit buff, creating a uniquely powerful hybrid that can rival specialized builds.
The Verdict: The Wolf School Gear is for the sophisticated player who values adaptability and a dynamic playstyle over min-maxed specialization. It requires more system mastery to build around effectively but rewards that investment with a thrilling and versatile combat experience that truly feels like playing a master Witcher. It’s not the best at any one thing, but it’s remarkably good at everything.
4. Griffin School Gear

Quick Cast Sign Mechanics
4. Griffin School Gear
Why it’s here: The Griffin School Gear is the undisputed champion for players who want to make Geralt’s Signs his primary weapon. While other sets dabble in magic, the Griffin gear is engineered from the ground up to transform you into a sorcerous powerhouse, offering the most straightforward and potent path to a pure sign build in the game.
The Sorcerer's Armor
The Griffin set is medium armor, which is the first clue to its purpose. It synergizes perfectly with the Griffin School Techniques general skill, which grants a 5% bonus to Sign Intensity and Stamina regeneration for each piece of medium armor worn. This creates a powerful feedback loop: the armor boosts your signs, and the skill makes the armor better. The gear’s inherent stats are laser-focused on this goal, with every upgraded piece (Basic, Enhanced, Superior, Mastercrafted, Grandmaster) providing significant percentage increases to Sign Intensity, far more than any other school’s gear offers natively.
Pros:
- Unmatched Sign Synergy: It provides the highest raw Sign Intensity bonuses of any Witcher set, turning even basic signs into devastating tools.
- Stamina Engine: Combined with Griffin School Techniques and glyphs, the set solves a sign-user’s greatest problem: stamina regeneration. You can cast signs in rapid succession.
- Defensive Utility: The 3-piece Grandmaster bonus (Double Casting) is incredibly versatile, allowing you to, for example, lay down a Yrden trap and immediately follow up with an Igni blast for zero extra stamina cost.
- Crowd Control King: The 6-piece Grandmaster bonus turns Yrden into a dominant zone-control tool, granting +100% Sign Intensity, +5/s Stamina Regen, and 20% damage reduction while standing in its enlarged radius.
Cons:
- One-Dimensional: It offers negligible bonuses to sword damage or critical hits. If you’re not casting signs, you’re not using the set’s potential.
- Mid-Range Playstyle Mandate: To maximize the Yrden bonus, you are encouraged to fight within its circle, which can feel static compared to the dynamic, dodging-heavy styles of the Cat or Wolf schools.
- Aesthetic Subjectivity: The bulky, golden armor is often considered the least "Witcher-like" in appearance, a point of contention for many players.
Specific Use Case: This set is best for players who want to commit fully to a Sign-focused playthrough. It excels in battles against groups, specters (against which Yrden is essential), and any enemy vulnerable to control effects like burning or knockdown. It’s the gear of choice for builds centered on the Conductors of Magic mutation, which adds sword damage to sign casts, as it provides the intensity to make that damage multiplicative.
Building the Ultimate Sign-Slinger
To unlock the Griffin set’s true potential, your build must be as specialized as the armor. Prioritize the Sign Intensity skill in each sign tree (Aard Intensity, Igni Intensity, etc.) and key abilities like Shock Wave (for Aard) and Supercharged Glyphs (for Yrden). The Alchemy skill Synergy is also crucial, as it dramatically amplifies the Sign Intensity bonus from your equipped Greater Blue Mutagens.
For gear modifications, socket Greater Veles Runestones in your swords for more Sign Intensity. For armor, the Runewright enchantment Rotation (which gives Igni a 360-degree area of effect) or Entanglement (which causes your Yrden trap to spawn additional traps on hit) can define your playstyle. Glyphs should match your preferred sign—Greater Glyphs of Igni for a pyromancer or Greater Glyphs of Yrden for a trap master.
The Verdict: The Griffin School Gear isn’t a balanced choice; it’s a declaration of intent. It demands a full investment in the sign skill tree and rewards that commitment by making Geralt a battlefield controller who can incinerate, shock, and immobilize foes with terrifying efficiency. If you’ve ever wanted to play more like a mage than a swordsman, this is your armor. For those who prefer a hybrid approach, the Wolf School gear awaits in the next section.
3. Cat School Gear
Close camera angles highlight the details of Witcher gear.
3. Cat School Gear
Why it’s here: The Feline set is the definitive armor for players who embrace a high-risk, high-reward philosophy. It is the ultimate tool for fast-attack, critical-hit-focused builds, demanding precision and aggression but rewarding it with the highest potential DPS (Damage Per Second) output of any Witcher set when played to its strengths. It ranks third on our list because, while its damage ceiling is unparalleled, its punishingly low damage resistance makes it a glass cannon—a playstyle not suitable for everyone or every situation.
The Glass Cannon Archetype
Forged for Witchers of the Cat School, this gear embodies their infamous, ruthless efficiency. It is light armor, which synergizes perfectly with the Cat School Techniques skill. This skill grants a 25% critical hit damage bonus and a 5% fast attack damage bonus per piece of light armor worn. This multiplicative bonus means a fully-equipped Geralt sees a massive 150% boost to critical damage and 30% to fast attacks before any other skills or mutagens are factored in. The set bonuses, available at the Grandmaster tier, further refine this aggressive stance:
- 3-Piece Bonus: Strong Attacks increase Fast Attack damage by 10% per piece of the set for 5 seconds. This encourages a fluid combat rhythm, using a heavy strike to prime your rapid flurries for even greater punishment.
- 6-Piece Bonus: Rear attacks deal 50% more damage and stun the opponent at the cost of 1 Adrenaline Point. This turns positioning into a weapon, allowing a skilled player to control the flow of battle with well-timed stuns.
The statistical focus is unwavering: Attack Power, Critical Hit Chance, and Bleed Chance are the primary modifiers across all tiers. Swords feature high base damage and bonuses to Aard Sign intensity, offering a useful crowd-control option. However, the glaring trade-off is defense. Even at the Grandmaster level, Feline armor provides the lowest raw damage resistance of all Witcher sets. Its Piercing, Slashing, and Monster Defense stats are merely adequate, forcing the wearer to rely on evasion, the Quen sign, and eliminating threats quickly to survive.
Pros & Cons: A Duelist's Bargain
Pros:
- Peak DPS Potential: Offers the highest sustained and burst damage for fast-attack builds, especially when combined with skills like Whirl and Rend.
- Superior Mobility: Light armor ensures minimal stamina penalty for dodging and sign casting, keeping you agile.
- Critical Hit Synergy: The built-in bonuses create a devastating feedback loop with critical-hit focused alchemy and combat skills.
- Rewarding Skill Expression: The rear-attack stun bonus adds a high-skill tactical layer for masterful players.
Cons:
- Extreme Fragility: You are the most vulnerable Witcher in this gear. A few missed dodges against powerful enemies can be fatal.
- Demanding Playstyle: Requires constant, aggressive engagement and perfect timing. It forgives mistakes poorly.
- Weak Against Crowds: Low armor and the need for precision make large groups of enemies exceptionally dangerous if you cannot control the engagement.
Specific Use Case: The Perfect Hunt
The Feline set is not for beginners or those who favor a tanky, sign-heavy approach. It is the specialist's choice for duels and controlled engagements. This gear shines brightest when you are fighting a single, powerful foe—a contract monster, a boss, or a human duelist. The ability to dart in, unleash a blistering flurry of critical hits, and retreat is paramount. It pairs perfectly with a fast-attack, critical hit, and light armor-focused skill build, supplemented by decoctions like Ekimmara (for healing on damage dealt) and Water Hag (for damage increase at full health) to offset its fragility. Use the Quen sign as your primary defensive tool, and Aard or Northern Wind bombs to create openings for those devastating rear attacks.
The Takeaway: Choose the Cat School Gear if you are confident in your reflexes and seek the thrill of maximizing Geralt’s offensive potential. It is the scalpel to the Bear School’s hammer—less survivable, but infinitely sharper in the right hands. For the player who views combat as a deadly dance where every step is an attack, the Feline set is the perfect partner.
2. Bear School Gear
2. Bear School Gear
Why it’s here: Occupying the runner-up spot, the Bear School Gear, also known as the Ursine set, is the definitive choice for players who want to feel like an unstoppable force. It trades the agility and finesse of other schools for raw, unadulterated power and resilience, making Geralt a true tank on the battlefield.
The Ursine set is the only Heavy armor among the Witcher schools, and its identity is built entirely around this weight class. Its core stats tell the story: it boasts the highest monster damage resistance (80%) and the highest human slashing resistance (70%) of any Grandmaster set. This isn't armor you wear to dodge; it's armor you wear to stand your ground and absorb blows that would shatter other witchers. Its primary set bonus is a massive +75% Adrenaline Point Gain, which fuels its unique playstyle. While it slows stamina regeneration—a significant drawback for sign-heavy builds—this is the price of its immense protective value.
Pros:
- Unmatched Survivability: The resistances are simply the best in the game. You can wade into groups of enemies or tank hits from massive monsters and come out standing.
- Adrenaline Engine: The huge boost to Adrenaline gain synergizes perfectly with combat skills that consume or benefit from these points, allowing for powerful, frequent ability use.
- Synergy with Strong Attacks: The Bear School Techniques skill grants +5% maximum Vitality and +5% Strong Attack damage per piece of heavy armor, making the fully-equipped Ursine Geralt a heavy-hitting powerhouse. Skills like Rend, which ignores enemy defense and scales with Adrenaline, become devastating.
- Powerful Set Bonuses: The Grandmaster bonuses are quintessentially tanky. The 3-piece bonus gives Quen a chance to recast automatically when broken, while the 6-piece bonus increases Quen-related damage by a staggering 200%.
Cons:
- Severe Stamina Penalty: The heavy armor drastically reduces stamina regeneration. This cripples sign-spamming builds and makes sustained sign use in combat very difficult without significant investment in stamina-related decoctions or skills.
- Slow Playstyle: The focus on defense and heavy, deliberate Strong Attacks means you lack the mobility of the Cat School or the sign versatility of the Griffin School. You commit to your attacks and your position.
- Late-Blooming: The full potential of the build, especially its synergy with the Rend skill and high-tier decoctions, doesn't fully come online until the mid-to-late game when you have more skill points to invest.
Specific Use Case:
The Ursine set is the ultimate tank build for Deathmarch difficulty or challenging boss fights. It’s designed for players who prefer a methodical, powerful combat style over acrobatics. The ideal Ursine build leverages its Adrenaline generation with skills like Metabolism Boosts (which uses Adrenaline to reduce potion toxicity) and Mutated Skin (which grants up to 45% damage reduction at full Adrenaline). You become a walking fortress that uses decoctions like Arachas (for added protection) and Ekimmara (for health regeneration) to become nearly unkillable. Pair it with the Severance upgrade for your swords to increase the reach of Whirl or Rend, and you control the space around you through sheer, intimidating presence.
The Verdict: The Bear School Gear doesn't just let you survive; it lets you dominate through attrition and overwhelming force. It’s the best choice for players who want to master a high-risk, high-reward strong-attack style and relish the power of being the hardest thing on the continent to kill. It loses the top spot only to a set that offers a more versatile and modern take on the "tank" archetype.
1. Forgotten Wolven Gear
The starting location for the Netflix DLC quest.
1. Forgotten Wolven Gear
Why it's here: The Forgotten Wolven Gear isn't just the top of our list—it's the ultimate evolution of Witcher gear, representing the pinnacle of hybrid gameplay. Introduced in the Next-Gen update, this set directly translates Henry Cavill's Netflix Geralt into the game, but its power is far more than just aesthetic. It masterfully synthesizes the core principles of the other schools into a single, supremely versatile and potent package. It’s the definitive choice for players who want to be the complete Witcher, seamlessly blending swordplay, signs, and alchemy without compromise.
Pros:
- Unmatched Hybrid Synergy: The set's unique power lies in its six-piece bonus, which dramatically increases Aard damage against enemies standing within a Yrden trap. This creates a powerful, synergistic combat loop that is both strategic and devastating.
- Balanced Stat Profile: As medium armor, it provides a robust mix of resistances comparable to the Bear School, while its stats boost both attack power (+20%) and Adrenaline Point gain (+20%), benefiting combat and sign builds alike.
- Incredible Build Flexibility: The armor's balanced nature allows it to be the centerpiece for multiple top-tier builds. It can be optimized for pure sign intensity with the Griffin School Techniques skill, or it can be transformed into a critical-hit monster using the Cat School Techniques skill in conjunction with the Levity glyphword.
- Potent Set Bonuses: Beyond the core Yrden-Aard synergy, the three-piece bonus increases potion duration, making alchemy builds more sustainable and easier to manage.
- Modern Design & Accessibility: Its visually distinct, Netflix-inspired design is a major draw, and the entire set is obtained through a single, dedicated scavenger hunt quest ("In the Eternal Fire's Shadow"), making it a cohesive and rewarding pursuit.
Cons:
- High Barrier to Mastery: To unlock its full potential, players must invest heavily in both the Aard and Yrden sign skill trees, as well as understand the mechanics of glyphwords like Entanglement (for automatic Yrden traps) or Levity (for Cat School synergy). This requires significant skill point investment.
- Late-Game Power Spike: While the basic diagrams are for level 20, the set truly shines at the Grandmaster level (level 40). Its most powerful builds also rely on late-game mutations like Euphoria (for a raw stat boost) or Piercing Cold (for Aard insta-kills), locking peak performance behind Blood and Wine content.
- Mandatory Six-Piece Commitment: To activate the crucial Yrden-Aard damage bonus, you must equip all six pieces (armor, two swords). This limits your ability to mix and match with other legendary swords like Aerondight without sacrificing the core set mechanic.
Specific Use Case: The Forgotten Wolven Gear is the ultimate hybrid build foundation. It is the best-in-slot choice for any player aiming to create a "Spellsword" Geralt who fluidly switches between powerful signs and lethal sword strikes. It excels in New Game+ and on Deathmarch difficulty, where its ability to leverage all three pillars of Witcher combat—signs, swords, and alchemy—provides the tools to handle any threat. Whether you're focusing on the Euphoria mutation for overwhelming stats or the Piercing Cold mutation for crowd-control and instant kills, this armor set is the perfect chassis.
The Verdict: The Forgotten Wolven Gear earns the #1 spot not by being the absolute best at any one thing, but by being exceptionally great at everything. It out-flexes the Wolf School, out-damages the Griffin School with its focused synergy, and provides a hybrid versatility that the specialized Cat and Bear schools can't match. It is the final, polished form of Witcher gear—a love letter to the modern portrayal of Geralt and the most powerful, adaptable toolkit available in the Continent.