The Burukan Bunker is a supply chain spread across Sakhal, not a door you can improvise your way through. The Frozen Scientist gives you the briefcase, the research camps give you the keys, and the southern peninsula gives you no clean water once the crossing begins. Plan those stops as one route and the bunker becomes a controlled operation instead of a blind loot run.
This is the vanilla route. Community servers can change event spawns, loot, or bunker rules, so use their configuration if it differs from the steps below.
Pack for the Volcano-to-Burukan Loop
Before you leave for the volcano, solve the route’s four dependencies: Scientific Briefcase Keys, a Glow Plug, gasoline, and water for the peninsula. Burukan has no clean water source, so a survivor who crosses thirsty cannot fix the mistake with a pump.
Bring:
- Warm clothing, a light source, and enough food to stay functional through Sakhal’s cold and the bunker’s dark interior.
- A filled water container. Save it for the Burukan crossing rather than drinking it casually on the approach.
- A gasoline can or a reliable way to collect fuel, plus room for the Glow Plug.
- One dependable weapon, medical supplies, and enough ammunition to survive contact at the bunker.
- A second survivor if possible. The generator and bunker are separate locations, which is the entire reason the two-player split works.
Do not cross the land bridge with only half the route solved. If the keys are in your bag but fuel is missing, resupply first; the bunker is far more forgiving when the first arrival is already the final setup run.
Find the Frozen Scientist and Unlock the Glow Plug
The Glow Plug comes from the Frozen Scientist dynamic event, not ordinary Humvee loot. Search the roads and lines of poles around Odinokiy Vulkan; in vanilla, the event appears within about 1 km of the volcano. The scientist lies in the snow beside a briefcase. If the body is there but the briefcase is gone, another survivor likely reached the event first.
The case requires Scientific Briefcase Keys, which spawn at two research camps on the volcano’s side. The vanilla iZurvive references used by this route are:
- South-east camp:
10980 / 11533 - West camp:
9675 / 12135
The scientist event has two commonly listed vanilla reference areas:
- West side of the volcano:
9465 / 12089 - South-east side of the volcano:
10402 / 11384
Use the coordinates as map references, not as a promise for a community server. The route order is the important part:
- Search the two research camps for a key.
- Check the Frozen Scientist event for the briefcase.
- Use the key on the case and take the Glow Plug.
- Move toward the Burukan land bridge only after the case is open.
The key camps and the scientist are separate stops. Reaching the corpse first does not skip the key step, and a key without the briefcase does not open the bunker.
Cross the Land Bridge to the Generator
Fill your water before crossing into Burukan, then follow the land bridge and the road toward the southern military peninsula. The port with submarines and cranes is the useful landmark on the way; from there, continue south toward the military base and bunker entrances. Industrial locations, vehicles, and the peninsula’s gas station are fuel options, but do not rely on finding one after you arrive.
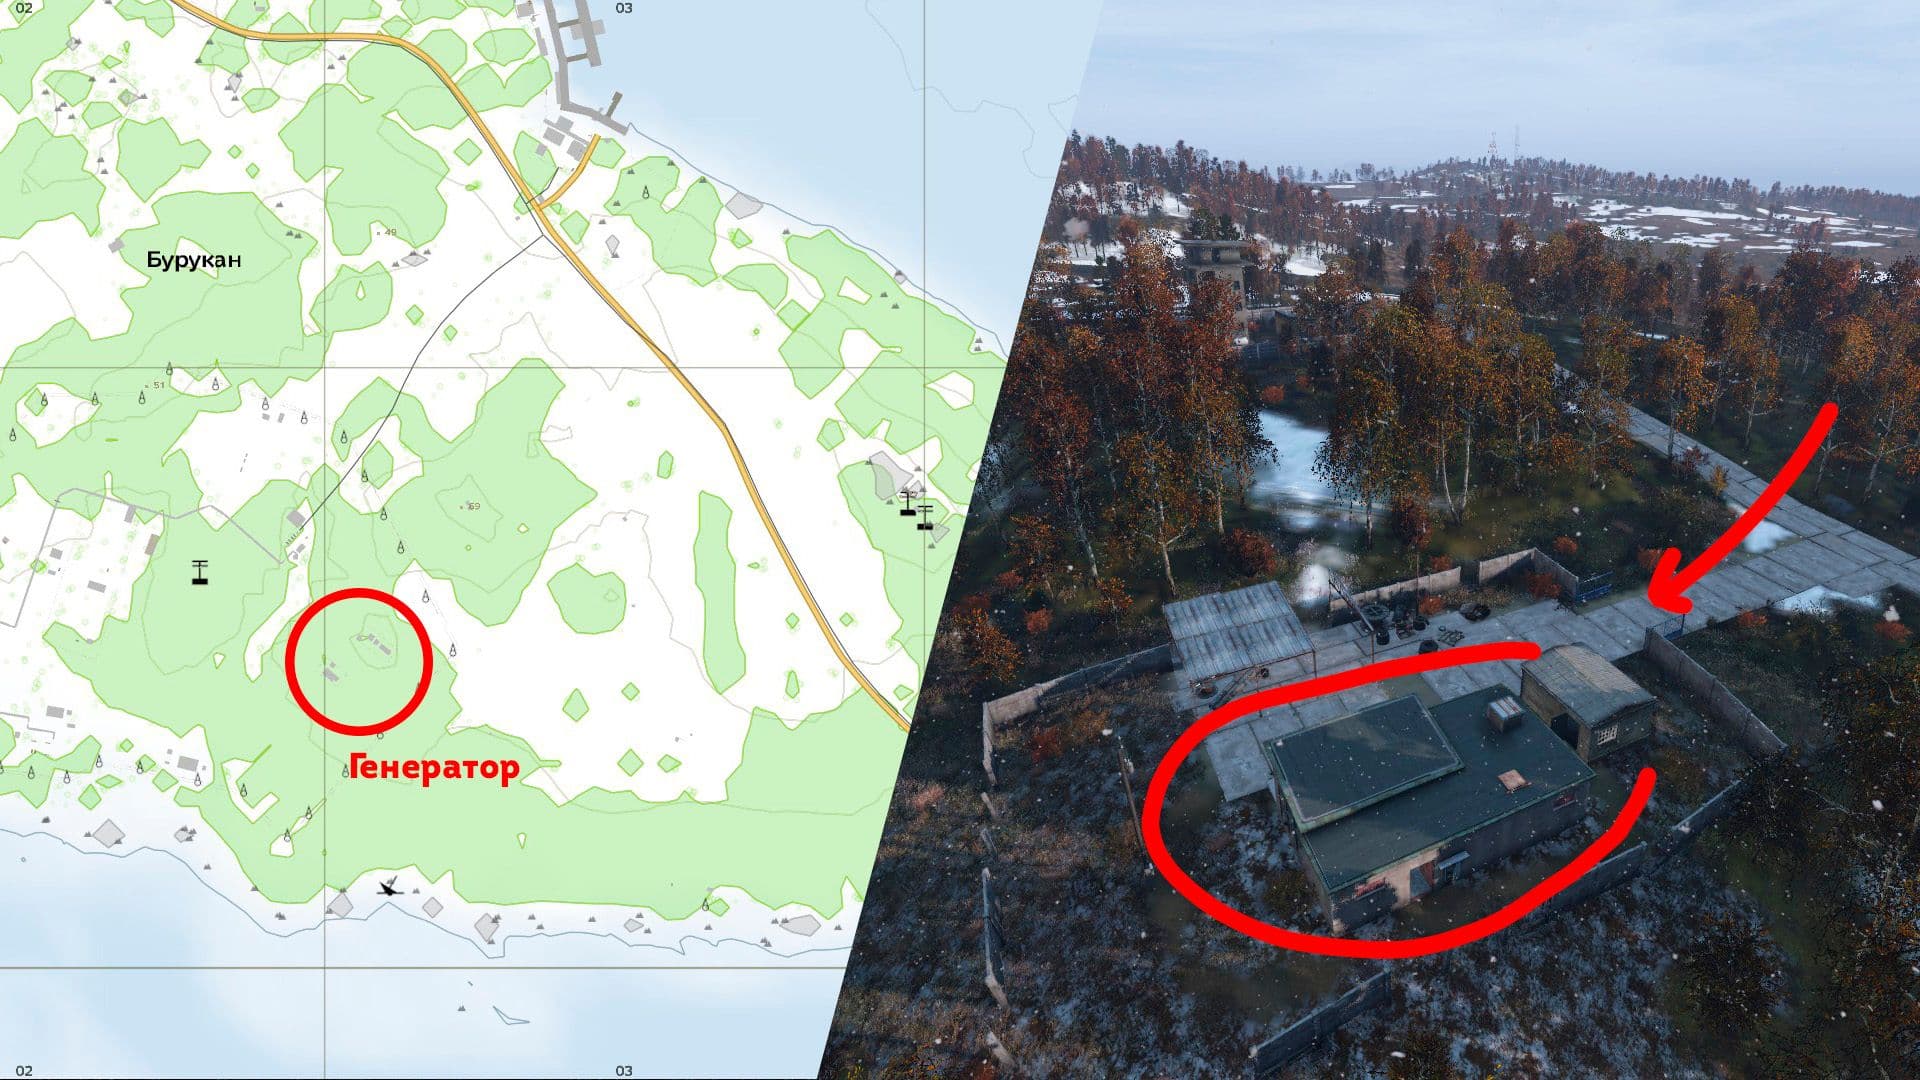
The Burukan map view marks the generator approach on the southern peninsula.
The generator is in a separate maintenance building south-east of the bunker. A ravine with hangars leads toward the shed; the generator and bunker are roughly 500 metres apart, close enough for two survivors to coordinate but far enough that a solo run must expose the route repeatedly.
At the generator:
- Insert the Glow Plug.
- Fill the generator with gasoline.
- Start it and confirm that the controls are powered.
- Keep the panel operator at the switches while the second survivor enters the bunker.
The outer bunker doors open by hand. They only lead to the accessible part of the complex; the valuable storage rooms still depend on the powered controls. Stage your light and medical supplies before starting the generator so the first trip inside is the one that matters.
Run D1–D4 With Two Survivors
The clean two-player split is one survivor at the generator panel and one survivor in the bunker. The operator calls each door state, and the runner calls when the room is clear. Neither player should abandon their job to improvise a faster loot handoff.
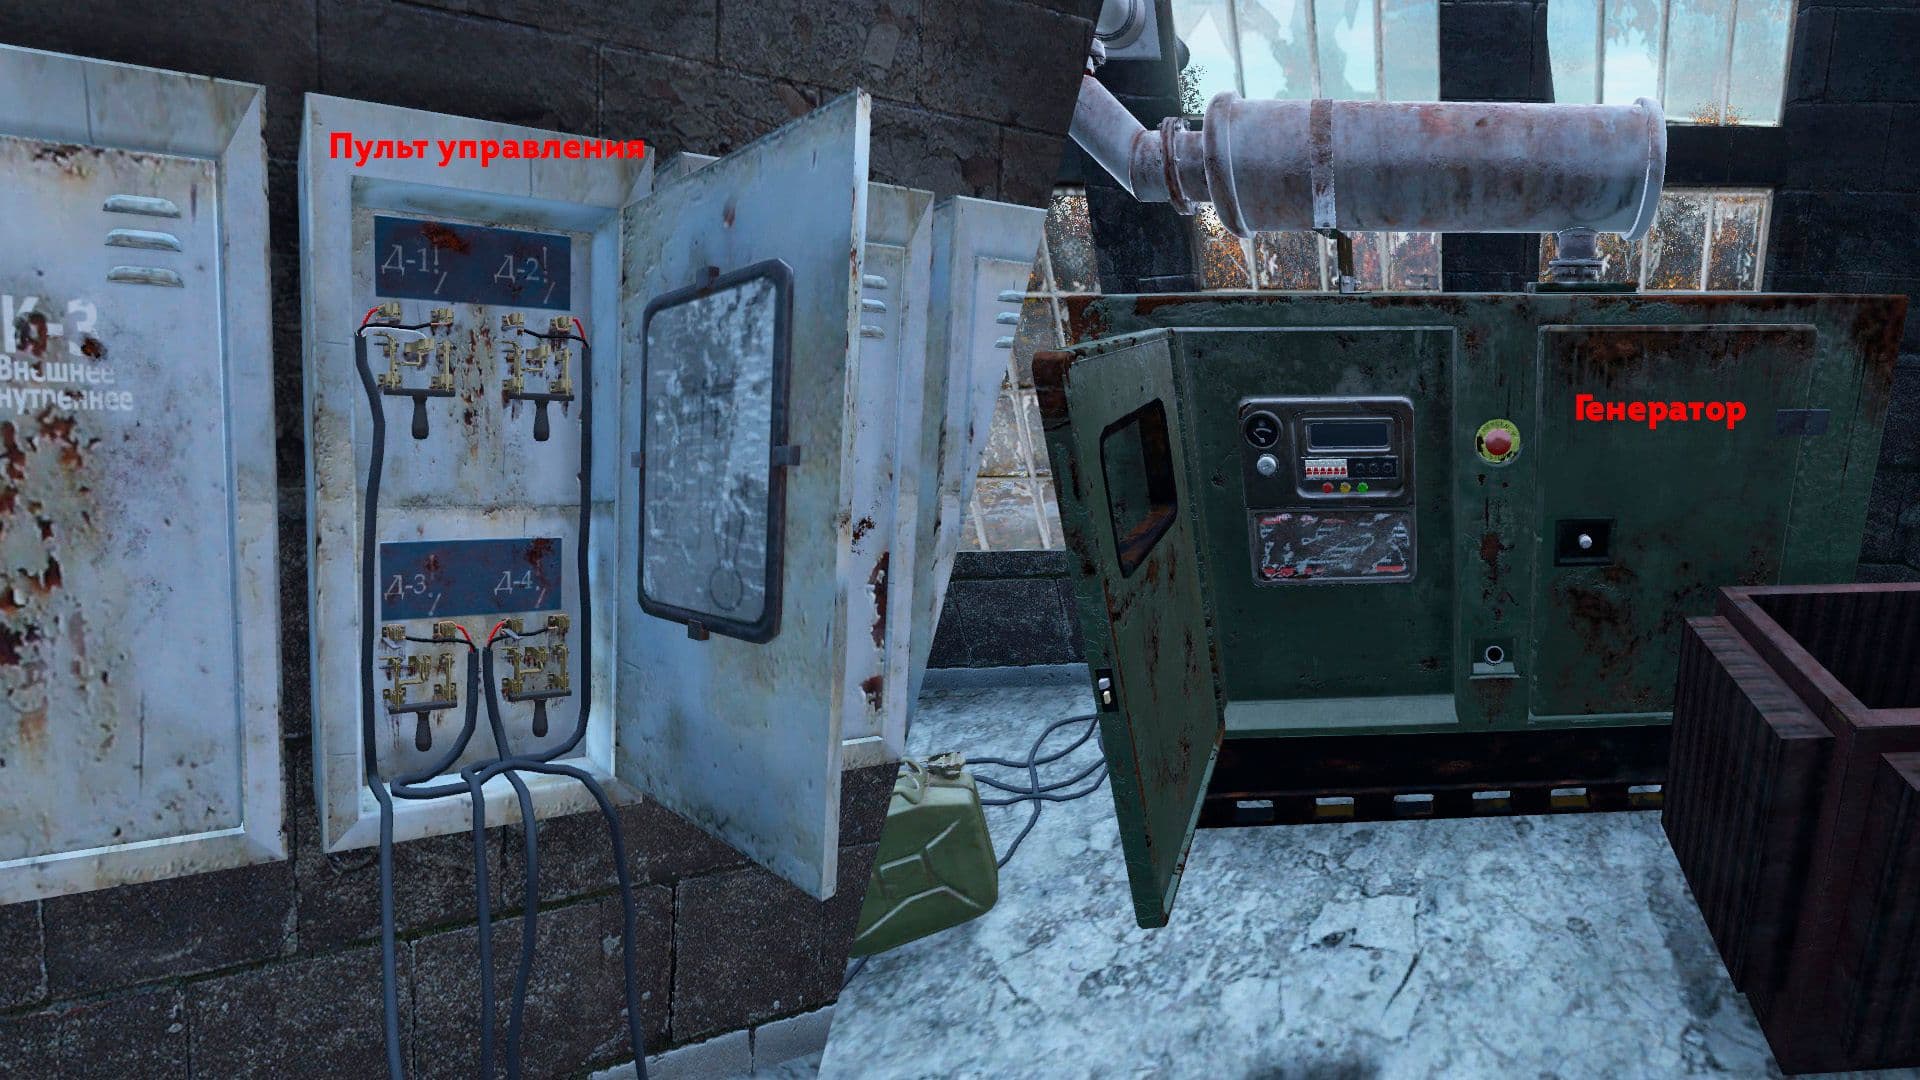
The generator and D1–D4 panel must be operated as one sequence.
Use this sequence:
- Start the generator and open D1.
- The runner enters, clears the room, and moves its loot into the accessible main area.
- The runner calls the room clear.
- The operator closes D1 before opening D2.
- Repeat the same close-then-open rhythm through D4.
Only one controlled door can be open at a time in the vanilla bunker. Opening another before the current door is closed short-circuits the panel; the system must recover before you can continue, costing time and fuel. The labels are the procedure: D1 through D4 correspond to the four controlled rooms.
Solo players can do the same run, but every room adds a generator trip. Open one door, loot it, return to close it, and only then open the next. If another survivor interrupts the route, stop treating the run as a loot problem and preserve the Glow Plug, fuel, and water you still have.
Use the 1.29 Entrance on the Bunker Mound
Update 1.29 expanded the underground bunker with a new section and an additional entrance. Community reports place the added entrance on top of the bunker mound, while the official notes describe the change as an extension to the bunker and another way inside. That entrance changes the approach and sightlines; it does not remove the Glow Plug, gasoline, or D1–D4 panel sequence.
On the current layout, check the mound as well as the older north and south approaches before the generator starts. The runner can use the least exposed entry, but the operator still stays at the panel and waits for the clear call before advancing the sequence. A new entrance is useful only if the team knows which door is open and where the runner will return with the loot.
Once the last room is clear, leave the peninsula with the first load. Burukan has no clean water, the generator advertises activity, and the same route is visible to anyone watching the military base. The run is complete when both survivors are moving away from the bunker with the Glow Plug and loot secured.