
How to Level Up and Increase Stats in Elden Ring
Your journey through the Lands Between is a fight for survival and power, and in Elden Ring, your most fundamental tool for growth is learning how to level up. It’s the core system that turns a fledgling Tarnished into a demigod-slaying legend. This isn’t just about getting stronger; it’s about permanently shaping your character’s destiny with every Rune you earn.
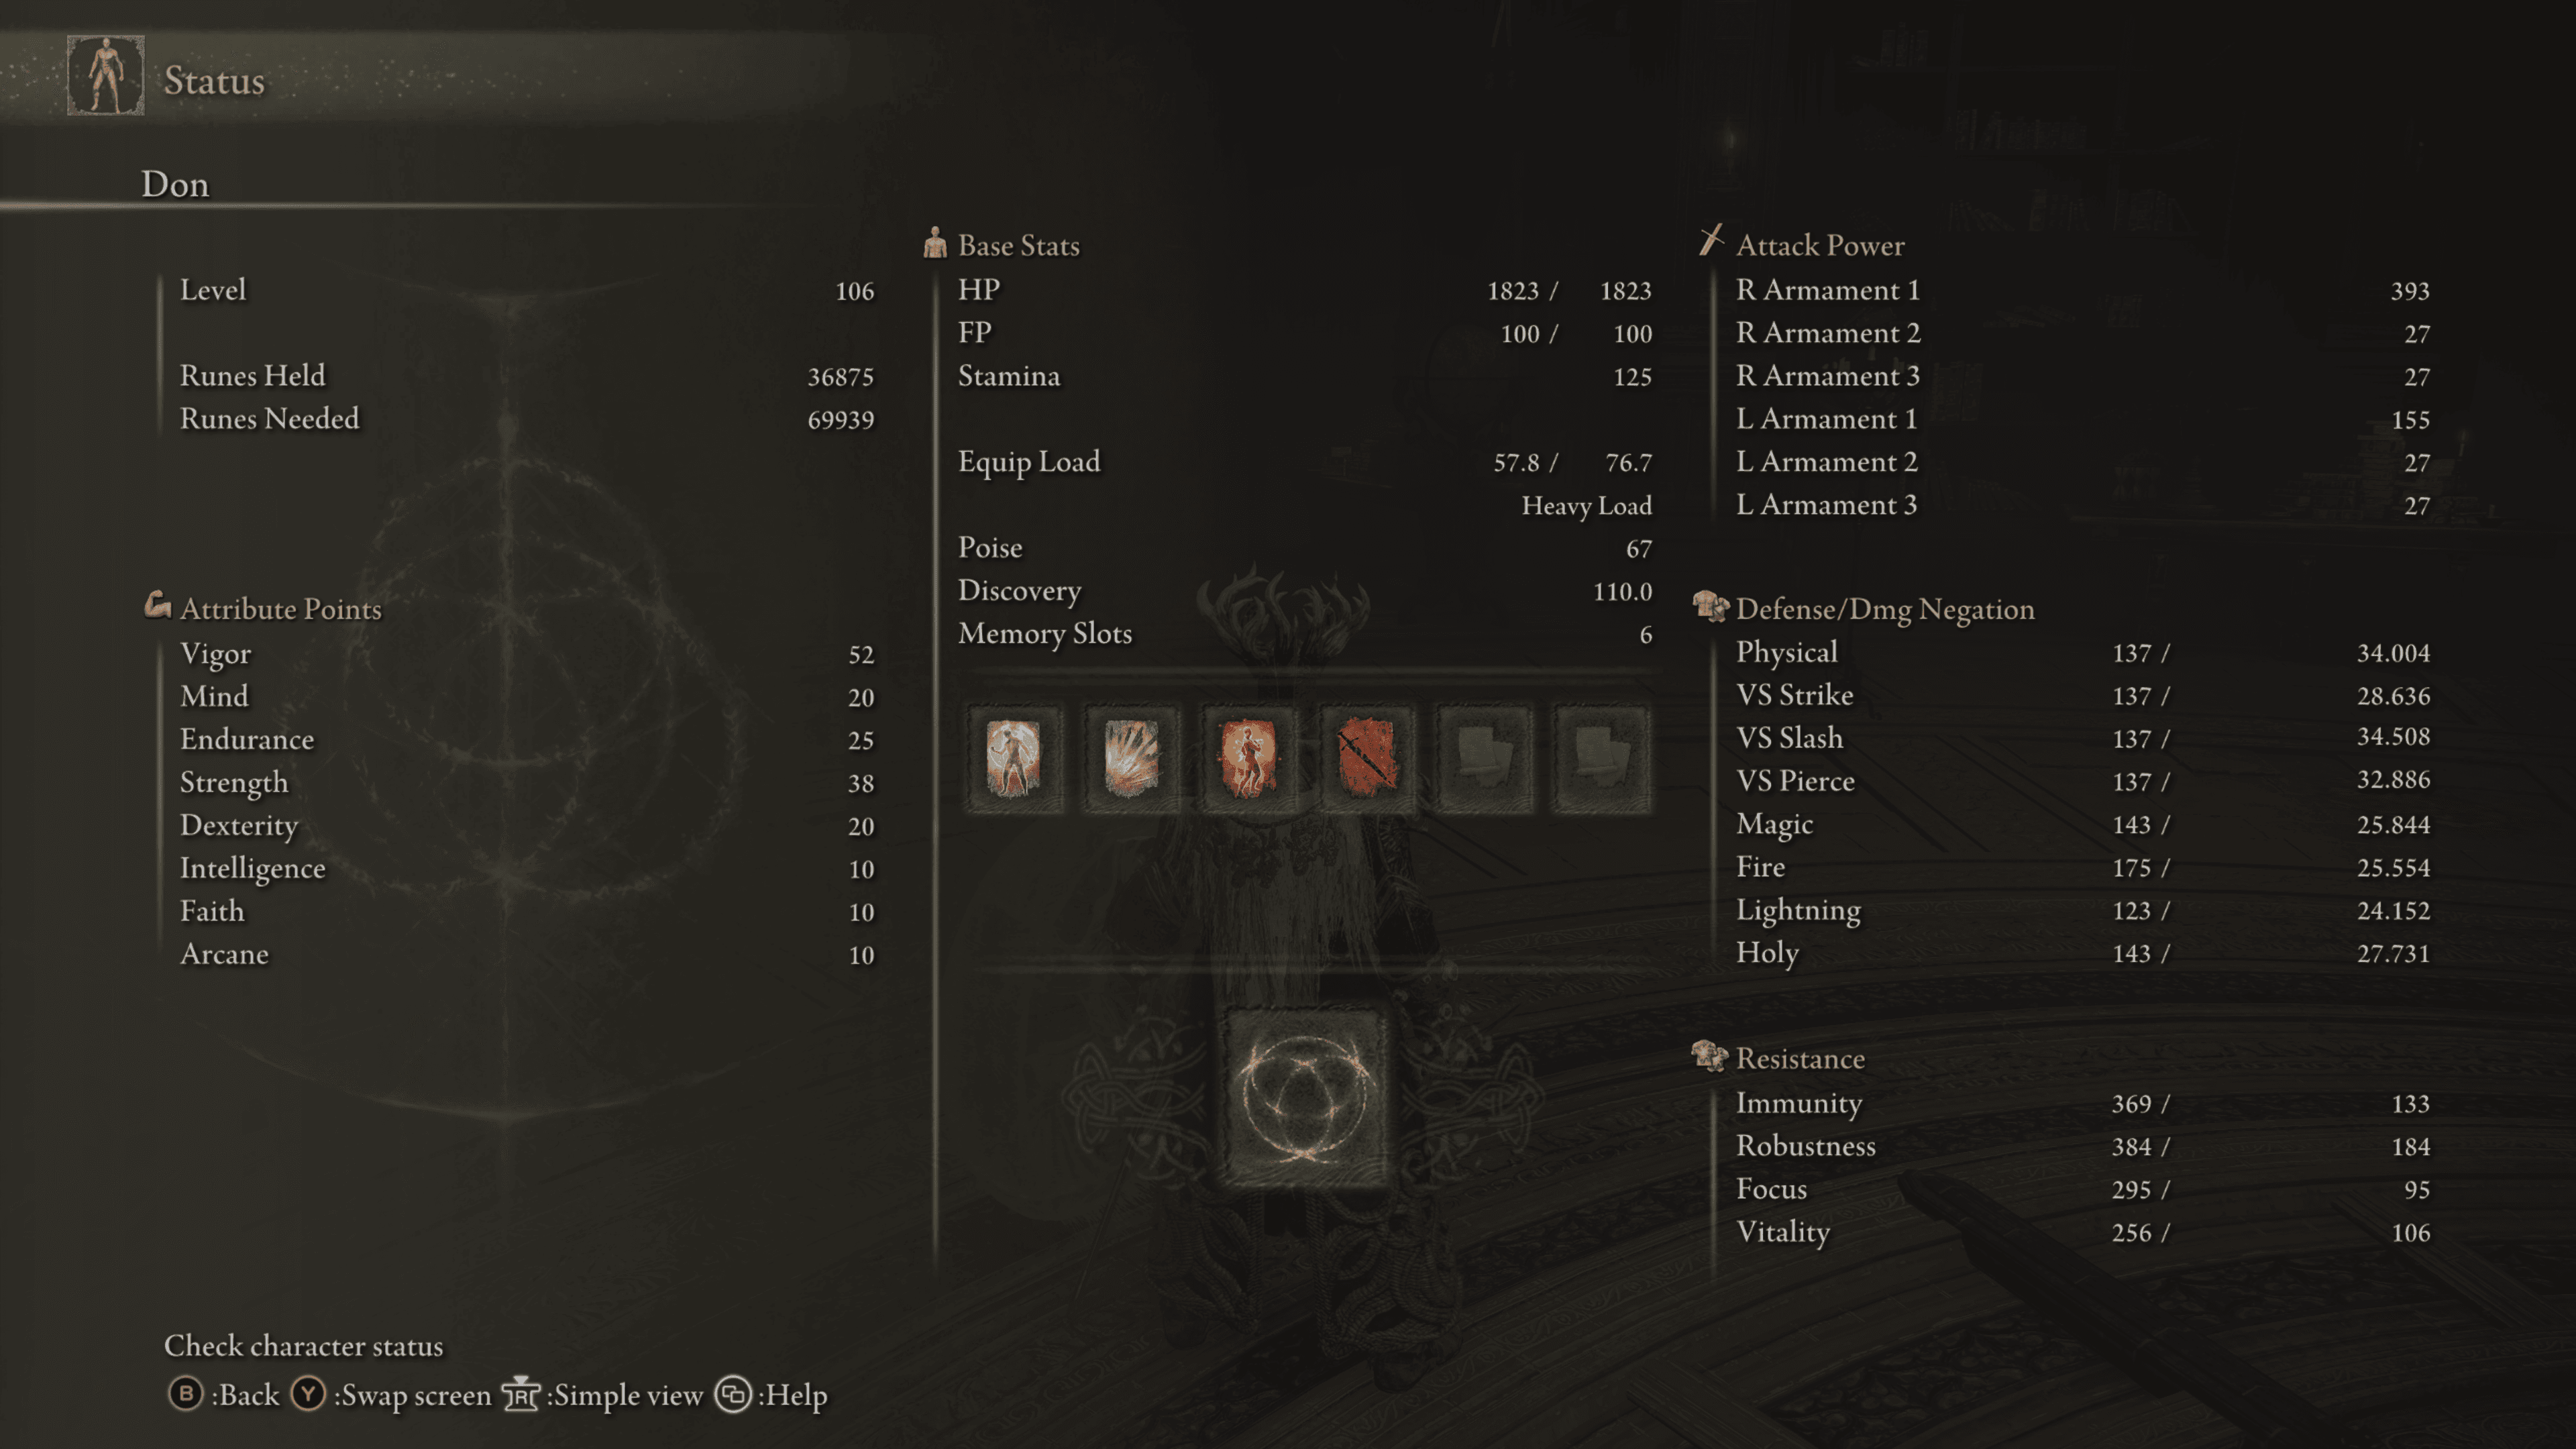
The character status screen displays all primary attributes and secondary stats.
The process unlocks after a pivotal early-game encounter. Shortly after emerging into Limgrave, you’ll rest at your first Site of Grace. Here, you’ll meet Melina, a mysterious finger maiden who offers an accord. Accepting her guidance grants you the ability to channel Runes into strength. From that moment on, at any Site of Grace across The Lands Between, you can press [Triangle/Y] to rest and select the ‘Level Up’ menu.
This menu is your character’s forge. Here, you spend your hard-earned Runes to increase one of eight primary attributes: Vigor, Mind, Endurance, Strength, Dexterity, Intelligence, Faith, or Arcane. Each point spent permanently boosts your capabilities, from health and magic to weapon damage and resistances. Your current Runes Held and the Runes Needed for your next level are always visible in your status menu, giving you a clear goal after every battle.
Before heading into a dangerous new area, spend your Runes! The cost of dying is losing every Rune you’re carrying. You drop them at your point of death and must retrieve them before dying again. It’s a harsh but classic Elden Ring penalty that makes smart leveling a key survival tactic.
Think of each level as a deliberate step toward the warrior, mage, or hybrid you want to become. This foundation of power is what the rest of this guide will help you master. Let’s get started.
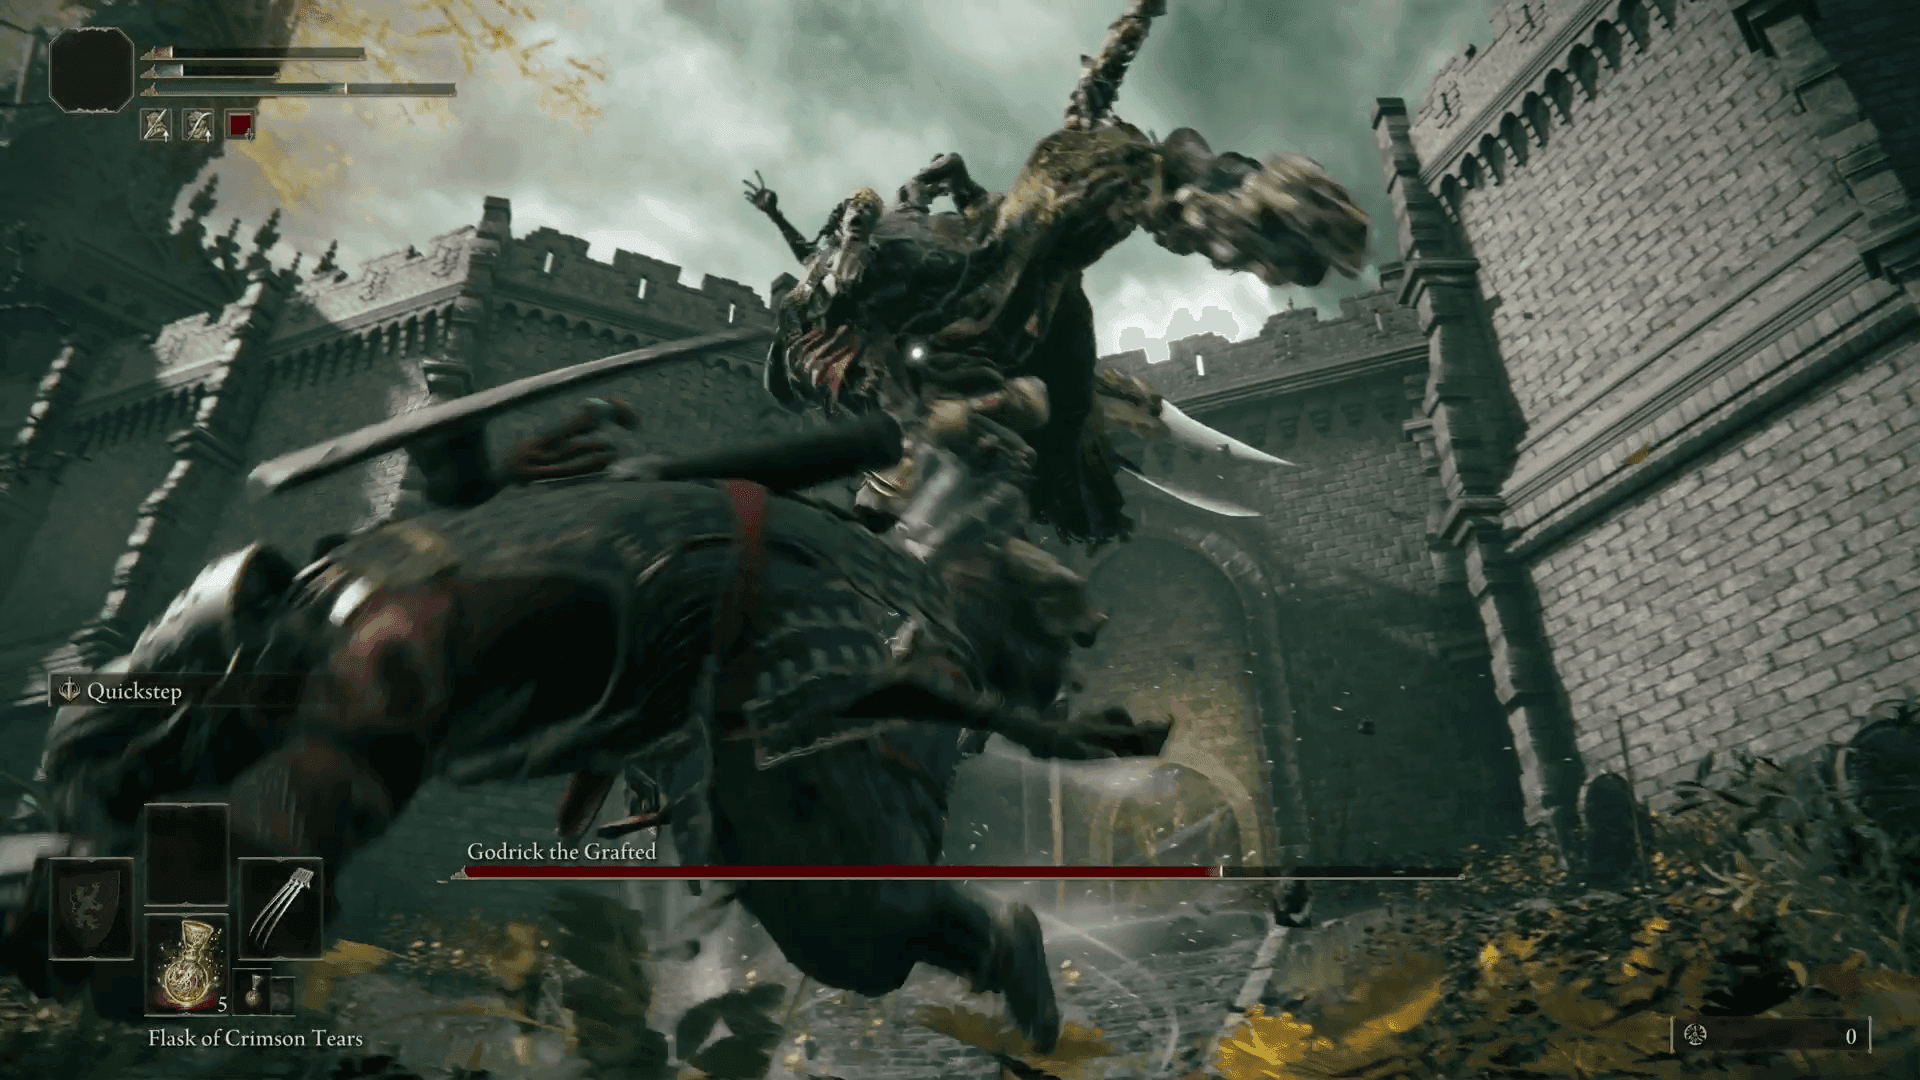
Elden Ring Vigor, Mind, and Endurance Stats Explained
Your adventure through the Lands Between is a marathon, not a sprint, and your survival depends on three pillars: health, magic, and stamina. In Elden Ring, understanding Vigor, Mind, and Endurance isn't just about dealing damage—it's about staying alive long enough to land the final blow. These are your core survival stats, and knowing where to stop investing is the key to an efficient build.
Each attribute point invested increases your character's base resistances and resource pools.
The Bedrock of Survival: Vigor
Vigor is your lifeline. It directly governs your HP, allowing you to take more hits, and it also influences your fire resistance and Immunity stat, which protects against poison and scarlet rot. If you're getting one-shotted by bosses, this is the stat you've been neglecting.
The gains from Vigor follow a clear pattern of diminishing returns, known as soft caps. From levels 1 to 40, you get excellent HP returns per level. After 40, the gains per level decrease noticeably. After the second soft cap at 60, the returns become so minimal that further investment is rarely worth it until much higher levels. Trust me, getting your Vigor to 40 should be a top priority for any build, and pushing to 60 is a wise investment for the brutal late-game areas.
Your Magical Fuel Tank: Mind
Mind is the reservoir for your magical and special abilities. It governs your FP (Focus Points), which is the blue bar used to cast Sorceries and Incantations, summon Spirit Ashes, and activate powerful Weapon Arts. If you want to be more than just a sword-swinging warrior, you need FP.
Just like Vigor, Mind has soft caps where your FP gains slow down. The first major efficiency drop happens at 50, and the second at 60. Leveling Mind beyond 60 gives you such a tiny amount of extra FP that those precious Runes are almost always better spent elsewhere. It also governs your Focus stat, which helps resist sleep and madness effects.
Even if you're not a pure mage, consider a modest Mind investment (15-25) to comfortably use your weapon's Ash of War skill multiple times between rests at a Site of Grace.
Stamina and Carry Capacity: Endurance
Endurance is your workhorse stat, governing two critical systems: Stamina and Equip Load. Stamina fuels every action—rolling, attacking, blocking, and sprinting. Running out mid-combo is a death sentence. Equip Load determines how much gear you can wear while maintaining a functional roll.
Stamina gains have three distinct soft caps: at 15, 30, and 50. You'll see solid gains up to 50, but pushing beyond that yields very little extra stamina. The Equip Load soft caps are at 25 and 60. This is crucial because your Equip Load percentage directly controls your roll speed and recovery in the Status Menu.
Here’s how it works:
- Light Load (under 30%): You have the fastest, farthest roll.
- Medium Load (30-70%): The standard roll. This is the sweet spot for most builds, balancing defense and mobility.
- Heavy Load (over 70%): You perform a slow, ineffective "fat roll." Avoid this at all costs.
Investing in Endurance lets you wear heavier, more protective armor and wield heavier weapons without sacrificing your vital medium roll. If you find yourself constantly "fat rolling," a few points in Endurance can feel like a whole new game.
With a solid foundation in Vigor for health, Mind for magic, and Endurance for stamina and armor, you've built a character who can withstand the horrors of the Lands Between. Now you're ready to focus on dealing damage.
Elden Ring Physical Stats: Strength and Dexterity
Alright, you’ve met Melina and learned to level up. You’ve invested in Vigor for health and Endurance for stamina. Now it’s time to pick your weapon and start swinging—welcome to the physical heart of your build in Elden Ring. This is where you decide if you’re crushing skulls with a colossal hammer or dancing through foes with a swift katana.
The Strength attribute is vital for heavy weapon scaling and requirements.
Understanding Strength and Dexterity
In Elden Ring, Strength and Dexterity are your primary physical damage stats. They determine which heavy hitters or nimble blades you can wield and how much damage you deal with them. Think of Strength as your gateway to colossal swords, great hammers, and massive shields, while Dexterity unlocks katanas, curved swords, and bows. Beyond raw power, Strength also passively boosts your physical, strike, slash, and pierce defense, making you naturally tougher.
Don’t just meet a weapon’s requirements—exceed them. Your damage scales with how high your stat is beyond the minimum, so pouring points into Strength or Dexterity directly increases your Attack Power.
The Power of Two-Handing
Here’s a game-changing mechanic for Strength builds: two-handing. By holding [Y/Triangle] + [RB/R1] or [LB/L1], you grip your weapon with both hands. This increases your effective Strength by 1.5x for the purposes of meeting stat requirements and calculating damage. That means if a glorious greatsword requires 30 Strength, you can two-hand it effectively with only 20. It’s the best early-game power boost for Strength warriors and remains a core technique for maximizing damage output.
Dexterity’s Hidden Advantages
While Dexterity governs your damage with faster, more technical weapons, it offers unique utility that Strength does not. First, it slightly reduces the casting time of sorceries and incantations, making it a valuable secondary stat for hybrid spellblades. Second, it softens fall damage, which can be a literal lifesaver when exploring the vertical world of The Lands Between. Finally, a higher Dexterity stat improves your stability while riding Torrent, making it harder for enemies to knock you off your spectral steed during mounted combat.
Planning Your Investment
Both stats have key Attack Power breakpoints at 50, 60, and 80, where the damage returns you get per level start to diminish. For a focused build, aiming for 50-60 in your main damage stat is a great target that balances power with the runes needed to level other vital stats like Vigor. If you love variety, consider a Quality build, which splits investment between Strength and Dexterity to wield a massive arsenal of weapons—though this approach truly shines at higher character levels.
⚠️ Watch out: Two-handing only boosts Strength for damage and requirement calculations. It doesn’t help you meet the Dexterity, Intelligence, or Faith requirements for a weapon.
Whether you choose the overwhelming force of Strength or the refined speed of Dexterity, mastering these stats is your path to becoming a true force in The Lands Between. Pick your favorite weapon, invest in its corresponding stat, and get ready to leave your mark.
Elden Ring Magic Stats: Intelligence, Faith, and Arcane
Now, we venture beyond raw strength and speed into the realm of the arcane. In Elden Ring, mastering the magical arts and the unseen forces of fate is just as crucial as swinging a greatsword, and your journey hinges on three key attributes: Intelligence, Faith, and Arcane. This is where you’ll find your path as a sorcerer, a holy warrior, or a wielder of forbidden power.
Attributes determine your character's damage, toughness, and spellcasting power.
Intelligence: The Power of Sorcery
Intelligence is your gateway to the world of Glintstone Sorceries. This stat is required to cast these spells, and it directly scales their power, turning a simple pebble into a devastating comet. But Intelligence isn’t just for offense—it also boosts your Magic Defense, making you more resilient against other spellcasters. When leveling it, you’ll find its effectiveness follows clear patterns. For boosting your spell power, the primary Attack Power (AP) breakpoints are at 50 and 80. Your casting speed also improves at certain thresholds (like 30, 45, 60, and 80), depending on which catalyst you use. In short, if you dream of raining down magical destruction from a safe distance, Intelligence is your star.
Faith: The Strength of Conviction
If sorcery is about intellectual mastery, Faith is about spiritual might. This attribute is required for Sacred Incantations, a vast school of magic that includes everything from hurling lightning and fire to casting powerful healing spells and protective buffs for you and your allies. Faith builds are incredibly versatile, capable of both formidable offense and unparalleled support. Like Intelligence, Faith’s scaling for incantation power has key breakpoints at 50 and 80. Whether you’re looking to smite foes with holy light or bolster your defenses with divine protection, Faith provides the tools to make any Tarnished a beacon of power.
Arcane: The Unseen Influence
Arcane is the most enigmatic of the three, governing the subtle, unseen forces in the Lands Between. Its most tangible benefit is Item Discovery, a stat in your Status Menu that increases the chance enemies will drop valuable items. This scales linearly with Arcane up to 99, meaning every single point makes you just a bit luckier. Beyond that, Arcane influences Holy Defense and Vitality (your resistance to the instant-kill Death Blight status). Crucially, it also scales the buildup for potent status effects like Poison, Bleed, Sleep, and Madness on weapons and spells that utilize them. If you fancy a build that overwhelms enemies with debilitating effects or simply want to farm gear more efficiently, Arcane is your secret weapon.
Don’t sleep on Arcane just for its discovery bonus. Weapons like Rivers of Blood scale brilliantly with it, making a Dexterity/Arcane hybrid one of Elden Ring’s most potent builds for applying rapid Bleed.
While Strength and Dexterity define your physical prowess, Intelligence, Faith, and Arcane unlock the true breadth of Elden Ring’s combat. Whether you’re channeling glintstone, calling upon the gods, or manipulating the fabric of luck itself, these stats give you the power to face the world on your own mystical terms.
How to Respec Stats in Elden Ring
Made a mistake with your stat spread? Don't worry—Elden Ring gives you a powerful do-over button. After a certain point, you can completely reallocate your attribute points, letting you pivot from a clumsy mage to a nimble swordsman without starting a new game. Here’s everything you need to know about respeccing your character.

Defeating Rennala, Queen of the Full Moon, is the first step to unlocking stat reallocation.
Unlocking the Rebirth Mechanic
Your path to a fresh start begins in Liurnia of thes Lakes, at the Raya Lucaria Academy. This legacy dungeon’s final boss is Rennala, Queen of the Full Moon. Defeating her is your ticket to respeccing. Once she’s beaten, she remains in the Grand Library at the heart of the academy, no longer hostile. Interact with her, and you’ll gain access to the “Rebirth” menu. This is your character editor.
The Cost of a New You: Larval Tears
Rennala’s services aren’t free. To perform a respec, you must offer her a Larval Tear, a rare key item consumed in the process. These are scattered throughout The Lands Between in hidden locations—often dropped by certain enemies, found in catacombs, or tucked away in obscure corners. Stock up on a few if you love to experiment.
Don’t burn your first Larval Tear on minor tweaks. Wait until you’ve found a new weapon or spell you love, then respec to build entirely around it.
How Rebirth Works
When you select “Rebirth” from Rennala’s menu, you’ll see your current attribute distribution. You can reallocate every single point you’ve earned from leveling up. However, there’s one crucial limit: you cannot lower any stat below its starting value for your chosen class. Your base stats are your permanent foundation. You simply redistribute the points you’ve added on top of them.
Think of it as a total reset back to your class’s level 1 configuration, with all your earned levels handed back to you to spend again. This lets you correct past mistakes or fund an entirely new build.
Planning Your Respecs
A common strategy is to respec up to 18 times per playthrough, based on the total number of Larval Tears you can find in the world. This is a generous amount, but it’s not infinite. Use them wisely. Before you commit, have a clear plan. Know the soft caps for your new main stats (like 50/60 for Vigor, or 80 for your primary damage stat) to avoid wasting points on diminishing returns.
⚠️ Watch out: You can’t get a Larval Tear back once it’s spent. If you’re unsure about a new build, consider using an online Elden Ring Build Calculator to test your stat spread before you make the change in-game.
With Rennala’s grace and a Larval Tear in hand, no build decision in Elden Ring is ever final. Go ahead and experiment—the perfect build for your playstyle is just a rebirth away.
Best Starting Class and Build Setups for Elden Ring
Now that you understand Elden Ring’s stats, it’s time to put them to work. This section transforms those numbers into living, breathing builds—the powerful templates that will carry you through the Lands Between. Think of your build as your character’s identity; it dictates how you fight, survive, and conquer. We’ll break down five proven setups, from the versatile warrior to the ultimate mage, giving you the exact stat targets and gear to aim for.

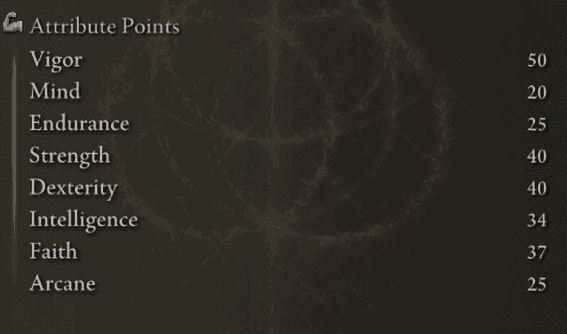
Every starting class begins with a unique distribution of these core attributes.
The Balanced Warrior: Vagabond Quality Build
Your adventure starts here with the ultimate jack-of-all-trades. The Vagabond is the ideal starting class for a Quality Build, which splits its power between Strength and Dexterity to wield a massive arsenal of weapons. For a Level 150 character, aim for 60 Vigor, 55 Strength, and 55 Dexterity. This spread gives you immense survivability and the stats to make almost any physical weapon sing.
The beauty of this build is its flexibility. Apply the Quality affinity to a weapon via an Ash of War, and its scaling will balance beautifully between your two main stats. A perfect early-to-late-game weapon for this is the Bloodhound's Fang; its innate bleed and strong scaling make it a monster with a Quality infusion. You’re not locked into one playstyle—switch between greatswords, halberds, or katanas as the situation demands.
While Quality builds are incredibly versatile, their damage truly shines in the mid-to-late game once your Strength and Dexterity are both high. Early on, you might get more immediate power from a Heavy or Keen affinity until your stats catch up.
The Arcane Artillery: Astrologer Pure Mage
For those who prefer to solve problems from a distance, the Astrologer Pure Mage is your calling. Start as an Astrologer and pour your levels into Intelligence. A classic Level 150 setup is 40 Vigor, 40 Mind, and a whopping 80 Intelligence. This gives you the FP pool to cast relentlessly and the spell power to delete enemies.
Your tool of choice is Lusat's Glintstone Staff, which offers the highest sorcery scaling at the cost of increased FP consumption—a trade-off worth making for sheer damage. Pair it with Comet Azur, the legendary laser beam spell, to melt bosses and tough enemies in a single, sustained channel. This build is about control and overwhelming force, keeping threats at bay with a barrage of Glintstone sorceries.
The Hemorrhage Hunter: Samurai Bleed Build
If you want to see health bars disappear in chunks, the Samurai Bleed Build is brutally effective. Starting as a Samurai gives you a head start with the Uchigatana. For a Level 150 version, target 50 Vigor, 55 Dexterity, and 45 Arcane. Arcane is the secret sauce here, dramatically increasing the bleed buildup on your weapons.
Your goal is to acquire Rivers of Blood, a katana that deals both physical and fire damage while inflicting massive bleed. For maximum carnage, wear the White Mask helmet, which boosts your attack power whenever blood loss occurs nearby. This build turns you into a whirlwind of slashes, stacking bleed procs that can devastate even the tankiest foes in seconds.
The Holy Crusader: Str/Faith Paladin
Mixing divine power with brute force creates the unstoppable Str/Faith Paladin. This build blends melee might with supportive incantations. A solid Level 150 template is 50 Vigor, 65 Strength, and 33 Faith. The high Strength lets you wield colossal weapons, while Faith opens up a suite of powerful buffs and heals.
Your signature weapon is the Blasphemous Blade, a greatsword obtained from Rykard's Remembrance. Its weapon skill heals you on hit and deals massive fire damage. Crucially, your Faith investment lets you cast Golden Vow, an incantation that boosts your damage by 15% and defense by 10% for 80 seconds. You become a durable, self-sustaining force on the battlefield.
The Ultimate Canvas: Wretch Challenge
For the purist or the seasoned veteran who wants total control, there’s the Wretch. This class starts at Level 1 with all stats at 10. It’s the hardest start, armed with only a club, but it offers maximum flexibility for min-maxing later. Because every stat begins at the same baseline, you waste zero points on attributes you don’t need for your final build.
Choosing the Wretch is a commitment to a difficult early game, but the payoff is a perfectly optimized character for any endgame vision. Whether you want to be a hyper-specialized mage with minimal Strength or a brute who ignores Magic completely, the Wretch gives you a clean slate to build upon. It’s the ultimate choice for planning your perfect character from the ground up.
With these five Elden Ring builds as your foundation, you have a clear path to power. Pick the one that matches your desired playstyle, start leveling toward those stat targets, and go claim your throne.
Elden Ring Secondary Stats and Resistances
You've mastered your primary stats in Elden Ring, but surviving the Lands Between isn't just about hitting hard—it's about not crumbling under pressure. Your character sheet hides a second layer of defense, a suite of resistance stats that determine whether a poison swamp is a nuisance or a death sentence. Understanding these is the difference between a panicked scramble for a cure and a confident stride through any hazard.
Endurance is a key attribute for physical defense and robustness.
Your Defensive Fortress: Status Resistances
Think of your character as a fortress. Vigor builds the walls, but Immunity is the gate's strength against toxic sieges. This stat, governed by your Vigor level, is your resistance to Poison and Scarlet Rot. If you’ve ever watched your health tick away in the Lake of Rot, you know why this matters. Higher Vigor doesn't just give you a bigger health pool; it slows the buildup of these debilitating effects, giving you precious extra seconds to react or retreat.
Your Endurance does more than let you swing a colossal sword. It also governs Robustness, your defense against Hemorrhage (Bleed) and Frostbite. Enemies from the wolves of Limgrave to the knights of the Mountaintops love to inflict these. High Robustness means you can trade more blows without suddenly losing a huge chunk of health to a bleed proc or having your stamina crippled by frost.
For spellcasters and warriors alike, Mind has a hidden benefit. It increases your Focus stat, which specifically resists Sleep and Madness. If you plan to explore the Consecrated Snowfield or face certain frenzied invaders, a healthy Mind pool will help you keep your wits when others lose theirs.
Don't just level Arcane for discovery. It also governs Vitality, your resistance to Instant Death from the Death Blight status. If you're venturing into areas plagued by Those Who Live in Death, a few points here can be a lifesaver—literally.
The Unseen Shield: Poise and Damage Negation
Beyond statuses, your gear determines your physical resilience. Poise is your hidden stagger meter, governed by the total weight of your armor. Reaching a threshold like 51 Poise allows you to tank hits from smaller enemies without your attack animations being interrupted—a game-changer for aggressive playstyles. Heavier armor sets are the key.
Finally, your armor and stats contribute to various Damage Negation percentages, listed in your equipment screen. These are separate values for Physical, Strike, Slash, Pierce, Magic, Fire, Lightning, and Holy damage. A well-rounded defense means checking these values and perhaps swapping a piece of gear before heading into a volcano or a sorcerer's tower.
Mastering these secondary stats transforms you from a glass cannon into a seasoned veteran. You stop fearing environments and start using them to your advantage. Now, you're truly ready to endure anything the Lands Between can conjure.
Elden Ring Build Rewards and Optimization Tools
Your build is locked in, your stats are set—but before you charge into the next boss arena, there’s one last frontier to master: squeezing every ounce of power from your setup. In Elden Ring, your final edge doesn’t always come from more Runes; it comes from the right tools and a bit of smart planning.

Arcane is a vital stat for builds focusing on discovery and status effects.
Essential In-Game Enhancers
Some of the most powerful boosts in Elden Ring aren't found on the stat screen; they're items you equip or consume.
First, seek out the Flask of Wondrous Physick. You'll find it in Limgrave > Third Church of Marika. This isn't a regular healing flask—it's a custom buff engine. You mix two Crystal Tears into it at any Site of Grace, creating effects like a temporary damage boost, a free FP-free spell cast, or a burst of HP regeneration. Press [X/Square] to drink it for a massive, fight-defining advantage.
Next, hunt for legendary talismans that fundamentally change your build's capabilities. The Shard of Alexander, earned by completing the Alexander Questline that spans from Caelid to Farum Azula, is a game-changer for any skill-focused build. It greatly boosts the Attack Power of your weapon skills (Ashes of War), turning powerful abilities into boss-melting finishers.
For a more general survivability boost, the Erdtree's Favor is a cornerstone talisman. Found deep in the Fringefolk Hero's Grave, it simultaneously increases your HP, Stamina, and Equip Load. This single slot can be the difference between a medium and heavy roll, or surviving that one extra hit.
Don’t sleep on the Flask of Wondrous Physick. Mixing a Crimsonburst Crystal Tear (gradual HP regen) with a Greenspill Crystal Tear (increased stamina) can give you incredible staying power for long, grueling boss fights.
Plan Your Power with External Tools
Here’s the trick most guides miss: you don't have to guess. Before you spend another Rune or commit to a respec, use an online Elden Ring Build Calculator. These external tools let you simulate your Attack Rating (AR), see exactly how your stats hit soft caps, and plan your entire gear setup without any in-game cost.
Plug in your target levels, your dream weapon, and your talismans. The calculator will show you the exact damage numbers and defensive stats you’ll achieve. This is invaluable for avoiding wasted levels and ensuring your final build performs exactly as you envision, especially for competitive PvP or tackling the game's toughest challenges.
With your build finely tuned through smart itemization and precise planning, you're not just ready—you're optimized. Now, go claim your throne.