
Best Starting Path and Leveling in Elden Ring
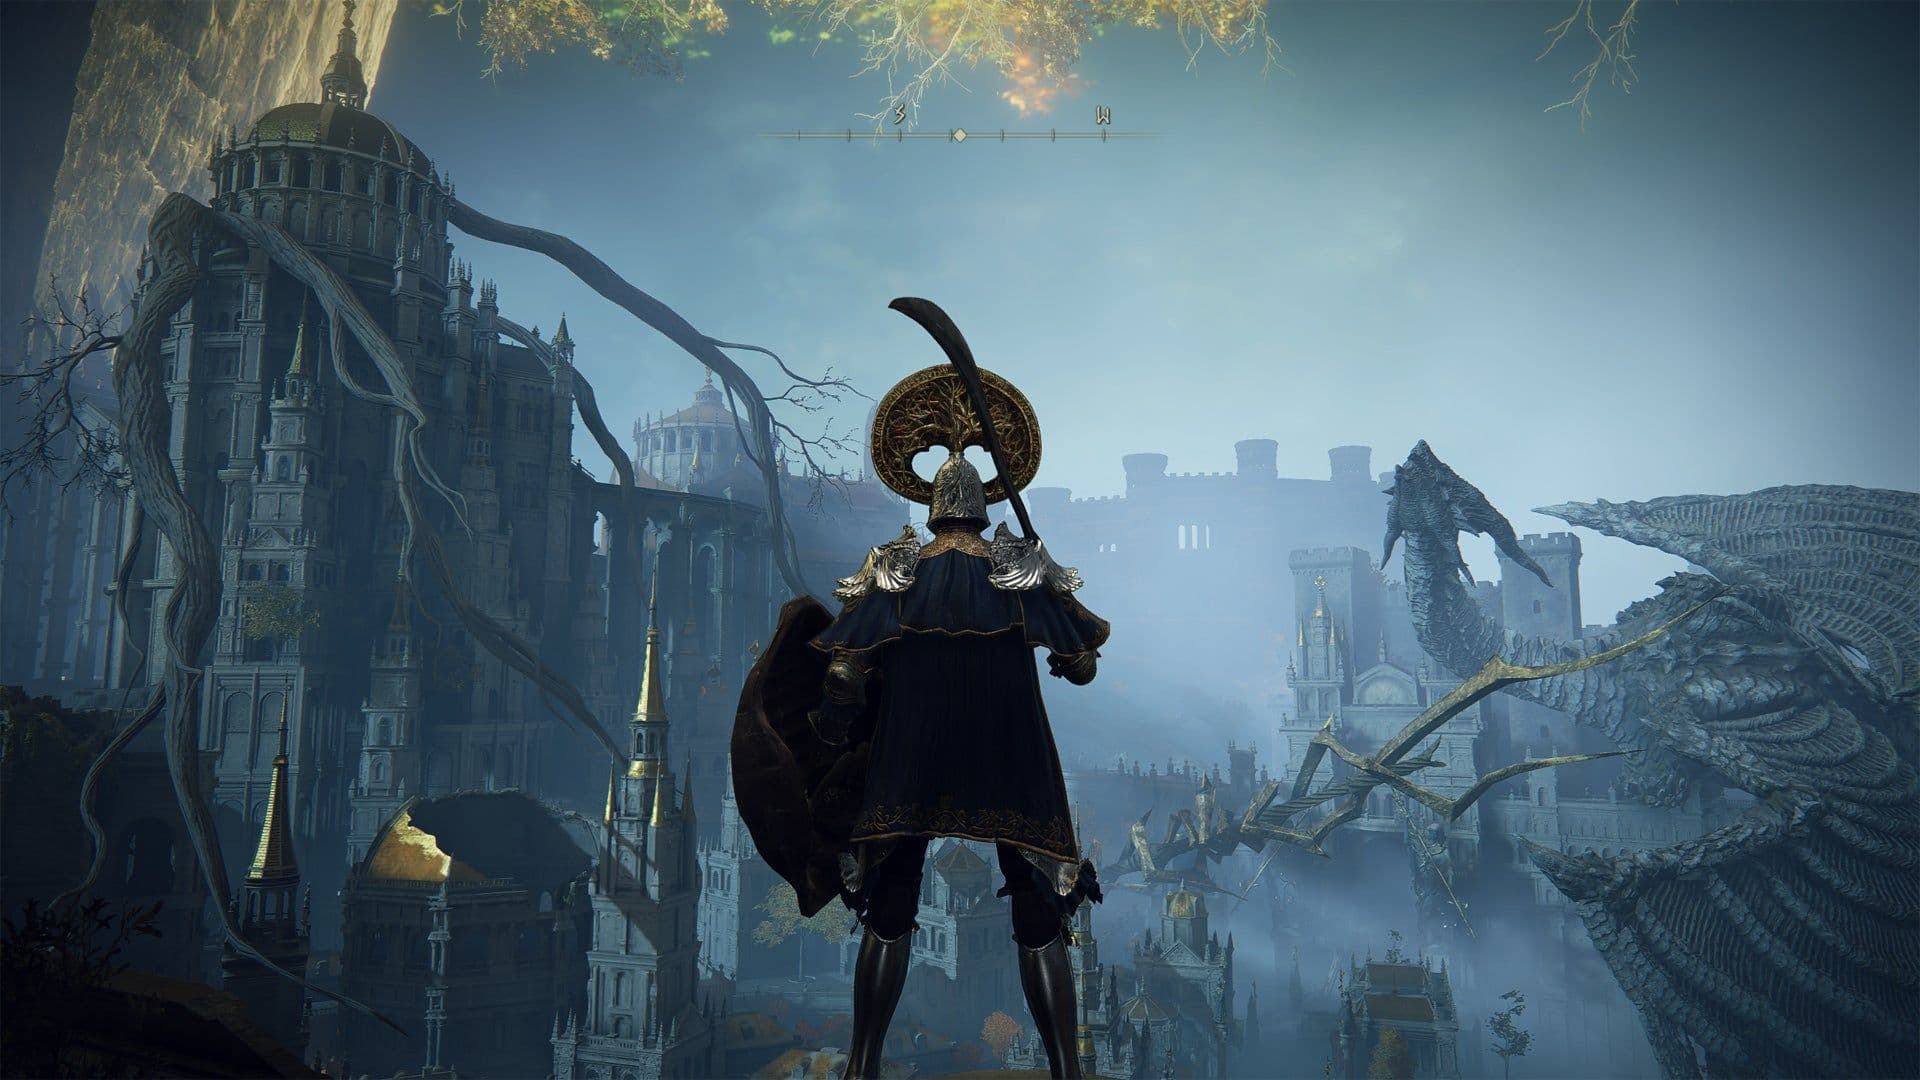
Your journey through the Lands Between begins with a single step—and a smart plan. In Elden Ring, the vastness of Limgrave can feel overwhelming, but a focused start will make you powerful enough to face anything. This section covers your essential first steps, from unlocking core abilities to smart early leveling.
The Gatefront Site of Grace serves as a vital early-game hub for character progression.
Unlocking Your Core Abilities
Your first goal is to gather the fundamental tools that make exploration and combat possible. Head north from the Stranded Graveyard to the Gatefront Ruins. Here, you’ll find the Gatefront Ruins Site of Grace. Resting here triggers a pivotal encounter: Melina, a mysterious maiden, appears. She grants you the ability to level up your character using Runes and, crucially, gives you the Spectral Steed Whistle. Use it from your quick-select pouch ([D-pad] to summon Torrent, your spectral mount. Trust me, this changes everything about traversing the open world.
You can summon Torrent even during some boss fights and while falling from great heights, making him an invaluable escape tool.
Also within the Gatefront Ruins, don’t miss the Whetstone Knife. It’s in a chest inside an underground cellar (look for a stairway near the ruins). This key item unlocks the ability to apply Ashes of War to your weapons at any Site of Grace, letting you customize your weapon skills and scaling.
Next, ride east to the Church of Elleh. Here, you’ll meet Kale, a nomadic merchant. He sells the Crafting Kit, which unlocks the ability to make items from materials you collect, and a Telescope for scouting. But the most important interaction here happens at night. Rest at the Site of Grace until nightfall, and a witch named Renna will appear. Exhaust her dialogue, and she’ll give you the Spirit Calling Bell and your first set of Lone Wolf Ashes. This bell allows you to summon spectral allies in areas marked by a glowing monument icon on your screen—a game-changer for tough fights.
Smart Early Leveling (Levels 1-15)
With your core tools secured, it’s time to grow stronger. The early game in Elden Ring is about building a solid foundation, not specializing too early.
Your primary focus for your first 15 levels should be Vigor and your primary damage stat (like Strength or Dexterity, depending on your starting class). Vigor directly increases your HP, which is the difference between surviving a mistake and starting over. Don’t get distracted by flashy spells or weapon requirements yet—survivability is key.
⚠️ Watch out: It’s tempting to pump points into damage stats, but a few extra points in Vigor early on will save you countless runes lost to preventable deaths.
Explore the western part of Limgrave thoroughly. Clear small groups of soldiers, hunt wildlife for crafting materials, and tackle some of the minor dungeons and caves. This will net you enough runes to reach the recommended Level 15 comfortably while also finding useful upgrade materials like Smithing Stone (1).
With Torrent under you, a spirit bell in your pocket, and a healthy stash of runes invested in Vigor, you’re no longer a lost Tarnished—you’re a prepared adventurer ready to claim the peninsula.
How to Navigate Limgrave and Weeping Peninsula in Elden Ring
Your adventure truly begins here—after getting your bearings in Elden Ring’s opening plains, the game opens up with two fantastic training grounds. This section will guide you through exploring Limgrave and the Weeping Peninsula, the game’s first two major zones, to build your power and confidence before tackling the first legacy dungeon.
The bridge connecting Limgrave to the Weeping Peninsula.
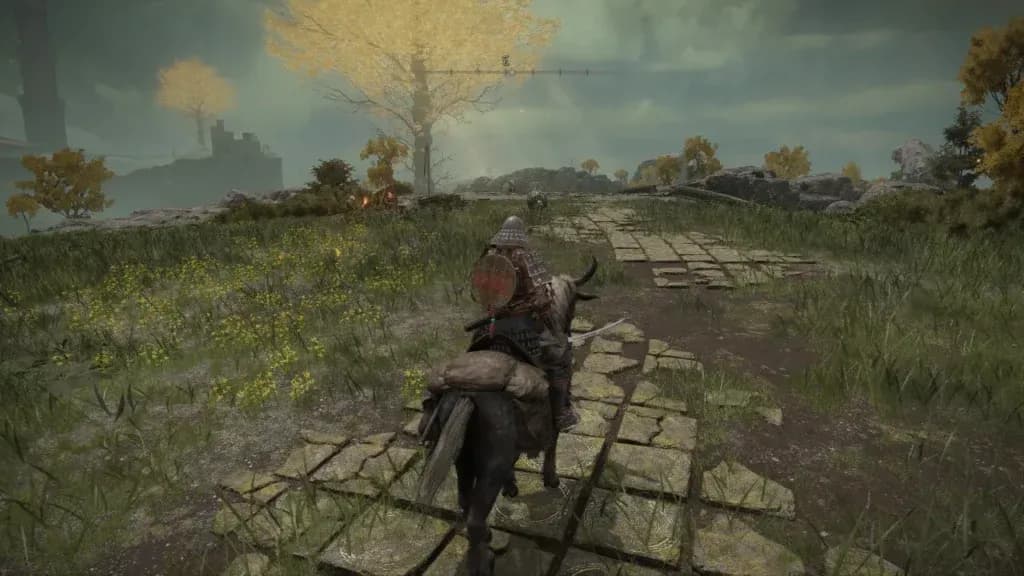
Limgrave is your sprawling starting sandbox, recommended for Levels 1-15. It’s designed to teach you Elden Ring’s core mechanics through gentle exploration and manageable challenges. Your first goal is to unlock your mount, Torrent. Rest at the Gatefront Ruins Site of Grace, where Melina will appear and give you the Spectral Steed Whistle. Assign it to your quick-select pouch (press [D-pad]) for instant summoning—trust me, you’ll use it constantly.
Spend a few minutes practicing mounted combat against the soldiers at Gatefront. Mastering hit-and-run tactics on Torrent is a skill you’ll use for the entire game.
Next, grab essential tools. Head back to the Church of Elleh at night to meet the witch Renna and get the Spirit Calling Bell, which lets you summon helpful spirit ashes. Also, loot the Whetstone Knife from the underground cellar at Gatefront Ruins; this lets you equip Ashes of War to customize your weapon skills at any Site of Grace.
Now, systematically explore. Clear the Gatefront Ruins for the map fragment and practice combat. Visit the Third Church of Marika in eastern Limgrave for the Flask of Wondrous Physick—press [Square/X] to drink this custom buff flask. Hunt for Golden Seeds (glowing saplings) and Sacred Tears (inside churches) to upgrade your Crimson and Cerulean Flasks. Don’t feel pressured to fight the Tree Sentinel patrolling near the First Step yet; use Torrent for hit-and-run tactics if you’re feeling brave, as he drops the powerful Golden Halberd.
Weeping Peninsula: Your First Power Spike
Once you’re comfortable, head south across the Bridge of Sacrifice. Welcome to the Weeping Peninsula, recommended for Levels 20-30. This rainy, mournful region is your perfect next step—it’s more challenging than Limgrave but far more rewarding.
Your main objective here is Castle Morne at the southern tip. This mini-legacy dungeon is packed with soldiers and Misbegotten enemies, culminating in the boss Leonine Misbegotten. Before you charge in, fortify yourself:
- Grab the Sacred Tear inside the Fourth Church of Marika on the peninsula’s west coast to boost your flask healing.
- Explore the Tombsward Catacombs and Earthbore Cave for spirit ashes and talismans.
- Complete the quest for Irina at the bridge and her father Edgar inside Castle Morne for a useful talisman.
Clearing the Weeping Peninsula will net you vital upgrades, plenty of runes for levels, and the excellent Grafted Blade Greatsword from the Castle Morne boss. You’ll also find Smithing Stones to get your weapon to +3 or higher, which is crucial for the next step.
With your flasks upgraded, your weapon reinforced, and your level comfortably in the 20s, you’re no longer a fledgling Tarnished. You’ve learned the rhythms of exploration and combat that define Elden Ring. Now, you’re ready to face the storm.
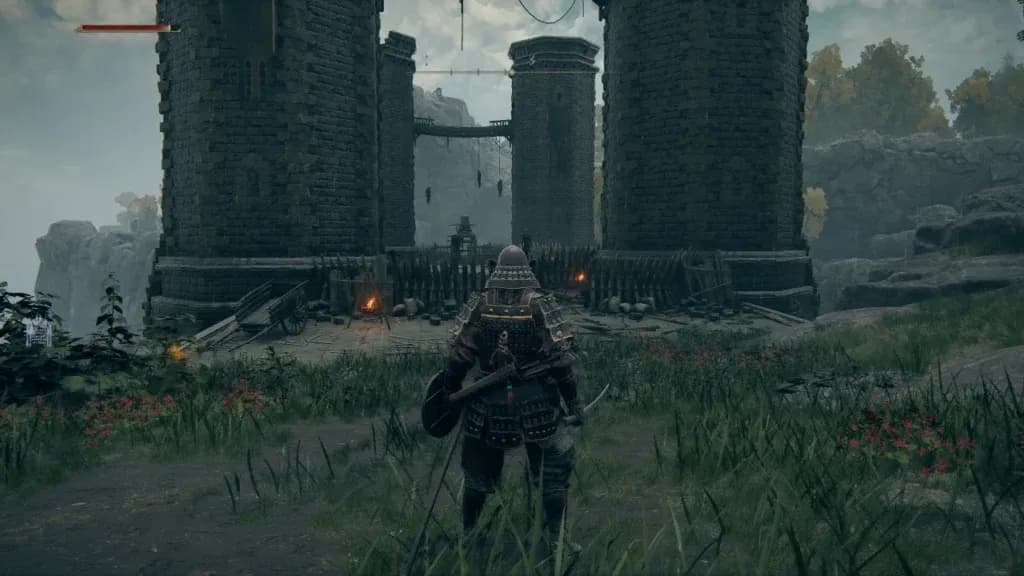
Stormveil Castle: First Legacy Dungeon Progression
Stormveil Castle is your first real test in Elden Ring—a sprawling, vertical fortress designed to push your skills to the limit. This is where the training wheels come off, and you’ll face two brutal bosses that define the game’s challenge. Trust me, navigating its ramparts and surviving its guardians is a rite of passage.
Obtaining Great Runes from Godrick in Stormveil is the first step toward Leyndell.
To tackle this first Legacy Dungeon, you should be around Level 30-40. After exploring Limgrave and the Weeping Peninsula, head north from the Stormhill Shack Site of Grace. You’ll see the imposing castle gates, but the path is blocked by barricades, soldiers, and a ballista. Your best bet is to use Torrent to gallop into the woods on the left, race along the castle walls to destroy the ballista, and then push through to the Castleward Tunnel. Here, the first major skill check awaits.
Confronting Margit the Fell Omen
Your path into Stormveil Castle is barred by Margit, the Fell Omen. This demigod boss fights on a narrow bridge, making positioning critical. He wields a cane and can summon holy daggers, swords, and a hammer in relentless combos.
- The Strategy: Patience is everything. Conserve stamina to [Roll] through his attacks or block, then use Guard Counters after his combos end. Never get greedy with your own attacks.
- The Trick: You can find Margit’s Shackle from Patches in Murkwater Cave. Using it during the fight will temporarily stun him, creating a huge opening to deal damage.
Listen for the audio cue of his holy dagger summon—it’s your signal to dodge immediately. This fight is about learning rhythms, not brute force.
Defeating Margit grants access to the castle’s Main Gate. An NPC inside will suggest two paths: the heavily guarded main gate or a sneaky side route. For maximum loot and fewer headaches, always take the side path.
Navigating the Castle Interior
The side route lets you weave through the castle’s guts, grabbing key items like the Hookclaws, a Stonesword Key, and the Curved Sword Talisman from a defeated black knight. Your goal is to reach the Rampart Tower Site of Grace, which becomes your central hub.
From here, exploration opens up. Don’t miss meeting Sorcerer Rogier in the Chapel. He’s a knowledgeable spellcaster who provides early info on Ranni’s questline and sells useful Sorceries. Deeper in, you’ll find the Liftside Chamber Site of Grace, which leads to the final boss. Before heading there, speak with the warrior Nepheli Loux—she can be summoned for the upcoming fight.
The Grafted King: Godrick
At the heart of the castle, in the Secluded Cell, awaits Godrick the Grafted, Elden Ring’s first Shardbearer. This boss has two distinct phases, with Phase 2 starting at 50% HP when he grafts a dragon’s head onto his arm, adding devastating fire attacks to his moveset.
Phase 1 Strategy: Godrick’s attacks are erratic but telegraphed. Stay mid-range, bait out his axe slams, and punish his recovery. Summoning Nepheli Loux outside the fog wall is highly recommended to split his attention.
Phase 2 Strategy (Dragon Graft): This is where the real challenge begins. The key is managing the new fire breath.
- Fire Breath: When he rears back, stay close to his side or behind him. The flames won’t hit you there, and you can attack freely.
- Ground Slams: After the breath, he often follows with ground slams. [Roll] through these toward him to stay in safe melee range.
- Shockwaves: His two-handed earthquake creates a golden shockwave. Jump over it to avoid damage and close the distance.
⚠️ Watch out: His wind-based vortex pull can set up a deadly combo. If you get sucked in, roll immediately as you land to avoid the follow-up slam.
Victory rewards you with Godrick’s Great Rune and the Remembrance of the Grafted. This isn’t the end of your journey with his power, however.
Activating Your Prize
To make Godrick’s Great Rune active, you must travel to the Divine Tower of Limgrave. From the castle’s main gate, defeat the mechanical giants on the bridge to find a teleporter. It will send you directly to the tower. Inside, interact with the fingers at the top to activate the rune, granting a powerful boost to all your attributes.
With Godrick defeated and his rune empowered, the throne room opens to the breathtaking Liurnia of the Lakes. You’ve conquered Elden Ring’s first major dungeon—equipped with new skills, gear, and the confidence to face whatever comes next.
How to Complete Liurnia of the Lakes in Elden Ring
Welcome to Liurnia of the Lakes, Elden Ring’s sprawling, magic-drenched region north of Stormveil. This is where your journey takes a sharp turn from brute force to arcane warfare, as you set your sights on the Academy of Raya Lucaria and its shardbearer. This section covers everything from navigating the foggy wetlands to conquering the academy itself, making it a critical step in your path to becoming Elden Lord.

Location of the Hoarfrost Stomp near Caria Manor.
Navigating the Wetlands and Finding the Key
Emerging from Stormveil Castle, you’ll arrive at the Lake-Facing Cliffs Site of Grace. Liurnia is a massive area, roughly the size of Limgrave, and your first goal here is to gain entry to the academy. The imposing Raya Lucaria Academy sits in the center of the lake, but its main gate is sealed by a magical barrier.
To get past it, you need the Academy Glintstone Key. Here’s the trick most guides miss: you don’t have to fight for it. The key is found on a corpse west of the academy, near the Glintstone Dragon Smarag. You can simply ride Torrent in, grab the key from the body nestled against the rocks near the sleeping dragon, and ride away. With the key secured, return to the South Raya Lucaria Gate, interact with the shimmering blue seal, and you’ll be transported inside.
Before heading to the academy, spend some time exploring the southern and eastern shores of Liurnia. You’ll find valuable Sacred Tears, NPC quest starters like Sorcerer Thops at the Church of Irith, and useful cookbooks in camps like the Liurnia Lakeshore.
Conquering Raya Lucaria Academy
Once inside, activate the Main Academy Gate Site of Grace. This legacy dungeon is a maze of sorcerers, marionettes, and spectral skeletons. Your path will take you through the Church of the Cuckoo, a treacherous graveyard, and the Schoolhouse Classroom. Be methodical—the Glintstone Scholars here spam projectiles relentlessly.
Your first major hurdle is the Red Wolf of Radagon in the Grand Library. This boss is incredibly fast, wields a magic sword, and is highly resistant to sorcery. The key is to corner it to limit its dodging. When it deploys its homing glintblades, roll diagonally forward through the projectiles to close the gap. Stick to physical, preferably slashing, damage. Defeating it grants access to the Debate Parlor Site of Grace.
From there, you’ll navigate a courtyard guarded by a rolling boulder trap and face Moongrum, Carian Knight at the top of the stairs. He’s a brutal parry master. A cheesy but effective strategy is to lure him onto the elevator shaft behind him, send the lift up, and watch his AI walk into the pit.
The Final Test: Rennala, Queen of the Full Moon
Past Moongrum lies the Grand Library and the shardbearer herself, Rennala, Queen of the Full Moon. This fight has two distinct phases:
- Phase 1: She floats protected in a bubble. Sprint around the room, avoiding flying books, and look for the scholars glowing with a golden aura. Attack three of them to break her shield and bring her down for a damage window. Repeat.
- Phase 2: She teleports you to a lunar arena. Rennala will bombard you with Comet Azur lasers and homing moons. Her physical poise is very low, so summons like the Lone Wolf Ashes can keep her staggered. At around 50% health, she’ll summon allies like a dragon or a troll—your best bet is to run until they despawn, then re engage.
Victory rewards you with the Great Rune of the Unborn and the Remembrance of the Full Moon. This is a monumental moment in Elden Ring: her Great Rune allows you to Respec your character’s stats at any time using Larval Tears, letting you completely rework your build if you’re not satisfied.
With Rennala defeated and a new Great Rune in hand, you’ve mastered Liurnia’s magical heart. You’re now ready to venture into the much harsher lands beyond, whether that’s the rotting wastes of Caelid or the lofty heights of the Altus Plateau.
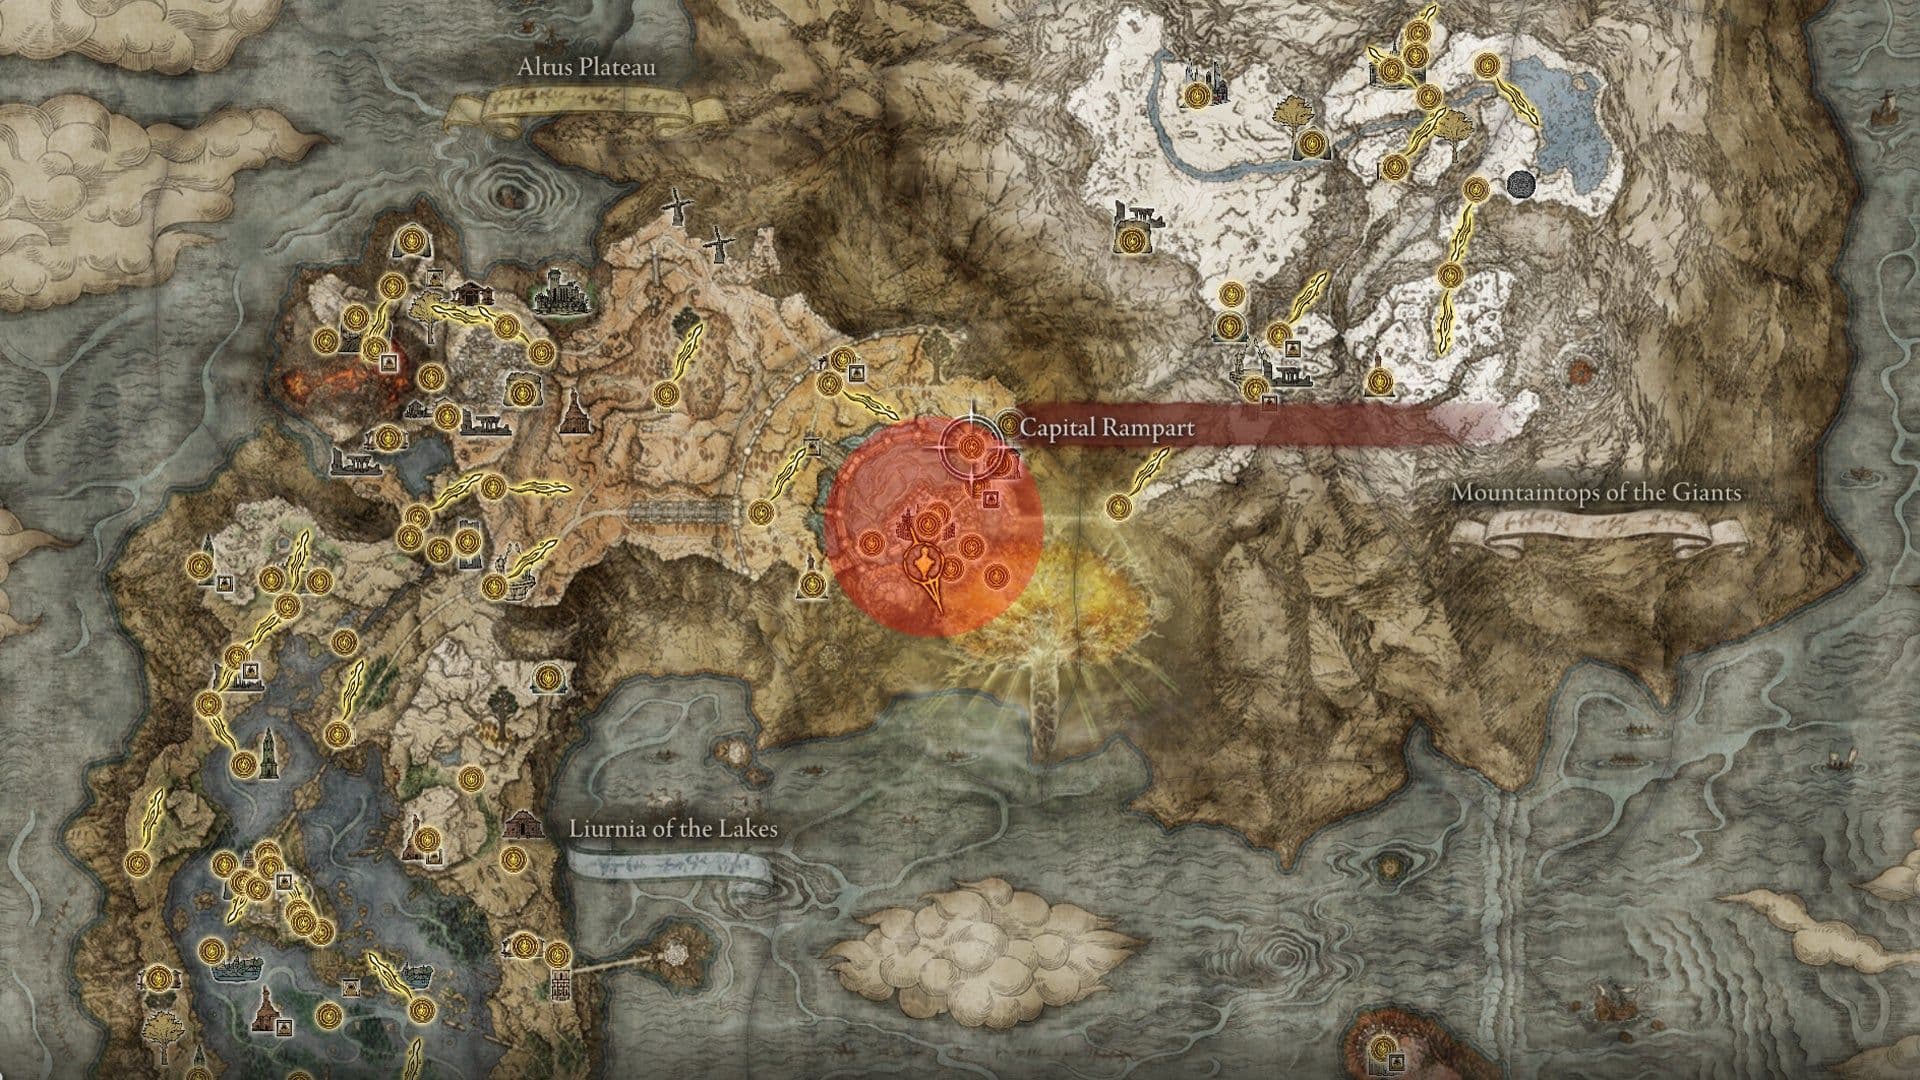
Caelid and General Radahn Progression Guide
Welcome to Caelid, where the sky is perpetually red and the ground wants to kill you—welcome to Elden Ring’s difficulty spike. This rot-infested wilds demand a Level 60-70 character, and your primary goal is surviving the environmental hazards while navigating toward the colossal showdown at Redmane Castle. Trust me, you’ll want to avoid that ‘Rot’ status buildup like the plague.

Starscourge Radahn, the legendary boss of the Caelid festival.
Your destination is Redmane Castle, located in the southeast of Caelid. This is where the legendary Radahn Festival takes place, but the castle is locked in its pre-festival state until you trigger the event. There are two reliable paths, both detailed in your research. The most straightforward is to reach the Altus Plateau—either by using the Grand Lift of Dectus or braving the Ruin-Strewn Precipice—and rest at any Site of Grace there. This world-state change is what clears the castle’s regular defenders and summons the festival NPCs. Alternatively, if you’re deep into Ranni the Witch’s questline and have spoken to Blaidd in Siofra River, that can also trigger the festival.
If you’ve reached Altus Plateau but the festival hasn’t started, try fast-traveling back to Redmane Castle and resting at the Chamber Outside the Plaza Site of Grace to force the area to refresh.
Once the festival is active, head to the castle grounds via the teleporter at the Impassable Greatbridge. You’ll find the courtyard filled with spectral warriors, including Alexander the Iron Fist, whom you may have first met in Gael Tunnel or near Saintsbridge. Speaking with Witch-Hunter Jerren overlooking the plaza kicks off the main event: the battle against Starscourge Radahn.
The Starscourge Radahn Boss Fight
This is it—one of Elden Ring’s most epic spectacles. You’ll be teleported to the Wailing Dunes, where Radahn begins by bombarding you with giant arrows. Your first move should be to [Interact] with the glowing gold summon signs scattered across the battlefield to call in your NPC army, including Alexander and Blaidd. Use them as distractions while you mount Torrent for hit-and-run attacks.
The fight’s most critical moment comes with Radahn Phase 2. When his health drops to 50% HP, he’ll leap into the sky and vanish. After about ten seconds, he’ll return as a meteor—your cue to get on Torrent and ride away from the impact zone as fast as you can. Surviving this lets you re-summon any fallen allies and continue the assault. Stay mobile, attack from behind while he’s occupied, and don’t get greedy.
Gearing Up in Caelid
Caelid isn’t just about the boss. While exploring, a key weapon to seek out is the Meteoric Ore Blade. You’ll find it in a chest within an underground room at the Caelid Waypoint Ruins. It’s a solid choice with natural strength scaling that can help against the area’s tougher enemies.
If you’ve wiped here before, you’re not alone—Radahn is a community rite of passage. But with your level in check, a strategy for his meteor strike, and a summoned army at your back, you’re ready to topple a demigod and claim his Great Rune. Let’s go.
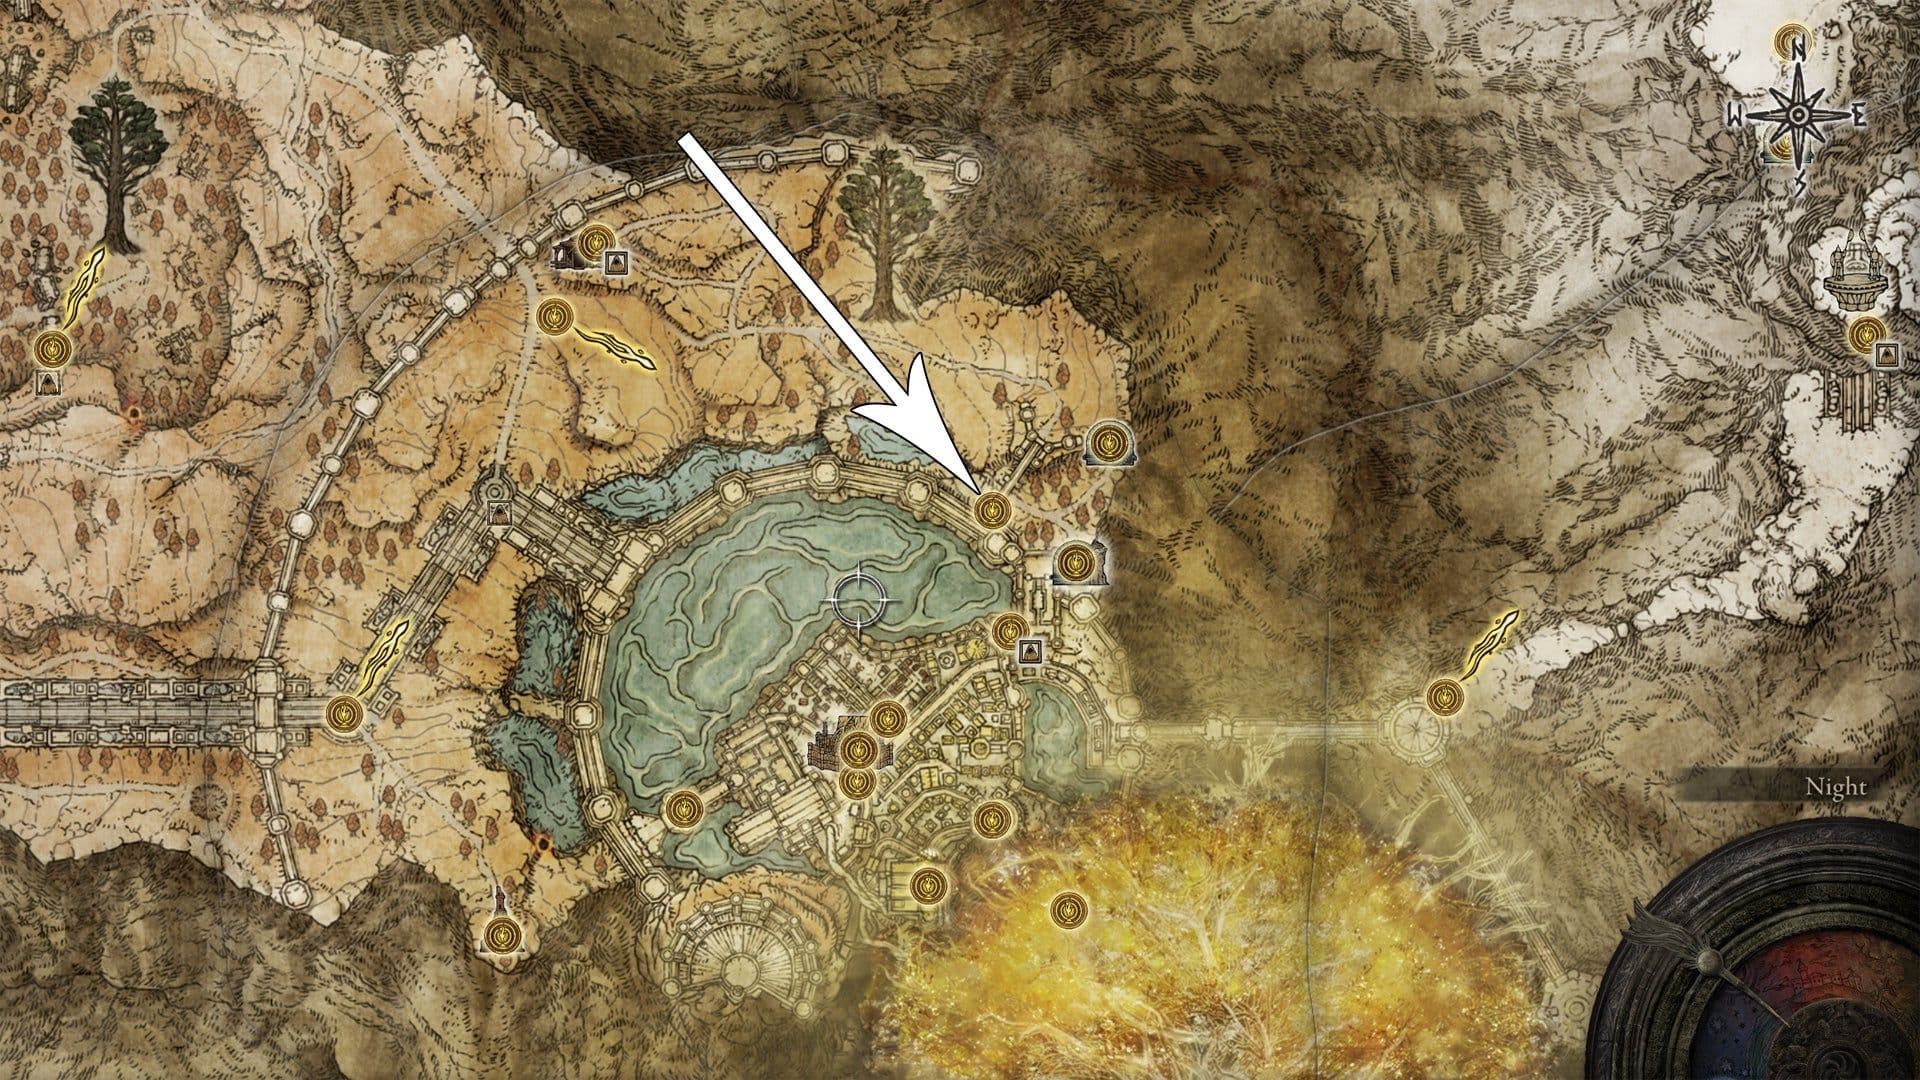
Altus Plateau and Mt. Gelmir Leveling Path
Welcome to the golden fields of the Altus Plateau, Tarnished. You’ve conquered the lakes, survived the scarlet rot, and now the path to the capital stretches before you—but first, you must navigate the volcanic peaks of Mt. Gelmir and the treacherous halls of Volcano Manor. This is Elden Ring’s mid-game crucible, where you’ll decide if you’ll join the blasphemers or fight your way through a town of fire and serpents.
Map showing the primary routes into the Altus Plateau.
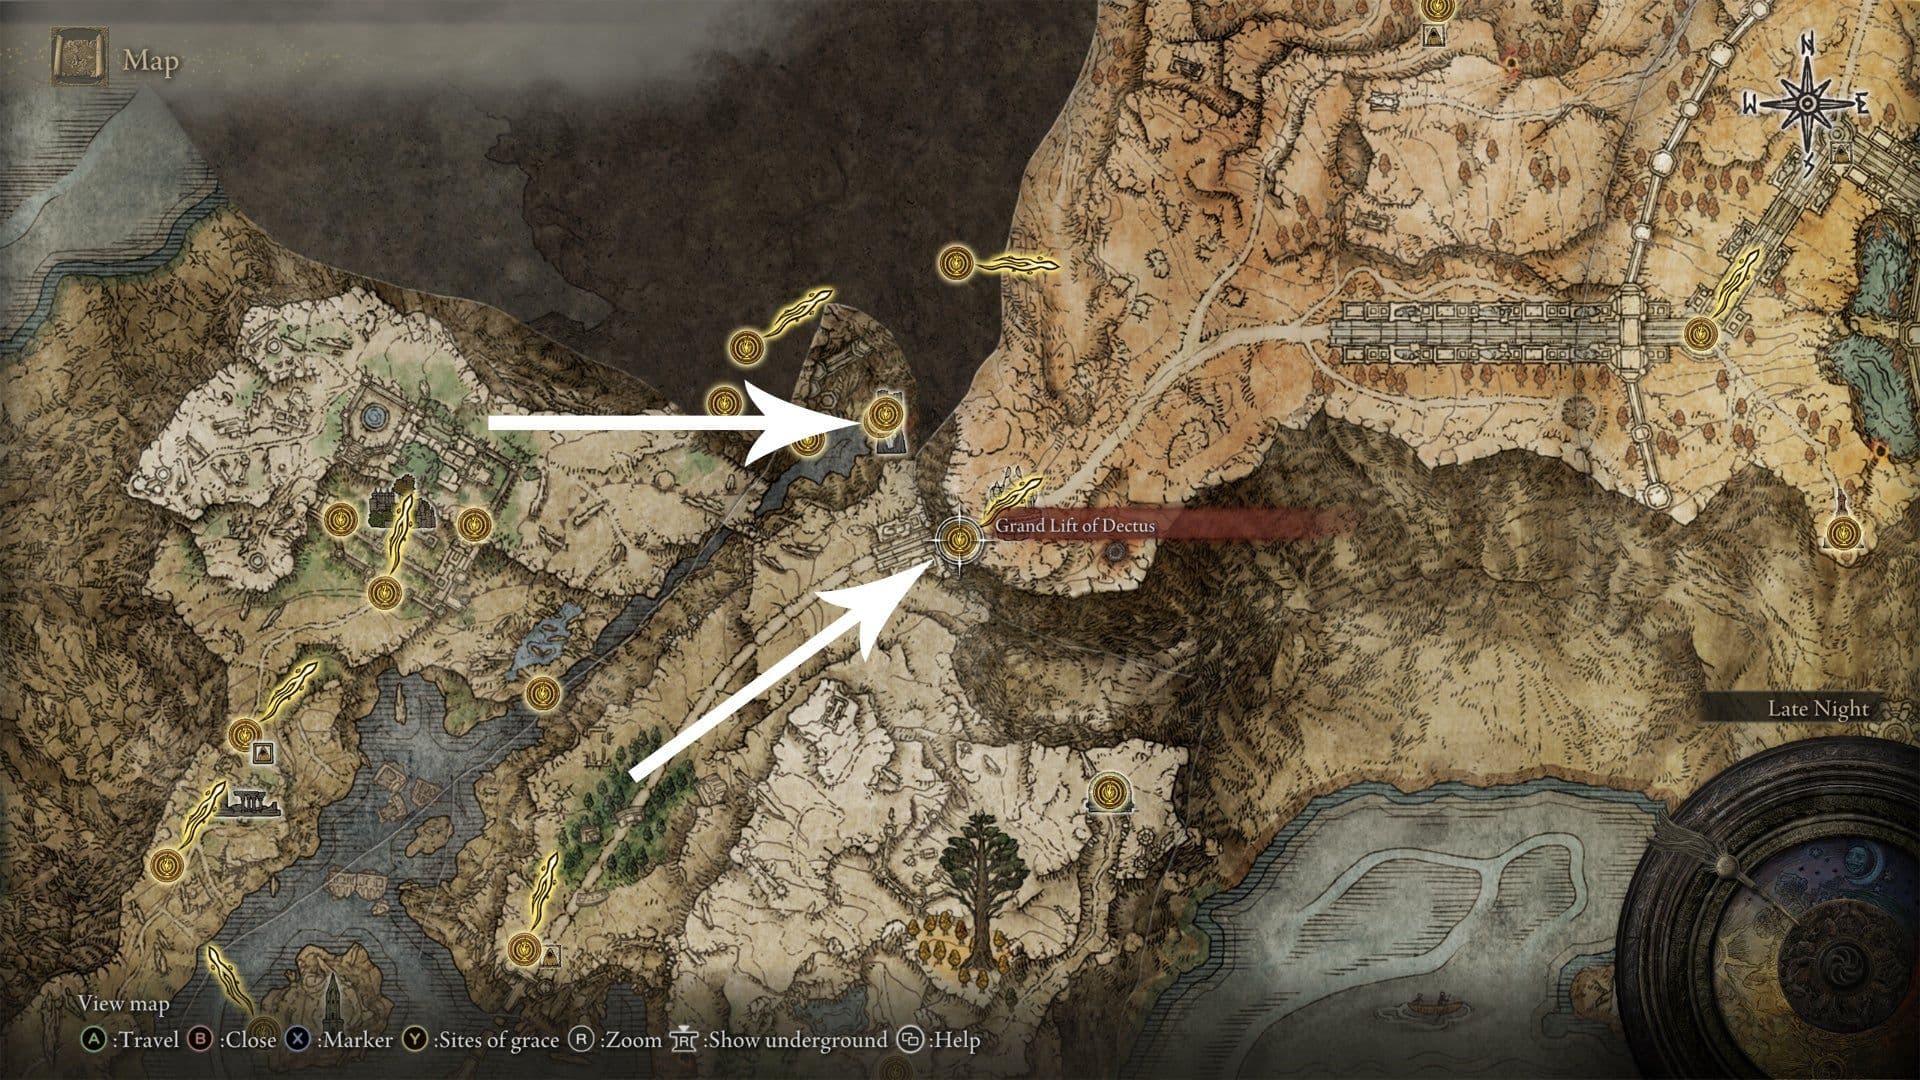
Your journey here begins at Level 70-80. You can reach the plateau via the Grand Lift of Dectus, which requires the Dectus Medallion Left, found in Fort Haight in Limgrave, and the Dectus Medallion Right, found in Fort Faroth in Caelid. The alternative path through the Ruin-Strewn Precipice is always available if you prefer a direct fight with a Magma Wyrm.
Once you arrive, the Altus Plateau is a sprawling, golden region with two major challenges: the path to Leyndell, guarded by a formidable sentinel, and the volcanic region of Mt. Gelmir, home to the sinister Volcano Manor.
Navigating Altus Plateau and Reaching Volcano Manor
The main road through Altus leads east from the Altus Highway Junction site of grace. Follow it north past the Windmill Village (watch for the dancing celebrants and the Godskin Apostle boss) and you’ll eventually reach the cliffs overlooking the capital. But before you tackle the city, you have a choice to make in the west.
Volcano Manor, the legacy dungeon within Mt. Gelmir, is your primary goal here. There are two main ways to get there:
- Through Rya’s Quest: If you helped Rya in Liurnia and retrieved her necklace, you can find her again on the Altus Plateau after using the Grand Lift. Speak to her, and she’ll offer to teleport you directly inside the manor.
- Via the Mountain Path: From the north of Altus, cross the Bridge of Iniquity and follow the winding mountain path past camps of frenzied soldiers. You’ll eventually reach the Ninth Mt. Gelmir Campsite. Use the nearby spirit spring to jump up to the plateau where the Full-Grown Fallingstar Beast waits. You can fight this optional boss for its jaw weapon and upgrade materials, or simply run past it. From the western side of its arena, drop down the rocky outcrop and follow the path down to the manor’s front door, guarded by a frenzied giant.
If you take the mountain path, the Fallingstar Beast is tough but optional. If you’re not ready, just sprint past it and drop down the western ledge—you’ll lose its rewards, but you’ll reach the manor safely.
Inside Volcano Manor: Join or Infiltrate
Volcano Manor is unique in Elden Ring. Upon entering and speaking with Tanith, the lady seated in the lobby, you’ll be invited to join the Recusants and rebel against the Erdtree. Accepting her offer does not lock you out of any other content or endings.
This gives you two paths through the area:
- The Assassination Path: Join the manor, receive the Drawing-Room Key, and complete letters of assignment to invade and kill other Tarnished in their worlds. This is a quicker route to the final boss and nets you unique armor sets, weapons like the Serpentbone Blade, and the Taker’s Cameo talisman.
- The Infiltration Path: Refuse or ignore the contracts. Instead, find the hidden illusory wall in the first room to the right in the main hallway (behind the crooked painting) to discover a secret passage that leads directly into the Prison Town dungeon below the manor.
Trust me, if you want the full experience and all the loot, you can do both—complete the assassination quests first, then explore the dungeon. Just do not defeat the area’s final boss, Rykard, until you are finished with everything you want to do here, as it will cause most NPCs to leave and lock you out of their quests.
Key Bosses and Challenges
Whether you infiltrate or assassinate, you’ll face several major fights in this region.
Draconic Tree Sentinel
Before you can even approach the capital, you must defeat the Draconic Tree Sentinel in the Capital Outskirts. This mounted boss guards the main gate to Leyndell. He uses powerful lightning attacks in addition to his halberd swings.
- Strategy: Use the terrain. The broken walls and pillars in the area can block his fireball attacks. His most dangerous move is a charged lightning slam; roll through it as he brings it down. He is highly susceptible to Poison and Scarlet Rot—applying these statuses can whittle him down while you focus on evasion.
Rykard, Lord of Blasphemy
The master of Volcano Manor is Rykard, Lord of Blasphemy, but you fight the God-Devouring Serpent first. This gimmick fight has one rule: use the Serpent-Hunter great spear found right inside the boss arena.
- Strategy: The spear’s special skill ([L2]/[LT]) fires a massive wind blade that staggers the serpent and does massive damage. Keep your distance, spam the skill, and the fight becomes trivial. In phase two, when Rykard emerges, the same tactic works. Just watch for his skull summons and wide lava waves.
Gearing Up and Moving On
The Altus Plateau and Mt. Gelmir are treasure troves. Don’t miss:
- The Perfumer’s Ruins for the Perfumer’s Talisman.
- The Wyndham Catacombs for upgrade materials.
- The Sainted Hero’s Grave for the powerful Dragoncrest Shield Talisman +1.
Once you’ve conquered the manor’s challenges and bested the Draconic Tree Sentinel, the gleaming spires of Leyndell, Royal Capital await. With the lessons learned in fire and assassination, you’re ready for the capital’s golden trials.
Leyndell, Royal Capital: Mid-Game Peak in Elden Ring
Welcome to the crown jewel of the Lands Between—Leyndell, Royal Capital is Elden Ring's sprawling mid-game peak, a city of golden splendor hiding brutal challenges. To enter, you'll need to have claimed at least two Great Runes (from bosses like Godrick and Rennala) and be around level 80-90. Your goal here is monumental: defeat the gatekeepers to the Erdtree itself and secure your passage to the endgame.
Leyndell, Royal Capital, serves as the mid-game peak of the Lands Between.
Navigating the Golden City
Your journey begins by defeating the Draconic Tree Sentinel on the bridge northeast of the Outer Wall Battleground. Trust me, this mounted boss is your final exam before entering the capital—fight him on Torrent with hit-and-run tactics, and watch for his lightning strikes in the second half. Victory grants you the Dragon Greatclaw and access to the Capital Rampart Site of Grace.
Inside, the city is a labyrinth. Make your way to the East Capital Rampart Site of Grace and prepare for exploration. The main treasures are found along the ash-covered main avenue, leading to the Avenue Balcony Site of Grace. This area is your central hub. Don't miss the Bolt of Gransax, a legendary spear obtained by jumping onto a giant golden spear embedded in a building along the western street.
The Erdtree Avatar patrolling the main street drops a Lord's Rune—a massive level-up item. If you're feeling confident, take it down, but you can also sprint past it to the safety of the Avenue Balcony.
Confronting the First Lord
From the Avenue Balcony, your path to the first major boss involves climbing a massive dragon's wing fossil to reach the West Capital Rampart. Here, you'll face a Valiant Gargoyle mini-boss; patience and punishing its aerial slams will net you the Gargoyle's Halberd and a Golden Seed. Follow the giant tree root upwards into a chapel to find your first true test: Godfrey, First Elden Lord.
This fight is against a golden spectral shade of the first Elden Lord. He wields a massive axe with slow, telegraphed swings. Bait out his long-range leap attacks for your safest openings. He is notably weak to Lightning damage. This incarnation of Godfrey has no second phase, so stay disciplined, land your hits after his big slams, and claim your reward: a Talisman Pouch for an extra equip slot.
The Path to the Omen King
After Godfrey, rest at the Erdtree Sanctuary Site of Grace. Exit to the east, turn left, and climb another set of roots to reach an upper building. Here, a Black Knife Assassin lurks; defeat it to find the Queen's Bedchamber Site of Grace. The stairs just beyond lead to your ultimate objective.
Morgott, the Omen King
This is it—the veiled monarch himself, and he's not playing around. Morgott, the Omen King is the true identity of Margit, boasting a vastly expanded and more aggressive moveset. If you've struggled with him before, you're not alone; this is one of Elden Ring's great skill checks.
Phase 1 Strategy: He mixes swift dagger throws with heavy hammer and sword combos. Your best openings are after his jumping hammer slam or when he charges with his spear—roll toward him to get behind the thrust. A key item from earlier, Margit's Shackle, can stun him twice in this phase for free damage. When he summons a rain of holy swords, roll toward him to avoid the projectiles and close the gap.
Phase 2 (at ~50% HP): Morgott's weapons ignite with bloody flame, adding lingering AoE explosions to many attacks. His aggression spikes, but the core strategy remains: maintain mid-range, punish the end of his combos, and avoid the ground explosions after his kneeling slam. Summoning Melina (her sign is by the fog gate) is highly recommended, as she draws agress and can heal you.
⚠️ Watch out: Morgott is highly resistant to Holy damage. Stack physical defense and consider the Haligdrake Talisman for his holy attacks. He is, however, vulnerable to status effects like Bleed, Frost, and Poison.
Upon his defeat, you'll receive the Remembrance of the Omen King and Morgott's Great Rune. More importantly, Melina will appear and grant you the Rold Medallion. This key item unlocks the Grand Lift of Rold, your gateway to the Mountaintops of the Giants and the final act of the game.
Secrets Below the Streets
Your business in the capital isn't quite finished. Before you leave, seek out the well in the ash-covered avenue to descend into the Subterranean Shunning-Grounds. This extensive sewer network is an optional but rewarding challenge, home to the powerful Mohg, the Omen boss and a path to a deeply hidden, legendary area.
With the capital conquered and the Rold Medallion in hand, you stand at the threshold of Elden Ring's endgame. The hardest challenges are yet to come, but you've now proven you can topple kings.
Mountaintops of the Giants and the Forge
The cold here bites deeper than any you’ve felt before. The Mountaintops of the Giants is Elden Ring’s final mandatory wilderness, a desolate, wind-scoured expanse where the game’s challenge ascends to its brutal peak. You’ve earned your place here by lighting the forge in Leyndell, but survival—and the cardinal sin to come—will demand every lesson you’ve learned. This is the prelude to the end.

Defeating Morgott is the final requirement to access the Mountaintops of the Giants.
Surviving the Frozen Frontier
Reaching this area requires the Rold Medallion, granted by Melina after you defeat Morgott in Leyndell. Take the Grand Lift of Rold from the Forbidden Lands to ascend. Once you arrive, you’ll be around Level 90-110. The enemies here hit hard and have massive health pools, so proceed with caution. Your first stop should be the Zamor Ruins site of grace just ahead. From there, the main path winds northeast past the Ancient Snow Valley Ruins, leading you toward the region’s key landmarks.
Two major legacy dungeons await exploration here. To the north, Castle Sol stands sentinel. Inside, you’ll face Commander Niall, a formidable boss who summons spectral knights, and more importantly, find the Haligtree Secret Medallion (Left), a crucial key for an optional endgame area. To the southeast, near the Church of Repose site of grace, you’ll be invaded by Bloody Finger Okina. Defeating him rewards you with the powerful Rivers of Blood katana, a top-tier weapon for bleed builds.
⚠️ Watch out: The Mountaintops of the Giants is littered with Giant Hands and Fire Monks. The hands are weak to fire, while the monks resist it. Adjust your tactics accordingly.
Confronting the Fire Giant
Your ultimate goal in this region is to reach the Flame Peak and defeat the Fire Giant. This colossal, mandatory boss guards the path to the Forge of the Giants. The fight has two distinct phases, and your strategy must adapt.
- Phase 1: Focus all your damage on the left ankle (the one with the thick rope shackle). This is a massive weak spot. Stay underneath or behind him, using Torrent to close distance when he rolls away. His most dangerous moves are his shield scoop (roll through it) and the homing fire orbs (sprint perpendicular to their path).
- Phase 2: After a dramatic cutscene, he tears off his own leg. His weak point shifts to the fiery eye on his chest and the burns on his hands. Stick to his sides and backside, attacking his wrists when he slams them down. Never stand in front of him—his crawling sweeps and flame breath are devastating.
Torrent is essential for Phase 1 mobility, but dismount for Phase 2. The tighter spacing and need for precise dodges makes being on foot far safer. Pack the Flamedrake Talisman and Fireproof Dried Liver to mitigate his immense fire damage.
The Forge and the Cardinal Sin
After the Fire Giant falls, ride east to the Forge of the Giants and activate the site of grace. Here, you’ll speak with Melina. She will ask if you are ready to commit a cardinal sin. This is a major point of no return.
- If you say “I’m ready,” a cinematic plays and you are immediately transported to the next legacy dungeon, Crumbling Farum Azula. You will not be able to fast travel until you defeat the first boss there.
- If you say “I’d like you to wait,” you can continue exploring the Mountaintops, the optional Consecrated Snowfield, and other endgame zones at your leisure. You can return to this grace and speak to her whenever you’re ready to progress the story.
Trust me, this is the moment to double-check your inventory, complete any unfinished quests in the capital or earlier regions, and ensure you’ve explored the optional paths branching from the Mountaintops. Once you light the forge, the world changes.
With the Fire Giant defeated and the forge awaiting your choice, you stand at the threshold of Elden Ring’s endgame. Prepare thoroughly—the trials ahead are the fiercest yet.
Crumbling Farum Azula and Endgame Bosses
You’ve lit the forge and changed the world. Now, the path forward is a one-way trip through time itself. Welcome to Crumbling Farum Azula, the final linear gauntlet of Elden Ring, a storm-wracked dungeon floating in the sky where you’ll face legendary beasts and a demigod destined to test your every skill. This is the point of no return—your last stop before the finale.
Maliketh boss fight location
Navigating this shattered city is a challenge in itself. Upon arriving at the Crumbling Beast Grave Site of Grace, you’ll be swarmed by powerful Azula Beastmen. Stick to the main path, use the ruins for cover, and make your way to the Dragon Temple. This sprawling sanctuary holds the first major roadblock: the Godskin Duo. This fight in the Dragon Temple Altar is infamous, but you can turn the tide. The trick is to focus one down at a time. Use [Sleep Pots] to completely neutralize one while you fight the other, breaking the duo’s oppressive rhythm and creating the breathing room you need to win.
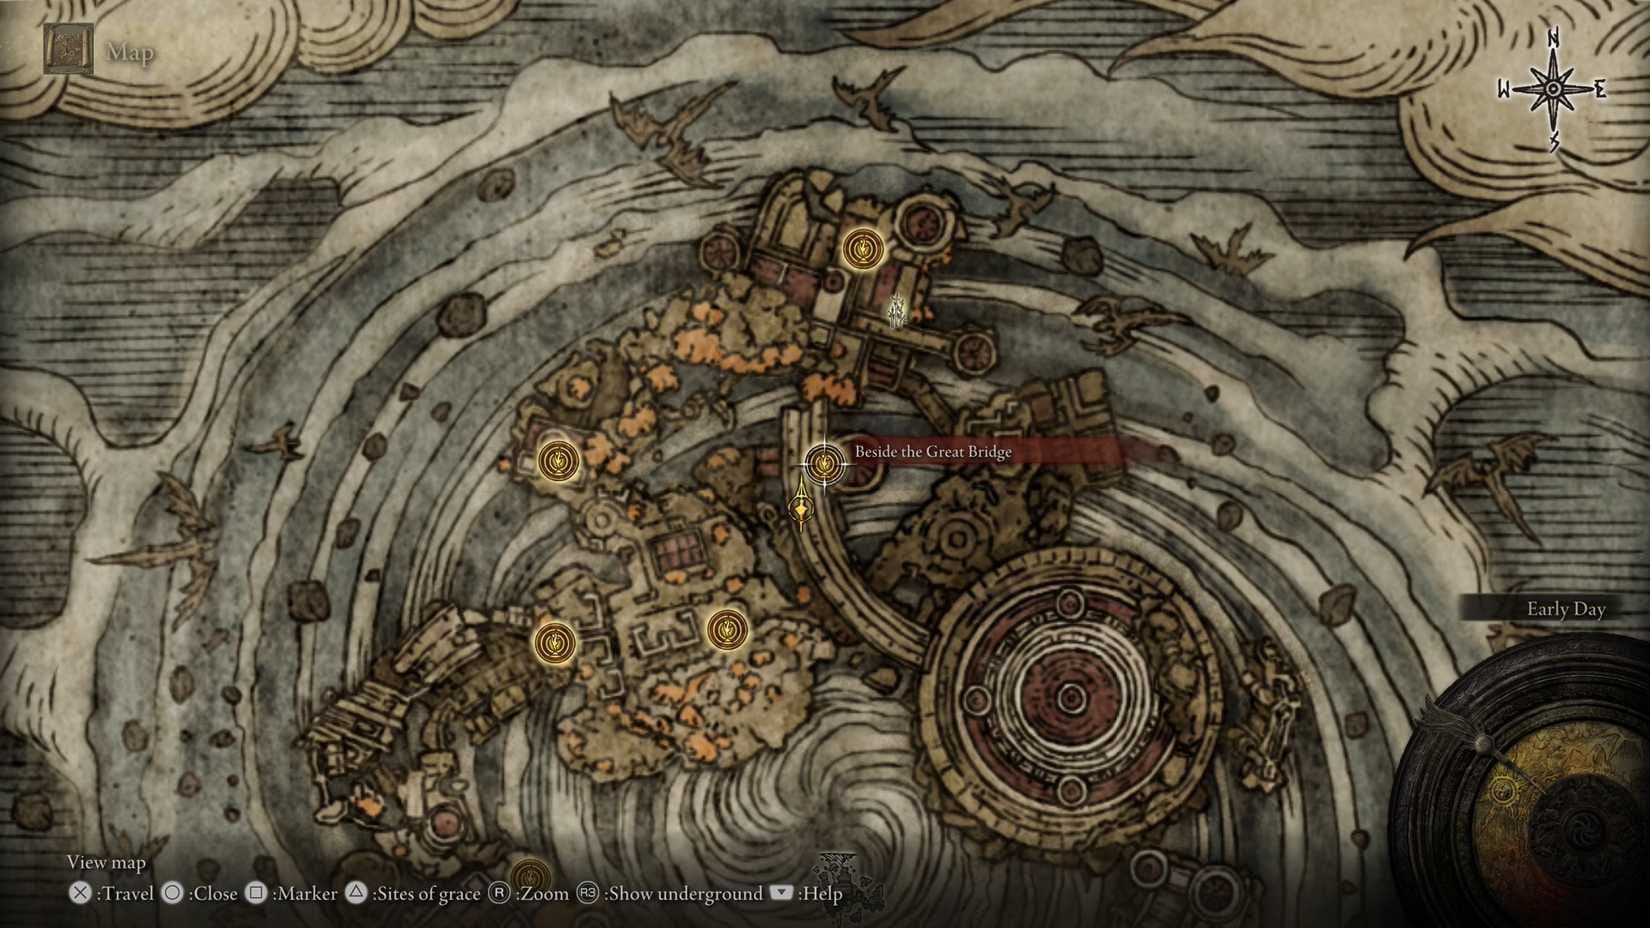
After the Duo, the path leads upward. You’ll navigate crumbling rooftops, face a massive dragon, and eventually reach the Beside the Great Bridge Site of Grace. Rest here, and prepare for the ultimate test of this zone.
⚠️ Watch out: Before you cross the bridge to Maliketh, turn back and explore the area behind this Site of Grace. You’ll find an invading Recusant Bernahl. Defeating him here after you’ve killed Rykard in Volcano Manor rewards the Blasphemous Claw, a key tool for the fight ahead.
Your final foe in Farum Azula is Maliketh, the Black Blade. This is a two-phase duel that demands precision. The first phase is against the Beast Clergyman, a familiar but far more aggressive foe. Use the pillars in the arena to block his rock-slinging spells and wait for his long dagger combos to end. His downward thrust after a combo is your prime opening to strike.
In phase one, when he thrusts his dagger into the ground and the area glows, back away immediately. He’s about to summon damaging rocks from the earth, and the safe punish window is very small.
At half health, the real fight begins. Maliketh sheds his cloak and wields the rune of Destined Death. His Phase 2 moves are blisteringly fast, and every hit from his black blade will reduce your maximum HP and inflict damage over time. This is where the Blasphemous Claw shines—it can parry his attacks that glow with a golden light, briefly stunning him. Stick close, dodge into his sweeping combos, and punish the end of his aerial slam attacks. This phase is brutal but short; stay aggressive during his brief recoveries.
Victory against Maliketh triggers a world-altering event and transports you to Leyndell, Ashen Capital. The endgame sprint is on. Your first obstacle here is Godfrey, First Elden Lord / Hoarah Loux. His first phase is a classic test of spacing and dodging his axe slams. In Phase 2, he sheds his lion and becomes Hoarah Loux, Warrior. He trades his axe for devastating grabs and earth-shaking slams. For his ground-shattering stomps, the key is to [Jump] to avoid the shockwaves entirely, giving you a moment to land a jumping attack on his head.
Next, you face the vessel of the Golden Order: Radagon of the Golden Order at the Elden Throne. Almost all his attacks deal Holy damage. Stack Holy Damage negation with talismans like the Pearldrake Talisman +2 (found earlier in Farum Azula) and incantations like Lord’s Divine Fortification. This fight is a marathon of dodging his hammer slams and golden wave projectiles. There’s no gimmick here—just learned timing and patience.
Finally, after Radagon falls, the true final boss emerges: the Elden Beast. This cosmic entity floats in a vast arena, forcing you to chase it constantly. Its most dangerous move is Elden Stars, a homing shower of golden projectiles. Don’t try to outrun it in a straight line. Instead, [Sprint] in a wide curve to let most of the stars harmlessly orbit past you. For its melee sword swings, your safest spot is behind it. Stay on its tail, chip away at its health, and manage your stamina for the long sprints across the arena.
If you’ve struggled here, you’re not alone—this back-to-back gauntlet is Elden Ring’s ultimate examination. But with the right prep and these strategies, you’re ready to claim your throne. The Elden Ring awaits.
Elden Ring Rewards and Optional Endgame Zones
Your journey through the Lands Between has reached its zenith, but Elden Ring’s true final test lies in its optional endgame—two brutally challenging secret zones that reward the most determined Tarnished with legendary power and the game's ultimate bragging rights.
Accessing Leyndell requires defeating the Draconic Tree Sentinel at the outer wall.
The Path to Mohgwyn Palace
Beneath the scarlet rot of Caelid lies Mohgwyn Palace, the sanguine domain of Mohg, Lord of Blood. You can reach it in two ways. The first is by completing the questline for White Mask Varré, which rewards you with the Pureblood Knight's Medal for teleporting directly there. The second is via a hidden portal in the Consecrated Snowfield. Head northwest of the Yelough Anix Ruins to find a Waygate teleporter; it activates only after you defeat the Sanguine Noble that invades nearby.
Once inside, you’ll navigate a sprawling, blood-soaked lake filled with Albinaurics and other horrors. The key loot here is exceptional: the Haligdrake Talisman +2 for holy damage negation is in the southwest of the lake, while caves along the eastern walls hide the Ash of War: Blood Tax and the Swarm of Flies incantation. Your ultimate goal is the Dynasty Mausoleum. Fight your way to the Dynasty Mausoleum Midpoint Site of Grace, where you’ll find a Somber Ancient Dragon Smithing Stone in front of a large statue. Take the lift up to face Mohg himself. Defeating him grants his Great Rune and the Remembrance of the Blood Lord, which can be traded for his powerful spells or weapon.
⚠️ Watch out: Mohg’s signature "Nihil!" attack inflicts unavoidable bleed buildup across three phases. Have the Purifying Crystal Tear in your Flask of Wondrous Physick, or stock up on healing to survive it.
Conquering Miquella's Haligtree
For many, Miquella's Haligtree represents Elden Ring’s pinnacle challenge. Accessing it is a quest in itself. You must first assemble the Haligtree Secret Medallion—the right half from Albus in the Village of the Albinaurics in Liurnia, and the left half from defeating Commander Niall in Castle Sol on the Mountaintops of the Giants. Use the medallion at the Grand Lift of Rold to hoist it and reach the Consecrated Snowfield.
Your final barrier is Ordina, Liturgical Town. Here, you must enter an Evergaol and light four candles while evading invisible Black Knife Assassins and deadly Albinauric Archers on the rooftops. Trust me, this puzzle is infamous—take your time, and remember that lit candles stay lit even if you die. Success breaks the seal and reveals a teleporter at the town's east end, sending you to the Haligtree Canopy.
The zone is a vertical nightmare of branches, rot, and deadly enemies. Work your way down from the canopy through Haligtree Town, where you’ll face Misbegotten and find the Pearldrake Talisman +2. Eventually, you’ll reach the Haligtree Town Plaza and its guardian, Loretta, Knight of the Haligtree. Beat her to unlock the Haligtree Promenade and a lift down to Elphael, Brace of the Haligtree. This is where the true test awaits.
Facing Malenia, Blade of Miquella
Deep within Elphael, you’ll find the resting place of Malenia, Blade of Miquella, arguably Elden Ring's toughest boss. She is a duelist of unparalleled speed who heals with every hit, even through shields. Her most dreaded move is the Waterfowl Dance: a flurry of slashes that can end the fight instantly. The survival trick is to [Roll] away from the first flurry, then roll through the subsequent ones as she closes distance. The fight is a marathon of patience and precision.
Bleed and Frostbite are highly effective against her. Weapons like Rivers of Blood or spells like Swarm of Flies can help you keep pressure on while staying mobile.
Victory rewards you with her Remembrance and the satisfaction of conquering what many consider the game's ultimate skill check. It’s a fight that will test everything you’ve learned.
Securing Your Ultimate Rewards
With the final boss defeated, you’ll receive the Remembrance of the Elden Beast. Take it to Enia at the Roundtable Hold to exchange it for the monumental Sacred Relic Sword or Marika's Hammer. To fully empower such weapons, you’ll need Ancient Dragon Smithing Stones. These rare upgrade materials, used to max out standard weapons to +25, are scattered in these endgame zones—one is in Mohgwyn Palace, and another can be found in the Haligtree Town.
You’ve ventured into the Lands Between’s most forbidden corners and emerged victorious. With these legendary rewards in hand, your legacy as Elden Lord is complete. Now, the only question that remains is: what challenge will you conquer next?