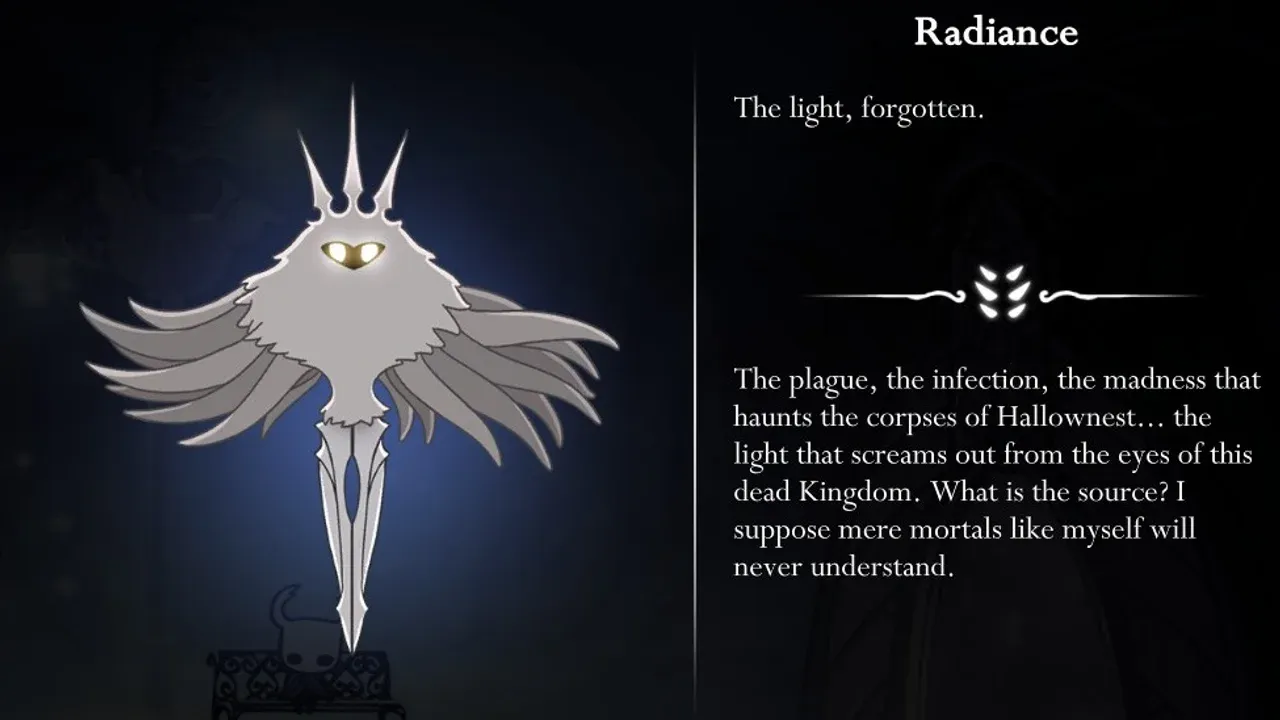
How to Unlock The Radiance in Hollow Knight
This is it—the final stretch of your journey through Hallownest. Unlocking The Radiance, the true final boss of Hollow Knight, isn't just about walking into a room; it's a multi-layered quest that weaves together the game's deepest secrets. If you've been wondering how to reach the source of the Infection and earn the "Dream No More" ending, this guide walks you through every prerequisite step-by-step. Trust me, this path requires patience, but the payoff is the most epic showdown the game has to offer.

The Awoken Dream Nail is required to access the final encounter.
The Path to Awakening
Your journey begins with dreams. At the Resting Grounds, the Seer, a member of the Moth Tribe, grants you the Dream Nail. This powerful tool is dull at first, and you must awaken it by collecting 1800 Essence. You'll gather this by battling Warrior Dreams, striking Whispering Roots, and from random enemy drops. Once you hit that threshold, return to the Seer to receive the Awoken Dream Nail—your key to hidden realms.
Gathering the White Fragments
Next, you need to find the two halves of the Kingsoul charm, held by Hallownest's former rulers. The first piece is in Queen's Gardens. To reach the White Lady, you must first defeat the Traitor Lord, a formidable boss blocking the path. After this fight, find her within a root-filled cocoon; speak to her to receive the White Fragment Left.
The second fragment is hidden within a dream. In the Ancient Basin, you'll need the Monarch Wings (obtained by defeating the Broken Vessel) to reach the Palace Grounds. Here, use your Awoken Dream Nail on the corpse of a Kingsmould to be transported into the White Palace. This area is a brutal platforming gauntlet. Survive it to reach the Throne Room and collect the White Fragment Right from the body of the Pale King.
For the White Palace, charms like Hiveblood or Grubsong can be lifesavers, letting you recover from the many, many spikes you'll encounter.
Back in your inventory, the two fragments automatically combine to form the Kingsoul. This charm generates Soul every 2 seconds, but its true purpose is yet to come.
Securing the King's Brand & Void Heart
Your next objective is in Kingdom's Edge. Here, you'll face Hornet Protector for a second time. Defeat her to gain access to the Cast-off Shell, the corpse of a great Wyrm, where you'll find the King's Brand.
This mark is the key to the Abyss. Return to the Ancient Basin and use the King's Brand to open a sealed door at its lowest level. Descend into the Abyss. With the Kingsoul equipped, walk to the very bottom of the main chamber—the ground will open, revealing a path to the Birthplace. Use your Awoken Dream Nail on the black egg here to witness a pivotal memory and transform the Kingsoul into the Void Heart. This charm becomes permanently equipped with no notch cost, marking you as ready for the end.
The Final Confrontation
With the Void Heart in your possession, the stage is set. You must still defeat the three Dreamers and enter the Temple of the Black Egg to face the Hollow Knight. Here’s the crucial moment: during that boss fight, Hornet will intervene and restrain the Hollow Knight. This is your cue. Use your Awoken Dream Nail on the restrained Hollow Knight.
If you've followed every step, this action will tear you from that battle and plunge you directly into the radiant arena against The Radiance herself. Without the Void Heart, this option simply won't appear, locking you out of the true ending.
With all the pieces in place, you're now standing before the light that threatens to consume all of Hallownest. This is the culmination of everything you've learned and collected. Take a deep breath—you've earned this fight.
How to Obtain the Void Heart in Hollow Knight
This is it—the final step before the ultimate confrontation in Hollow Knight. The Void Heart isn't just another charm; it's the culmination of your journey, transforming your very nature and unlocking the path to the true ending. If you've gathered the Kingsoul, you're already on the precipice. Here's how to complete the transformation.
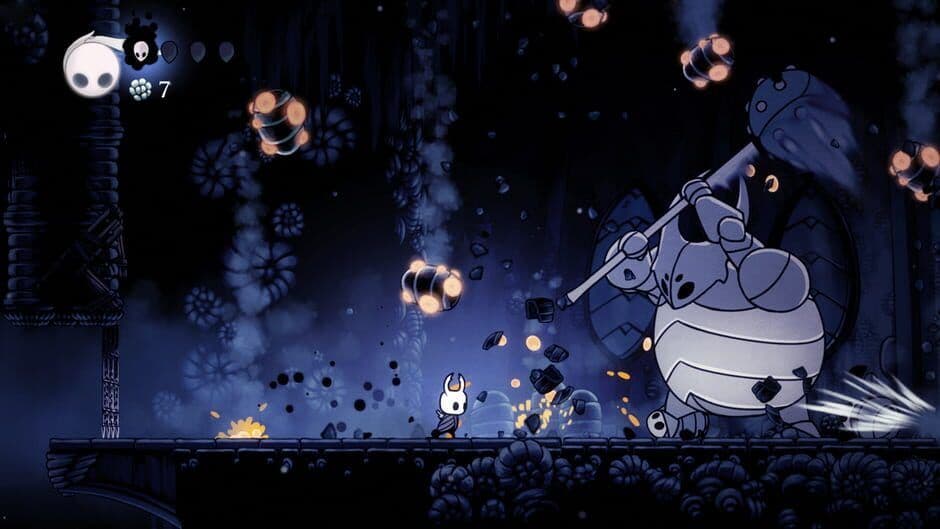
Exploring the depths of Hallownest to find the Kingsoul fragments.
To begin, you must have already acquired the King's Brand from the Cast-off Shell in Kingdom's Edge. With that key item in hand, return to the Ancient Basin. At its lowest level, you'll find a sealed doorway that was previously impassable. The King's Brand is the key—approach the door to open it, descending into the lowest depths of Hallownest: The Abyss.
Navigate down the main chamber of The Abyss. With the Kingsoul charm equipped, the floor at the very bottom will open, revealing a hidden path. Follow this new tunnel to reach the Birthplace. Here, you'll find a black egg with your reflection inside. This is the moment of truth.
Make sure the Kingsoul is actively equipped before you descend to the bottom floor of The Abyss. The floor won't open without it.
Stand before the egg and use your Awoken Dream Nail on it. You'll witness a flash of the past, and the Kingsoul will be permanently transformed into the Void Heart. This new charm has no notch cost and becomes a permanent part of your being, signifying your unity with the Void. This action cannot be undone, but it's essential for what comes next.
Now, head to the Temple of the Black Egg. Fight through the Hollow Knight as usual. During the final phase of that battle, Hornet will appear to restrain the chained vessel. This is your cue. While she holds them, press [Y] to use your Dream Nail on the Hollow Knight. This triggers the dream entrance, pulling you into the mind of the Infection's source and beginning your battle with The Radiance.
With the Void Heart secured, you are no longer just a wanderer in Hallownest—you are its destined end. You're ready to face the light.
Best Charm Builds for The Radiance Boss Fight
This is it—the final test of Hallownest. Beating The Radiance in Hollow Knight is a battle of endurance and precision, and your charm build is the difference between a desperate struggle and a calculated victory. While skill is king, the right setup lets you trade blows on your terms. Here, we’ll break down the two most effective playstyles for the base game’s ultimate boss: the relentless Nail master and the devastating Spell slinger.

The Nail Specialist Build
For players who thrive in close-quarters combat, this build maximizes your melee damage and reach, letting you carve through The Radiance’s health bar with brutal efficiency.
- Fragile/Unbreakable Strength: This is your cornerstone. It increases your Nail damage by a massive 50%, making every hit count significantly more in a fight where openings are brief.
- Quick Slash: Paired with Strength, this charm turns you into a DPS machine. The faster attack speed lets you capitalize on every small window, generating more Soul and dealing more damage in less time.
- Mark of Pride: The extended reach is a game-changer. It lets you safely punish The Radiance when she teleports just out of standard range, keeping you out of harm's way more often.
- Fragile/Unbreakable Heart: The final piece. This charm provides two extra masks of health. Trust me, you'll want this cushion—healing opportunities are scarce, and every hit from The Radiance deals two masks of damage.
This setup turns your Nail into a surgical instrument. Your goal is to dash in, unleash a furious combo with Quick Slash, and retreat, using your extended range from Mark of Pride to stay safe.
If you haven't upgraded your Fragile charms with Divine in Godhome, be aware they can break if you die. For a stress-free attempt, invest in the Unbreakable versions.
The Spell Slinger Build
If you prefer to fight from a distance and unleash explosive bursts of damage, this build focuses on making your spells, particularly Abyss Shriek, utterly devastating.
- Shaman Stone: The most important charm for any spell build. It dramatically increases your spell damage and size. With this equipped, a single Abyss Shriek (found in the Abyss) can deal up to 120 damage to The Radiance’s large hitbox.
- Spell Twister: Spamming spells is costly. This charm reduces the Soul cost of each cast, allowing you to use Abyss Shriek or Descending Dark more frequently during her attack patterns.
- Soul Eater: This ensures a constant, heavy flow of Soul. While it costs a hefty four notches, it means you’ll almost always have fuel for your next spell barrage, reducing the need to risk Nail hits for Soul generation.
- Fragile/Unbreakable Heart: As with the Nail build, the two extra masks here are crucial for survivability, giving you room to breathe and focus on casting.
The strategy here is patience. Dodge meticulously, and when The Radiance teleports above you—especially during her Beam Burst attack—jump up and unleash Abyss Shriek. With Shaman Stone, a few good casts will melt her health bar.
Defensive & Alternative Options
Maybe you’ve tried these builds and need a little more help staying alive. Here are key charms that can tweak your setup for better survivability:
- Quick Focus: Found in Salubra's Shop, this charm lets you heal faster by holding [A]. It’s invaluable for sneaking in a mask of healing during very tight windows, like just after dodging a Sword Burst.
- Joni's Blessing: Located in Joni's Repose in the Howling Cliffs, this charm converts all your masks into blue Lifeblood hearts. It’s a high-risk, high-reward option that prevents healing but gives you a larger single health pool—great if you struggle with finding safe moments to heal.
- Steady Body: Another purchase from Salubra's Shop. This low-cost charm prevents knockback when your Nail strikes an enemy. It’s a subtle but powerful tool for maintaining your positioning, ensuring you don’t hit yourself backwards into a spike or beam.
- Grubsong: A reward from the Grubfather in the Forgotten Crossroads. This excellent one-notch charm provides Soul whenever you take damage. If you find yourself getting hit, Grubsong can gift you enough Soul for an emergency heal or a retaliatory spell, turning a mistake into a potential recovery.
Choose the build that matches your instincts. Whether you’re a frontline warrior or a tactical caster, with these charms equipped, you’re not just entering the arena—you’re defining the terms of the fight.
The Radiance Phase 1: Grounded Combat
This is it—the moment you've been building toward in Hollow Knight. After all the preparation, you now stand face-to-face with the source of the Infection itself, The Radiance. Phase 1 serves as your introduction to her full arsenal of punishing attacks on a flat, open arena. Don't let the straightforward space fool you—this is where you learn the dance.
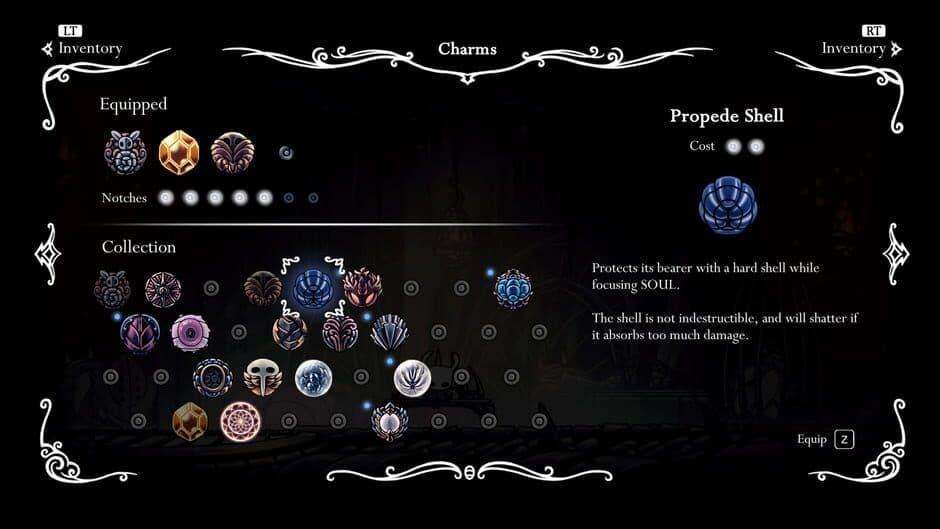
Preparation is vital for the grounded combat phase.
Your primary goal here is survival and pattern recognition. The Radiance herself deals no contact damage; the danger comes entirely from her six distinct projectile attacks. Each one hits for two Masks of damage, so mistakes are costly. Stay near the center of the arena to give yourself maximum reaction space in every direction.
Here’s a breakdown of every attack you'll see and how to counter it:
- Beam Burst: The Radiance fires three waves of light beams from her face that rotate outward with each flash. Move to the open gaps between the beams—small, controlled steps are better than a panicked dash. She stays perfectly still during this, making it a prime opening.
- Sword Burst: A circle of 12 swords forms around her face before firing outward in a spread. Watch for the gaps between the swords as they launch and sidestep through them.
- Sword Wall: A vertical wall of swords approaches from either side of the arena. It moves quickly but has clear openings. Time a jump to pass through a gap, or use your Shade Cloak by pressing [RT] to dash through it cleanly.
- Sword Rain: Swords fall from the sky in successive waves. The pattern is less dense than it looks. Stand in the gaps and keep moving. When she's stationary above you during this or other attacks, it's your best chance to strike.
- Wall of Light: A slow, floor-to-ceiling wave of light travels across the arena. You cannot jump over it. You must use your Shade Cloak and press [RT] to dash through it.
- Orb Barrage: The Radiance summons 3-4 homing orbs that drift toward you. The safest counter is to dash toward them just before they hit, making them impact the ground or a wall and disappear.
The Beam Burst and Sword Rain attacks are your biggest damage opportunities. When she's locked in place above you, unleash Abyss Shriek ([Up] + [B]) for massive damage. A few well-timed shrieks can dramatically shorten this phase.
If you’ve wiped here before, you’re not alone—the sheer volume of attacks can feel overwhelming. The key is to stay calm, focus on one threat at a time, and prioritize dodging over dealing damage. Nail hits to generate Soul are fine, but your big bursts will come from spells. Master these patterns on solid ground, and you'll have the foundation needed for the chaotic phases to come. You've got this.
The Radiance Phase 2 & 3: Spike Hazards
The arena shifts. Just when you thought you had a handle on her patterns in Hollow Knight, The Radiance changes the rules. Phase 2 introduces a brutal new hazard, and Phase 3 cranks the pressure to a relentless, chaotic peak. This is where calm, deliberate movement separates victory from a quick return to the Black Egg.
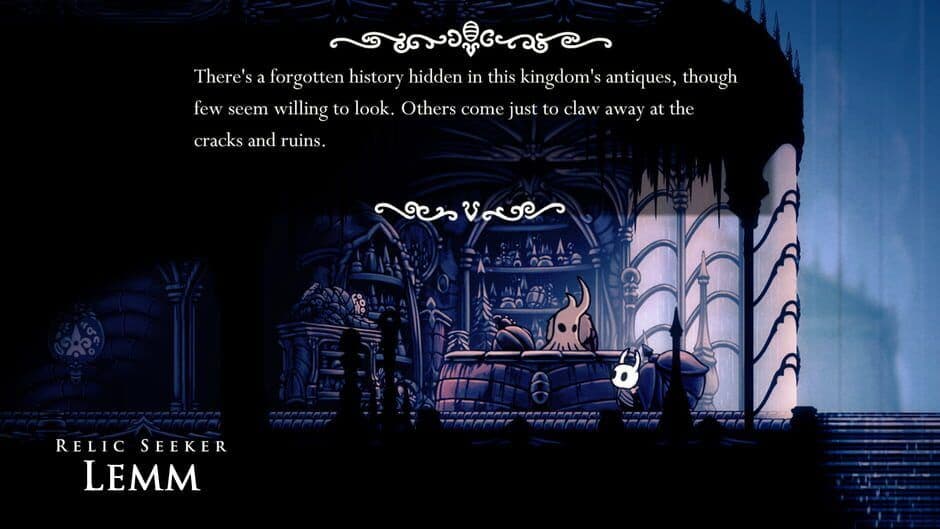
Atmospheric environment
Managing the Spike Floor
After you’ve dealt enough damage in Phase 1, the fight escalates. Phase 2 introduces the Spike Floor—a row of deadly spikes that covers 50% of the arena, alternating between the left and right sides. Your safe space is instantly halved.
This is where the fight tests your positioning discipline. You can no longer dash wildly to the edges. Instead, you must make small, controlled adjustments within the safe half of the room while continuing to dodge her standard attacks. The Shade Cloak becomes even more critical for passing through the Wall of Light, as you may not have the lateral room to simply run around it. Watch for the telegraph—white orbs appearing on the ground—and calmly reposition to the clear side.
Don’t panic and overcorrect. A simple hop or short walk is often enough to avoid the spikes. Save your dash for her actual attacks, not the floor hazard.
Surviving the Sword Rain Onslaught
Phase 3 is the ultimate test of your composure under fire. The Spike Floor splits, now covering both far ends of the arena, leaving only a narrow strip of safe ground in the center. Simultaneously, The Radiance initiates her Sword Rain Infinite attack, summoning a constant, overwhelming barrage of swords from above while she stays stationary.
It looks chaotic, but this phase has a rhythm. The key is to land Nail hits during the sword gaps to refill Soul Vessels. Watch the falling patterns—there are always safe lanes. Focus on small, precise movements within the central safe zone, slashing when you can to generate Soul. This is your best chance to top off your resources before the fight’s most demanding section.
This is also a prime damage window. While she’s stationary, you can unleash your most powerful tool: Abyss Shriek. By pressing [Up] + [B], you deal massive burst damage to her large hitbox. A few well-timed casts here can significantly shorten the phase and conserve your health for the trials ahead.
If you’ve struggled here before, you’re not alone—the visual noise is intense. But by focusing on the gaps, not the swords, and using the stationary boss as a Soul battery, you’ll turn this overwhelming phase into a strategic advantage. Master this, and you’re ready for the platforming gauntlet that comes next.
The Radiance Phase 4: Floating Platforms
Here it is—the moment where the ground vanishes beneath you, and the true test of your aerial control in Hollow Knight begins. Welcome to Phase 4.
Combat in Hollow Knight.
The arena transforms completely. Gone is the solid ground; in its place, a series of small platforms over the Void appears. The stakes are instantly higher—one missed jump or mis-timed dodge means a fall and instant death. Don’t panic. This phase is about discipline and precision, not speed.
Your new home base is the bottom-middle platform. From here, you have the best vantage point to see The Radiance’s attacks coming and the easiest access to other platforms. The core strategy now is Wait and Punish. Stay put, focus entirely on dodging her Sword Walls, Orbs, and Beam Bursts, and only commit to an attack when she teleports close to your platform. A few quick nail hits or, better yet, an Abyss Shriek if you have the soul, is your reward for patience.
Listen for the audio cue of her teleport—a distinct whoosh—to know when she’s about to appear nearby. It’s your signal to get ready to strike.
The platforming makes her Beam Burst attack both a threat and an opportunity. If you’re positioned safely on a platform between the rotating beams, this is a rare, reliable healing window where you can safely heal 1 mask. More importantly, her other attacks can now overlap dangerously. This is where Descending Dark becomes your lifeline. Press [Down] + [B] to cast it; the plunge gives you a crucial 0.4s of invincibility frames, letting you safely land through a Sword Wall or dodge an incoming Orb if you’re caught mid-air.
Trust me, if you’ve struggled here before, you’re not alone—the shift to aerial combat trips everyone up. Stay centered, punish only when it’s safe, and use your invincibility plunge to reset your positioning. Master this calm, defensive dance, and you’ll be ready for the final ascent.
The Radiance Phase 5: The Final Climb
This is it—the final ascent. After surviving the floating platforms of Phase 4, you’ve pushed The Radiance to her breaking point. In Hollow Knight, Phase 5 is a pure test of nerve and platforming as you make The Climb while the Void rises from below to swallow you. It's a tense, cinematic push for the finish line.

Official Hollow Knight artwork.
The arena transforms completely. All platforms vanish, replaced by a vertical stack of floating ledges you must scale. Below you, the black Void begins to rise, creating a soft-lockout that adds immense pressure. Your only goal is to climb. The Radiance herself will retreat to the very top, firing her only attack in this phase: the Giant Light Beam.
This attack is a more focused, deadly version of her earlier beams. A single, high-accuracy tracking beam will flash intermittently, targeting your position. The trick is to never stop moving upward, but to time your jumps between the flashes. Listen for the audio cue—a distinct charging sound—and make your jump just after the beam fires. Don't rush; a panicked double-jump can leave you airborne when the next beam strikes.
⚠️ Watch out: The beam's accuracy increases as you climb. Stay patient and make deliberate, single jumps from platform to platform. The Void may be rising, but it's not as fast as it seems—falling to a mis-timed beam is the real danger.
Once you reach the top platform, you’re face-to-face with the wounded goddess. The fight is over. A single, clean strike is all that’s required. Walk up and press [X] for one final Nail hit. That’s it—no complex combo needed. This Final Blow triggers the breathtaking conclusion.
Landing that hit begins the Dream No More ending cutscene. You’ll witness the Hollow Knight's Shade and your Shade Siblings emerge from the Void below, joining you to finally banish The Radiance into the darkness forever. It’s the definitive, cathartic finale to your journey.
You did it. You faced the light at the heart of the Infection and won. Take a moment to soak in that hard-earned victory and the closure of Hollow Knight's true ending.
How to Defeat Absolute Radiance in Hollow Knight Godhome
This is it—the ultimate test. After conquering the base game's Radiance, you might think you've mastered the light. But deep within Godhome, the Pantheon of Hallownest awaits, and at its peak is Absolute Radiance, a rematch that redefines the word "challenge" in Hollow Knight. This isn't just a harder version; it's a brutal, unforgiving endurance run designed to push your skills to their absolute limit.

Hollow Knight character art.
To even face her, you must first conquer the entire Pantheon of Hallownest, a grueling gauntlet of 42 consecutive bosses without a single checkpoint. The final hurdle before Absolute Radiance herself is the Pure Vessel, a masterfully fast and aggressive boss you must defeat immediately before this final showdown. Your charm build must be effective against both, as there’s no chance to change your loadout between them.
⚠️ Critical Requirement: Before attempting the Pantheon, you must practice in the Hall of Gods. Fight Absolute Radiance on "Ascended" difficulty there to learn her patterns without the 40-boss warm-up. Trust me, this is non-negotiable.
Absolute Radiance shares the same six-phase structure as her base counterpart, but with critical, punishing differences. Every single hit from her or her arena—including falling into the Void—deals Double Damage, costing you two Masks instead of one. Her attacks are faster, her health pool is larger (2,181 HP), and her patterns can overlap in ways that demand pixel-perfect positioning and split-second decisions.
The most dramatic change comes in the final phase, Phase 6: The Final Duel. Instead of a simple climb, you’re fighting on two tiny, isolated platforms at the very top of the screen. Here, she spams her relentless Orb Barrage attack while continuing to fire other projectiles.
Pro Tip for Phase 6: The safest strategy is to stay airborne. Use the pogo technique (bouncing on her head with downward nail strikes) to deal damage while simultaneously dodging below the homing orbs, which often despawn when you're above them. Aggression is key, as healing is nearly impossible.
This Hollow Knight superboss is a marathon of focus and execution. It demands that you internalize every telegraph, optimize every movement, and maintain composure through a 45-60 minute gauntlet. But with dedicated practice in the Hall of Gods and a build honed for the Pure Vessel and Absolute Radiance alike, you can ascend to the peak of Godhome and claim your victory. You’ve mastered Hallownest; now master yourself.