
How the Charm System Works in Hollow Knight
In the sprawling, silent depths of Hallownest, your journey in Hollow Knight is defined by more than just your nail and spells. It’s your collection of Charms—mystical trinkets that reshape your abilities—that truly unlocks the game’s potential. This guide is your key to mastering that system, starting with the absolute fundamentals: how to equip them, manage your capacity, and avoid a costly mistake that can cripple your run.
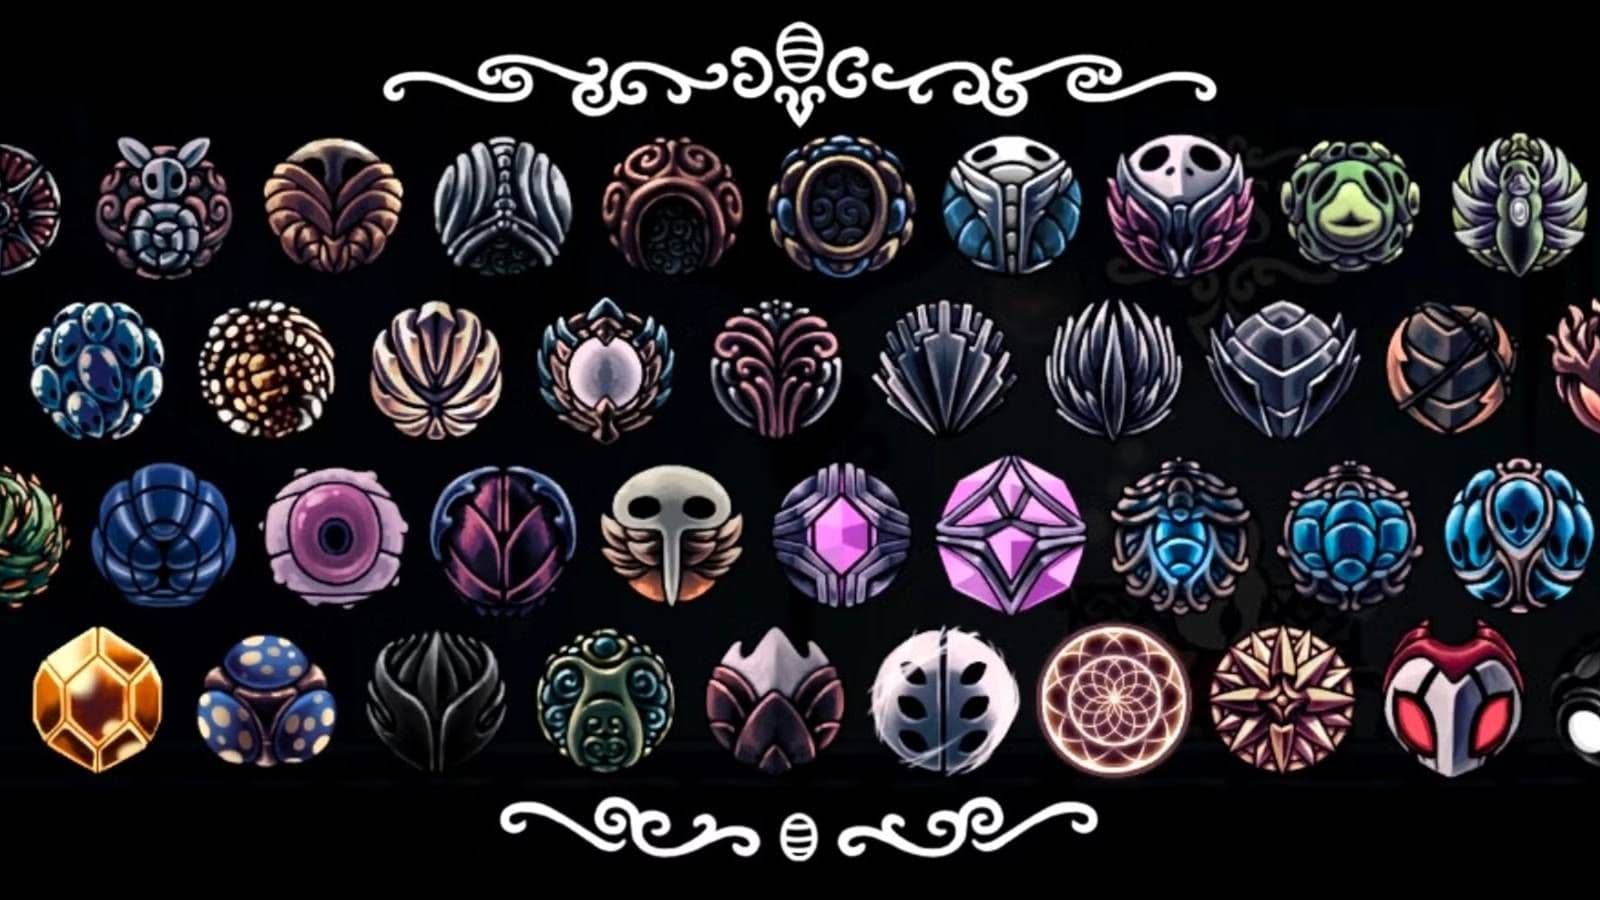
Charm Notches determine how many Charms you can equip at once.
Your hub for all charm-related activities is any Bench. Approach one and press [A] to sit to open menu. From here, navigate to the Charms tab to equip/unequip your collected artifacts. This is where you’ll spend time before every major challenge, tweaking your loadout to suit the path ahead. The limit to your power is shown in your HUD > top left, indicates how many charm slots are currently available. These slots are called Charm Notches, and each charm you find has a notch cost (from 1 to 4). You can only equip charms whose total cost does not exceed your available notches.
⚠️ Watch out: The game lets you break this rule, but you’ll regret it. In the Charm Menu > attempt to equip charm exceeding remaining notches 5 times → [Double Damage] penalty. This state is called Overcharming. While it lets you temporarily equip more powerful combinations, taking double damage from every source is a brutal trade-off, usually reserved for experts who can avoid getting hit entirely.
To expand your capabilities, you’ll need to find more notches. Your primary source is the cheerful vendor Salubra, located in the Forgotten Crossroads > southeast area. She sells charms and notch upgrades, making her shop a critical stop throughout your adventure. Collecting charms themselves is also key, as she offers your first notch upgrade simply for owning a handful of them.
Think of charms as your personal toolkit for customizing Hollow Knight’s challenge. With the basics of equipping and notch management down, you’re ready to start building.
How to Increase Charm Notch Capacity in Hollow Knight
Your journey through Hallownest is about to get a whole lot more powerful. In Hollow Knight, Charm Notches are the golden tickets to unlocking your true potential, letting you equip more powerful Charms at once. You start with 3, but there are 8 more hidden across the world, bringing your total capacity to a mighty 11 slots. Finding them is non-negotiable for tackling the game’s toughest challenges.
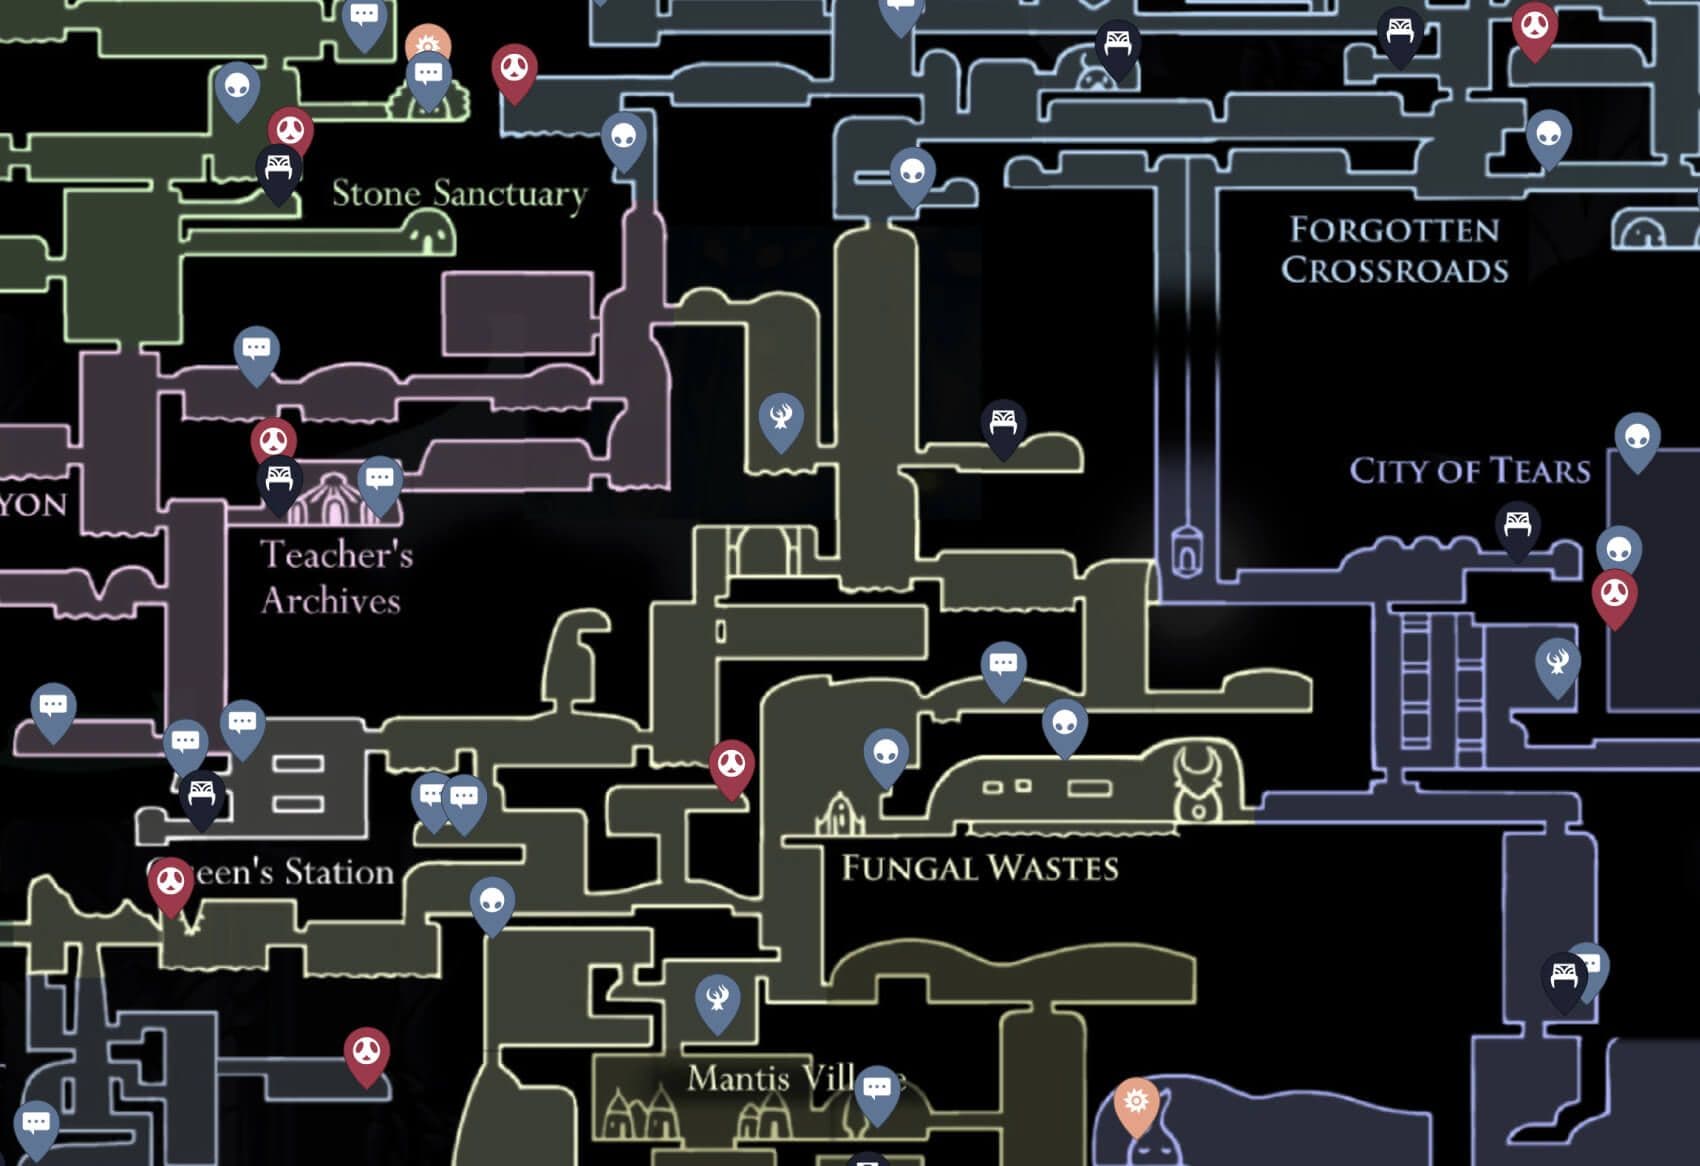
Comprehensive map of Charm Notch locations and vendor requirements.
Here’s a complete breakdown of where to find every single one.
The Salubra Four: Your First Major Goal
Your most reliable source for extra notches is Charm Lover Salubra in her shop in the Forgotten Crossroads. You can buy four notches from her, but each one requires you to have collected a specific number of Charms first. This makes exploring and buying Charms from other vendors a prerequisite for your notch hunt.
- First Notch: Costs 120 Geo and becomes available after you’ve collected 5 Charms.
- Second Notch: Costs 500 Geo and requires 10 Charms in your collection.
- Third Notch: Costs 900 Geo and unlocks once you have 18 Charms.
- Fourth Notch: Costs 1400 Geo, the final and most expensive, needing 25 Charms.
Visit Salubra often as you collect Charms. Her shop is a great Geo sink, and those extra notches will make your mid-game exploration significantly easier.
Fog Canyon: A Hazardous Treasure
Venture into the volatile Fog Canyon, specifically the area northeast of the Overgrown Mound. Here, you’ll find a hidden room not marked on your map, filled with explosive Oomas and pools of acid. You’ll need the Isma's Tear ability to safely swim through the acid to reach it. Navigate this dangerous maze, and you’ll find a Charm Notch waiting on a pedestal, guarded by volatile spores.
Fungal Wastes: A Mini-Boss Reward
Deep in the Fungal Wastes, in a small arena just below the topmost Bench, you’ll face a pair of Shrumal Ogres. These hulking fungal beasts attack with venom spits and body slams. Defeat both of them, and they’ll drop a Charm Notch as a reward. This is a straightforward combat challenge that’s very doable with early-game upgrades.
Colosseum of Fools: Prove Your Might
For those who crave a trial by combat, head to the Colosseum of Fools atop Kingdom's Edge. Pay the 100 Geo entry fee to attempt the Trial of the Warrior, the first and easiest of the three arena challenges. Survive the waves of enemies—including Vengefly Kings, Primal Aspids, and even Zote the Mighty—and the cheering crowd will shower you with Geo and a well-earned Charm Notch.
Queen's Gardens: A Platforming Puzzle
The final notch requires some precise movement. In Queen's Gardens, head to the area below the Stag Station. You’ll find a series of thorny vines and platforms leading down to a secluded chamber. Successfully navigate this platforming challenge, and you’ll be rewarded with the last Charm Notch in Hollow Knight, sitting on a pedestal.
With all eight additional notches secured, you’ve maximized your Charm capacity. You’re now ready to experiment with the most powerful and synergistic builds Hollow Knight has to offer, transforming the Knight into a true force of Hallownest.
Best Exploration Build for Hollow Knight
The map of Hallownest is vast and unforgiving, but the right charm setup transforms exploration from a chore into a thrill. This build isn't about boss-killing power—it’s about unlocking the world efficiently, ensuring you miss nothing and lose nothing along the way.
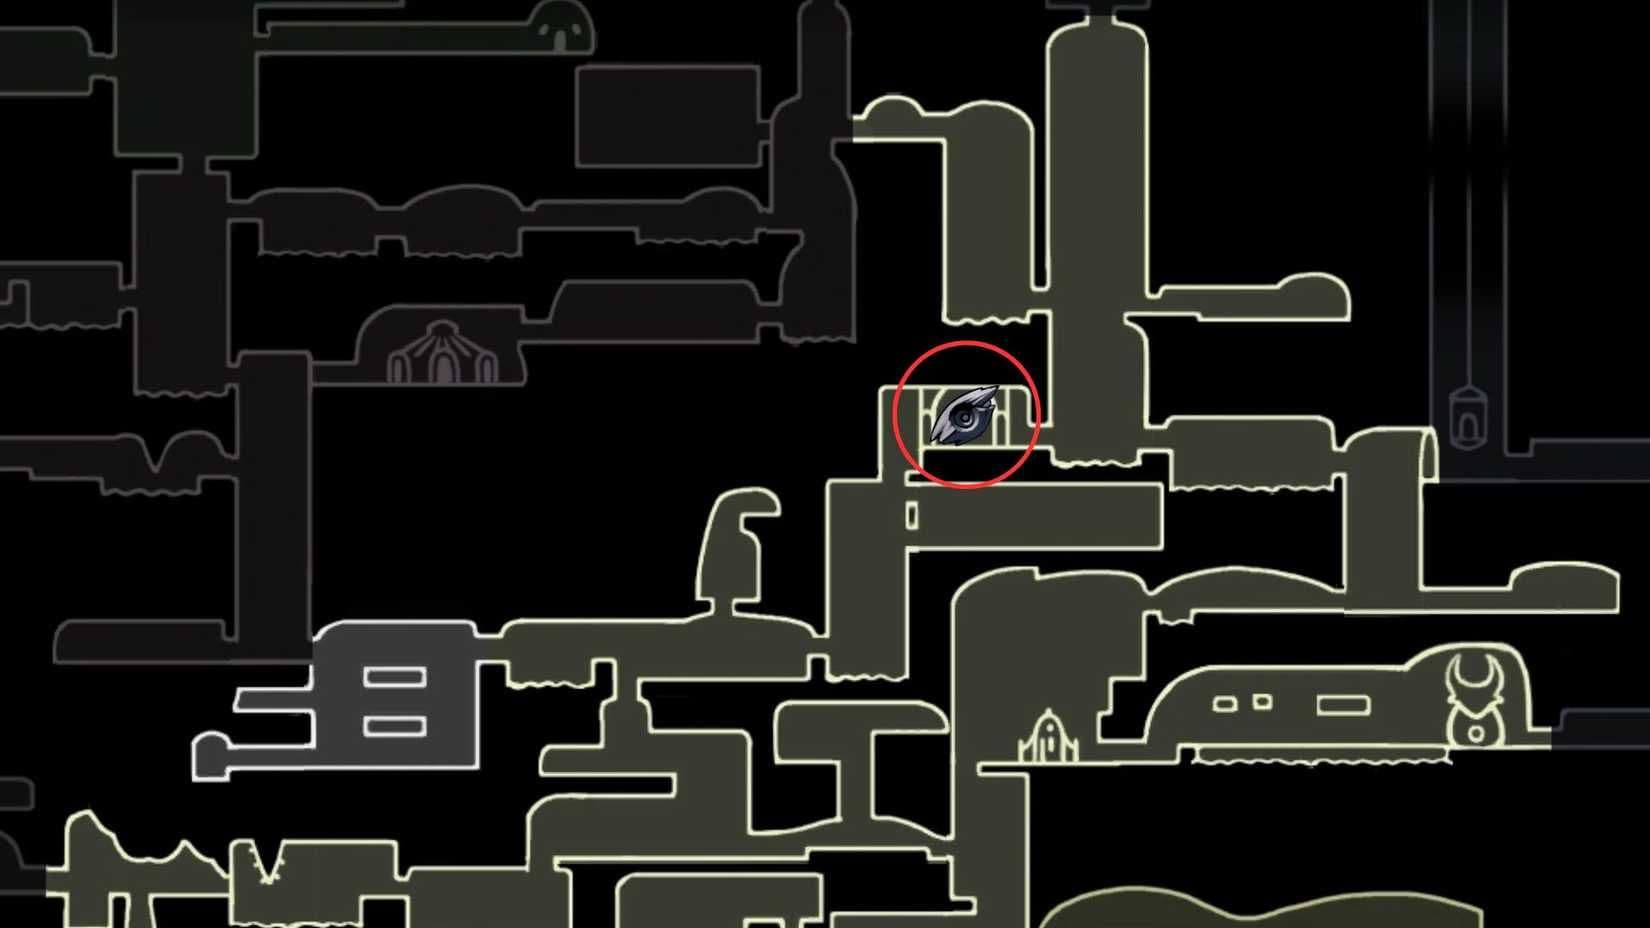
Finding hidden notches allows for more complex charm loadouts while exploring.
Your first stop for any new journey should be the shop of Salubra in the Forgotten Crossroads. Here, you absolutely must purchase the Wayward Compass. It’s a simple, one-notch charm that marks your exact position on the map, and it’s indispensable. Trust me, navigating the twisting caverns of Hollow Knight without it is a recipe for getting hopelessly lost. While you’re in Dirtmouth, visit Sly’s Shop and grab the Gathering Swarm. For just one notch, this charm sends out a swarm of tiny insects to automatically collect any Geo you drop, saving you from frantic backtracking after a tough fight or a tricky platforming section.
This duo forms the core Map-Maker Setup. Always equip Wayward Compass + Gathering Swarm when you first enter a new zone. You’ll know exactly where you are, and you won’t lose a single Geo while you’re sketching the edges of your map.
To supercharge your movement through those new areas, seek out the Dashmaster charm. You’ll find it hidden in the Fungal Wastes, specifically in a breakable wall near Mantis Village. This two-notch charm is an explorer’s dream: it reduces the cooldown of your dash, letting you use it more frequently, and—crucially—it unlocks the ability to dash downwards. This opens up entirely new platforming routes and lets you descend deep pits safely, which is essential for reaching many secret areas.
This next part can feel overwhelming with so many paths to choose from, but don’t panic. With this loadout equipped, you’re free to wander. The Compass guides you, the Swarm secures your finances, and the Dashmaster gives you the mobility to go anywhere your curiosity leads. You’ll fill out your map, uncover hidden rooms, and stockpile Geo for future upgrades without breaking a sweat. Now, the depths of Hallownest are yours to conquer.
Best Combat and Boss Builds for Hollow Knight
You’ve mapped Hallownest, mastered movement, and collected charms—now it’s time to turn those trinkets into tools of conquest. In Hollow Knight, the difference between a frustrating wipe and a triumphant victory often comes down to your charm loadout. This section breaks down the high-tier combinations that will carry you through the game’s most punishing boss fights.

Testing high-tier combat builds against difficult foes.
When the arena shrinks and the attacks become a relentless storm, you need a build that matches your playstyle. Whether you’re a spell-slinging archmage or a nail-art master, here are the proven setups to dominate late-game encounters.
The Pure Nail Build: Maximum Melee Pressure
For players who live in the boss’s face, this build turns your nail into a buzzsaw. The core is a devastating trio: Quick Slash, Unbreakable Strength, and Mark of Pride.
First, grab Quick Slash from a hidden room in Kingdom’s Edge near Oro's hut. This charm increases your Nail attack speed by a massive 39%, letting you squeeze in extra hits during every brief opening. Pair it with Unbreakable Strength. You can buy the fragile version from Leg Eater in the Fungal Wastes, and later make it unbreakable via Divine in the Grimm Troupe. It provides a flat 50% increase to your Nail damage. Finally, Mark of Pride (found in the Mantis Village) increases your nail’s range by 25%. This extra reach is priceless for safely pogo-ing on bosses and landing hits from a slightly safer distance.
Together, these charms maximize your melee DPS and control the space around you. You’ll melt health bars while staying just out of retaliation range.
This build shines against bosses with large, predictable attack patterns where you can plant your feet and slash. It’s less ideal for hyper-aggressive, teleporting foes that rarely stay still.
The Spellcaster Build: Unleash Raw Magic
When you’d rather fight from a distance, this build turns your Soul gauge into a cannon. The goal is to cast more often and hit harder with every spell. The essential combo is Shaman Stone, Spell Twister, and Soul Catcher.
Start with Shaman Stone, purchased from Salubra in the Forgotten Crossroads. It increases your Spell damage and even enlarges spells like Vengeful Spirit. Next, find Spell Twister in a hidden room within the Soul Sanctum in the City of Tears. This key charm reduces the Soul cost of all your Spells, letting you cast more frequently. Round it out with Soul Catcher (found in the Ancestral Mound), which increases the Soul you gain per nail hit, ensuring your magic fuel tank is always full.
This synergy creates a powerful loop: hit the boss a few times to generate ample Soul, then unleash a barrage of cost-reduced, damage-boosted spells. It’s perfect for bosses where melee opportunities are scarce but punishable with well-timed Desolate Dives or Howling Wraiths.
Adapting to the Fight
These two builds are your foundation, but Hollow Knight’s true charm mastery comes from adaptation. For a brutal fight where you’re taking constant chip damage, try weaving in Grubsong (grants Soul when hit) and Quick Focus (speeds up healing) for incredible sustain. If you’re going for a no-hit run or a speedkill, consider the high-risk, high-reward Overcharmed state to equip one more powerful charm, but remember—it doubles all damage you take.
⚠️ Watch out: Always visit a bench before a boss arena. Swapping even one charm to counter a specific attack pattern can be the difference between victory and defeat.
With these optimized loadouts in your arsenal, you’re not just entering a boss room—you’re entering with a tailored plan of attack. Equip your chosen combination, learn the rhythms of the fight, and claim your victory.
Hollow Knight Charm Customization Rewards and Tips
Mastering Hollow Knight’s charms isn’t just about collecting them—it’s about forging your own legend. The true reward is the freedom to tackle any challenge in Hallownest exactly how you want, and these final tips will help you perfect your approach.

Customizing your charm loadout is essential for surviving Hallownest's dangers.
The ultimate prize for any collector is Salubra's Blessing. Once you’ve tracked down all 40 charms, return to Salubra's Shop in the Forgotten Crossroads. This final reward automatically refills your Soul gauge every time you sit at a Bench. It’s a fantastic quality-of-life charm that lets you start every new area or boss attempt with a full tank of spells, perfect for those nail-biting rematches.
Always reassess your loadout before entering a boss arena or a demanding platforming section like the White Palace. This habit of Bench Swapping is what separates good players from great ones. Don’t just stick with one build—adapt.
Part of that adaptation is understanding Synergy Bonuses. Certain charms, when equipped together, create unique combined effects that aren't listed in their descriptions. A classic example is Defender's Crest combined with Spore Shroud, which creates a much larger, more damaging cloud of spores. Experimenting with these hidden combos can unlock incredibly powerful and fun new strategies.
Your journey with the Grimm Troupe questline presents a meaningful choice that impacts your charm collection. You must choose between completing the ritual to earn Grimmchild, a familiar that fights alongside you, or banishing the troupe to receive Carefree Melody, a charm that has a chance to negate damage. Both are valid, so pick the one that best fits your playstyle—aggressive summoner or resilient survivor.
With your collection complete and these strategies in hand, you’re no longer just following a path through Hallownest; you’re carving your own. Go claim your ending.