
How to Find Cornifer and Iselda in Hollow Knight
Navigating the vast, interconnected kingdom of Hallownest in Hollow Knight can feel overwhelming. Your lifeline from the very start is the game’s mapping system, and it all begins with two key NPCs: the wandering cartographer and his wife.

Cornifer leaves notes directing players to Iselda's shop in Dirtmouth.
Your first priority after dropping into the well at Dirtmouth is to find Cornifer the Cartographer, the traveling merchant who sells area maps. He’s most easily found in the Forgotten Crossroads, the first region below Dirtmouth. Head left from the entrance and drop down the long vertical shaft. Listen closely for his distinctive humming and follow the trail of discarded paper scraps to an alcove near the bottom—here you’ll find Cornifer, ready to sell you the map of this initial region for 30 Geo. Trust me, buying this map immediately transforms your exploration from blind wandering into purposeful adventure.
Once you’ve met Cornifer and purchased your first map, head back to the surface. Your visit with the cartographer triggers a crucial event: Iselda, Cornifer's wife, will now have opened her Map Shop in Dirtmouth. Located in the building on the right side of town, Iselda becomes your permanent source for essential mapping tools. This is your new hub for navigation. She sells the Quill (which lets you update your map at benches), the Wayward Compass charm (to see your location), and, critically, any maps you might have missed if Cornifer has already left a region.
Always listen for Cornifer’s humming when entering a new area—it’s your best clue that you’re on the right path. If you hear it, you’re close to making that uncharted darkness feel a lot more manageable.
With Cornifer charting the depths and Iselda providing the tools in Dirtmouth, you’ve unlocked the foundation for mastering Hallownest’s geography. Let’s get you oriented.
Best Mapping Tools and Pins to Buy from Iselda
Alright, you’ve found Cornifer and his wife Iselda has opened her shop in Dirtmouth. Now comes the critical part: turning that blank parchment into your greatest tool for conquering Hallownest. The map isn’t just a picture; it’s a dynamic system you need to build and customize. Here’s exactly what to buy from Iselda’s shop in Dirtmouth to make navigation manageable and precise.
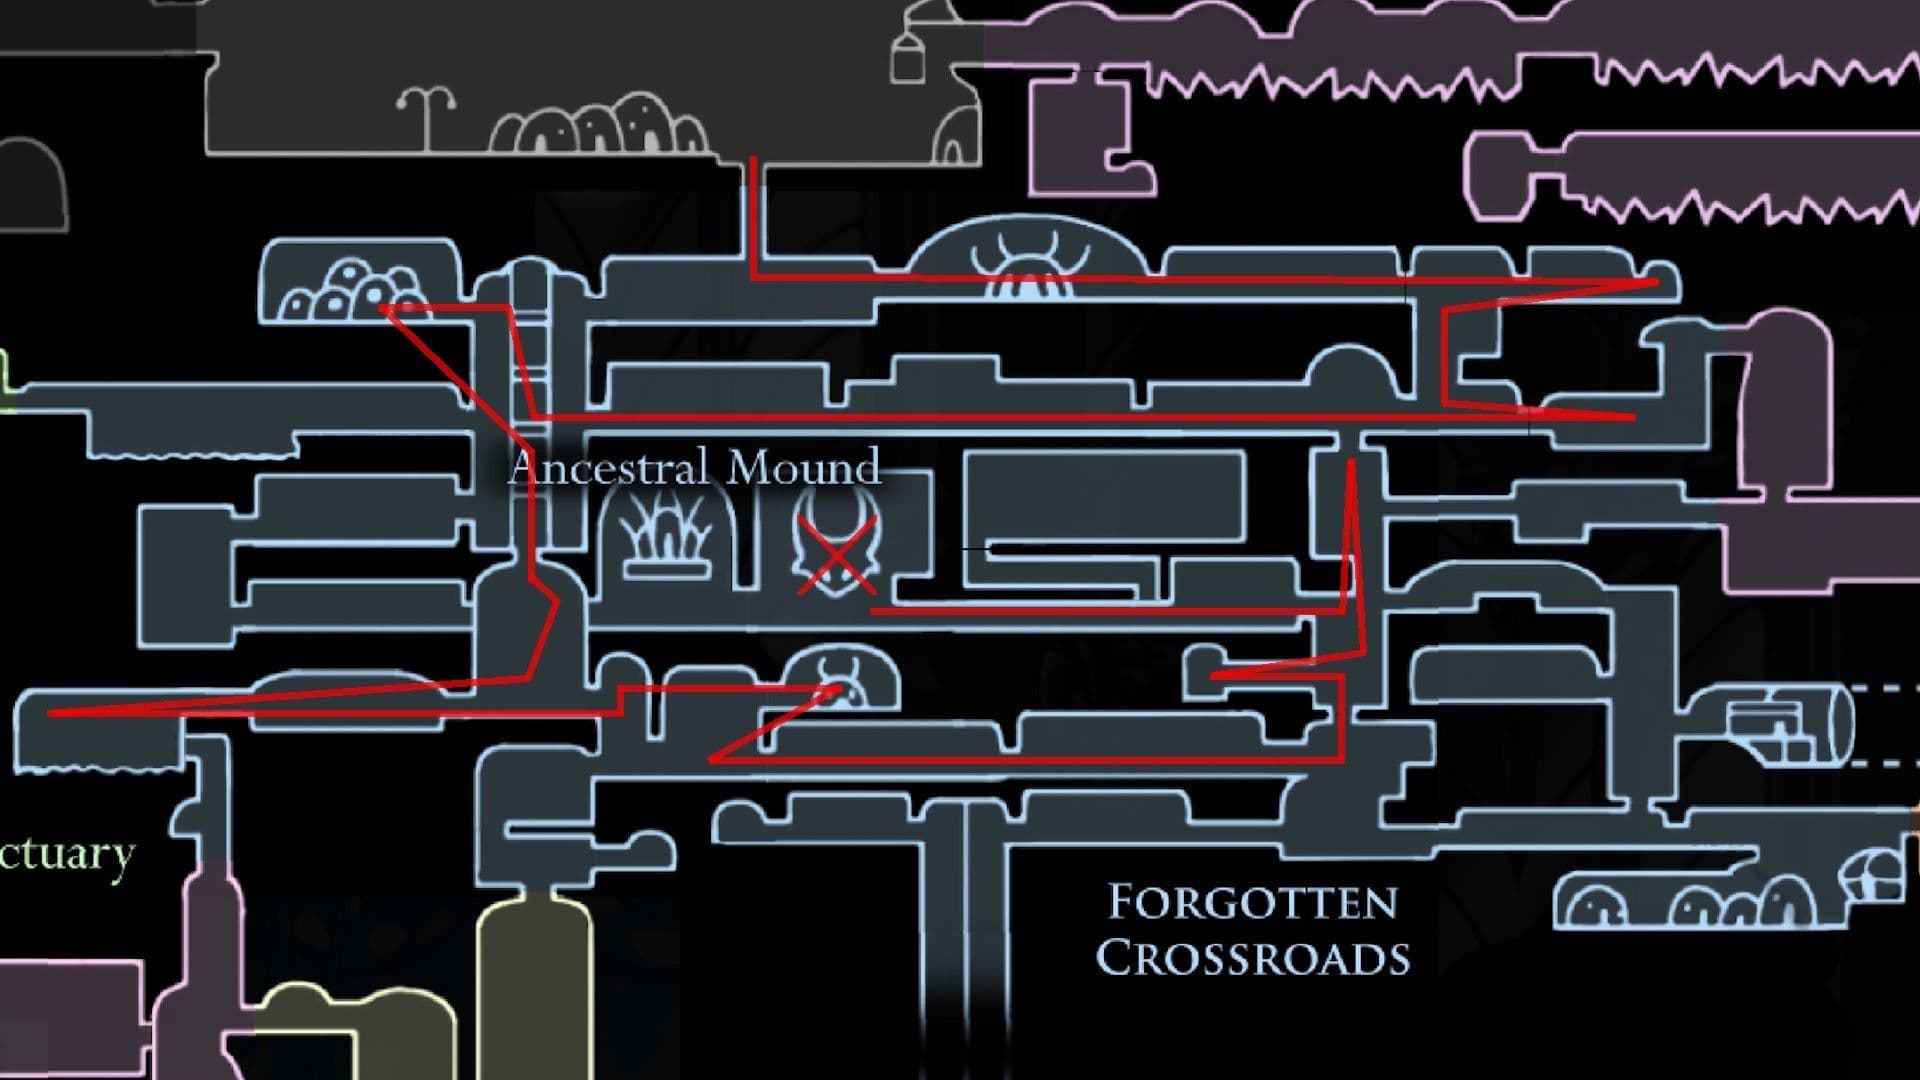
Mapping routes for the Forgotten Crossroads and Iselda's shop.
Your Essential Navigation Toolkit
Your first and most crucial purchases are the tools that make the map functional. Without them, you’re just staring at a static drawing.
- The Quill: This is non-negotiable. For 120 Geo, the Quill allows your map to update automatically with all the rooms you’ve explored whenever you rest at a Bench. Trust me, wandering a new area with a blank map is a recipe for frustration—this fixes that.
- The Wayward Compass: For 220 Geo, this charm is a lifeline for new explorers. Simply equip it in your Charm menu and your exact location will be displayed as a small face icon on your map. It’s a single notch charm, and it’s worth every Geo and notch slot until you’ve memorized every corridor.
Keep the Wayward Compass equipped at all times during exploration. The one-notch cost is trivial compared to the hours of saved confusion, especially in maze-like areas like Deepnest or the Royal Waterways.
Pins: Your Personal Map Legend
Once your map is updating, you’ll start noticing places you can’t reach yet or important spots you need to remember. This is where Iselda’s pins become indispensable. They let you build a personalized legend right on your map.
- Bench Pin & Stag Station Pin: Each costs 100 Geo. Once purchased, these pins will automatically mark every Bench and Stag Station you discover on your map. This is vital for planning safe routes, knowing where you can save, and utilizing the fast-travel network efficiently.
- Vendor Pin: Also 100 Geo, this pin automatically marks the locations of key merchants like Sly in Dirtmouth and Salubra in the Forgotten Crossroads. No more forgetting where to go to spend that hard-earned Geo.
- Marker Pins: For a small fee, you can buy sets of colored Marker Pins. To use them, open your map, select a pin, and place it manually. This is your power. Use them to mark anything: a breakable wall you can’t smash yet, a tough boss you need to come back to, a platforming challenge, or the location of a Whispering Root.
⚠️ Watch out: Don’t just pin randomly. Develop a system. Maybe red pins for obstacles, blue for secrets to investigate, and green for completed goals. This turns your map from a reference into a strategic plan.
Putting It All Together
With the Quill auto-filling your explored paths, the Wayward Compass showing where you are, and a set of pins tracking your goals, the overwhelming expanse of Hallownest becomes a navigable, conquerable space. You’ll transition from feeling lost to directing your own adventure, knowing exactly where to go when you get that new ability.
Invest in these tools early. The Geo cost is modest, but the confidence and time they give you back is immeasurable. With a fully-equipped map, you’re ready to delve deeper.
How to Find Cornifer in the Early Game Regions
Now that you’ve met Cornifer and stocked up on tools from Iselda’s shop in Dirtmouth, it’s time to chart the unknown. The early hours of Hollow Knight can feel overwhelming, but finding Cornifer’s maps in the first few regions transforms that maze into a manageable adventure. Trust me, making this your first priority in each new area saves hours of wandering and frustration.

Cornifer in Greenpath
Here’s exactly where to find him and how much Geo you’ll need in the first four major zones.
Forgotten Crossroads: Your First Map
Your cartographic journey begins in the Forgotten Crossroads. After entering from Dirtmouth, head left into a long vertical shaft. Drop all the way to the bottom of this first vertical shaft—you’ll start to hear Cornifer’s humming and see his discarded paper trails. He’s tucked in an alcove near a hole in the floor. His map here costs 30 Geo. If you miss him, you can buy it later from Iselda in Dirtmouth for 36 Geo.
Listen closely as you explore. Cornifer’s distinctive hum carries through walls and shafts, acting as your best audio beacon to find him before you even see him.
Greenpath: Navigating the Overgrowth
After acquiring the Vengeful Spirit and facing the False Knight, your path leads to Greenpath. Enter from the Forgotten Crossroads and proceed all the way left, then drop down a spiky vertical shaft. Head right through a room with Moss-knights, and look for an opening on the right-hand wall at the end. Cornifer waits in a larger, open cavern. The Greenpath map costs 60 Geo from him, or 72 Geo from Iselda if he’s already moved on.
This map is crucial, as Greenpath’s winding, leafy paths and multiple exits are easy to lose track of.
Fungal Wastes: Bouncing to the Cartographer
The Fungal Wastes introduces new platforming mechanics with its bouncing mushrooms. The most straightforward route to Cornifer is from the Queen's Station Stag Station. Head right and down, navigating the mushroom jumps until the path splits toward Mantis Village and the City of Tears. Before that fork, look for a small alcove near the path to Mantis Village. You’ll find Cornifer there, selling the area map for 75 Geo (or 90 Geo from Iselda).
City of Tears: Mapping the Rain-Soaked Metropolis
Gaining entry to the City of Tears requires the City Crest from the False Knight. Pass through the large gate, head right, then go up through a small opening. Work your way right through a room with moving platforms until you find a bench—this is the City Storerooms Bench. Cornifer is located in a small room just below this bench. The City of Tears map costs 90 Geo from him, or 108 Geo from Iselda.
With this map in hand, the sprawling, interconnected streets and towers of the city become much less daunting to navigate.
With maps for the Forgotten Crossroads, Greenpath, Fungal Wastes, and City of Tears secured, you’ve laid the perfect foundation for your journey. You’ll know exactly where you are, where you’ve been, and where those tantalizing, still-unexplored passages might lead. Let’s go explore.
How to Find Cornifer in Mid-to-Late Game Regions
Now you're getting into the heart of Hallownest. In Hollow Knight, the mid-to-late game areas aren't just tougher—they're gated behind specific abilities, making finding Cornifer a true exploration challenge. Trust me, you'll want these maps before you get lost in the dark, acid, or deep, deep silence.

Cornifer's location in the hazardous Fog Canyon.
Navigating the Dark and the Deep
Let's start with the two areas that demand special tools just to see where you're going.
For the Royal Waterways Map, you'll need the Lumafly Lantern from Sly. Drop into the sewers from the City of Tears and head all the way left. Navigate past floating platforms and a bench sign until you hear Cornifer's humming. After defeating the enemies that guard a door, you'll find him tucked in the top-left corner of a chamber. His map here costs 75 Geo. Without the lantern, this place is a pitch-black maze—don't attempt it blind.
The Crystal Peak Map is locked behind a different kind of barrier. To even enter the mines from the Forgotten Crossroads, you need the Desolate Dive spell to shatter a weak floor. Once inside, traverse the hazardous conveyor belts and crushing platforms. Keep ascending past crystal enemies; you'll see his notes leading you to a room in the upper shaft near conveyor belts where he's waiting. Be prepared to pay 112 Geo for this one.
The Silent Cartographer and Distant Edges
Next up are two notoriously tricky regions where Cornifer plays hard to get.
Finding the Deepnest Map is an eerie experience because Cornifer is hiding in fear—he won't hum. The easiest path is from the Fungal Wastes: after defeating the Mantis Lords, head left into the Fungal Core entrance and take the long fall down. He's in a small cavern immediately to your left after landing. Grab his map for 38 Geo and get out quickly; this is not a place to linger without a guide.
For the Kingdom's Edge Map, head to King's Station. Exit to the bottom right into the ashy wastes, pass through the initial corridor, and drop down slightly to the left. You'll find Cornifer on a ledge below the King's Station exit, selling his map for 112 Geo. The openness here can be disorienting, so securing this layout early is a huge help.
The Final Falls
Your last stops are in the deepest reaches of the kingdom, rewarding those who have mastered movement.
To find the Ancient Basin Map, fall into the basin from the Royal Waterways. From the entry room, head directly downward, then make your way to a small cavern to the right. His familiar humming will guide you once you're close. This map costs 112 Geo from Cornifer, or 134 Geo from Iselda if you miss him.
For areas like Deepnest and Ancient Basin, consider setting a Dreamgate (unlocked from the Seer) near the entrance before you go hunting. It lets you warp out instantly after buying the map, saving you a dangerous trek back.
With these five maps secured, the most forbidding corners of Hallownest are no longer a mystery. You've graduated from a wanderer to a master navigator—ready to chart the rest of this fallen kingdom.
How to Map the Fog Canyon and Queen's Gardens
Alright, here we go—the final frontier of your map collection. In Hollow Knight, the Fog Canyon and Queen's Gardens aren't just late-game areas; they're the two most expensive maps Cornifer sells, and reaching him here requires some of your most advanced movement abilities. If you've felt locked out, don't worry—here's exactly how to chart these elusive regions.

Finding Cornifer in the Queen's Gardens.
Navigating the Fog Canyon
Let's start with the Fog Canyon, a misty, volatile zone filled with explosive jellyfish. Cornifer’s spot here is tricky, and you’ll need one of two specific abilities to get there. The most common route is from Queen's Station in the Fungal Wastes. Head up and left into the canyon, then climb to the very top of the first major room and go left. You’ll eventually see a Shade Gate—a black barrier you can’t pass without the Shade Cloak. This late-game ability, found in the Abyss, lets you dash through enemies and these gates. Pass through, then follow Cornifer’s humming and paper trail upward and left to find him in the room behind the Shade Gate. His map here costs 150 Geo.
If you haven’t unlocked the Shade Cloak yet, there’s a backdoor. From the Fungal Wastes, find the small acid pool northwest of Leg Eater. With Isma's Tear (the acid immunity ability from the Royal Waterways), you can swim through it directly into the Fog Canyon and simply head left to find Cornifer.
Charting the Queen's Gardens
Next up are the Queen's Gardens, a beautiful but treacherous zone of thorns and mantis traitors. The most straightforward entrance is, again, from the Fog Canyon side of Queen's Station. In the middle of that first Fog Canyon room, look for a breakable wall on the left. Smash through, and you’ll find a secret acid pool. With Isma's Tear, swim across to enter the Queen's Gardens.
Once inside, head left, drop to the bottom of the next chamber, and go right. You’ll face some mantis enemies, but soon you’ll see Cornifer’s notes and hear his familiar hum. He’s located near the central Bench in the area. Grab his map for another 150 Geo—the highest price alongside Fog Canyon, so make sure your wallet is ready.
Don't Forget the Howling Cliffs
While not as expensive, the Howling Cliffs map has its own access challenge. From Dirtmouth, you need both the Mantis Claw (for wall-climbing) and the Mothwing Cloak (for dashing) to scale the cliff east of the well. After a few wall-jumps and a dash, you’ll reach the top and enter the zone. A few rooms west, you’ll find Cornifer in a cliffside opening near Mato's Hut. His map here is a more reasonable 75 Geo.
⚠️ Watch out: If you defeat the main boss of any of these areas before buying the map, Cornifer will leave. You can still purchase them from Iselda in Dirtmouth, but at a premium: 200 Geo for Fog Canyon or Queen's Gardens, and 100 Geo for the Howling Cliffs.
With these three maps secured, you’ve conquered the most demanding cartography challenges Hollow Knight has to offer. Your atlas of Hallownest is nearly complete.
Resting Grounds and Missed Maps in Hollow Knight
This final stretch of your cartography journey in Hollow Knight holds two important truths: not every region is visited by Cornifer, and it's always possible to get a second chance at a map you missed. Let’s tie up those loose ends so you can navigate Hallownest with complete confidence.

Finding Cornifer in the depths of the Ancient Basin.
The Resting Grounds is a unique case—Cornifer never sets up shop here. This serene, somber area is home to the Seer, keeper of ancient knowledge, who grants you the pivotal Dream Nail. Since you can't buy a map from the cartographer, your only source is Iselda's shop back in Dirtmouth. Head to her counter and purchase the Resting Grounds Map for 75 Geo. It's a straightforward purchase, but a necessary one for navigating the area's spiraling paths and accessing its crucial dream-related content.
Since you have to buy this map from Iselda anyway, consider picking it up right after you first gain access to the Resting Grounds. Having the layout immediately will make finding the Seer and other secrets much easier.
Now, what if you explore an entire region and never hear Cornifer’s familiar hum? In Hollow Knight, if you defeat the main boss of an area, Cornifer will pack up and leave. Don’t worry—you haven’t locked yourself out. This triggers the Missed Map Acquisition mechanic. Just like with the Resting Grounds, you can purchase any map you missed from Iselda in Dirtmouth. The catch is that her prices are always a bit higher than Cornifer's. It’s a helpful safety net that ensures you’re never permanently stuck navigating blind.
Finally, remember that buying a map is only half the battle. To make it useful, you need to Update the Map regularly. This happens automatically whenever you rest at a Bench. Simply walk up to a bench and press [A] to sit down—your Quill will instantly draw all the rooms and passages you’ve explored since your last rest onto the parchment. Get into the habit of sitting at benches not just to heal and save, but to crystallize your discoveries. If you’ve been wandering with a blank map fragment, a quick rest will reveal everything you’ve just traversed.
With the Resting Grounds mapped and the knowledge that Iselda has your back, your atlas of Hallownest is complete. You’re now a master navigator, ready to face the kingdom’s deepest secrets.