How to Get Started in Marvel Rivals: Roles and 6v6 Format
Welcome to the arena. Marvel Rivals throws you into a fast-paced 6v6 format where teams of Marvel heroes and villains clash over dynamic objectives. Before you dive into the chaos, understanding the game’s core structure is your first step to victory. This guide will break down the essential roles and the unique third-person perspective that defines every match.
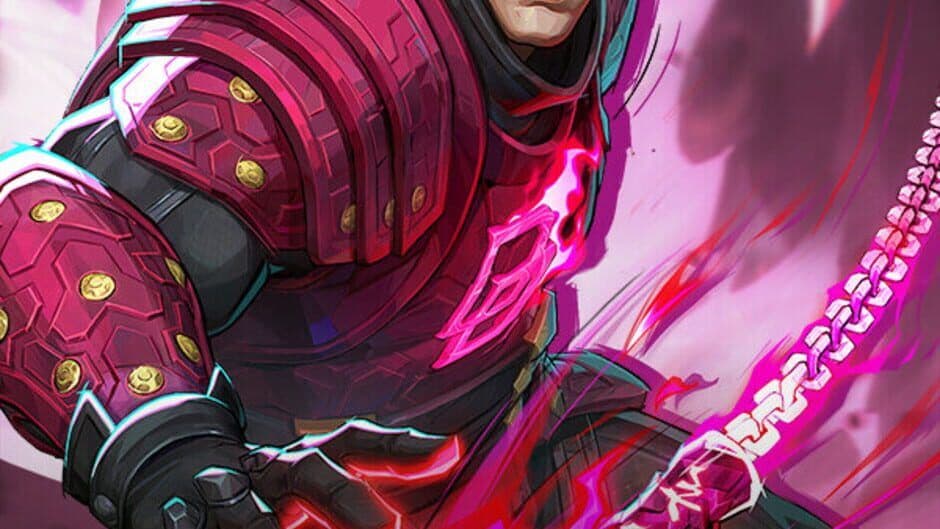
Distinct character designs help players identify roles at a glance.
At its heart, Marvel Rivals is built on three distinct roles, each with a critical job. Vanguards are your team's anchors—tanks with large health pools designed to create space and absorb pressure. They use damage mitigation abilities, often activated with [L-Shift/E], to protect teammates and control the flow of the fight. Standing with them are the Strategists, the supports who provide the healing, buffs, and utility needed to keep the team stable and in the fight. Finally, Duelists are your high-damage dealers, specializing in mobility and burst damage. They excel at taking flanks and securing key eliminations on vulnerable targets.
The third-person perspective isn't just a camera angle—it's a powerful tactical tool. This view lets you peek around corners and gather crucial information without fully exposing your character. Use it to scout enemy positions, set up ambushes, and avoid walking blindly into a crossfire.
In your first few matches, focus less on getting kills and more on understanding your role's purpose. A Vanguard creating safe space or a Strategist keeping a key ally alive often wins more games than a lone Duelist chasing a highlight.
With the 6v6 team structure, three clear roles, and the advantage of the third-person camera in your toolkit, you have the foundational knowledge to step into your first match with confidence. Let's get you ready to rumble.
Best Positioning Strategies for Vanguards in Marvel Rivals
Your team is looking at you. The enemy is holding the choke. In Marvel Rivals, the Vanguard isn't just a damage sponge—you're the space creator, the tempo-setter, and the wall your team fights behind. Good positioning here isn't about surviving; it's about making the entire map feel safer for your Duelists and Strategists.
Team coordination is essential for Vanguard success.
Your job is to control the battlefield through smart, repeatable positioning habits. Forget standing in the open and hoping your health pool holds; the best Vanguards win by controlling angles and forcing the enemy to fight on their terms.
The Cornerstone of Your Play: Corner Discipline
Think of every corner on the map as a checkpoint. Corner discipline means treating these corners as your primary tool to break line-of-sight instantly. Your goal is to fight from one piece of cover to the next, not in the no-man's-land between them. Peek from the corner, apply pressure, and slip back before taking unsustainable damage. This forces enemies to commit resources to push you, which is exactly what you want.
When peeking, try to have the corner on your left side (so you peek from the right). This often gives you a slight camera and firing advantage, making you harder to hit as you expose yourself.
Understanding the Three Lines of Engagement
To create space effectively, you need to visualize the battlefield in three zones, or The 3 Lines:
- The Hold Line: This is your team's safe zone, typically one strong corner back from the main fight. Your backline should feel secure here.
- The Pressure Line: This is where you trade cooldowns and damage. You step up to this line (often the next corner forward) to force enemies to use their abilities and attention on you.
- The Commit Line: This is the invisible boundary past the enemy's front line. You only cross this when you have a decisive advantage (like a pick or a key cooldown burned) to convert a won fight.
Your default rhythm should be bouncing between the Hold and Pressure lines. Crossing the Commit Line without backup is the most common way Vanguards get deleted and leave their team exposed.
Executing Your Space Rhythm
This bounce between lines is formalized as your Space Rhythm. It's a four-step loop that should become second nature:
- Step In: Move from your Hold Line to your Pressure Line, using a corner for safety.
- Force Resources: Draw enemy fire and abilities. Your mere presence should make them waste cooldowns trying to move you.
- Step Out: Before your health gets critical, use your corner to break line-of-sight and retreat to your Hold Line.
- Get Healed: Allow your Strategist to top you up so you can...
Repeat. This rhythmic pressure is exhausting for the enemy and creates windows for your Duelists to capitalize on.
Positioning for Your Vanguard Archetype
Your specific approach depends on your hero's design. Marvel Rivals Vanguards generally fall into two camps, each with a distinct positioning philosophy.
For Defensive Vanguards like Groot or Magneto, your job is to be the immovable object. You position directly at the forefront of your team, using your bulk and damage-mitigation tools to absorb incoming fire and deny space. You are the anchor your team forms around. Your positioning should be assertive but readable to your teammates, so they know where the safe space is behind you.
For Aggressive Vanguards like Thor or Venom, your role is disruption. You excel at hit-and-run tactics against the enemy backline. Instead of holding the main frontline indefinitely, you look for opportunities to dive onto a vulnerable Strategist or Duelist, force a panic, and then use your mobility to disengage back to safety. You are best paired with a defensive Vanguard who can hold the main line while you create chaos.
⚠️ Watch out: Whether you're defensive or aggressive, the golden rule is to never advance so far that you lose line-of-sight to your Strategist. If they can't see you, they can't save you.
Mastering these positioning fundamentals transforms you from a simple tank into the strategic core of your Marvel Rivals team. You dictate where the fight happens, control the pace of the engagement, and create the openings your damage dealers need to shine. Now, step up to that corner and own it.
How to Master Duelist Positioning and Off-Angling
This is where Duelists become legends—not by having perfect aim, but by finding the angles where the enemy can't fight back. In Marvel Rivals, your job isn't just to deal damage; it's to create impossible choices by mastering off-angling and knowing when to vanish.
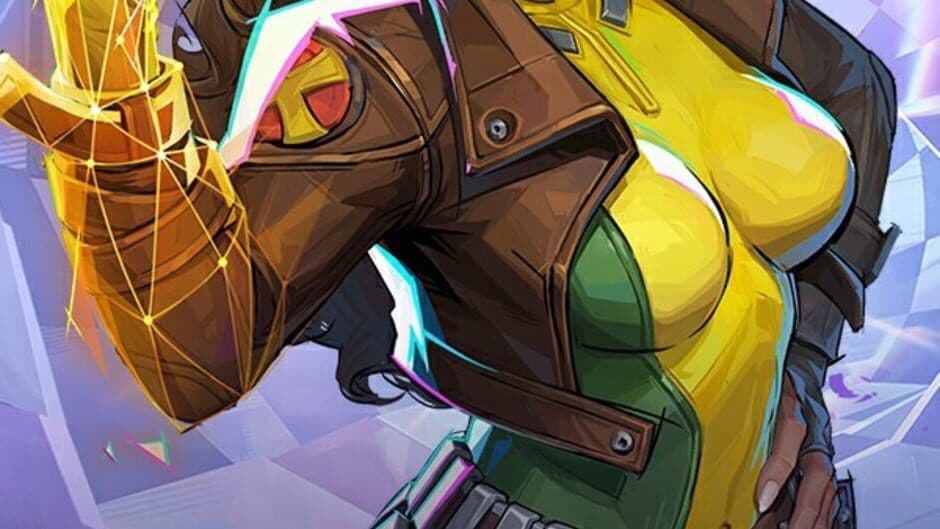
Coordinating off-angles with your team's frontline.
The core concept is off-angling: positioning yourself 5-15 meters to the side of the main team to create crossfire. Don't stack in the same doorway as your Vanguard. Instead, slide to a nearby piece of cover on the flank. This forces enemies to either face your Vanguard's pressure or turn to deal with you, splitting their focus and health pools. It’s the simplest way to multiply your team’s threat without taking a huge risk.
Before you even take a shot, follow the Escape Route Rule. Identify a retreat path [Doorway/Cover] before taking an aggressive angle. If you get focused, you should know exactly which corner to duck behind or which door to slip through to break line-of-sight. This single habit stops you from "feeding" and turns risky plays into calculated pressure.
The Flank Spectrum: From Safe to Suicide
Not all flanks are created equal. Your safest and most consistent tool is the Short Flank. This means staying wide enough for crossfire but close enough to rejoin team within seconds. You’re not trying to get behind the enemy; you’re creating a second, punishing angle that’s still within your Strategist’s healing range. If the enemy collapses on you, a quick dash or slide can get you back to your team’s safety.
When you do take a deeper route, use the Two-Second Reveal technique. Reveal at flank angle for 2 seconds to scout before committing to a fight. Peek out, see who’s there, and assess if you have a clear shot on a vulnerable target. If you see two enemies staring right at you, that’s your cue to back off and rotate. If you see a distracted support, that’s your green light.
Choosing Your Moment: Pick or Pressure?
Every angle presents a choice: go for the elimination or apply sustained pressure. This is the Pick vs. Pressure decision.
- Pick Plays: High-risk, high-reward. You’re committing resources (like mobility or a high-damage ability) to try and instantly eliminate a key target, like an enemy Strategist. Only go for this when you have a clear advantage (they’re low health, alone, or using an important cooldown).
- Pressure Plays: Safer and often more valuable. You’re dealing consistent damage from your off-angle to force enemies to use cooldowns, burn healing resources, or retreat from the objective. This creates space for your team to move up. If you start taking return fire, you use your pre-planned escape route.
Trust me, in the chaotic teamfights of Marvel Rivals, consistent pressure from smart angles wins more fights than risky, all-in dives that leave you stranded.
Putting It All Together
Your mental checklist as a Duelist should be: Find an off-angle, spot your escape route, take a two-second peek to assess, then decide—apply pressure or go for the pick. If you take damage, retreat before you’re low health. Your value comes from staying alive and making the enemy team’s position untenable.
Master this flow of angle, scout, pressure, and reset, and you’ll stop taking duels you can’t win and start creating wins for your entire team.
Best Strategist Positioning for Survival and Support
As a Strategist in Marvel Rivals, you’re the team’s lifeline—but you’re also the number one target. This isn't about hiding in the back; it’s about finding the sweet spot where you can support your team without becoming a free elimination. The best support players don't just heal; they control the fight from a position of unshakeable safety.
Your golden rule is the Strategist Triangle. You must position yourself at the intersection of three things: immediate Cover, a clear Sightline to your teammates, and Peel access from allies who can protect you. If you're missing any one of these, you're in a dangerous spot. A wall you can duck behind, a view of your Vanguard, and a Duelist within shouting distance—that’s your ideal home.
To maintain this, develop the Tether Habit. Don't anchor yourself mindlessly to the objective. Instead, position relative to your Vanguard's safe line. Where is your tank holding a corner? That’s your anchor point. You should be one safe corner behind them, ensuring you have line-of-sight to heal them but are far enough back that you’re not the first target the enemy sees. This keeps you connected and mobile, ready to rotate when the fight shifts.
Central vs. Roaming: Play to Your Hero's Strength
Your specific positioning depends heavily on your hero’s kit. Central Strategists like Rocket Raccoon or Jeff the Land Shark excel when they stay close to defensive Vanguards. Their value comes from consistent, reliable healing output. For Rocket, that means finding angles to fire his Healing Spheres through multiple allies or bouncing them off walls. For Jeff, it means tethering himself to a tank and being their dedicated pocket healer. Their positioning is about maximizing uptime, not making flashy plays.
Conversely, Roaming Strategists like Loki or Cloak & Dagger have the mobility and utility to play more dynamically. When healing demands are lower or you have a second support, you can use your kit to flank, create distractions, or pair up with an aggressive Duelist to form a surprise attack duo. This doesn't mean going solo; it means using the edges of the fight to apply pressure where the enemy isn't looking.
The Lifesaver's Priority List
When bullets fly and abilities explode, knowing who to heal first is critical. Follow this Triage Order:
- Priority 0: Your Own Survival. You can’t heal anyone if you’re dead. This isn't selfish—it's your job. Use cover and save a defensive cooldown for yourself.
- Priority 1: Keep the Vanguard Alive During Engage. When your tank steps in to create space, they need your full attention. Keeping them up enables everything else.
- Priority 2: Save the Teammate Being Hard-Focused. If a Duelist is diving your Duelist, shift heals and use utility to save them.
- Priority 3: Stabilize the Team After the Danger Window. Once the immediate threat is over, top everyone up for the next fight.
"Save the save." Your biggest defensive tools (like a protective ultimate or a powerful crowd control) should be reserved for real enemy commit windows—a full dive, an overtime touch, or an enemy ultimate chain. Using them during the initial poke phase is a waste.
Your impact in Marvel Rivals isn't measured in damage dealt, but in fights stabilized and teammates kept in the fight. Master the triangle, tether to your tank, know your hero's style, and always—always—save yourself first. Do that, and you’ll be the silent MVP that every team desperately needs.
How to Use High Ground and Environmental Mechanics in Marvel Rivals
Look up. In Marvel Rivals, the battle isn't just fought on the ground—it's won by controlling the space above and using the world itself as a weapon. This is where map knowledge becomes power, and understanding verticality separates good players from great ones. Let's break down how to dominate the high ground and leverage environmental mechanics to tilt every fight in your favor.
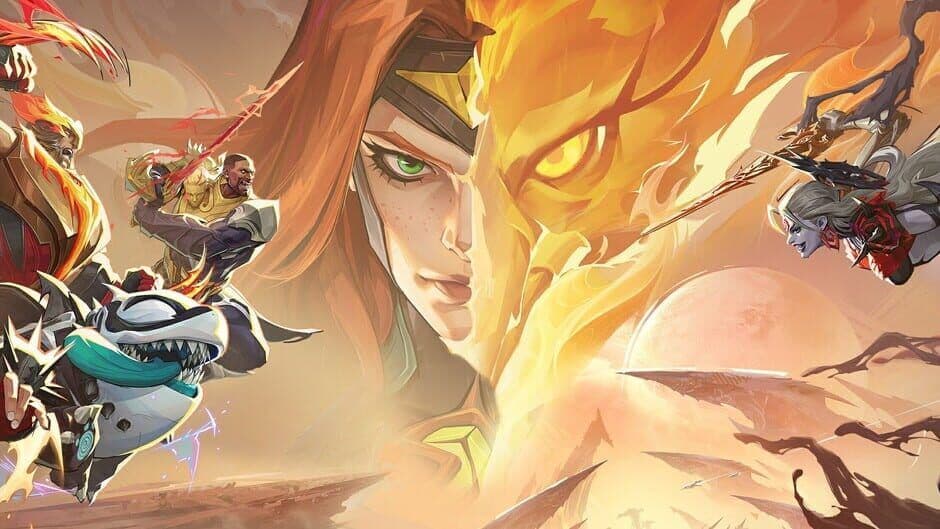
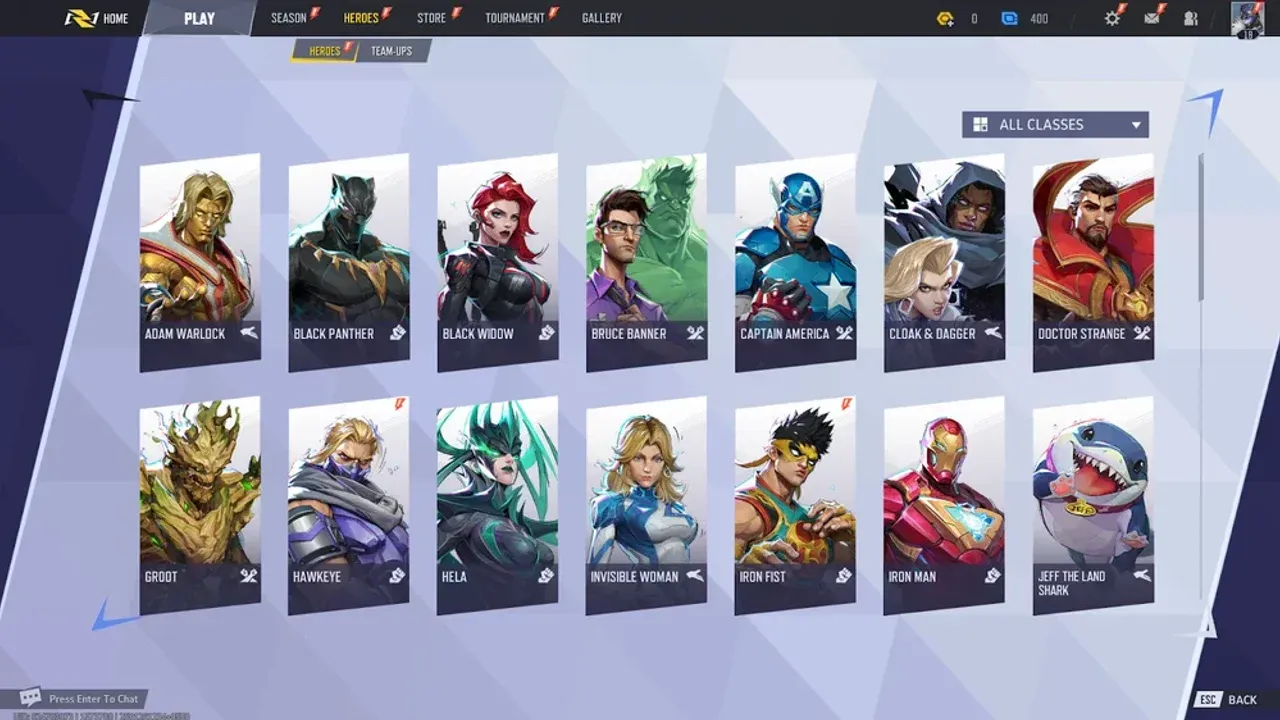
The roster of Marvel Rivals heroes
The Power of High Ground
Grabbing the high ground isn't just a nice-to-have; it's a massive force multiplier. You get better sightlines, make yourself a harder target, and can dictate the terms of engagement. But holding it incorrectly is a fast track back to the spawn room.
Your golden rule for high ground is the CAR Rule: any elevated position you take must provide Cover, a threatening Angle, and be within your hero's effective Range. If you’re missing one of these, you’re just a sitting duck. A sniper perch with no nearby wall is useless. A platform that only overlooks an empty alley is worthless. Always check for the CAR before you commit.
High ground is a temporary resource, not a permanent home. Use it in cycles of 3-8 seconds at a time. Peek, apply pressure, then drop or reposition before the enemy can coordinate to focus you down.
This leads directly to your Drop Plan. Before you even take the high ground, decide exactly where you’ll bail to if pressured. Which side will you drop off? Which piece of cover will you land behind? Having this pre-planned eliminates panic and turns a retreat into a strategic reposition.
Mastering Map Vision and Destruction
Marvel Rivals arenas are living battlefields. Walls crumble, routes open and close, and sightlines shift in an instant. To stay ahead, you need to master two key tools: information and destruction.
First, get in the habit of using Chrono Vision. Tap [B] on PC or [D-pad Right] on console to highlight all destructible terrain and interactive map elements. Use this when leaving spawn to plan a new route, or when stuck at a choke to find a surprise flank. It’s your cheat sheet for seeing the map’s hidden potential.
Second, understand that Destructible Cover fundamentally changes the fight. After a major brawl where abilities are flying, the geometry you started with is often gone. You must re-scout sightlines. That wall your team was using for safety might now be a gaping hole that gives the enemy a new angle onto your Strategist. Conversely, you can create your own advantages by blasting open a new lane or removing the cover an enemy sniper is hiding behind.
⚠️ Watch out: Destruction is a double-edged sword. Think before you shoot—breaking a wall might open a perfect sightline for you, but it could also obliterate the only cover protecting your backline from a flank.
Putting It All Together
The best players weave high ground and environmental play into a seamless rhythm. They use Chrono Vision to find a route up, apply the CAR Rule to hold a powerful angle for a few seconds, support their team’s push, then execute their Drop Plan to re-engage from a new, unexpected position on the low ground. They treat the map not as a static backdrop, but as a toolkit to be reshaped.
If a fight feels stuck, ask yourself: Is there a higher angle I can take to break it? Is there a wall I can destroy to open a new path? The answer is almost always yes. By mastering verticality and the dynamic environment, you control not just your hero, but the entire battlefield.
Marvel Rivals Objective Strategy: Domination, Convoy, and Convergence
In Marvel Rivals, winning a team fight feels incredible, but it’s meaningless if you lose the objective while chasing kills. This is where the game truly tests your discipline—knowing when to brawl and when to simply touch the point. The three core modes, Domination, Convoy, and Convergence, each demand a unique positional mindset that goes beyond basic combat. Your goal isn't just to out-shoot the enemy; it's to out-think them on the map.
Domination: Control the Perimeter, Not the Point
The biggest trap in Domination is the instinct to stack your entire team on the glowing capture zone. This turns you into a perfect target for area-of-effect ultimates and makes you predictable. The winning strategy is Domination Perimeter control.
Instead of crowding the center, fight on the edge of the zone and hold perimeter corners. Your Vanguard should anchor a strong corner near the objective, Duelists should take off-angles from adjacent high ground or doorways, and your Strategist should position where they can see both. This creates a lethal crossfire that punishes any enemy trying to step onto the point. Retaking a lost point requires the same discipline: use two different entry routes instead of funneling your whole team through one doomed doorway.
A common winning play is Back Capping—sending one mobile player to sneak onto the objective while the enemy team is distracted fighting your main force. If you see the enemy fully commit to a fight away from the point, don’t be afraid to be that sneaky hero.
Convoy: It's a Corner Fight
Convoy simplifies the battlefield: the fight happens around the payload. The key concept here is Convoy Corner Control. Your team’s goal, whether attacking or defending, is to control the corner directly in front of the moving payload.
As attackers, don’t just escort from behind. Your Vanguard needs to push up and hold the corner directly in front of the payload to prevent enemy touches. This creates a safe zone behind them for the payload to move. Duelists should hold side angles that watch that critical corner, ready to punish anyone who tries to contest. Defenders should use the same logic—contest from that forward corner with Touch Discipline, using the payload itself as a moving piece of cover, and retreat early to regroup if you lose the duel.
Convergence: Master the Phase Transition
Convergence is a two-part race that punishes teams who don’t adapt. The first capture phase is a brutal, close-quarters brawl. Positioning is tight: control safe entry routes and use corners to create crossfire on the point. However, the most common game-throwing mistake happens the moment you win the capture.
The instant the escort phase begins, the map opens up. If your team stands in the open celebrating the capture, you’re offering free eliminations to the respawning enemy. This is why Convergence Transitions are critical. You must reposition immediately after capture phase to avoid being picked off during escort. Have a pre-planned route to take new high ground or a defensive corner along the escort path. This isn’t a suggestion—it’s a mandatory reset that separates winning teams from those who blow a hard-earned advantage.
The Universal Rule: Touch Discipline
Across all modes, Touch Discipline is what separates strategic players from brawlers. It means contesting the objective at critical moments/overtime rather than standing on it permanently. A Vanguard blindly standing on the point is just feeding ultimate charge. Instead, time your touch for when it matters most: to stop an overtime tick, to secure the final percentage, or to force the enemy to make a desperate, mistake-prone push into your crossfire.
Mastering these objective-specific strategies turns chaotic matches into calculated victories. Control the space around the objective, win the corner fights, and always, always reset on phase transitions. With this mindset, you’re not just playing the heroes—you’re playing the map.
Essential Teamwork and Counterplay Tips for Marvel Rivals
The final piece of the puzzle in Marvel Rivals isn't about your aim or your hero—it's about how your team moves as one and shuts down the enemy's best player. This is where individual skill transforms into coordinated dominance. If you’ve ever felt like a meta hero was unstoppable or that your team was just a collection of individuals, this section is your turning point.
Here’s the trick: winning in Marvel Rivals is a dance of positioning, timing, and resource denial. You win by creating unanswerable problems for the enemy, not by winning every duel.
The Counterplay Mindset: Deny Their Win Condition
Every strong hero feels oppressive because they exploit a specific weakness. Your job is to identify and deny it. Instead of asking “How do I kill this hero?” ask “How do I stop their plan?”
The biggest mistake when countering a meta hero is tunnel vision. If the enemy has a dominant Devil Dinosaur, don’t just shoot the tank. Pressure his supports. If they have a Phoenix, don’t clump for her ultimate—spread out and save a denial tool.
Your counter plan should have three layers:
- Positioning Counter: Stand where their best angle doesn’t exist.
- Timing Counter: Fight when their key cooldown is down.
- Resource Counter: Answer their “big moment” with the correct defensive ability.
Essential Team Coordination Rules
Great teamwork isn't chaotic; it's built on simple, repeatable habits. Start with these two frameworks.
First, adopt the 1-2-3 Spacing Rule. This isn't about standing in a line, but forming a dynamic triangle. Your Vanguard should be the 1st point of contact, holding a corner. Your Duelist should be the 2nd angle, creating crossfire from a soft flank. Your Strategist should be the 3rd point, positioned for a safe sightline on both. This shape makes you harder to collapse on and naturally creates crossfires.
Second, master Two-Sentence Comms. Clear, short calls win games. State the problem, then state the plan. For example: “Flank threat right side. Duelist, peel backline.” Or: “High ground occupied. Vanguard, pressure main while we rotate left.” This cuts through the noise and gives everyone an immediate job.
Mastering Team-Up Synergies and Counters
Team-Up Abilities are a hidden meta layer. These passive and active synergies, like the one between Magneto and Scarlet Witch, can swing fights. Treat them like ultimates: they’re most devastating when you’re forced to fight in a tight space.
The counter? Don’t fight on their terms. If the enemy team is built around a powerful Team-Up, bait the window and re-engage. Show enough presence to force the activation, then back up for a few seconds. When their synergy window ends, that’s your signal to commit with everything you have.
The Art of the Strategic Reset
Not every fight needs to be to the death. A smart reset can turn a lost fight into a winning next one. One advanced technique is The Reset Trap. Here’s how it works: when your team is losing a brawl, coordinate a pretend retreat to a strong, pre-selected corner or choke point. As overconfident enemies chase, your team turns as one from cover, punishing their overextension. This turns their advantage into a vulnerable, staggered push.
This ties directly into a crucial support habit: Save the Save. As a Strategist, your big defensive ultimates and cooldowns are fight-winners. Don’t waste them during the initial poke phase. Hold them for the enemy’s true “commit windows”—like when their divers jump your backline, during an overtime touch, or when they chain their own ultimates. Using your immortality field or team shield after the enemy has committed all their resources is how you reverse a fight.
Putting It All Together: Your Pre-Fight Checklist
Before every major objective fight, run through this quick mental checklist with your team:
- Where is their win condition? (e.g., “Phoenix holding high ground”)
- What cooldown decides this fight? (e.g., “Magneto’s bubble”)
- Who is our answer? (e.g., “Our Hela holds her ultimate for Phoenix”)
- Who touches if it goes to overtime? (Assign this! Don’t leave it to chance.)
With these teamwork and counterplay principles, you’re not just reacting to the enemy—you’re dictating the terms of every fight. Remember, in Marvel Rivals, the team that creates the better problem wins. Go make their lives difficult.
Marvel Rivals Rewards and Progression: Units and Achievements
Your progress in Marvel Rivals isn’t just about winning fights—it’s about what you earn along the way. From unlocking stylish cosmetics to proving your strategic mastery, the game’s reward and progression systems are designed to keep you engaged and looking sharp. Let’s break down the currencies, achievements, and goals that turn your time into tangible rewards.
Understanding Units: Your Path to Cosmetics
The primary currency you’ll be chasing is Units. Unlike some games, Units are purely for cosmetic customization—they let you purchase unique Costumes for your favorite heroes. You can’t buy power or heroes with them, but they’re essential for personalizing your look.
The fastest way to build your Unit stash early is by completing Bootcamp Achievements for every hero. This not only floods your account with currency but also forces you to learn the basics of the entire roster, making you a more versatile teammate.
To maximize your gains, head to the Practice Range (found in the main menu under Practice) before jumping into matches. This is your safe space to experiment with ability sequences, identify optimal opening moves for each hero, and understand when to save cooldowns for defense. Mastering a hero’s kit here first means you’ll perform better in real matches, completing those Bootcamp Achievements faster.
The Achievement Grind: From Beginner to Master
Marvel Rivals features a deep achievement system with 161 total rewards, categorized to guide your growth. They’re more than just bragging rights; they teach you the game’s core systems.
Start with the Social and Discovery and Entry-Level Competitive achievements (each worth 5 points). These are designed to familiarize you with character backgrounds and basic gameplay loops. As you improve, tackle the Advanced Competitive Goals (10 points each), which require knowledge of multiple heroes and team composition principles. The most dedicated challenges are the Partnership Achievements, which often require specific hero combinations to unlock, encouraging you to explore Team-Up synergies.
Don’t overlook the Chronoverse Saga achievements either. These are tied to specific maps and require you to interact with unique environmental elements or storyline progressions, not just win standard matches. Completing all 161 achievements is a true badge of mastery, estimated to take 100-200 hours, and marks you as a knowledgeable and dedicated player.
Special Modes and Seasonal Rewards
Limited-time events like the Zombie Mode (a PvE experience) introduce their own progression loops. Here, you earn Moon Power by surviving waves, which is then spent between rounds on temporary upgrades called Khonshu’s Blessings. These blessings power up your hero for the next wave, creating a compelling risk-reward cycle. Higher difficulty tiers in these modes offer better XP multipliers and exclusive cosmetics, making the challenge worthwhile.
Setting Your Competitive Benchmark
While climbing the ranked ladder is its own reward, a meaningful skill threshold to aim for is Platinum Rank. This is where Marvel Rivals truly shifts from a simple team deathmatch feel to a strategic hero shooter. Reaching Platinum means you’ve internalized the fundamentals of positioning, objective timing, and hero synergy that the previous sections have covered.
With your Units funding a fresh look, your achievement list showcasing your dedication, and your rank reflecting your skill, you’re not just playing Marvel Rivals—you’re mastering it. Now get out there and earn your rewards.