How to Understand Redstone Power and Signal Strength in Minecraft
Alright, let's get this circuit powered up. In Minecraft, Redstone is the game’s electric current—a glowing dust that brings your world to life with moving parts, automated farms, and hidden secrets. But before you can build any of that, you need to understand the language Redstone speaks: signal strength, decay, and timing. This is the foundation every great Redstone engineer builds on.
Redstone signal strength diminishes by one for every block it travels.
The Language of Power: Signal Strength and Decay
Every Redstone signal has a strength, measured on a scale from 0 to 15. Think of it as the signal's volume: 15 is full power, the maximum shout a source can give, while 0 is off, complete silence. Levers, buttons, and Redstone Torches all output that maximum strength of 15.
However, that shout doesn't carry forever. When you lay down a line of Redstone Dust—your basic wire—the signal weakens as it travels. This is signal decay: the signal loses 1 strength per block it travels along the dust. After 15 blocks, the signal dies completely, dropping to 0. This is why your first contraption might mysteriously fail halfway across your base; the signal simply ran out of steam.
Use the visual glow of Redstone Dust for debugging. A brighter, more vibrant red indicates a higher signal strength (closer to 15), while a dimmer glow means it's weaker. This is your built-in meter for checking your circuit's health.
The Pulse of Your Machine: Redstone Ticks
Redstone doesn't just care about if a signal arrives, but when. The game measures these moments in Redstone ticks. There are 10 Redstone ticks per second, meaning each tick is 0.1 seconds long. Every component you add to a circuit—a repeater, a torch, a piston—adds at least 1 tick of delay as it processes the signal. This tiny pause is crucial. It’s what lets you sequence pistons to extend in order or create a clock that pulses on and off rhythmically. If your sticky piston isn't pulling a block back, it's often because the pulse was too short (just 1 tick); adding a repeater to lengthen the pulse usually fixes it.
Mastering these three core ideas—the 0-15 strength scale, the 15-block decay limit, and the tick-based timing—is like learning the alphabet before you write a novel. With this foundation, you’re ready to start connecting power sources to the amazing machines they can bring to life. Let's build.
Essential Redstone Power Sources and Inputs
Now that you understand how Redstone power flows in Minecraft, it's time to meet the components that start the party. Every great circuit begins with a trigger, and knowing your power sources is the difference between a flickering lamp and a fully automated fortress.
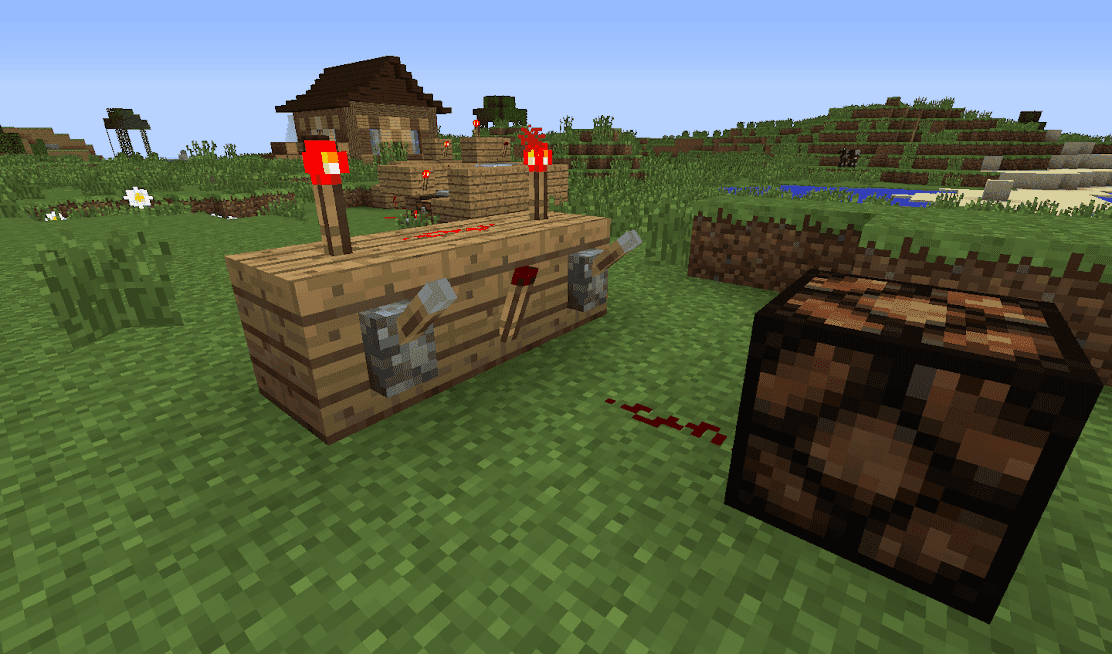
A fundamental redstone circuit showing the connection between a power source and a mechanism.
In this section, we’ll break down the essential switches, sensors, and buttons—your toolkit for bringing any Redstone build to life.
Your Core Power Sources
Think of these as your primary set of keys for unlocking different types of automation. Each one has a unique behavior that makes it perfect for specific tasks.
Lever
Crafted with 1 Stick + 1 Cobblestone, the Lever is your go-to for manual, permanent control. [Right-Click] to toggle it, and it provides a steady, unwavering signal strength of 15 until you flip it off. It’s perfect for master switches controlling your base lighting or the main power to a complex machine.
Stone Button & Wooden Button
Both provide a temporary pulse, but their timing is different. A Stone Button, crafted from 1 Stone, emits a 1-second (20-tick) pulse when you [Right-Click] it. Its wooden counterpart, crafted from 1 Wood Plank, lasts longer, offering a 1.5-second (30-tick) pulse. This extra time from the Wooden Button can be crucial for slower mechanisms like pistons that need a longer signal to fully extend and retract.
Use a stone button for quick triggers like opening a door, and save wooden buttons for circuits where you need that extra half-second for timing, like in a multi-step piston sequence.
Stone Pressure Plate & Wooden Pressure Plate
These plates turn physical presence into a Redstone signal. The Stone Pressure Plate, crafted from 2 Stone, activates only when a living entity (like you or a mob) stands on it. It’s great for automatic doors you don’t want pets or dropped items triggering.
The Wooden Pressure Plate, made from 2 Wood Planks, is more sensitive. It activates for both entities and dropped items. This makes it the ideal choice for item collection systems or traps that should spring when something is thrown onto them.
Advanced Environmental Sensors
For builds that react to the world itself, you need a smarter input. That’s where the Daylight Sensor comes in.
Crafted with 3 Glass + 3 Nether Quartz + 3 Wood Slabs, this block outputs a Redstone signal strength proportional to the amount of sky light hitting it, peaking at 15 at midday. [Right-Click] it to invert its mode, making it output power at night instead—perfect for automatic lighting systems that turn on at dusk. Just remember, it needs a direct, unobstructed view of the sky to work correctly.
With these inputs mastered, you have the first critical piece of any Redstone puzzle. You know how to start a signal; next, we'll learn how to shape, extend, and direct it.
How to Use Transmission Components: Dust, Repeaters, and Comparators
Now you've got the power—let's move it. In Minecraft, your signal is only as good as its journey. This section is about mastering the transmission: stretching a signal across vast distances, controlling its timing, and giving it the logic to make decisions. We’ll break down the three components that act as the nerves and brain of your circuits.
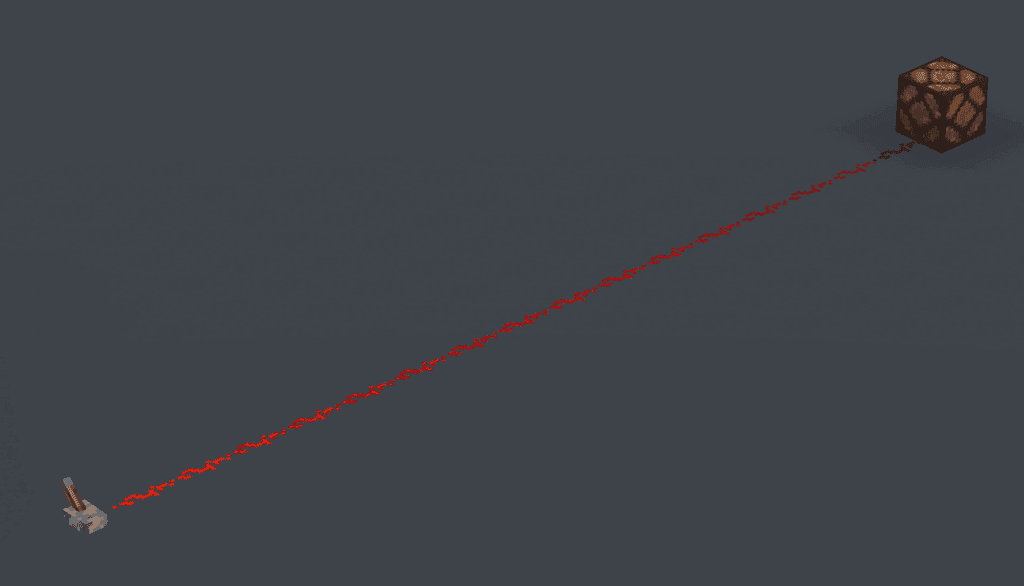
Redstone dust can carry a signal up to 15 blocks before requiring a repeater.
Understanding Your Transmission Toolkit
Your basic Redstone Dust is your wire, but it has limits. It connects automatically to adjacent dust and components on the same level or one block up or down, but not diagonally. More critically, its signal dies after traveling 15 blocks. This is where your specialist tools come in.
First, the Redstone Repeater. Crafted with 2 Redstone Torches, 1 Redstone, and 3 Stone, this is your signal's lifeline. It does three jobs: it refreshes a fading signal back to full strength 15, it adds a crucial delay of 1 to 4 ticks (adjustable by right-clicking), and it forces a signal to flow in one direction only, preventing messy feedback in your circuits.
Think of a repeater as a checkpoint. Place one every 12-14 blocks of dust to keep your signal strong and prevent it from dying unexpectedly.
Then there's the Redstone Comparator, the brainy cousin. Crafted with 3 Redstone Torches, 3 Stone, and 1 Nether Quartz, it reads data instead of just power. Right-click to toggle between its two modes. In Measure mode (front torch off), it outputs a signal strength based on container fullness—perfect for item sorters. In Subtract mode (front torch on), it subtracts the signal from its sides from the signal at its back, allowing for precise signal math.
Powering Blocks: Strong vs. Weak
This is the trick that unlocks compact, clever designs. When you power a solid block, you're either giving it Strong Power or Weak Power.
- Strong Powering happens when a component like a Redstone Repeater or a Redstone Torch outputs directly into a block. A strongly powered block can do two things: it activates any mechanism attached to it (like a door or piston) and it can power Redstone Dust placed on adjacent blocks.
- Weak Powering occurs when Redstone Dust leads into a block. A weakly powered block can still activate adjacent mechanisms, but it cannot power adjacent Redstone Dust.
⚠️ Watch out: This distinction is why sometimes a piston fires when you think it shouldn't. Always check if the block it's attached to is being strongly powered from an unexpected source.
Putting It All Together
Let’s see how this works in practice. Say you want a hidden lamp that only lights up when two separate levers are flipped. You’d use dust to carry the signal from each lever to a comparator in subtract mode, creating a simple logic check. Or, to send a signal straight up a wall, you could create a "torch ladder": place a block, put a torch on its side, place a block on top of that torch, and repeat. Each torch powers the block above it, carrying the signal vertically.
Trust me, once you internalize the difference between strong and weak power and get comfortable placing repeaters and comparators, you’ll stop fighting your circuits and start commanding them. You're no longer just connecting points A and B—you're sculpting the signal's path, speed, and intelligence.
Mastering Redstone Logic Gates and Inversion
This is where your Minecraft journey transforms from building structures to programming machines. Logic gates are the foundation of all advanced Redstone automation, letting you create circuits that make decisions based on multiple inputs. Think of them as the game’s version of “if-then” statements—they’re how you build everything from a two-key security door to a complex item sorter.
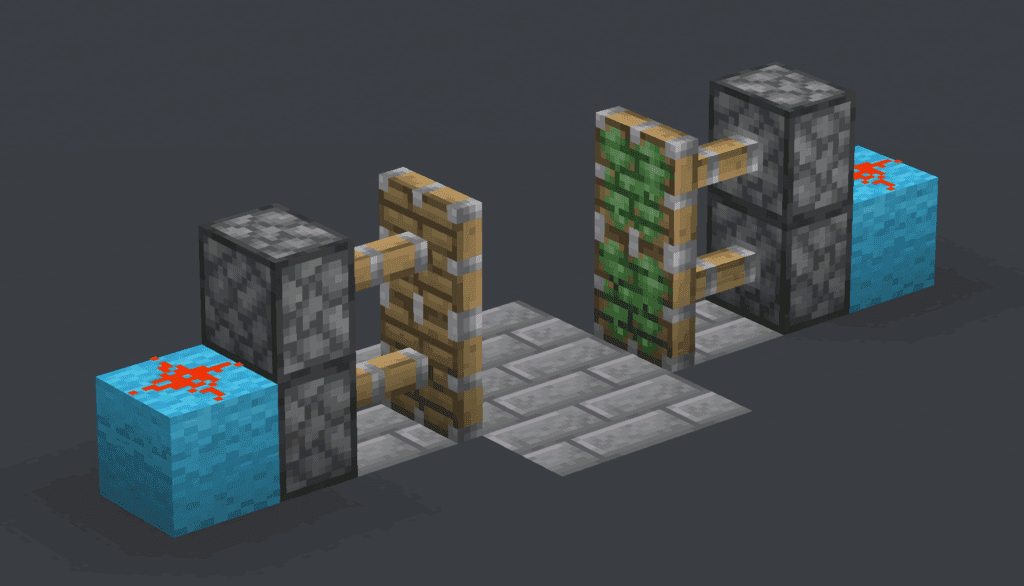
A standard AND gate configuration in Minecraft.
The Power of Inversion: The NOT Gate
Your most essential tool for creating logic is the humble Redstone Torch. Crafted from 1 Stick + 1 Redstone, it’s a constant power source, but its true magic is inverting signals. When you place a torch on a block and then power that block, the torch turns OFF. This creates a NOT Gate, or inverter.
A Redstone Torch on a powered block is the simplest logic check. It’s your go-to for creating opposite behaviors, like a lamp that turns ON when a lever is OFF.
The NOT gate is your fundamental building block. If the input is ON, the output is OFF, and vice-versa. This single behavior is the key to unlocking all more complex logic.
Combining Conditions: The AND Gate
An AND Gate requires multiple conditions to be met. Its output is ON only when ALL of its inputs are ON. This is perfect for creating a secure door that only opens when two separate levers are flipped, or for an automated farm that only harvests when a crop is grown and there’s room in the chest.
You build an AND gate by strategically placing Redstone Torches and dust. The common design uses torches in a line where all must be powered (turned off) for the final signal to pass through. It’s a bit more complex than a NOT gate, but once you see the pattern—where powering every input block deactivates a chain of torches—you’ll understand how it enforces that “all or nothing” rule.
Creating Options: The OR Gate
Sometimes you want a circuit that reacts to any trigger, not all of them. That’s an OR Gate. Its output is ON if ANY input is ON (including when multiple are ON). This is great for convenience features, like room lighting you can control from multiple switches.
Building an OR gate is often simpler than an AND gate. You can route multiple input lines of Redstone Dust to merge at a single point. Since dust carries power from any direction, if any of those input lines is active, the merged line will be active, creating the OR logic.
Exclusive Choices: The XOR Gate
For more precise control, you need an XOR Gate (Exclusive OR). This is the trickiest of the basic gates, but incredibly useful. Its output is ON only when exactly one input is ON. If both inputs are OFF or both are ON, the output stays OFF.
Imagine a light switch at the top and bottom of a staircase—flipping either one toggles the light, but if both are in the same position, the light is off. That’s XOR logic. Building it in Minecraft involves combining other gates (like OR, AND, and NOT) to create that exclusive condition. It’s a fantastic project once you’re comfortable with the basics, leading to clever puzzles and advanced mechanisms.
With these four gates—NOT, AND, OR, and XOR—you have the complete toolkit to start designing circuits that think. Combine them, chain them, and you’re no longer just wiring power; you’re writing logic into the world of Minecraft itself.
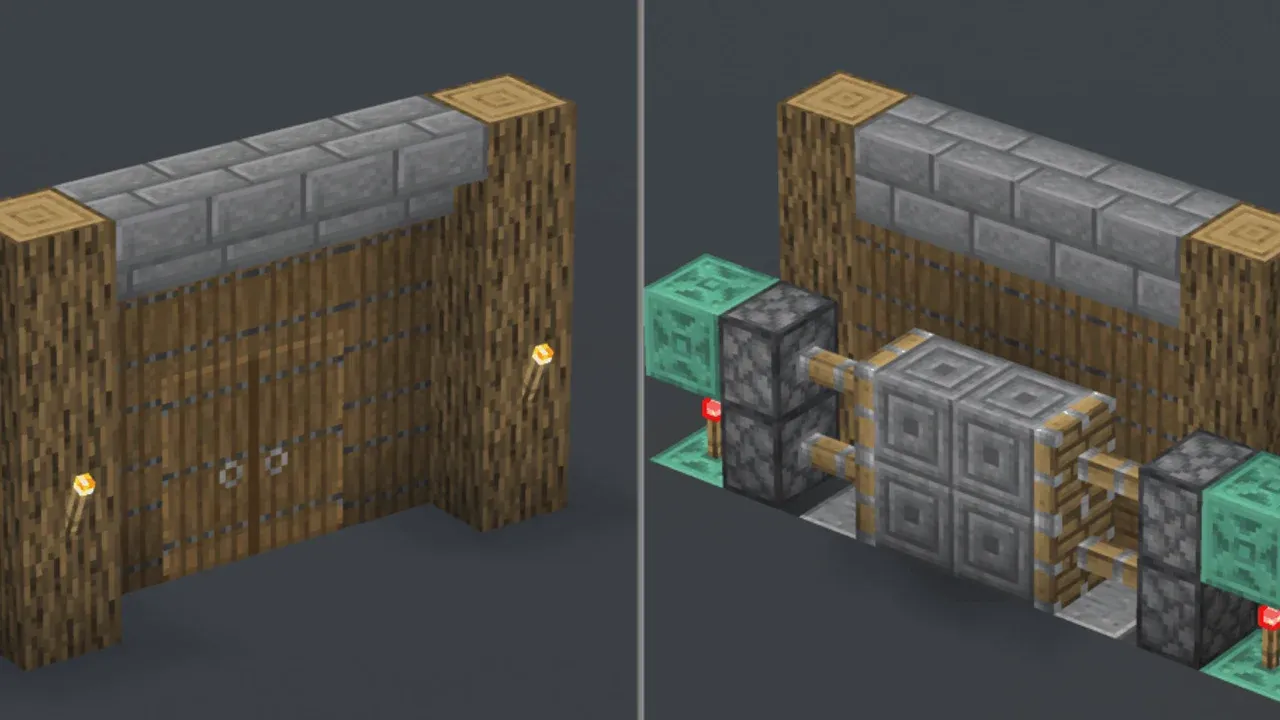
How to Build a Hidden Piston Door in Minecraft
Time to put theory into practice. In Minecraft, nothing feels more satisfying than stepping up to a blank wall, pressing a hidden switch, and watching it seamlessly slide open. The 2x2 Piston Door is your classic secret entrance, and while it might look complex, it teaches you everything about signal routing, timing, and the magic of Sticky Pistons.
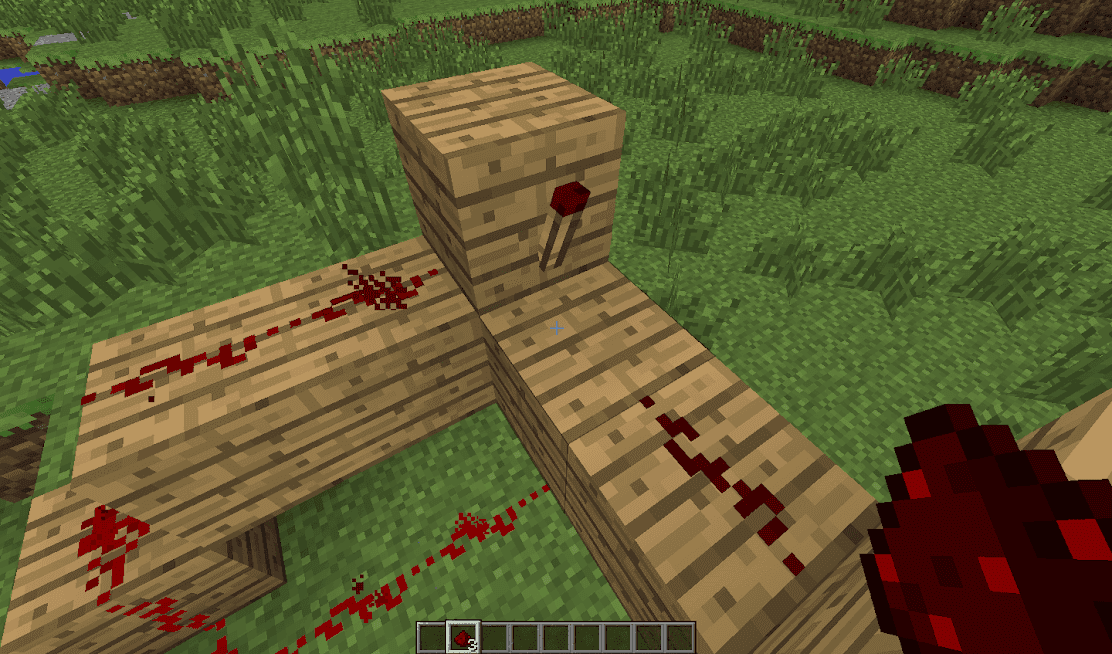
Stack two sticky pistons on each side of the doorway.
This build is a rite of passage for any budding Redstone engineer. It combines everything you've learned about power and logic into a single, functional masterpiece. Don't worry if it seems daunting—just follow each step, and you'll have a working hidden door before you know it.
Step-by-Step Build Guide
First, gather your materials. You'll need:
- 4 Sticky Pistons (crafted with 1 Piston + 1 Slimeball)
- 12 Redstone Dust
- 2 Redstone Torches
- 4 Pressure Plates (Stone recommended to avoid accidental item triggers)
- 4 solid blocks for the door itself (any block works, but Stone or Wood Planks are common)
- A stack of extra building blocks to cover your wiring
Now, let's build. Find a flat wall where you want your door.
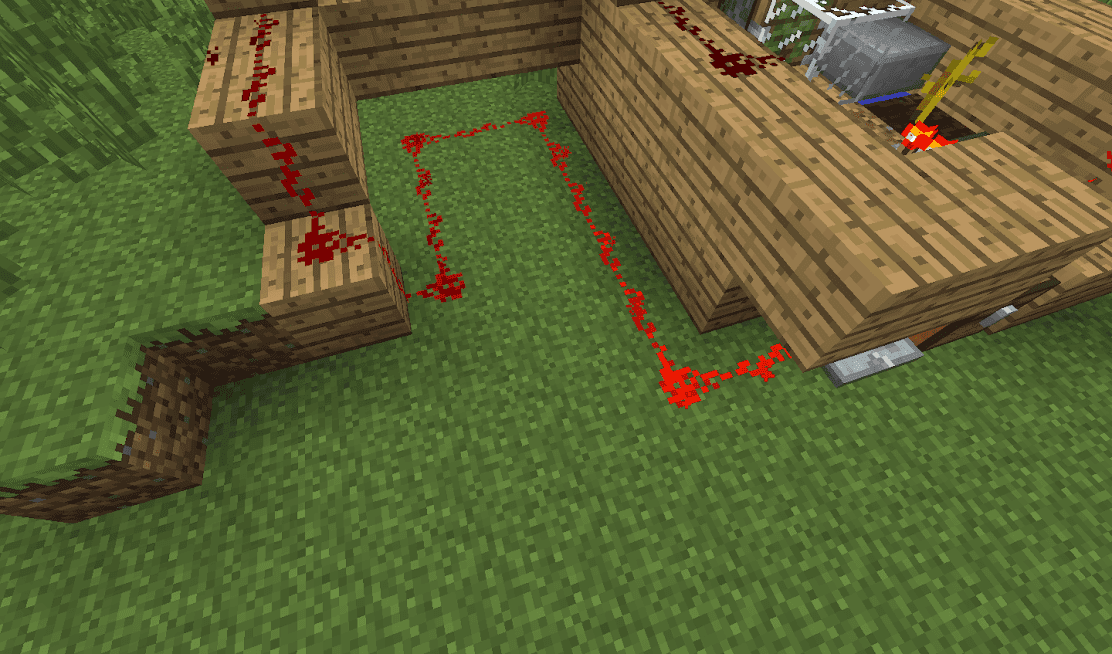
- Excavate the Trench: Dig a hole that is 2 blocks wide, 3 blocks long, and 2 blocks deep directly in front of your chosen wall spot. This is your wiring cavity.
- Lay the Central Wiring: In the bottom of this trench, dig a 1-block-wide, 2-block-long channel down the center. Place 2 pieces of Redstone Dust in this channel.
- Build the Torch Towers: On the inner wall at each end of your trench, place a solid block. On the side of each of these blocks facing the trench, place a Redstone Torch. These torches are currently ON, which will keep your door closed by default.
- Cover and Connect: Place a block on top of each torch. On top of these new blocks, place one more piece of Redstone Dust on each. This dust is now powered by the block below it, which is strongly powered by the torch.
- Place the Pistons: On top of the Redstone Dust you just placed, position your 4 Sticky Pistons. They should be facing each other, two on each side. Because the block beneath them is powered, the pistons will extend immediately, pushing their arms out.
- Build the Door: Place your 4 chosen door blocks on the faces of the extended pistons. They'll stick.
- Conceal the Mechanism: Use your spare building blocks to fill in the trench, covering all the Redstone. The ground should be flush again.
- Add the Triggers: Finally, place 2 Pressure Plates on the floor directly in front of the door blocks, and 2 more on the floor directly behind them, on the inside.
Before you cover everything, test the mechanism by stepping on a pressure plate. The Redstone signal from the plate should travel through the block beneath it, powering the block your side torch is on. This turns the torch OFF, cutting power to the piston above and causing it to retract, pulling the door block with it.
Understanding the Redstone Magic
Here’s what’s happening under the floor: Your Redstone Torches act as permanent power sources, keeping the pistons extended (door closed). When you step on a Pressure Plate, it sends a signal down into the block it's sitting on. That block is directly adjacent to the block your torch is attached to, so it "strongly powers" it.
This is where the inversion happens. A Redstone Torch turns OFF when the block it's mounted on is powered. So, the powered block turns the torch off, breaking the circuit to the piston above. With no power, the Sticky Piston retracts, pulling the door block back into the wall. Step off the plate, the torch turns back on, and the door closes.
⚠️ Watch Out for Torch Burnout: If your door starts flickering wildly and the torches emit smoke, you've created a feedback loop. This happens if a torch is powering a circuit that eventually powers the block it's on. In this build, that shouldn't happen if you've wired it correctly. If it does, double-check that your Redstone Dust isn't accidentally connecting back to the torch's base block.
A Note for Java Edition Players
If you're playing Minecraft: Java Edition, be aware of a unique behavior called Quasi-Connectivity. It’s a quirk where pistons, droppers, and dispensers can be activated by a Redstone signal powering the block diagonally above them, as if they were a door. While our door design doesn't rely on this, it's a famous cause of unexpected piston activations in other builds. If a piston in your future contraptions fires when it shouldn't, check for a powered block located two blocks above it.
With the last block placed, step back and admire your work. You’ve just built a fully functional, hidden entrance using core Redstone principles. This 2x2 door is more than just a cool base feature—it's proof you understand how to route power, invert signals, and control mechanisms. Now that you've mastered the classic, you're ready to design even more impressive automated wonders.
Automating Your World: Clocks and Observer Farms
Now that you’ve mastered the basics, it’s time to put that knowledge to work and make your Minecraft world run itself. This is where Redstone engineering truly shines, letting you automate tedious tasks so you can focus on the fun stuff. Two core concepts will unlock this automation: reliable Redstone Clocks to create repeating pulses, and clever Observer Farms that harvest crops the moment they grow.
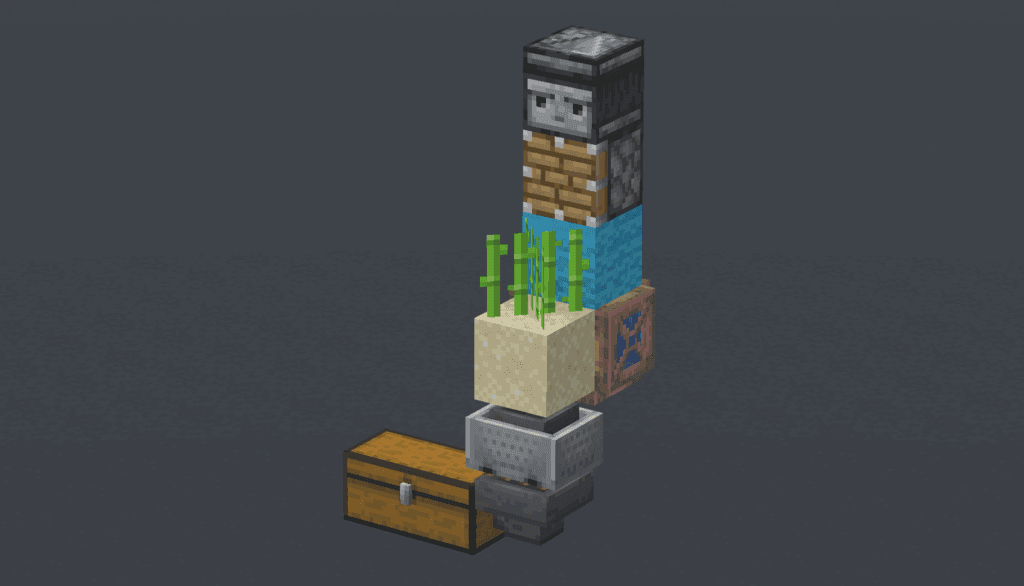
An observer detecting growth to trigger a harvesting piston.
Building Your First Redstone Clock
A Redstone Clock is a simple circuit that generates a continuous on-and-off pulse without you touching it. It’s the heartbeat of any timed machine, from flashing lights to automated droppers.
The most reliable design is the Repeater Clock. Here’s how to build it:
- Place two Redstone Repeaters facing opposite directions, with one block of space between them.
- Connect the output side of each repeater to the input side of the other using Redstone Dust, forming a loop.
- To start the pulse, you need to briefly power one piece of the dust in the loop. The easiest way is to quickly place and then break a Redstone Torch next to any dust segment.
Once activated, the signal will race around the loop indefinitely. You can adjust the pulse speed by right-clicking the repeaters to change their delay from 1 to 4 ticks.
For slower, more controlled clocks, add more repeaters to the loop. This creates a longer path for the signal to travel, resulting in a longer pause between pulses.
Automating Harvests with Observer Farms
While clocks are great for timing, the Observer block is your key to event-driven automation. This block watches the space in front of its “face” and emits a short, 2-tick pulse from the Red Dot on its back whenever it detects a block update—like a pumpkin or melon growing to full size.
This makes it perfect for a fully automatic Observer Crop Farm. The classic setup for pumpkins and melons is beautifully simple:
- Plant your stems on farmland with an air space next to them for the fruit to grow into.
- Place an Observer so its face is watching that air space.
- Position a Piston (regular or sticky) so that when it extends, it will break the mature fruit. Connect the Observer’s red-dot output side to the piston with Redstone Dust.
- Place a Hopper (and a chest beneath it) below the farmland to catch all the harvested items.
The moment a fruit pops into existence, the Observer sees it, triggers the piston to break it, and the hopper collects the drops. It’s 100% automatic and 100% efficient.
Managing Your Loot with Hoppers
Speaking of collection, the Hopper is the unsung hero of automation. Crafted with 5 Iron Ingots and 1 Chest, this block funnels items from the block space above it into any container it’s pointing into. In your farm, it silently grabs the melon slices or pumpkins off the ground and delivers them straight to your chest.
Remember, a Hopper’s movement can be stopped by giving it a Redstone signal—this “locks” it, which is a crucial feature for building item sorters (a topic for another day).
Putting It All Together
With a clock for timing and an Observer for reaction, there’s almost no limit to what you can automate. Start with a simple pumpkin farm to see the magic happen, then try using a slow clock to automatically dispense bonemeal over a crop field. The rhythm of your autonomous base begins with these two fundamental circuits.
⚠️ Watch out: When building with Observers, double-check the direction. The face must be looking directly at the block you want to monitor, and you must connect your output circuit to the red-dot side on its back.
Trust me, once you’ve set up your first self-harvesting farm and walked away with a chest full of goodies, you’ll see Minecraft in a whole new, incredibly convenient light. Let’s get building.
Minecraft 1.21 Redstone Features: Crafters and Copper Bulbs
The Tricky Trials update wasn't just about new mobs—it quietly revolutionized Redstone automation. With the Crafter, Copper Bulbs, and Copper Doors, Minecraft 1.21 introduced components that make building smarter, more reliable contraptions easier than ever. This isn't just an update; it's a toolkit upgrade for every aspiring engineer.

Redstone engineering is the foundation of Minecraft automation.
Let's dive into these new toys.
The Crafter: Your Automated Assembly Line
The Crafter is exactly what it sounds like: a block that crafts for you. It accepts items via hoppers and produces the crafted result upon receiving a Redstone pulse. This is a game-changer for fully automated farms, like those for pumpkins or melons, where you can now have the produce instantly turned into pies or slices without a single click.
The real power of the Crafter comes from its ability to lock specific slots. [Right-Click] any slot in its interface to disable it. By locking all but the essential slots for a recipe, you can feed in bulk ingredients from a farm and ensure it only crafts exactly what you want, preventing wasted resources and incorrect outputs.
Copper Bulbs: Toggleable Memory for Your Circuits
Forget the on/off binary of a Redstone lamp. The Copper Bulb introduces state. It toggles its state with each Redstone pulse it receives—one pulse turns it on, the next turns it off. This makes it ideal for memory circuits, indicator lights, or any build where you need a component to "remember" its last state without a constant signal.
Think of it as a light switch you can control remotely. This behavior opens up cleaner designs for things like multi-stage alerts, where a single observer pulse can flip a room's lighting state, or for compact binary counters that track events in your farm.
Copper Doors: Secure, Signal-Controlled Access
Copper Doors (and their trapdoor counterparts) function similarly to Iron Doors—they require a Redstone signal to open. This makes them perfect for fortified bases, vaults, or any area where you want access strictly controlled by your circuit logic, not by a wandering villager bumping into a wooden door.
Integrate them with a pressure plate, a hidden button, or a complex logic gate sequence for that satisfying, high-security feel. They're a stylish and functional upgrade for any Redstone-controlled entrance.
With these three additions, your automation toolbox just got a major boost. The Crafter handles the tedious work, Copper Bulbs add elegant memory, and Copper Doors provide secure control. It's time to rethink your old designs—Minecraft's automation future just got brighter.
Troubleshooting and Common Redstone Mistakes
Even the most brilliant Redstone engineer has stared at a silent piston or a dead lamp and asked, "Why isn't this working?" In Minecraft, the gap between a brilliant idea and a functioning machine is often just a simple, overlooked mistake. This final section is your diagnostic toolkit—let's fix those stubborn circuits so your creations come to life.
Weak signals at the end of a long wire may fail to trigger components.
Signal Fades: The 15-Block Limit
Your first and most common culprit is signal decay. Remember, a line of Redstone Dust can only carry a signal for 15 blocks before it dies completely. If your machine works perfectly for a short run but fails on a longer one, this is almost certainly the issue.
If you're building a long circuit, place a Redstone Repeater every 12-14 blocks as a rule of thumb. This not only refreshes the signal to full strength but also prevents any chance of failure right at the 15-block mark.
Direction Matters: Facing the Right Way
Many components in Minecraft have a specific orientation. A single backward-facing piece can break your entire build.
- Redstone Repeaters: The small moving bars must face toward the next component in your circuit. Power flows in through the back and out the front.
- Observers: The "face" with the observing eye must point at the block you want to monitor. The red dot on the opposite side is the output.
- Hoppers, Droppers, and Dispensers: The output spout (the narrow end) points in the direction items will travel. You can often tell a hopper is backwards if items aren't flowing into your chest.
Always double-check the arrows and faces on your components. If a mechanism that should be triggering isn't, this is the first thing to verify.
The Edition Divide: Java vs. Bedrock
This is a critical, non-negotiable check. Minecraft: Java Edition and Minecraft: Bedrock Edition handle some Redstone mechanics differently. If you're following a tutorial and your build fails, confirm the edition it was made for.
- Quasi-Connectivity (Java Edition): This is a quirk (originally a bug) where pistons, dispensers, and droppers can be activated by a power source located one block diagonally above them, even without a direct connection. This allows for incredibly compact circuits in Java but will not work in Bedrock.
- Piston Timing (Bedrock Edition): Pistons in Bedrock are generally faster and can behave more randomly. A 1-tick pulse that causes a sticky piston to leave its block in Java might still retract it in Bedrock. This is especially important for flying machines and precise timings.
If your complex piston contraption from a YouTube tutorial is acting weird, the edition difference is likely why.
The Ultimate Safety Net: Creative Mode Testing
Before you spend your hard-earned diamonds and iron on a massive sorting system or intricate door in Survival, build and debug it in Creative mode first. This is the single best practice for any ambitious Redstone project. It lets you:
- Experiment with layouts without wasting resources.
- Test timing and redstone ticks without pressure.
- Isolate and fix problems in a controlled environment.
- Perfect the design, then recreate it in your Survival world with confidence.
Trust me, spending an hour troubleshooting in Creative saves countless hours of frustration and resource-gathering in Survival.
With these troubleshooting steps in your back pocket, you can diagnose and fix almost any Redstone problem. Remember, every broken circuit is just a puzzle waiting to be solved. Now get back out there and make your automated world a reality