
Minecraft Survival Ranking Criteria and Core Mechanics
Before we can rank survival strategies, we must establish the playing field and the rules of the game. Survival in Minecraft is a race against two clocks: the 20-minute day-night cycle and the invisible depletion of your saturation. Every decision, from the first punch on a tree to the layout of your mega-farm, is judged by its efficiency in preserving your life and accelerating your progress. The strategies that follow are ranked not by their complexity, but by their foundational importance and their return on investment in terms of safety, resource gain, and time saved.
This ranking is built on two core pillars:
- Efficiency: How quickly does this action secure essential resources or provide a critical advantage?
- Safety: To what degree does this action mitigate the ever-present threats of mobs, hunger, and environmental hazards?
With these criteria in mind, let's examine the fundamental systems and the strategies that master them.
1. The 20-Minute Sprint
Why it’s here: This is the immutable countdown that defines early-game panic and mid-game planning. You have approximately 10 minutes of safe daylight, followed by 10 minutes of darkness where hostile mobs spawn. Ranking strategies begins with acknowledging this constraint. The most efficient plans are those that convert those first 10 minutes into a secure, productive night. A strategy that leaves you exposed at dusk is, by definition, a failing one. This cycle dictates everything from your initial wood gathering pace to the location of your first shelter.
2. The Hidden Saturation Meter
Why it’s here: While the hunger bar (10 drumsticks) is visible, the saturation mechanic is the true engine of survival. Think of saturation as an invisible buffer on top of your hunger. Actions like sprinting (0.1 exhaustion/meter) and, most critically, natural health regeneration (a whopping 6.0 exhaustion per 1 HP healed) drain saturation first. Only when it's empty does your visible hunger bar deplete. This is why you can sprint a long distance without seeing your hunger drop—you’re burning through saturation. A top-tier survival strategy prioritizes high-saturation foods like Cooked Porkchop or Steak (12.8 saturation) not just to fill hunger, but to create a large buffer that enables rapid healing and sustained sprinting without constant eating.
3. The First-Night Shelter Trifecta
Why it’s here: This is your first major test in efficiency and safety. The three archetypes represent a risk-reward spectrum:
- The Dugout: Carving a 3x3x3 room into a hillside. Most efficient on materials (zero building blocks needed), maximally safe using terrain as armor.
- The Surface Hut: A 4x4 or 5x5 box of dirt/cobblestone/planks. Moderately efficient, very safe if fully enclosed and lit, but consumes gathered materials.
- The Pillar Escape: Building a column 15-20 blocks high. Least efficient (wastes blocks, risky to descend), last-resort safety only against ground mobs.
The Dugout is often ranked highest for pure first-night efficiency, as it turns gathered stone into tools instead of walls.
4. The Stone Tool Rush
Why it’s here: This is the most critical efficiency upgrade in the game. The sequence—punch wood, craft planks, make crafting table, craft wooden pickaxe, mine 20 cobblestone, craft stone tools—is non-negotiable. Stone tools mine over twice as fast as wood and have significantly more durability. Spending more than a minute with a wooden pickaxe after finding stone is inefficient. The stone sword is your first real defense, the stone axe accelerates wood gathering, and the stone pickaxe unlocks the iron era.
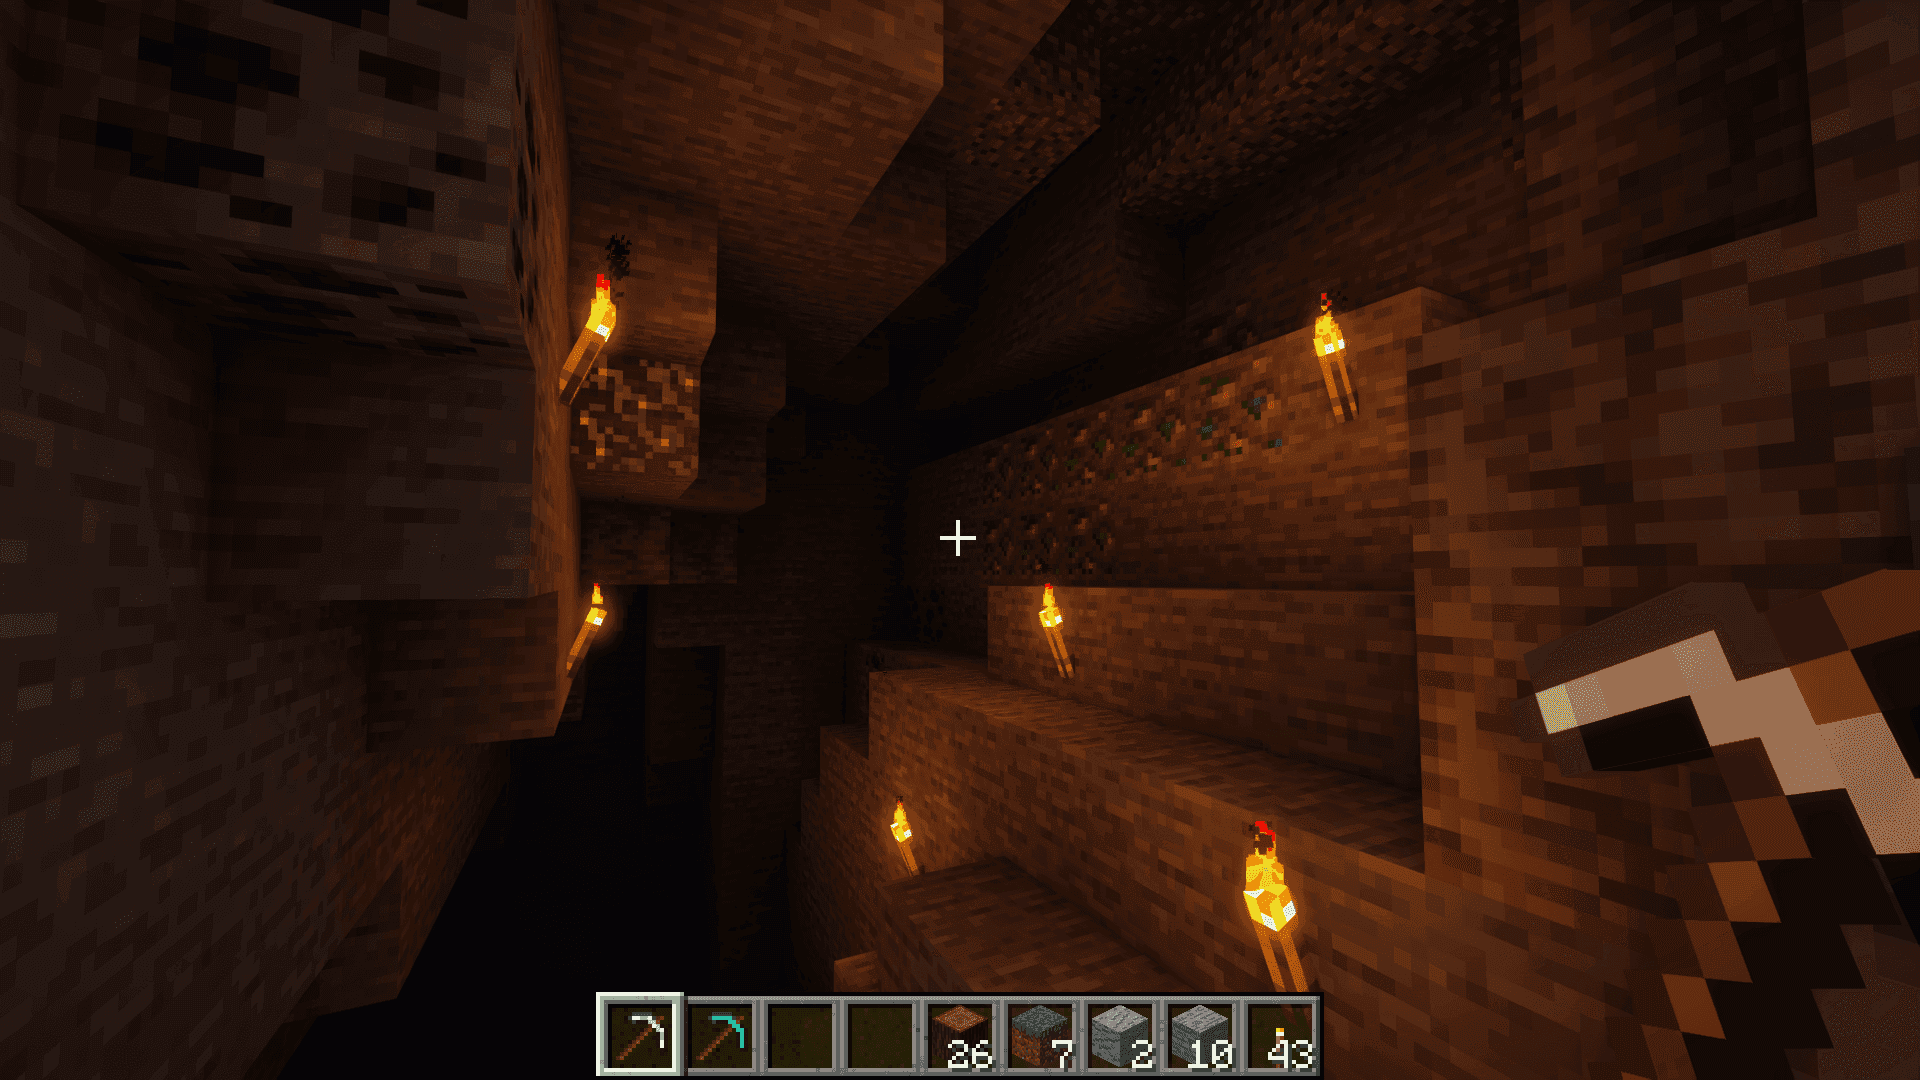
5. Strategic Torch Placement
Why it’s here: Safety through proactive denial. Hostile mobs spawn in light level 0. A single torch creates light level 14. The strategy isn't just to hold torches; it's to place them to claim territory. This means lighting your shelter interior, then creating a perimeter "ring of safety" around your base with torches placed every 10-15 blocks. In mines, placing torches on one consistent side (e.g., always on the right wall as you descend) turns a maze into a navigable, mob-free highway. It’s a minimal resource investment (charcoal + sticks) for maximum safety payoff.
6. The Bed Spawn Lock
Why it’s here: The single greatest risk mitigation tool. Crafting a bed (3 wool, 3 planks) does two things: it lets you skip the dangerous night entirely, and it sets your personal spawn point. Without it, death sends you back to the world's original spawn, potentially miles from your base and items. A strategy that secures wool (from 3 sheep) and a bed before the first night is S-tier in safety. It transforms the game from a nightly siege into a controllable cycle of daytime productivity.
7. The Furnace & Cooked Food Priority
Why it’s here: This addresses both safety (food poisoning) and efficiency (saturation). Eating raw chicken risks Hunger effect; rotten flesh has an 80% chance of inflicting it. A furnace (8 cobblestone) turns risky food into safe, high-value fuel. Cooked meat restores double the hunger of raw meat and provides superior saturation. Furthermore, smelting logs into charcoal provides a coal alternative for torches. Securing a furnace and cooked food before your first mining trip is more important than having a lavish base.
8. The Water Bucket Lifesaver
Why it’s here: Arguably the most versatile safety tool in the game, yet often overlooked by beginners. A single iron ingot crafts a bucket. With water, you can:
- Negate all fall damage by placing water at your feet before impact.
- Create safe pathways across lava lakes.
- Extinguish yourself or structures on fire.
- Create infinite water sources for farming.
- Climb vertical shafts.
Carrying a water bucket transforms dangerous terrain from a threat into a manageable obstacle, ranking it extremely high for advanced safety.
9. The Coordinated Navigation Baseline
Why it’s here: Efficiency is nullified by being lost. In Java Edition, pressing F3 brings up the debug screen, showing your X, Y, Z coordinates. Noting your base's coordinates (or writing them down) is not cheating; it's fundamental logistics. It allows precise return trips, systematic exploration, and the ability to convey locations to others in multiplayer. A survival strategy that doesn't use coordinates is like sailing without a compass—you might get lucky, but you're not in control.
10. The "Essentials-Only" Initial Inventory
Why it’s here: This is a meta-strategy for efficiency. Your early inventory is precious. Before any major expedition, your hotbar should be curated for survival, not hoarding. A recommended loadout includes: a weapon (sword/axe), a pickaxe, food (cooked meat), torches (at least 16), blocks (cobblestone/dirt for building, bridging, and pillar-escaping), a water bucket, and optionally a shield. Storing everything else in a chest at base prevents catastrophic loss upon death and streamlines decision-making under pressure.
The Takeaway: Surviving in Minecraft isn't about doing one thing perfectly; it's about executing a sequence of interlocking, efficient actions that each bolster your safety. The top-ranked strategies are those that, like the saturation mechanic itself, provide a hidden buffer—against time, against mobs, against starvation, and against your own mistakes. Master these ten, and you've built an unshakeable foundation. Now, let's examine the specific rules and techniques that protect you from the world's most immediate dangers.
The Never Dig Straight Down Rule
This is the single most famous rule in Minecraft survival, a mantra repeated to every new player since the game’s inception. It is the foundational law of safe exploration, a direct and brutal lesson in risk management. The rule exists because the world beneath your feet is a chaotic, three-dimensional labyrinth of caves, ravines, and lava lakes. Digging a single-block vertical shaft is an act of blind faith—you have no way of knowing if the block beneath your feet is solid stone or a 50-block drop into a pit of monsters, or worse, the open air above a bubbling lava pool. Violating this rule is the quickest way to turn a promising mining trip into a catastrophic loss of gear and progress. While it sounds like an absolute commandment, its true mastery lies in understanding when and how it can be strategically broken.
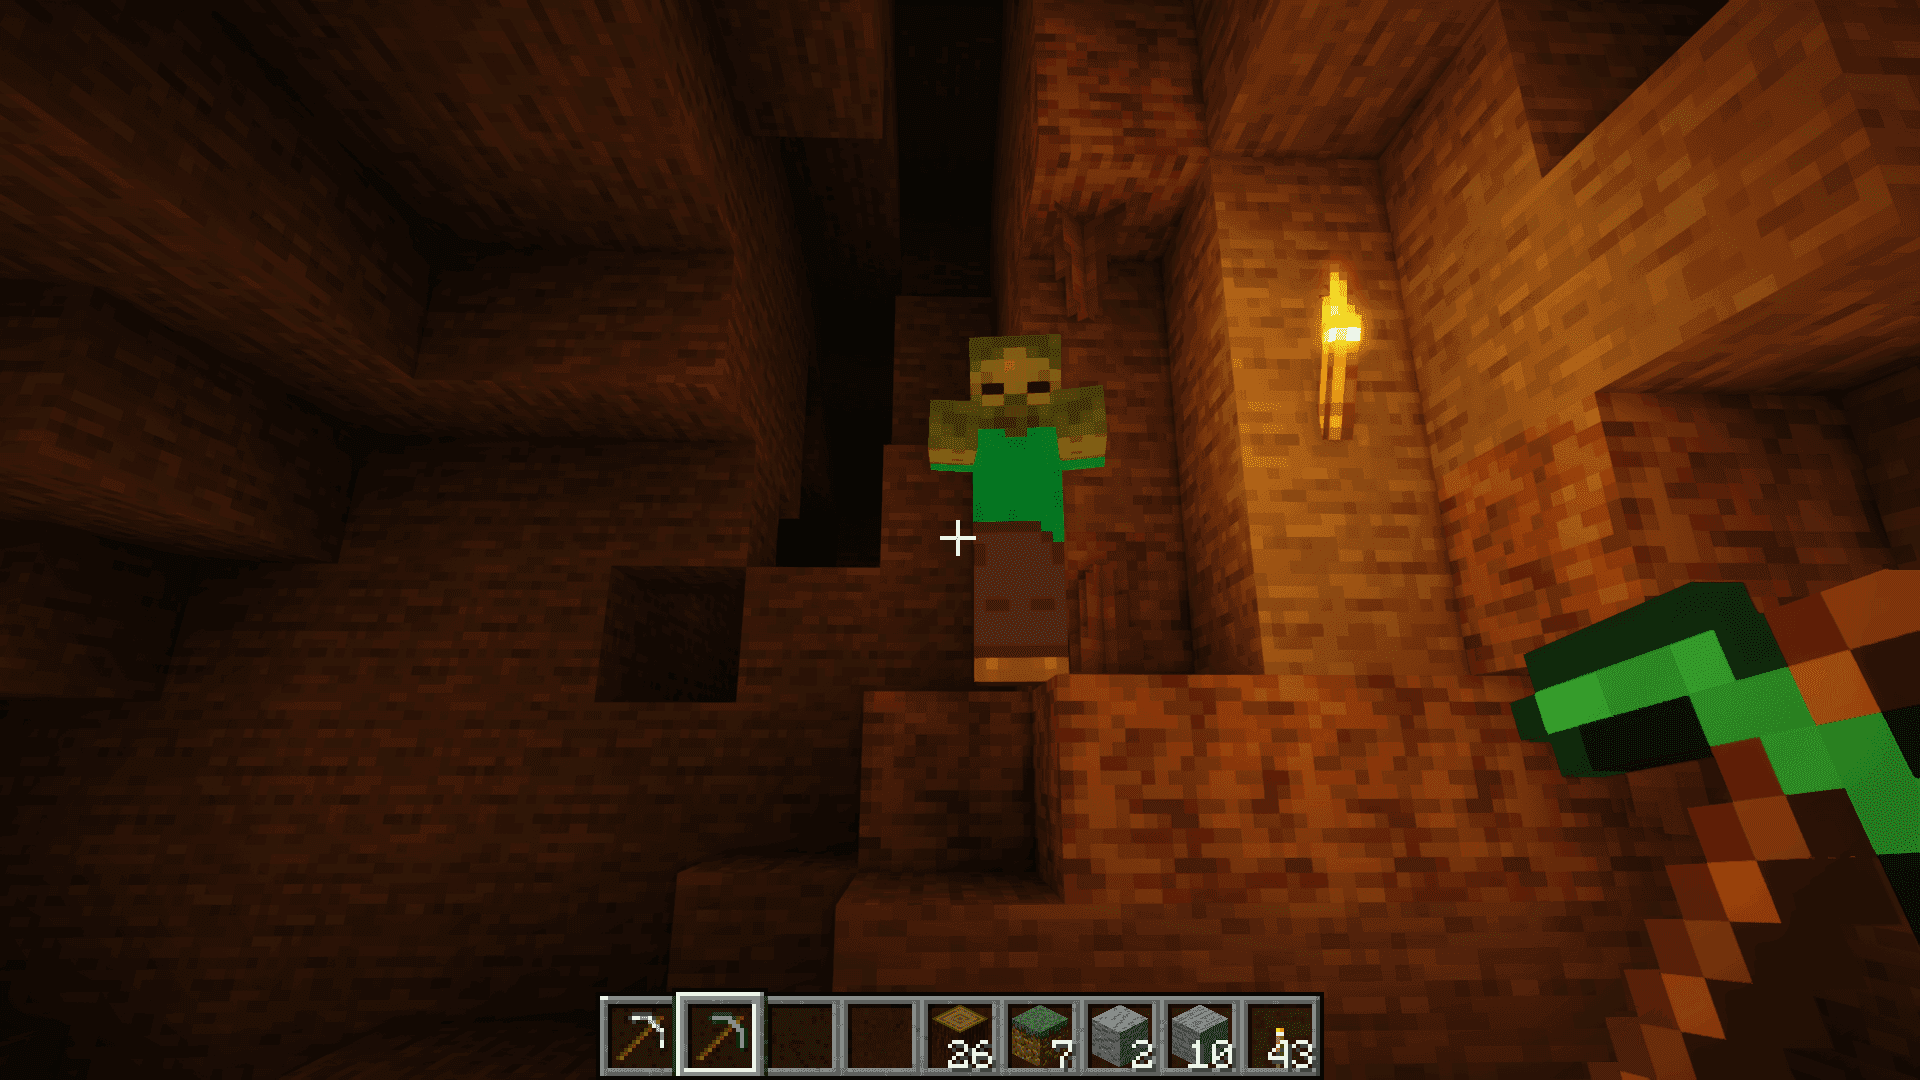
Following safety measures is essential when mining underground.
Why It’s Here: The Inescapable Dangers
The primary, non-negotiable reason for this rule is the omnipresent threat of lava and deadly falls. Lava generates frequently below Y-level 11 and can occupy entire caverns. Falling into it destroys items instantly and deals massive, often fatal, damage. A long fall onto solid ground or into a monster-filled cave is nearly as lethal. The secondary danger is surprise mob encounters. Digging straight down can drop you directly into a dark cave system teeming with Creepers, Skeletons, and Zombies, leaving you disoriented and vulnerable. The rule’s purpose is to eliminate these unpredictable, instant-death scenarios by forcing a methodical approach.
For Beginners: This is an ironclad law. Your early-game resources and spawn point are too precious to gamble. The cost of death—losing all your iron tools and the ore you just spent an hour collecting—is devastating. Adhering to this rule is the difference between a frustrating restart and steady progression.
For Pros (The Strategic Exception): Experienced players with Feather Falling IV boots, Fire Resistance potions, a water bucket in hand, and endgame gear might selectively ignore this rule in controlled circumstances, such as quickly descending a known, pre-lit shaft. However, even then, the risk of a misclick or a forgotten hazard makes it a calculated gamble, not standard practice. The pro move isn't digging straight down; it's knowing precisely when you can afford to.
The Safe Alternatives: Staircases and Ladders
If you cannot dig straight down, how do you descend? The two approved methods are the staircase mine and the ladder shaft.
- The Staircase Mine: This is the gold standard for early-game vertical mobility. You dig a diagonal tunnel down, placing stairs as you go. Pros: It provides a gentle, walkable path back to the surface, allowing you to easily bring down furnaces, chests, or animals. It also exposes a large surface area of blocks, increasing your chance of spotting ore veins on the way down. Cons: It is resource-intensive (each step forward digs multiple blocks) and slower than a vertical shaft.
- The 2x1 Ladder Shaft: This is the efficient, late-game method. You dig a two-block-wide, one-block-long shaft straight down, placing a ladder in one column and using the other to climb up and down. Pros: It is the fastest way to reach deep depths (like Y=-58 for diamonds) and uses minimal materials (just ladders). Cons: It requires you to look at the ladder to climb, making it slightly awkward. Crucially, you must still never dig the block directly beneath your feet. Instead, dig the two blocks in front of you one level at a time, always leaving a floor beneath you.
Takeaway: For your first major mine, build a staircase. It’s safe, productive, and builds good habits. Once you have a surplus of wood for ladders and a clear need for speed, a 2x1 shaft is the efficient upgrade.
The "Two-Block Gap" Technique
This is the specific, tactical procedure that allows for safe vertical mining and is what pros use when they need to check what’s below. Instead of standing on one block and mining it, you stand on the boundary between two blocks. Mine the first block in front of you and look down. If it’s safe, you can drop down one level. Then, turn around and mine the other block you were just standing on. By alternating in this "zig-zag" pattern, you always have a solid block under at least one of your feet, preventing a fatal plunge. This method lets you descend quickly while maintaining a safety net, effectively allowing you to "dig straight down" safely.
Use Case: This is perfect for quickly descending through known stone in your mine to reach your mining level, or for creating a vertical access shaft after you’ve already branch-mined and illuminated an area. It is not for initial, blind exploration.
The Complementary Rule: Never Dig Straight Up
While less famous, this rule is equally critical. Digging straight up risks dislodging gravel or sand, which will fall and suffocate you, or releasing a water or lava cascade that will flood your tunnel or burn you alive. The safe method is to place a torch, sign, or ladder on the block above your head before mining it. These placed objects will prevent gravel/sand from falling and will stop the flow of water/lava, allowing you to safely clear the block.
Final Verdict: "Never dig straight down" is the ultimate beginner's shield against cheap deaths. As you master the game, it evolves from a rigid rule into a principle of situational awareness. You learn that the goal isn't to move slowly, but to move safely. By using staircases, ladder shafts, and the two-block gap technique, you exchange blind luck for controlled, predictable progress—which is the true cornerstone of survival mastery.
Mastering the Shield and Combat Defense
Defending against hostile mobs in the dark.
Mastering the Shield and Combat Defense
In the frantic early game of Minecraft Survival, a player’s survival often hinges not on the strength of their sword, but on their ability to mitigate incoming damage. While a bed and a well-lit shelter can protect you from the night, they are passive defenses. True mastery comes from active protection, and nothing embodies this better than the shield. This section details the crafting and strategic utility of the shield for early-game protection, explaining why it is the single most important upgrade after acquiring iron and how it fundamentally shifts combat dynamics in your favor.
Why it's here: The shield is the great equalizer for new players. It transforms terrifying encounters with skeletons and creepers into manageable challenges, dramatically increasing survivability with minimal resource investment. This entry is ranked for its unparalleled defensive utility and its role as a cornerstone of early-game progression.
The Shield: Your First and Best Line of Defense
The path to the shield begins with iron, your first major material upgrade. Its recipe is simple yet profound: one iron ingot placed above six wooden planks in a crafting table's "Y" pattern. This humble combination yields an item that can block up to 100% of damage from most melee attacks and projectiles. The immediate impact cannot be overstated. A skeleton's arrow, which can whittle down a player's health from a distance, becomes a harmless thunk against a raised shield. A zombie's relentless pursuit is neutered as its attacks are parried with ease.
However, the shield's most celebrated function is its interaction with the game's most infamous mob: the creeper. As detailed in our research, a shield can reduce creeper explosion damage by up to 80%. This is not merely a reduction; it's a game-changer. Where a direct hit from a normal creeper on Hard difficulty can deal a catastrophic 64.5 HP of damage—more than enough to kill an unarmored player three times over—a raised shield can turn that into a survivable 12.9 HP. When combined with even basic iron armor, surviving a point-blank explosion becomes not just possible, but likely. The shield also completely negates the powerful knockback from explosions, allowing you to hold your ground and counter-attack. This makes the shield not just a defensive tool, but an offensive enabler against Minecraft's #1 beginner killer.
Crafting Priority: You should prioritize crafting a shield immediately after smelting your first iron ingot, even before making a full set of iron tools. The defensive security it provides far outweighs the marginal speed increase of an iron pickaxe at this stage. An iron sword for increased damage is useful, but a shield ensures you live long enough to use it.
The Water Bucket: The Agile Art of Fall Negation
While the shield protects you from enemies, the water bucket protects you from the environment and your own missteps. Crafted from three iron ingots, it is another early-game tool of immense utility, but its most critical function is negating fall damage. This technique, often called "MLG water bucket clutching," involves placing a water source block beneath you just before hitting the ground. When executed successfully, it completely cancels fall damage, turning a potentially lethal plummet into a safe splash landing.
This skill is invaluable for safe exploration and mining. It allows for quick descents from cliffs, escape from precarious ledges in caves, and recovery from being knocked off a high pillar by a ghast fireball. Compared to building slow, block-by-block staircases or relying on feather falling enchantments much later in the game, the water bucket offers immediate, reusable protection against one of the most common causes of death. It also serves as a versatile multi-tool for extinguishing yourself or blocks set on fire, creating obsidian, and irrigating farms. Mastering the timing of the water bucket clutch separates reactive players from proactive survivors.
Defensive Synergy: The shield and water bucket form a perfect defensive duo. The shield handles hostile intent, while the water bucket handles environmental hazards. Together, they cover the majority of acute threats a player faces in the early to mid-game.
Strategic Implementation and Combat Flow
Simply having these tools is not enough; integrating them into your combat flow is key. The effective use of a shield requires understanding its mechanics: right-clicking (or crouching on Bedrock) raises it, creating a 100-degree arc of protection in front of you. This blocks attacks but also slows your movement. The strategy is to raise the shield momentarily to absorb an incoming attack—like a skeleton's arrow—then lower it to move in and strike. Against groups, use terrain to funnel enemies and deal with them one at a time with your shielded side facing the threat.
For creepers, the best practice is to hit them once with a sword to trigger their hiss, then immediately raise your shield and back away to a safe distance. The shield will absorb the bulk of the blast. The water bucket's defensive use is more situational but should be practiced in safe environments. Carry a water bucket in your hotbar at all times when exploring mountains, mining near deep ravines, or in the Nether.
The Takeaway: Do not view the early game as a race to diamond gear. The most significant power spike in survivability comes from iron, not for the tools, but for the shield (and the bucket it enables). Crafting a shield should be your absolute first goal upon acquiring iron. It is the definitive item that transitions a player from being prey to being a prepared survivor, turning panic into calculated defense and making the hostile Overworld a far more navigable space. No other single item provides such a comprehensive and immediate return on investment for early-game safety.
Optimal Mining Depths and Resource Management
Official game artwork
Optimal Mining Depths and Resource Management
Your survival journey will eventually lead you underground, where the real treasure lies. Knowing where to dig is half the battle; the other half is having the fuel to keep your furnaces running. This section breaks down the exact coordinates for your diamond hunt and the sustainable fuel source you can create anywhere.
The Diamond Motherlode: Y-Level -58 to -64
Why it’s here: This is the single most important coordinate range in the game for mid-game progression. Since the Caves & Cliffs update, ore generation follows a triangular distribution pattern, and for diamonds, the peak of that triangle is at the very bottom of the world. Mining at Y-level -58 to -64 (just above the bedrock layer) maximizes your chances of finding diamond ore veins. At these depths, you’ll primarily encounter Deepslate Diamond Ore, which is more common than its stone variant but takes slightly longer to mine. This is a deliberate trade-off for vastly improved odds. Always bring an Iron Pickaxe or better, as diamond ore requires it. For maximum efficiency, employ branch mining: dig a long main tunnel at Y=-59, then dig 1x2 branches off it every two blocks. This method systematically exposes the most stone while minimizing the risk of missing hidden veins. Crucially, avoid large, open caves for diamond hunting. The game’s generation has a chance to delete ore veins that are exposed to air, making the controlled environment of a strip mine far more reliable in the long run.
The Takeaway: For the highest diamond yield, set up a branch mine at Y=-59. It’s a grind, but it’s the most statistically sound method.
Charcoal: The Universal, Renewable Fuel
Why it’s here: Coal is not always where you need it, especially in wood-rich but coal-poor biomes like jungles or swamps. Charcoal is the perfect solution. Crafted by smelting any log or wood block in a furnace, it is functionally identical to coal for all crafting recipes: 1 charcoal + 1 stick = 4 torches. This makes it your primary early-game light source and a reliable furnace fuel. To produce it, you only need wood (infinitely renewable via tree farming) and a furnace (8 cobblestone). A single log smelted with another log as fuel yields one charcoal, effectively turning wood into a superior fuel source. This creates a self-sustaining loop: chop trees, use some planks as furnace fuel to smelt logs into charcoal, use that charcoal to smelt more or make torches. It eliminates dependency on finding coal veins, allowing you to secure a well-lit base and begin smelting iron on your first day, regardless of your spawn location.
The Takeaway: Never be without light or furnace fuel. If you have trees and cobblestone, you have charcoal. It’s the cornerstone of early-game resource independence.
Strategic Fuel Management & The Furnace
Why it’s here: Efficient resource management separates prepared survivors from those constantly scrambling. Your furnace (8 cobblestone) is your engine for progress, but fuel choice matters. While charcoal is your early-game staple, know your alternatives. Coal is more efficient if you find a vein, as one coal/charcoal smelts 8 items. Logs and planks are less efficient (a log smelts 1.5 items) but are perfect for burning a few items quickly. For bulk smelting, coal blocks (9 coal) smelt 80 items, and a lava bucket smelts a whopping 100 items, making it the ultimate fuel for large projects, though it’s non-renewable. The key is to use the right fuel for the job: charcoal for ongoing, small-batch operations; lava buckets for smelting stacks of cobblestone into stone or sand into glass.
The Takeaway: Don’t just burn anything. Plan your fuel: use renewable charcoal for daily tasks and reserve high-efficiency fuels like lava buckets for your big industrial smelting sessions.
The Supporting Cast: Other Key Ore Levels
Why it’s here: While diamonds are the crown jewel, a successful miner knows where to find everything else. After securing diamonds for a pickaxe, you’ll need other resources to progress.
- Iron (Best: Y=16 or Y=232): Your first major upgrade. For a reliable underground source, mine at Y=16. For a massive windfall, seek out mountain biomes and mine near the peaks around Y=232, where iron generates in huge, exposed blobs.
- Redstone (Best: Y=-58): Shares its optimal layer with diamonds, so you’ll collect plenty while diamond hunting. It’s essential for advanced mechanics and brewing.
- Lapis Lazuli (Best: Y=0): Found around the seam where stone transitions to deepslate. It’s crucial for enchanting your new diamond gear.
- Coal (Best: Y=96+): Ironically, the classic starter ore is now best found high up. Mountain slopes above Y=136 are often littered with exposed coal, making it a surface-level resource in the late game.
The Takeaway: A master miner targets specific layers. Use Y=16 for iron, Y=-58 for diamonds and redstone, and the mountaintops for coal and emeralds. This stratified approach is far more efficient than random digging.
Village Trading and Long-Term Sustainability
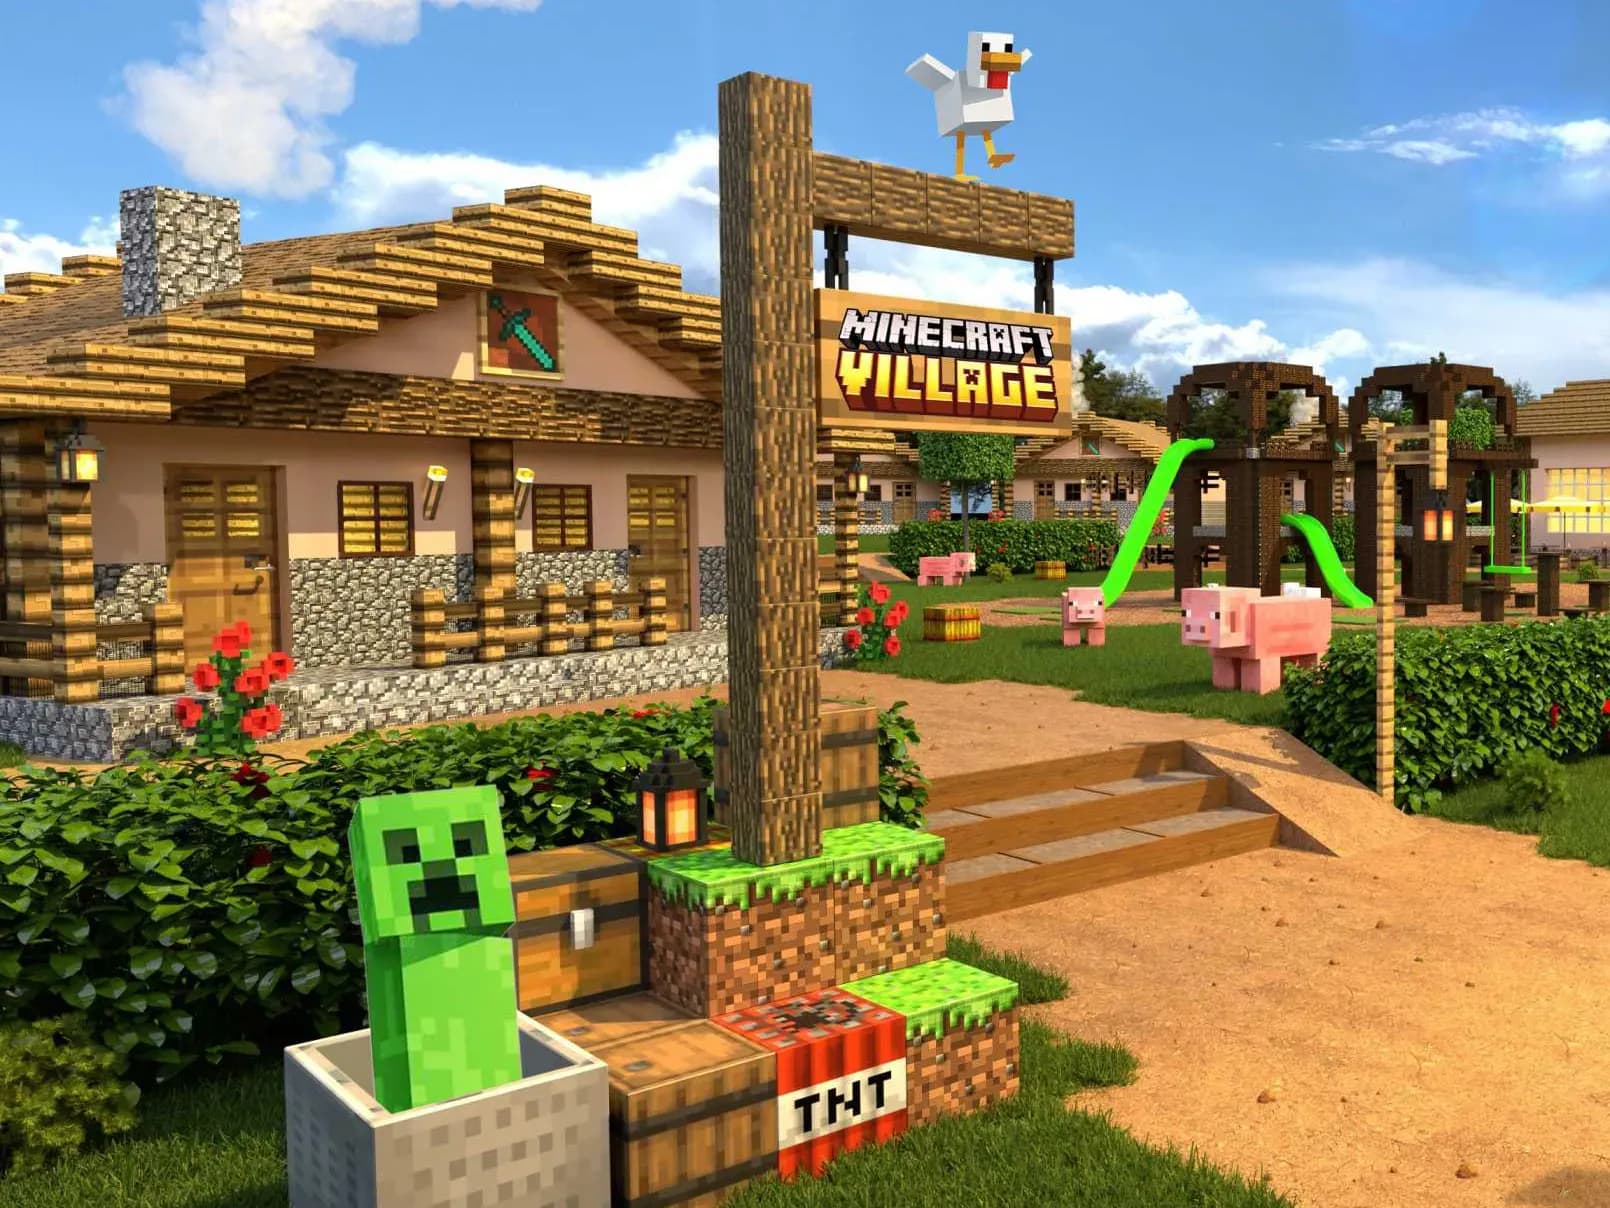
Establishing a base in a village is the first step toward long-term sustainability.
Village Trading and Long-Term Sustainability
Mastering the early game in Minecraft is about survival; mastering the late game is about establishing an unbreakable, self-sustaining economy. While mining yields finite diamonds and hunting provides sporadic food, a well-oiled villager trading system offers a renewable, scalable, and powerful path to endgame gear and resources. This is the ultimate evolution from a scavenger to a sovereign, leveraging the game's NPCs to automate your progression and secure your long-term future.
Why Villager Trading is the Keystone of Endgame Progression
Villager trading transforms your gameplay from a grind into a streamlined economy. It allows you to convert common, farmable resources—like pumpkins, paper, or sticks—into the game's universal currency: emeralds. These emeralds can then be spent on items that are otherwise rare, non-renewable, or extremely tedious to acquire. The primary benefits are threefold: renewable high-tier gear, access to powerful enchantments, and infinite sustainable food. Unlike strip-mining for diamonds, which depletes your world, a trading hall produces value indefinitely. It turns your established farms into engines of progress, making previously daunting goals like fully enchanted Netherite armor a matter of systematic farming rather than incredible luck.
The Indispensable Professions: Librarians, Armorers, and Toolsmiths
Not all villagers are created equal. For long-term sustainability, you must curate specific professions.
- Librarians are arguably the most critical. They provide enchanted books, including treasure enchantments like Mending—which allows gear to repair itself using experience—and Unbreaking III, Sharpness V, and Efficiency V. A hall of librarians effectively gives you a curated enchantment table, removing the randomness of enchanting and granting you direct access to the best modifiers in the game. They also offer a renewable source of glass and name tags.
- Armorers and Toolsmiths provide renewable diamond gear. Once leveled to Master, an Armorer will sell enchanted diamond armor (helmet, chestplate, leggings, boots), while a Toolsmith and Weaponsmith sell diamond tools and weapons. This means you can outfit yourself in full diamond gear without ever mining a single diamond ore, preserving those resources for other uses like jukeboxes or enchanting tables. This is a game-changer for sustainability.
- Farmers are the cornerstone of your food supply. At high levels, they trade golden carrots, which are the best food in the game for saturation (restoring 6 hunger and 14.4 saturation), enabling rapid health regeneration. They also buy your excess pumpkins and melons, creating a perfect economic loop: farm crops, sell to farmer for emeralds, buy golden carrots for ultimate sustenance.
Setting Up Your Trading Hall: Efficiency and Exploitation
A "trading hall" is a controlled, centralized location where you house your curated villagers. Its design prioritizes efficiency and safety. Each villager is assigned to a specific workstation (e.g., Lectern for Librarian, Smithing Table for Toolsmith) and contained in a booth, preventing them from wandering or losing their profession. Lighting and secure walls are mandatory to prevent zombie sieges.
To maximize efficiency, players employ advanced techniques. Historically, zombifying and curing a villager (using a Weakness potion and a Golden Apple) would grant permanent trade discounts. While repeated curing for stacking discounts has been patched, curing a villager once still provides a significant price reduction, making your emerald economy even more powerful. The goal is to create self-sustaining trade loops. For example, a Fletcher buying sticks and selling arrows, or a Farmer buying melons and selling golden carrots, turns basic farm output into permanent advantages.
From Sustainability to Sovereignty
Integrating a villager trading hall is the final piece in moving from a survivor to a ruler of your Minecraft world. It dovetails perfectly with earlier sections: the coal from your optimal mining runs fuels the furnaces to smelt iron for buckets and anvils; the shield you mastered defending with now protects you while you transport villagers; the resources you managed become the capital for your emerald empire. This system doesn't just give you better gear; it provides renewable diamond equipment, guaranteed top-tier enchantments, and optimal, infinite food. It is the definitive endgame strategy, turning your world's resources into a perpetual motion machine of progression and making you truly self-sufficient.