How to Unlock Satchel Crafting in Red Dead Redemption 2
Your adventure in Red Dead Redemption 2 truly begins when you realize you can barely carry anything. That frustrating inventory limit is about to become a thing of the past, but first, you need to unlock the game’s satchel crafting system. Trust me, this is the first and most important step to becoming a true frontier legend, and it all starts back at camp.
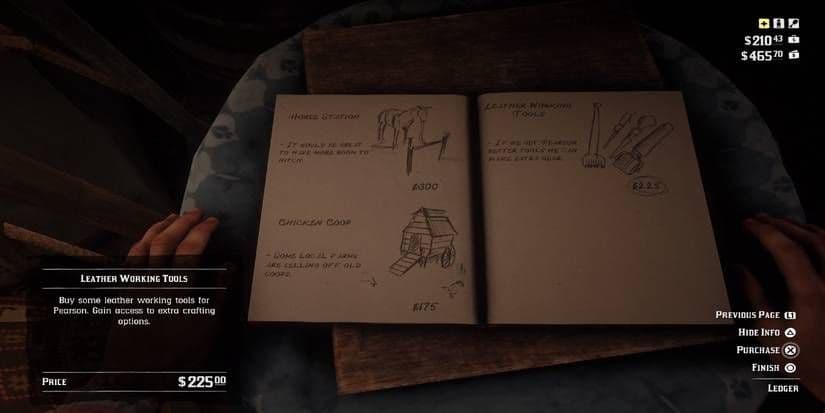
Access the Camp Ledger to begin unlocking satchel crafting upgrades.
Before Pearson, the gang’s camp cook at the Chuck Wagon, can craft a single satchel, you need to complete a critical mission. In Chapter 2, you’ll get a mission from Leopold Strauss, the gang’s bookkeeper. Complete ‘Money Lending and Other Sins’ for him—this isn’t just a story mission. Finishing it unlocks the Camp Ledger, the little book next to the donation box that controls all your camp upgrades.
With the ledger unlocked, you can now purchase the single most important camp upgrade: the Leather Working Tools. Flip to the Lodging page in the ledger and pay the $225 fee. This purchase is non-negotiable—it’s what transforms Pearson from just a cook into your personal leatherworker, unlocking his ability to craft satchels and other gear.
Do this as early as possible in Chapter 2. The $225 might seem steep, but the quality-of-life improvement from the satchels you’re about to unlock is worth every cent.
Here’s the trick most guides miss: buying the tools isn’t the final step. To fully set up Pearson’s Crafting Station and make the satchel menu appear, you need to donate 5x Perfect Deer Pelts directly to him. Head out, hunt five Whitetail Deer (look for three-star ones in places like the Heartlands), and bring those perfect pelts back to Pearson at his wagon. Once you’ve done this, his crafting table is fully operational.
With the mission complete, the tools purchased, and Pearson’s station prepped, you’re officially ready to start the legendary hunt for satchel upgrades. Let’s get to work.
Best Preparation and Hunting Tools for Perfect Pelts
Alright, hunter—this is where the real work begins. In Red Dead Redemption 2, a perfect pelt isn’t just about luck; it’s about bringing the right tool for the job and understanding the game’s hidden systems. Your entire satchel-crafting journey hinges on this one principle: use the wrong gun, and you’ll ruin a pristine animal. Let’s make sure that never happens.
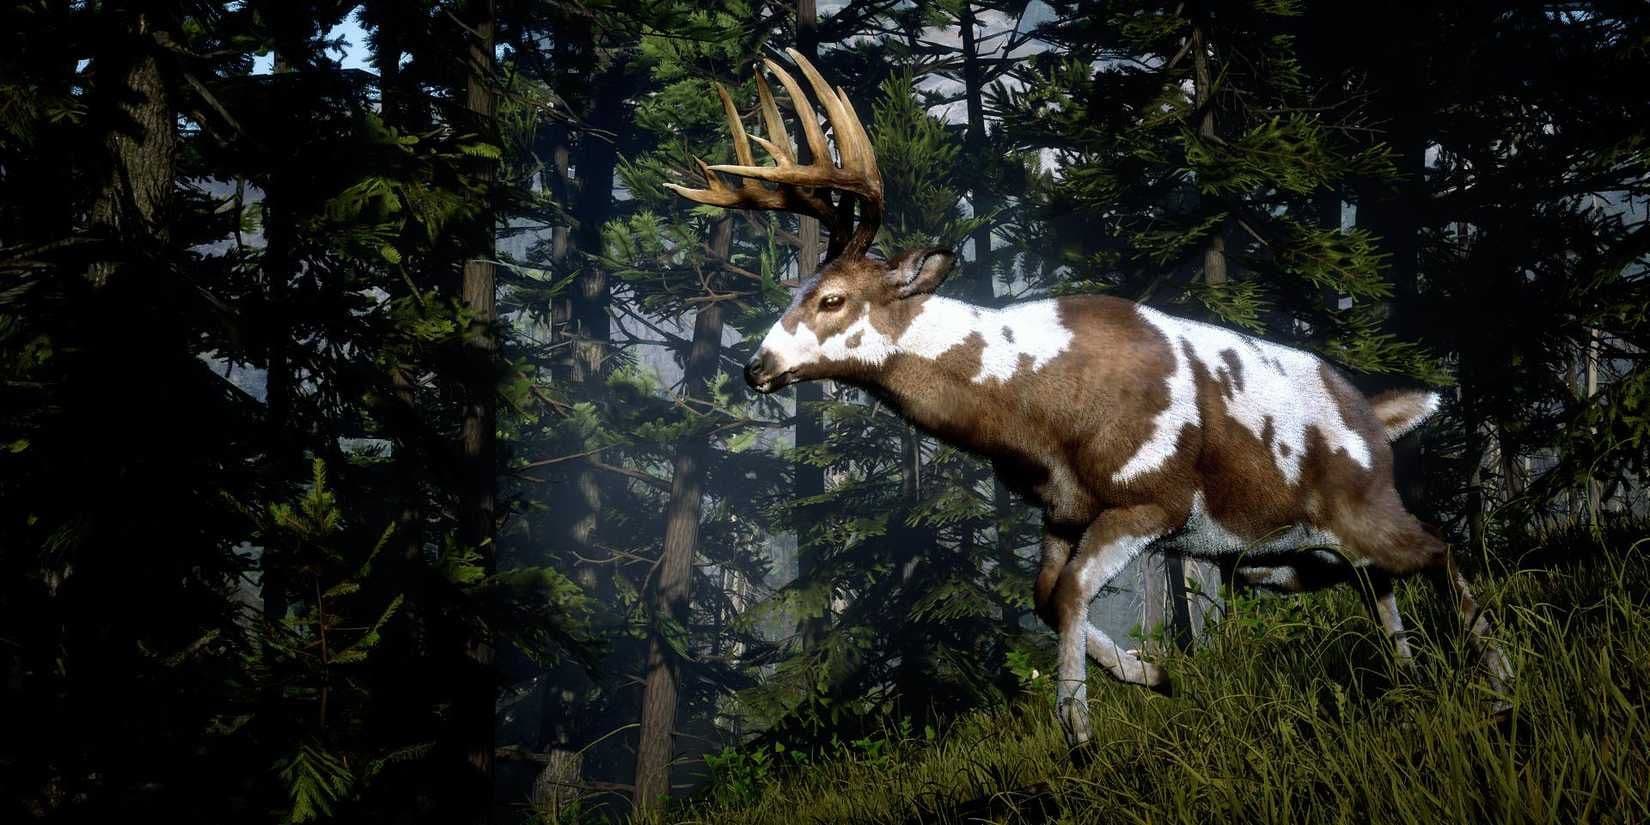
Hunting the Legendary Buck is essential for the Buck Antler Trinket.
First, you need to know your prey. Before you even raise your rifle, aim your Binoculars (or a scoped weapon) at an animal and hold [RB] to Study it. This reveals its star rating—only 3-star animals yield perfect pelts—and, crucially, tells you the recommended weapon class for a clean kill. This is your most important tool. Trust me, eyeballing it isn’t enough; a misjudged shot wastes time and a rare spawn.
Now, for your arsenal. You’ll need three key weapons, and they’re non-negotiable:
- For small mammals: The Varmint Rifle. Buy this from any Gunsmith for $120. It’s essential for perfect pelts from Badgers, Beavers, Raccoons, and Iguanas. Anything more powerful will damage the hide.
- For medium and large game: A Springfield Rifle or Bolt Action Rifle, loaded with Express or High Velocity ammo. This is for Deer, Elk, Bison, Cougars, and Wolves. Go for a headshot or heart shot for an instant kill.
- For tiny critters: Your Bow equipped with Small Game Arrows. Press [LB] to hold the bow, then tap [RB] to switch arrow types. This is the only way to get perfect pelts from Squirrels and Rabbits. A regular arrow or any firearm will destroy them.
Head to Rhodes early. You can buy and upgrade both the Varmint Rifle (with a short scope) and your rifle of choice (with a medium scope) at the gunsmith there. Having a scope makes studying and lining up that perfect shot infinitely easier.
Here’s the trick most guides miss: your first major hunt shouldn’t be for a satchel ingredient at all. Ride to Big Valley in West Elizabeth, northwest of Strawberry. This is the territory of the Legendary Buck. Track and kill it (any weapon works on legendaries), then take its antler to any Fence. There, you can craft the Buck Antler Trinket. This item is a game-changer—it permanently increases the chance that a 2-star animal will drop a perfect pelt, and it even gives you a safety net if you botch a shot on a 3-star. Do this before you start your serious hunting grind. You’ll thank yourself later.
With the right weapons in your hands and the Buck Antler Trinket in your pocket, you’ve turned the odds in your favor. You’re not just a hunter now; you’re a craftsman. Let’s go find those pelts.
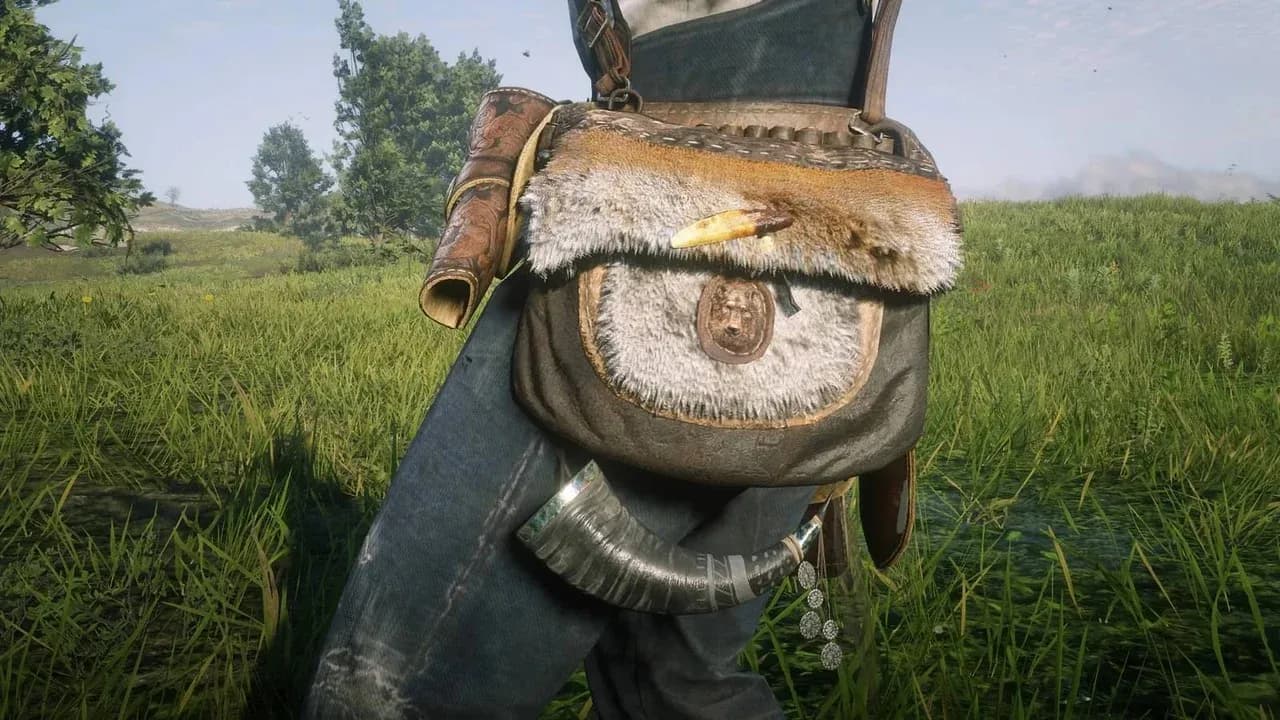
How to Craft the Tonics, Ingredients, and Kit Satchels
With the Leather Working Tools purchased and your hunting kit ready, it’s time to put your skills to work. In Red Dead Redemption 2, the first three satchels—Tonics, Ingredients, and Kit—are your gateway to inventory freedom, letting you stockpile more of the essentials that keep you alive and fighting.
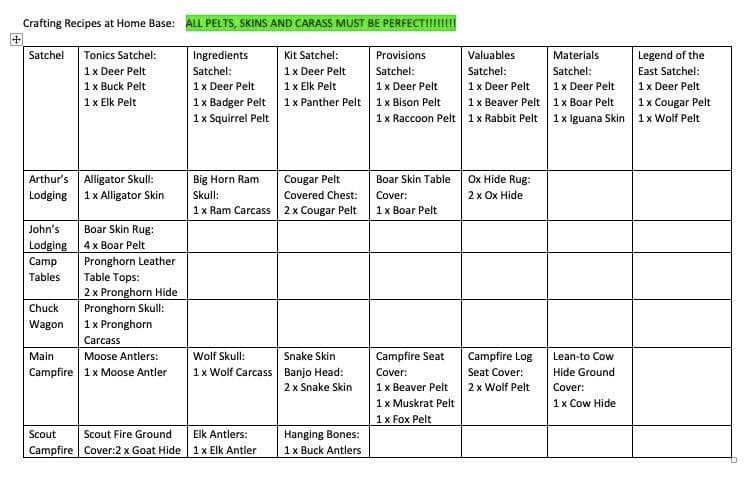
Comprehensive materials list for satchel crafting.
Here’s how to secure them.
The Tonics Satchel
This upgrade lets you carry far more health cures and stamina boosters, a game-changer for long expeditions. To unlock it, you first need to upgrade the Medicine Wagon twice via the camp ledger. Once that’s done, donate these three perfect pelts to Pearson at his Chuck Wagon:
- 1x Perfect Deer Pelt
- 1x Perfect Buck Pelt
- 1x Perfect Elk Pelt
Deer and Bucks are plentiful in areas like The Heartlands. For the Perfect Elk Pelt, head to their preferred habitats in Ambarino, specifically the Cumberland Forest or Grizzlies East. Use your Springfield Rifle or Bolt Action Rifle with Express ammo for a clean headshot on these large animals.
The Ingredients Satchel
Never worry about running out of cooking materials again. To unlock this recipe, you must first donate 5 animal carcasses to Pearson. After that, he’ll need:
- 1x Perfect Deer Pelt
- 1x Perfect Badger Pelt
- 1x Perfect Squirrel Pelt
The Perfect Badger Pelt is the trickiest here. These small, nocturnal critters are best hunted at night in places like Scarlett Meadows. Use your Varmint Rifle and aim carefully. For the Perfect Squirrel Pelt, you must use a Bow with Small Game Arrows—any other weapon will ruin it. They’re common in wooded areas.
The Kit Satchel
This satchel expands your capacity for weapon cleaning and horse care kits, crucial for maintenance on the trail. The unlock requires donating 3 Valuables (like jewelry or pocket watches) to the Camp Tithing Box. Then, gather these pelts:
- 1x Perfect Deer Pelt
- 1x Perfect Elk Pelt
- 1x Perfect Panther Pelt
The Perfect Panther Pelt is your first major hunting challenge in Red Dead Redemption 2. Panthers are rare, aggressive, and will kill you in one hit if you’re careless. Your best bet is the Panther Spawn in Lemoyne, specifically the woods south of Braithwaite Manor near Bolger Glade.
⚠️ Panther Pro-Tip: Save your game before entering the area. Use Potent Predator Bait at night, climb a rock for safety, and wait with your scoped rifle ready. Listen for growls—a single headshot with Express ammo is your only safe option.
Once you’ve braved the panther and collected the other pelts, donate all three to Pearson. He’ll craft the satchel, and you’ll immediately feel the quality-of-life boost.
With these three satchels complete, you’ve tackled some of the most varied hunts Red Dead Redemption 2 has to offer—from tiny squirrels to deadly panthers. You’re now perfectly set up to pursue the remaining upgrades with confidence.
How to Craft the Provisions, Materials, and Valuables Satchels
You’ve unlocked Pearson’s table and crafted the first three satchels—nice work. Now it’s time to finish the set. This section in Red Dead Redemption 2 focuses on gathering the remaining pelts for the Provisions, Materials, and Valuables Satchels. While the first batch had you hunting in familiar forests, this trio sends you to swamps, rivers, and islands for some of the game’s more elusive creatures. Let’s round out your collection.
The satchel crafting menu at Pearson's camp.
Provisions Satchel: Bison, Deer, and Raccoon
First up is the Provisions Satchel, which lets you carry more food. To unlock it, you need to upgrade the Provisions Wagon at camp twice. Once that’s done, Pearson will need a Perfect Deer Pelt, a Perfect Bison Pelt, and a Perfect Raccoon Pelt.
You already know the drill with deer—head to The Heartlands or Scarlett Meadows with your Springfield Rifle. The American Bison is a bigger target but requires a similar approach. Find the herd roaming the Great Plains near Blackwater or the Heartland Overflow east of Flatneck Station. Use your most powerful rifle—Springfield or Bolt Action with Express ammo—and aim for the head or heart. One clean shot is all you need.
The Raccoon is a nocturnal trickster. Your best bet is to hunt at night near Riggs Station or along the Dakota River in West Elizabeth. Crouch, use Eagle Eye to spot their glowing tracks, and take them out with a single shot from your Varmint Rifle. Don’t rush—they’re skittish.
Hunt the bison herd during the day for clear visibility, but save your raccoon search for after sundown. The night makes their eyes glow in Eagle Eye, making them much easier to spot.
Materials Satchel: Boar, Deer, and Iguana
Next is the Materials Satchel, boosting your capacity for crafting components. To unlock it, you must first craft 3 recipes at the Scout Fire in camp. After that, bring Pearson a Perfect Deer Pelt, a Perfect Boar Pelt, and a Perfect Iguana Skin.
You’ve got deer covered. For the Wild Boar, head to Bluewater Marsh in Lemoyne or the woods along the Kamassa River. These beasts charge if provoked, so keep your distance and use a rifle for a clean headshot.
The Green Iguana is your most exotic hunt yet. You’ll find them sunning themselves on the large island west of Rhodes in Flat Iron Lake. You’ll need a boat or a very strong horse to swim out there. Once ashore, use your Varmint Rifle for a clean kill—their small size means anything bigger will ruin the skin.
Valuables Satchel: Beaver, Deer, and Rabbit
Last of this batch is the Valuables Satchel, expanding space for jewelry and trinkets. Unlock it by donating $50 to the Camp Tithing Box. Then, deliver a Perfect Deer Pelt, a Perfect Beaver Pelt, and a Perfect Rabbit Pelt to Pearson.
Again, deer is straightforward. Rabbits are everywhere—just use Small Game Arrows with your bow for a perfect pelt. The Beaver requires a specific trip. The most reliable spot is in West Elizabeth at Owanjila Dam, or along the Kamassa River in Roanoke Ridge. Beavers are easily spooked, so approach slowly from downstream and use your Varmint Rifle. Remember, if they dive into the water, you can’t retrieve the body, so make that first shot count.
⚠️ Watch out: When hunting beaver, make sure you’re on land and they are too. A beaver killed in the water will sink, and you’ll lose that precious pelt.
With these three satchels crafted, you’ll have dramatically more room for supplies, parts, and loot. More importantly, you’re one step away from the ultimate prize. Stock up on ammunition, save your game before hunting predators, and let’s finish this.
How to Obtain the Legend of the East Satchel in Red Dead Redemption 2
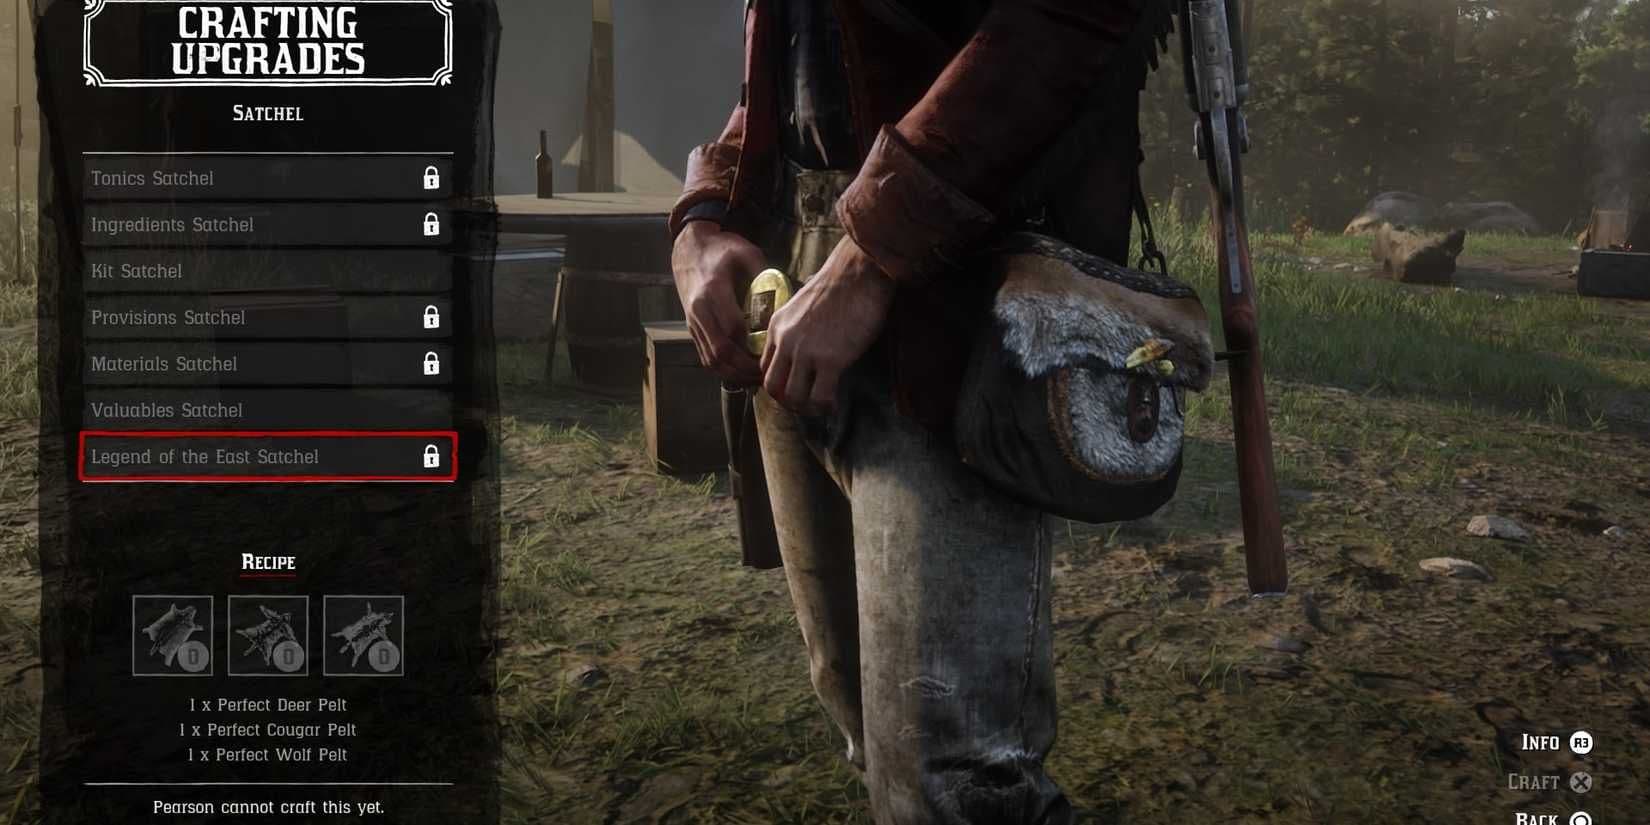
The final hunt is here. After tracking, skinning, and donating your way through six different satchels, you stand on the precipice of the ultimate prize in Red Dead Redemption 2—the Legend of the East Satchel. This is more than just an upgrade; it’s total inventory liberation, and the last three perfect pelts are the most dangerous yet.
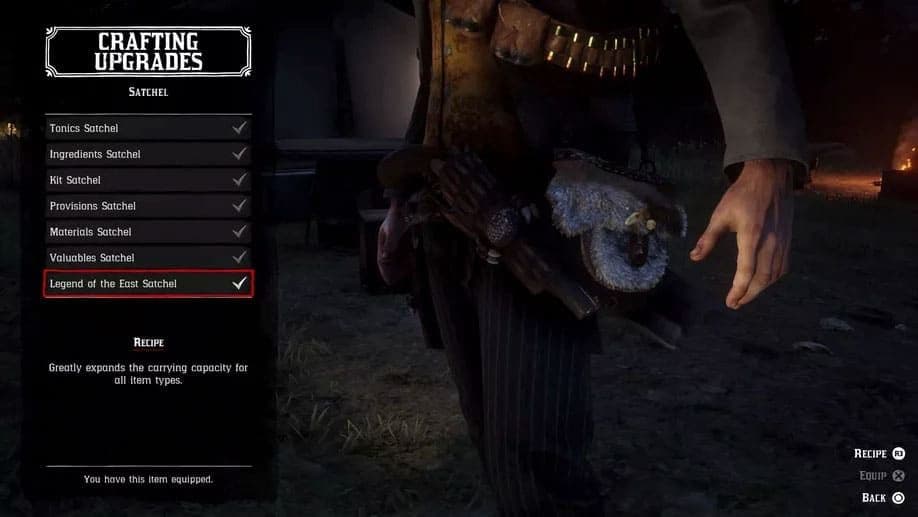
Completing the final crafting step unlocks the maximum item capacity.
Final Crafting and the Ultimate Reward
Your final task is to return to Pearson at his Chuck Wagon in camp. The recipe for the Legend of the East Satchel is simple on paper: 1x Perfect Deer Pelt, 1x Perfect Cougar Pelt, and 1x Perfect Wolf Pelt. But it’s only available once you’ve crafted all six previous satchels. If you’ve been following our guide, this is your final donation.
Once crafted, the effect is immediate and game-changing. The Legend of the East Satchel increases your carrying limit to 99 for almost all item types. No more agonizing over which tonics to drop or leaving behind valuable crafting materials. It’s the single greatest quality-of-life upgrade in the game.
Before you set out for these final predators, double-check Pearson’s ledger. Ensure all six previous satchels are marked as “Crafted.” If one is missing, you won’t see the final option.
Hunting the Final Predators
You’ve hunted deer plenty by now, so the final Perfect Deer Pelt should be a familiar task in The Heartlands. The real challenge lies with the apex predators.
For the Perfect Cougar Pelt, head to the dense woods of West Elizabeth > Black Bone Forest or the rugged terrain of New Hanover > Roanoke Valley. These cats are stealthy, aggressive, and can kill you in one pounce. Move slowly on horseback, listen for growls, and keep your Springfield Rifle loaded with Express ammo ready. Using Predator Bait in a clearing and retreating to a rock can give you a clean shot.
The Perfect Wolf Pelt often comes with company. Your best bet is to head to Ambarino > Cotorra Springs or the snowy slopes of Grizzlies West. Wolves travel in packs, so use Dead Eye liberally to mark multiple headshots as they charge. A rifle is again your best tool here.
⚠️ Watch out: If you die or fast travel with a perfect pelt on your horse, you’ll lose it. After bagging a cougar or wolf, ride straight back to camp to donate it. The risk isn’t worth it.
The Epilogue Shortcut
If, for any reason, you reach the end of Arthur’s story without completing this epic hunt, all is not lost. Every satchel, including the Legend of the East Satchel, becomes available for purchase at any Fence during the epilogue. You can find them in Rhodes or Saint Denis, though they’ll cost a pretty penny. Crafting it yourself is free and far more satisfying, but the option is there.
You’ve done it. With the Legend of the East Satchel equipped, the constant inventory management of the frontier is finally over. You’re free to loot, gather, and explore to your heart’s content, carrying the literal fruits of your labor on your back. Now, the whole world is yours to take.
