How to Understand The Choicer Voicer Dub Packs in The Choicer Voicer
In The Choicer Voicer, dub packs turn ordinary voice-pack playback into a full video-dubbing experience. Introduced in version 0.5.0, this advanced voice-pack format works in both normal gameplay and Dub Mode, but it needs two parts to function correctly: metadata for the audio samples and an OGV video.
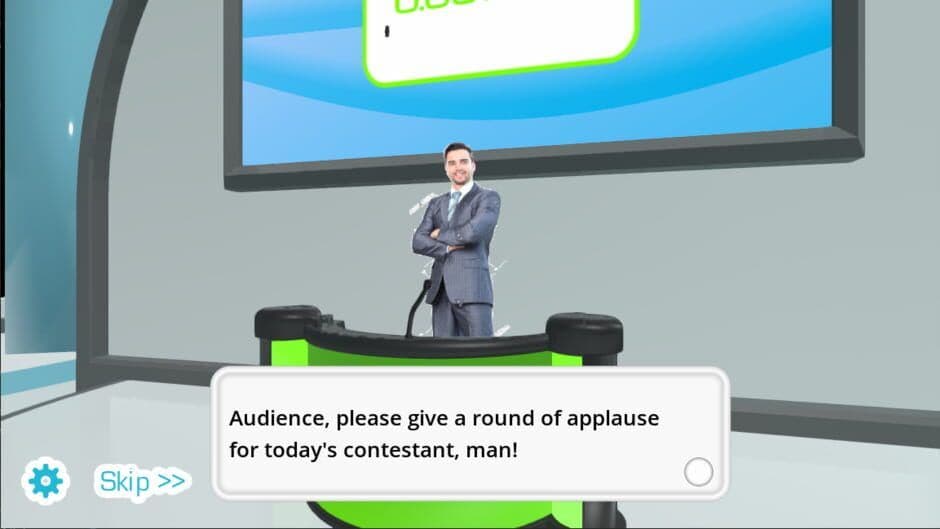
Menu settings in The Choicer Voicer.
During normal gameplay, the game plays audio samples and you mimic them to earn points. Your samples need to stay ordered, while their metadata tells The Choicer Voicer when each line should play. That same timing information becomes essential in Dub Mode, where the game synchronizes your performance with the included video.
Dub Mode is the main reason to build a dub pack. You get unlimited performance retakes, but your recordings remain inaudible until the session ends. Complete every sample first, then the game plays back your recordings alongside the video so you can hear the finished dub.
Don’t judge a dub pack after recording only one or two lines. In Dub Mode, you won’t hear the results until you complete every sample, so test the entire sequence before troubleshooting individual clips.
The video must be in OGV format because The Choicer Voicer uses the Godot Engine, which currently supports OGV video playback rather than common formats such as MP4 or AVI. The metadata and OGV video work together: metadata controls the audio timing, while the video provides the scene your recordings are synchronized against. The rest of this guide covers the complete process, from preparing samples and timestamps to converting, installing, and testing the finished pack.
With that foundation clear, you’ll know exactly what you’re building—and why both pieces are required—before you start editing.
Best Dub Pack Setup for The Choicer Voicer
Before you start converting anything, get the foundation right—The Choicer Voicer will not recognize a dub pack built from only half the required files. Prepare the source video, extract its audio, and make sure both the sample metadata and final video are ready to work together.
Minimum Dub Pack Requirements
A functional dub pack needs sample metadata and an OGV video. The metadata tells The Choicer Voicer when each audio sample plays, while the video provides the footage that the game synchronizes with the player’s performance. You need both components before testing; a pack containing only sample metadata or only a video is incomplete.
You’ll also need the original video and its extracted audio before editing begins. Use the source video as the visual basis for the pack, then extract its audio separately so you can build the voice samples and sample metadata from the same timing reference. Keep the source files available while you work—matching the audio clips to the video is much easier when you can check the original material.
Treat the source video and extracted audio as a matched pair. If you replace or trim one later, the sample timing may no longer line up with the footage.
The Choicer Voicer Video Format Limitation
The Choicer Voicer relies on Godot Engine for video playback, and Godot Engine currently supports OGV rather than MP4 or AVI. That means an MP4 or AVI source cannot be loaded directly as the dub video; convert unsupported formats before loading the pack.
Your pre-conversion checklist is simple:
- Original source video
- Extracted audio from that video
- Sample audio and metadata prepared from the extracted audio
- A plan to convert the source video to OGV
The conversion itself comes later, but this setup prevents the most common mistake in The Choicer Voicer: trying to test a dub pack before its required metadata and compatible video exist. Gather these pieces first, and the rest of the workflow will go smoothly.
How to Find The Choicer Voicer Packs Voice Folder in The Choicer Voicer
In The Choicer Voicer, the file location is straightforward once you know where to look—but putting a pack in the wrong folder can stop the game from finding it. Open the game’s main menu and use it to access the game files, then locate the packs_voice folder.
Opening the Pack Location
From the The Choicer Voicer main menu, access the game files and find packs_voice. This is the folder where completed dub packs belong. Create a new individual dub-pack directory inside packs_voice, or select the directory for a pack you’re already building.
Keep the pack’s files together from the beginning. It makes troubleshooting much easier if The Choicer Voicer fails to recognize the pack later.
Each dub-pack directory inside packs_voice must contain the pack’s metadata and audio files in the same location. Keep the optional backing track there as well when you use one, along with dub_video.ogv. Don’t scatter these files across separate folders—the game needs the individual pack directory to hold the complete set.
Once you’ve created or selected the correct directory, use it as the central workspace for the rest of your The Choicer Voicer dub-pack setup. With packs_voice open and the pack folder organized, you’re ready to prepare the source video and its audio files.
How to Prepare The Choicer Voicer Source Video in The Choicer Voicer
Before you start cutting samples for The Choicer Voicer, make sure the source video is the right foundation. A clean video and a matching audio track will save you from rebuilding the entire dub pack later.
Acquire and Check the Source Video
Procure the desired video before making a dub pack, then confirm it is legally and technically usable for your project. Check that the video plays correctly from start to finish and that its dialogue is clear enough to divide into individual voice samples.
Keep the original source video unchanged as a reference. You’ll need to compare the final audio samples against it so every line still matches the correct moment in the footage.
Separate the Source Audio
Separate the audio from the source video and save the resulting track for editing. This audio becomes the basis for making individual voice samples, while the video remains the visual reference for timing and playback.
As you review the track, identify where each spoken segment begins. Don’t rely on rough estimates: The Choicer Voicer uses metadata timestamps to align player recordings with the included video, so every sample needs its exact start position recorded.
Keep the source video open while reviewing the extracted audio. Matching the dialogue to visible scene changes makes it much easier to catch timing mistakes before they reach the dub pack.
Preserve Video and Sample Synchronization
In The Choicer Voicer, dub-pack playback uses metadata timestamps to align player recordings with the included video. Record the exact start position of every sample in the source audio, then use those positions when the clip metadata is added later.
If a sample starts at the wrong time—or its timestamp is only an approximation—the player’s recording can appear out of sync with the video. Treat the source video and extracted audio as a matched pair throughout preparation, and don’t move or trim the reference material without updating your timing notes.
Once you’ve acquired a usable source video, separated its audio, and logged each sample’s exact start position, the synchronization foundation is ready. Next, you can turn that audio into individual clips for The Choicer Voicer.
How to Extract The Choicer Voicer Audio for a Dub Pack in The Choicer Voicer
In The Choicer Voicer, the soundtrack is your raw material—but a crowded mix can make voice samples difficult to edit. Start by turning the source video's soundtrack into a clean working file, then prepare the spoken lines before you export individual clips.
Open the Extracted audio track—the extracted audio file from your source video—in your audio editor. Use this track as the basis for your samples, keeping the original video nearby so you can compare the timing and confirm that each spoken line matches the correct scene.
Clean Up the Source Audio
Use Isolate vocals when the soundtrack is crowded with music or background noise. Separate the vocals from those other elements and retain the clean vocal material for your samples. This makes speech easier to identify and gives your exported clips a clearer foundation for gameplay.
If a line is difficult to distinguish in the full soundtrack, isolate the vocals before cutting anything. It is much easier to find clean sample boundaries once the music and background noise are out of the way.
Set a Usable Volume
Your Loud sample source needs to be sufficiently loud for gameplay. Normalize the vocal material or raise its level in the editor, but listen carefully while doing so—pushing the volume too far can make the sample unusably distorted. The goal is a clear, strong voice recording rather than the loudest possible waveform.
Once the extracted audio is clean and audible, save that edited working version before moving on to individual sample exports. With a clear vocal track and controlled volume, the rest of your The Choicer Voicer dub-pack workflow becomes far less frustrating.
How to Create The Choicer Voicer Backing Track in The Choicer Voicer
The backing track is optional, but it can make a The Choicer Voicer Dub Mode session feel much closer to the original scene. Instead of leaving the player’s voice alone after separating the vocals, you can preserve the music or background noise and have it play underneath the completed dub.
Creating the Backing Track
After separating the vocals from the source audio, save the remaining music or background noise as _backing_track.ogg. Place this file in the dub-pack directory alongside the other pack files. The filename must be exactly _backing_track.ogg, including the leading underscore.
When you play the pack in The Choicer Voicer Dub Mode, _backing_track.ogg plays alongside player recordings. This keeps the original scene atmosphere—music, ambient noise, or other non-vocal sound—present while the game synchronizes your performance with the video.
Keep the backing track focused on separated music or background noise rather than the original vocals. Otherwise, the source dialogue may still play beneath your recordings and make the dub harder to hear.
If you do not need an accompaniment track, simply omit _backing_track.ogg from the dub-pack directory. The Choicer Voicer can still use the pack without this optional file; include it only when you want to preserve the scene’s background atmosphere.
Best Audio Editing Setup for The Choicer Voicer Samples
Your source audio is ready—now comes the careful part in The Choicer Voicer: turning a full performance into clean, usable clips. Good edits preserve the spoken line, keep timing manageable, and give every sample enough volume to stand out during gameplay.
Open the extracted audio or isolated vocals in Audacity, or use an equivalent audio editor. Listen through the track and identify each spoken segment before making cuts. Mark where each line begins and ends so you can export clips in a consistent order later.
Keep Clips Short and Natural
Keep each sample ideally under 6 seconds. If a line runs longer, split it into separate clips at a sensible speech break rather than forcing one oversized sample into the pack.
Cut at logical speech points: avoid clipping the beginning or end of a word, but also remove excessive silence before or after the dialogue. The goal is a clip that starts naturally and finishes cleanly when played back in The Choicer Voicer.
Play each cut from slightly before the speech begins. If the first consonant sounds chopped off, move the start point earlier; a tiny amount of breathing room is better than losing part of the line.
Check Sample Loudness Before Export
Make every exported clip loud enough for gameplay. Preview the samples at a comfortable listening level and compare quieter lines against louder ones, checking the levels in Audacity before exporting.
Avoid boosting a clip so aggressively that it becomes unusably distorted. If one sample is noticeably quieter than the rest, adjust its level in the editor and listen again before saving the final version.
Once every line is short, naturally cut, and loud enough to hear clearly, export the clips and move on to organizing their filenames and timestamps. With this editing setup, your The Choicer Voicer samples will be much easier to synchronize and enjoy in-game.
How to Name The Choicer Voicer Audio Samples in The Choicer Voicer
Your audio clips are ready for The Choicer Voicer, but a messy filename list can turn metadata entry into a guessing game. Set up a predictable naming system now, and you’ll always know which sample comes next and which timestamp belongs to it.
Start every filename with ascending numbers that match the clip’s playback order:
01_NiceOfThePrincess02_LotsaSpaghetti03_LuigiLook
This numbering keeps your audio exports, playback sequence, and metadata work aligned. Avoid arbitrary unordered names, even if the clip description seems clear—sorting files later becomes much harder when the names do not show their intended order.
Add the recorded start time after the clip name as a reference. For example, a sample beginning at 44.048 seconds can be named 07_MyClip_44-048. Keep the hyphen format consistent so you can quickly match each file to its source timing when working on The Choicer Voicer metadata.
Use the same structure for every export: sequence number, descriptive clip name, and, when useful, the timing suffix. The filename does not replace entering the timestamp in the game, but it gives you a reliable reference while you build the dub pack. With this system, your samples stay organized from the first export through final testing.
How to Record The Choicer Voicer Sample Timestamps in The Choicer Voicer
The timing is the backbone of every dub in The Choicer Voicer. If a sample starts even slightly late, your recording can drift away from the video, so capture each clip’s exact starting point while you still have the source audio open.
Open the extracted audio or isolated vocal track in Audacity and work through the clips in sequence:
- Place the cursor at the precise point where the spoken sample begins.
- Read the Audio Position indicator, which shows the location in hours, minutes, seconds, and milliseconds.
- Record that complete start time for the matching sample.
- Repeat the process for every exported clip, checking that the cursor is at the beginning of the speech rather than in the preceding silence.
Preserve millisecond-level start timing during sample preparation. When you later enter the timing in The Choicer Voicer, convert the editor reading to seconds for the game metadata. Keep a simple list matching each numbered filename to its timestamp so you don’t confuse similar clips.
Keep the audio editor and your timestamp notes visible together. Recording each start time immediately is much safer than trying to reconstruct the positions after exporting all your samples.
For example, a clip beginning at 44.048 seconds can be identified as 07_MyClip_44-048. This naming reference connects the sample to its source position at a glance, while the exact value—44.048 seconds—remains ready for the game’s timestamp field.
With every sample tied to a precise start time, your clips are ready for the metadata editor. Double-check the list before moving on; accurate timestamps now mean properly synchronized dubbing later.
How to Add The Choicer Voicer Clip Metadata in The Choicer Voicer
In The Choicer Voicer, accurate clip metadata is what keeps your recordings lined up with the dub video. If a sample’s timing is missing or incorrect, the game may trigger your performance too early or too late—so this is the step where your careful timestamp notes pay off.
Entering Clip Timestamps
- From the The Choicer Voicer main menu, open Extras.
- Select Edit Voice Packs & Clip Metadata.
- Open the dub pack and work through every exported audio sample.
- Add each clip’s playback timestamp in seconds, using the recorded source start time from your audio editor.
Match each timestamp to the exact moment when that sample begins in the source audio. For example, a clip that starts at 44.048 seconds needs 44.048 entered as its timing value. Your numbered filenames and timing suffixes make this much easier to verify, but the editor’s timestamp field is the data The Choicer Voicer uses for synchronization.
Enter timestamps directly from your notes instead of estimating by ear. Even a small timing error can make a correctly recorded line feel out of sync with the video.
Check Every Exported Sample
You need one timestamp for every sample in the clip metadata editor. Provide timing data for each exported audio file and each time it plays; do not leave a clip unmapped. Before leaving Edit Voice Packs & Clip Metadata, compare the editor’s sample list against the files in your dub-pack directory and confirm that every clip has a timestamp.
Once all timings are entered, save the metadata and keep the pack together with its audio files. This gives The Choicer Voicer the timing information it needs to place player recordings over the video correctly, leaving the later testing step to catch any remaining alignment problems.
How to Add The Choicer Voicer Captions and Images in The Choicer Voicer
The presentation details can make a dub pack feel polished, but a misplaced edit can throw off the whole scene. In The Choicer Voicer, use the existing Edit Voice Packs & Clip Metadata editor to add captions, images, and clip tags while leaving each sample’s timing untouched.
Add Captions to The Choicer Voicer Clips
Open the relevant sample in Edit Voice Packs & Clip Metadata, then attach caption text that matches the spoken line. Check the wording against the audio before saving—captions should correspond to what the clip actually says, not a rough description of it.
Keep each caption tied to its correct sample. If you reuse similar lines, compare the audio and caption together so you do not accidentally assign one clip’s text to another.
Assign Images to The Choicer Voicer Clips
You can also assign an image to a sample through the editor’s image field. Choose the image for the correct clip, but do not alter the timestamp while adding it; the image is presentation data, while the timestamp controls when the sample matches the video.
Add captions and images only after confirming the sample itself is correct. This small check prevents polished metadata from being attached to the wrong line.
Organize Clips with Tags
Apply tags to samples for organization and filtering. Keep tags consistent across related clips—for example, use the same tag format for clips belonging to the same group rather than creating several slightly different versions of one label.
Captions, images, and tags should improve how your The Choicer Voicer pack is presented without changing its synchronization. Once every sample has the right caption, image, and consistent tags, review the pack metadata and move on to the character and Dub Mode settings.
How to Use The Choicer Voicer Dub Character Tags in The Choicer Voicer
In The Choicer Voicer, scenes with multiple audio sources can become confusing if every clip is treated as one character. Dub character tags solve that problem by linking each clip to the character who speaks it, so players can choose exactly whose lines they want to perform.
Assigning Dub Character Tags
- Open Edit Voice Packs & Clip Metadata from the game’s metadata editor.
- Select a clip and assign it to its spoken character using its dub character tag.
- Repeat this for every relevant audio source in the scene, including each character whose lines players may want to dub.
- Keep the tags consistent across clips so the character filter can separate the voices correctly.
Once the tags are in place, players can use the dub-character filter to choose which character they want to dub. For example, a scene with several speakers can be configured so the player performs only one character’s lines instead of recording every voice in the sequence.
Tag every relevant source correctly, even for characters you do not expect players to select. A missing or inconsistent tag can make clips fall into the wrong character group.
What Happens to Unselected Characters
In The Choicer Voicer’s Dub Mode, characters excluded by the player’s dub-character filter retain their original audio. Only the selected character’s tagged clips are prepared for the player’s performance, while the other characters continue using the source audio during playback.
Test the scene with different filter selections before considering the setup finished. Choose one character, confirm that character’s clips are the ones being dubbed, then switch the selection and verify that the newly chosen character replaces the previous one while unselected-character audio remains original.
With complete dub character tags, multi-speaker scenes stay organized and flexible. The Choicer Voicer can then deliver focused character-specific dubbing without stripping away the rest of the scene’s dialogue.
How to Mark The Choicer Voicer Dub-Only Clips in The Choicer Voicer
Dub-only clips are your way to keep special scene lines out of ordinary play. In The Choicer Voicer, use this setting for audio meant specifically for the video-dubbing variant, while leaving shared voice content available in normal modes.
Marking Clips as Dub Only
Open Edit Voice Packs & Clip Metadata from the game’s metadata editor, then select the clip you want to restrict. Enable dub only for that clip. The game will then prevent it from appearing outside Dub Mode, so it won’t interrupt the standard voice-pack experience.
Use this toggle selectively:
- Review the clip’s purpose in the dub pack metadata.
- Enable dub only for lines intended exclusively for the video-dubbing variant.
- Leave shared voice content unmarked so those clips remain available to normal modes.
- Repeat the check for every special-purpose clip before testing the pack.
Don’t mark every clip as dub only. Keep dialogue used by both formats shared, and reserve the toggle for lines that only make sense alongside the dub video.
After saving the metadata, test the pack in The Choicer Voicer’s Dub Mode and confirm the restricted clips appear there. Then run normal gameplay to make sure those clips stay out while your shared voice content still plays as expected. With the clips sorted correctly, your dub pack will behave cleanly in both modes.
How to Convert The Choicer Voicer MP4 to OGV in The Choicer Voicer
The conversion step is where a working The Choicer Voicer dub pack can quietly fail. Your source MP4 or AVI needs a real OGV conversion—not a renamed extension—before the game can use it.
- HandBrake can serve as one possible MP4-to-OGV conversion tool. Open the source video, configure the export to produce OGV, and verify that the result is genuinely an OGV file before adding it to the pack. If HandBrake does not provide a usable OGV output in your setup, switch to FFmpeg instead of installing a file that only looks correct by name.
- FFmpeg provides a command-line MP4-to-OGV conversion route. Convert the source video through FFmpeg, then confirm that both the output container and codec are actually OGV-compatible. The file extension alone is not proof: changing
.mp4to.ogvleaves the video in an unsupported format and can stop The Choicer Voicer from loading it.
⚠️ Watch out: Don’t test only by checking the filename. Open or inspect the converted file independently and confirm it is a genuine OGV before moving it into your dub-pack directory.
Once the conversion succeeds, keep the verified output ready for the next step, where it will receive the exact filename required by The Choicer Voicer. With a true OGV file—not a renamed MP4—you’re ready to finish the video side of the dub pack.
Best OGV Conversion Settings for The Choicer Voicer
In The Choicer Voicer, a renamed MP4 is not a conversion—it’s a broken dub-pack video waiting to crash. The safest approach is to verify what HandBrake or FFmpeg actually produces before placing the file in your pack.
What the OGV Output Must Contain
Your conversion result must produce a genuine OGV file, not an MP4 or AVI with a changed extension. The file’s container and codec both matter: changing .mp4 to .ogv does not make it compatible.
Godot Engine uses its supported OGV playback path when loading the converted video. Reject any output that remains in an unsupported container or codec, even if the filename ends in .ogv. The available research does not specify a verified HandBrake preset or exact codec setting, so don’t rely on a generic “Web” or “Game” preset—confirm the resulting file is genuinely OGV-compatible.
Use either HandBrake or FFmpeg, then test the output independently before installing it in the dub pack:
- Convert the source video to OGV.
- Confirm the output is a real OGV file rather than a renamed MP4 or AVI.
- Open or inspect the converted file outside The Choicer Voicer to make sure it loads correctly.
- Only then use the required filename and place it in the pack.
⚠️ Watch out: The extension alone proves nothing. If the file will not open independently, The Choicer Voicer will not be able to use it reliably either.
Recovering From a Failed Conversion
If a HandBrake or FFmpeg conversion produces a file that will not open or load, don’t install that broken file and hope the game fixes it. Recheck the container, codec, and output filename, then reconvert the source video. A successful filename change is not a successful format conversion.
Once the result passes an independent playback check, continue with your dub-pack setup. This extra verification takes only a moment and can save you from troubleshooting an apparently mysterious OGV loading crash later. With a genuine OGV output in hand, your The Choicer Voicer video is ready for the next setup step.
How to Name The Choicer Voicer Dub Video in The Choicer Voicer
The final filename is the small detail that can make or break your The Choicer Voicer dub pack. Get it wrong, and the game’s loader won’t recognize the video—even if the conversion itself is perfect.
Name the converted video exactly:
dub_video.ogv
The filename must be dub_video, followed by the .ogv extension. Rename the converted file or export it under that exact name before adding it to your pack.
⚠️ Watch out: Don’t leave extra text in the filename, such as
dub_video_final.ogv, and don’t use an uppercase or different extension. The Choicer Voicer expects the exactdub_video.ogvname for video playback.
Keep dub_video.ogv in the dub-pack directory alongside the pack’s other files. Once the name is correct, the game can identify the video when you load the pack—so double-check the spelling before moving on.
How to Place The Choicer Voicer OGV Video in The Choicer Voicer
The converted video is the final piece of your The Choicer Voicer dub pack. Place it correctly now, and the game can connect your video, audio samples, and metadata instead of rejecting the pack at launch.
Install the Video in the Dub-Pack Directory
Open the packs_voice folder and enter the dub-pack directory you prepared earlier. Copy dub_video.ogv into that same folder, beside the sample metadata and audio files. Don’t place it in a separate video folder—the loader expects the video and the rest of the pack files to stay together.
Check the filename manually after copying. A hidden extra extension such as dub_video.ogv.ogv can stop the loader from recognizing the file.
Before launching The Choicer Voicer, confirm that the dub-pack directory contains the complete file set:
- The sample metadata
- The numbered audio samples
- The optional _backing_track.ogg
- dub_video.ogv
The backing track is optional, so its absence is fine when your pack does not use one. The metadata, numbered samples, and video are the essential pieces that must be present together.
Check the Video Filename
If dub_video.ogv is missing, the dub pack fails to load when it cannot find an OGV file named dub_video. Check the spelling and extension first, then confirm the file is inside the correct dub-pack directory within packs_voice.
With the video beside the metadata and audio files, your pack is ready for the next step: testing Dub Mode in The Choicer Voicer. The file placement is simple, but getting this checklist right saves you from chasing a loading error later.
How to Test The Choicer Voicer Dub Mode in The Choicer Voicer
Your dub pack is ready for its real trial run. In The Choicer Voicer, test both playback paths separately: normal gameplay checks the voice-pack behavior, while Dub Mode confirms that your recordings line up with the included video.
Test The Choicer Voicer Dub Mode
Start Dub Mode and perform every sample in the pack. Dub Mode allows unlimited retakes, so use that freedom to retry any line that feels mistimed or unclear. Remember, your recordings cannot be heard until the game ends, so don’t mistake the lack of immediate playback for a broken pack.
After you complete the session, listen to the player’s recordings synchronized over the included video. Check whether each recording begins at the correct moment and remains aligned with the corresponding spoken line. If a clip starts too early or late, return to its metadata and adjust that sample’s timestamp rather than rebuilding the entire pack.
Test a few difficult clips first, then run the full session. A single incorrect timestamp can reveal a synchronization problem before you spend time reviewing every sample.
Test Normal Gameplay Compatibility
Next, play the pack in normal gameplay as a voice pack. Mimic the samples for points and confirm that ordinary clips behave as intended. Check that the samples play in the correct order and that their captions, images, and character behavior match what you set in the pack.
If both tests succeed, your The Choicer Voicer dub pack is functioning in its intended gameplay contexts: regular voice-pack playback works for scoring, and Dub Mode delivers the synchronized video performance. With that confirmed, you’re ready to troubleshoot only if a specific loading or crash issue appears.
How to Diagnose The Choicer Voicer OGV Loading Crashes in The Choicer Voicer
An OGV loading crash in The Choicer Voicer usually points to the dub pack itself before it points to your Steam Deck or installation. If the pack refuses to load, work through the file, path, and metadata checks in that order—you’ll isolate the problem much faster than changing system settings at random.
Check the OGV File First
An unsupported or malformed video can prevent the entire dub pack from loading. Start by testing a known-good OGV in the same pack setup. If the pack loads with the known-good OGV, the original video is the likely cause; reconvert it instead of continuing to troubleshoot the game.
For file-format diagnosis, verify that the video is genuinely OGV rather than an MP4 or AVI with a changed extension. If the container or codec is wrong, reconvert the source and test the new output independently before putting it back into the pack. Simply renaming a file will not make The Choicer Voicer accept it.
⚠️ Watch out: A file named
.ogvis not automatically a valid OGV. A renamed MP4 or AVI can still trigger the same loading crash.
Verify the Filename and Path
Next, check the folder structure. Confirm that the pack is inside packs_voice, that the files are in the intended pack directory, and that the video uses the exact spelling dub_video.ogv. Correct the path or filename before changing system settings, especially if the pack worked before you moved or renamed its files.
A missing file, a typo, or an extra extension can stop the dub-pack loader even when the video itself is valid. Compare the file location and name carefully, then launch The Choicer Voicer again before moving on to deeper troubleshooting.
Isolate Metadata from the Video
If the video passes its standalone test and the path is correct, perform a metadata isolation test. Where possible, test the video and sample metadata separately: use the video with a minimal or known-working metadata setup, then test the sample metadata without the suspect video. This helps identify whether the timestamps or the video trigger the failure.
A pack that loads until you add specific sample metadata points toward a metadata problem, while a pack that fails as soon as the video is present points back to the OGV. Check the affected timestamps against the source timing and confirm that each exported sample has matching metadata, but avoid changing several files at once—you want one clear variable per test.
If all three checks pass and The Choicer Voicer still crashes, treat it as broader game instability. Return to the basic Steam Deck checks from the previous section: confirm compatibility, remove unauthorized mods, check official channels or forums for known issues, maintain a stable internet connection, and make sure the device is not overheating. With a known-good OGV, the exact dub_video.ogv path, and isolated metadata tests, you’ll know whether to fix the pack or troubleshoot the system.
How to Perform Basic The Choicer Voicer Steam Deck Checks in The Choicer Voicer
Before changing storage, DNS, or Proton settings, start with the simple checks that can expose a wider problem. In The Choicer Voicer, a crash on Steam Deck may come from compatibility, modifications, an unstable connection, or heat—not necessarily your dub pack.
- Check Steam Deck compatibility. Confirm The Choicer Voicer’s current compatibility status, then consult official channels or forums for known issues. If other players are reporting the same crash, you may be dealing with a game or SteamOS problem rather than a faulty installation.
- Use a mod-free installation. Remove or disable unauthorized mods while diagnosing crashes, then retest the unmodified game. This gives you a clean baseline before you investigate your custom dub files or system settings.
- Check your connection and temperature. Maintain a stable internet connection and prevent overheating, then retry the game. Give the Steam Deck time to cool if it feels hot, and avoid testing while connection problems or heat-related instability are still present.
- Force-reboot the Steam Deck if the game remains stuck or crashes immediately. Press and hold the Power button for at least 12 seconds, then start the system again and launch The Choicer Voicer. This can clear a minor software glitch without changing your files or configuration.
⚠️ Watch out: Don’t jump straight to a factory reset or other drastic fix. First confirm compatibility, remove unauthorized mods, and rule out connection and heat issues.
These checks give you a clean starting point for the rest of your troubleshooting. If The Choicer Voicer still crashes after the compatibility check, mod-free retest, stable connection, temperature check, and force reboot, move on to the more targeted Steam Deck fixes covered in the troubleshooting path. With the basics ruled out, you’ll know whether the problem is really the game—or your custom dub setup.