How to Access Dub Mode in The Choicer Voicer
Dub Mode is The Choicer Voicer’s relaxed answer to the pressure of judged rounds: instead of chasing a score, you perform voiceovers for synchronized scenes. Before you start, make sure the game has a compatible dub pack—otherwise, there may be no scene content available to play.
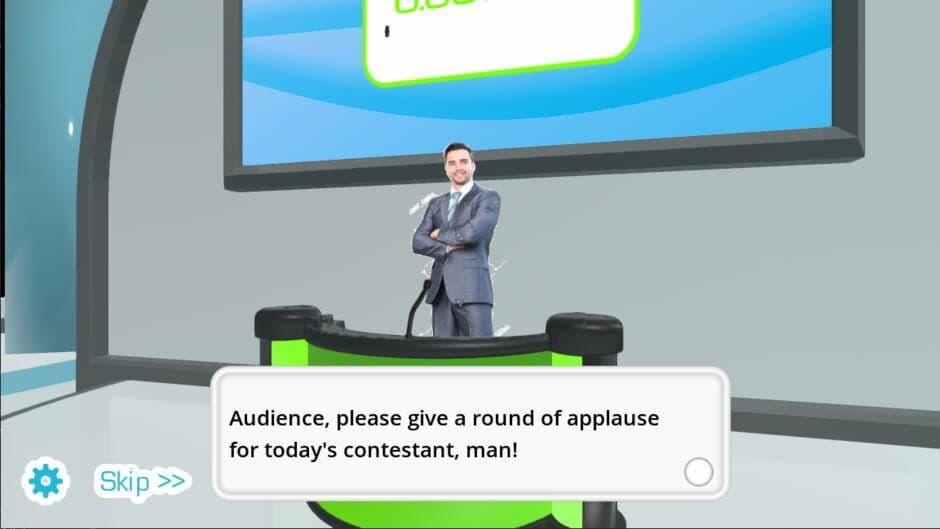
Official screenshot of the game's visual style.
What Dub Mode Does
Dub Mode is a game variant that records voiceovers for scenes with no competitive scoring. It works as a low-pressure performance sandbox, letting you focus on delivering lines and matching the scene rather than impressing the judges. You can use it to experiment with character voices, practice performances, or create entertaining shared clips.
Access Dub Mode through the game’s available mode selections, then choose a compatible dub pack from the content stored in the packs_voice folder. A working dub pack requires synchronized audio metadata and a video. The metadata tells The Choicer Voicer when each line should play, while the video provides the scene being voiced over.
Check your available content before starting a session. The Choicer Voicer is an early access alpha framework that relies heavily on player-supplied voice packs and user-generated scenes rather than a large built-in content library.
How It Differs from Standard Play
The Standard Game Show Studio is The Choicer Voicer’s local game-show mode, where players mimic audio clips for computer-judged scores. The basic flow is:
- Press [A] to select a prompt.
- Use your microphone to record your performance.
- Submit the recording for judging.
That competitive loop is separate from Dub Mode. In the standard mode, the computer judges evaluate your impression; in Dub Mode, you are voicing a scene for performance rather than competing for a score. The game still uses its recording systems in both variants, but the goal changes from winning approval to making the dialogue fit the scene.
If you launch The Choicer Voicer and find little content ready to play, don’t panic—the game is designed around customization. Once you place a compatible dub pack with synchronized audio metadata and a video in the packs_voice folder, Dub Mode has the material it needs. With that pack installed, you’re ready to start dubbing instead of waiting for a traditional campaign library.
How to Compare Standard Dub Mode and Freestyle Dub Mode in The Choicer Voicer
In The Choicer Voicer, the difference between Standard Dub Mode and Freestyle Dub Mode comes down to how much the scene controls your delivery. Both modes use recorded performances and final video playback, but their caption cues and line timing may ask you to follow very different workflows.
Standard Dub Mode Timing
Standard Dub Mode uses a flashing caption cue during the synchronized scene. When the cue appears, begin or deliver the assigned line at its intended moment. Treat the caption as your timing signal: starting too early can make the line lead the action, while starting too late can make it feel disconnected from the scene.
Follow the cue, preserve the source line's pauses, and finish before the next prompt takes over. The goal is not simply to say the words correctly—it is to make your recording land where the original dialogue belongs.
Freestyle Dub Mode Timing
Freestyle Dub Mode uses flashing caption cues and line timing that differ from standard Dub Mode. Before recording, verify whether its prompts are fixed, optional, or player-directed. Do not assume that every flashing caption requires the same immediate response as Standard Dub Mode.
If the prompts are fixed, follow their timing as you would in the standard format. If they are optional or player-directed, use them as guidance and decide when your performance should enter the scene. This check matters because the right workflow depends on how the specific Freestyle Dub Mode setup handles its captions.
On your first attempt, watch for the flashing caption cues without trying to give a perfect performance. You’ll quickly learn whether Freestyle Dub Mode is asking for strict synchronization or giving you room to choose your delivery.
Retakes and Final Playback
Dub Mode allows unlimited retakes, so repeat a take whenever the timing or delivery feels off. The catch is that your recordings cannot be heard until the session ends. Make one adjustment at a time—such as starting earlier, holding a pause longer, or changing your vocal delivery—and remember what you changed before trying again.
After all samples are performed, The Choicer Voicer plays your recordings over the included video at their assigned timestamps. This final synchronization is where you can judge whether each line matches the scene's action and caption timing. If a take feels wrong during playback, return to the next retake with a specific change rather than randomly repeating the line.
Standard Dub Mode rewards precise caption timing, while Freestyle Dub Mode first requires you to understand how its prompts are meant to be used. Once you identify that difference, the unlimited-retake system gives you plenty of room to polish the final synchronized scene.
Best Recording Setup for The Choicer Voicer Dub Mode
Before you start a timed voiceover, make sure your hardware is ready—nothing kills a good Dub Mode take faster than discovering the game never captured your voice. In The Choicer Voicer, each player should have a working microphone connected before starting a session.
Check Your Microphone Before Recording
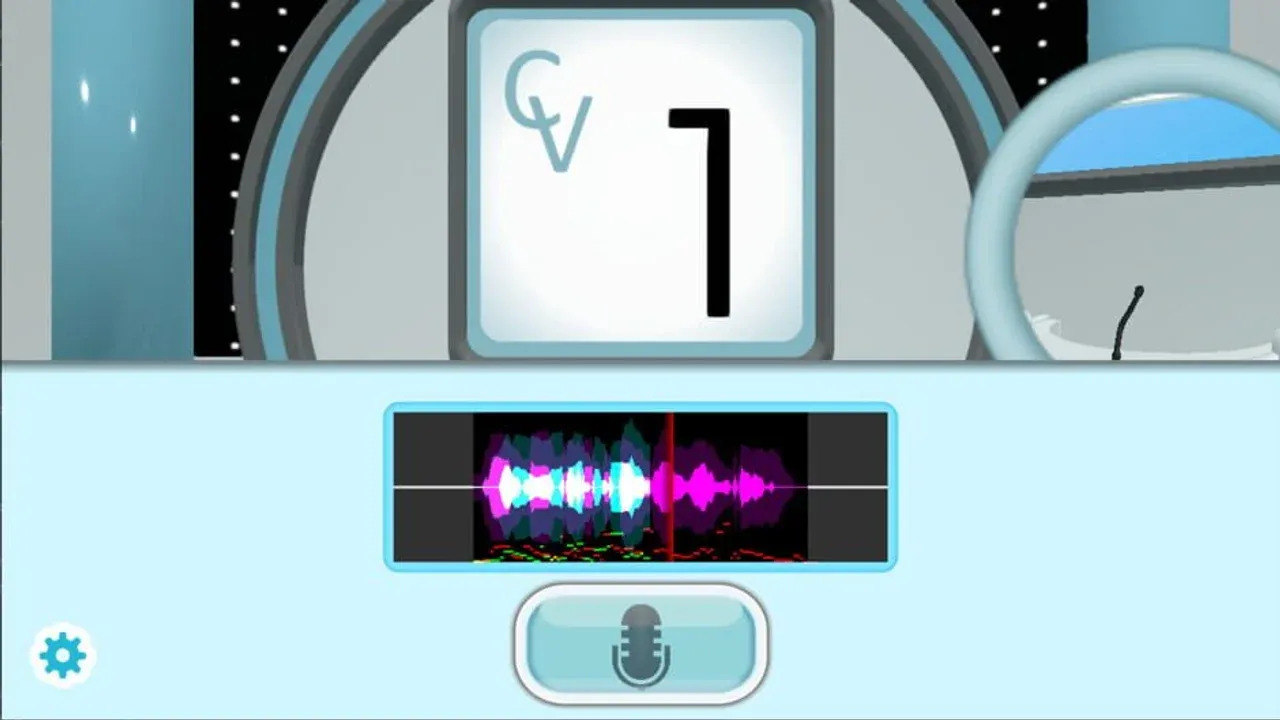
Begin a short recording and watch the live waveform playback in the recording interface. Your microphone input displays a waveform while recording, so use it as a quick confirmation that The Choicer Voicer is receiving sound. If the waveform stays flat, stop and troubleshoot before attempting a full scene.
A clear modest headset microphone is generally sufficient for Dub Mode. Performance, tone, timing, and delivery matter more than raw recording fidelity, so focus on a reliable input rather than expensive hardware.
Avoid Surround-Sound Recording Problems
Surround-sound recording failure is a known issue in The Choicer Voicer's early-access microphone systems. Surround-sound configurations can prevent microphone audio from recording even when the microphone appears connected, so switch to a simpler audio configuration or test another input if the waveform does not react.
Once every player sees microphone activity in the live waveform, you’re ready to focus on the scene instead of fighting your setup. Make this check before each new group session, and your Dub Mode recordings will start on solid ground.
How to Fix Silent Microphone Recordings in The Choicer Voicer
Silent recordings can make Dub Mode feel completely broken, especially when you’re spending retakes on takes the game never captured. In The Choicer Voicer, test the input before rebuilding an entire session, then use an external monitoring workaround if the internal recording path still fails.
Start with No Gameplay Demo, The Choicer Voicer’s testing build or mode. Use it to verify microphone capture before troubleshooting a full Dub Mode session. If No Gameplay Demo also records silence, the problem is likely with the audio route or device setup rather than the scene you’re trying to dub.
If the issue is tied to a surround-sound recording problem, use this fallback workflow:
- Route the game audio output to an unused audio device.
- In OBS, create an audio source linked to that rerouted output.
- Enable OBS monitoring.
- Speak into your microphone and verify that the input plays back through OBS.
The OBS monitoring workaround requires OBS and an alternate audio route. Treat it only as a workaround for failed internal microphone capture—it is not a built-in fix for The Choicer Voicer’s recording system. Some setups may still require trial and error with audio devices before the microphone playback becomes audible.
After a silent or incorrect take, stop and retest the input before spending more retakes on a broken signal. If monitoring remains silent, change the device route and restart the session.
Once No Gameplay Demo confirms your input—or OBS successfully monitors it—return to Dub Mode and make a short test recording before committing to the full scene. With the signal verified first, you can focus on timing and vocal delivery instead of wondering whether the game captured anything at all.
Best Timing Technique for The Choicer Voicer Dub Mode
In The Choicer Voicer, great dubbing is about more than saying the right words—the line has to land with the scene. Match the source clip’s start time, pauses, cadence, and ending to the visual action, and your performance will feel synchronized instead of merely recited.
Match the Scene’s Timing
Treat the flashing caption cue as your visual timing signal. Begin the line promptly when it flashes, but avoid starting early; even a strong delivery can feel off if it arrives before the character’s action or the scene’s intended beat.
Before recording a take, listen for the preceding beat or visual action. Count the interval internally, then speak when the caption cue and scene timing align. This gives you a reliable count-in without rushing to fill the silence before the line begins.
Focus on the moment immediately before the line, not just the caption itself. That preceding action often tells you exactly when the source clip is about to start.
Control Pauses and Line Endings
Keep the source rhythm intact from the first syllable to the final word. Preserve the pauses between phrases, follow the original cadence, and finish at the same point as the source clip so your ending lines up with the next visual action, caption, or sample.
For a long or energetic line, take a controlled breath before the cue rather than inhaling halfway through the delivery. Maintain the source rhythm and finish before the next caption or sample begins. If you run out of breath, the line may slow down near the end and drift out of sync.
With a pre-listen, an internal count, and deliberate breath control, you can match the scene instead of chasing it. In Dub Mode, aim for the complete performance arc: start on cue, ride the pauses and cadence, and end cleanly with the action.
Best Vocal Performance Technique for The Choicer Voicer Dub Mode
In The Choicer Voicer Dub Mode, simply saying the right words is only half the performance. Your voice needs to communicate who is speaking and how they feel, so focus on recognizable acting choices instead of chasing a flat, perfectly literal reading.
Start with tone matching: reproduce the source character's vocal tone and emotional energy rather than only the literal words. A nervous character should sound nervous, while an angry or excited character needs that same emotional force in your delivery. Even when your voice does not naturally resemble the source, matching its attitude gives the audience an obvious performance to follow.
Next, work on inflection matching. Copy the source line's pitch movement, emphasis, stress, and cadence. Listen for the words that rise, drop, stretch, or land harder, then mirror those choices in your take. This makes the line resemble the source even when your exact vocal texture is different.
The game’s scoring priorities support this approach in standard judged rounds: computer evaluation can value tone, timing, and overall delivery more than technically perfect word accuracy. Dub Mode is not scored in the same competitive way, but that feedback still tells you what makes a voiceover convincing—your performance should feel intentional, not merely correct.
In a group performance or comedic scene, exaggerate recognizable emotion and articulation when subtle delivery may be difficult for listeners to distinguish. A bigger reaction, clearer stress, or sharper character voice can make the joke and the speaker instantly readable.
Try one restrained take first, then push the emotion further on your next retake. Once you can identify the character’s feeling, pitch movement, and strongest words, your The Choicer Voicer dub performance will sound far more deliberate—and much easier for an audience to recognize.
How to Handle Caption Length and Pauses in The Choicer Voicer Dub Mode
In The Choicer Voicer Dub Mode, flashing captions are your timing lifeline. They identify when a line is active, so watch the cue and trust your visual timing instead of waiting for your own recording to become audible.
Match the Caption Without Rushing
When the caption flashes, align your first spoken syllable with the cue’s intended onset—not several words later and not before it appears. Keep the line’s natural duration, then stop before the next cue activates. This keeps your voiceover attached to the scene instead of causing one line to spill into the next.
Think of the flashing caption as a starting signal, not a countdown. Prepare your first word during the preceding visual beat, then speak as soon as the line prompt becomes active.
Preserve Dialogue Pauses
If the source dialogue contains pauses, leave equivalent silence between phrases. Don’t fill the gap with extra words, nervous breaths, or background noise; those additions can make the delivery feel rushed and push the ending toward the next caption. Use the pause to maintain the scene’s rhythm, just as you would preserve the source line’s cadence.
Recover From a Missed Cue
If you start late or early, don’t automatically abandon the take. Continue if you can still finish the line before the next cue appears. If the timing mistake makes that impossible, use another retake and reset from the preceding visual beat rather than trying to force the rest of the scene back into place.
With this approach, every flashing caption becomes a clear anchor: start on its intended onset, preserve the pauses, and finish before the next prompt. The scene will feel far more natural, even when the first take goes slightly off track.
How to Use Dub Character Captions in The Choicer Voicer
In The Choicer Voicer, scenes with several speakers can become confusing fast—especially when captions flash one after another. dub character tags solve that problem by identifying which character owns each sample, letting you filter the scene before you start recording.
Open the clip metadata for the scene and check the tags assigned to each sample. When a scene has multiple audio sources, filter for the desired speaker before recording. For single-character dubbing, choose one character to dub and leave the other characters unselected. The game then keeps those unselected character voices as original audio during synchronized playback, so you only replace the lines belonging to your chosen speaker.
In a crowded scene, confirm that every flashing caption belongs to the selected character before recording. Otherwise, you may perform a line meant for another speaker and end up with voices assigned to the wrong character.
During the final playback, listen for the contrast: your recordings should replace the selected character’s lines, while unselected characters retain their original audio. This makes multi-speaker scenes much easier to manage and keeps the conversation intact. With the right character filter, you can focus on one performance instead of trying to voice the entire scene.
How to Configure Dub-Only Clips in The Choicer Voicer
Scene-specific lines can clutter standard rounds if they remain in the general clip pool. In The Choicer Voicer, the dub only flag keeps those synchronized voiceover samples where they belong: Dub Mode.
Marking a Clip as Dub Only
Open The Choicer Voicer’s main menu and choose Extras, then select Edit Voice Packs & Clip Metadata. This metadata editor is where you can change a sample’s timestamps, captions, images, tags, and dub-only status.
Find the scene dialogue sample you want to restrict, then toggle it as dub only. Once enabled, that sample appears in Dub Mode but not in other modes, keeping scene-specific lines out of standard gameplay.
Apply the flag to every clip that depends on a scene’s visuals or synchronized timing. Leaving even one of these lines unmarked can make it appear in an incompatible standard round.
Separating Mixed Voice Packs
If your voice pack contains both regular impression clips and scene dialogue, use the metadata editor to separate them logically. Mark the scene-synchronized samples as dub only, while leaving ordinary impression clips available to standard gameplay.
This setup lets one mixed content pack support both experiences without forcing every clip into every mode. With the correct metadata in place, The Choicer Voicer can keep your regular rounds clean while reserving synchronized dialogue for the scenes built around it.
How to Create a Dub Pack for The Choicer Voicer
In The Choicer Voicer, a custom synchronized scene needs more than a collection of voice clips—it needs the right folder structure and video asset. Set it up correctly now, and Dub Mode can line up each player recording with the scene instead of leaving your pack unable to load.
Set Up the Dub Pack Folder
Create or place your custom dub pack in the packs_voice directory within The Choicer Voicer’s game files. The dub pack folder stores the scene video, audio samples, and the metadata that tells the game when each sample plays. Keep all of these files together inside the same pack folder so the game can read them as one synchronized package.
A functional dub pack requires two components:
- Metadata for every audio sample, including its playback timing and other clip information
- A scene video that provides the visual sequence for synchronization
The audio files alone are not enough. The Choicer Voicer uses the metadata to match each recording to the correct moment in the video, while the video supplies the scene players are dubbing.
Add the Required Video
Convert your scene video to the OGV format, then name the finished file dub_video.ogv exactly. Place dub_video.ogv directly inside the dub pack folder. The filename must match this spelling and capitalization; using another name prevents the pack from loading correctly.
⚠️ Watch out: MP4 and AVI files cannot substitute for dub_video.ogv. Even if the original scene plays perfectly elsewhere, Dub Mode still needs the converted OGV file.
This restriction comes from the Godot Engine, which currently supports OGV for The Choicer Voicer’s video playback. MP4 and AVI are not compatible with the game’s Dub Mode video playback, so convert the scene before testing the pack rather than troubleshooting a format the engine cannot use.
Once the dub pack folder contains metadata for every audio sample and the correctly named dub_video.ogv, you have the foundation for a playable synchronized scene. With that structure in place, the remaining work is linking each clip to its timestamp and presentation details—then you’ll be ready to test your custom dub in The Choicer Voicer.
How to Prepare Source Audio for The Choicer Voicer Dub Mode
Your dub pack lives or dies by the clarity of its reference audio. In The Choicer Voicer, clean source dialogue makes every caption cue, timestamp, and retake easier to follow—especially when the original scene includes music or environmental noise.
Start with the selected video and extract its audio track before cutting any individual dialogue samples. This gives you a workable audio file that matches the scene’s timing, so your exported clips can stay aligned with the video during Dub Mode playback.
If you’re working from a noisy source recording, separate the vocals from the background audio when possible. Isolating the dialogue makes the reference line easier to hear and prevents music or background noise from obscuring the words you need to perform. Keep the removed music or noise if you want the finished dub to retain the scene’s atmosphere: save it in the dub pack as _backing_track.ogg, which plays alongside player recordings.
Don’t cut dialogue while the full soundtrack is masking quiet words. Isolate the vocals first, then use the cleaner track to identify natural phrase boundaries and pauses.
Open the extracted audio—or the isolated vocals—in Audacity. Use it to cut and export each individual dialogue sample, keeping the source timing intact for the timestamp and metadata steps covered later. Make sure each sample is loud enough to hear clearly; very small waveforms can produce less accurate scores in The Choicer Voicer’s audio sampling.
Once the dialogue is clean and separated, you have a reliable foundation for your clips. With the reference track prepared in Audacity and _backing_track.ogg saved when needed, your Dub Mode recordings will be much easier to synchronize and perform.
Best Dub Clip Length and Naming Setup for The Choicer Voicer
Dub pack editing is where a smooth scene can either come together—or turn into a synchronization headache. In The Choicer Voicer, keeping each dialogue sample short, clearly named, and easy to hear makes recording and retaking far less frustrating.
Keep individual dialogue clips under 6 seconds whenever possible. Short samples are easier to time against the source video and less tiring to redo during a session. That doesn’t mean cutting a sentence in the middle: use the dialogue waveform and make intuitive sample cuts at natural speech boundaries, such as completed phrases or pauses.
Name your exported clips with sequential numbers so their order is immediately clear. A clean setup could use 01_NiceOfThePrincess, 02_LotsaSpaghetti, and 03_LuigiLook. This naming system keeps the samples organized while you add metadata and makes it easier to identify which line belongs next in the scene.
Make each exported sample’s vocal waveform sufficiently loud. Very small waveforms can produce inaccurate audio sampling and weaker results, so increase the clip’s loudness enough for the speech to register clearly before exporting.
Once your clips are short, naturally cut, numbered, and audible, the rest of your The Choicer Voicer dub pack becomes much easier to manage. You’ll spend less time hunting for lines and more time refining the performance.
How to Record Dub Timestamps in The Choicer Voicer
In The Choicer Voicer, every dubbed line needs a reliable place in the scene’s timeline. Record each clip’s exact source start time while editing so the game can trigger your voice at the right moment instead of making you guess during playback.
Record the Source Timestamp in Audacity
- Open the extracted source audio in Audacity and locate the beginning of an individual dialogue sample.
- Place the playback cursor exactly where that sample starts.
- Read the Audacity Audio Position display in the bottom-left corner. Record the time as hh:mm:ss plus milliseconds—for example, a sample might begin at 00:00:44.048, or 44.048 seconds.
- Repeat this for every exported sample. Don’t estimate from the waveform; even a small timing error can make a line start too early or too late against the video.
Write down each timestamp immediately after placing the cursor. Recording the time before exporting the clip prevents a messy editing session from turning into a guessing game later.
Add the Time to Each Filename
Use the timestamp to keep your exported clips organized. Append the start time to the filename in seconds and milliseconds, using a hyphen between those values. For example, a clip beginning at 44.048 seconds can be named 07_MyClip_44-048.
The sequential number keeps the samples in order, while the timestamp gives you a quick reference when entering metadata. This is especially useful when a pack contains many short lines and you need to match each file to its position in the source scene.
Enter Playback Times in The Choicer Voicer
After exporting the clips, open the clip metadata editor through Extras and Edit Voice Packs & Clip Metadata. Enter each sample’s playback timestamp in seconds, using the exact start time you recorded in Audacity.
If the same sample occurs more than once in the scene, enter a timestamp for every time that sample occurs. One timestamp only covers one playback point, so repeated dialogue needs separate timing entries to synchronize correctly.
Once the filenames and metadata agree, your dub pack has a dependable timing map. With those exact seconds recorded, The Choicer Voicer can line up your performance with the scene instead of leaving your best delivery stranded between cues.
How to Add Dub Captions and Images in The Choicer Voicer
In The Choicer Voicer, clean metadata turns a functional dub pack into something you can actually perform from. Once the scene starts moving, readable captions and recognizable images help you track each line without losing the visual action.
Open Extras, then select Edit Voice Packs & Clip Metadata. Choose the corresponding audio sample and add the spoken line as its caption. Keep the text concise and synchronized with the spoken line so you can read the prompt quickly while still watching the scene and reacting to the flashing caption performance cue.
The same editor lets you assign an image to the sample. Use clip image metadata to identify the current sample or speaker during the scene, especially when several characters appear close together. A useful image should make the active voice obvious at a glance rather than pulling your attention away from the video.
Be careful with dialogue that repeats. If the same sample is used more than once, enter a timestamp for each occurrence in Edit Voice Packs & Clip Metadata. Every appearance needs its own timestamp so your recording syncs correctly whenever that line returns.
Preview your captions alongside the scene before sharing the pack. If a line is too long to read before the next visual cue, shorten the caption while keeping the spoken wording clear.
With concise captions, speaker-identifying images, and timestamps for every repeated appearance, your dub pack becomes much easier to follow. Set up the metadata carefully now, and your next performance can focus on delivery instead of hunting for the right line.
How to Validate a The Choicer Voicer Dub Pack Before Playing
Before committing to a full recording session, give your The Choicer Voicer dub pack a quick quality check. A few minutes spent testing the files can catch a failed load, silent clips, bad audio levels, or synchronization problems before you reach the final scene.
Check the Dub Pack Files
Start with the video asset. Inside the dub pack folder, confirm that the scene video is named dub_video.ogv exactly—including the spelling, underscore, and .ogv extension. If the file uses a different name or format, the dub pack fails to load.
Next, inspect every voice clip used by the scene. WAV, MP3, and OGG are supported voice audio formats, but avoid compressed WAV files because the game engine cannot process them. Make sure the clips are audible rather than extremely quiet; very small waveforms can produce inaccurate scores and make timing checks harder.
⚠️ Watch out: Don’t leave duplicate versions of the same clip in different formats unless you intend to use the priority system. When multiple extensions share a basename, WAV takes priority over MP3, and MP3 takes priority over OGG.
Test the Pack in an Actual Session
The pack selection screen does not fully validate content immediately. Invalid, corrupted, or overlong clips may still appear selectable until The Choicer Voicer generates a gameplay batch, so test the pack in an actual session before inviting others or starting a complete recording run.
Use that test session to confirm three things:
- The pack loads with dub_video.ogv present.
- Each voice clip plays clearly at a usable volume.
- The scene, captions, and recorded lines remain synchronized at every timestamp.
If a line starts late or early, return to the clip metadata and check its timestamp against the source audio. For a clip that appears more than once, verify each occurrence rather than assuming one timestamp covers every appearance.
Once the pack survives a real gameplay batch, you can record with confidence instead of discovering a broken file halfway through the scene. Run this checklist every time you update the video, replace an audio clip, or reorganize the pack—your future self will thank you.
How to Tune Voice Pack Clip Length for The Choicer Voicer
In The Choicer Voicer, clip length determines which voice samples can enter a session. Tune this range carefully: a pack can contain clips up to 60 seconds, but the game’s default selection window is much shorter.
Every standard voice-pack audio clip must be 60 seconds or shorter. You can then control which lengths are eligible for play through Settings, where the playable clip range can be set from 0 to 60 seconds.
By default, The Choicer Voicer uses a 0 to 5.5 seconds clip length range. That setting keeps sessions focused on short lines, so longer clips may remain in the pack without appearing in a normal batch until you expand the range.
Start with the default 0 to 5.5 seconds range when testing a new pack. If clips are missing from your sessions, check the length setting before assuming the files failed to load.
Dub packs follow a different practical target. Even though standard voice-pack clips can be as long as 60 seconds, synchronized dialogue samples should ideally stay under 6 seconds. Shorter samples are easier to align with scene timestamps, captions, and pauses, while long clips can make synchronization harder to manage.
Keep standard pack clips within the 60-second limit, adjust the Settings range when you need longer material, and reserve under-6-second cuts for synchronized dubbing. With that setup, The Choicer Voicer will pull the kind of clips you actually want to perform.
Best Content Pack Organization for The Choicer Voicer Dub Mode
In The Choicer Voicer, a tidy voice-pack structure saves you from hunting through a messy scene library later. Organize clips by theme or scene, then use the pack’s built-in metadata files to make each collection easy to identify.
Build a Clear Voice-Pack Hierarchy
Start in the packs_voice folder and create a Voice pack subfolder. The name you give this folder becomes the pack's in-game name, so choose something recognizable rather than a temporary label. For example, a folder named after a scene collection or character group will be much easier to find when you return to The Choicer Voicer.
Add the optional _author file inside the voice pack folder when you want to credit the creator. This must be a TXT file, and it keeps authorship information attached to the pack instead of buried in a separate readme.
You can also add the optional _subtitle file to the same folder. This TXT file supplies the pack description shown in-game, making it useful for explaining the pack’s theme, source material, or intended audience.
Keep the parent folder focused on one broad theme, then use child folders to separate scenes or speakers. You’ll spend less time managing clips as the pack grows.
Use Nested Folders for Scene Groups
The Choicer Voicer supports Nested voice-pack folders, letting a parent pack contain child folders with their own clips and optional metadata. When you select the parent, the game automatically merges clips from its child folders into the playable pack. That gives you one convenient selection for an entire collection without forcing every scene into a single crowded directory.
For Dub Mode content, this structure works well for separating related scenes while keeping them under one main pack. Set up the parent as the overall collection, then place each scene or subgroup in its own child folder. With that setup, your The Choicer Voicer content stays readable on disk and remains easy to expand later.
Organize the parent pack first, name each child folder clearly, and add _author or _subtitle files where extra context helps. Once the hierarchy is in place, you can manage a larger Dub Mode collection without losing track of what each group contains.
How to Add Subtitles and Images to The Choicer Voicer Voice Packs
Subtitles and images do more than decorate a pack in The Choicer Voicer—they help you recognize the line you’re performing at a glance. Set up each clip’s matching files carefully, then let the game’s fallback rules cover anything you haven’t customized.
Add Subtitles to Individual Clips
For every audio clip, create a matching subtitle TXT file with the exact same basename as the audio file. For example, an audio clip named voice_file.mp3 needs a subtitle file named voice_file.txt. The game pairs these files automatically, so even a small naming difference can stop the subtitle from appearing.
Add the spoken line to the TXT file, then save it beside the corresponding audio clip in the voice pack folder. This gives you a readable prompt during performance, which is especially useful when several lines play close together.
Assign Images to Clips
You can also add a matching clip image by placing a PNG, JPG, or WEBP file with the same basename as the audio clip. For voice_file.mp3, use an image named voice_file.png, voice_file.jpg, or voice_file.webp to assign a specific visual to that line.
If a clip does not have its own image, include _pack_filler_image in the voice pack folder. The game uses this shared fallback image for clips without a matching clip image, saving you from creating artwork for every single file.
Use clip-specific images for memorable characters or standout lines, then keep _pack_filler_image for everything else. You’ll get a more varied presentation without turning pack assembly into a massive art project.
If the game finds no matching image and no _pack_filler_image, it displays its default no_image graphic instead. That fallback keeps the clip usable, but adding at least a shared filler image makes the pack feel much more complete.
With matching TXT subtitles, optional PNG, JPG, or WEBP images, and the fallback order understood, your voice pack will remain readable and presentable even when some clips lack custom assets.
Best Voice Pack Curation for The Choicer Voicer Dub Mode
In The Choicer Voicer, a huge voice pack can look impressive on paper but make Dub Mode less fun in practice. When every selected line is clear, memorable, and enjoyable to perform, each session feels like a highlight reel instead of a trawl through filler.
Keep Only Strong Performance Clips
The game samples clips uniformly from a voice pack. That means adding many weak clips makes individual high-quality lines appear less often. A pack with 20 excellent samples will usually provide a better practice experience than one with 100 clips padded by unclear, repetitive, or unfunny material.
Use a less-is-more approach when assembling your pack. Keep clips that are:
- Clear, with dialogue that is easy to understand
- Funny or entertaining to perform
- Recognizable, giving players an immediate performance target
- Worthwhile to perform, even if the reference is less familiar
This matters especially in Dub Mode, where the goal is to enjoy the voiceover rather than simply cycle through as much content as possible. Remove samples with distracting audio, weak delivery, or little performance value—trust me, you won't miss them once the pack starts selecting stronger lines consistently.
Clean Up the Reference Audio
Clean reference material makes timing and performance cues much easier to follow. Remove unnecessary music and noise where possible, and keep the dialogue consistently loud so you can hear the source line clearly while practicing. If a scene needs its background audio, preserve it separately rather than allowing it to obscure the dialogue.
This cleanup also helps you recognize pauses, line endings, and changes in delivery during The Choicer Voicer's synchronized playback. You can then focus on matching the performance instead of guessing whether a quiet syllable was part of the dialogue or buried in the recording.
Listen to every clip as a player would hear it, not just while editing it. If you have to strain to understand a line, cut it or clean it further before adding it to the pack.
Use More Than One Image
For presentation, use varied images instead of relying exclusively on _pack_filler_image. A shared fallback is convenient, but different images help players distinguish clips, characters, or scenes and make the pack feel more engaging during play.
With a tightly curated clip list, clean reference audio, and varied visual assets, your The Choicer Voicer Dub Mode pack will stay focused and rewarding. Every selection has a reason to be there—and every practice take gets a better chance to shine.
How to Practice Dub Mode Timing in The Choicer Voicer
Dub Mode in The Choicer Voicer is the perfect rehearsal room: no judges, no score pressure, and plenty of room to find the rhythm of a scene. If you’re a newcomer or a nervous performer, use this non-scoring sandbox to rehearse timing and vocal acting before entering competitive judged rounds.
A Repeatable Dub Mode Timing Routine
- Study the first attempt. On your first attempt, watch the scene and flashing captions without trying to perfect the voice. Identify when each cue begins, how long the pauses last, and where each line ends. Treat this pass like a map-making exercise—you’re learning the scene’s rhythm before worrying about your performance.
- Record a simple baseline take. On the next attempt, focus on starting when the caption cue appears and finishing with the scene’s action. Don’t chase a perfect voice yet; you need a reference take so you can tell whether later changes actually help.
- Run a retake refinement loop. Dub Mode allows unlimited retakes, so change only one variable per attempt: start timing, cadence, tone, or volume. After each take, remember what you changed and compare the final synchronized playback. Changing one element at a time makes it much easier to identify what caused a line to feel early, late, flat, or too quiet.
- Use memory-based monitoring. Your recordings remain hidden until the session ends, so remember how each take felt while you perform it. During final playback, check whether the mismatch came from timing or delivery. If the words land correctly but the scene feels awkward, adjust cadence or tone; if the line clashes with the visual action, move the start earlier or later on the next cycle.
💡 Tip: Keep a mental note such as “started late,” “pause was too short,” or “volume dropped at the end.” That turns the delayed playback into useful feedback instead of a guessing game.
Repeat the routine until the caption onset, spoken line, pauses, and ending feel connected to the scene. You don’t need a flawless first take—just make one controlled adjustment at a time. With this low-pressure practice loop, you’ll build reliable Dub Mode timing and head into competitive rounds with much more confidence.