How to Understand The Choicer Voicer Scoring System
In The Choicer Voicer, a strong score comes from more than repeating the right words. In the Game Show Studio, computer-controlled judges evaluate how closely your entire vocal impression matches the source performance, so tone, pitch, rhythm, and delivery matter just as much as the line itself.
Official documentation suggests several key metrics are tracked during play.
What The Choicer Voicer Scores
The game’s Judge Panel awards points based on your overall performance matching the reference. That includes:
- Tone — the character and vocal quality of the delivery
- Timing — when phrases and syllables begin and end
- Inflection — changes in emphasis and vocal expression
- Rhythm — the beat and grouping of the words
- Cadence — the rise, fall, and pacing of the line
- Pitch — the movement between higher and lower notes
- Overall delivery — the energy, attitude, and emotional shape of the performance
A technically accurate reading can still score poorly if it sounds flat, rushed, or emotionally different from the source. Likewise, you can earn a better result with an imperfect character voice if you capture the original performance’s timing, pitch movement, and attitude.
Why the Scoring Formula Feels Mysterious
The developer-facing research does not publish a complete scoring formula for standard judged rounds. Players have largely reverse-engineered how the system responds, but a judge’s comment should not be treated as proof of one fixed rule. The panel’s feedback is useful, yet it does not fully explain how every part of a performance contributed to the final result.
Use repeated attempts as your evidence. Compare one take with another while paying attention to the biggest difference—such as a closer cadence, stronger inflection, or more accurate pitch—rather than assuming a single judge reaction reveals the entire formula. Your recorded playback is especially valuable here: listen to your take, compare it with the source, and use the judge feedback to decide what to adjust next.
Don’t chase volume as a substitute for accuracy. A louder impression is not automatically a better one; prioritize the source performance as a whole, especially its tone, timing, inflection, rhythm, cadence, pitch, and overall delivery.
Treat The Choicer Voicer’s scoring as a practical feedback system, not a perfectly transparent measuring tool. Once you focus on matching the complete performance and use repeated takes to test your changes, the judges become much easier to read—and your scores will start climbing.
How to Start a Scored Round in The Choicer Voicer
The microphone goes live, the prompt starts, and suddenly you have only a moment to turn what you heard into a convincing performance. In The Choicer Voicer, the safest approach is to follow the complete round sequence instead of changing your strategy after a single unclear reaction.
Complete Scored-Round Flow
In Game Show Studio, each scored round follows four stages:
- Listen to the prompt. A short audio prompt plays first. It may be a movie line, internet meme, quote, or other character performance, so listen for more than the words. Pay attention to the emotional shape, rhythm, and pauses before you speak.
- Record your impression. Use your microphone to perform the line as closely as you can. Start after you have identified how the source clip begins, where it pauses, and how it ends.
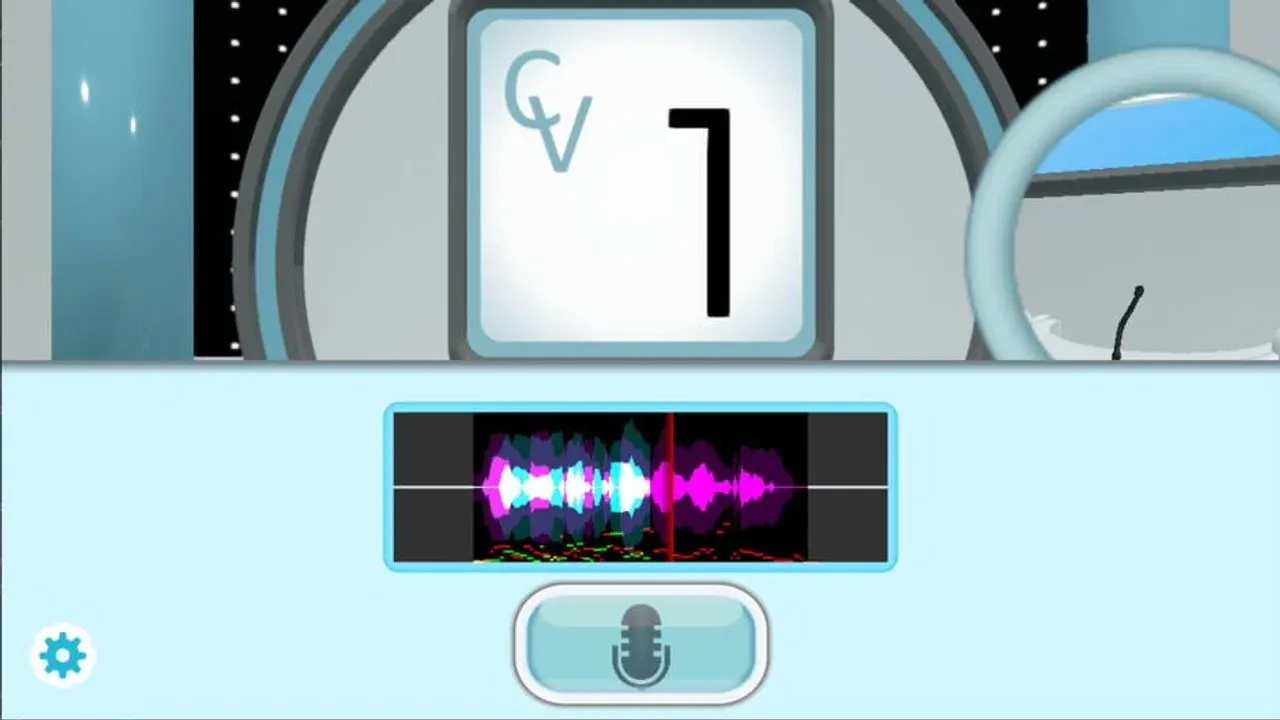
- Review the recording. After recording, waveform playback lets you hear your own take before the judges score it. Replay it mentally and listen for timing and volume problems—an early entrance, an awkward pause, or a delivery that becomes too loud can stand out immediately.
- Submit for evaluation. Once you are satisfied with the take, submit it for Judge Panel evaluation. The judges then assess the performance and provide the round’s score and reactions.
Pro tip: Treat the playback step as part of the round, not as decoration. If your recording sounds rushed or much louder than the source, use that information on the next attempt rather than changing several performance choices at once.
The key is to complete the full sequence—listen, record, review the waveform/playback, and submit—before changing your approach. If the first score is disappointing, you already have a useful comparison: review what you heard, identify the clearest mismatch, and adjust that element on your next take.
Once this rhythm becomes familiar, scored rounds in The Choicer Voicer feel far less frantic. Listen carefully, commit to the impression, check the recording, then let the judges do their work.
Best Listening Setup for The Choicer Voicer Accuracy
The Choicer Voicer rewards players who hear the whole performance before trying to recreate it. A short reference clip can hide its most important details in the pauses, final phrase, or emotional turn, so don’t jump in after the first recognizable words.
Analyze the Full Reference Clip
Listen through the entire clip before recording. As you listen, track:
- The opening: how quickly the speaker begins and how the first phrase is shaped
- Stressed words: which syllables receive extra emphasis
- Pauses: where the speaker leaves space between words or phrases
- Pitch movement: when the voice rises, falls, or holds a note
- The ending: whether the final words trail off, stop sharply, or receive extra emphasis
Don’t imitate only the first recognizable phrase. In The Choicer Voicer, the complete sentence shape matters, and a strong opening can still lose accuracy if the ending or middle section drifts.
Match Cadence Before Speaking
Cadence matching means reproducing the source’s rhythm, syllable spacing, pauses, and sentence shape. Before you speak, rehearse the timing silently by moving through the words in your head, or use a quiet hum to follow the reference performance’s pacing. This helps you remember when each phrase begins without locking yourself into a flat word-perfect reading.
Pay attention to how quickly the source moves between syllables. A line may accelerate through one phrase, pause before its final thought, and then slow down for emphasis. Recreate those changes instead of delivering every word at the same speed.
Hum the reference once without saying the words. If your hum follows the same rises, falls, pauses, and ending shape, you’re ready to add the dialogue.
Follow Relative Pitch Movement
Pitch matching is about following the source’s relative high and low pitch movement and emphasized notes. Match the contour—even when an exact character voice is impossible. If the reference rises on a key word and drops at the end, make those same movements with your own voice rather than forcing yourself to copy the character’s exact vocal range.
Listen for held notes and sudden changes in emphasis as well. You don’t need identical vocal hardware or an identical voice; preserving the movement between high and low points usually does more for the impression than chasing an unreachable character voice.
Listen for the Performance’s Structure
Use structural listening to understand the short audio sample as a complete shape. Focus on its tempo, instrumentation or vocal texture, repeated hooks, and the overall shape of the delivery. These details help you recognize whether the performance feels restrained, energetic, musical, abrupt, or deliberately repetitive.
This is the trick that prevents a flat word-perfect reading. You can say every word correctly and still miss the reference if you ignore its tempo or vocal texture. In The Choicer Voicer, listen for how the parts work together before choosing which details to emphasize.
Once you can describe the opening, stressed words, pauses, pitch movement, and ending, your first take has a clear target. Take that complete performance into the microphone, and you’ll be matching the reference instead of merely repeating its words.
Best Pitch Performance for The Choicer Voicer
In The Choicer Voicer, a convincing impression is not about hitting every note perfectly—it’s about tracing the source’s vocal shape. The judges compare your tonal movement with the reference, so focus on how the line rises, falls, holds notes, and uses emphatic changes.
Before you record, hum or softly speak the source’s melody and stress pattern. Then add the words while keeping the same pitch transitions. If your delivery collapses into monotone, restart the rehearsal rather than trying to patch the line mid-performance; once the contour is steady, repeat it with your full character delivery.
Pitch over volume. A louder voice does not automatically create a better pitch match. Keep the pitch shape and articulation stable instead of shouting—especially on held notes and emphasized changes.
You don’t need to reproduce the source’s exact absolute pitch to score well. Preserve the rises, falls, held notes, and emphatic changes first, then adjust your voice to a comfortable range. With the contour intact, your performance will sound intentional and much closer to the reference in The Choicer Voicer.
Best Timing and Cadence Setup for The Choicer Voicer
In The Choicer Voicer, knowing every word is only half the battle. You can deliver a technically perfect line and still score poorly if you start too soon, miss a pause, or finish after the source clip has already ended.
Match the Source’s Timing and Cadence
During your recorded impression, align the key landmarks with the reference:
- Begin each phrase at the same moment.
- Make stressed syllables land in the same places.
- Reproduce pauses and breaths with similar spacing.
- End the line when the source ends.
Treat the source clip’s duration and spacing as your timing target. Don’t simply fit the correct words into the recording—match how much time the original performance gives each phrase.
Your rhythm and cadence should follow the source’s beat, syllable grouping, acceleration, and deceleration. Avoid reading every word at an even pace, especially if the reference speeds up through one phrase and slows down before the ending. That changing pace is part of the impression, and the game compares more than the text itself.
Before speaking, silently tap through the source’s phrase breaks. If you know where the line accelerates and where it settles, your spoken take will feel much closer without forcing the voice.
Map Pauses Before Recording
Listen for meaningful silences and breaths in the reference clip, then reproduce their approximate length. A pause can separate two thoughts, create emphasis, or set up the final word, so removing it may make an otherwise accurate performance sound rushed. Only shorten pauses that prevent the line from fitting the recording window.
If your first phrase starts early or late, don’t try to rescue the rest of the take by rushing the remaining words. Discard the failed recording and restart from the reference’s first beat. Recovering mid-line usually shifts every later syllable farther from the source.
Once the opening, phrase spacing, pauses, and ending line up, your delivery has a much stronger foundation. Use that structure in each The Choicer Voicer attempt, and the judges can hear the performance you intended instead of a correctly worded line with mismatched pacing.
Best Commitment and Delivery for The Choicer Voicer
The Choicer Voicer rewards more than a line that technically contains the right words. When the source sounds smug, panicked, heroic, or completely unhinged, a flat reading loses that character—and the panel can hear the difference.
Match the Source’s Character Intent
During a judged performance, the panel evaluates tone, inflection, energy, and overall delivery alongside the words. Your goal is to reproduce the source’s attitude rather than giving a neutral recitation. Treat the line as an acting performance: decide what the character is trying to feel and communicate, then let that intent shape how you speak.
Commitment means matching the source’s emotional intensity, articulation, posture, and phrase emphasis. If the character sounds physically tense, relaxed, timid, or theatrical, reflect that in your performance without abandoning the line’s timing or clarity. Most importantly, choose that character and maintain it throughout the entire line instead of slipping back into your normal speaking voice halfway through.
Imagine the source character is standing in front of you and reacting to the situation. That mental image often produces a more convincing performance than simply trying to copy the recording’s sound.
Use Controlled Exaggeration
In multiplayer, subtle performances can disappear when several players perform the same clip. Make key pitch, rhythm, and emotional choices distinct enough to read clearly, but exaggerate the performance qualities rather than only increasing decibel level. A sharper emphasis, more obvious emotional shift, or clearer character attitude will usually communicate commitment better than shouting into the microphone.
This does not mean turning every line into the biggest performance possible. Keep your chosen energy aligned with the source: exaggerate its defining qualities, not random parts of the delivery. A restrained character may need controlled seriousness, while an already dramatic character may benefit from broader emphasis and stronger emotional contrast.
Keep Your Intent Consistent
The full clip matters, including the final syllable. Do not begin with the source’s emotion and fade into ordinary speech as the line continues; keep the same character energy through the final syllable. Losing commitment at the ending can make an otherwise strong impression feel unfinished.
After your take, think about where your performance changed—not just whether you were loud enough. If your opening sounds committed but the middle becomes neutral, or your ending loses the character’s attitude, retake the line with one goal: preserve the same intent from start to finish.
With controlled exaggeration and consistent character energy, your performance will stand out for the right reasons. In The Choicer Voicer, commit to the acting choice first—volume comes second.
How to Avoid Loudness Penalties in The Choicer Voicer
A forceful impression can sound committed in The Choicer Voicer, but shouting is a risky shortcut. Raw volume is not the same as pitch, timing, or delivery accuracy—and pushing too hard can distort the match you’re trying to reproduce.
Keep Volume Separate From Commitment
A strong performance doesn’t require maximum loudness. If you shout into the microphone, your voice may lose the source’s intended pitch movement, timing, or delivery shape, especially when the microphone cannot capture the sudden intensity cleanly. Commit to the character’s energy, but lower the intensity when shouting starts to distort the intended match.
Before a scored take, set a clear, moderate input level and speak at the source’s apparent intensity. Avoid pushing your volume beyond the microphone’s clean range; a readable signal gives The Choicer Voicer a better version of the performance to evaluate.
Exaggerate the character’s emotion, articulation, or phrase emphasis—not simply the number of decibels. Controlled energy usually matches better than a clipped shout.
Don’t Confuse Normalized Clips With Loud Performance
The scoring algorithm struggles with small waveforms, which is why normalized clips are recommended when preparing voice-pack references. A normalized source clip provides a healthy reference signal for the game to analyze; it does not mean you need to yell when performing it.
Keep that distinction in mind when a reference sounds loud. Match its apparent intensity and vocal character at a sustainable speaking level instead of copying the raw loudness literally. This protects the clarity of your own recording while preserving the performance choices that matter.
Use a Quieter Fallback
If a loud take scores poorly, record the same pitch and cadence at a sustainable speaking level. Then compare the playback rather than assuming louder is always better. If the quieter version preserves the source’s shape more clearly, use that approach for the next attempt.
With a moderate microphone level and controlled commitment, you can make an impression that sounds powerful without overpowering the match. Keep the signal clean, let the performance carry the energy, and you’ll give The Choicer Voicer your best shot.
Best Microphone Setup for The Choicer Voicer Scoring
In The Choicer Voicer, a perfect impression means nothing if the game never captures your voice. Set up and test your microphone before entering a judged round—especially in Game Show Studio, where each local player should have a working microphone.
Start with No Gameplay Demo for basic microphone testing, or use an unscored recording before launching a competitive session. Speak normally and confirm that your input is actually being captured. Trust me, this quick check is far better than discovering a silent recording after everyone has taken their turn.
You don’t need an expensive studio microphone. The Choicer Voicer prioritizes vocal tone, timing, and delivery over expensive raw recording quality, so a clear modest headset microphone is generally sufficient.
Fixing Silent Microphone Recordings
The Choicer Voicer is available on Windows/Linux early-access alpha, and surround-sound configurations can prevent microphone audio from recording because of current Godot audio limitations. If your input is silent, switch routing or stereo settings before troubleshooting the performance itself. This is a known audio-path problem, not necessarily a failure of your microphone or impression.
If changing those settings does not restore recording, try the reported OBS workaround:
- Route the game’s audio output to an unused audio device.
- Add that output as an OBS audio source.
- Enable OBS monitoring so you can hear the microphone.
- Verify that the workaround works before starting a scored match.
This workaround bypasses the problematic route for some setups, though it is not a guaranteed built-in fix. Test it in an unscored recording first, then move into Game Show Studio once you can hear and capture your voice reliably.
With a working input, a clear headset mic, and a tested audio route, you can focus on the performance instead of fighting the game’s recording system. Set up the microphone before the group is ready, and your next The Choicer Voicer round will start on solid ground.
How to Practice in The Choicer Voicer Before Scoring
The Choicer Voicer is at its best when you can experiment without worrying about a bad score. Before entering a competitive round, use the game’s unscored tools to check your microphone, rehearse a performance, and get comfortable with a new voice pack.
Start with the No Gameplay Demo, a downloadable testing entry point for basic microphone testing. Use it before troubleshooting a judged session: speak into your microphone, confirm that your voice is being captured, and make sure playback works as expected. This is especially useful if you’re dealing with the known recording problems associated with some audio setups.
Next, try Dub Mode, an alternative mode for recording voiceovers over scenes without scoring. It lets you rehearse delivery and test a voice pack without judge pressure, so you can focus on whether a line feels natural rather than chasing points. Dub Mode performances are a creative sandbox and do not receive the normal competitive score—use it for practice, not score comparison.
Use Dub Mode to test one difficult line several times. Keep the same words, then adjust only one performance choice per attempt so you can tell what actually improves the result.
Follow this iterative practice loop during an unscored rehearsal:
- Listen to the reference.
- Perform the line.
- Review playback.
- Identify one pitch, timing, or delivery error.
- Repeat while changing one variable at a time.
Don’t try to fix everything in a single take. If the line sounds too flat, work on its pitch movement; if it feels rushed, adjust the spacing; if the impression lacks energy, change the delivery. Once the recording feels consistent in the No Gameplay Demo or Dub Mode, you’re ready to take that practice into a scored round with much less guesswork.
Best Solo Practice Strategy for The Choicer Voicer
Solo runs in The Choicer Voicer are more useful than they first appear. Without other players setting the pace, you can turn the Game Show Studio into a personal lab for testing small changes and building consistency.
In a one-player session, compare your current performances with your own previous scores rather than treating another player’s delivery as the benchmark. Your goal is to identify which choices make your impressions more reliable, then repeat those choices until they feel natural. A lower score is still useful if it reveals a specific weakness you can target on the next attempt.
Use One-Variable Retakes
After your first judged round, diagnose pitch, timing, or commitment before trying again. On the next take, change only that category—for example, keep your words and pauses the same while matching the source’s pitch movement more closely. Compare both the score and the judge response to see whether that single adjustment helped.
- Make an initial performance without trying to fix everything at once.
- Choose one focus: pitch, timing, or commitment.
- Retake the same kind of performance while changing only that focus.
- Compare the result with your previous score and judge response.
- Keep the adjustment if it helps; otherwise, test a different category.
Treat each retake like a controlled experiment. Changing pitch, timing, and commitment simultaneously makes it difficult to tell which choice actually improved your result.
Diagnose Your Playback
After each take, listen for the most obvious mismatch in your recording. Check for an early entrance, flattened pitch, missing pause, weak ending, or excessive volume. Pick only the clearest problem for your next attempt instead of rebuilding the entire performance from scratch.
This approach makes solo play in The Choicer Voicer a steady improvement loop: perform, identify one issue, retake, and compare. With your own previous scores as the benchmark, every round gives you a clearer path toward a more consistent impression.
Best Multiplayer Strategy for The Choicer Voicer
In The Choicer Voicer, multiplayer turns every performance into a live comparison. The goal isn’t simply to be louder than your friends—it’s to make your character choices clear while keeping the source clip’s pitch contour, cadence, and delivery intact.
Organize Turns and Microphones First
The Game Show Studio supports one to four local players, with everyone taking turns performing before the same judge panel. Before starting, confirm that every player has a working microphone and decide the turn order so nobody is scrambling to connect audio between rounds. This keeps the focus on the performance rather than setup delays.
With multiple players sharing a room, listen to what the others do well, but don’t automatically imitate the loudest take. A forceful voice may be easier to notice, yet volume alone won’t replace accurate phrasing or a matching performance shape.
Use Comparisons to Refine Your Performance
When two or three players perform the identical clip, the contrast makes small differences much easier to hear. Compare each take’s pitch contour, cadence, and delivery: one player may match the vocal movement, while another captures the pauses or emotional energy more effectively.
Use those comparisons as a diagnostic tool rather than copying a friend wholesale. If another player sounds more successful, identify the specific quality that helped—such as a clearer pitch movement or stronger cadence—and add that quality to your own interpretation.
In a group round, make your emotional and rhythmic choices obvious before increasing your microphone volume. Clear performance decisions stand out more reliably than shouting.
Make Four-Player Performances Read Clearly
In a four-player room, clear, deliberately exaggerated character choices may be easier to distinguish from the other performances. Amplify the source’s emotional and rhythmic features—such as a dramatic attitude or sharply defined phrase movement—while preserving accurate timing and pitch.
A technically accurate but understated impression can be overlooked beside a bold performance in a large multiplayer group. If your take disappears in the lineup, increase expressive clarity rather than raw loudness. Keep the recording clean, match the source’s structure, and let controlled exaggeration make your interpretation memorable.
With this multiplayer strategy for The Choicer Voicer, you can stand out without sacrificing accuracy: prepare the microphones, study the differences between identical clips, and make your strongest character choices easy to recognize.
How to Interpret The Choicer Voicer Judge Panel
The Judge Panel can feel like a comedy routine, but its reactions are useful evidence in The Choicer Voicer. Learn to separate the number of favorable votes from the judge delivering the commentary, then compare repeated attempts instead of treating one reaction as a definitive scoring rule.
At the Game Show Studio, the Judge Panel consists of five computer-controlled judges at the studio podiums. The panel evaluates your vocal impressions and provides score reactions, so treat each reaction as feedback on the submitted performance—not as a complete explanation of why the take scored as it did. A judge’s personality or presentation may change when you use customized judge content, which makes concrete differences in your audio more reliable than a single joke or comment.
During a standard judged round, favorable votes trigger score blips in order from scoreblip1 through scoreblip5, regardless of which judge votes. Count the total favorable votes rather than attributing blip order to judge identity: the second blip means the second favorable vote, not necessarily a vote from judge #2.
Judge-specific audio works differently. Each judge can play a judgeX_voice file when that particular judge votes in favor, so use the correct judge identity when interpreting customized audio feedback. For example, a response from the judge associated with judge3_voice belongs to that judge, while the score-blip sequence still reflects vote order.
Repeat the same performance while changing one clear audio choice at a time. Compare several attempts and listen for concrete differences in your recording, because judge personalities and presentation can vary with customized judge content.
With this approach, the panel becomes a feedback tool instead of a confusing collection of sound effects. Track favorable votes, identify judge-specific responses, and trust repeated performance comparisons to guide your next take in The Choicer Voicer.
How to Configure Judge Feedback in The Choicer Voicer
The Judge pack folder is where you can change how The Choicer Voicer presents its verdicts without changing what earns a score. Open the packs_judges folder from the game’s main menu; it contains the five judges used in standard and Twitch panelist modes.
Start with the judge portraits. Add judge1, judge2, judge3, judge4, and judge5 as PNG/JPG files to assign the five characters. PNG preserves transparency, while image size affects how each judge appears around the podium, so inconsistent dimensions can make the panel look uneven.
Next, customize the favorable-vote display with a success image. This file replaces the default favorable-vote podium image and should use a 2:1 ratio, such as 512x256.
Treat these images as presentation feedback, not scoring evidence. A different success graphic changes the look of an approving vote—it does not alter the criteria used to judge your impression.
For more control, assign an individual judge success image using judgeX_success, such as judge4_success. This overrides the default success image for that numbered judge, while unassigned judges continue using the default. With the right judge pack assets in place, The Choicer Voicer’s feedback becomes easier to read at a glance without mistaking customization for a change to the scoring system.
How to Configure The Choicer Voicer Score Audio
The feedback burst after a performance can feel like part of the verdict, but in The Choicer Voicer it’s mainly the showmanship around the result. Configure the audio carefully so you can tell which sounds represent favorable votes—and which sounds simply make the studio more entertaining.
Open a Judge pack to manage the audio reactions used by the five judges. The score blip files are named scoreblip1, scoreblip2, scoreblip3, scoreblip4, and scoreblip5. When judges favor a performance, these sounds play in vote order: the first favorable vote triggers scoreblip1, the second triggers scoreblip2, and so on. The order follows the vote sequence, not the identity or position of the judge producing each vote.
Judge-specific reactions use files named judgeX_voice, where X is the correct judge number. For example, a voice file for judge number 2 must use the corresponding judge2_voice name. That file plays when the corresponding numbered judge votes favorably, so make sure the number matches the intended judge rather than assuming the audio follows the score-blip order.
If you want judge voices without the blip layer, open the Judge pack config JSON and set play_voices_with_blips to false. This disables the score blips while leaving the judge voice reactions available, giving the panel a cleaner presentation.
Treat custom images, voices, and blips as presentation changes—not scoring evidence. A dramatic reaction from a custom judge pack can make a result feel more positive, but it does not prove that the underlying scoring formula changed.
With the audio configured, you’ll know exactly what each favorable vote sounds like and won’t mistake flashy feedback for a change in your actual performance score.
How to Use Voice Packs for The Choicer Voicer Accuracy
The reference clip is your target in The Choicer Voicer, so a poor-quality sample can make an accurate performance feel impossible. Before blaming your delivery, make sure the voice pack gives you a clear, consistent performance to match.
Open the packs_voice folder from the main menu. This Voice-pack folder stores the audio samples used by all game modes, so the clips inside it become the performance references you hear during play. To create a pack, make a folder and add your audio files—no specialized editor is required.
Voice-pack audio clips must use WAV, MP3, or OGG files, and each file must be under 60 seconds. Short samples work best for the game’s quick vocal-impression rounds, while supported formats let you build packs from recordings made with common audio tools.
Check Reference Audio Before Playing
Before using a custom pack, play each clip and confirm that it is audible, short enough, and free of distracting level differences. Replace or normalize quiet samples before adding the pack to a scored session. If one clip is much quieter than the others, you may struggle to hear its word emphasis, pauses, or vocal movement clearly—and that makes matching it far harder than it should be.
Test the entire pack at the same listening volume you use in The Choicer Voicer. A clip that sounds acceptable by itself may still be noticeably quieter or louder beside the rest of the pack.
When creating voice packs, normalize clip volume. The scoring algorithm struggles with small waveforms, so a clear signal gives the game a more reliable reference. This does not mean you should shout into your microphone: normalized reference audio provides a healthy source signal, while your performance still needs controlled volume and accurate matching.
Once every clip is audible and consistent, use the pack for practice or scored rounds. Clean references let you focus on reproducing the source instead of fighting uneven audio, giving your accuracy attempts a fair shot.
How to Create and Test Voice Packs in The Choicer Voicer
Creating a dependable reference library in The Choicer Voicer is refreshingly simple: you don’t need to code, and you don’t need a specialized editor just to get started. The key is organizing clean clips first, then using the game’s metadata tools to make the pack easy to understand and test.
Build a Basic Voice Pack
- Open the packs_voice folder from the game’s main menu.
- Create a new folder for your pack.
- Add compatible audio files in WAV, MP3, or OGG format. Each clip must be less than 60 seconds long.
- Launch The Choicer Voicer and verify that the pack appears.
That’s the complete basic workflow—no coding required. If the pack does not appear, check that the audio files are inside the new pack folder rather than sitting directly in packs_voice. Keep your clips clear and properly normalized so they provide reliable references for scoring.
Start with a small test pack containing only a few clips. It’s much easier to find a bad filename or unusable recording before you build a huge library.
Add Metadata in the Voice Pack Editor
From version 0.5.0, Voice Pack Editor tools are available in The Choicer Voicer. Launch the game, open Extras from the main menu, and select Edit Voice Packs & Clip Metadata. This lets you refine the pack without manually editing its files.
You can use the editor to:
- Assign images to individual samples
- Add captions
- Add tags so players can sort samples by type
- Add dub data
- Assign a pack icon
- Add a subtitle beneath the pack name
- Change the displayed pack name, which otherwise defaults to the folder name
- Add contributing authors
- Write a description or readme
These details won’t replace the audio itself, but they make the pack easier to browse and share. Captions can also help players confirm which line they’re about to perform, while tags separate different kinds of clips at a glance.
Assign Artwork Automatically
You can give the entire pack a fallback image by adding an image named _pack_filler_image to the voice pack. Any audio clip without its own assigned artwork will use that image. _icon works as an alternative fallback if _pack_filler_image is not available.
For more precise artwork, give an image the same filename as its audio clip. For example, an audio file named my_clip automatically uses an image also named my_clip, if that image exists. This lets you highlight important samples individually while still using a pack-wide fallback for everything else.
Test the pack after adding audio, metadata, and artwork. In The Choicer Voicer, a small pack that loads correctly is more useful than a massive collection with missing references or confusing labels. Build it in stages, verify each stage, and you’ll have a reliable set of scoring clips ready for your next round.
How to Use Player Modpacks in The Choicer Voicer
Your multiplayer session in The Choicer Voicer feels much more organized when every contestant has a recognizable identity on the podium. Set up player modpacks before inviting everyone in, so names, portraits, colors, and introductions are ready before the first scored round.
Start in the packs_player folder, which you can access from the game’s files. Create a new folder there for a contestant pack, or use Add New Pack in the in-game Customization Menu to begin. Using the menu is the easier option if you want the game to populate the pack with its default settings.
Add the contestant portrait by placing an image file named player inside the player modpack. The supported formats are PNG, JPG, or WEBP. PNG is preferred, and an image at least 1000 pixels tall is recommended for better visual quality. The game does not natively support animated image formats, so use a still image for the contestant.
Next, open Player Customization and go to the Overview page. Set the displayed contestant name there—the name is separate from the player modpack folder name—then choose the two customizable colors for that contestant. These colors appear on the contestant podium and the individual score screen, making it easier to tell players apart when everyone is taking turns.
Give each player a distinct name and color before starting. In a four-player session, that small bit of preparation makes score comparisons much easier to follow.
Open the Details page in Player Customization to edit the Introduction Text. This text appears when the contestant is introduced, and the interface provides a preview so you can check the formatting before using the pack in a multiplayer show. Keep introductions short enough to read quickly, especially when several contestants are queued.
Once each player has a working portrait, clear identity, and tested introduction, load the packs and verify that the right contestant appears before scoring begins. With the presentation sorted, your The Choicer Voicer multiplayer session can focus on the performances instead of figuring out whose score belongs to whom.
How to Configure Player Reactions in The Choicer Voicer
In The Choicer Voicer, a missing contestant reaction can make a round feel broken—even when the score is working normally. Reaction audio is separate feedback tied to your result, so check your player modpack and game version before assuming a silent cheer or upset means the judges changed your score.
Legacy Reactions in Version 0.4.12 and Earlier
For Version 0.4.12 and Earlier, player modpacks use three specific reaction files:
- talk_cheer — plays for scores of 4 or 5, and when you win the game
- talk_upset — plays for scores of 0 or 1, and when you lose the game
- talk_greet — plays when the host introduces the player
These files belong in your player modpack and can use WAV, MP3, or OGG formats. If a file is absent, no audio plays for that reaction; the missing sound does not alter the score itself.
Nine Reaction Slots in Version 0.4.13 and Later
Starting with Version 0.4.13 and Later, The Choicer Voicer uses a more detailed nine-slot reaction system. The available slots are:
- Winning reaction
- Losing reaction
- Introduction greeting
- Score of 0
- Score of 1
- Score of 2
- Score of 3
- Score of 4
- Score of 5
You assign these reactions through Player Customization. This system lets you give each score its own response instead of grouping scores together under talk_cheer or talk_upset. The default setup still mirrors the older system for backward compatibility, so your existing reactions may continue working after an update.
Validate Each Reaction Filename
For Version 0.4.13 and Later, place the desired audio files directly in the player modpack first. Then type each file’s exact filename beside its matching reaction field in Player Customization. Press the adjacent play button to test it immediately.
If the text turns red, The Choicer Voicer could not load the assigned audio file. Check the spelling, filename, and file location, then test it again. A failed reaction load only means that particular feedback clip will not play—it is not evidence that the related score was rejected or recalculated.
Assign one audio file to multiple reaction slots while testing. You can also leave a slot empty for silence, which makes it easy to confirm exactly which reaction fields are configured correctly.
Once every filename plays correctly, run a few results across the score slots and verify the winning, losing, and introduction reactions separately. With the audio mapped to the right version and slots, you’ll know whether a quiet round is a scoring result or simply a missing reaction file.
How to Distinguish AI Judges from Twitch Voting in The Choicer Voicer
In The Choicer Voicer, the same performance can feel completely different when you switch from the computer-controlled judges to the Twitch Variant. The key is understanding who is judging: Twitch Integration replaces the computer-controlled judge panel with live votes from streamer chat, so you should read the result as audience consensus rather than the standard AI panel’s evaluation.
How Twitch Voting Changes the Challenge
Twitch chat voters are audience members who vote on performances during a streamer session, and they may use commands to participate vocally. Before you perform, coordinate the voting prompt so everyone knows when to vote and what the performance is supposed to match. Otherwise, a delayed vote or confused command can make the final result harder to interpret.
Live chat is also less predictable and often less forgiving than the default computer judges. A technically accurate impression may still struggle if viewers do not immediately recognize your pitch, timing, or commitment. Make those choices obvious from the start: enter confidently, preserve the source’s timing, and commit to the character instead of relying on subtle details that chat may miss.
Treat Twitch voting like a quick-read performance. Make the most recognizable pitch movement, pause, and emotional choice clear early, because live voters may decide before they carefully analyze every detail.
Judge Packs Still Affect the Presentation
Judge packs can still provide the displayed panel presentation in Twitch panelist voting mode, even though voting authority changes to chat. The familiar judges, podiums, and reactions may remain on screen, but they do not mean the AI judges are evaluating your performance in the usual way.
Because of that, do not compare raw results as if both modes use identical judges. A score from the standard mode reflects the computer-controlled panel, while a Twitch result reflects the live audience’s response and timing. Use Twitch sessions to learn which performances communicate clearly to viewers, not as a direct replacement for the standard AI panel’s evaluation.
Once you separate presentation from voting authority, the difference becomes much easier to read. Perform clearly for the audience, confirm the voting instructions beforehand, and treat every Twitch result as live feedback rather than a fixed verdict on your impression.
How to Use Studio Packs Without Misreading Scores in The Choicer Voicer
Studio customization can make The Choicer Voicer look and sound completely different, but don’t let a flashy set—or a dramatic score animation—mislead you about your performance. In The Choicer Voicer, studio packs change presentation; they do not replace the actual performance-scoring criteria.
Open the packs_studio folder accessible from the main menu to manage studio packs. These packs are used in standard Game Show Studio and Twitch panelist voting mode, so the same customized environment can appear whether the game uses its computer-controlled judges or audience voting.
Build a Custom Studio Environment
A custom studio model replaces the default game-show environment. Add a file named model.glb or model.gltf to your studio pack. Keep the file size and geometry under control: larger files and high vertex counts increase loading time, so an overly detailed set can leave you waiting several seconds before a show loads.
When you create a new studio folder, the game generates a template .glb. Use this template for sizing because it shows the positions of the judge, contestant, and three screens. None of the objects in the template are required for your model to work properly, so treat them as layout references rather than mandatory parts of the finished environment.
Test a new studio with a short round before using it for multiplayer or streaming. If the model loads slowly, simplify its geometry before troubleshooting anything related to scoring.
Keep Presentation Separate From Scoring
Studio packs can also replace several audio and visual elements:
- music_studio WAV/MP3/OGG changes the studio music.
- screen.ogv replaces the contestant score background with a muted looping video.
- absolute_image PNG/JPG changes the rare 6/5 “absolute” display shown for an exceptionally close match.
These assets affect what you hear and see around the performance, not how accurately your impression is judged. A different music_studio WAV/MP3/OGG file cannot improve your vocal match, and a more exciting screen.ogv background does not make a weak take score higher. Likewise, absolute_image PNG/JPG only changes the image used for the rare 6/5 “absolute” display—it is not a scoring modifier.
This distinction matters even more in Twitch panelist voting mode. The customized studio still provides the setting and presentation, while the voting result comes from the mode’s active voters. Don’t mistake a dramatic screen, loud music, or polished model for evidence that the game judged your delivery differently.
With a studio pack loaded, judge the result by your performance—not by the backdrop, music, or reaction graphics. Keep the environment readable and fast to load, then focus on matching the source clip. That’s the reliable way to finish your The Choicer Voicer setup with confidence.