How to Find Chatter Packs in The Choicer Voicer
The stage is ready, but Twitch interaction needs the right content before your audience can join in. In The Choicer Voicer, Chatter Packs are the content packs built specifically for Twitch streamers, letting chat vote on performances and vocalize through the show.
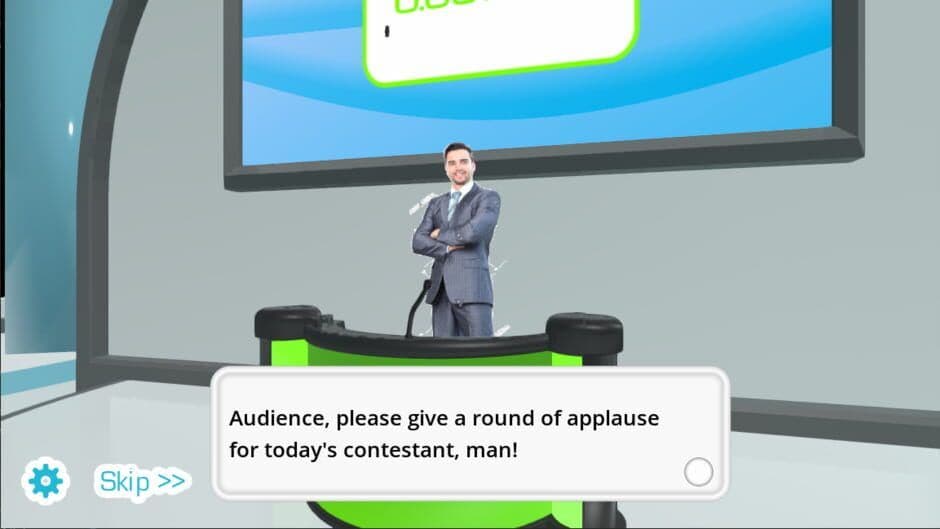
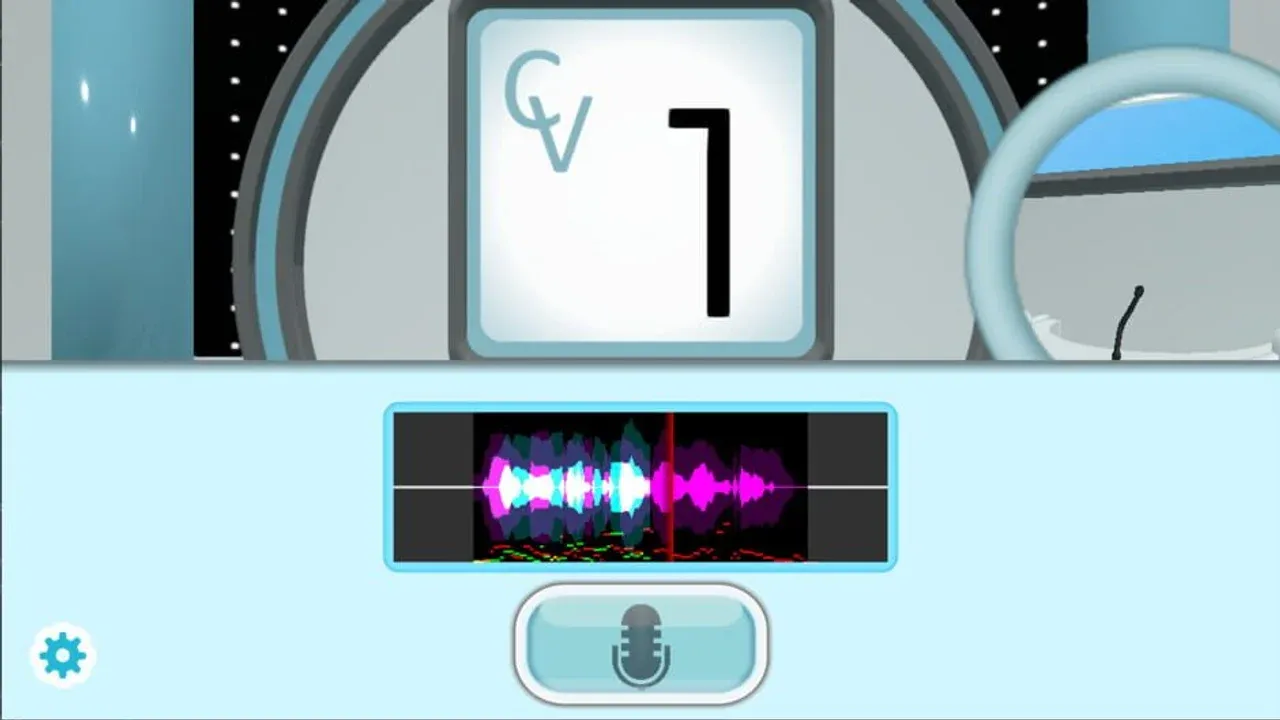
Menu navigation in The Choicer Voicer.
What Chatter Packs Do
The Twitch Variant uses Chatter Packs to turn your stream audience into part of the game show. Instead of relying on the computer-controlled judges used in standard play, Twitch panelist voting replaces them with the streamer's live chat. A compatible pack supplies the content that makes those audience interactions possible.
You can find Chatter Packs through the game's custom-content ecosystem, alongside voice, contestant, judge, studio, menu, host, and dub packs. Since The Choicer Voicer has limited built-in content, community-made packs are an important part of finding new material. Check the community sources where The Choicer Voicer packs are shared, then select a Chatter Pack that matches your stream and audience.
Review a Chatter Pack before streaming. Because its content controls how chat participates, previewing it helps you avoid broken or unsuitable material during a live show.
What You Need for Twitch Integration
Twitch integration requires both a Twitch-enabled mode and a Chatter Pack. Configure the pack before streaming so The Choicer Voicer knows which audience interactions to use. The game does not provide general online multiplayer; Twitch participation is the intended way for viewers to take part remotely.
Once you have a suitable Chatter Pack ready, the next step is setting up its voting and vocalization features for your audience. For now, remember the essential rule: standard judge packs are for the computer-controlled panel, while Chatter Packs are only for Twitch streamers and the Twitch Variant.
How to Use Chatter Packs for Twitch Viewers in The Choicer Voicer
The audience is in the jury seat now—The Choicer Voicer turns a streamer’s impression into a live Twitch event where chat can judge the take and even become part of the show.
Run a Twitch Audience Round
Before starting, enable the Twitch mode and verify that the game is connected to the correct chat. Once the streamer starts a performance, viewers can react in real time instead of leaving the decision to computer-controlled judges. Chat acts as the jury, voting on the streamer’s impression as the round unfolds.
The selected chatter pack controls how those votes work. Review the pack’s command syntax before inviting viewers to participate, then confirm that each command is mapped to the intended audio response. If viewers use the wrong wording, the game may not recognize their votes or reactions.
Viewers can also use pack-defined chat commands to vocalize as part of the show. This goes beyond voting: chat can trigger the mapped voice responses while the streamer performs, creating a back-and-forth between the impression and the audience’s reactions. Confirm both the command syntax and the mapped audio in the selected pack before streaming.
Run a private or controlled Twitch session first. Ask a trusted viewer to test one voting command and one vocal command so you can catch spelling, connection, or audio problems before your full audience arrives.
Keep a fallback local mode ready in case Twitch connectivity fails or a command does not trigger correctly. The ideal flow is simple:
- The streamer starts a performance.
- Twitch chat votes on the take in real time.
- Viewers use the pack’s commands to vocalize around the performance.
- The streamer checks that votes and audio reactions are registering.
- If the connection breaks, switch to the prepared local mode instead of stopping the show.
Once the commands respond correctly, the Twitch audience round becomes wonderfully chaotic: the streamer supplies the impression, chat supplies the judgment, and the selected pack supplies the voices. Test it before going live, then let your viewers take over.
Best Chatter Pack Setup for Twitch Streamers in The Choicer Voicer
In The Choicer Voicer, a smooth Twitch show depends on more than choosing a pack and going live. Prepare your Chatter Pack like part of the broadcast: it should provide pack-defined chat commands and viewer vocal responses, and you need to obtain or create a compatible Chatter Pack before starting the stream.
Pre-Stream Chatter Pack Test
Before broadcasting, run a private or controlled Twitch session. Test all three pieces of the setup:
- Voting: Confirm chat votes register correctly during a performance.
- Vocal commands: Check that the pack-defined commands trigger the intended viewer vocal responses.
- Audio playback: Make sure each mapped response actually plays at the right moment.
If a command fails, a response is missing, or audio playback breaks, replace the broken mappings before going live. If you can't fix the issue in time, switch to standard judge mode rather than letting a technical problem derail the show.
Ask one trusted viewer or moderator to test commands with you. They can catch spelling, mapping, or timing problems that are easy to miss when you're running the stream alone.
Choose a Pack That Fits Your Audience
For variety, browse community-made packs built around memes, popular-culture references, or streamer inside jokes. Pick material your viewers will recognize, but review every clip and command before sharing it on stream. Check that the content is relevant to your audience and suitable for the broadcast—an amusing pack in private may not be the right choice for a public Twitch session.
A reliable setup also benefits from having a backup pack ready. Keep one compatible Chatter Pack with familiar commands available in case your main pack has broken mappings or audio issues. With a tested pack, a moderator-assisted command check, and a safe backup plan, your The Choicer Voicer stream is ready to let chat take over the show.
How to Reach The Choicer Voicer Twitch Mode
The next stop is Twitch mode, where your broadcast audience can take the place of the usual judges. Before you set up your packs, remember that The Choicer Voicer is still in early access alpha, so Twitch play expands your audience interaction—but it does not turn the game into standard online multiplayer.
Check Your Platform and Player Count
The Choicer Voicer is downloadable on Windows and Linux. Install the correct platform build before launching the game and preparing your stream.
For in-person sessions, Game Show Studio supports 1 to 4 local players. Everyone plays in the same local setup, taking turns performing while the game handles the show format. If your audience needs to participate beyond those four local players, use Twitch mode instead of trying to add more local contestants.
Twitch mode is best treated as an audience-jury format, not an online multiplayer lobby. Keep your local contestants within the 1 to 4 player limit, then let Twitch handle the wider participation.
Understand the Online Multiplayer Limitation
Studio Mode remains local-only in the current alpha. Broader networked multiplayer is not provided because the game still faces privacy and security hurdles around implementing it properly. In other words, you cannot use The Choicer Voicer as a general online multiplayer session for remote players.
Twitch integration is the intended way to involve people who are not in the same room. Start the Twitch-enabled mode, connect your broadcast setup, and use the Chatter Pack configuration covered earlier so your chat can participate in the show. If you want a traditional local game, stay with Game Show Studio and its four-player limit.
With the correct Windows or Linux build and the right expectations about local play, you’re ready to reach Twitch mode. Treat it as a stream-focused extension of The Choicer Voicer—not a replacement for online multiplayer—and your setup will be much smoother.
How to Find Voice Packs for The Choicer Voicer
In The Choicer Voicer, the right voice packs are the fuel for every performance round. Whether you’re preparing clips for Chatter Pack sessions or another mode, start by checking the game’s content folder before troubleshooting anything else.
Open the game files from the main menu and find the packs_voice folder. This directory is accessible from the main menu, and it’s where you place your voice-pack folders along with their audio clips. If a pack doesn’t appear in the game, confirm that the folder is inside packs_voice rather than sitting beside it.
Each voice-pack audio clip must be an individual sample file in WAV, MP3, or OGG format and shorter than 60 seconds. The game loads these files as the samples players perform, so keep the clips focused enough to imitate during a quick round. The base game relies heavily on custom content, which means downloaded or community-made packs can make a major difference when the default selection feels limited.
Listen to every clip before using it in a session. Clear audio makes the intended cadence, pitch, timing, and line shape easier to follow—and those details matter more than simply shouting louder.
During a performance round, players imitate the supplied audio samples and are scored on the match. The scoring basis prioritizes cadence, pitch, timing, and line shape rather than volume alone; a loud performance that misses the rhythm can score worse than a quieter, more accurate one. Once you’ve located a pack with clean clips and placed it correctly, you’re ready to perform.
How to Create Voice Packs for The Choicer Voicer
The Choicer Voicer is built like a stage waiting for your material—your voice pack supplies the clips players imitate in standard shows, Dub experiences, and Twitch sessions. The best part is that creating one takes no coding and no specialized editor.
Build a Basic Voice Pack
- Create a new folder for your pack inside the game’s
packs_voicelocation. - Add your compatible audio files to that folder.
- Use WAV, MP3, or OGG files, with each clip shorter than 60 seconds.
- Launch the game and select the pack when you start a mode that uses voice samples.
That’s genuinely all the basic setup requires. The Choicer Voicer loads the audio files directly from the folder, so you can build a pack around memes, quotes, character lines, or anything else you want players to imitate. Standard game shows, Dub experiences, and Twitch-focused content all draw from this same voice-pack foundation, even though they use the clips in different ways.
Keep clip names simple and recognizable. You can identify and organize their metadata later, but clear filenames make it much easier to replace a bad recording or track down a missing sample.
Normalize Your Audio
Before importing clips, normalize your audio volume. The scoring algorithm struggles with small waveforms, so very quiet recordings can make performances feel frustrating even when the source line is clear. Raise quiet recordings before you add them to the pack, and aim for consistent volume across the collection.
Loudness alone does not guarantee a high score in The Choicer Voicer—players still need to match the sample’s pitch, timing, cadence, and line shape. Normalization simply gives the game a stronger signal to analyze, which makes your pack more reliable and enjoyable to perform.
Let the Game Load Packs at Runtime
The Choicer Voicer swaps packs from folders at runtime instead of hard-coding them into the game. That means you can add, remove, or replace audio content without rebuilding the game or writing code.
If a newly added pack does not appear, restart the game or reload the relevant menu so The Choicer Voicer scans the folder again. Once it shows up, test a few clips before sharing the pack or using it during a stream—catching a silent or overly quiet file now saves a lot of confusion later.
With a folder, a handful of compatible recordings, and properly normalized audio, you already have a working voice pack. Start small, test the clips, and expand the collection as you find lines worth performing.
How to Use the Voice Pack Editor in The Choicer Voicer
In The Choicer Voicer version 0.5.0+, the Voice Pack Editor turns a folder of audio clips into a properly labeled, easy-to-browse pack. Open the main menu, choose Extras, then select Edit Voice Packs & Clip Metadata to access the in-game metadata editor.
Edit Individual Voice Pack Samples
Select an audio clip in the editor to update its individual metadata:
- Voice-pack sample image: Assign an image to a specific audio clip. This lets each sample display its own artwork rather than relying only on a pack-wide fallback.
- Voice-pack caption: Add a caption to identify or present the clip. Use this to show the line, explain its context, or give performers a clearer prompt.
- Voice-pack tags: Add tags to help players sort clips by type and find the performances they want. Tagging samples is especially useful in larger packs with different kinds of lines.
Use consistent tags across your pack—such as character, mood, or scene type—so players can quickly narrow down the right clips before a round starts.
Complete the Pack Metadata
The editor also lets you manage information for the entire voice pack. You can add data specific to dub packs, list contributing authors, and provide a description or readme with instructions or context. The pack’s displayed name, subtitle, and visual icon can also be set here, making the pack easier to recognize when players browse their collection.
For images, assign artwork to clips individually when you want precise control. Any clip without its own assigned image can use the pack’s filler image, while the pack description or readme gives players the extra information they need before selecting it.
Save your changes after organizing the samples, then check the pack in-game to confirm that its captions, images, and tags appear as intended. With clear metadata and consistent tags, your The Choicer Voicer pack will be much easier to browse—and much more enjoyable to perform.
How to Customize Chatter Pack Identity in The Choicer Voicer
A good identity makes a pack easier to recognize before a Twitch stream gets chaotic. In The Choicer Voicer, use the Voice Pack Editor to turn your pack metadata into a clear label for streamers and viewers—not just a folder full of clips.
Open the editor from the main menu through Extras, then Edit Voice Packs & Clip Metadata. Select your pack and update these identity fields:
- Voice-pack icon: Assign a visual icon to represent the pack. A recognizable icon helps you identify it quickly when choosing between multiple packs.
- Voice-pack subtitle: Add a short identifying subtitle that appears beneath the selected pack name. Use it to clarify the pack’s theme or intended audience.
- Voice-pack display name: Replace the default folder name shown in-game with a readable public-facing pack name. This is the name streamers and viewers will see when the pack is selected.
- Voice-pack author metadata: Use the contributing-author field to add creator names. Users can search their packs by author, making this especially useful for shared projects or community collections.
Make the display name and subtitle do different jobs. Use the display name for the main theme, then use the subtitle to explain whether the pack is meant for a specific streamer, audience, or style of show.
Keep the icon, display name, subtitle, and author information consistent with the pack’s actual content. With clear branding in the Voice Pack Editor, your Chatter Pack is much easier to identify and share during a The Choicer Voicer stream.
How to Find Voice Pack Images in The Choicer Voicer
In The Choicer Voicer, strong clip visuals make a voice pack easier to understand at a glance—especially when streamers and viewers are scanning samples during a fast session. Set up individual images where you can, then add reliable fallback artwork so clips never appear without a visual.
Assigning Images to Voice Pack Clips
Open the Voice Pack Editor from the location covered earlier and edit each sample’s metadata. You can assign an image to an individual audio clip, and the game will use that image whenever the clip appears.
There’s also a simple filename shortcut: give an image the same name as its audio clip. For example, an audio clip named my_clip automatically uses an image named my_clip when that image exists in the same voice pack. This is useful for larger packs because you can match artwork to clips without assigning every image manually.
Use clear, recognizable images for clips that will appear frequently on stream. Viewers can identify the prompt faster, and the pack feels much more polished.
Setting Up Fallback Images
Add a _pack_filler_image file to the voice-pack folder to create a fallback image. Any clip without an individually assigned image uses this artwork by default, giving the entire pack a consistent visual identity.
You can also use _icon as an alternative filler image. If a clip has no specific image and no _pack_filler_image is provided, the game can use _icon as the filler instead. Keep the filename exactly as shown, including the leading underscore, or the fallback may not be recognized.
While editing the pack’s metadata, add a voice-pack description or readme with usage notes and context for streamers and viewers. Explain what kind of clips the pack contains, what references viewers may encounter, or how the pack is intended to be used. This context is particularly helpful when several community packs are available for a Twitch session.
With clip-specific artwork, a _pack_filler_image, and a _icon fallback in place, your The Choicer Voicer pack will stay visually consistent even when some samples lack custom images. Add the voice-pack description or readme as the final touch, and streamers can choose it with confidence.
How to Customize Contestant Packs in The Choicer Voicer
In The Choicer Voicer, contestant packs let you put a recognizable face on every performance. They work especially well alongside Chatter Packs: streamers can give regular players or community mascots a clear on-screen identity, while local groups can build contestants around their friends.
Building the Contestant Pack
Create or store your player modpacks in the packs_player folder within the game files. Each contestant pack can contain its own artwork, name, colors, introduction text, and reaction audio, so you can keep different streamer personas, friend groups, or recurring characters separated into individual packs.
The most important visual asset is the player image. Place an image file named player inside the contestant pack. The game supports PNG, JPG, or WEBP files; PNG is preferred, and animated formats are not natively supported.
Aim for an image that is at least 1000 pixels tall. The player image is rendered without scaling, so small artwork may appear noticeably low-quality or undersized during the show.
Before importing artwork, resize small images and check that the file is named exactly player. A correctly prepared image gives your contestant a consistent presence on the podium and score screen, making it easier for viewers—or friends sitting around the same screen—to recognize who just performed.
With the right image in place, your contestant pack becomes more than a cosmetic swap: it gives every voice performance a distinct identity. Pair your custom contestants with the rest of your The Choicer Voicer content setup, and your next show will feel like it belongs to your group.
How to Unlock Contestant Customization in The Choicer Voicer
Creating a contestant for a streamer-branded show in The Choicer Voicer takes only a few minutes, but the identity fields are easy to overlook. Start in the game’s customization tools, then give your contestant a name, colors, and introduction text that viewers will recognize.
Create a Contestant Pack
- Open the Customization Menu and select Add New Pack. This generates a player modpack with default settings, giving you a ready-made starting point instead of requiring you to build every entry manually.
- Open the new pack in Player Customization and go to the Overview page.
- Set the contestant name there. The contestant name is independent from the modpack folder name, so you can keep a technical folder label while showing your streamer name or character name in the game.
- Choose the contestant color pair. These two colors are used by the contestant podium and the individual score screen, helping your branded character stand out during performances.
Next, open the Details page in Player Customization and write the contestant introduction text. This is the text shown when the contestant is introduced, and the interface includes a preview so you can check its formatting before using the pack in a show.
Treat the Overview page as your contestant’s identity card: use a clear public name and a consistent color pair, then use the Details page to add the personality that viewers will remember.
Once you save these fields, your new contestant has a recognizable name, visual identity, and on-screen introduction. With that setup ready, your streamer-branded The Choicer Voicer show is one step closer to feeling like its own production.
How to Use Contestant Voice Reactions in The Choicer Voicer
In The Choicer Voicer, contestant reactions depend on your game version. The older system groups reactions into three files, while newer builds use nine individual slots—so identifying the naming scheme first will save you from chasing a “missing” voice line that the game simply isn’t looking for.
Legacy Contestant Reactions in Version 0.4.12 and Earlier
In Version 0.4.12 and Earlier, contestant packs use three reaction audio files:
- talk_cheer plays for scores of 4 or 5, and when the contestant wins the game.
- talk_upset plays for scores of 0 or 1, and when the contestant loses the game.
- talk_greet plays during the host’s introduction of the contestant.
Place these files in the contestant pack, using WAV, MP3, or OGG audio. WAV is preferred. If one of the files is missing, that reaction produces no audio—useful if you want a contestant to stay silent for a particular result.
If your pack was built for the older system, check for talk_cheer, talk_upset, and talk_greet before adding new reaction names. Those three filenames are the quickest way to confirm that a contestant pack uses the legacy format.
Nine-Slot Reactions in Version 0.4.13 and Later
Version 0.4.13 and Later uses an experimental nine-slot reaction system. Instead of grouping several outcomes under one file, it provides separate slots for:
- A winning reaction
- A losing reaction
- An introduction greeting
- Score 0
- Score 1
- Score 2
- Score 3
- Score 4
- Score 5
You assign these reactions through Player Customization by entering the desired audio filename beside the corresponding reaction field. The audio files still belong in the contestant pack, and the game checks those filenames when loading each reaction. This system can use the same audio file in multiple slots, while an empty slot remains silent.
The newer setup keeps the older behavior as its default arrangement for backward compatibility, but the individual slots give you much finer control. For example, you can create different lines for score 4 and score 5 instead of sending both outcomes to talk_cheer.
Check your game version before editing a pack: Version 0.4.12 and Earlier expects talk_cheer, talk_upset, and talk_greet, while Version 0.4.13 and Later uses the nine reaction fields in Player Customization. Once you match the pack to the correct system, your contestant’s voice reactions should trigger reliably in The Choicer Voicer.
How to Set Reaction Slots in The Choicer Voicer
In The Choicer Voicer version 0.4.13 and later, reaction slots let you control contestant audio much more precisely. Instead of relying on three broad reactions, you can assign separate audio to the win, lose, intro, and score 0 through score 5 fields.
- Place your audio files in the contestant pack.
- Open Player Customization and go to the reaction fields on the Details page.
- Type the exact filename beside the reaction you want to assign. Include the file extension if it appears in the filename.
- Press the adjacent play button to test the assignment.
The nine slots cover the winning reaction, losing reaction, introduction greeting, and the six round-score reactions from 0 through 5. You can use a different clip for every slot, or assign one audio file to multiple slots when you want a consistent contestant response. Leaving a slot empty intentionally disables audio for that reaction.
Reuse a strong clip across several slots while testing your pack, then replace individual fields once you know the contestant pack loads correctly.
If a reaction filename field turns red in Player Customization, the game could not load that audio. Check the spelling, confirm the extension matches the actual file, and make sure the audio is placed in the contestant pack rather than another pack folder. Press the play button again after correcting it; a successful load gives you an immediate way to verify the slot before starting a round.
Once every reaction you want is assigned—and any deliberately silent slots are left empty—your contestant pack is ready for testing in The Choicer Voicer. With the play buttons confirming each clip, you can catch broken reactions before they interrupt the show.
How to Find Judge Packs for The Choicer Voicer
In The Choicer Voicer, a judge pack controls the five-judge panel that appears during the game show. That same panel-style presentation remains relevant when you use Twitch mode, so a well-built pack keeps the stage looking consistent instead of leaving mismatched artwork behind.
Open the game files from the main menu and find the packs_judges folder. Place your judge packs there, with each pack containing the assets for all five judges:
- judge1
- judge2
- judge3
- judge4
- judge5
Each judge character image must use PNG or JPG. PNG preserves transparency, making it the safer choice when your artwork needs to sit cleanly against the studio background.
Prepare all five image files before testing the pack. Missing one of the numbered judge images can leave the panel incomplete, especially when the pack is used for Twitch panel-style presentation.
Judge images are not scaled by the game, so image dimensions directly affect how large each character appears at the podium. Target roughly 500 pixels wide by 1000 pixels tall for each judge image. If a character needs to move upward, add empty space below the artwork rather than resizing the image—the extra space changes where its bottom edge meets the studio floor.
Once the files are in the packs_judges folder, select the pack through The Choicer Voicer’s customization options and check the panel in a game show. With five correctly named images and consistent sizing, your judge pack is ready for both standard judging and Twitch’s panel-style presentation.
How to Customize Judge Pack Reactions in The Choicer Voicer
The reaction panel is where The Choicer Voicer gets its personality. With a few files in your judge pack, you can replace the podium success visuals, give each judge a distinct voice, and make every vote sound different.
Customize Judge Success Images
Open your judge pack and add an image named success to replace the default podium-vote image. This image uses a 2:1 ratio, with a default reference size of 512 by 256 pixels.
For judge-specific reactions, use the format judgeX_success, replacing X with the judge’s number. For example, judge4_success assigns a custom success screen to judge 4. Any judge without an individual judgeX_success image uses the default success image instead.
Use success as your fallback, then add judgeX_success images only for judges who need a unique reaction. That way, you don’t have to create five separate images just to complete the pack.
Add Judge Score Blips
Score blips are the short sounds that play as judges vote in favor of a performance. Add files named scoreblip1, scoreblip2, scoreblip3, scoreblip4, and scoreblip5 to control the five vote sounds.
These files play in vote order, regardless of which judge casts each vote. In other words, scoreblip2 always plays for the second favorable vote, even if that vote comes from a different judge than usual.
Give Each Judge a Voice
To add a voice line for an individual judge, name the audio file judgeX_voice, using that judge’s number for X. For example, judge2_voice plays whenever judge 2 votes in favor of a performance.
This is separate from the score blips: the blip follows the order of the vote, while the judge voice follows the specific numbered judge who votes. You can use both systems together for layered reactions, or mute the blips and let the judge voices carry the panel’s personality.
Rename Judges and Mute Blips
You can edit the displayed judge names in the Customization Menu. Give each judge a name that matches their character, voice, or visual design so the panel feels like a real cast rather than five anonymous voters.
If you want judge voices without the numbered vote sounds, open the judge pack’s config JSON file and set play_voices_with_blips to false. This mutes the score blips while retaining judge voices.
With custom success images, ordered score blips, and judge-specific voice lines, your The Choicer Voicer panel will sound and look like its own show. Set the names last, test a full round, and you’ll know exactly how every vote lands.
How to Configure Judge Packs for The Choicer Voicer
In The Choicer Voicer, a polished judge pack is about more than swapping character art and reactions. You can rename the panel in-game, control whether generic voting sounds play, and make judge-pack visuals take priority over the studio’s default reactions.
Rename Judges in the Customization Menu
Open the Customization Menu and enter your judge-pack configuration. From there, edit the displayed names for the five judges so the panel matches your pack’s theme. These names are separate from the judge image files, so changing a name does not require renaming judge1, judge2, judge3, judge4, or judge5.
This is a small change, but it makes a big difference in The Choicer Voicer—especially for streamer packs, where recognizable names help viewers follow the panel.
Mute Score Blips Without Losing Judge Voices
Judge packs can play two types of audio when a judge votes: the ordered score blips and the individual judge voices. If you want the judges to speak without the generic voting sounds, open the judge pack config JSON and find the key play_voices_with_blips. Set its value to false.
This mutes the score blips while retaining the judge voices. The five score blips still follow vote order when enabled, but this switch gives your pack a cleaner presentation when the character reactions are meant to carry the moment.
Test the pack with several voting outcomes after changing play_voices_with_blips. A voice-only setup can sound much more distinctive, but only if every judge’s reaction audio is clear at normal game volume.
Give Judge Reactions Priority
Judge-pack absolute images override the corresponding studio-pack image. Use judge-pack absolute images when the panel’s reactions must take precedence over the visuals supplied by the studio pack.
You can assign judge-specific visuals so individual judges show their own reaction when the rare absolute score occurs. This lets your judge pack maintain its identity even when another studio pack is selected in The Choicer Voicer.
With the names configured, the unwanted blips muted, and judge-pack absolute images taking priority, your panel will sound and look consistent across different setups. That’s the finishing touch that makes a custom judge pack feel ready for a real show.
How to Find Studio Packs for The Choicer Voicer
The stage is more than background decoration in The Choicer Voicer—it frames every performance and keeps both regular matches and audience-driven shows feeling distinct. If the default set is getting stale, a studio pack lets you replace the game-show environment before the next performance begins.
Open the game files from the main menu and locate the packs_studio folder. Store your studio environments there, with each studio pack in its own folder. After adding a pack, select a compatible studio pack before starting the show so the game loads the correct set.
Studio packs work in both Game Show Studio and Twitch panelist voting mode. In either mode, the selected pack changes the game-show environment used for the performances, so your local matches and Twitch sessions can share the same custom stage—or use completely different ones.
The main asset is the Studio model. Inside a studio pack, add a custom model in a .glb or .gltf format and name the file model. The game then imports it to replace the default studio. Custom modeling is optional, though: a pack can still be used for other studio presentation changes without requiring you to build a new model.
Keep the selected studio pack active for a test show before streaming. A large custom environment can take longer to load, so checking it ahead of time helps you avoid an awkward pause when your audience is waiting.
Once your pack is placed in the packs_studio folder and selected before the show, the new environment is ready for both standard performances and Twitch panelist voting. Pick the stage that matches your group, start the show, and let the custom set do the rest.
How to Customize Studio Packs in The Choicer Voicer
Your studio is the stage for every performance, so a few smart pack edits can make The Choicer Voicer feel like a polished streamer show instead of a rough prototype. You can reshape the set, swap its music, and add a custom score-screen video—but keep an eye on loading times.
Build and Test the Studio Model
When you create a new studio folder in The Choicer Voicer, the game generates a template .glb file. Use the template’s judge, contestant, and three-screen positions as sizing references for your own model. None of those objects is mandatory, so you can replace the environment without including them in the finished studio.
Export your custom model as a .glb or .gltf file and name it model. The game uses that file in place of the default studio. For a reliable stream, avoid unnecessary geometry: larger files and high vertex counts can make custom studios take multiple seconds longer to load.
Test your studio before going live. A beautiful model is not worth a long loading pause between rounds, especially when your Twitch audience is waiting for the next performance.
Add Music and Score-Screen Video
To replace AzureOtsu's default track, place a WAV, MP3, or OGG audio file named music_studio in the studio pack. The game uses this track during the game show, giving your The Choicer Voicer presentation a stronger theme. If you need a custom loop point, configure music_studio_loop_start in the studio config: use the starting sample for WAV, or the starting time in seconds for MP3 and OGG.
You can also replace the contestant score-screen background with a muted looping video. Add an OGV file named screen to the studio pack, and The Choicer Voicer will play it on a loop behind the score screen without audio. This works especially well for a stream overlay or a themed show package, since the visual change appears during each contestant’s results.
With a lightweight model, music_studio, and screen set up correctly, your studio pack is ready to give every round its own identity. Test the full flow once before streaming, and you’ll avoid awkward loading delays or missing presentation assets when the show begins.
How to Configure Studio Audio and Lighting in The Choicer Voicer
In The Choicer Voicer, a polished studio pack is about more than the set model. These advanced settings control your show’s music timing, lighting, rare-score visuals, and recording presentation—small details that make a big difference when you’re streaming or playing with friends.
Configure Studio Audio and Score Presentation
Open your studio pack’s configuration and adjust these options:
- Studio music loop point: Use
music_studio_loop_startto choose wheremusic_studiobegins looping. For a WAV file, enter the starting sample; for an MP3 or OGG file, enter the starting seconds. This helps prevent an awkward pause or a badly timed restart during repeated performances. - Studio absolute-score image: Add a PNG or JPG named
absolute_imageto your studio pack to replace the visual shown for the rare 6/5 absolute match. If your judge pack includes its own absolute-score image, the judge-pack image overrides the studio-pack version.
Set the music loop point after listening to the full track in the game. A loop that sounds seamless in an audio editor may still restart noticeably if the timing value does not match the file format.
Control Studio Lighting and Recording Colors
The game includes built-in studio lighting by default. If your imported model already supplies its own lighting, set use_builtin_light to false in the studio config; otherwise, the default lighting remains active.
You can also edit the colors of the audio recording overlay from the Customization Menu through the studio configuration options. Pick colors that remain easy to read against your set, especially if your custom model uses a busy background or bright materials.
These settings let you tune The Choicer Voicer’s presentation without rebuilding the entire pack. Set the loop carefully, choose the right absolute-score image, disable built-in lighting only when your model needs it, and adjust the recording overlay for clear on-stream visibility. With those final details handled, your studio is ready for the spotlight.
How to Find Menu Packs in The Choicer Voicer
The final customization stop is the Menu Packs system. In The Choicer Voicer, menu modpacks let you reshape the game’s presentation, but start by putting them in the correct directory and checking their version compatibility.
Find or Create a Menu Pack
Open the game files and locate the packs_menu folder. Create new menu modpacks there, or store menu modpacks you download in the same location so The Choicer Voicer can load them.
You can also create one in-game through the Customization Menu. Select Add New Pack to generate a menu pack with default settings. The generated pack starts with default values except for blank menu music, so you’ll need to add your own music if you want the menu to play a custom track.
Create the pack with Add New Pack before editing it. Starting from the generated structure gives you a clean base and avoids missing expected settings.
Check Version Compatibility
The current menu-pack structure applies to version 0.4. However, the structure is expected to change significantly in version 0.5, so menu packs made for version 0.4 may need to be reviewed or updated after the major version change.
That warning matters because a pack that works perfectly in The Choicer Voicer version 0.4 may not load correctly—or may require its files to be reorganized—after the version 0.5 update. Keep a backup of your working pack before changing versions.
Once your menu pack is inside the packs_menu folder and compatible with your game version, you’re ready to customize the presentation. With Add New Pack as your starting point and a backup ready for version changes, you can safely give The Choicer Voicer a menu that feels entirely your own.