
How to Start The Choicer Voicer Studio Mode
Studio Mode is where The Choicer Voicer turns a microphone into a game-show spotlight. Instead of trivia or reflex challenges, you imitate reference audio clips and perform for computer-controlled judges, who evaluate your vocal performance.
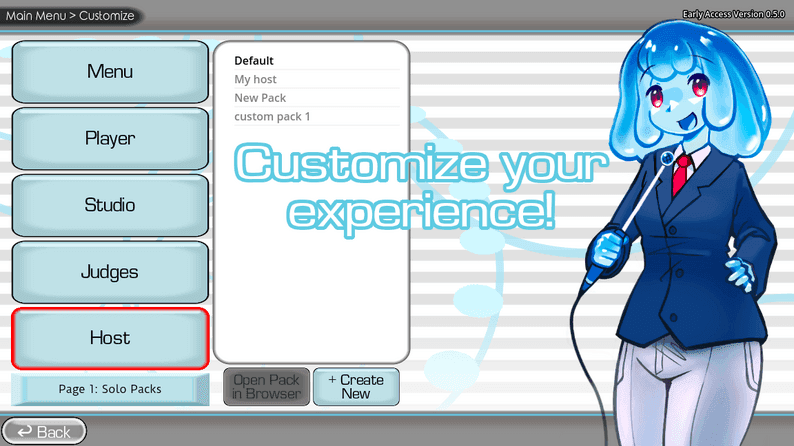
The main menu where players can select Studio Mode to begin their session.
Before starting a round, install and select a voice pack. The base game has almost no built-in prompts, so you’ll need to load existing or community content before Studio Mode has anything meaningful to play. A pre-made pack is the easiest way to learn how the game’s short performance-and-score loop works.
From the Customize menu at the main menu, open the studio setup screen. Here, select the studio, judge panel, host, and voice pack you want to use before starting the session. The microphone is your primary input: you’ll hear a reference clip, imitate it, and submit your take for judging.
Start with an existing voice pack rather than building custom content immediately. The game’s blank-slate design is powerful, but learning the Studio Mode rhythm first makes later customization much easier.
The presentation is modular, so you can swap the studio, judge panel, host, and content pool independently without changing the underlying scoring loop. That means the same voice pack can feel like a completely different show when you change its visual stage, judges, or presenter. Once your content and presentation choices are set, you’re ready to move on to the microphone check, player setup, and your first round in The Choicer Voicer.
Best Setup for The Choicer Voicer Studio Mode
Before you invite everyone into The Choicer Voicer, make sure the microphone works from start to finish. A failed recording can kill the energy faster than a bad impression, so spend a few minutes on this checklist before locking in your Studio Mode settings.
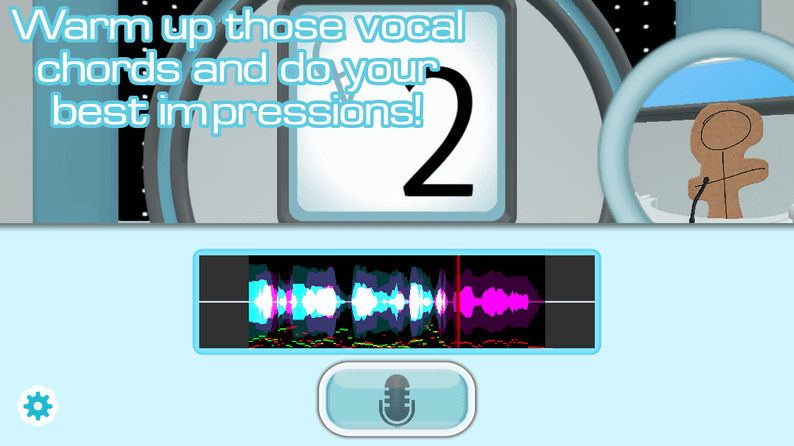
Calibrate your microphone using the on-screen waveform before starting a round.
Pre-Session Microphone Checklist
- Verify detection, recording, and playback. Confirm that The Choicer Voicer detects your microphone, captures your voice, and plays the recording back correctly. Test the input before inviting players—especially if you are using a new headset, USB microphone, or audio interface.
- Use a standard stereo input. When using surround-sound audio, switch to a standard stereo configuration. Surround setups can cause failed or silent recordings in The Choicer Voicer, so stereo is the most reliable starting point.
- Check your audio route. If recording or playback fails, check the selected input device, output device, system input level, permissions, routing, and background noise. If the game still cannot capture your voice, try external or virtual audio routing if necessary.
⚠️ Watch out: Test every microphone you plan to use, not just the one connected to the host computer. A setup that works for one player may still fail when another input is selected.
Test Before You Buy
If you have not purchased the full game yet, use the free No Gameplay Demo to test microphone compatibility first. It provides no gameplay access, but it can confirm whether your system can handle the game's microphone input before you commit to a full Studio Mode session.
Once detection, recording, and playback all work—and your input is running through standard stereo—you are ready to bring in the players. With the audio sorted out first, The Choicer Voicer can focus on what it does best: quick, chaotic vocal performances instead of troubleshooting between every round.
How to Select Players in The Choicer Voicer Studio Mode
Studio Mode in The Choicer Voicer is built for a shared-room game-show session, not a remote lobby. Gather your performers, decide who goes first, and keep the microphone handoff organized—once the round starts, the fun comes from watching everyone take their turn.
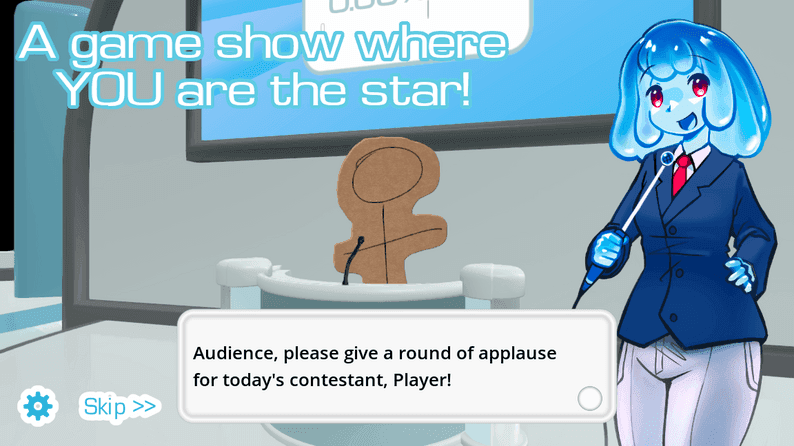
Prepare your local group by loading the desired voice packs before starting.
Player Limit and Turn Order
A Studio Mode session supports 1-4 players in one shared local studio. That means you can play alone or include up to four local contestants, but there is no fifth local contestant slot.
In a 1-4 player session, contestants take turns performing prompts and receive individual scores. Before each take, assign the active performer so everyone knows whose turn it is; the other players can listen, react, and prepare for the next prompt while the current contestant records.
Write down the order before starting—Player 1 through Player 4—and keep it consistent for the session. It prevents awkward pauses and makes score comparisons much easier.
Plan the Shared Local Setup
Local play means everyone stays in the same room, sharing one studio and microphone setup. Arrange seating so the active performer can reach the microphone comfortably, while other players remain far enough away to avoid accidentally being picked up.
Plan your inputs before beginning. If players have separate microphones, assign them in advance and mute unused microphones where possible. With one shared microphone, simply pass it to the active contestant between turns and keep background chatter down during recording.
No Online Multiplayer
Studio Mode has no online lobby or networked multiplayer, so you cannot invite remote friends into a standard networked session. For face-to-face play, use same-room local play; for a remote audience, use The Choicer Voicer's Twitch features instead.
With the player order, microphone plan, and seating sorted out, your group is ready to keep the rounds moving. Whether you are playing solo or filling all four slots, every contestant gets a clear turn and an individual score.
How to Use The Choicer Voicer Host
The show needs more than contestants and judges to feel like a real performance—this is where The Host steps in. In The Choicer Voicer, The Host acts as the game-show presenter and session mediator, giving each round a clear rhythm without affecting how the judges score your voice.
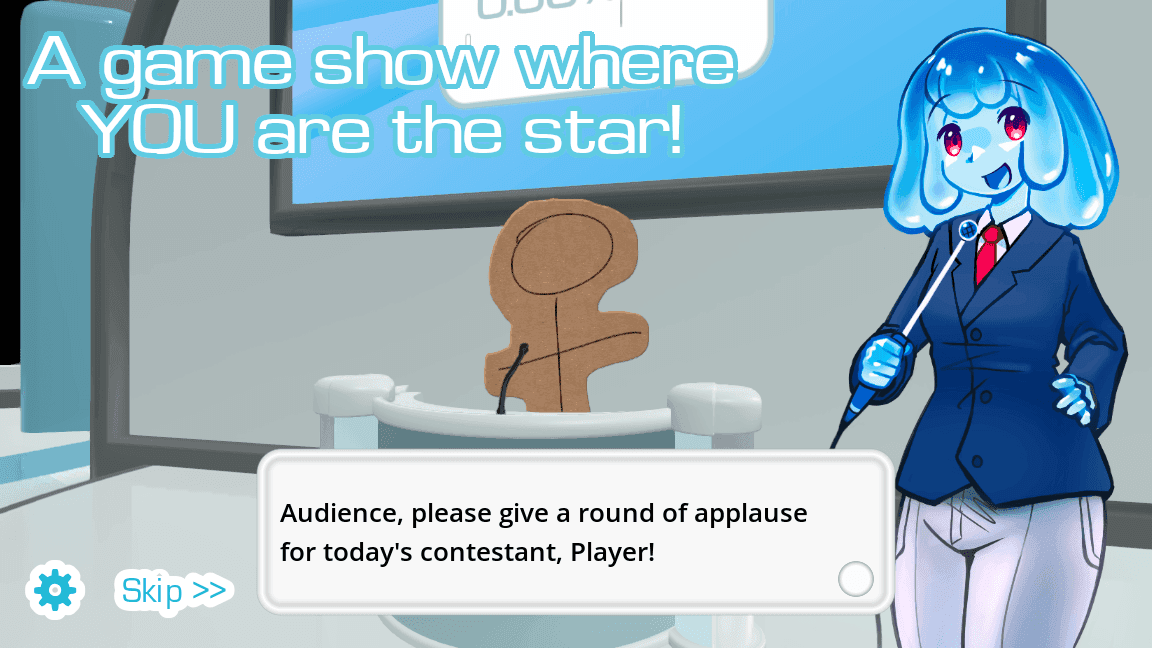
The host introduces the star of the show and manages the stage flow.
During Studio Mode, host lines and character presentation provide the show structure. The Host introduces contestants, frames the performance, and helps lead everyone into the score announcement. If the default presenter does not match your setup, swap Host Packs to give the session a different personality and presentation style.
How The Host Works With the Judges
After a performance, The Host can mediate or participate in the judges’ discussions and mock arguments. The panel reacts to the take first, while The Host helps keep the exchange moving before the final score is revealed. Follow the score reveal after the panel reacts rather than treating The Host’s commentary as another vote—the judges remain responsible for evaluating the performance.
To change the presenter, open the Customize menu and adjust the host configuration through a Host Pack. A Host Pack defines The Host’s appearance and lines, so selecting a different pack changes who presents the show and how announcements are delivered. This swap affects the presentation, not the underlying scoring mechanics.
Pick a Host Pack that matches your group’s mood. A more dramatic presenter can make serious attempts feel like a competition, while a playful one makes failed impressions even funnier.
Think of The Host as the bridge between contestants and judges: contestants perform, judges evaluate, and The Host frames the action so each round feels like a complete show. With the right presenter selected, your The Choicer Voicer session will flow naturally from introduction to performance to score reveal.
How to Begin a Round in The Choicer Voicer Studio Mode
The round moves fast in The Choicer Voicer: listen carefully, catch the cue, then commit before the window closes. Once your selected Voice Pack is ready, the standard Studio Mode sequence is straightforward.
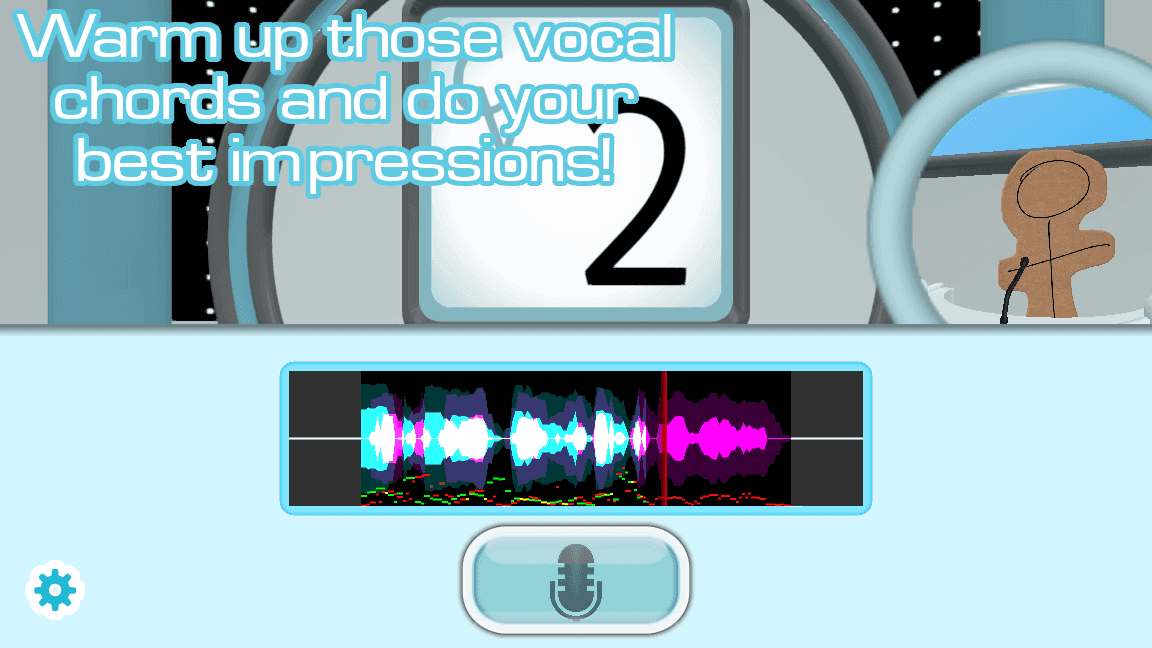
The vocal warm-up and recording interface in Studio Mode.
- Wait for prompt selection. At the start of a standard round, the game draws a prompt from the currently loaded Voice Pack. Make sure the intended pack is selected before beginning, especially if you have several community packs installed.
- Study the reference. After prompt selection, the game plays or displays the reference audio, text, image, or character line. Don’t rush to speak—listen for the delivery details, including the line’s pitch, rhythm, pauses, and overall shape.
- Use the timing lights. Before the reference clip starts, customizable timing lights signal the clip start with three beeps followed by a silent fourth beat. Treat that silent beat as your final preparation moment, then begin your impression on cue.
- Perform during the short window. After hearing or reading the reference, perform the impression live into the microphone. Start when prompted and finish within the expected duration; rushing can throw off the delivery, while dragging the line out can make the take miss its timing.
- Check the recorded take. After the microphone take, the game records your performance and provides waveform or playback feedback before judgment. Listen for missing or distorted audio—if the take is silent or garbled, the problem is likely with the recording rather than your impression.
Use the first listen to identify the opening sound and final word. The timing lights give you a clean launch point, but matching how the reference begins is often what makes the rest of the performance fall into place.
That’s the complete standard-round flow in The Choicer Voicer: the game selects a prompt, presents the reference, cues you with the timing lights, records your performance, and lets you check the take before judgment. Once you recognize that rhythm, you can focus on making each impression your own.
How to Understand The Choicer Voicer AI Judge Panel
In The Choicer Voicer, the performance is not scored by the people sitting beside you. After every Studio Mode performance, the Computer-controlled judge panel evaluates the recorded take instead of relying on contestant votes. Wait for the panel's decision before assuming you know how well you performed.
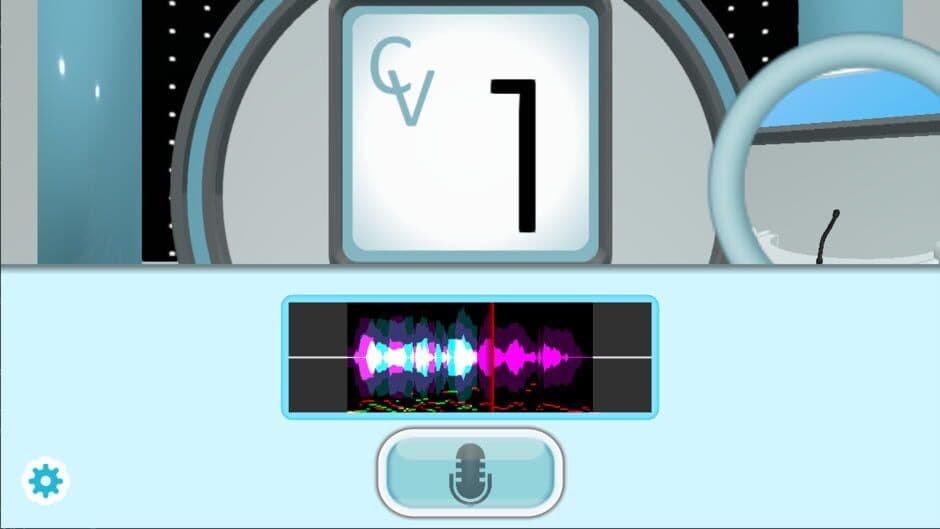
A look at the standard performance screen where judges observe the player.
Who Actually Determines Your Score?
The AI judges use the same scoring system regardless of who is playing. In The Choicer Voicer, solo or local multiplayer sessions use the same computer-controlled scoring system to evaluate every mode's standard rounds. That means other players cannot go easy on or sabotage a score—and they cannot inflate a friend's result just because they enjoyed the performance.
This is the key distinction between audience reaction and scoring. Your friends may laugh, cheer, or vote for a performance, but those player votes do not determine the points awarded by the game. The recorded take is sent to the AI evaluation system, which produces the official score.
Treat player votes as entertainment and feedback, not as a prediction of your final result. The panel's score is the result that matters.
How the Judge Panel Appears
In standard game-show mode, judge packs can display a five-judge panel with podium reactions. The panel you see is based on the active panel selected in Customize, so the visual lineup and reactions may change when you use a different judge pack.
That presentation is part of the showmanship in The Choicer Voicer, but it does not turn the other contestants into decision-makers. The judges may react dramatically, disagree for comedic effect, or build suspense before the result appears. Keep watching the active panel, because its reactions lead into the official score reveal.
Reading the Score Reveal
After judging, judges react and award points before the next player or round begins. Watch the podium and score screen for the result rather than immediately handing the microphone to the next contestant. The game presents the panel's response first, then confirms the points attached to your take.
The same process applies throughout The Choicer Voicer: perform, let the Computer-controlled judge panel evaluate the recording, then wait for the score reveal. In local multiplayer, the player reactions around you can make the result feel unpredictable, but the AI judging remains consistent from one contestant to the next.
Once you understand that The Choicer Voicer separates social voting from official scoring, the panel becomes much easier to read. Focus on the recorded performance and the score screen—not on whether the room thinks your impression was funny—and you’ll know exactly what the game judged.
How to Read The Choicer Voicer Judge Personalities
The panel in The Choicer Voicer is less a technical exam board and more a comedy troupe with scorecards. Once you understand each personality, their reactions become easier to read—and a strange critique feels like part of the show instead of a confusing verdict.
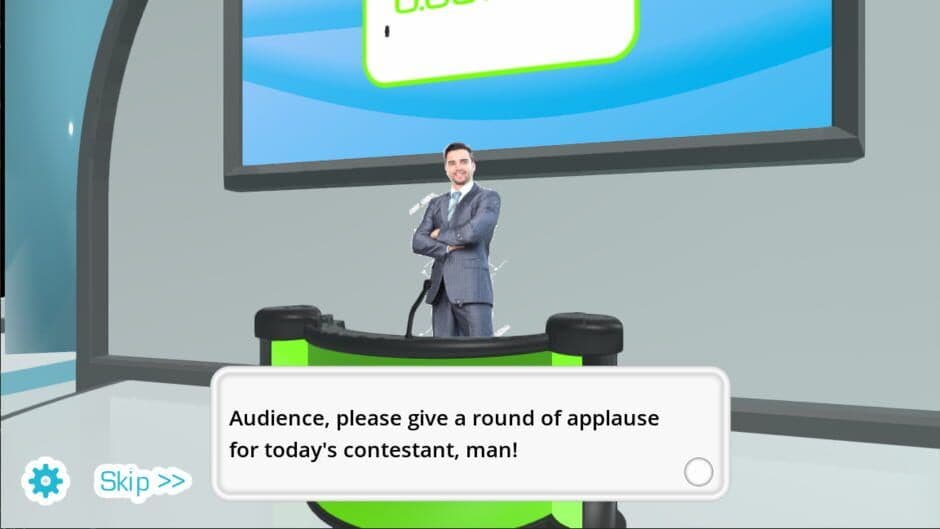
The interface provides visual cues for how judges are perceiving your current performance.
The Three Judge Personalities
- Critical Judge: During panel evaluation, this judge nitpicks technical flaws such as poor plosives, predictability, flat delivery, or “plosive purgatory.” If this personality keeps criticizing your take, sharpen your consonants and make deliberate choices instead of delivering the line without emphasis. A clean, intentional performance gives the Critical Judge fewer weak points to attack.
- Enthusiastic Judge: This judge rewards effort, creativity, vocal range, and unconventional choices. Commit to a bold delivery when the reference gives you room to experiment—playing it too safely may earn less excitement than a memorable vocal decision. The Enthusiastic Judge is the panelist most likely to appreciate a risky performance that clearly has personality.
- Eccentric Judge: This judge gives bizarre comedic critiques and potentially unpredictable scoring criteria. Treat absurd feedback as entertainment rather than literal technical instruction; a comparison to something completely nonsensical does not necessarily tell you what to change in your voice. Listen for the fun of the reaction, then use the more practical feedback from the rest of the panel to guide your next attempt.
How to Interpret the Final Verdict
The Choicer Voicer uses subjective judging. The judges combine vocal terminology, personal quirks, entertainment value, and bias rather than strict objective fairness, so the score is not a perfect measurement of your voice acting. Prioritize a clear, committed performance, but don’t panic if one round seems inconsistent—this RPG-like game-show panel is designed to entertain as much as evaluate.
After a take, watch for judge deliberation before the tally appears. The judges can debate, interrupt, or mock-argue with The Host before revealing the tally, so wait through the panel discussion instead of assuming the first reaction is the final result.
Give the Critical Judge clear consonants, give the Enthusiastic Judge a committed performance, and give the Eccentric Judge something memorable to react to. That balance works far better than simply shouting louder.
Once you recognize which judge is speaking, the panel’s chaos becomes readable. Use practical criticism to refine your delivery, embrace praise for creative risks, and enjoy the bizarre comments for what they are: the personality-driven payoff that makes The Choicer Voicer so entertaining.
How to Improve Pitch Matching in The Choicer Voicer
The Choicer Voicer rewards an impression that follows the reference’s vocal shape—not simply the loudest performance in the room. If you’ve been matching the words but still receiving weak scores, focus on pitch, tone, and texture before adding more volume.

The Choicer Voicer is centered entirely around microphone-based gameplay.
How Pitch Matching Works
During standard scoring, pitch matching compares how closely your delivery follows the reference tone and pitch. Listen for the high and low points in the line, then mirror those changes instead of speaking on one flat note. A strong impression rises and falls with the original, even if your voice sounds different.
Don’t force yourself into an unsafe register to copy a reference exactly. If the original reaches a pitch you can’t comfortably produce, use a controlled approximation and preserve the same overall movement. In The Choicer Voicer, an accurate, sustainable performance is more useful than a strained attempt that breaks up or becomes difficult to understand.
Match Tone and Texture, Not Just Pitch
Vocal tone and texture matter while preparing a take. Tone is the character of the sound—such as bright, dull, tense, or relaxed—while texture is the quality that makes a voice feel rough, smooth, breathy, or sharp. Try to match the shape and texture of the original voice rather than only shouting at its pitch, and choose a sustainable vocal register you can maintain cleanly.
Start with a quiet rehearsal before recording. Say the line softly while identifying its pitch landmarks, including where the voice rises, drops, or holds steady. Once you understand the rhythm and vocal movement, perform the same shape with full energy for the actual take.
Rehearse quietly first, then increase your energy without changing the line’s pitch path. This helps you avoid confusing volume with a better match.
Avoid strained imitation during performance preparation. Don’t force an uncomfortable pitch or volume just to imitate the reference; use a controlled approximation and prioritize a clean take. Once you can follow the reference’s high and low points while keeping your voice comfortable, your impressions in The Choicer Voicer will sound more deliberate—and score more consistently.
How to Match Timing in The Choicer Voicer
Timing is where a good impression can fall apart in The Choicer Voicer. You can match the voice’s pitch and texture, but if you rush the opening, drag out the middle, or miss the ending, the game’s scoring can still mark the take down.

During standard scoring, timing evaluates whether your delivery fits the reference’s expected temporal window. Avoid rushing or dragging the line; the goal is to match not only what you say, but when each part happens.
Practice the Vocal Landmarks
Before a take, listen for the line’s vocal landmarks in order:
- Pauses between words or phrases
- Speed changes that make one section faster or slower
- Breaths before or during the delivery
- Sharp consonants that create clear timing points
- Volume changes that signal emphasis
- The timing of the final word
Reproduce those landmarks in sequence during your rehearsal. A quiet practice run helps you map the rhythm without wasting energy, then you can deliver the same pattern with full commitment when the round begins.
Don’t memorize only the words. Listen for the start, rhythm, pauses, speed, and ending of the reference—once those landmarks are familiar, your timing becomes much easier to repeat.
Match the Cadence
While performing a reference line, follow the original start, rhythm, pauses, speed, and ending instead of merely saying the same words. If your rhythm slips, reset and retry rather than forcing the rest of the line at the wrong pace. The game rewards a delivery that follows the reference’s shape, not a technically correct sentence performed too quickly or too slowly.
Keep your take concise as well. Throughout Studio Mode, rounds are intentionally brief and advance rapidly after scoring, so keep the performance concise so the next contestant can begin. This pacing is part of the appeal of The Choicer Voicer: each player gets a focused performance window without letting one difficult line stall the session.
With a repeatable routine—identify the pauses, speed changes, breaths, sharp consonants, volume changes, and final-word timing, then mirror them in sequence—you’ll make your timing more consistent. Once the rhythm clicks, The Choicer Voicer’s short rounds start to feel fast and controlled instead of rushed.
How to Improve Clarity in The Choicer Voicer
Clarity can make or break an otherwise excellent performance. In The Choicer Voicer, the judges assess whether your microphone signal is clean and understandable—not just whether your impression sounds accurate.
How Clarity Affects Your Score
During judge evaluation, Clarity scoring assesses whether the microphone signal is clean and understandable. A strong impression can still score poorly if the recording is garbled, distorted, or difficult to hear, because the game cannot reliably compare unclear audio with the reference.
Before a round, use a functioning input with an appropriate level and minimal background noise. After recording, test playback before continuing: if your voice sounds muffled, clipped, or much quieter than expected, fix the input before spending another take. Trust me, catching a bad signal early saves a lot of frustrating retries.
When creating or testing clips, keep reference audio understandable and clean at normal speaking volume. Avoid quiet waveforms that are difficult for the scoring system to compare.
You do not need to shout to improve clarity. Speak at a controlled, normal speaking volume, pronounce each word cleanly, and leave enough space between your voice and competing background noise. The aim is a stable signal that preserves the shape of your delivery without distortion.
Recovering From a Bad Take
If the take is silent or distorted, do not immediately blame your acting. Check the input selection, stereo configuration, audio routing, and microphone permissions before replaying the round. A recording failure can make even a precise performance sound unusable.
Once the signal is clean, perform the line again with the same vocal choices—but prioritize an understandable recording over extra volume. Clear audio gives The Choicer Voicer's scoring system something reliable to judge, putting your performance back in control.
How to Use The Choicer Voicer Scoring Settings
How to Use The Choicer Voicer Scoring Settings
If The Choicer Voicer feels harsh during your first few sessions, don’t assume your performance is the problem. The game includes a scoring option that can make judge evaluations more forgiving, while its audio-matching behavior also changes how quieter clips are compared.
Open the Settings menu and look for Easier scoring from judges. This option is enabled by default and adjusts judge scoring to be more forgiving. Leave it enabled for beginner sessions while you learn how pitch matching, timing, tone, and clarity affect results. Disable it only when you want a stricter challenge.
The audio-scoring system also uses maximum waveform comparison. With this approach, increased weighting compares maximum waveform values rather than relying primarily on average waveforms. That improves matching for quieter clips, since a quiet reference is not judged only by its overall average volume.
Older scoring behavior placed more emphasis on average waveform comparison. This could perform poorly with quiet reference material, so use normalized, audible clips as a fallback when preparing or testing audio. In practice, make sure the reference is clear enough to hear without boosting your playback volume excessively.
⚠️ Watch out: The exact scoring algorithm is not fully documented, and some of its logic is reverse-engineered. Treat pitch, timing, tone, and clarity as practical guidance rather than guaranteed thresholds—matching those elements closely should help, but no publicly confirmed cutoff explains every score.
For an easier first run in The Choicer Voicer, keep Easier scoring from judges enabled and use clear, normalized reference clips. Once your performances consistently match the reference’s delivery, disable the option to test yourself against the game’s stricter scoring behavior.
How to Prepare Voice Packs for The Choicer Voicer Studio Mode
The blank stage in The Choicer Voicer is waiting for material. Before you start performing, prepare a reliable Voice Pack so every game mode has reference clips to draw from—and so your first session feels like a show rather than an empty framework.
What a Voice Pack Contains
A Voice Pack is a collection of reference audio samples used by all game modes. Place it in the packs_voice folder within the game files, then install or select a pack before playing. The game uses these clips as the lines, sounds, or other prompts you’ll hear before making your own take.
Each clip in the packs_voice folder may use WAV, MP3, or OGG format, and every file must be under 60 seconds long. If a clip fails either requirement, convert it to one of those formats or shorten it before adding it to the pack. Trust me, checking this now is much easier than troubleshooting a missing prompt once friends are ready to play.
Keep reference clips easy to understand at normal speaking volume. Quiet or unclear source audio makes performances harder to follow and can frustrate everyone during scoring.
Choose Starter Content First
For your first session, use a pre-made or community starter pack before building custom content. A starter pack lets you learn The Choicer Voicer’s short-round structure, reference audio, recording flow, and scoring loop without also dealing with content creation.
The game provides a framework with minimal built-in material, so a fresh installation will not offer a full library of playable prompts on its own. Add downloaded or self-created clips to make sessions playable, then select the pack you want to use before starting. Once you understand how the rounds feel, creating a themed pack around characters, memes, moods, or favorite quotes becomes much less overwhelming.
Start with a small, tested pack rather than loading a huge collection immediately. Play a few clips, confirm that they load and sound clear, and expand from there. With valid audio and a dependable starter pack ready, The Choicer Voicer’s Studio Mode has everything it needs to turn your microphone into the main event.
How to Manage Voice Pack Metadata in The Choicer Voicer
The library is where The Choicer Voicer starts feeling like a real party game—but a large collection can become messy fast. Use the in-game Voice Pack Editor to label, sort, and test clips before you bring them into a serious session.
Edit Voice Pack Metadata
From the main menu, open Extras, then choose Edit Voice Packs & Clip Metadata. This editor lets you manage the information attached to each pack and its clips without manually editing files. You can:
- Edit captions for individual samples
- Assign images to clips
- Add tags for filtering
- Set a voice pack icon
- Change the displayed pack name
- Add a subtitle beneath the pack name
- List contributing authors
- Write a description or readme
The displayed name does not have to match the pack's folder name, which makes it easier to give a downloaded or personally assembled pack a clear title. Adding authors and a description is especially useful when you share packs or maintain several versions of similar content.
Sort Clips with Tags
Tags classify clips in the voice pack selection screen, helping you filter a large collection by categories you define. Nested folders are automatically treated as unique tags, so a folder structure can provide extra sorting categories without requiring you to label every clip individually. If that automatic behavior creates clutter, disable automatic nested-folder tags in Options.
Use consistent tags for themes such as character, mood, or difficulty. Once your The Choicer Voicer library grows, thoughtful metadata is much faster than browsing every clip manually.
Search by Author and Preview Clips
The voice pack selection screen includes an author search. Enter author: followed by a creator name to search by author—for example, use author:CreatorName when you want to locate packs from a particular contributor. Combining author names with pack descriptions, subtitles, and tags gives you a practical way to organize a large library.
You can also click a clip thumbnail on the voice pack selection screen to preview its audio, image, and filename before selecting it. This is handy when several clips have similar names or when you want to confirm that an image and caption belong to the intended sample.
Wait for Clips to Preload
When you select a large voice pack, clips may take several seconds to preload for filtering and error reporting. Wait for loading to finish before diagnosing a pack or assuming that a clip is missing. The Choicer Voicer needs those clips available before its filtering and error-reporting tools can give you reliable results.
With the Voice Pack Editor, clear tags, author searches, and clip previews, you can turn a crowded The Choicer Voicer library into a collection that is easy to browse and ready to perform.
How to Configure The Choicer Voicer Studio Presentation
The stage is where The Choicer Voicer gets its personality. A well-chosen Studio Pack can make the same voice clips feel like a polished game show or a laid-back performance session, but remember: these changes affect presentation—not how the game judges your voice.
Choose a Studio Visual Theme
Open the Customize menu and select a Studio Pack that fits your group’s mood. The game offers presentation shells ranging from a formal game-show atmosphere to a more relaxed setup. This visual theme changes the stage, colors, screens, and overall visual framing, while leaving the core scoring loop untouched.
In other words, a dramatic set will not make pitch matching easier, and a casual-looking stage will not lower the judges’ standards. Pick the theme that best suits the atmosphere you want for your The Choicer Voicer session.
Install and Build Studio Packs
Studio Packs are stored in the packs_studio folder in the game files. A pack can work without a custom model, but adding a file named model.glb or model.gltf lets you replace the default game-show set with your own environment.
When you create a new studio folder in-game, The Choicer Voicer generates a reference template. Use it to line up the judges, contestants, and three screens correctly. The objects shown in that template are not required in your finished model, but their positions give you a reliable guide for keeping the stage layout usable.
Start with the generated reference template instead of guessing the scale. A beautiful custom set is much more effective when the judges, contestants, and screens remain easy to see.
Watch Studio Loading Time
Large custom models can slow down the start of a session. Higher file sizes and vertex counts may add multiple seconds of loading, so use a lighter model if the game appears to stall while loading your set. This is especially useful when testing several Studio Packs before a local session.
You can also customize the audio-visual details of a selected Studio Pack. Depending on the pack, you can change:
- Music for the game-show stage
- Recording-light colors
- Waveform borders
- A looping score-screen video
Check these presentation assets before inviting everyone into the show. Studio music can use WAV, MP3, or OGG audio, while a score-screen video uses an OGV file named screen; that video loops and plays muted. The game also supports an absolute_image file for the rare 6/5 “absolute” result, although an image from a Judge Pack takes priority over one from a Studio Pack.
With the right Studio Pack, The Choicer Voicer can look completely different without changing its underlying voice-impression challenge. Keep the model light, verify the visual and audio assets, and choose a theme that matches your group—then the stage is ready.
How to Customize The Choicer Voicer Judge Panel
The right Judge Pack can completely change the personality of a The Choicer Voicer session, from the panel’s faces to the way a successful vote lights up the podium. Set up the pack once, then use it in standard Studio Mode or Twitch Panelist voting.
Build the Judge Pack
A Judge Pack is a set of judges used in standard Studio Mode and Twitch Panelist voting. Place it in the packs_judges folder in the game files, then select it through the main menu or Customize menu. You can swap the panel without changing your voice pack or the underlying scoring.
For the panel images, use the filenames judge1, judge2, judge3, judge4, and judge5, with each file saved as PNG or JPG. PNG is preferable because it supports transparency, which helps the judges sit cleanly against the studio presentation.
The images are not scaled by the game, so their original dimensions directly affect how large the judges appear. Aim for approximately 500 pixels wide by 1000 pixels tall so each character fits the podium properly. To move a judge upward, add empty space below the image rather than resizing the character itself.
Keep all five judge images close to the same size. A mismatched image can make one panelist look noticeably larger or smaller even when the files are otherwise correct.
Customize Podium Reactions
When a judge votes in favor of a performance, the podium lights up using the image named success. This shared image uses a 2:1 ratio. For individual reactions, name the files judgeX_success, replacing X with the judge’s number—for example, judge4_success gives judge four a unique success image. Judges without an individual image fall back to the shared success image.
You can also give the panel custom reaction audio. The files scoreblip1, scoreblip2, scoreblip3, scoreblip4, and scoreblip5 play in vote order, while judgeX_voice plays for a specific judge when that numbered judge votes. The judge names can be edited in Customize, letting you match the panel’s presentation to your chosen characters.
With the images, podium reactions, and optional audio configured, your Judge Pack is ready to give The Choicer Voicer its own identity. Test one favorable vote before inviting players, and you’ll know the panel is reacting exactly as intended.
How to Configure The Choicer Voicer Judge Audio
The panel’s reactions are more than colorful noise in The Choicer Voicer—they tell you how many judges approved the performance and which panelist is speaking. Configure the audio files carefully, and every favorable vote becomes easy to follow.
Configure Score Blips and Judge Voices
When a judge votes in favor of your performance, the score blips play in a fixed sequence:
scoreblip1scoreblip2scoreblip3scoreblip4scoreblip5
This order is independent of which judge votes. For example, the second favorable vote always plays scoreblip2, even if a different panelist provides that vote. Use the sequence to understand the vote count as the panel evaluates your take.
Judge-specific voice lines work differently. During a favorable vote, the file for that numbered judge plays, so name each file for its intended panelist:
judge1_voice— judge #1judge2_voice— judge #2judge3_voice— judge #3judge4_voice— judge #4judge5_voice— judge #5
The score blips follow vote order, while judgeX_voice follows the identity of the judge who voted. That distinction matters when you’re building a custom panel audio setup for The Choicer Voicer.
Keep the score blips if you want the clearest vote-count feedback. If you prefer each panelist’s personality to carry the reaction, mute the blips and rely on the judge voice lines instead.
Mute Score Blips in the Judge Pack Config
If you want only judge voices to play, edit the Judge Pack config JSON and set play_voices_with_blips to false. This disables the score blips while leaving the judge-specific voice lines available for favorable votes.
Edit the configuration carefully, then test a round before using the pack in a full session. If the result sounds wrong, check the JSON setting and confirm that the intended judgeX_voice files are named correctly.
Configure the Absolute Score Reaction
A rare 6/5 result can display an absolute image after an exceptional performance. You can provide this reaction through the studio pack or the Judge Pack by including an absolute_image file.
When both packs provide an absolute_image, the Judge Pack image takes priority over the studio pack image. Test the result after installing both packs so you know which reaction The Choicer Voicer is actually displaying.
Once the score blips, judge voices, and absolute reaction are configured, the panel audio will be much easier to read—and your custom setup will sound like a complete game show.
How to Assign Contestants in The Choicer Voicer
The stage is ready, but your contestant still needs an identity. In The Choicer Voicer, the right cast setup gives your Studio Mode session a personal touch, from the name on the podium to the image and introduction shown before a performance.
Choose the Right Contestant Pack
A Host/Contestant Pack defines the show's host or contestant presentation, so select a compatible pack when you want to change the cast visuals and lines together. This is useful when a themed setup includes its own presenter and player characters; otherwise, you can configure the contestant separately.
A Contestant Pack is stored in the game's packs_player folder. It customizes the on-screen contestant image, name, colors, introduction, and reactions. The pack folder name does not have to be the name shown during the show, so set the display identity in-game before starting your session.
Create and Name Your Contestant
Open the Customization Menu and choose Add New Pack, or create a new folder in the packs_player folder. Creating the pack through the menu automatically supplies default settings, which is the easiest route if you're new to custom contestants.
Next, open Player Customization and use the Overview page to set the contestant name. Do this before the session begins—the name you enter here is the identity used when the contestant is introduced, rather than the folder name itself.
Give every contestant a clear name before inviting friends in. It prevents confusion when several custom packs are available and makes the score announcements easier to follow.
Set the Contestant's Appearance
Add an image named player to the packs_player folder. The image accepts PNG, JPG, or WEBP, and it should be at least 1000 pixels tall so the contestant remains clear on the Studio Mode stage. Use PNG when possible, especially when you want a clean image with transparency.
The game does not scale the player image automatically, so check how it looks in the preview before committing to a multiplayer session. A poorly sized image can make the contestant feel visually out of place even though the pack itself works correctly.
Customize the Presentation
Open the Details page in Player Customization to edit the introduction text and assign two colors. Those colors appear on the contestant's podium and on that player's individual score screen, giving each local player a distinct visual identity.
Use the preview to check the introduction and color choices before playing. The reactions are also part of the contestant presentation, so a complete pack can respond to introductions, scores, wins, and losses with its own character style.
With the contestant name, player image, introduction, and two colors set, your custom cast member is ready for the spotlight. The Choicer Voicer will now present your contestant as part of the show's identity—not just as an unnamed player behind the microphone.
How to Handle The Choicer Voicer Contestant Reactions
The contestant reactions in The Choicer Voicer add personality after each performance, but they don’t determine your score. Treat them as customizable feedback audio: the judges handle scoring, while your contestant pack supplies greetings, victory lines, losses, and score-specific reactions.
Legacy Contestant Reactions
For versions 0.4.12 and earlier, contestant packs use three fixed reaction files:
- talk_cheer plays for scores of 4 or 5 and when you win the game.
- talk_upset plays for scores of 0 or 1 and when you lose the game.
- talk_greet plays when the host introduces you.
If one of these files is missing, that reaction simply has no audio. This older setup is straightforward, but it gives you less control over the response to middle scores.
Modern Contestant Reaction Slots
In versions 0.4.13 and later, Player Customization uses nine reaction slots instead. These cover:
- The winning reaction
- The losing reaction
- The introduction greeting
- The score of 0
- The score of 1
- The score of 2
- The score of 3
- The score of 4
- The score of 5
To assign a reaction, open the Details page in Player Customization and enter the exact filename beside the appropriate slot. The game uses that file when the matching introduction, result, or score occurs, so you can give a score of 2 a different response from a score of 5 rather than relying on broad win-or-loss categories.
Each slot includes a play button for testing its assigned filename. Press it after entering the file name; if the text turns red, the audio file is missing or failed to load. Fix the filename or file placement before starting a local session, because an empty reaction can be easy to mistake for a recording or playback problem.
In a modern contestant pack, you can assign one audio file to multiple slots when you want a consistent reaction. You can also leave any slot empty for silence—test the result with each slot’s play button before inviting everyone to play.
Once your contestant reactions are mapped, The Choicer Voicer will respond consistently to introductions and results without muddying the judge panel’s actual scoring. Set the reactions you want, leave deliberate gaps where silence works better, and your custom contestant is ready for the next round.
How to Run The Choicer Voicer Single-Player Practice
Solo practice is the best way to get comfortable before the room gets loud. In The Choicer Voicer, a one-player Studio Mode session uses the same AI judge scoring as group play, so you can complete rounds without other contestants while learning how your voice and timing affect each result.
Build a Solo Learning Session
Before joining local multiplayer, play several short rounds with the selected Voice Pack. Use these practice takes to learn the available prompts, judge reactions, microphone behavior, and timing cues without worrying about a leaderboard or holding up friends. Preview the Voice Pack first, then listen closely to each reference before performing it.
Treat your first few rounds as calibration, not a performance test. You’re learning what the game hears as much as you’re practicing the impression.
After every score, compare your take with the reference across five areas:
- Pitch: Did your high and low points follow the original?
- Timing: Did you start, pause, and finish at the right moments?
- Tone: Did your voice have a similar shape and texture?
- Emotional delivery: Did you commit to the reference’s intended feeling?
- Clarity: Could the microphone capture every word cleanly?
Use that result to adjust the next take rather than repeating the same mistake. If the pitch is close but the score remains weak, try changing your timing or emotional delivery; if the performance feels right but the result is poor, check whether the recording itself sounds clear.
Confirm the Pack Before Multiplayer
Before competitive local play, agree on and preview the Voice Pack so every contestant understands the available content pool. This prevents confusion when an unfamiliar prompt appears and gives everyone a fair chance to recognize the reference style. A few solo rounds with that same pack also help you identify which lines are easy warm-ups and which ones demand more precise delivery.
Once you understand the prompts, judge reactions, microphone behavior, and timing cues, local play becomes much more relaxed. You’ll enter the next session knowing what The Choicer Voicer expects—and ready to turn that practice into better scores.
How to Organize The Choicer Voicer Local Multiplayer Session
A good local session in The Choicer Voicer should feel chaotic on-screen—not chaotic in your audio setup. With four players sharing the room, a little planning keeps every take clean and makes the handoffs between contestants feel effortless.

Additional titles from the game's source site.
Plan the Session Before the First Round
Before starting a 1-4 player game, agree on a clear order: Player 1 through Player 4, or whatever rotation suits your group. Choose the voice pack you want to use, test the active microphone, and decide whether the goal is chasing high scores or going for funny performances. That last choice matters—players can focus on accurate impressions, or deliberately make bold, ridiculous choices for the best laughs.
For a four-player session, write the order down or keep it visible so nobody talks over the next contestant's turn. Once the group has agreed on the format, avoid changing microphones or contestants mid-round unless a recording problem forces you to stop.
Assign Microphones and Control Voice Bleed
In local multiplayer, assign microphones to players before the first round. Use separate inputs where possible, then make sure unused microphones cannot capture voice bleed from the active performer. If everyone shares one microphone, place it where the current contestant can speak clearly and keep the other players quiet until the take ends.
Treat the microphone like a stage spotlight. Only the active contestant should be near it or speaking toward it while the take is being recorded.
Leave space between microphones during local play, and mute unused inputs. This reduces background chatter and prevents accidental recordings when someone reacts to a joke, repeats the prompt, or starts practicing early. It also helps the computer panel judge the intended performance rather than a mix of several voices.
Rotate Players After Each Result
Each local turn has one active contestant: only that player performs while the computer panel scores that take. After the result appears, rotate to the next player in the agreed order. Give the next contestant a moment to get into position, then keep everyone else quiet until the new take is complete.
This rotation keeps individual scoring fair and makes the session easy to follow. You can still celebrate dramatic scores, but save the loud reactions for after the recording finishes—otherwise the room's excitement can become part of the wrong player's performance.
With a fixed order, assigned microphones, sensible same-room spacing, and a shared goal, The Choicer Voicer's four-player format runs smoothly. Keep the audio clean, let one contestant perform at a time, and your group is ready for a session full of either impressive scores or gloriously bad impressions.