
How to Find Ancient Cores and Giant Ancient Cores in Breath of the Wild
In The Legend of Zelda: Breath of the Wild, few materials are as coveted—or as elusive—as the Ancient Core and its giant counterpart. This guide will demystify these rare Sheikah artifacts, explaining exactly what they look like, where they come from, and why they’re worth the hunt.
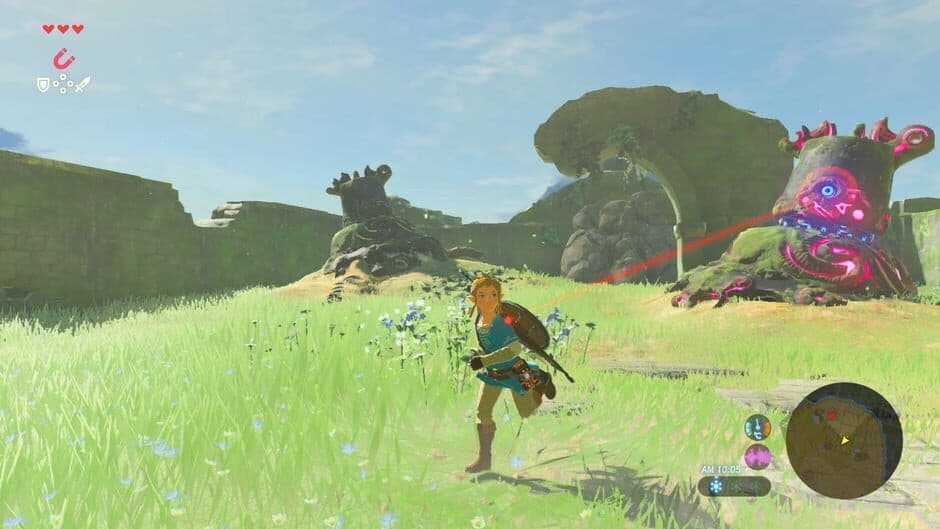
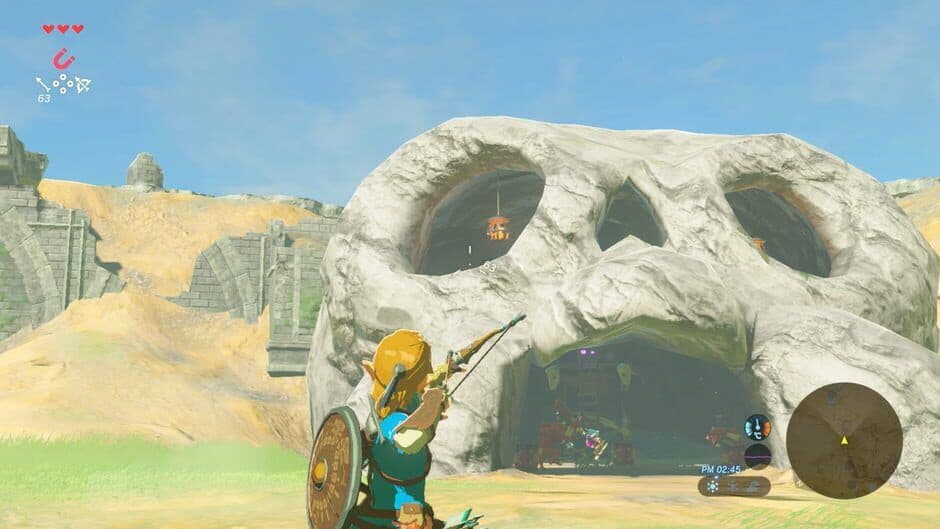
Exploring Hyrule for Guardian materials
Let’s start with the basics. The Ancient Core is a rare drop primarily from active Guardians like Guardian Stalkers, Guardian Skywatchers, and Guardian Turrets. It’s a crucial component for upgrading your Sheikah Slate abilities, like Stasis+, and for crafting the powerful Ancient Armor set at the Akkala Ancient Tech Lab.
The Giant Ancient Core, however, is a whole different level of rare. This is an extremely rare drop from those same powerful Guardians. Visually, it’s easy to spot the difference: a Giant Ancient Core features two glowing rings, with the inner ring spinning horizontally while the core itself spins diagonally. It’s the key ingredient for the highest-tier armor upgrades and for crafting top-tier gear like the Ancient Bow and Ancient Shield.
Don’t waste these cores on cooking or selling. Their true value is in late-game upgrades and crafting—save every one you find.
Now, about those drop rates. This is where the grind becomes real. For a Giant Ancient Core, each individual part dropped by a defeated Guardian has only a 0.5% chance of being one. Since a Guardian Stalker drops between 10 to 12 parts, this translates to roughly a ~5% total chance per kill. It’s a numbers game, which is why efficient farming (covered in later sections) is essential.
With a clear understanding of what these cores are and why they matter, you’re ready to start hunting. Let’s find them.
Best Farming Locations for Guardians in Breath of the Wild
So you’ve got your strategy down and you’re ready to hunt—now you need to know where to go. In The Legend of Zelda: Breath of the Wild, the best farming grounds are crawling with active, high-yield Guardians. Let’s map them out.

Guardian targeting mechanics during a hunt.
Your number one destination is the area surrounding Hyrule Castle and the Castle Town Ruins. This is the undisputed champion for Guardian density, with over 50 targets including Guardian Stalkers and Guardian Turrets patrolling the fields and moats. This is where your farming loop begins and ends.
For the perfect starting point, warp to the Central Tower in Central Hyrule. From this vantage, you can easily survey the fields to the west and north, teeming with Stalkers. A popular and efficient route is to glide west from the tower to engage your first Stalker, then work your way north and east through the ruins and plains. A full circuit here can net you 6-8 Stalkers in about 15-20 minutes.
If you’re looking for a slightly less intense environment to practice or gather basic parts, head to the Forgotten Temple in Tanagar Canyon. This massive ruin is filled with stationary, decayed Guardians. While they have a much lower drop rate for rare cores, they’re excellent for farming common Ancient Screws and Springs in relative safety.
For a change of pace and a shot at different loot tables, the Akkala Citadel Ruins in Akkala are a prime location for Guardian Skywatchers. These flying patrols have a good chance to drop the rare parts you’re after and keep you on your toes with their mobility.
Always sync your farming runs with the Blood Moon reset. Every Blood Moon respawns all overworld Guardians, letting you run your favorite route again for a fresh batch of targets. Warp back to the Central Tower right after the cutscene ends for maximum efficiency.
With these locations in your rotation, you’ll have a steady stream of Guardians to challenge. Stock up on weapons and shields—your hunt is about to get profitable.
How to Master Guardian Combat and Parry Timings
The Guardian’s laser locks on, its ominous piano music builds, and your heart races. In The Legend of Zelda: Breath of the Wild, this is the moment of truth—master it, and these terrifying machines become your personal loot factories. Here’s how to dismantle them with precision.
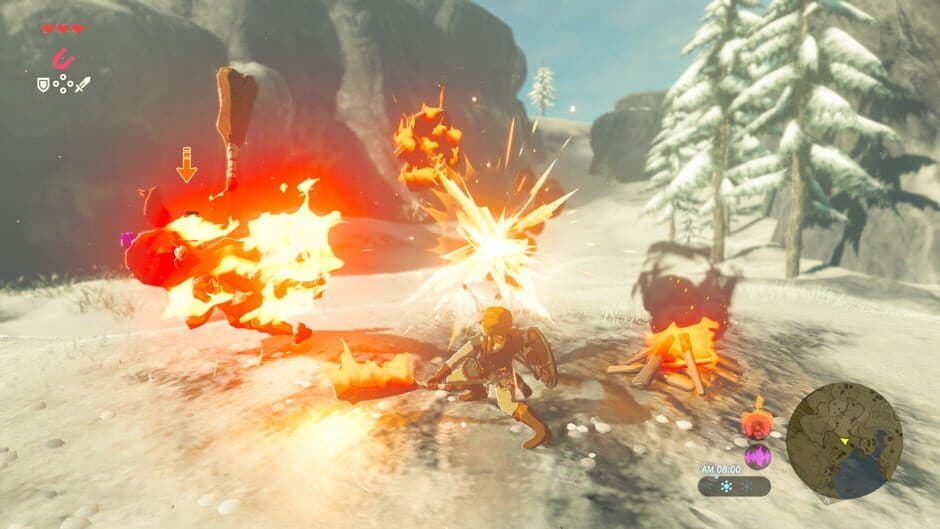
Identifying the Guardian's lock-on laser.
The Perfect Shield Parry
This is your most reliable, resource-free method. Hold [ZL] to raise your shield. Watch the Guardian’s central blue eye—when it flashes brightly and you hear a distinct beep, press [A] to parry. Time it right, and you’ll deflect the laser back into its eye for massive damage. It’s a tight window, but once you nail it, you’ll feel unstoppable.
The audio cue is your best friend. Listen for that sharp beep over the music; it’s more consistent than trying to catch the exact flash.
Guardian Stalkers require three successful parries to destroy. Guardian Turrets and Guardian Skywatchers typically go down in one. If your timing is off, a Hylian Shield can absorb multiple blasts, giving you room to practice.
Dominating Guardian Stalkers
For the iconic spider-like Guardian Stalkers, the parry isn’t your only option. A more aggressive—and potentially more rewarding—tactic is leg removal.
- Stun First: Use [ZR] to aim your bow and press [A] to fire an arrow into its central blue eye. This causes an immediate stun, buying you precious seconds.
- Sever the Legs: Sprint in and use a powerful weapon like the Master Sword (which glows with 60 damage near Guardians) or an Ancient Bladesaw. Press [Y] to attack each leg. Severing a leg not only stuns the Guardian again but may also increase the number of material parts it drops when defeated.
- Finish the Job: With its mobility gone, finish it off with continued melee attacks.
Controlling the Fight with Abilities
Don’t forget your Sheikah Slate tools. Hold [L] to activate Stasis+, aim the reticle at a charging Guardian, and press [A] to freeze it in time. This gives you a huge window to line up a perfect eye shot or close the distance safely. It’s perfect for when you’re feeling overwhelmed.
For the ultimate “skip the fight” button, use an Ancient Arrow. Aim for the eye and fire—it’s an instant kill. Crucially, the Guardian will still drop its full loot table, making this a fast, if expensive, farming method.
⚠️ Watch out: While powerful, Ancient Arrows cost resources. Save this method for when you’re swimming in materials or using the save/reload trick to farm a specific core.
With these tools in hand—the precise parry, the brutal leg-break strategy, and your slate’s time-stopping magic—you’re no longer prey. You’re the hunter. Head to the fields around Hyrule Castle, listen for that piano, and turn fear into fuel for your finest gear. Let’s go.
Best Gear and Build for Farming Ancient Materials
You’ve mastered the parry and know the best hunting grounds. Now, let’s talk gear. In The Legend of Zelda: Breath of the Wild, the right equipment doesn’t just make farming Guardians easier—it turns you into a walking demolition crew for ancient tech. Here’s how to build for maximum efficiency and survival.

Navigating Guardian-infested territories for ancient parts.
Your Core Armor: The Ancient Set
Your first stop should be the Akkala Ancient Tech Lab. Purchase the full Ancient Armor Set from the Ancient Oven. This set provides Guardian Resist, reducing damage from their lasers, and its true power is unlocked by upgrading it twice at a Great Fairy Fountain. Doing so grants the Ancient Proficiency set bonus, which boosts the damage of Ancient and Guardian-type weapons by a whopping 80%. This single upgrade will more than halve the time it takes to bring down a Guardian Stalker.
Weapons That Dominate
For your main weapon, nothing beats the Master Sword for this job. When you’re near Guardians or in Hyrule Castle, it automatically powers up to 60 damage, and it won’t consume durability while glowing. This makes it perfect for severing legs without breaking your best swords.
For a pure damage option under the Ancient Proficiency bonus, craft the Ancient Bladesaw at the Akkala Ancient Tech Lab. For ranged attacks, the Ancient Bow (also crafted at the lab) is invaluable. Its flat arrow trajectory makes sniping a Guardian’s central eye from a distance much easier, setting up easy stuns or finishing blows.
The Ultimate Safety Net: Shields and Consumables
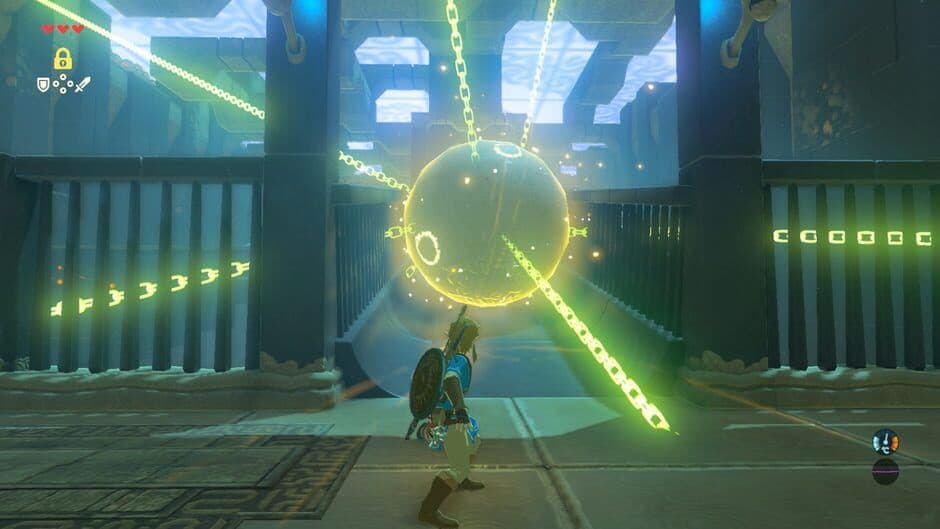
Even masters miss a parry. That’s where the Hylian Shield comes in. Found in the Lockup beneath Hyrule Castle, its massive durability can absorb multiple direct laser blasts, giving you room for error. Pair it with defensive consumables for near-invincibility.
Before a farming run, cook up some Tough Elixirs using a Rugged Rhino Beetle and any monster part. These boost your defense, letting you survive a direct hit if your shield breaks. For speeding up kills, brew Mighty Elixirs with a Bladed Rhino Beetle instead.
Don’t sleep on food, either. Cook 5x Mighty Bananas or similar attack-boosting ingredients for a strong meal. Stacking an attack boost with your Ancient Proficiency bonus lets you shred through Guardians.
Putting It All Together
A typical optimized farming loop looks like this: After a Blood Moon, warp to Central Tower. Gear up in your fully upgraded Ancient Set, equip the Master Sword and Hylian Shield, and consume a Mighty Elixir. Glide down to the fields west of Hyrule Castle. Stun a Stalker with an arrow to the eye, sever its legs with the Master Sword to increase drops, then finish it with a few powered-up swings. Rinse and repeat across the castle grounds.
With this build, you’re not just surviving Guardian encounters—you’re farming them on an industrial scale. Let’s go collect those cores.
Static Treasure Chest Locations for Giant Ancient Cores
Hunting Guardians is thrilling, but if you want a sure thing, this is your list. In The Legend of Zelda: Breath of the Wild, a handful of non-respawning treasure chests hold guaranteed Giant Ancient Cores. These are your failsafe—once you find them, they’re yours for good, no RNG required. Let’s map them out.
Ancient ruins often house valuable treasure.
Shrine Chest Locations
Your first and most reliable batch comes from Ancient Shrines. Eight shrines across Hyrule each contain a single chest with a Giant Ancient Core.
- Dah Hesho Shrine in the Akkala Region, south of Akkala Falls.
- Ritaag Zumo Shrine in the Akkala Region on Rist Peninsula.
- Shora Hah Shrine in the Eldin Region on the Isle of Rabac.
- Kuhn Sidajj Shrine in the Woodland Region within Korok Forest.
- Maag Halan Shrine in the Woodland Region near Mido Swamp.
- Mirro Shaz Shrine in the Woodland Region by Pico Pond.
- Kah Okeo Shrine in the Tabantha Region on the Rayne Highlands.
- Sato Koda Shrine in the Lanayru Region along the Rutala River.
If you’ve already cleared a shrine but aren’t sure if you grabbed the chest, check your map. A treasure chest icon next to the shrine name means you’ve collected everything inside.
Overworld Chest Locations
Two more chests are hidden in the world itself, offering a core each without needing to solve a shrine puzzle.
- Forgotten Temple Chest: Head to Tanagar Canyon and find the massive Forgotten Temple. The chest is tucked away behind the Rona Kachta Shrine at the temple’s far end.
- Lomei Labyrinth Island Chest: Sail to Lomei Labyrinth Island in the Akkala Sea. Navigate to the northwest portion of the labyrinth to find this well-hidden chest.
⚠️ Remember: Unlike Guardians, these chests do not respawn after a Blood Moon. Once you open them, that’s it. Make a mental note of which ones you’ve collected.
With these ten static chests secured, you’ve got a solid foundation of cores for your most important upgrades. It’s the perfect, stress-free start to gathering what you need.
How to Buy Ancient Cores from Teli the Merchant
If you're tired of farming Guardians and just need a few more Ancient Cores to finish a crucial upgrade, there's a merchant who can help—if you can catch him in the right mood. Here's how to buy Ancient Cores from Teli in The Legend of Zelda: Breath of the Wild.
Merchants change their stock based on the weather.
Find Teli the Treasure Hunter
You'll find Teli, a traveling merchant who deals in Ancient Parts, walking the main road between Hateno Village and Fort Hateno. He's your go-to source for a guaranteed, if limited, daily purchase of Ancient Cores. His normal stock includes common parts like Ancient Screws, Springs, and Gears, but the good stuff is reserved for special weather.
To find Teli quickly, wait at the entrance of Hateno Village at 5:00 AM. He starts his daily walk from there. If it's raining, you can also check The Great Ton Pu Inn in Hateno Village, as he'll take shelter inside the stable.
Trigger the Rainy Day Specials
Here's the trick most guides miss: Teli only sells his rare inventory during Rainy Day Specials. You must speak to him while it is raining or thundering. When you do, his shop expands to include Ancient Shafts and, crucially, Ancient Cores.
⚠️ Watch out: Teli only sells a single Ancient Core per rainy day. He does not sell Giant Ancient Cores—those you'll still need to farm from Guardians or find in shrine chests, as covered in other sections.
Making the Purchase
Once you've found him in the rain, simply open his shop. The Ancient Core will be listed among his wares for purchase with Rupees. This is a perfect way to top off your count for an armor upgrade at a Great Fairy Fountain or to buy that last piece you need for the Ancient Bow at the Akkala Ancient Tech Lab.
While it's not a fast method for bulk farming, it’s a reliable, stress-free way to grab one core at a time. Pair this with your Guardian farming runs after a Blood Moon, and you'll have your Ancient Armor Set fully upgraded in no time.
Ancient Core and Giant Ancient Core Rewards in Breath of the Wild
After all that hunting and gathering, you’re standing on a pile of ancient tech. Now comes the best part: turning those rare Ancient Cores and Giant Ancient Cores into the most powerful tools and armor in The Legend of Zelda: Breath of the Wild. This is where your patience pays off, unlocking abilities and gear that will make you a true master of Hyrule.
Seeking armor upgrades
Powering Up Your Sheikah Slate and Crafting Legendary Gear
First, let’s turn those regular Ancient Cores into a game-changing ability. Head to the Hateno Ancient Tech Lab and speak with Purah, the director of ancient technology research. For 3 Ancient Cores, she’ll upgrade your Stasis rune to Stasis+. This lets you freeze not just objects, but enemies in their tracks—a crucial tool for crowd control and setting up devastating attacks.
Stasis+ is perfect for interrupting a Guardian’s laser charge, giving you a free window to attack its legs or line up a perfect parry.
Your Giant Ancient Cores, however, are reserved for the pinnacle of end-game equipment. The primary hub for this is the Akkala Ancient Tech Lab. Speak with Robbie, the ancient tech enthusiast, who uses these cores to craft the ultimate anti-Guardian weaponry. You can purchase the Ancient Bow and Ancient Shield from him, but each requires a steep price: 2,000 Rupees, 20 Ancient Gears, 30 Ancient Springs, and 2 Giant Ancient Cores. Trust me, the investment is worth it—the Ancient Bow has a perfectly flat trajectory for sniping, and the Ancient Shield can automatically parry Guardian beams.
Achieving Maximum Defense: The Final Armor Upgrades
This is where your stockpile of Giant Ancient Cores will be tested. To reach the absolute peak of defense and unlock powerful set bonuses, you need to visit the Great Fairy Fountains. The Ancient Armor Set (Helm, Cuirass, and Greaves) is the best defense against mechanized foes, and its final ★★★★ upgrade for each piece requires 2 Giant Ancient Cores and 1 Star Fragment.
But the Ancient Set isn’t alone. The four Divine Helms—Vah Medoh, Vah Naboris, Vah Rudania, and Vah Ruta—also need the same costly upgrade at the Great Fairies: 2 Giant Ancient Cores and 1 Star Fragment each for their final ★★★★ tier. In total, that’s a staggering 14 Giant Ancient Cores just to fully upgrade all four Divine Helms. If you’ve been diligently farming, this is your ultimate goal.
Alternative (But Not Recommended) Uses
While selling or trading your cores is tempting, it’s almost always a waste. You can sell a Giant Ancient Core to regular shops for 200 Rupees, or to the mysterious Kilton at his Fang and Bone shop for 100 of his special Mon currency. You can also bring one to Kochi at the Kochi Dye Shop in Hateno Village to create Gray Dye. However, common monster parts like Bokoblin Horns work for dye, and rupees are easier to get elsewhere. Cooking with them only creates dubious food. Your cores are simply too valuable to spend on anything but top-tier upgrades.
With your Sheikah Slate enhanced, your armor at its peak, and legendary weapons in hand, you’ve transformed ancient relics into tangible power. You’re no longer just surviving Hyrule—you’re commanding it.