
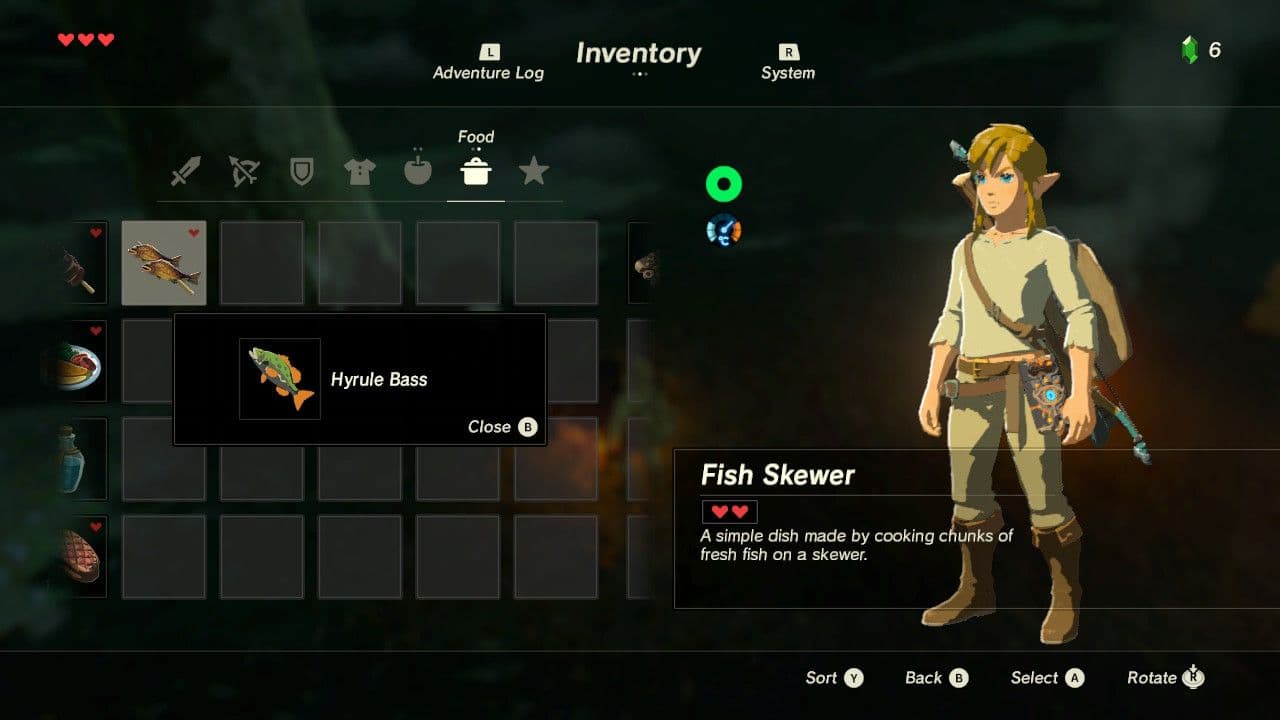
Breath of the Wild Cooking Criteria and Potency Mechanics
Before we dive into the specific recipes that will define your journey across Hyrule, you need to understand the engine under the hood. The cooking system in Breath of the Wild isn't just a charming mini-game; it’s a precise, calculable mechanic that determines survival and dominance. The seven recipes featured in this list aren't chosen at random. They are the apex predators of Hylian cuisine, selected based on strict criteria of Potency, Duration, and Ingredient Efficiency.
The Logic of Potency Points
Every ingredient with a special effect (like "Mighty," "Chilly," or "Hasty") carries a hidden "potency point" value. The cumulative points from the ingredients you toss into the pot determine the tier of the buff you receive.
- Tier 1 (Low): Achieved with 1-2 potency points. Provides a basic, noticeable effect.
- Tier 2 (Mid): Achieved with 3-4 potency points. Offers a significant boost.
- Tier 3 (High): Achieved with 5+ potency points. Grants the maximum possible effect strength.
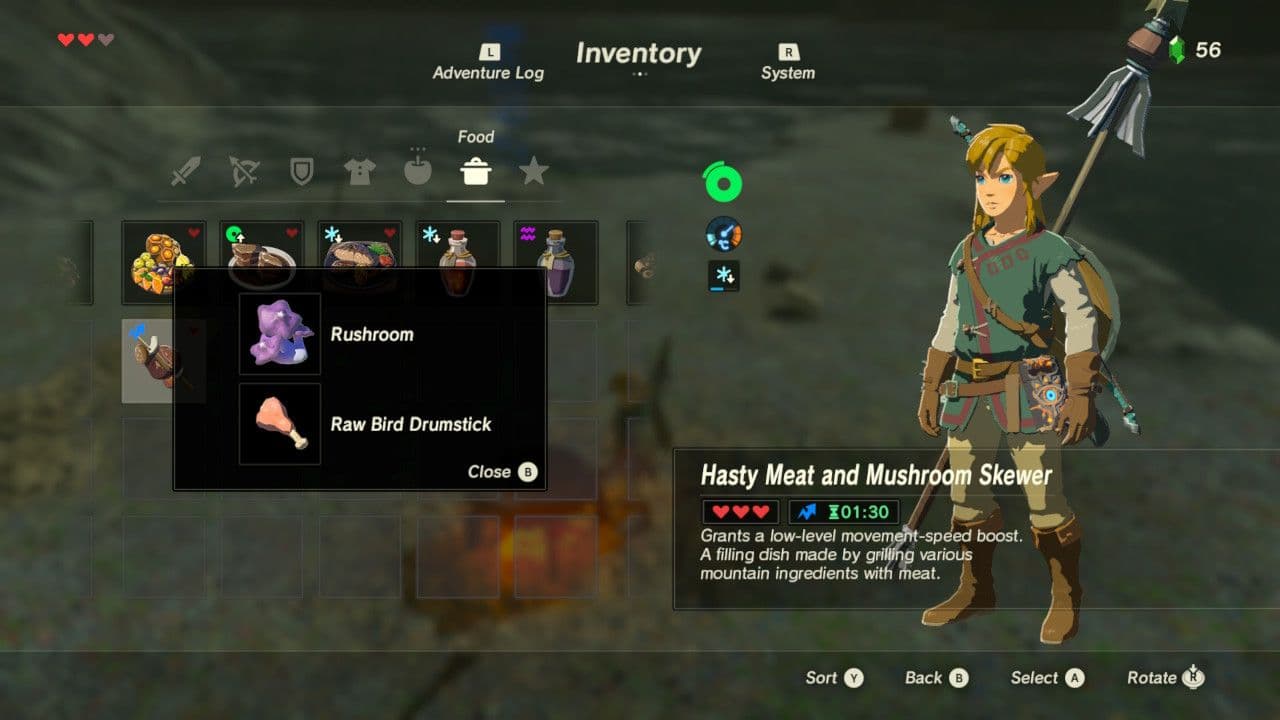
This is why, for example, a Hasty Mushroom Skewer made with a single Rushroom gives a minor speed boost, while one made with four Rushrooms launches Link into Tier 3 maximum velocity. Our listed recipes are engineered to hit the highest tier for their respective effect with the most efficient ingredient combination, ensuring you're not wasting rare resources for subpar results.
The Clock: Mastering Effect Duration
Potency dictates how strong the buff is, but duration dictates how long you can rely on it. Duration is calculated differently for meals and elixirs:
- Meals: Adding more of the core effect ingredient generally increases duration. Adding neutral ingredients (like Apples or Raw Meat) can also extend the timer without diluting the primary effect.
- Elixirs: The duration is almost entirely determined by the monster part used. A common Bokoblin Horn might give you a few minutes, while a rare Lynel part can stretch it past 10. This is why knowing which monster part to sacrifice is as important as knowing the critter.
The ultimate duration hack, applicable to both meals and elixirs, is the Dragon Horn Shard. Adding a shard from Farosh, Naydra, or Dinraal to any recipe will lock its duration at a staggering 30 minutes, making it the single most valuable culinary item in Hyrule for marathon exploration or dungeon dives.
The Critical Moon: Guaranteed Power-Ups
Cooking isn't just about what you use, but when you use it. If you cook at a cooking pot between 11:30 PM and 12:30 AM during a Blood Moon, you are guaranteed a "Critical Cook." This special bonus manifests in one of three ways:
- +5 Minutes of Duration: Extends the effect beyond its normal limits.
- +3 Extra Hearts: Adds a substantial healing bonus to the dish.
- +1 Tier of Potency: Can elevate a Tier 2 effect to the coveted Tier 3.
This mechanic is why savvy players save their most valuable ingredient combinations for the crimson glow of the Blood Moon. It’s a predictable way to supercharge any recipe on our list.
The Cardinal Sin: Avoiding Dubious Food
The fastest way to waste good ingredients is to ignore the game's fundamental cooking law: Never mix food and critters. Combining a Hyrule Herb (food) with a Hot-Footed Frog (critter) and a Bokoblin Horn (monster part) doesn't create a super-dish—it creates "Dubious Food," a worthless, low-heal item. The rule is absolute:
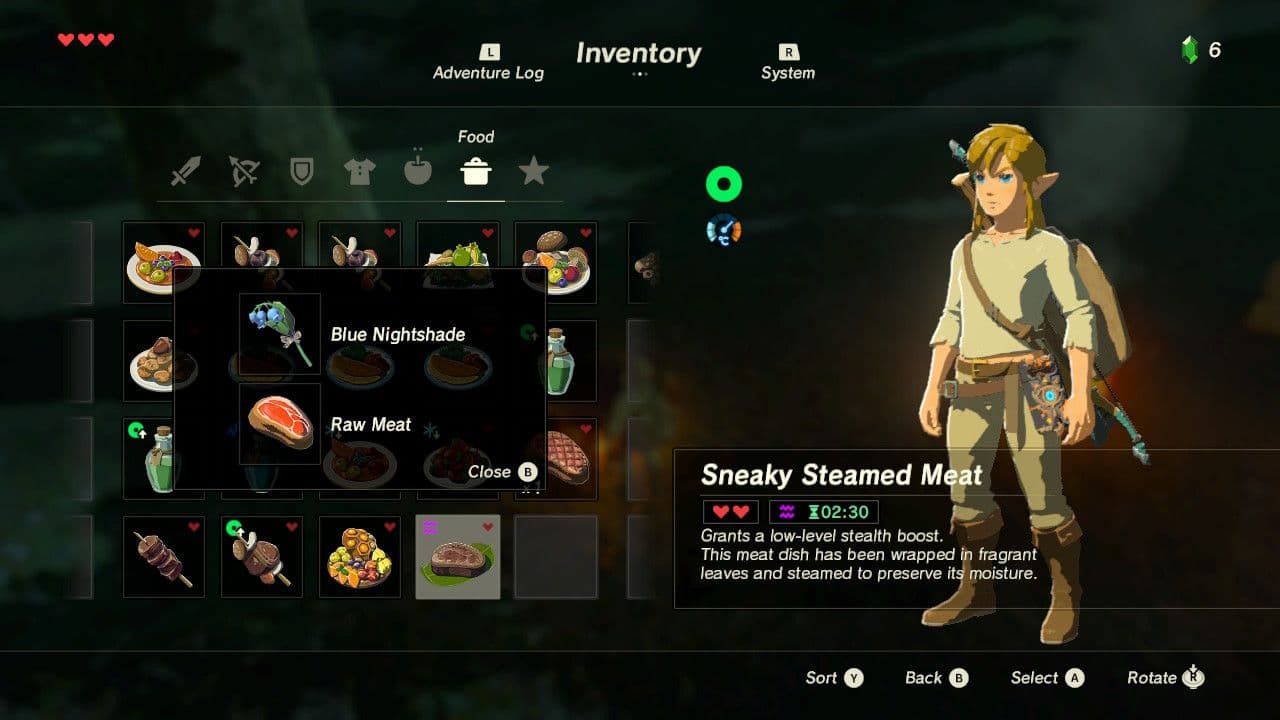
- Meals = Food Ingredients Only (Fruits, Vegetables, Fish, Meat, Herbs).
- Elixirs = Critter + Monster Part Only (Lizards, Butterflies, Frogs + Horns, Guts, etc.).
Similarly, mixing ingredients with conflicting effects (like a Spicy Pepper for cold resistance and a Chillshroom for heat resistance) will cancel each other out, resulting in a meal with no buff at all. The recipes that follow adhere to a pure, single-effect philosophy to deliver reliable, powerhouse results.
Why This Matters for Our List: Every entry you're about to read has been vetted against these principles. They represent the most efficient, potent, and reliable applications of the cooking system. We’re not just telling you what to cook; we’re giving you the master recipes that leverage the game's mechanics to their absolute limit. Now, let's get cooking.
1. Fireproof Elixir: The Essential Death Mountain Pass

Preparing the right recipes is essential for surviving Hyrule's diverse climates.
1. Fireproof Elixir: The Essential Death Mountain Pass
Why it's here: The Fireproof Elixir isn't just a helpful buff; it's a mandatory entry ticket. Without it, the ambient heat of the Eldin region will set Link ablaze, making a direct health-drain that no amount of healing food can outpace. This elixir provides the Fireproof effect, granting total immunity to Death Mountain's burning air and open flames, allowing you to safely navigate to Goron City and confront Divine Beast Vah Rudania. While the Flamebreaker Armor is the permanent solution, this elixir is the indispensable key to acquiring it.
The Critical Distinction: Flame Guard vs. Fireproof
A common and fatal mistake is confusing the Heat Resistance needed for the Gerudo Desert with the Fireproof effect required for Death Mountain.
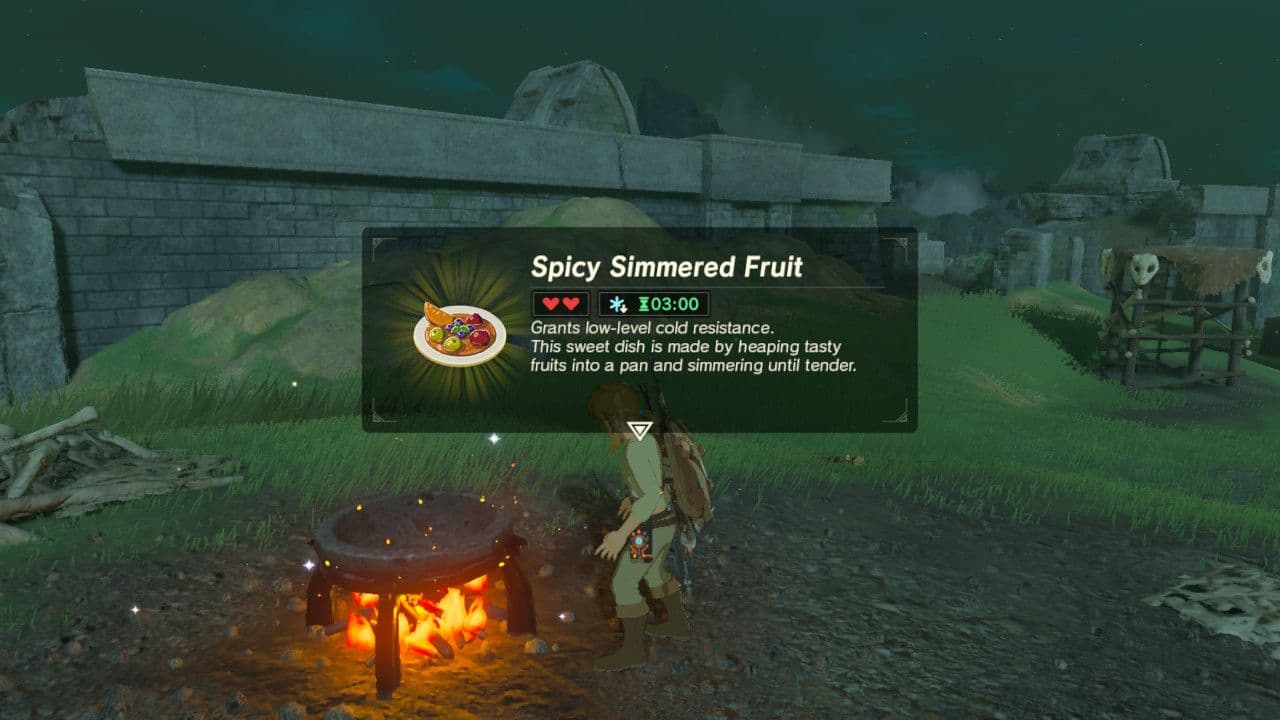
- Flame Guard (Heat Resistance): This is indicated by a blue sun icon. It protects against hot weather and sun, primarily in the Gerudo Desert and parts of Faron. It's achieved through "Chilly" ingredients (Chillshrooms, Hydromelons) or the Desert Voe Armor.
- Fireproof: This is indicated by a red flame icon. It provides immunity to the literal burning air and open flames of Death Mountain and the Eldin Volcano. It is only achievable via Fireproof Elixirs or the Flamebreaker Armor.
Using Flame Guard items on Death Mountain is like wearing sunscreen in a bonfire—utterly ineffective. The Fireproof Elixir is your one-way ticket through the gates of this fiery region.
Crafting the Perfect Passport: Ingredients & Duration
The elixir recipe is elegantly simple: 1 Fireproof Critter + 1+ Monster Parts. The critter defines the effect (Fireproof), while the monster parts exclusively determine the duration.
- Primary Critters:
- Fireproof Lizard: The most reliable source. Found abundantly on the rocks of the Southern Mine, making it the premier farming location. Wear the Sheikah Armor or use stealth elixirs for easier collection.
- Smotherwing Butterfly: A viable alternative found fluttering near lava flows and hot air vents around Death Mountain and Eldin Tower.
- Monster Parts & Duration Tiers:
The rarity of the monster part is the sole factor for duration. You should always use your most common, low-value parts (like Bokoblin Horns) here, saving rare parts for armor upgrades.- Common (Bokoblin Horn, Chuchu Jelly): ~1 minute 50 seconds per part.
- Uncommon (Bokoblin Fang, Moblin Horn): ~3 minutes 10 seconds per part.
- Rare (Bokoblin Guts, Moblin Fang): ~4 minutes 30 seconds per part.
- Very Rare (Lynel, Hinox, Molduga Parts): Up to ~19 minutes.
- Dragon Parts (Dinraal's Horn Shard): The ultimate extender, setting the duration to a full 30 minutes.
Optimal Early-Game Recipe: For your initial trek to Goron City, combine 1 Fireproof Lizard with 4 Bokoblin Fangs. This yields a substantial duration (~12-13 minutes) without consuming valuable monster resources, giving you ample time to reach the city or complete Kima's side quest.
The Emergency Purchase: NPC Gaile at Foothill Stable
If you'd rather not craft, head to the Foothill Stable at the base of Death Mountain. Outside by the cooking pot, you'll find NPC Gaile. She sells Fireproof Elixirs, offering a bulk discount:
- 1 Elixir: 60 Rupees
- 2 Elixirs: 110 Rupees
- 3 Elixirs: 150 Rupees (Best Value)
Pro-Tip: Buying the set of three is highly recommended for your first journey. It provides a safety net in case you get lost or delayed, ensuring you don't burn up mid-climb.
Fireproof Elixir vs. Flamebreaker Armor: A Strategic Choice
Your goal should be to transition from temporary elixirs to permanent armor, but understanding the trade-off is key.
| Fireproof Elixir | Flamebreaker Armor | |
|---|---|---|
| Effect | Temporary Fireproof (Duration varies) | Permanent Fireproof when worn |
| Cost | Cheap to craft/purchase (e.g., 150 Rupees for 3) | Expensive (3,300 Rupees for full set) |
| Armor Slots | Frees up all slots for other armor benefits | Occupies all three slots |
| Acquisition | Available immediately via Gaile or crafting | Requires reaching Goron City (using elixirs) |
The Verdict: Use elixirs for your initial, critical ascent to Goron City. Once there, prioritize purchasing at least the Flamebreaker Armor (600 Rupees) and Boots (700 Rupees). Wearing two pieces grants Level 2 Fireproof, making you permanently immune to Eldin's heat and freeing your inventory from elixir management. The armor's defense and eventual set bonus (total fire attack immunity when upgraded) make it the definitive endgame solution.
Essential Survival Tips
- No Stacking: Drinking a new elixir simply resets the timer to the new duration. Don't waste them.
- Expiration Crisis: If your elixir runs out, Link will instantly catch fire. Pause immediately to drink another, equip Flamebreaker Armor, or warp to safety.
- No Shortcuts: The game design is absolute. You cannot out-heal the damage or bypass the heat without the Fireproof effect.
Final Takeaway: The Fireproof Elixir is a non-negotiable consumable for conquering Death Mountain. Master its efficient crafting with common parts, utilize Gaile as a backup, and view it as the stepping stone to the superior Flamebreaker Armor. Without it, the path to Goron City remains forever sealed behind a wall of flame.
2. Chilly Steamed Fish: Maximum Desert Heat Resistance
Fish and seafood recipes are essential for heat resistance.
2. Chilly Steamed Fish: Maximum Desert Heat Resistance
While the Fireproof Elixir is your ticket to Death Mountain, conquering the vast and scorching Gerudo Desert requires a different, more potent kind of culinary armor. For that, you need the Chilly Steamed Fish. This isn't just any heat-resistance meal; it's the pinnacle of cooling cuisine, engineered specifically to grant Level 2 Heat Resistance—the absolute maximum protection needed to explore the desert's most extreme southwestern areas without a sliver of health drain.
Why it's here: This recipe is the definitive answer to the Gerudo Desert's peak temperatures. While the Desert Voe armor set provides a permanent Level 2 buff, crafting this dish is the essential, accessible method for your first foray into the sands or for supplementing your armor's effects for marathon exploration sessions. It’s the culinary equivalent of a high-grade desert survival kit.
Crafting the Ultimate Coolant
The power of the Chilly Steamed Fish comes from a specific synergy of premium "Chilly" ingredients. The core recipe is:
- 2x Chillfin Trout
- 1x Hydromelon
This combination reliably produces a dish with high-level (Level 2) heat resistance and a significant duration. The Chillfin Trout is the star, being a high-potency "Chilly" ingredient found in the cold waters of the Hebra Mountains and Tabantha regions. The Hydromelon, abundantly available in the Gerudo Desert itself at places like Kara Kara Bazaar, acts as a supporting ingredient, boosting the effect's duration and heart recovery.
Pro-Tip for Potency: For the absolute longest-lasting effect, you can modify the recipe to 3x Chillfin Trout and 1x Hydromelon. Adding more of the primary "Chilly" ingredient (the fish) is what pushes the duration to its maximum potential before applying advanced duration extenders.
Strategic Ingredient Farming
Knowing where to find these components is half the battle:
- Chillfin Trout: Your best hunting grounds are the chilly rivers and ponds of the Hebra Mountains and the Tabantha Frontier. Look for their distinctive light blue fins in the water.
- Hydromelon: These are desert natives. The easiest source is the patch of land at Kara Kara Bazaar, just outside Gerudo Town. You can also find them growing wild in the Gerudo Desert region.
For a more accessible, though slightly less potent, alternative, you can farm Chillshrooms. These are found in colder high-altitude areas like the Gerudo Highlands and the Hebra Mountains, often on cliff faces and in snowy areas. A dish like "Chilly Fruit and Mushroom Mix" (1 Hydromelon + 1 Chillshroom) provides Level 1 resistance and is a great early-game option.
The 30-Minute Desert Expedition Secret
Here is the masterstroke that elevates this from a good recipe to an essential strategic tool: Dragon Horn Shards. Adding a single Shard of Farosh's Horn (or from Dinraal or Naydra) to the Chilly Steamed Fish recipe overrides the normal duration calculation and sets the effect to a full 30 minutes. This is a game-changer for lengthy desert exploration, shrine hunting, or Molduga hunts, freeing you from constant inventory management. Remember, cooking during a Blood Moon (between 11:30 PM and 12:30 AM) guarantees a "critical cook," which can also randomly boost duration or potency, making it the perfect time to use your precious dragon parts.
The Verdict: The Chilly Steamed Fish is the top-tier meal for Gerudo Desert mastery. It provides the essential Level 2 Heat Resistance through easily farmable ingredients, and its potential for a 30-minute duration via a dragon horn shard makes it the most efficient and long-lasting cooling buff in Link's culinary arsenal. Don't just survive the desert; explore it on your own terms with this recipe in hand.
3. Hasty Mushroom Skewer: The Tier 3 Speed Solution

The Hasty Mushroom Skewer is a top-tier recipe for increasing Link's movement speed.
3. Hasty Mushroom Skewer: The Tier 3 Speed Solution
Why it's here: For sheer, unadulterated velocity, nothing beats the Hasty Mushroom Skewer crafted with four Rushrooms. This is the definitive recipe for achieving Tier 3 Speed, the maximum possible movement buff in Hyrule. While elixirs can offer longer durations, this food-based meal is the most efficient and accessible path to becoming a blur across the landscape, perfect for rapid exploration, timed shrine quests, and outrunning any threat.
The Recipe & Its Rivals
The core of this entry is a single, perfect recipe, but to justify its crown, we must compare it to all viable speed-boosting options. The Hasty effect operates on a potency point system: 1-2 points grants Tier 1 (noticeable), 3-4 points grants Tier 2 (significant), and 5+ points unlocks the coveted Tier 3 (maximum).
- Hasty Mushroom Skewer (Tier 3):
4x Rushroom. This is the gold standard. It requires no rare monster parts or elusive critters, just four of the same, easily farmable ingredient. It provides 4 minutes of Tier 3 speed.- Pros: Maximizes speed potency. Ingredients are simple to find on cliff faces, especially around the Gerudo Highlands and Great Plateau. No risk of creating Dubious Food.
- Cons: Base duration is limited to 4 minutes. Does not restore hearts on its own.
- Hasty Steamed Fruit (Tier 3):
4x Fleet-Lotus Seeds. A direct competitor, offering identical Tier 3 speed for 4 minutes.- Pros: Functions identically to the Rushroom skewer.
- Cons: Fleet-Lotus Seeds are found in water, which can be slightly less convenient to farm than cliff-side Rushrooms. This minor accessibility issue is why the Mushroom Skewer takes the top spot.
- Hasty Elixir (Tier 3):
4x Hot-Footed Frog + 1x Monster PartOR4x Hightail Lizard + 1x Monster Part. These elixirs also grant Tier 3 speed.- Pros: Duration is determined by the monster part, allowing for potentially longer buffs (e.g., 9 minutes 40 seconds with a Moblin Guts). Excellent for pre-planned, long hauls.
- Cons: Requires catching multiple fast-moving critters, which is more tedious than picking mushrooms. Mixing critters and monster parts is a common rookie mistake that leads to Dubious Food. For pure, on-demand speed potency, the food recipe is more reliable.
- Lower Tier Options (For Context):
- Tier 2:
3x Rushroomor3x Fleet-Lotus Seeds(3 minutes). Good, but not the "best." - Tier 1:
1x Rushroomor1x Fleet-Lotus Seeds(1 minute). Barely worth the cooking pot fire.
- Tier 2:
Ultimate Optimization: The 30-Minute Skewer
The base Hasty Mushroom Skewer is fantastic, but its true power is unlocked through synergy with Hyrule's most potent ingredients. To create the ultimate exploration meal, cook 4x Rushroom + 1x Shard of a Dragon's Horn (Farosh, Naydra, or Dinraal). This guarantees a critical cook and sets the duration to a staggering 30 minutes while maintaining the Tier 3 speed effect. This transforms the meal from a situational boost into the key for non-stop sprinting across entire regions.
Specific Use Cases: Desert Dash vs. Mountain Climb
While the Hasty buff is universal, its application shines in different environments:
- Gerudo Desert: Here, speed is a survival tool. The deep sand drastically slows movement. A Tier 3 Hasty buff, especially a 30-minute one, allows you to outrun the heat, navigate sandstorms more efficiently, and cover vast distances between oases without relying solely on Sand Seals. Pair it with your Desert Voe armor for heat resistance and speed.
- Death Mountain/Eldin Region: The terrain is steep and fraught with danger. A Hasty buff drastically improves your climbing speed, allowing you to scale cliffs to avoid fiery foes or reach safer ground quickly. It complements your Fireproof Elixir or Flamebreaker Armor, letting you traverse the volatile environment faster and spend less time exposed.
The Verdict: The Hasty Mushroom Skewer (4x Rushroom) is the pinnacle of speed cooking. It delivers maximum velocity with minimal ingredient complexity. For dedicated explorers, augmenting it with a Dragon part creates a consumable that fundamentally changes how you traverse Hyrule, making it an indispensable tool in any adventurer's inventory.
4. Mighty Simmered Fruit: The Ultimate Attack Buff
Cooking in a pot is essential for creating Mighty Simmered Fruit.
4. Mighty Simmered Fruit: The Ultimate Attack Buff
When the path forward is blocked by a Silver Lynel or a camp of Black Bokoblins, raw courage and a sharp sword aren't always enough. You need an edge, a decisive advantage that turns a desperate struggle into a calculated victory. That edge is the Mighty Simmered Fruit, the undisputed king of attack-boosting meals in Hyrule. While elixirs can grant a similar effect, this fruit-based powerhouse offers superior accessibility, duration, and heart recovery, making it the go-to recipe for maximizing damage output in any major combat encounter.
Why it's here: In a game where weapons break and enemies scale, a reliable, high-tier Attack Up buff is the closest thing to a permanent weapon upgrade. The Mighty Simmered Fruit delivers the maximum Tier 3 attack boost, turning Link from a survivor into a predator. It’s here because it represents the pinnacle of offensive culinary arts, providing a straightforward, potent, and farmable solution for overwhelming Hyrule's toughest foes.
The Recipe & The Rationale:
The formula is beautifully simple: five Mighty Bananas. Cook them together at any pot to create a dish that grants a Tier 3 (high-level) Attack Up boost for 4 minutes and (approximately) 10 seconds. This duration is more than enough for most battles, including protracted mini-boss fights. The beauty lies in its purity. Using five identical "Mighty" effect ingredients guarantees the highest possible potency tier without any guesswork or chance. As established in our cooking criteria, stacking ingredients with the same effect amplifies its power, and five is the magic number for reaching the cap.
Pros:
- Guaranteed Tier 3 Boost: No RNG, no critical cook required. Five Mighty Bananas always yields the highest attack increase.
- Excellent Duration: At over 4 minutes, it outlasts almost any single combat engagement.
- Substantial Heart Recovery: Unlike elixirs, this meal restores a significant chunk of health (varies, but often 10+ hearts), letting you heal and buff in one action—a crucial efficiency in combat.
- Highly Farmable: Mighty Bananas grow abundantly in the Faron region, particularly around Lake Floria and the Floria Falls. A dedicated farming run can net dozens.
- Resource Efficient: It uses only common fruit, preserving your rare monster parts for elixirs or armor upgrades.
Cons:
- Ingredient Commitment: Requires dedicating all five cooking slots to Mighty Bananas, meaning you cannot add other ingredients (like more hearty items) to this specific dish.
- No Duration Extension Trick: Adding a sixth ingredient (like an apple) won't extend the buff's duration, as the 4:10 duration is the standard cap for a 5-ingredient "Mighty" meal. For longer durations, you must incorporate a Dragon part.
Specific Use Cases: Gerudo Desert vs. Death Mountain:
This is where strategic cooking shines. The Mighty Simmered Fruit is your universal combat tool, but your pre-combat preparation must account for the environment.
- In the Gerudo Desert, you need Heat Resistance. Do not try to combine Mighty Bananas with Chillshrooms or Hydromelons; you'll create a useless, effect-neutral dish. Instead, consume your Heat Resistance meal or elixir first, then consume the Mighty Simmered Fruit. The attack buff will stack on top of your environmental protection. Prioritize a long-lasting Heat Resistance buff (like one made with a Dragon horn) so you don't have to reapply it mid-fight.
- On Death Mountain, you need the Fireproof effect. The same stacking principle applies. Use a Fireproof Elixir or your Flamebreaker Armor, then pop the Mighty Simmered Fruit before engaging enemies. The intense environment makes the meal's simultaneous heart recovery even more valuable, as it mitigates any chip damage you might take.
The Verdict: For systematically dismantling high-level enemy camps, conquering Hyrule Castle's depths, or simply wanting to feel overpowered, the Mighty Simmered Fruit is non-negotiable. It is the culinary equivalent of bringing a siege weapon to a sword fight. Farm those bananas in Faron, cook them in bulk, and transform every confrontation into a display of overwhelming force.
5. Hearty Fried Wild Greens: The Full Recovery Staple

Hearty meals provide full health recovery plus bonus temporary hearts.
5. Hearty Fried Wild Greens: The Full Recovery Staple
Why it's here: In a game where inventory management is key, the single-ingredient hearty meal is the undisputed king of efficiency. While complex buffs have their place, nothing beats the raw, reliable power of a dish that instantly refills your entire health bar and grants bonus hearts for the cost of one ingredient. This entry isn't about one specific recipe, but about mastering the principle behind the most valuable healing item in your pouch.
The Unbeatable Math of a Single Ingredient
The magic of "hearty" ingredients—Hearty Radishes, Hearty Truffles, Big Hearty Truffles, Hearty Bass, and others—lies in a simple, overpowered rule: any meal cooked with just one hearty ingredient will fully restore all of Link's red hearts and grant bonus temporary (yellow) hearts. This means a single Hearty Radish, which might restore 2.5 hearts raw, becomes a full heal plus extra when cooked alone. Ten hearty ingredients don't make one powerful meal; they make ten full-heal potions. Compare this to stacking dozens of basic ingredients like Hyrule Herbs or Apples to achieve a similar heal, and the efficiency is staggering. It liberates your inventory, maximizes your resource yield, and provides a panic button for any combat situation.
Ingredient Breakdown & Strategic Farming
Not all hearty ingredients are created equal, but they all serve the core purpose. Here’s the tactical breakdown:
- Hearty Radish: The balanced choice. Found in "normal" biomes, particularly in Akkala (e.g., northwest of Tarrey Town, near Skull Lake). Relatively reliable post-Blood Moon respawns make it a solid farm.
- Hearty/Big Hearty Truffle: The forager's prize. These grow at the base of trees in forested areas and within caves. While random, areas near Hateno Village and deep woods are productive. The "Big" variant grants more bonus hearts but follows the same full-heal rule.
- Hearty Durian: The beginner's bounty. The Faron region, especially the jungles around the Spring of Courage, is littered with trees bearing 2-3 Durians each. A quick trip can net you 15-20, setting you up for hours.
- Hearty Bass/Salmon: The angler's option. Useful if you're near water, but farming is less efficient than foraging for plants.
- Purchased Options: For when you're rich, not patient. Gerudo Town sells Durians, Beedle sells Hearty Lizards, and the Korok inside the Deku Tree occasionally sells Hearty Truffles.
Pros, Cons, and the Critical Comparison
- Pros: Maximizes Inventory Slots (one ingredient, one full-heal meal). Unmatched Emergency Utility (instant full HP from any damage level). Simplifies Cooking (no recipes to remember, just cook solo). Cost-Effective (uses minimal, farmable resources).
- Cons: Provides No Buffs (unlike the Mighty or Tough meals covered elsewhere). Bonus Hearts Vary (a single regular Hearty Radish may give only +1 or +2 yellow hearts, while a Big Hearty Truffle can give +4).
The trade-off is clear: for pure, unadulterated healing per inventory slot, nothing beats a single-ingredient hearty meal. A stack of "Hearty Fried Wild Greens" (the default name for a cooked single Radish or Truffle) is more valuable than a stack of complex, heart-restoring buff meals when you're in the thick of a Lynel fight and just need health now.
Specific Use Cases: Gerudo Desert vs. Death Mountain
This healing staple's beauty is its universality, but its application shines in extreme environments.
- In Gerudo Desert: Your focus is on Heat Resistance buffs from Chilly ingredients. Here, hearty single-ingredient meals are your sustenance. Cook your Hydromelons and Chillshrooms for buffs, and keep a separate stack of Hearty Radishes for healing. This keeps your buffs active (since eating a new meal replaces the old one) and your health full as you navigate the scorching sands.
- On Death Mountain: The imperative is the Fireproof buff from elixirs. Similarly, your Fireproof Elixir is sacred; you don't want to overwrite it by eating a complex meal for health. A Hearty Fried Wild Greens or a Hearty Simmered Fruit (single Durian) allows you to top off your health without touching your essential flame immunity, ensuring you don't combust mid-fight with a Fire-Breath Lizalfos.
The Verdict: Before you master attack buffs or stamina overfills, master this. Stockpiling a dozen single-ingredient hearty meals is the single most important culinary habit in Breath of the Wild. It turns exploration from a resource-scrounging panic into a confident adventure. For pure, slot-efficient survival, this is the only recipe philosophy you truly need to know by heart.
6. Enduring Mushroom Skewer: Overfilling the Stamina Wheel
Enduring ingredients provide extra yellow stamina bars.
6. Enduring Mushroom Skewer: Overfilling the Stamina Wheel
While speed buffs are for covering ground quickly, the Enduring Mushroom Skewer is for conquering it entirely. This recipe solves the most common exploration roadblock: running out of stamina mid-climb or mid-glide. Its purpose is singular and powerful: to fully restore your stamina wheel and add two full, temporary yellow wheels on top of it. This is the key to scaling the highest peaks without a single ledge to rest on and paragliding across vast chasms like the Gerudo Desert or Lake Hylia without fear of plummeting.
Why it's here: It is the most efficient and reliable food-based method for generating bonus stamina. Unlike elixirs, which require specific critters and monster parts, its core ingredient—the Endura Shroom—is a foragable mushroom, making it far more accessible for regular use. While an Endura Carrot performs a similar function, Endura Shrooms are more plentiful in their native regions (like the Hebra Mountains and Tabantha Frontier), allowing you to stockpile this crucial buff. For the ultimate climbing session or a marathon glide, this skewer is non-negotiable.
The Recipe & Mechanics:
- Base Recipe: 1x Endura Shroom.
- Optimal Recipe: 5x Endura Shroom.
- Effect: "Enduring" – Fully restores stamina and adds temporary stamina wheels.
- Key Stat: Cooking 5 Endura Shrooms creates Enduring Fried Wild Greens, granting two extra yellow stamina wheels.
The magic lies in the "Enduring" effect. A single Endura Shroom will fully refill your green stamina wheel and add a small portion of a yellow one. However, by using five, you maximize the bonus, granting those two full extra wheels. This is a massive buffer, often representing more than double your base stamina. There is no "duration" in the traditional sense; the yellow wheels remain until you deplete them through climbing, sprinting, or gliding. This makes it a consumable resource you control, perfect for a planned, grueling ascent.
Pros:
- Unmatched Vertical Mobility: Enables climbs that are otherwise impossible without numerous mid-air stamina meals.
- Flight Security: Allows for safe, extended paragliding trips, making it ideal for crossing the Gerudo Desert or traversing canyons.
- Resource Efficiency: Endura Shrooms are renewable and found in specific, knowable biomes, unlike elixir critters which can be skittish and scarce.
- No Conflict with Armor: Frees up your armor slots. You can wear your best climbing gear and have max stamina.
Cons:
- Specialized Use: It provides only stamina. It doesn't restore hearts, so you must manage health separately if you take damage mid-climb.
- Ingredient Commitment: To get the maximum two-wheel bonus, you must commit five inventory slots to a single dish. This is a substantial investment for one meal.
- Overkill for Short Tasks: Using this for a short cliff is a waste of precious Endura Shrooms.
Specific Use Cases:
- Gerudo Desert vs. Death Mountain: This skewer's value is universal, but its application differs. In the Gerudo Desert, it's for epic Sand Seal-less traversals. Paragliding from the high cliffs of the Gerudo Highlands deep into the desert wastes requires immense stamina. Here, the skewer is a lifeline. On Death Mountain, it's for ascending the sheer, volcanic rock faces around the caldera to reach ore deposits or shrines like the Daqa Koh Shrine, where the winding paths are too dangerous or slow.
The Verdict: The Enduring Mushroom Skewer is not an everyday meal. It is a strategic tool for monumental tasks. When you look up at a cliff that disappears into the clouds or out across a shimmering heat haze with no end in sight, this is the fuel you cook. For pure, unadulterated stamina extension, no other recipe is as straightforward or as powerful for a chef-adventurer. Always keep one in your pocket for when the world tests your endurance.
7. Tough Steamed Meat: High-Level Defense for Guardians
Ingredients used to create Tough status effects.
7. Tough Steamed Meat: High-Level Defense for Guardians
While fireproofing and heat resistance are essential for survival, the most direct threat in Hyrule often comes from a Guardian’s laser sight locking onto you. For those moments, you need a Tough Steamed Meat. This dish is the cornerstone of a defensive culinary strategy, providing a substantial, multi-tiered defense buff that turns lethal guardian blasts into survivable hits. It’s here because, when you’re staring down a Lynel or navigating a field of decayed Guardians, raw healing power isn't enough—you need to reduce incoming damage at its source, and this recipe delivers the highest level of protection a meal can offer.
Why it's here: This entry focuses on the Tough effect, the culinary counterpart to the Mighty buff for attack. The goal is to minimize damage during the game's most punishing encounters, from Lynel crushers to Guardian beams. While armor provides a static defense rating, a Tough buff stacks on top, offering a percentage-based damage reduction that can mean the difference between a one-hit KO and a chance to heal. Among defense-boosting foods, Tough Steamed Meat stands out for its efficient use of common ingredients to achieve the maximum Tier 3 defense boost, making it the premier choice for pre-battle preparation.
The Premier Defense Recipe: Tough Steamed Meat
- Recipe: 5x Ironshrooms OR 4x Armored Carp + 1x Armoranth
- Effect: Tier 3 Defense Boost for 4 minutes and 10 seconds (with 5 Ironshrooms).
- Best For: Tanking hits from Guardians, Lynels, Hinox, and any major boss encounter. Essential for surviving the Trial of the Sword or Eventide Island.
This is your bread-and-butter for high-stakes combat. The logic is beautifully simple: five of the same "Tough" ingredient guarantees the highest potency. Ironshrooms are the ideal candidate—they are plentiful near trees in the Necluda region and can be purchased in bulk from the Spore Store in Korok Forest. Cooking five together yields a Tough Mushroom Skewer with a Tier 3 defense buff lasting over four minutes. The alternative recipe using Armored Carp and Armoranth is slightly less consistent to farm but follows the same potency principle.
Pros:
- Maximum Potency: Guarantees a Tier 3 (high-level) defense boost, the best available from food.
- Ingredient Efficiency: Uses only one type of effect ingredient, eliminating recipe confusion.
- Excellent Duration: Over 4 minutes is more than enough for most difficult fights or exploration in dangerous areas.
- Easy to Farm: Ironshrooms are common, making this a sustainable, high-level buff.
Cons:
- No Healing: This recipe, in its pure form, restores zero hearts. You must manage healing separately.
- Occupies Meal Slot: Consuming it uses a food slot that could hold a combined healing/defense meal, though that's often less optimal.
Specific Use Case: This is your go-to before engaging a Guardian Stalker. The defense boost can turn its devastating beam from a one-hit kill into a survivable blow, giving you time to mount a counterattack or retreat. It’s far more effective than trying to out-heal the damage mid-fight.
The Defensive Elixir: Tough Elixir
- Recipe: 1-4x Rugged Rhino Beetle + 1x Monster Part (any).
- Effect: Defense Boost (Tier dependent on number of beetles). 4 Beetles + 1 Monster Part yields a Tier 3 boost.
- Best For: Players who have stockpiled rare critters and want to free up armor choices, or those early-game before finding good "Tough" food ingredients.
Elixirs follow the same potency rules as food but use critters and monster parts. The Rugged Rhino Beetle is the key "Tough" critter, found clinging to trees in forested areas like the Great Hyrule Forest (use stealth!). The monster part determines duration, not potency, so a Bokoblin Horn works fine.
Pros:
- Armor Flexibility: Allows you to wear any armor set (like the Ancient Set for maximum Guardian defense) while still getting a defense buff.
- Longer Potential Duration: Using rare monster parts can extend the buff significantly beyond the standard meal duration.
Cons:
- Critter Rarity: Rugged Rhino Beetles are far rarer and trickier to collect than Ironshrooms.
- No Healing: Like its food counterpart, it restores zero hearts.
- Inefficient for Max Tier: Requires four rare beetles for Tier 3, a steep investment.
Specific Use Case: This is a niche choice for min-maxers tackling the Hyrule Castle gauntlet who want to wear the Ancient Helm and Greaves for set bonuses but use the Barbarian Armor for attack. A Tough Elixir can patch up the missing defense.
The Balanced Survivalist: Tough Fish Skewer
- Recipe: 4x Armored Porgy + 1x Ironshroom (or any other "Tough" ingredient).
- Effect: Tier 3 Defense Boost for approximately 4 minutes and 30 seconds.
- Best For: Players who want a strong defense buff and don't mind a slightly more involved fishing trip.
A variant of the top recipe, this uses Armored Porgy, a fish that grants the "Tough" effect. Found in the waters around the Lanayru Great Spring and the Tabantha Frontier, they require active fishing. Combining four with a fifth "Tough" item like an Ironshroom creates a Tough Fish Skewer.
Pros:
- Max Tier Defense: Achieves the same coveted Tier 3 boost.
- Slightly Longer Duration: The fish base can sometimes yield a dish with a few extra seconds.
Cons:
- Less Convenient: Farming fish is generally slower than foraging for mushrooms.
- No Healing: Still a pure buff meal.
Specific Use Case: If you’re already exploring Lanayru for other reasons and come across a school of Armored Porgy, this is a fine alternative to the Ironshroom recipe. It’s functionally equivalent but born from opportunity rather than targeted farming.
The Early-Game Buffer: Tough Meat Skewer
- Recipe: 1x Ironshroom + 1x Raw Meat (any quality).
- Effect: Tier 1 Defense Boost for about 1 minute and 30 seconds.
- Best For: New players in the Great Plateau or early zones facing tougher Bokoblins and Moblins.
This is the entry-level defense meal. By combining a single "Tough" ingredient with a neutral meat, you create a functional, low-level buff. The meat adds heart recovery, making this a hybrid meal.
Pros:
- Accessible: Uses one common effect ingredient and ubiquitous meat.
- Provides Healing: Restores hearts while offering a defensive edge.
- Teaches Mechanics: Introduces the concept of combining effect and neutral ingredients.
Cons:
- Low Potency: Only a Tier 1 boost, which is marginal against serious threats.
- Short Duration: Lasts barely over a minute.
Specific Use Case: Perfect for your first encounter with a Blue-Maned Lynel in the Ploymus Mountain area near Zora’s Domain. It won't make you a tank, but that small reduction in damage, coupled with its healing, could give you the extra moments needed to learn its patterns or flee.
The Guardian Specialist: Tough Simmered Fruit
- Recipe: 5x Armoranth.
- Effect: Tier 3 Defense Boost for 4 minutes and 10 seconds.
- Best For: Players who have exhausted their Ironshroom supply or are farming Armoranth for armor upgrades.
Armoranth is the floral "Tough" ingredient, found in rocky areas like the Eldin Canyon slopes. Cooking five yields a Tough Simmered Fruit. It is mathematically identical to the 5x Ironshroom recipe.
Pros:
- Maximum Potency: Another reliable path to Tier 3 defense.
- Alternative Source: Good if you’re foraging in Eldin or Hebra.
Cons:
- Slightly Less Common: Armoranth isn't as densely clustered as Ironshrooms in most regions.
- Competes with Upgrades: You might need Armoranth for upgrading the Soldier’s Armor set, creating a resource conflict.
- No Healing.
Specific Use Case: When you’re stocking up for a run through the Guardian-infested Central Hyrule field, and your usual Ironshroom spots are picked clean, switch to gathering Armoranth. The end result is the same formidable buff.
The "Panic Button" Meal: Hearty Simmered Fruit with Defense
- Recipe: 1x Big Hearty Truffle + 4x Ironshrooms.
- Effect: Full Health Recovery + 4 Temporary Yellow Hearts and a Tier 2 Defense Boost.
- Best For: Emergency situations where you are low on health and about to take massive damage. Not a primary pre-buff.
This is a critical recipe to understand, but it highlights a limitation. When you mix a Hearty ingredient (which has a dominant "full recovery" effect) with other effect ingredients, the Hearty effect overrides the secondary buff's potency. You get the full heal and bonus hearts, but the defense boost is capped at Tier 2, not Tier 3.
Pros:
- Life-Saving Combo: Simultaneously maxes your health and provides a solid defense boost.
- Efficient Inventory Use: One meal slot does two jobs.
Cons:
- Sub-Max Defense: You sacrifice the peak Tier 3 defense for the healing utility.
- Wastes Resources: Using four Ironshrooms for a Tier 2 boost is inefficient.
Specific Use Case: This is your "oh no" meal when a Guardian catches you off-guard with half a heart. Eat it to survive the next hit, then reassess. It's for recovery, not optimal preparation.
The Duration King: Tough Steamed Meat (Dragon Horn)
- Recipe: 4x Ironshrooms + 1x Shard of Dinraal's Horn (or Farosh/Naydra).
- Effect: Tier 3 Defense Boost for 30 minutes.
- Best For: Marathon sessions in high-danger zones: clearing all of Hyrule Castle, the entire Trial of the Sword, or lynel hunting circuits.
This is the ultimate evolution of the defense meal, applying the dragon horn mechanic to the Tough effect. A shard from any dragon's horn sets any recipe's duration to a flat 30 minutes and causes a critical cook. Paired with four Ironshrooms, it gives you half an hour of maximum defense.
Pros:
- Unmatched Duration: 30 minutes of top-tier defense is essentially unlimited for any single engagement or exploration run.
- Critical Cook Guarantee: The dragon part ensures you always get the maximum possible output from your ingredients.
Cons:
- Dragon Part Cost: Farming dragon horns is a late-game, time-consuming activity.
- Overkill: For a single guardian or lynel fight, a standard 4-minute buff is more than sufficient.
Specific Use Case: When you plan to methodically cleanse Hyrule Field of every single Guardian, this is the pre-game meal. It removes the need to manage your buff timer, letting you focus entirely on combat and parry timing.
Final Verdict: For systematic, high-level damage mitigation, the 5x Ironshroom (Tough Mushroom Skewer) recipe is the undisputed champion. It delivers the highest defense tier with minimal farming fuss. Reserve the dragon-horn version for extended, planned sieges, and keep a Hearty-defense hybrid on hand for emergencies. Remember, a Tier 3 defense buff doesn't make you invincible, but it does give you the crucial margin for error needed to conquer Hyrule's deadliest foes.