
Fader's Vegvisir is not a guaranteed reward for clearing a Charred Fortress. The primary roll is in the fortress's central tower, and the current location data puts the chance at 50 percent. That changes the job: you are not searching every courtyard chest for a hidden marker. You are trying to reach one tower without spending more health, supplies, or structural loot than the roll is worth.
This guide covers the current Ashlands mechanics before Valheim 1.0. It identifies the fortress and tower to search, gives a lower-risk order for disabling the defenses, and compares a gate-preserving climb with a controlled Battering Ram breach. If the tower is empty, that is a failed roll—not evidence that you missed a secret room.
Find the green beam and identify the correct tower
Start by looking for a vertical green beam rising from the Ashlands. It marks a Charred Fortress, an inland stronghold set among the biome’s volcanic interior rather than a generic ruin or coastal landmark.
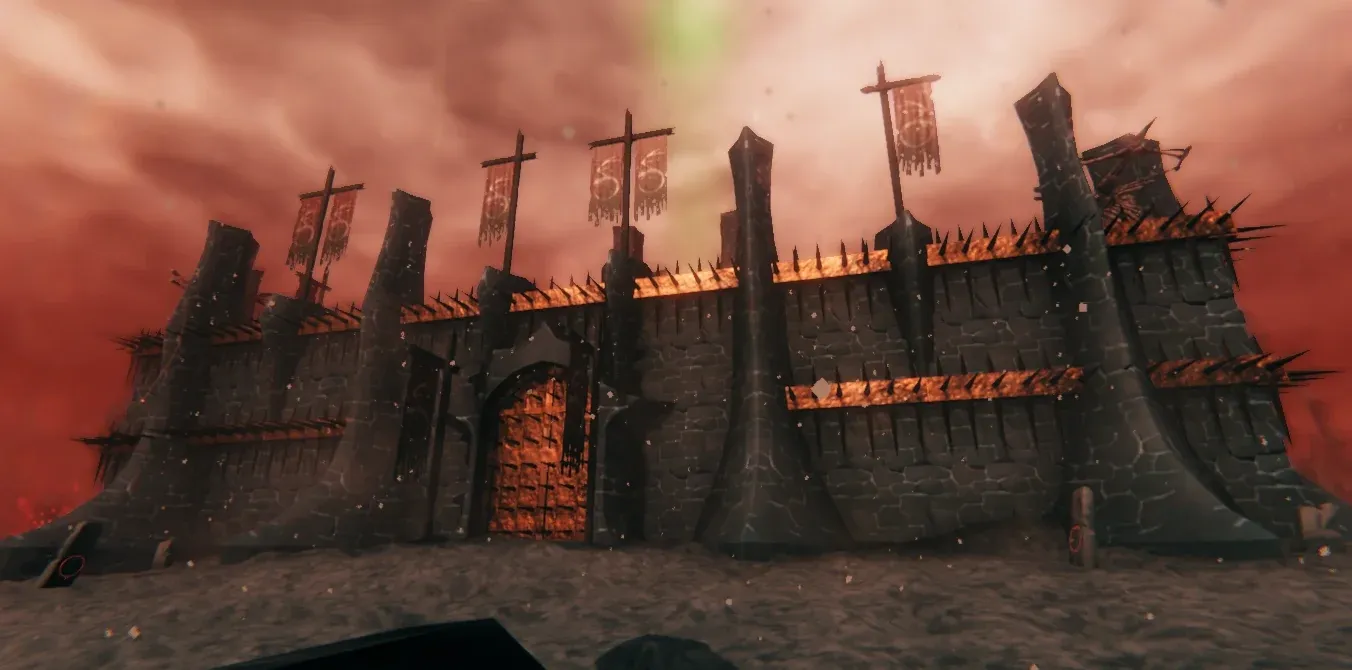
A green beam marks a Charred Fortress in the Ashlands.
The fortress has tall outer walls, two opposing gates, a courtyard with gravestones, Effigies of Malice, stone ramps, and parapets you can circle from above. Beyond that outer section stands the tall central tower. That tower—not the courtyard, gates, or outer-wall structures—is the destination you should plan to reach.
These are the current pre-1.0 Ashlands mechanics. Once you spot the green beam, approach the fortress with the central tower in mind and avoid spending your search time checking unrelated ruins or courtyard structures. The next question is whether every tower actually contains the marker.
Expect a 50% tower roll, not a guaranteed Vegvisir
The central tower contains the Fader Vegvisir roll alongside the Bell Altar, a Charred Chest, and two Molten Cores. The roll succeeds only 50 percent of the time, so reaching the correct tower does not guarantee that the marker will be there.
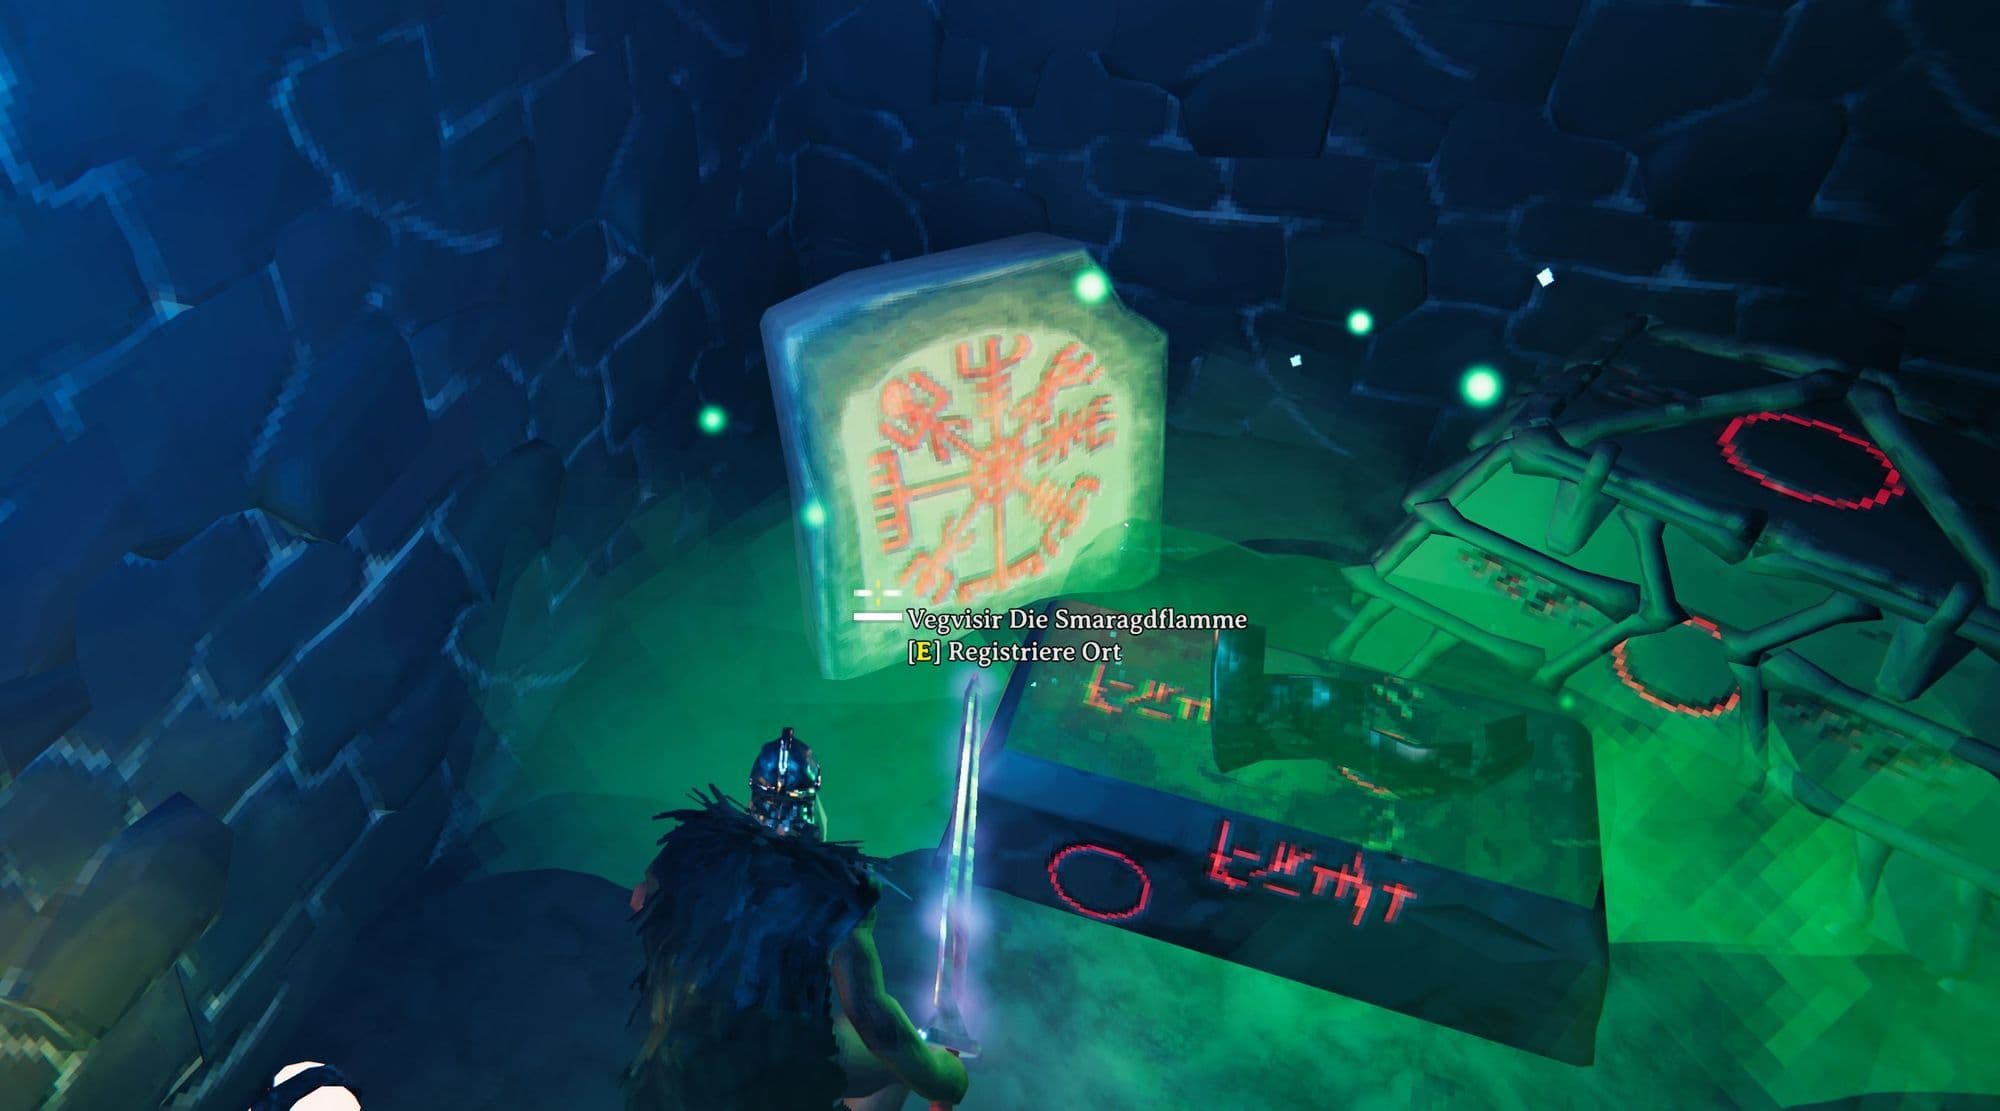
The Fader Vegvisir reveals the nearest summoning altar.
For example, you might find the Bell Altar and other tower loot, inspect the available spaces, and still see no Vegvisir. That is a failed tower roll—not proof that the marker is hidden in another chest or room elsewhere in the fortress.
When the Vegvisir is present, interact with it to reveal the nearest Fader summoning altar on your map. Reading it provides the altar’s location; it does not summon Fader, so the marker only completes the map-finding step.
Clear the fortress defenses before committing to entry
Treat the approach as an Ashlands expedition, not a short courtyard fight. Bring strong food, fire resistance, healing and Stamina Meads, portal materials, and a recovery plan. Keep stamina available for retreating, and preserve an escape option instead of spending every resource on the first enemies you see.
Approach the fortress from outside and check its possible corner positions. Shoot each Skugg you find before moving closer. They can detect you from up to 40 metres away and fire 120-Pierce-damage bolts every two seconds, so removing them with ranged attacks reduces the pressure you face later.
Next, destroy the Effigies of Malice before committing to a prolonged fight. They can continue generating enemies, so killing the initial defenders alone does not mean the fortress is finished producing threats. Use enemy friendly fire when it helps thin a group, disengage when the fight becomes crowded, and consider spawnproofing nearby ground with structures or campfires where practical.
With the reinforcement sources disabled, focus the Charred Warlocks and the Twitchers they summon. Their ranged pressure is more dangerous when you are also dealing with melee attackers. After that, clear the remaining Charred Warriors and Marksmen. This order lowers your exposure, but it is still a risk-reduction plan—not a guarantee of a safe raid.
Reach the central tower with a controlled, loot-safe breach
With the main pressure reduced, preserve the outer gate when practical. A ladder, stairs, or raised-ground pillar lets you cross the wall without opening the 6,000-health gate, leaving it available as a route into a cleared fortress and a useful recovery position. Once inside, breach the central tower rather than damaging the surrounding structure indiscriminately.
Fortress walls and gates require tier-5 pickaxe damage or higher. The inner tower wall is the better target: it has 1,500 health, compared with 4,500 total across the three outer-wall layers and 6,000 for a gate. Make the opening from a position that gives you room to retreat, then enter on foot.
A Battering Ram is the controlled siege alternative when building over the wall is impractical. Load it with fuel and operate it from between its arms; it strikes automatically for 600 Pickaxe damage. Fuel is consumed while it remains loaded, even when you are not actively operating it.
The Ram is safest when you have a clear escape path behind you. It can pin its operator between the engine and defenders on the other side of a breach; using it again while looking down at it or dodge-rolling away can release you. Stop the siege work once the tower opening is usable, move away from the engine, and finish the approach on foot.
Be especially careful around the tower’s loot. The Bell Altar has only 10 health and no damage resistance, so uncontrolled Ram strikes or other broad siege damage can destroy it. Pickaxe excavation beneath the wall, a Catapult with Explosive Payloads, and platform-based access are possible backups, but terrain limits, fall damage, or awkward positioning make them less dependable. A gate-preserving climb is therefore the default; use the Ram only with controlled strikes, a retreat route, and enough space to avoid being trapped.
If the tower is empty, move to another fortress
If you find the Bell Altar or other Bell-related loot but no Fader Vegvisir in the central tower, treat that fortress as an unlucky roll. Do not keep searching the same courtyard, outer walls, or secondary structures for a hidden copy; once the central tower has been checked, the practical search is over.
Leave the gate intact where practical and avoid unnecessary demolition; once the area is cleared and secured, the fortress can serve as a recovery position or a place to return later. Then move on to another fortress marked by a green beam. The Vegvisir can very rarely appear on top of a Charred Ruin, but that alternative has no quantified probability and is not a predictable replacement route.
Check the central tower once, then either read the Vegvisir or follow the next green beam.