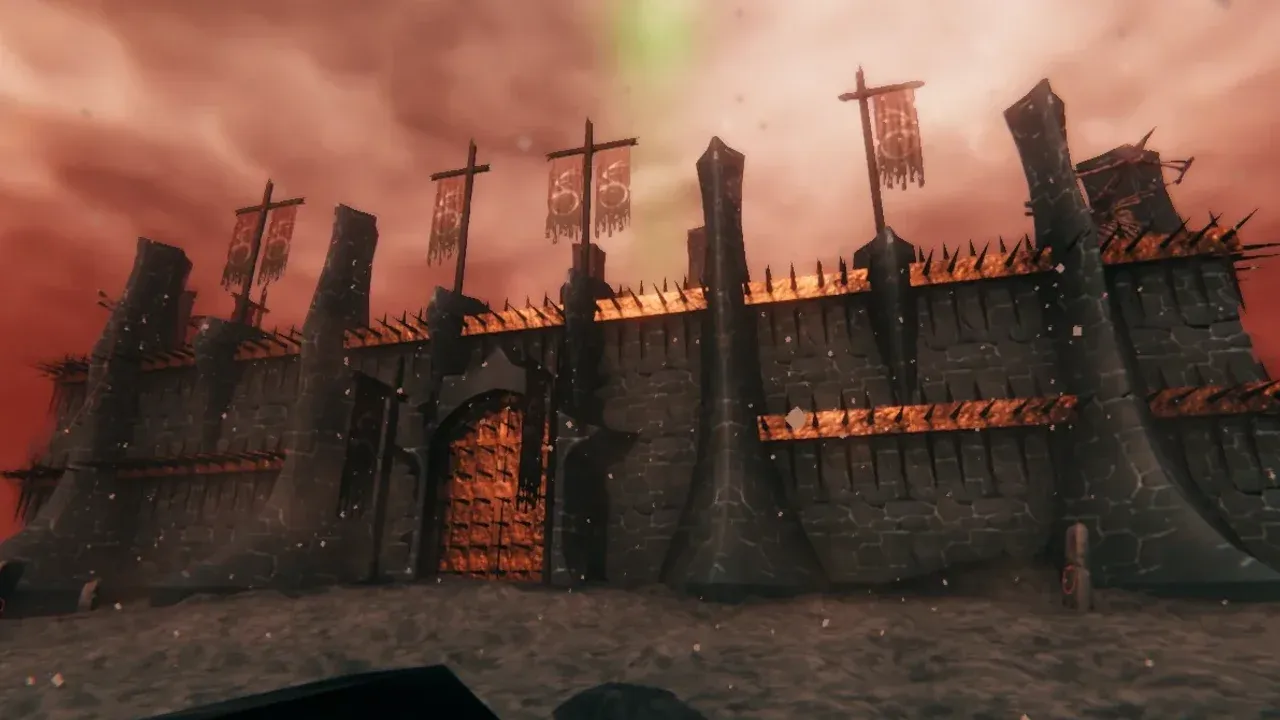
Charred Fortresses are designed to punish the first thing most Vikings try: running straight at the gate. The reliable route is to turn the fortress into a series of smaller problems—remove the outside threats, gain a foothold on the wall, shut down the spawners, and only then open the tower where the Ashlands’ rarest rewards are waiting.
Prepare for a First Fortress Clear
Charred Fortresses sit inland among the lava fields rather than along the Ashlands coast. Their central tower projects a green beam high into the sky, so use it as your landmark while scouting instead of marching toward the first cluster of enemies you see. The structure is a large rectangle with an inner tower, two closed gates, spike defenses, ramps to the parapets, and two Effigies of Malice in the courtyard.
Arrive with an exit plan. Iron Gate recommends defeating The Queen before traveling to the Ashlands, and the biome’s new content only generates properly in areas that were not previously explored. Set up a portal at a cleared, defensible position near the fortress—not in the assault zone—so a failed push becomes a reset instead of a corpse run.
Bring endgame food, Fire Resistance Mead, a rested bonus, a dependable shield, and a ranged weapon. A Staff of Embers and Eitr-weave armor let you work from above the fortress instead of trading blows at the gate. Also carry a Hoe, enough Stone for a raised-ground route, and a way to repair your chosen breach tool.
Silence the Ramparts Before You Enter
Do not start by attacking the gate. Walk the perimeter at range and identify the Skugg ballistae, Charred Marksmen, Charred Warlocks, and the Effigies of Malice. The Skuggs punish you from the walls, while the effigies keep adding pressure once you are inside. Warlock projectiles and their summoned Charred Twitchers are especially dangerous when you are also trying to climb.
Use an elevated rock, a raised-ground pillar, or a natural ledge to create a firing position. Remove the Skuggs first if they have a clear line to your approach, then burn down the visible effigies and Warlocks. A Staff of Embers is excellent here, but the decision is the same with a bow or crossbow: make the approach quiet before you climb. The fortress’ initial Warlocks, Marksmen, and Skuggs do not respawn after they are killed; the effigies are the pressure you need to eliminate before looting.
Once the outside is quiet, build a small workbench-and-repair position outside the wall where the fortress blocks tower fire. Keep the retreat lane open.
Take the Wall, Not the Gate
For a first clear, use a Battering Ram if you want the dependable route, or a raised platform if you want to preserve the fortress as a base. The front gate is a poor target: it is tougher than the wall, and the terrain makes a ram awkward to steer.
Battering Rams cost 10 Ashwood, 10 Flametal, and 2 Surtling Cores, and they must be built near a Workbench. Fuel the ram with Wood, stand between the rear ends of its arms, and use the Hoe’s Level Ground function to make a short path across uneven terrain. Break the outer wall, reposition, and use it again on the inner tower.
If you want to keep the exterior walls intact, build a wooden staircase toward the parapet or raise a stone pillar with the Hoe. Start far enough away for the structure to remain stable, but close enough that the final platform lets you jump over the wall. A Black Metal Pickaxe is the fallback when siege materials are unavailable; it works, but the breach takes time and durability. Catapults are better saved for later assaults because they are difficult to aim and require a Charred Cogwheel from a Skugg.
Kill the Spawners, Then Take the Tower
After you land inside, stay on the wall or in its corners and clear one side at a time. Destroy the Effigies of Malice first; they are what turns a controlled fight into a crowd around your corpse.
Then remove the remaining Warlocks and Marksmen. Pull melee enemies toward a corner or back over the wall, and leave through the route you created if the courtyard fills. Re-enter after the enemies spread out rather than fighting the whole population in the center.
The central tower is the payoff, and it is where you must stop using area damage. The Charred chests and Bell altar are destructible; the altar is extremely fragile and has no damage resistance. Clear the last defenders, switch to precise attacks, and open the tower deliberately.
Protect the Tower Loot Before You Break Anything
The Bell altar drops two to four Bell Fragments when destroyed. Three fragments craft one Bell at the Black Forge Cooler, and Fader requires three Bells, so you need nine fragments in total. The tower also holds a Charred chest that can contain Iolite, Bloodstone, or Jade, along with Molten Cores and a possible Fader Vegvisir. Additional Charred chests can spawn around the tower walls.
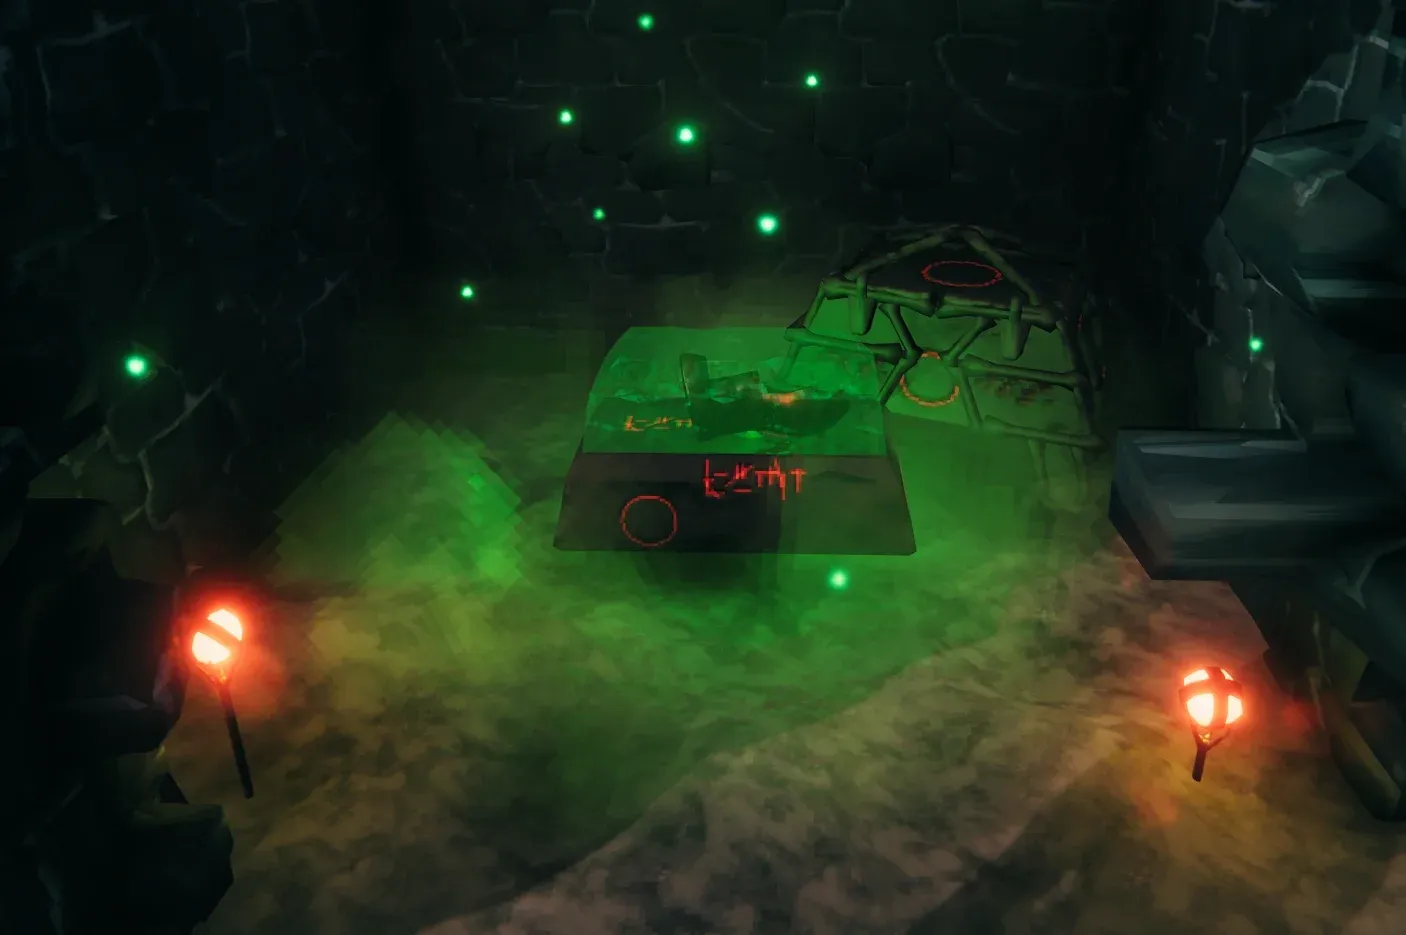
The Bell altar inside the fortress tower: protect it before destroying it.
The loot order matters more than the final fight. Check where the altar and chests are before swinging a wide weapon or throwing fire. Take the altar only after the room is safe, and interact with it from close range instead of bombarding the tower from outside. When you have the Bell Fragments, mark the fortress and carry them home through a portal—they are teleportable.
Leave the outer shell standing if you want an Ashlands foothold: intact fortress walls keep most ground threats out.
FAQ
Where do Charred Fortresses appear?
They appear inland in the Ashlands, usually among the central lava fields. Look for the green beam from the fortress tower.
What is the safest way to enter a Charred Fortress?
Use a raised platform to preserve the walls, or a Battering Ram when you need the dependable breach.
How many Bell Fragments do you need?
You need nine Bell Fragments to craft the three Bells used to summon Fader. A Bell altar drops two to four fragments.
Can Bell Fragments be teleported?
Yes. Bell Fragments are teleportable, so you can send them home once the tower is secure.