How to Diagnose Crosshair Placement Issues in Counter-Strike 2
You’ve got the raw aim to click heads in aim trainers, but in real Counter-Strike 2 matches, you’re losing duels you feel you should win. This is it—the classic disconnect that traps so many players. Trust me, the issue is rarely your raw mechanical skill. More often, it’s your crosshair placement, the predictive skill of positioning your crosshair at head height before an enemy even appears. This guide will help you spot the difference and diagnose the exact problem.
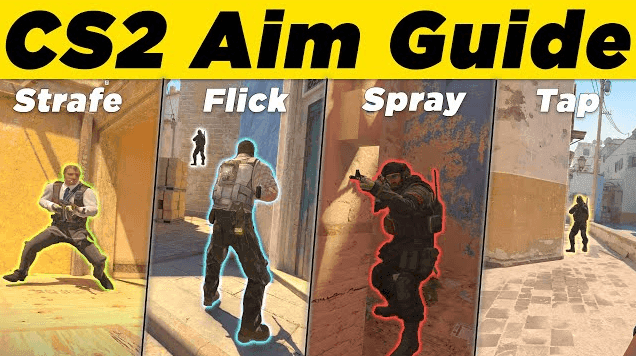
Visualizing different aiming mechanics and pre-aiming techniques.
Here’s the trick most guides miss: good aim and good crosshair placement are two different skills. Raw aim is your mechanical ability to move the mouse to a target you can see. Crosshair placement is your game sense and prediction, parking your crosshair where an enemy’s head will be. When your placement is off, you’re forced to combine your reaction time (an average of 200-250 milliseconds) with a flick to the head. This stacks delays and effectively doubles your time-to-kill, losing you the duel before you even fire.
So, how do you know if your placement is the bottleneck? Watch for these specific symptoms in your own gameplay:
- Floor Drifting: This is the most common habit. As you move through the map, check rotations, or reposition, does your crosshair unconsciously drop toward the ground? If you’re focusing on movement or the next corner, your aim often follows your eyes down. This forces a large, slow vertical flick upwards when an enemy peeks, putting you at a massive disadvantage.
- Micro-flick Dependency: Do you find yourself making a tiny, mandatory adjustment before almost every shot? This isn’t the same as an intentional, practiced flick for an unexpected peek. This is a symptom—your crosshair is resting near the head, but not on it, so a small correction is always needed. Good placement results in clean clicks with no adjustment.
- Late First Bullets: This is a subtler sign. You see the enemy, you click, but your shot lands in their chest or misses entirely. Your reaction felt fast, but because your crosshair started further from the head (usually too low), the distance your mouse had to travel made you late. The duel was lost in the first millisecond.
The easiest way to diagnose this is to play ten rounds of 1v1 Duels. After each opening kill or death, ask yourself: “Did I need to adjust my crosshair before firing?” If you answer “yes” more than half the time, crosshair placement is your primary bottleneck.
If these signs feel familiar, don’t panic—you’re not alone, and you’ve just identified the single biggest thing holding back your consistency. The good news is, once you see it, you can’t unsee it. You’re now ready to move from diagnosis to the solution.
Best Crosshair Settings and Pro Codes for Counter-Strike 2
You've diagnosed your crosshair placement issues—now let's build the perfect tool to execute that precision. In Counter-Strike 2, your crosshair isn't just a dot; it’s your primary reference point for every duel, spray, and flick. The best settings blend visibility with predictability, letting your muscle memory shine. Let's find yours.
Standard in-game crosshair visibility
The Core Principles of a Good Crosshair
A great crosshair should be your anchor, not a distraction. It needs to be instantly readable on every map background, from the bright sands of Anubis to the dark corridors of Ancient. Most pros opt for small, static designs that minimize screen clutter and provide a consistent aiming point. Here’s what to look for:
- Visibility: It must stand out against any wall or skybox. Colors like cyan, neon green, or pink are popular because they rarely blend into the environment.
- Predictability: A static crosshair (one that doesn't expand when you move or shoot) builds trust. You always know exactly where your bullets will land when you're stationary.
- Precision: A tight center gap helps you pinpoint exactly where that first bullet will go, crucial for long-range headshots.
Your crosshair should feel like an extension of your focus. If you're constantly noticing it or struggling to see it, it's not working for you—time to tweak.
Essential Console Commands for Precision
While the in-game menu works, console commands give you finer control and let you save your setup permanently. Here are the key ones:
cl_crosshairstyle 4: This sets your crosshair to Classic Static. It’s the go-to for most pros because it remains locked in place, helping you learn weapon spray patterns through muscle memory instead of visual feedback.cl_crosshair_drawoutline 1: This adds a thin black border around your crosshair lines. Turn this on for extra visibility, especially on bright maps like Anubis or if you use a thinner crosshair.cl_crosshair_sniper_width: If you play AWP, this command is your secret weapon. The default is1, but increasing it to1.5or2makes the scope's crosshair lines thicker, which can help your eye track faster during lightning-fast flicks.
Top Pro Crosshair Codes to Try
These aren't magic bullets, but they're fantastic starting points that embody the principles above. Each is tailored to a playstyle.
s1mple (CSGO-MQfzY-jnHyz-Whzv3-USwcf-2pFKO): The legendary AWPer and rifler uses a tight, static crosshair with a cyan or green color and a tight gap. This setup is perfect for hybrid players who need precision for both sniping and rifling.
donk (CSGO-jU4eP-8wSj8-EZVsB-HcJZs-iyNQC): As an aggressive entry fragger, donk uses a compact static crosshair. It's small and precise, designed for the fast, close-range engagements where entry players thrive.
ZywOo (CSGO-s5Qbj-nvF89-cJjDd-mRdSG-5Yt4N): Known for his calm, controlled play, ZywOo’s crosshair is a slightly thicker, blocky green design. This makes it highly visible during chaotic fights and helps with quick recognition when switching to pistols.
How to Import and Customize
To try these out, open your Counter-Strike 2 settings, go to the Game tab, and find the Crosshair section. Click "Share or Import", paste one of the codes above, and hit Import. Jump into a deathmatch to feel it out.
If a pro setup isn't quite right, customize it step-by-step. Change one setting at a time—like the gap or thickness—play a few rounds, and see if it improves your clarity and confidence. Remember, the goal is consistency. Once you find a crosshair that feels right, stick with it. Changing it after every bad game will only hurt your progress.
With a crosshair that’s clear, predictable, and tailored to your role, you’ve built the perfect tool for the precision work ahead. Let’s lock it in and move on to mastering the angles.
How to Master Pre-aiming and Angle Clearing in Counter-Strike 2
This is where Counter-Strike 2 transforms from a game of pure reaction into one of chess-like prediction. You can have the fastest flick in the world, but if your crosshair is staring at the floor when an enemy swings out, you’ve already lost the duel. Mastering pre-aiming and angle clearing is about winning the fight before it even begins.
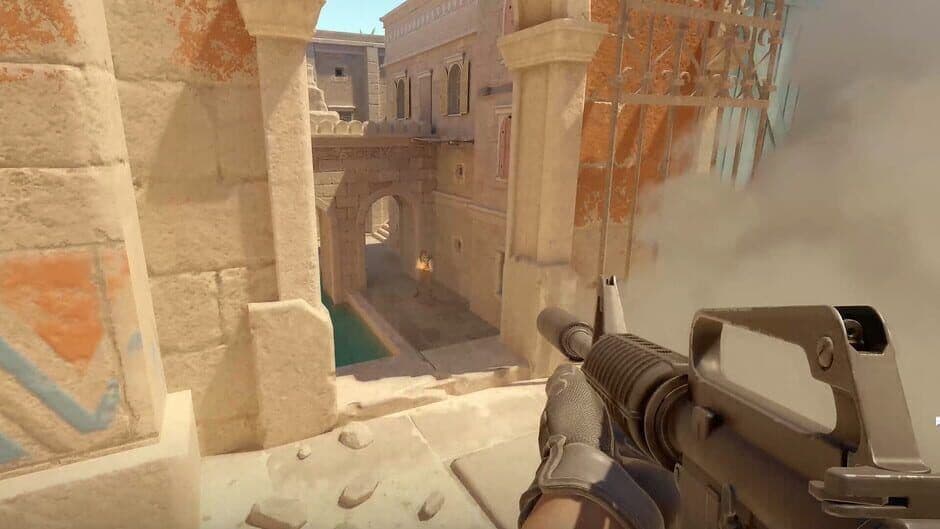
Map geometry used for clearing angles.
Think of it like this: every corner you approach is a pie, and you need to slice the pie cleanly. This isn't about wildly swinging around a corner hoping for the best. It's a deliberate, controlled process. You use your [A/D] strafe keys to expose yourself to only one slice of danger at a time, clearing each potential angle sequentially before moving to the next. This prevents you from being exposed to multiple enemies at once and lets you focus your crosshair perfectly on each threat zone.
That’s where pre-aiming comes in. This is the art of positioning your crosshair on the exact pixel where an enemy’s head will appear, based entirely on your map knowledge. You’re not aiming at the wall itself; you’re aiming through it at the spot an enemy will occupy. This eliminates the need for a large, time-consuming flick and lets you fire the instant you see them. The difference is milliseconds, but in Counter-Strike 2, that’s the difference between a headshot and a death screen.
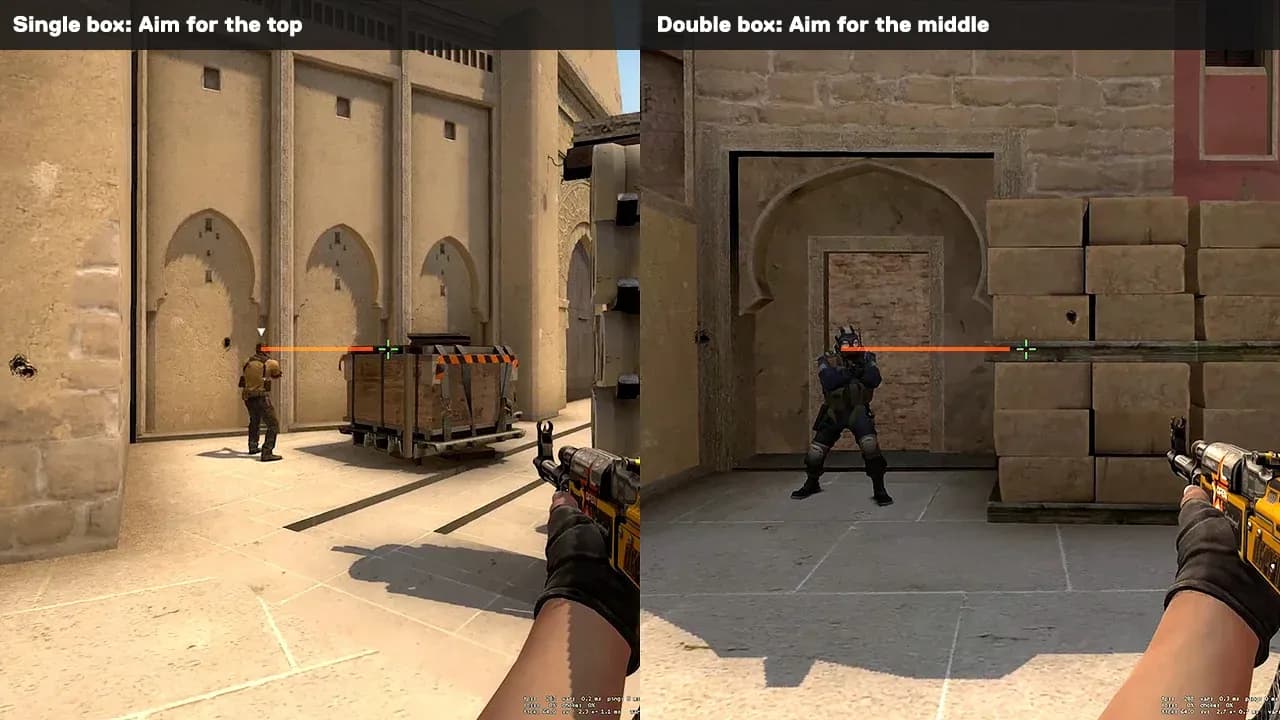
⚠️ Pro tip: Your peek budget for a dangerous angle is usually one clean peek. If you don’t get the kill or the info you need, reset or reposition. Re-peeking the same angle alone is how you donate your rifle to the enemy team.
When holding an angle, don’t glue your crosshair to the wall’s edge. Use angle offset. Hold your crosshair a head’s width off the wall. This accounts for an enemy’s swing speed and your own reaction time, ensuring your crosshair is already over their head when they appear. The farther away the angle, the tighter this offset can be. For a close-range corner, hold it wider—they’re going to fly out fast.
Not every peek is a commitment to kill. Sometimes you just need to know what’s there. That’s the info peek. This is a low-commitment movement where you quickly tap [A] or [D] to expose a sliver of your shoulder and instantly snap back to cover. Your goal isn’t to shoot; it’s to bait a shot from a hidden AWPer, hear a step, or confirm a presence. It’s a safe way to gather critical data without risking your life.
Trust me, if you’ve ever felt like enemies always see you first or that you’re constantly adjusting your aim before firing, this is the skill gap you’re feeling. Start by walking common routes in a practice server, consciously keeping your crosshair at head height and slicing every corner. Once you internalize this, your duels will feel effortless, and you’ll be the one catching opponents off-guard.
Essential Movement Mechanics for Accurate Shooting
Here’s the trick most guides miss: in Counter-Strike 2, your aim is only as good as your movement. You can have the best crosshair placement in the world, but if you're still sliding when you pull the trigger, that first bullet is a coin flip. This is the core of first-bullet accuracy—your ability to stop perfectly before you fire.
CS2 gameplay showcasing weapon mechanics.
The foundation of this is counter-strafing. This isn't a fancy trick; it's the bedrock of every clean peek and duel. When you're strafing left with [A], you tap [D] to cancel your momentum instantly. This brief, opposite key press stops your player model dead, allowing the game's sub-tick accuracy system to register your shot as perfectly stationary. Without it, you're fighting the game's physics—the subtle visual feedback might look okay, but the server knows you were moving and penalizes your shot.
Practice counter-strafing in an empty server. Strafe left, tap right, and fire a single bullet at a wall. If the bullet doesn't land dead center, your timing is off. This muscle memory is non-negotiable.
Your distance from the corner also plays a huge role in this dance. Hugging the wall might feel safe, but it restricts your view and makes your peeks awkward. Standing a few steps back gives you better angle geometry, letting you see more of the lane and control your exposure. It also makes your counter-strafes cleaner, as you have more space to accelerate and decelerate smoothly.
For those ultra-tight, close-range duels, a technique called crouch-tapping can add a layer of precision. A brief tap of [Ctrl] right before you fire momentarily shrinks your hitbox and can throw off an opponent's head-level aim. Use this sparingly and intentionally—predictable crouch-tapping in the same spot is an easy read for experienced players.
Mastering the relationship between stopping your movement and placing your shot is what separates chaotic spray-and-pray from controlled, lethal engagements. Get this right, and your duels will start feeling effortless.
Map-Specific Crosshair Placement Tips for Mirage and Inferno
This is where theory meets the wall. You can have perfect settings and movement, but if your crosshair is in the wrong place on the map, you’ll lose the duel before it starts. In Counter-Strike 2, each map has its own geometry, and mastering the specific head heights and angles for key chokepoints is what separates good players from great ones. Let's break down two of the most important battlegrounds.
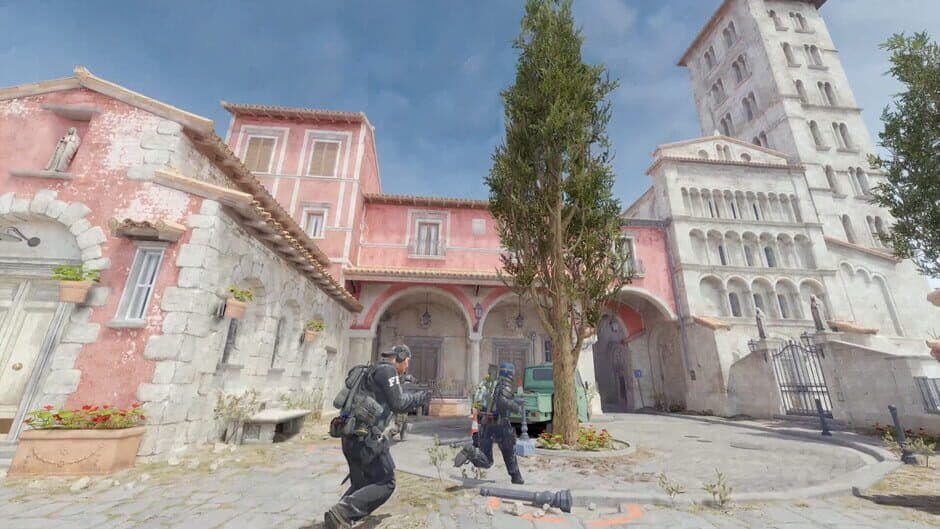
Map textures and lighting in CS2.
Mirage: The Connector Staircase
Holding Mid from Connector is a classic duel, and the difference between winning and losing is often a few pixels of crosshair height. The most common mistake is holding your crosshair flat across the Connector stairs at body level, waiting for an enemy to walk up. This is wrong.
Instead, you need to pre-aim the lip of the stairs at head height. Visualize where an enemy’s head will be the moment it becomes visible as they peek from Mid. That spot is the very top edge of the staircase. By placing your crosshair there, you eliminate the need for a vertical flick. When they peek, their head walks right into your crosshair—all you do is click.
Don’t glue your crosshair to the wall. Hold it a head’s width off the edge of the staircase. This catches both a cautious shoulder peek and a committed wide swing from Mid.
Inferno: Controlling the Banana
Inferno Banana is a chaotic funnel, and your crosshair placement dictates control. When holding from the CT side, a fatal habit is resting your crosshair directly on the edge of the car or sandbag at chest height. You’re aiming at the cover, not where the enemy will be.
The correct technique is to hold your crosshair one step off the car/sandbag edge at head level. Imagine an enemy swinging out from behind that cover. Their head won’t be glued to the wall; it will be in the space just next to it. By pre-aiming that spot, you’re ready for the swinging enemy. If your crosshair is on the cover itself, you’ll have to make a horizontal adjustment every single time, costing you precious milliseconds.
Applying the Principles to Other Maps
While Mirage and Inferno provide perfect case studies, the same logic applies everywhere. Trust me, once you see it, you can't unsee it.
On Dust2 Long, don’t aim at the middle of the doors at chest height. To cover all peek styles, hold a head's width off either door edge at head height. This placement catches both a slow shoulder peek and a fast, wide swing from a T trying to entry.
Ancient Mid is a masterclass in dynamic adjustment due to its multi-level design. As you advance through this area, you must reset your crosshair height for each zone's elevation changes. The head height from T-Ramp is different from the head height at the top of Mid, which is different again when aiming into B Main. If you keep it static, you’ll be aiming at knees or the sky.
This next part can feel overwhelming, but don't panic. The key is to use the map's geometry as a reference, not a target. Your crosshair should be waiting where a head will appear, not on the wall itself. The distance you hold off the edge should scale with the situation: tighter for slow peeks at long range, wider for close-range swings.
With these map-specific adjustments drilled into your muscle memory, your first bullets will land faster and more consistently. You’re not just aiming better—you’re thinking like the enemy. Let's lock it in.
Daily Practice Routines to Improve Headshot Percentage
You’ve learned the mechanics, the settings, and the map-specific spots. Now, it’s time to build the muscle memory that turns theory into instinct. This final Counter-Strike 2 routine is your 10-minute daily commitment to locking in that crisp, first-bullet headshot precision.
Standard gameplay environment.
Think of this as your aim gym session—short, focused, and designed to ingrain the habits that win duels. Trust me, consistency here will pay off faster than any aim map grind.
The 10-Minute Daily Drill
This routine targets the two core skills you need: maintaining head-level discipline and applying pre-aim under pressure. It’s split into two focused five-minute blocks.
First 5 Minutes: Headshot-Only Deathmatch (HS DM)
Jump into a community headshot-only deathmatch server, like those hosted on xplay.gg. Here’s the trick most guides miss: in this mode, body shots don’t count. You are physically forced to aim for the head with every engagement, which ruthlessly punishes lazy crosshair height. Your only goal for these five minutes is to keep your crosshair glued to head level as you move, peek, and reposition. Don’t worry about your score; focus on the discipline. If your crosshair dips, you get no feedback—no hit marker, no damage. This is pure, unadulterated head-level training.
Next 5 Minutes: 1v1 Arena Duels
After warming up the raw mechanics, switch to a 1v1 Duels mode. This isn't about fragging out; it's a diagnostic tool. In a live duel, you must systematically hold and clear angles against a thinking opponent. Play ten rounds with a single focus: count how many of your opening shots are fired without needing a micro-adjustment. If that number is less than half, your pre-aim and predictive placement need work. This mode exposes the gap between aim map bots and real player movement.
Run this drill before you queue for competitive matches. It primes your brain for precision and turns proper crosshair placement from a conscious thought into a subconscious habit.
Creating Your Own Headshot-Only Lab
You can also create a controlled practice environment offline. Load into a practice map with bots, open the console with [~], and enter the command mp_damage_headshot_only 1. This forces every kill to be a headshot, perfect for methodically walking maps and drilling head-level placement on every corner and peek spot without the chaos of a live server.
Tools for Fine-Tuning
While practicing, ensure your crosshair isn’t working against you. Use the Steam Workshop map Crashz' Crosshair Generator to test configurations and pro setups in real-time. It lets you instantly apply and feel different crosshairs against bots and various backgrounds, so you can settle on one that feels right and stick with it. Constantly changing your crosshair hurts consistency more than any sub-optimal setting.
Tracking Your Progress
Improvement in Counter-Strike 2 is a marathon, not a sprint. Track your headshot percentage in your in-game stats. A solid benchmark to aim for in ranked play is consistently hitting 40%+. This shows your crosshair placement and tap/burst control are working in unison. For context, professional players often maintain astonishing rates of 60% or higher.
Commit to this short, daily ritual. In just a week, you’ll notice your first bullets landing faster and more reliably. You’re not just practicing aim; you’re building the disciplined foundation that makes great aim possible. Now, get in there and make those headshots count.