Cyberpunk 2077’s current cyberware system splits two jobs that older guides often bundle together. Kerenzikov is a Nervous System implant for slowing time while you aim ranged attacks during movement; visual information comes from specialized Kiroshi optics in the Face slot. The old Ocular System mod model is a version boundary, not the setup you should shop for now.
That distinction gives you a cleaner loadout decision. First make Kerenzikov’s movement-and-aim trigger reliable, then choose whether your scanner needs nearby enemies, cover-hidden targets, cameras, traps, or all of them. Threat detection adds another layer: some cyberware reacts when enemies are close to spotting V, but reacting to detection is not the same as highlighting a target.
The current system separates Kerenzikov’s time dilation from Kiroshi highlighting
That split is also a slot correction. Since Update 2.0, cyberware is organized around Cyberware Capacity, tiered implants, attribute attunement, and ripperdoc upgrades. Those rules replace the older rarity-and-mod vocabulary, so a guide that still treats every effect as a fragment installed into one ocular implant is describing a different system.
Kerenzikov belongs to the Nervous System. Its job is combat time dilation tied to aiming ranged attacks during movement; it is not a general perception, stealth, melee, or quickhack bonus. This is why the supplied shorthand that places Kerenzikov under the Frontal Cortex is misleading. The category tells you what kind of problem the implant solves: it changes the timing of a mobile ranged attack, rather than revealing information through V’s eyes.
Visual information now belongs to the Face slot. Update 2.0 replaced the old Ocular System label with Face and removed the current cyberware-mod model. In its place, specialized Kiroshi optics divide scanning and highlighting jobs between separate implants. The useful question is therefore not which universal ocular mod adds threat highlighting, but which current Face optic supplies the kind of information you need. The individual Kiroshi choices come later; here, the important boundary is that they are a separate system from Kerenzikov.
Consider the difference in play. When V aims while moving with Kerenzikov equipped, the relevant result is a combat time window around a ranged attack. When V scans with a Face optic, the result is visual information about the scene—such as a highlighted target or device. Both can make a fight easier to read, but they spend different cyberware capacity and answer different questions. Equipping one does not make the other unnecessary unless your build only needs one of those jobs.
Threat response is a third category, not a synonym for either one. Synaptic Accelerator slows time when enemy detection reaches 50%, so it reacts to V becoming exposed rather than highlighting an enemy or waiting for Kerenzikov’s movement-and-aim condition. A detection threshold, a combat trigger, and a scan highlight may all involve time or visibility, but they are not interchangeable effects.
With those jobs separated, the next decision is narrower: how to make Kerenzikov trigger reliably during a real ranged attack.
Kerenzikov only activates when movement and ranged aim line up
The first practical test is simple: equip Kerenzikov in the Nervous System, aim a ranged weapon, and perform the attack while you slide, dodge, or Dash. The movement by itself is not enough. Kerenzikov’s condition is the combination of an aimed ranged attack and one of those supported movements, so pressing Dash or dodging without aiming will not produce the implant’s time-dilation window.
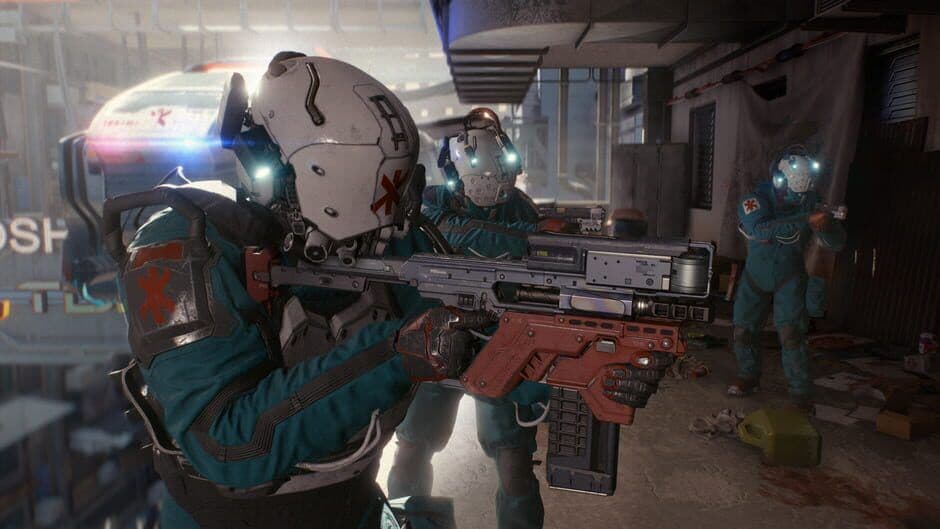
A ranged firefight is the kind of combat pattern Kerenzikov supports.
When it activates, current records describe a 60% time slow. The exact window depends on the implant’s tier, and published databases do not agree on every number: one lists roughly 2 to 3.75 seconds with an 8-to-6-second cooldown, another lists 2 to 3.5 seconds, and a current tier-5 row shows 3.5 seconds and a 6.5-second cooldown. Treat those as evidence of tier-sensitive values, not as a universal table. Read the live tooltip for the item you are buying or upgrading.
For a rifle or SMG user, the reliable sequence is to start aiming before pressing Dash, or to begin a slide or dodge while already aiming. The slow window then gives you time to place a headshot, shift around incoming fire, and finish the movement in a better position. If the effect fails to trigger, the aim-before-movement timing is the first thing to practice. This makes Kerenzikov valuable for a mobile ranged loop: the implant creates a short opportunity to shoot accurately while repositioning, rather than a passive slow that follows every evasive action.
Patch 2.1 also extended the supported ranged set to throwable weapons. That makes an aimed throwable attack a valid part of the same movement-and-aim pattern, but it does not broaden Kerenzikov into a universal combat trigger. Merely dodging, swinging a melee weapon, or uploading a quickhack does not satisfy the supported condition as stated. Smart Weapons introduce a separate tradeoff: their lock-on process can consume part of the short slow window, making Kerenzikov less convenient unless the build’s movement and firing pattern justify that delay.
The capacity decision follows from that trigger. Current records list Kerenzikov at 12 Capacity, with Reflexes attunement that adds 0.1% Crit Chance per Attribute Point; the attunement is a bonus, not a requirement to equip it. Spend that capacity when you repeatedly aim ranged attacks during movement, and first confirm the live duration and cooldown while practicing the timing in combat. Once the base trigger is dependable, the next question is whether a companion should extend the slow’s output, protect the moment after it ends, or open an aerial route.
Support Kerenzikov with the right companion, not a bigger perception label
The base slow is only one part of a mobile-ranged build, and each companion spends its own Cyberware Capacity. Choose the piece that fixes your build’s bottleneck rather than treating every Kerenzikov-adjacent item as mandatory. These companions change stamina use, the danger after the slow, or the way you attack from the air; none replaces the Nervous System implant or turns into a visual-information tool.
Kerenzikov Boost System is the sustained mobile-gunner pairing. It is Frontal Cortex cyberware available at Tiers 3–5 and costs 3 Capacity. While Kerenzikov is active, it removes the shooting stamina cost and adds more relative time slow; the supplied records list an additional 5% at Tier 3 through 15% at Tier 5. That combination suits a rifle or SMG build that repeatedly Dashes, slides, or dodges while aiming: you can keep using the active window for mobile shooting without paying the usual stamina cost, while the added slow gives the attack a little more room to work. The Boost System has no independent value without Kerenzikov, so it is wasted capacity on a build that does not reliably trigger the base implant.
Defenzikov addresses the moment Kerenzikov ends instead of extending the shooting window. It creates a short Mitigation Chance window after the slow wears off; the current tier-5 record lists +90% Mitigation Chance for 4 seconds. That percentage is not 90% damage reduction. Mitigation Chance describes how often incoming damage can be reduced, while the reduction amount is a separate Mitigation Strength value. Pair this with Kerenzikov when your problem is surviving the exposed transition after repositioning, not when you need more time to line up a shot. It is a risk-management choice, not a perception or highlighting upgrade.
Air Kerenzikov is the aerial route, and it comes with visible perk and weapon limits. The supplied record requires 15 Reflexes, Gundancer, and Aerial Combat; it also restricts the effect to Assault Rifles and SMGs. With those prerequisites and Air Dash, launch into an aimed Assault Rifle or SMG attack in mid-air: activating Kerenzikov suspends V in place and extends the effect. This is useful for a build deliberately built around aerial control, but it is not a universal extension for every ranged weapon and it does not remove the need for Kerenzikov’s base activation.
Spend the extra capacity only after identifying whether your build needs stamina and uptime, post-effect survivability, or aerial control. Once that Nervous System package is settled, the separate Face-slot decision is about the exact information your scan needs to reveal.
Choose a Kiroshi optic by the threat information you need
With the Nervous System package separated out, the Face slot is easier to choose: start with the question your scan needs to answer. Do you need to know which enemies are nearby, which ones are hiding behind cover, where the cameras are, or whether the floor contains a mine? The current Kiroshi optics divide those jobs instead of giving every model the same kind of highlight.

A holographic cyberware presentation reflects the visual-information role of Kiroshi optics.
The exact range is tier-sensitive, so use the tooltip on the optic in front of you rather than treating database entries as a universal table. Current records put Kiroshi scan zoom on a tiered scale from 4x at Tier 1 to 10x at Tier 5, while the published highlight ranges differ slightly between sources and rows. Patch 2.1 improved the way Kiroshi highlights appear in the scanner, but that visual improvement does not turn a focused optic into a general-purpose detector.
- Clairvoyant: Choose it when nearby enemies are the problem. Scanning highlights enemies and keeps the highlight active for 60 seconds; current tier records place its range at roughly 17.5–19.5 meters. It is the straightforward choice for entering a room or crossing an approach where you want hostile bodies to remain readable after the scan. It does not answer the separate camera, turret, or trap questions as directly as their dedicated optics.
- Stalker: Choose it when cover is hiding the next target. While aiming, it highlights enemies behind cover within a limited field of view and depth; current listings place that depth at roughly 47–53 meters. Its strongest supplied interaction is with Tech Weapon aiming, so it fits a cover-oriented shooter who wants to line up a shot through the fight’s visual obstruction. It is less useful as a general scan of everything around you because the effect is tied to aiming and its view is limited.
- Sentry: Choose it for security hardware. While scanning, it highlights cameras and turrets, with current tier records giving roughly 35–39 meters. That makes it useful when the danger is an automated sightline or a device controlling an approach, but it is not the enemy-highlighting option to pick simply because a room contains guards.
- Doomsayer: Choose it when the environment is the threat. It highlights explosive devices and traps near the crosshair, with current tier records placing the range around 26–29 meters. Keep the crosshair where you are about to move or breach; the optic is built for checking that immediate path, not for replacing an enemy scan.
- The Oracle: Choose it when you genuinely need broad coverage. It combines the major highlight families: enemies, including enemies behind cover, cameras and turrets, and explosive devices or traps. The current record lists scan-triggered ranges of about 15–19.5 meters for enemies, 30–39 meters for cameras and turrets, and 22–29 meters for traps, with the effects persisting for 60 seconds after scanning. That breadth comes with a higher Capacity cost—the current record lists 10 Capacity—and more visual noise, so the all-in-one optic is not automatically the best optic.
Two other Face choices clarify what this comparison is and is not. Basic Kiroshi slows camera detection—current records list a 40% reduction—so it is a camera-avoidance effect, not a replacement for Sentry’s device highlights or Clairvoyant’s enemy highlights. Cockatrice lists a 30% Crit Chance increase and 10x optical zoom in the current record, but it does not supply the enemy, device, or trap highlights in this decision. Pick either when that non-highlighting benefit is the actual gap in your build.
The practical sequence is therefore narrow: use Clairvoyant for nearby enemies, Stalker for enemies behind cover while aiming, Sentry for cameras and turrets, and Doomsayer for traps and explosives. Use The Oracle when a single scan must cover several of those categories and you accept its extra Capacity and clutter. If one focused problem keeps recurring, a focused optic supplies the needed information without paying for highlight families you will rarely use. Once those current choices are clear, the remaining confusion comes from older “threat” names that sound like they belong in this list but do not map cleanly onto it.
Threat Analysis and Threat Detector are legacy labels, not current highlighting choices
If a search result puts Threat Analysis beside “threat detection,” read the effect before trusting the name. The supported record for Threat Analysis is +2% Mitigation Chance: it belongs to a defensive calculation, not to enemy detection, scanning, or highlighting. In other words, the useful translation is:
| Search label | Supported meaning |
|---|---|
| Threat Analysis | Mitigation Chance, not an enemy highlight |
That name also comes from an older optical-mod lineage. Threat Analysis is recorded as having replaced Trajectory Generator in Patch 1.5, which helps explain why it appears in pre-2.0 Kiroshi or Ocular System pages. The historical context does not turn its mitigation bonus into a scanner effect, and it does not make the old mod vocabulary a current loadout recommendation.
Threat Detector is a different legacy record. Its old role was to highlight enemies when an enemy detected V, which is close enough to current scanner language to cause confusion. However, current sources disagree about whether a standalone Rare Ocular System page represents live post-2.0 content: newer system documentation says the Ocular slot became Face and cyberware mods were removed, while a dated database page still preserves the old Threat Detector entry. Treat that conflict as stale or unresolved terminology. There is no supported current vendor route to give for Threat Detector.
Target Analysis should not be grouped with either highlighting or detection. Its legacy/database description says that weapons become non-lethal, headshots do not deal additional damage, and Smart weapons primarily target limbs. Those are targeting and damage-behavior changes, not a way to reveal enemies, cameras, or traps. Like Threat Analysis, the record uses the old Ocular System/Kiroshi fragment model, so its presence in a database is evidence of the version model being documented—not proof that it belongs in the current Face-optic comparison.
The safe comparison is therefore between meanings, not names. If you want nearby-enemy highlights, enemies behind cover while aiming, or a broader scan package, use the current Face-slot logic from the previous section—Clairvoyant, Stalker, or The Oracle, respectively—rather than silently substituting a page named Threat Detector. The current optics are the supported highlighting choices; Threat Analysis is mitigation, Target Analysis is legacy targeting behavior, and Threat Detector is an ambiguous old label.
Use the terminology as a version check when reading an older guide. Ocular System, cyberware mod, old rarity or price language, and standalone Threat Detector instructions all signal that you should stop and identify which ruleset the page describes. The same warning applies to pre-2.0 Kerenzikov advice that carries over old rarity, Reflexes gates, prices, or blocking triggers. For the current system, keep the Face-optic choice tied to the information problem you identified, and do not treat a legacy name as evidence that a different highlight effect is available. With those labels disambiguated, the remaining decision is the current loadout and the live tooltip for the item in front of you.
Use the live tooltip to choose a focused loadout and buy it at the right tier
The purchase step should follow the problem you actually want to solve, not the name of an older database entry. Kerenzikov and ordinary Kiroshi optics are current cyberware choices found through ripperdoc inventories as the relevant player levels and tiers become available. They do not need a special quest reward or one guaranteed clinic, and the published first-purchase expectations for Kerenzikov differ—some records place it around level 10, others around level 20. Treat those numbers as clues to check stock, not as a rule to build around. The same caution applies to The Oracle: a level-30 starting expectation is documented, but its tier and expansion context still belong to the live vendor inventory.
Before spending eddies or Cyberware Capacity, open the item tooltip and verify the tier, Capacity cost, trigger or scan condition, duration, cooldown, range, and whether that exact item is available from the ripperdoc in front of you. This matters because current databases disagree on Kerenzikov’s tier-specific duration and cooldown, and the Kiroshi ranges change with tier. The tooltip also tells you whether an upgrade has changed the number that matters to your build. Do not carry over pre-2.0 rarity, prices, attribute gates, or a single-clinic guarantee from an older guide.
Use the tooltip to make one of these focused decisions:
- Mobile rifle, SMG, or throwable build: Start with Kerenzikov if you regularly aim while sliding, dodging, or Dashing. Add Kerenzikov Boost System only if stamina-free shooting and extra time slow justify its Frontal Cortex Capacity; choose Defenzikov instead when the dangerous moment is the transition after the slow ends. If your plan is aerial Assault Rifle or SMG fire, confirm the 15 Reflexes, Gundancer, and Aerial Combat prerequisites before paying for that route.
- Cover-oriented Tech Weapon build: Choose Stalker when the information you need is enemies hidden behind cover while you aim. Its value comes from that narrow firing problem, so there is no reason to pay for a broad scan package if cover is the only recurring obstruction.
- Trap- or device-focused approach: Choose Doomsayer for explosives and traps near the crosshair, or Sentry for cameras and turrets. Select the one that answers the hazard you keep missing; neither requires Kerenzikov to do its Face-slot job.
- Broad scanner: Choose The Oracle only when one scan genuinely needs enemy, behind-cover, camera/turret, and explosive/trap highlights. Its combined coverage can replace several focused questions, but its higher Capacity cost and visual noise are part of the price. If you mostly need nearby enemies, a focused optic such as Clairvoyant can leave more Capacity for the rest of the build.
For a melee-only or quickhack-only character, leave Kerenzikov on the shelf and spend that Capacity elsewhere. Its value depends on repeatedly aiming supported ranged attacks during movement, and its Reflexes attunement favors a ranged build that can use that pattern.
At the next ripperdoc visit, inspect the current stock, select the smallest Kerenzikov package or Face optic that matches your movement and information need, and buy it only at the tier whose live tooltip supports the way you intend to play. Retest the trigger or scan after an upgrade or patch, then leave the obsolete Ocular-mod instructions behind.