How to Unlock and Restore Mines in Death Stranding 2: On the Beach
In Death Stranding 2: On the Beach, the sprawling, resource-hungry landscape of Australia demands a new approach to logistics. While scavenging and deliveries will get you started, the real key to rebuilding infrastructure lies in restoring the continent's dormant mines—a game-changing mechanic that unlocks massive, reliable resource hauls. This guide will walk you through how to unlock, restore, and upgrade these vital facilities.
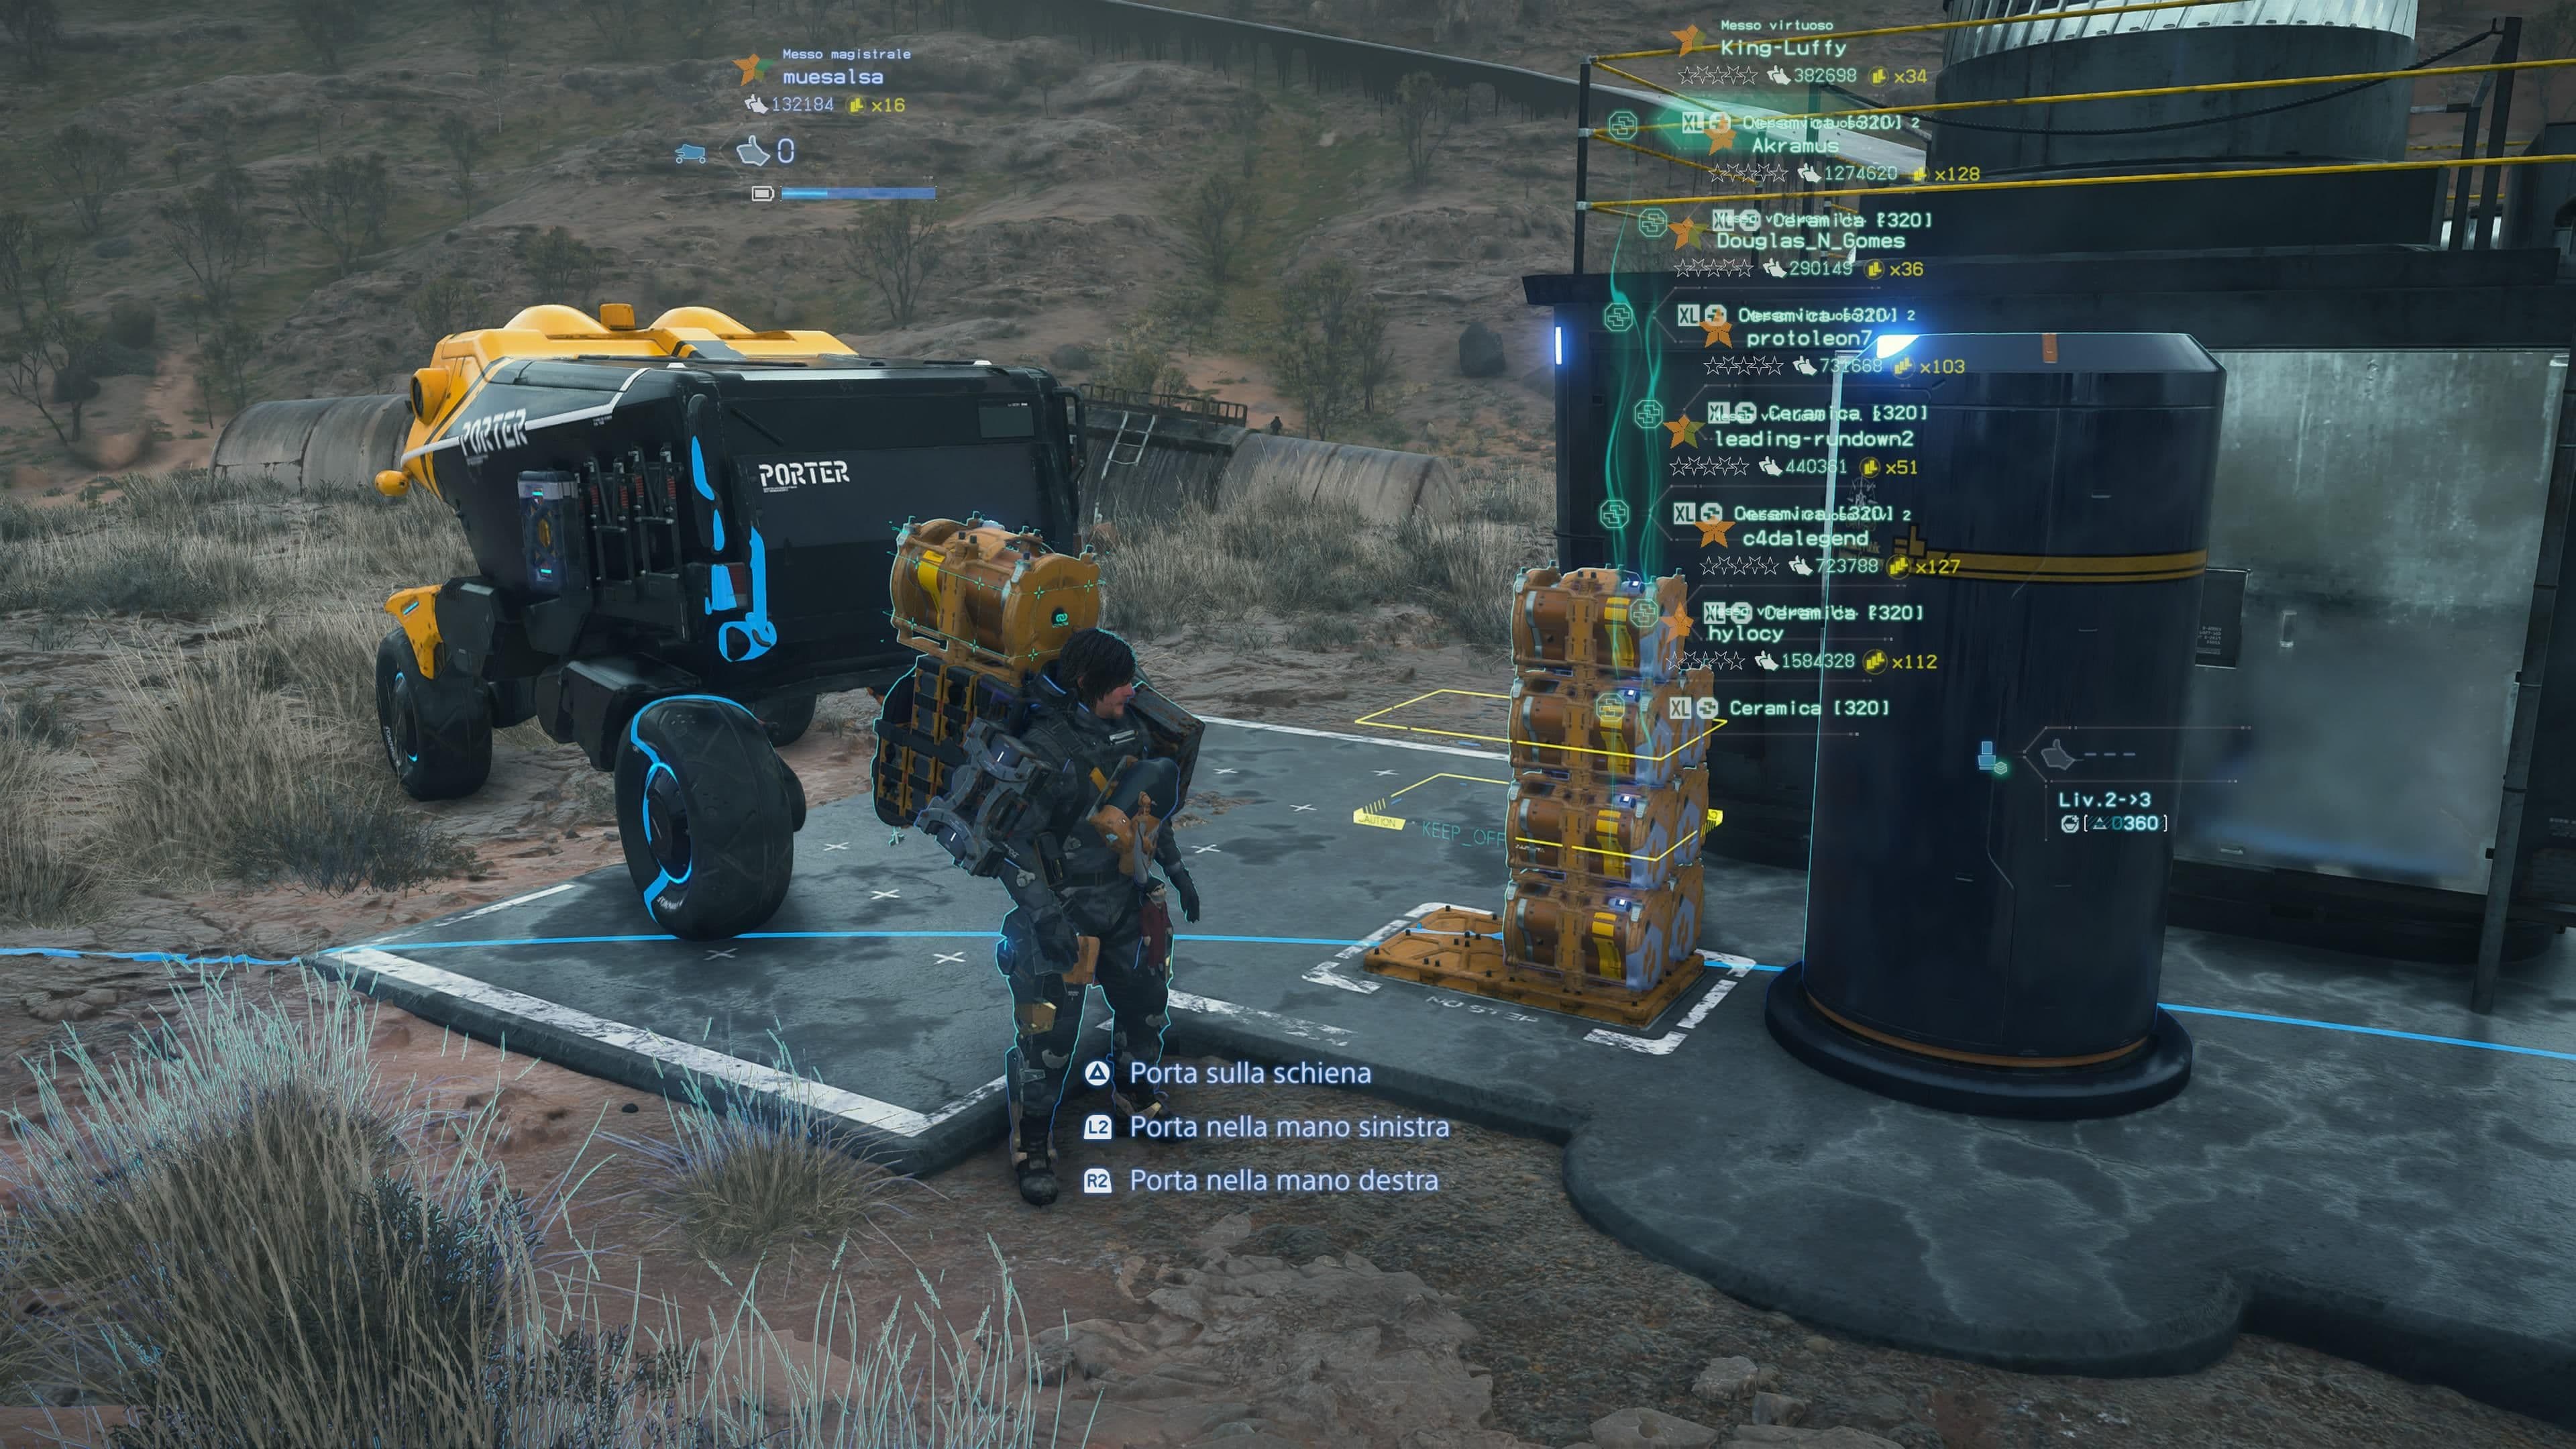
A mining machine used for extracting resources in the field.
How to Unlock the Mining System
The entire mining system is locked behind a key story mission. You’ll gain access after completing Main Order 13: Restore the Monorail and Deliver Special Alloys to F1. This mission is your gateway to the Mine North of F1, and more importantly, it teaches you the core loop: repairing infrastructure to unlock new, high-yield resource generation. Once this order is complete, the concept of restoring mines for materials becomes available across Australia.
The Two-Step Process: Restoration and Operation
Getting a mine working is a two-part process: first you restore it, then you operate it.
Mine Restoration: To activate a dilapidated mine, you must first travel to its location and interact with its terminal. Here, you’ll need to deposit specific materials. For large mines (typically connected to the monorail network), this usually means contributing Special Alloys and Resins. Small mines (standalone facilities) primarily require Special Alloys. If the mine is outside the Chiral Network, you’re on the hook for all these materials yourself.
PRO TIPIf a mine is inside the Chiral Network, other players can contribute to its restoration. Always check the terminal—you might find a community project already half-finished!
- Mine Operation: Once restored, the mine doesn’t automatically produce goods. To collect resources, you must pay a one-time cost in Chiral Crystals at the terminal. This is an all-or-nothing transaction that instantly grants you the mine’s entire yield—you can’t take a partial amount. Think of Chiral Crystals as the fuel that accelerates the mine’s natural production cycle.
Enhancing Your Investment: Upgrades and Community Help
Your relationship with a mine doesn’t end after the first haul. To maximize efficiency, you should consider upgrading them.
- Mine Upgrading: Return to any restored mine’s terminal and you’ll find an option to upgrade it. This requires another deposit of materials (often more Special Alloys and Resins), but the payoff is worth it: each upgrade permanently increases the mine’s yield per Chiral Crystal payment and boosts its damage resistance against Timefall. It’s a long-term investment that pays for itself after just a few mining sessions.
- Chiral Network Contribution: This community aspect is crucial for upgrades too. At the terminal, you can view ongoing community material contributions. Even if you can’t spare the thousands of kilograms needed for an upgrade, you can donate a portion. Conversely, you might arrive to find other porters have already supplied most of what’s needed, letting you finish the job with minimal effort.
With the mines restored, you’ll have a powerful engine for gathering the ceramics, alloys, metals, and resins needed to reshape Australia. The hard part is over—now it's time to put those resources to work.
Best Locations to Farm Special Alloys in Death Stranding 2
Special Alloys are the lifeblood of late-game infrastructure in Death Stranding 2: On the Beach, but they’re frustratingly scarce from standard supply runs. When you need hundreds or even thousands of units to upgrade structures or complete monorail projects, you need a dedicated, reliable source. Here’s where to get them.
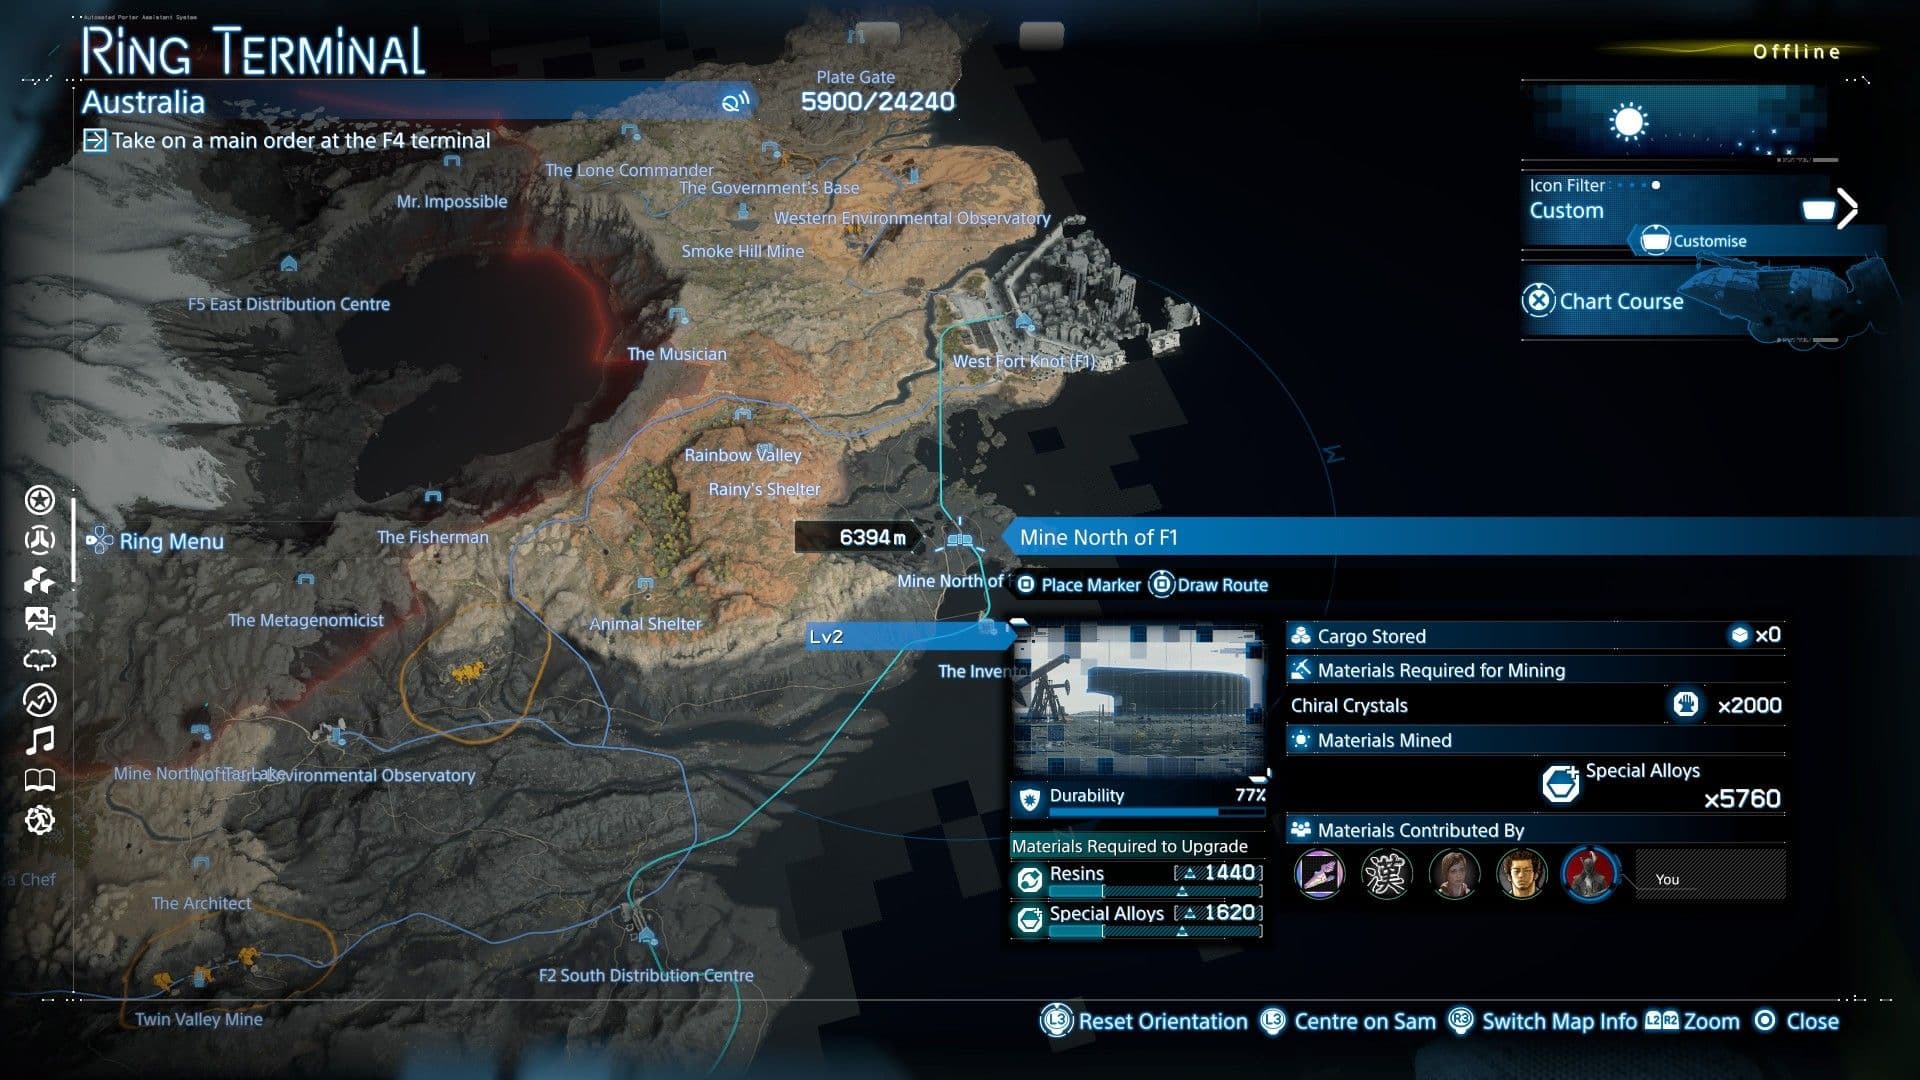
The Mine North of F1 is a primary source for Special Alloys.
Your primary and most efficient source is the Mine North of F1, a large mine on the western coast, north of West Fort Knot. This is the mine you unlock during Main Order 13, and it’s directly connected to the monorail network. Once restored, you can exchange 2000 Chiral Crystals for a massive haul of Special Alloys x4800. This single transaction nets you nearly half a metric ton of the material, enough to fuel major construction for hours. The monorail connection makes transporting this mountain of metal back to West Fort Knot or the DHV Magellan trivial—just load it onto a rail car and send it directly to a facility’s private locker.
For a solid secondary source, head to the Savanna Mine, a small mine located on an island on the eastern side of the map, between the northern desert and southern mountains. It’s not connected to the monorail, but its cost-to-yield ratio is excellent. For just 900 Chiral Crystals, you’ll receive Special Alloys x2400. You’ll need a sturdy vehicle like the Pickup Off-Roader to haul this cargo out, but it’s a fantastic supplement when you need a top-up without draining your entire Chiral Crystal reserve.
Always check the shared cargo lockers at major facilities like the DHV Magellan. Porters often dump excess Special Alloys there, and you can claim them for free to supplement your mine hauls.
If you’re caught short on Chiral Crystals and need a quick infusion, consider Brigand Camp Raiding. Across Australia, hostile camps sometimes contain XL resource containers holding Special Alloys. Use your [R1] scanner to sweep the area for these rare containers, which can hold up to 240 units. It’s less consistent than mining, but it requires no upfront crystal investment.
With the Mine North of F1 as your workhorse and the Savanna Mine as your backup, you’ll never face a Special Alloy shortage again. Stockpile those crystals, and you can fabricate and upgrade to your heart’s content.
Best Locations to Farm Ceramics in Death Stranding 2
Ceramics are the backbone of any major construction project in Death Stranding 2: On the Beach, and when you need them in bulk, the mines are your best bet. Forging highways and upgrading critical structures demands thousands of units, and luckily, two dedicated mines can keep your stockpile overflowing.
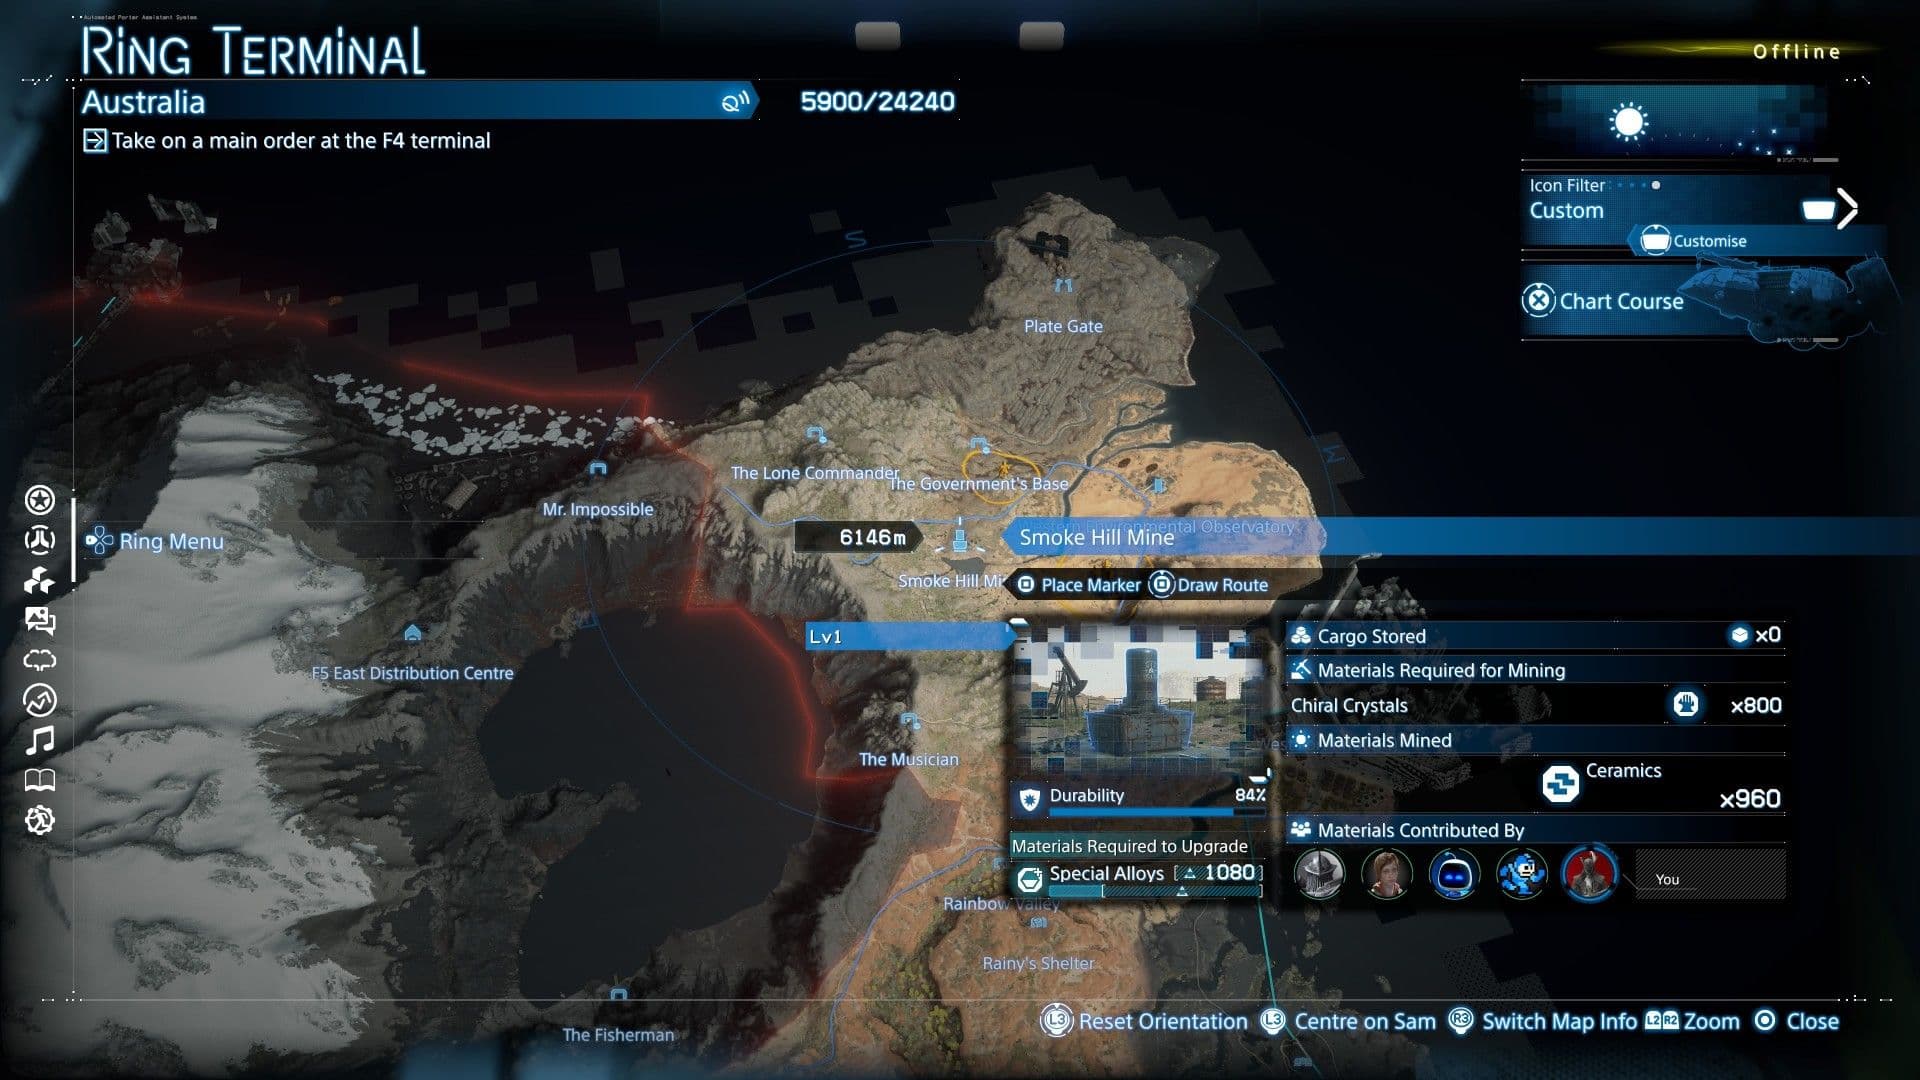
The Smoke Hill Mine is a primary source for Ceramics.
Your primary ceramic hub is the Mine North of Tar Lake, a large mine located east of the Northern Environmental Observatory. This is your workhorse. At Level 1, you can exchange 1600 Chiral Crystals for a massive haul of Ceramics x3200. Its connection to the monorail network makes transporting this enormous payload to your private locker anywhere on the line incredibly efficient—a game-changer for late-game builds.
For a smaller, more accessible source, head to the Smoke Hill Mine. This small mine is located north of The Government’s Base and is restored via Sub Order 104: Restore Smoke Hill Mine. It’s a perfect early-to-mid-game option. At Level 1, it costs 800 Chiral Crystals to get Ceramics x960. While the yield is smaller, the lower crystal cost and simpler location (no monorail needed) make it a great starter farm.
Prioritize unlocking the Mine North of Tar Lake for your biggest ceramic projects. The monorail link means you can move thousands of units across Australia in seconds, saving you hours of grueling cargo runs with a truck.
If you've been manually scrounging ceramics from postboxes or enemy camps, trust me, switching to mine farming feels like unlocking a cheat code. With these two locations secured, you'll never face a material shortage for paving the future of Australia again. Let's build.
How to Farm Other Essential Materials in Australia
With your mines for Special Alloys and Ceramics humming, it's time to secure the other essential resources that power Death Stranding 2's infrastructure. Metals, Resins, and Chemicals are the lifeblood of fabrication, and Australia hides some of its best sources in remote, challenging locations.
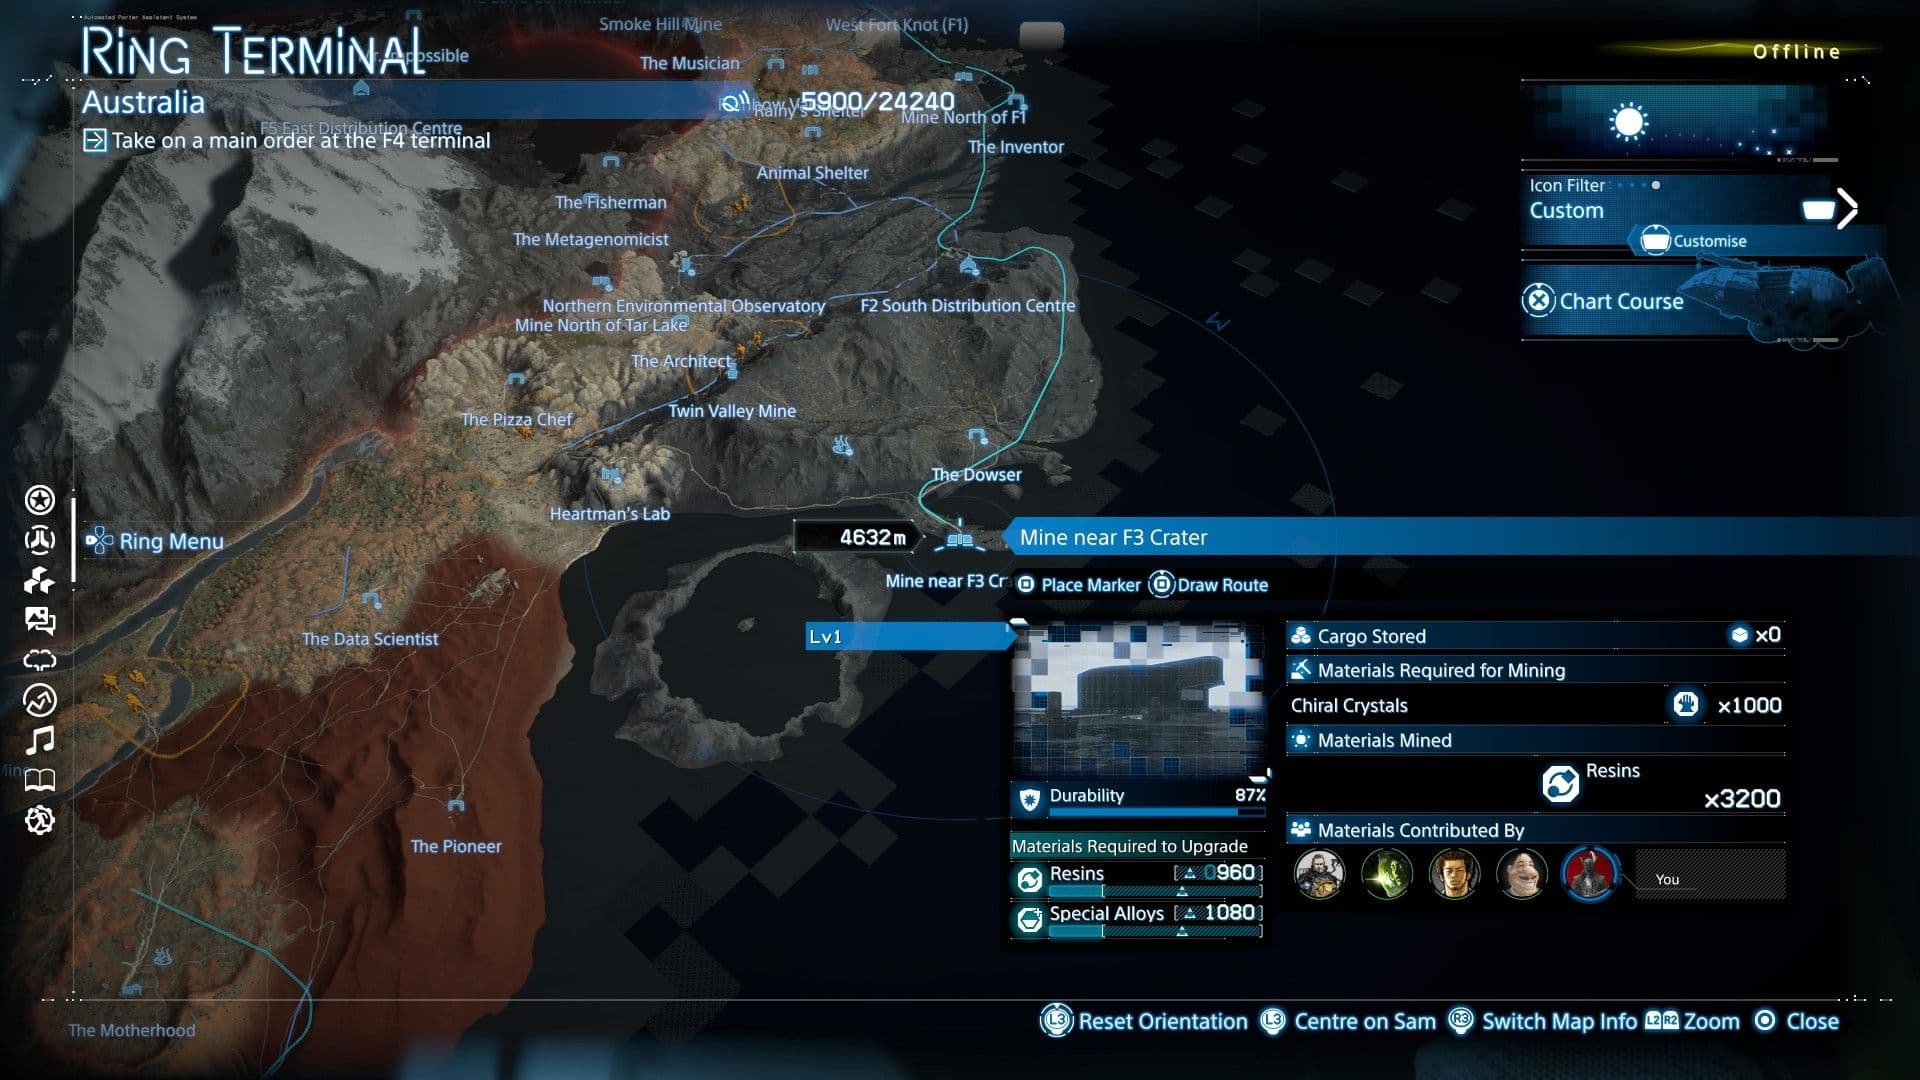
The Mine near F3 Crater is a primary source for Resin.
Let's chart the best spots to keep your stockpiles overflowing.
Securing a Reliable Metal Supply
For the heavy-duty materials needed for roads and structures, you'll want to target the mines dedicated to Metals.
Your primary source is the Northeastern Mine, a large mine located just northwest of The Motherhood in the northeastern desert oasis. This is a monorail-connected facility, and for an investment of 1200 Chiral Crystals, it yields a massive 4800 Metals. It's the most efficient way to gather bulk metal for late-game projects.
For a smaller, more accessible cache, head to the South Edge Mine. This small mine is located directly south of the Southern Environmental Observatory (or southwest of South Fort Knot). It’s perfect for topping up your supplies while working on the southern Auto-Pavers, costing only 600 Chiral Crystals for 1200 Metals.
Use the Northeastern Mine for your big, planned construction pushes, and keep the South Edge Mine in your back pocket for quick top-ups when you're in the region. The monorail makes the former incredibly convenient.
Farming Resins for Fabrication
Nearly every piece of gear you craft requires Resins, making these mines non-negotiable. Your two best options are both large mines connected to the monorail network.
First, seek out the Mine Near F3 Crater on the northern coast peninsula, west of a massive crater lake. Once its area connects to the Chiral Network (around Order No. 23), you can exchange 1000 Chiral Crystals for 3200 Resins. Repairing it (which costs 900 Special Alloys and 480 Resin) also restores a monorail link to The Dowser, making transport a breeze.
Your second major resin hub is the Mine North of F6 along the southeastern coast, south of The Tar Therapist. At Level 2, this mine offers an even better yield, providing 3840 Resins for the same 1000 Chiral Crystals.
The Lone Chemical Mine
Chemicals are the rarest of the standard materials, with only one dedicated source in all of Australia. You’ll find it at the Twin Valley Mine, a small mine located north of the Tar Lake area, past The Architect.
A word of caution: this mine is situated within an enemy camp. The easiest approach is to follow the road east from the F2 South Distribution Center, just past Auto-Paver AUS-HIGHWAY-03-04. Be prepared for a fight or a stealthy incursion. Your reward for clearing the area and restoring the mine is 720 Chemicals for 1200 Chiral Crystals.
⚠️ Watch out: The Twin Valley Mine is in hostile territory. Scout the camp with a Watchtower first, bring a vehicle to haul the chemical containers, and be ready for a scrap. Once cleared, the camp stays inactive for a while, giving you a safe window to operate the mine.
With these mines mapped and operational, you'll have a steady, renewable pipeline of every essential material Death Stranding 2 demands. No more scrounging—just strategic planning and efficient hauling. Let's get building.
Best Transport Strategies for Mine Materials
You've restored the mines in Death Stranding 2: On the Beach and paid the Chiral Crystals—now comes the real challenge. Moving literal tonnes of metal, ceramic, and alloys from these remote pits to where they're needed is the true logistical puzzle of late-game Australia. Here’s how to master the art of bulk transport.
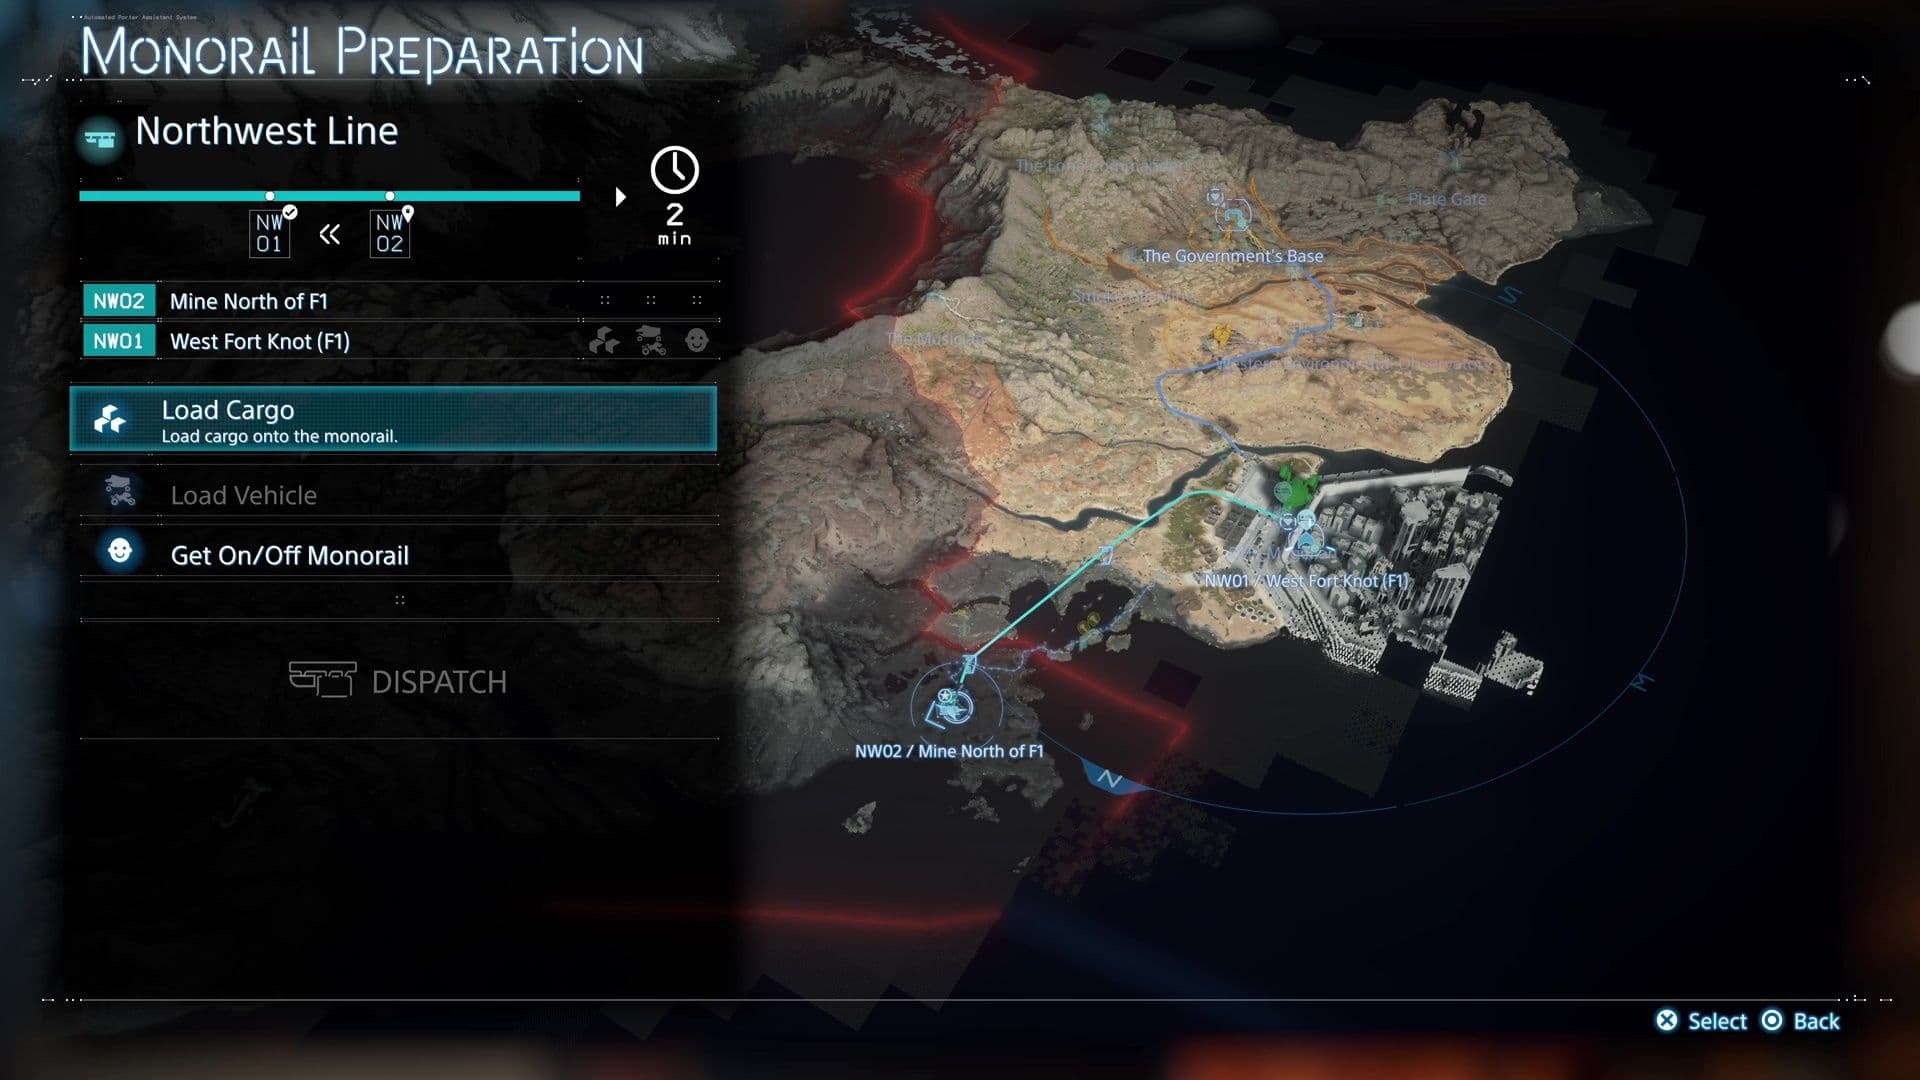
Building monorails requires significant amounts of Chiral Crystals and Special Alloys.
Monorail: The Ultimate Bulk Hauler
For the large mines connected to the network—like the Mine North of F1 or the Mine Near F3 Crater—your best friend is the monorail. These facilities have a dedicated Monorail Station. Approach the terminal, select your cargo, and press [Square] to load cargo for delivery to Private Lockers. This instantly teleports hundreds of kilograms of material to your personal storage at any connected facility, bypassing treacherous terrain entirely. It’s the fastest, safest way to move the massive yields from these central hubs.
Before you pay the Chiral Crystals to harvest a large mine, make sure your destination’s private locker has enough space. You can’t take a partial load; it’s all or nothing.
Advanced Monorail Tactics: Vehicle Stacking
Here’s a trick that feels like cheating: you can transport a fully loaded vehicle on the monorail. Drive your Pickup Off-Roader—packed to the brim with extra materials from a nearby small mine or bandit camp—right onto the Monorail Station platform and park it on the monorail car. This lets you move thousands of units of metal or ceramic across the map in seconds. It’s perfect for consolidating resources from multiple sources into one super-delivery to a major construction project.
The Pickup Off-Roader: Your Ground-Based Workhorse
For the small, off-grid mines like the South Edge Mine or Twin Valley Mine, the monorail isn’t an option. This is where the Pickup Off-Roader from your Fabrication Menu becomes essential. With a cargo capacity of approximately 900kg and built-in Timefall protection, it’s the only vehicle rugged enough to navigate the rough terrain to these sites and haul back their entire yield in one trip. Trust me, trying this with a Tri-Cruiser is a recipe for frustration and multiple journeys.
Call for Backup: Using Supply Request Signs
Sometimes you’re just a few hundred ceramics short of finishing a road paver, and driving all the way back to a mine feels excessive. This is where the community comes in. In high-traffic areas like major roads or outside facility entrances, open your menu and use [Options] > Signs to place a Supply Request Sign. Other players can see these and donate materials directly from their own stockpiles. It’s not for moving mine hauls, but for topping off projects, it’s a fantastic time-saver.
With the monorail handling your bulk hauls from large mines, the Pickup Off-Roader conquering the remote small mines, and the community ready to fill the gaps, you’ve got a complete logistics network. Now, those mountains of materials are no longer a burden—they’re your ticket to rebuilding Australia.
How to Farm Chiral Crystals for Mining Operations
Your mines are restored, your transport routes are ready—but those silent, humming machines demand payment. Chiral Crystals are the lifeblood of your mining empire in Death Stranding 2: On the Beach, and you'll need a mountain of them. The cheapest mine costs 600 crystals, while the most expensive demands 2,000. If you want to keep the continent's infrastructure humming, you need a reliable, high-yield farm. Here's how to build your crystal stockpile.

Defeating gold BTs is a primary method for farming Chiral Crystals.
Primary Method: BT Hunting in Australia
This is your most direct and rewarding path. BT Zones across Australia are your crystal quarries. When you defeat a BT—whether through stealth takedowns or all-out combat—they drop substantial quantities of Chiral Crystals. The larger the BT, the bigger the payout. This method turns tense, eerie encounters into lucrative resource runs.
Equip a Harmonica before entering a BT zone. Playing it can lure BTs closer together, letting you take out multiple targets with a single Hematic grenade or weapon burst for maximum crystal efficiency.
Supplemental Crystal Sources
While BT hunting is king, keep an eye out for these passive sources to top off your reserves:
- Tar Pools: Scout the perimeters of your mines and other remote areas. You'll often find Chiral Crystals growing in and around these tar pools. A quick detour can net you a few hundred crystals without a fight.
- Timefall Harvesting: When Timefall begins, the world changes. Not only does the rain accelerate deterioration, but Chiral Crystals also appear more frequently on the landscape during active rain. Use these weather events as a cue to go on a focused crystal-gathering run.
A Key Contact for Context
As you establish this operation, you might cross paths with a crucial NPC. On a small island north of the Mine North of F1, you'll find The Inventor. This character provides essential context on monorail and mining technology during Main Order 13, helping you understand the full scope of the logistical network you're powering with your crystals.
Stockpile wisely, porter. With a steady flow of Chiral Crystals, you hold the key to unlocking Australia's vast material wealth and rebuilding a broken world. Let's dig.
Death Stranding 2 Mine Rewards and Trophies
You’ve done the hard work—hauling materials, restoring infrastructure, and fighting BTs to power up the mines across Australia. Now, let’s talk payoff. In Death Stranding 2: On the Beach, a fully operational network of mines isn’t just about raw materials; it’s the key to unlocking powerful rewards, trophies, and the ability to truly reshape the continent.
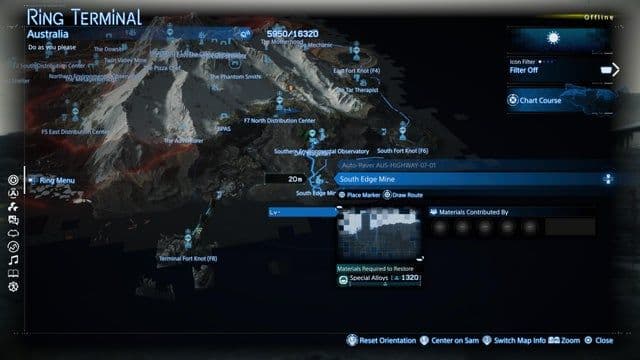
Map showing the South Edge Mine location and resource yields.
The Ultimate Reward: The Dig! Dig! Dig! Trophy
Your most immediate and satisfying reward comes from simply getting the mines working. To unlock the Dig! Dig! Dig! trophy, you just need to restore any three mines to working order. It doesn’t matter if they’re large monorail-connected mines or small, isolated ones. The moment you activate the third mine’s terminal, the trophy will pop, celebrating your contribution to rebuilding Australia’s industrial backbone.
Why Mines Are Your Endgame Engine
Beyond the trophy, mines fundamentally change your late-game resource economy. While you can always scavenge from Brigand Camps for XL Resource Containers (which hold 240 units of raw materials), mines provide a reliable, massive, and repeatable source of specific materials. This is especially crucial for the game’s most ambitious projects.
Don’t just rely on mines for everything. Use them strategically to supplement rare materials like Special Alloys, while continuing to level up facilities and Claim Materials from their terminals for a steady, passive income of common resources.
Connecting the Continent and Its People
Restoring mines also deepens your connection to the people of Australia. For example, finding the Mine North of F6 on the southeastern coast is easier if you use the shelter of The Tar Therapist as a landmark. This large mine becomes a vital source of Resins for the region, and connecting it via monorail creates a lifeline for you and other porters. Every mine you bring online strengthens the Chiral Network, making material contributions from other players more frequent and accelerating upgrades.
With your mines operational, you’re no longer just a porter—you’re an industrial foreman. You have the means to build every road, reinforce every structure, and fabricate any piece of gear you can imagine. The landscape of Australia is now truly yours to shape.