
How to Reach the Roboticist in Death Stranding
The trek to the Roboticist Shelter is one of Death Stranding's most perilous journeys—a mountain pass crawling with BTs that will test your navigation skills to the limit. Your reward, the coveted All-Terrain Skeleton, is worth every careful step. Here's how to prepare for and survive the climb.
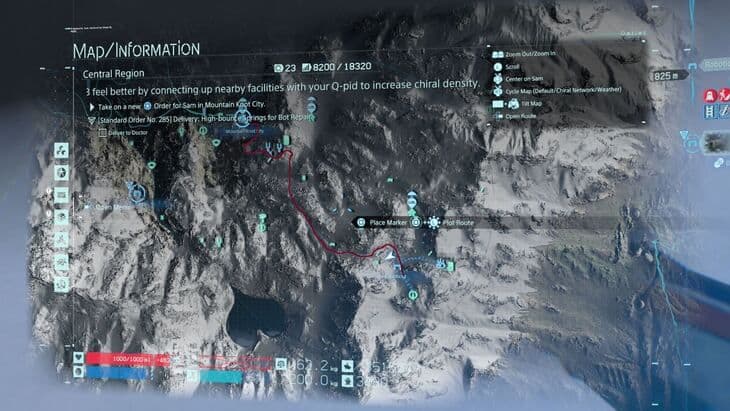
The map route to the Roboticist's shelter.
First, you must be in Episode 6 and have reached Mountain Knot City in the game's Central Region. This is the point where Sam operates without his BB, so you'll need to rely on your own senses. To start the quest, head to the terminal in Mountain Knot City and accept Order No. 47: High-bounce Spring Delivery. This order tasks you with delivering a package to the Roboticist, a prepper located in the mountains southeast of the city.
The path between Mountain Knot City and the Roboticist Shelter is notoriously dangerous, filled with Beached Things (BTs) that often cluster near eroded ruins. Your primary strategy should be avoidance.
- Stealth is Key: Press [C] to crouch and move slowly. Hold [R1] to hold your breath when the Odradek starts spinning wildly. Scan the ground carefully for the subtle ripples and handprints that indicate a BT's presence.
- Prepare for Confrontation: If you're spotted, have EX-grenades ready. Throwing these will cause BTs to flee, giving you a window to escape. For a more permanent solution, you can sneak up close to a BT and press [O] to cut its umbilical cord, sending it back to the Beach.
Before you leave, check the map for ziplines left by other players. A network can let you sail over the most dangerous BT zones. If you need to build your own, you'll need a Level 2 PCC and materials (240 Chemicals & 480 Special Alloys per zipline), but you can't fully connect a line to the Roboticist until she's on the network after this first delivery.
Once you successfully navigate the pass and deliver the package, speak with the Roboticist at her shelter terminal. She'll connect to the chiral network and, most importantly, grant you the blueprints for the All-Terrain Skeleton Level 1. With the shelter now on your map and the hardest part behind you, you're set to start crafting this game-changing gear.
How to Unlock and Craft the All-Terrain Skeleton in Death Stranding
You’ve braved the BT-infested mountains and delivered the package. Now, standing in the Roboticist Shelter after completing Order No. 47: High-bounce Spring Delivery, the real reward is in your hands: the blueprints for the All-Terrain Exo-Skeleton Level 1. This is where your mountain traversal in Death Stranding truly levels up.
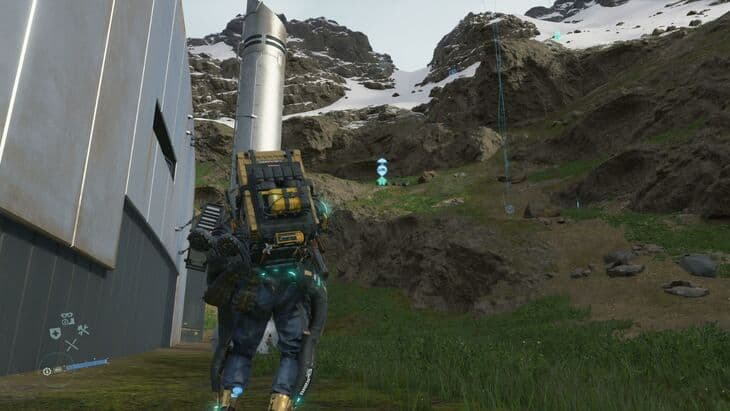
The All-Terrain Skeleton equipped for mountain traversal.
The Roboticist, grateful for the connection, grants you the blueprint immediately. To craft your first All-Terrain Skeleton, open Sam’s Fabrication Menu. You’ll need 140 Resins and 140 Ceramics—common materials you’ve likely stockpiled. Once fabricated, equip it from your suit’s exoskeleton slot.
Always carry a spare All-Terrain Skeleton in your private locker. If your current one breaks from damage or Timefall erosion, you can swap it out at any safehouse or postbox without losing progress.
This skeleton isn’t a one-and-done unlock. To get the superior All-Terrain Exo-Skeleton Level 2 and Level 3, you need to deepen your bond with the Roboticist. Keep delivering her Lost Cargo and accepting Standard Orders from her terminal. You’ll unlock Level 2 when you reach a Rank 3 connection level with her, and the top-tier Level 3 blueprint at Rank 4. Trust me, the stat boosts are worth the grind.
Remember, all exoskeletons run on battery. Your All-Terrain Skeleton will drain power as you move, especially when boosting or under heavy load. Recharge it via solar charging in sunlight, or by using a PCC to build a Generator at a rest stop. Running out of juice mid-delivery in deep snow is a surefire way to get stranded.
With the blueprint secured and the crafting recipe known, you’re ready to forge the tool that will conquer Death Stranding’s most unforgiving landscapes. Let’s get building.
All-Terrain Skeleton vs Power Skeleton: Performance Comparison
Choosing between the All-Terrain Skeleton and the Power Skeleton in Death Stranding is more than just a gear check—it's about defining your approach to the game's toughest landscapes. One is your steadfast anchor in a blizzard, while the other is the undisputed king of the heavy haul. Let's break down the hard numbers so you can make the right call for any delivery.
Speed: Snow vs. Roads
This is where the two skeletons diverge most dramatically. In snowy terrain, the All-Terrain Skeleton 3 (ATS3) is in a league of its own. It maintains a steady 14.1 kph whether you're Sprinting or Jogging, giving you reliable, stamina-efficient movement through the worst conditions. The Power Skeleton 3 (PS3), by comparison, struggles here, with a Sprint speed of only 8.3 kph and a Jog speed of 6.0 kph.
On flat roads, however, the tables turn slightly. Both the ATS3 and PS3 share the same Sprint speed of 27.0 kph. This is solid, but notably slower than the Speed Skeleton 3's blistering 32.3 kph. Their shared Jog speed is the universal standard of 15.5 kph, a speed that remains constant regardless of which skeleton you wear.
For pure snow traversal, the ATS3 is unmatched. Its ability to Jog at the same speed it Sprints means you can cover ground efficiently without burning through your stamina bar.
Stability & Load Capacity
Their secondary stats define their core purpose. The All-Terrain Skeleton specializes in preventing slipping in mud, snow, and rivers. It’s the skeleton you wear when the ground itself is your enemy, offering superior footing that lets you maintain momentum where others would stumble.
The Power Skeleton is built for brute strength. It offers massive weight capacity and legendary stability under load. A key feature is its wider "stair steps" for capacity—40 kg per step compared to the standard 20 kg. This means you can carry significantly more weight before your balance meter becomes unstable, allowing you to haul enormous loads with confidence.
The Impact of Accessories and Overload
Two critical mechanics affect both skeletons equally, and understanding them prevents nasty surprises.
First, using Floating Carriers tethered to Sam imposes a flat 16.7% speed reduction on your movement. This penalty applies whether you're using one or two carriers, and it's roughly the same if they're empty or full. Trust me, you'll feel this drag, especially when trying to Sprint.
Second, if you push beyond your Max Stated Capacity (when your weight indicator turns red), you enter a Trudge state. Here, your speed drops to a painfully slow but consistent 2.25 kph, regardless of how much over capacity you are or which skeleton you're wearing. This makes trudging wildly inefficient—making two trips is almost always faster.
Which Skeleton Should You Choose?
Your delivery route decides everything.
- Pick the All-Terrain Skeleton 3 when your path leads through deep snow, across rocky riverbeds, or over slick, muddy slopes. Its consistent speed and anti-slip properties are lifesavers.
- Pick the Power Skeleton 3 when you have a massive, multi-hundred-kg haul across relatively flat ground (like desert highways or established roads). Its superior load capacity and stability under weight are unparalleled.
In short, the ATS3 masters the environment, while the PS3 masters the cargo. With these stats in mind, you can gear up perfectly for the journey ahead.
Best Mountain Mountaineer Loadout for Snowy Regions
The snow-covered peaks of Death Stranding’s northern mountains are a breathtaking yet brutal final exam for your delivery skills. With the right gear, however, you can conquer the altitude, deep snow, and sudden storms to become the ultimate mountain porter.
Rocky terrain can be just as treacherous as snow without the right skeleton.
The Essential Mountain Kit
This environment demands a specialized loadout built around your All-Terrain Skeleton 3 (ATS3). While we've covered its unmatched snow speed of 14.1 kph, you need to support it with gear that addresses the region's other lethal hazards. First, equip Thermal Boots. Found in the Northern Mountains, these are non-negotiable, as they completely negate the cold-induced stamina drain that can stop you in your tracks. For your accessory slot, always carry a Weather Talisman. This item provides critical flood and storm prediction in mountain regions, giving you precious minutes to find shelter or reroute.
Your tools are just as important. Pack at least three Level 2 Climbing Anchors, which become essential for controlled descents down sheer slopes. For creating infrastructure, bring two Level 2 PCCs. Remember, each one costs 240 Chemicals and 480 Special Alloys to fabricate and is used to build Ziplines.
Before a major mountain trek, fabricate your PCCs and anchors at a shelter with a terminal. Carrying the raw materials is far heavier and less efficient.
Mastering Mountain Movement and Cargo
Navigation here is a mix of patient climbing and strategic infrastructure. For long-distance travel across chasms, nothing beats Zipline Traversal. Open your map with [Options], view the traverse graph to plan your route, then press [X] to mount a line. You’ll zip along at a consistent 55.0 kph, unaffected by weight or incline—this is your key to bypassing the worst terrain.
When you must walk, especially with a heavy load, Cargo Stacking is critical. In the Snowy Mountains, always keep your cargo stack flush with Sam’s shoulders. A tall, unbalanced stack acts like a sail in the high winds, making you dangerously unstable and prone to devastating falls.
Putting It All Together
Your journey might look like this: Use a Zipline network to reach a high-altitude prepper, then dismount for a short, careful walk in your ATS3 and Thermal Boots. Your Weather Talisman warns of an approaching whiteout, so you quickly deploy a Level 2 Climbing Anchor to secure yourself and wait it out. Once the storm passes, you carefully balance your delivery stack and complete the final trek.
⚠️ Watch out: Even with the ATS3, sprinting uphill in deep snow drains stamina and battery rapidly. A steady jog is often more sustainable for long climbs.
With the All-Terrain Skeleton as your foundation, supported by climate-specific gear and smart cargo management, these imposing peaks transform from an impassable barrier into your most rewarding delivery route. Stay balanced, watch the skies, and keep on keeping on.