
How to Start Disco Elysium on the First Day in Martinaise
Disco Elysium begins in a wrecked Whirling-in-Rags hostel, where your first morning is less about heroic detective work and more about figuring out what happened to you. Take your time here: the hotel room and cafeteria are your starting point and first investigation hub in Martinaise.
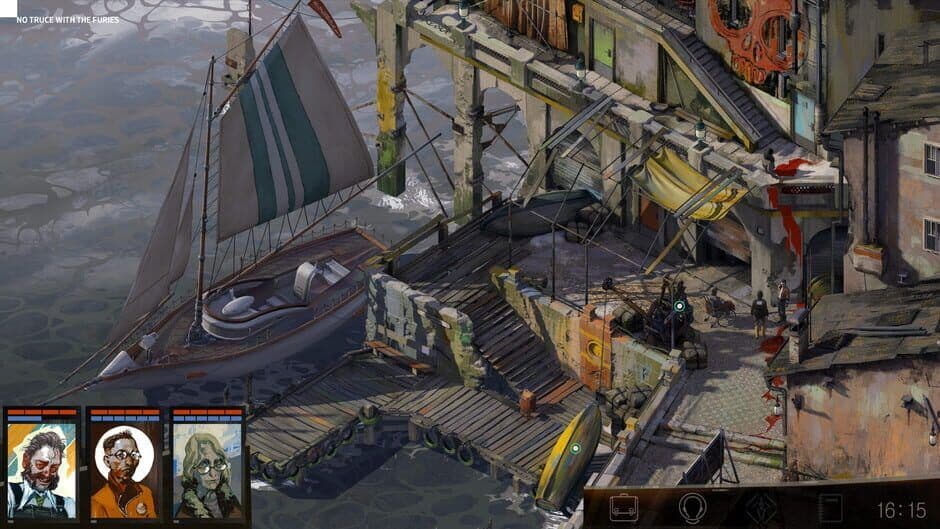
Navigating the interior of the Whirling-in-Rags.
Use [LMB] click to move and interact with the world. Hold [RMB] to highlight usable objects and exits, then inspect every highlighted hotspot before moving on. This catches important interactions, equipment, and clues that are easy to miss when you rush through the room.
Your immediate objective is to establish the first-day investigation: in the starting hotel room, wake up and recover your equipment, then head to the cafeteria. There, speak with Kim Kitsuragi, a Precinct 57 lieutenant and your assigned partner, who provides investigation context and accompanies you. After that, begin investigating the corpse behind the hostel.
Before leaving the Whirling-in-Rags hostel, sweep the starting hotel room and cafeteria for every highlighted hotspot. Disco Elysium often hides useful context in small environmental interactions.
That’s your first route through Disco Elysium: wake up, inspect the hotel, meet Kim Kitsuragi, and start the corpse investigation. Once those steps are complete, you’ll have a clear lead and a solid base for exploring Martinaise.
Best Character Setup for Disco Elysium Day 1
Your first build quietly shapes how Disco Elysium talks to you. Pick the right spread and Day 1 opens up through extra clues, emotional reactions, and practical solutions; pick a narrow build and other skills will still comment, but they may not be able to help as often.
Investing skill points wisely is crucial for surviving the first day.
Understand the Four Primary Attributes
Disco Elysium has four primary attributes: Intellect, Psyche, Physique, and Motorics. Each attribute governs six skills and related passive checks, so your starting attribute levels affect more than just visible dialogue options—they also determine which thoughts and observations reach you automatically.
- Intellect supports Logic, Encyclopedia, Rhetoric, Drama, Conceptualization, and Visual Calculus. This is the strongest foundation for deduction, factual knowledge, argument, and interpreting evidence.
- Psyche supports Volition, Inland Empire, Empathy, Authority, Esprit de Corps, and Suggestion. These skills help you manage yourself, read people, understand instinctive impressions, and influence conversations.
- Physique supports Endurance, Pain Threshold, Physical Instrument, Electrochemistry, Shivers, and Half Light. This group covers resilience, physical actions, bodily urges, city-wide intuition, and danger responses.
- Motorics supports Hand/Eye Coordination, Perception, Reaction Speed, Savoir Faire, Interfacing, and Composure. These skills are valuable for noticing details, handling objects, reacting quickly, moving stylishly, and maintaining control.
For a reliable Day 1 setup in Disco Elysium, avoid pushing one attribute so far that the others become irrelevant. A balanced spread gives you more chances to trigger passive checks across conversations and exploration, while a focused attribute creates a stronger identity and more frequent results from its six associated skills. Neither approach is wrong—the best choice depends on whether you want broad information or a more specialized detective.
Choose the attribute whose kinds of answers you enjoy most, then keep the other three usable. Disco Elysium rewards failure with new story content, so you do not need to pass every check to have a successful first day.
Spend Skill Points With a Plan
Skill points are your main progression tool. Spend points to improve skills, raise learning caps, unlock Thought Cabinet slots, or accept white-check retries. Improving a skill can make its future checks more favorable, while raising a learning cap lets you continue investing in that skill when its ordinary limit would otherwise stop you.
Do not spend every point immediately just because the upgrade is available. If a conversation or interaction has already revealed a difficult check, save a point when possible and use it on the relevant skill—or on a skill that can open a white-check retry. This lets you respond to the investigation instead of committing your entire build before you know what Day 1 demands.
Learning caps also make specialization a deliberate choice. When a skill reaches its cap, increasing the skill itself is no longer the only option: raise the learning cap first, use a Thought Cabinet slot when appropriate, or spend the point elsewhere. The game gives you several ways to shape the detective, so a failed check is information about your next upgrade rather than a reason to restart.
With a balanced attribute foundation and patient skill-point spending, your Disco Elysium detective will have more ways to investigate Martinaise on Day 1. Let the skills that speak most often guide your next investment, and you will build a character that feels distinct without locking yourself out of useful discoveries.
How to Use Disco Elysium Skill Checks on Day 1
Day 1 in Disco Elysium is less about passing every test and more about understanding what each check is asking from you. Some checks happen quietly in the background, while others put your detective’s fate on the line with a visible roll—so knowing the difference helps you choose when to push forward and when to prepare.
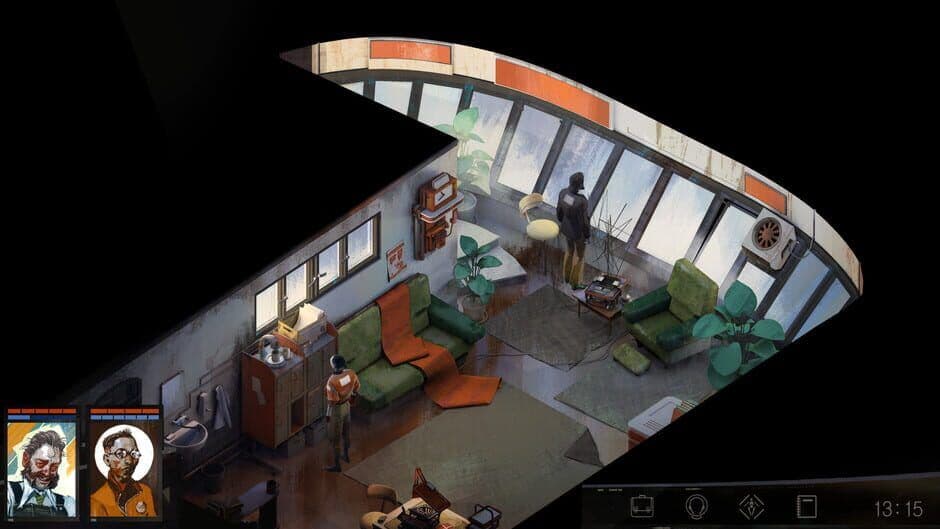
Your location and equipment can modify your check outcomes.
Passive Checks Reveal Information Automatically
Passive checks happen during dialogue and exploration when a skill tests automatically without dice. If the relevant skill is high enough, it reveals information, observations, or reactions without asking you to choose an option.
These checks are easy to miss because there is no roll to approve. A skill may simply notice something while you are speaking to someone or examining the environment. If nothing appears, that does not always mean you missed a required clue—your current skill may not be high enough to trigger the passive check.
Active Checks Use a 2d6 Roll
Active two-dice checks appear as selectable dialogue or interaction options. The game rolls 2d6, then adds the relevant skill and any modifiers to determine whether you succeed.
Your displayed chance is not the whole story. A low skill, an unfavorable clothing effect, or missing information can make the check risky, while a modifier from earlier dialogue or investigation can improve it. Before committing, read the option carefully and consider whether the result is worth the gamble.
Do not treat every available active check as mandatory. Disco Elysium often lets you continue after failure, so save your most uncertain attempts for moments where the possible reward matters.
Red Checks Are Usually One-Time Attempts
A red check is a one-time attempt that cannot normally be retried. Because the result is permanent for that opportunity, save before choosing a risky red check—especially if the action could affect your Health, Morale, or investigation progress.
Failure does not automatically end the story. It can lead to a different conversation, create a consequence, or change how you approach the next objective. Still, saving first gives you a way to reconsider if the outcome causes more trouble than you can safely handle.
White Checks Can Be Improved and Retried
A white check can be retried after you increase the relevant skill, change equipment, gain a modifier, or complete related dialogue. If the chance looks poor, do not rush into it. Explore other available conversations and interactions first, then return when you have improved the conditions.
Changing equipment can raise or lower the skill connected to the check, while related dialogue may unlock a modifier. Spending a skill point can also help, though you may prefer to wait until you know whether another route can improve the attempt for free.
What Happens When You Fail?
Failure in Disco Elysium is often a branch, not a dead end. A failed check can reveal new information, alter the conversation, or create a complication that changes your next step. Some failures may also damage Health or prevent immediate progress, so pay attention to the situation before clicking.
Use this simple routine on Day 1:
- Read the check type. Treat red checks as irreversible attempts and white checks as opportunities you can improve.
- Look for modifiers. Review whether dialogue, equipment, or another action can change the result.
- Check your meters. Avoid gambling on a dangerous interaction when your Health or Morale is already low.
- Save before red checks. For white checks, try other tasks first and return after improving your odds.
- Accept useful failures. If the story continues, note what changed instead of assuming you played incorrectly.
Once you recognize passive checks, active 2d6 rolls, red checks, and white checks, Disco Elysium’s uncertainty becomes much easier to manage. You do not need to win every roll—the real skill is knowing which failures you can afford and which attempts deserve preparation.
How to Manage Disco Elysium Health and Morale
Disco Elysium gives you two failure meters to watch from the moment you wake up: Health and Morale. Physical damage reduces Health, while psychological damage reduces Morale—and either meter reaching zero causes a game-over. Early conversations and physical interactions can hurt more than expected, so treat both resources as equally important.
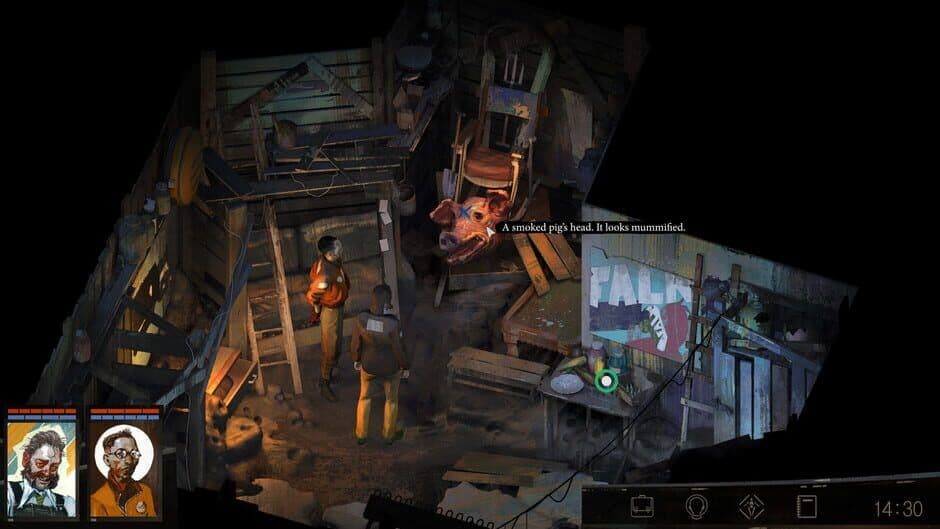
Endurance and Volition stats dictate your total health and morale pools.
How Health and Morale Work
Check your character interface regularly, especially after a difficult conversation, failed physical interaction, or unexpected skill result. Health protects you from physical damage, while Morale absorbs psychological damage. Don’t assume a full Health meter means you’re safe; a harsh dialogue exchange can drain Morale instead.
⚠️ Watch out: Either Health or Morale reaching zero ends the game. If one meter is already low, avoid risky interactions until you recover.
Health Recovery Items
Magnesium can be found in the Whirling-in-Rags hotel room and early Martinaise containers. It is a consumable that restores Health when used from the inventory, making it especially useful after physical damage or a dangerous interaction.
Nosaphed is another consumable that restores Health. Look for it in early Martinaise shops, containers, or other usable item sources, then keep it available rather than spending it casually. The game can punish you for entering a physical encounter with no recovery option.
Morale Recovery
Keep Magnesium or similar morale medicine available for moments when Morale is close to failure. This consumable restores Morale and should be reserved for imminent failure, rather than used simply because the meter is not full.
You don’t need to heal after every small loss. Instead, use recovery items when a meter is dangerously low, before a known risky interaction, or when continuing could push Health or Morale to zero. Check your inventory before starting major conversations or physical actions so you know exactly which emergency option is available.
Think of recovery items as a safety net, not a refill button. Keeping at least one Health recovery item and one Morale recovery item in reserve gives you room to survive Disco Elysium’s unpredictable early-game checks.
With Health, Morale, and your emergency consumables under control, you can explore Martinaise confidently without letting one bad conversation or failed action end the investigation.
Best Health and Morale Safety Routine for Disco Elysium
Disco Elysium can punish one careless interaction with a sudden game over, especially during the first day in Martinaise. Build a simple safety routine: check your meters, save before danger, and keep emergency medicine in reserve.
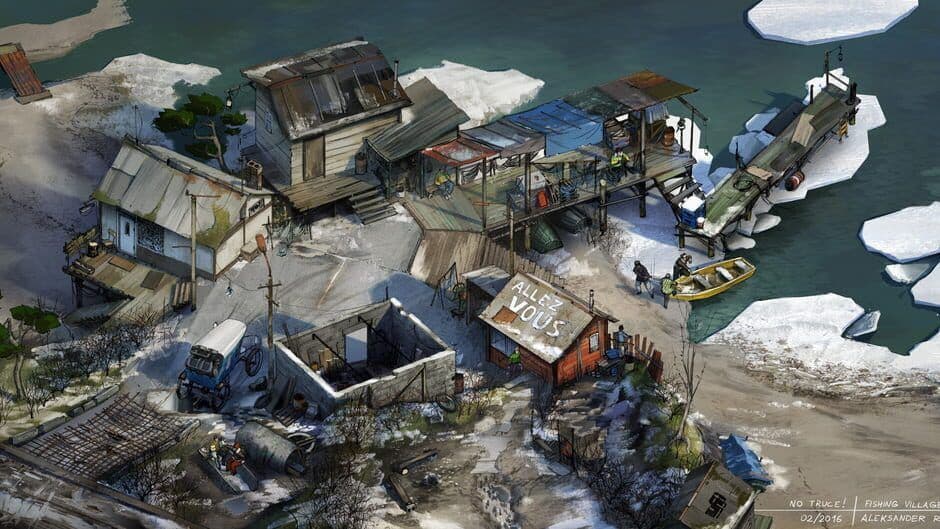
Visualizing the detective's mental state.
The First-Day Safety Routine
After any damaging conversation or physical interaction, inspect both Health and Morale before starting another check. Use medicine before either reaches zero—waiting until the last possible moment can leave you with no chance to recover if another passive check or dialogue choice causes damage.
Follow this loop throughout your first day:
- Finish a risky conversation or physical interaction.
- Inspect Health and Morale.
- Use medicine if either meter is dangerously low.
- Save before the next red check, physical action, or major conversation.
- Attempt the interaction, then reload after an unrecoverable failure.
To save safely, press [Esc] to open the pause menu, choose save, and then attempt the interaction. This is especially useful before red checks and physical actions, where failure can cause damage or cut off your immediate options.
⚠️ Watch out: Do not spend every healing item immediately. During early Martinaise exploration, keep at least one Health and one Morale recovery item available because unexpected passive checks and dialogue can deal damage.
Treat your supplies as an emergency buffer rather than routine healing. If one meter takes a hit, recover before chaining into another difficult scene; this gives you room to survive an unlucky check and continue investigating instead of restarting the day.
With this repeatable routine, Disco Elysium’s early hazards become much less threatening. Check both meters, save before danger, and preserve one Health and one Morale recovery item—you’ll be ready for the next conversation or investigation without gambling your run.
How to Inspect the Disco Elysium Hotel Room
The starting hotel room in Disco Elysium looks like a disaster zone, but it’s also your first compact investigation site. Before you step into Martinaise, search the room carefully—several interactions recover important equipment and let your skills reveal extra dialogue.

The setting of Martinaise is introduced in the hotel.
Start with the furniture, clothing, containers, and unusual objects around the starting hotel room. This environmental interaction matters because inspecting objects can trigger unique dialogue from your skills, sometimes revealing clues or context you would otherwise miss. Don’t rush toward the exit; interact with every accessible hotspot before leaving.
Check the room for the Detective's ledger and recover it as a key investigation item. Then interact with the ceiling fan to retrieve the Tie, which also triggers its own dialogue. These interactions are easy to overlook if you focus only on the obvious objectives, so sweep the room once more before heading downstairs.
Treat the starting hotel room as a tutorial for Disco Elysium’s investigation style. If an object looks unusual, inspect it—even a messy piece of furniture or clothing can start a useful conversation.
With the Detective's ledger recovered, the Tie retrieved, and the room fully searched, you’ve completed the most important early interactions. You’re ready to leave with more equipment, clues, and a better sense of how Disco Elysium rewards curiosity.
How to Meet Kim Kitsuragi in Disco Elysium
Disco Elysium’s investigation changes the moment Kim Kitsuragi arrives. You’re no longer handling Martinaise alone: Kim becomes the steady professional presence who keeps the case moving when your detective work—or your dialogue choices—starts veering off course.

Kim helps you navigate the complex social landscape of the city.
At the Whirling-in-Rags cafeteria, meet Kim Kitsuragi, a Precinct 57 lieutenant and assigned partner. He provides investigation context, explains unfamiliar evidence and police procedure, and accompanies you as you follow leads. Listen to his explanations before making aggressive or irreversible choices; Kim often supplies the practical information your character is missing.
Kim also brings useful equipment to the investigation. During the body investigation, Kim's flashlight serves as a practical light source for inspecting dark areas and supporting investigation interactions. It doesn’t replace your own skills or checks, but it helps Kim contribute to difficult investigative moments.
Your partnership with Kim is shaped by dialogue and investigation. Kim reacts to your choices, competence, and behavior, so follow his explanations and avoid needless hostility to preserve cooperation. Let him support difficult conversations, ask for clarification when evidence or procedure is unclear, and treat his reactions as warnings when a decision may be reckless.
Kim is not a replacement for skill checks. Use his context to understand a situation, then rely on your skills, modifiers, and equipment to handle the actual checks.
Kim Kitsuragi is your investigation’s anchor in Disco Elysium: he keeps the case grounded, offers context when your thoughts become unreliable, and accompanies you through the early evidence gathering. Work with him instead of trying to overpower every conversation, and you’ll have a much clearer path through the first day.
Best Partnership Strategy for Kim Kitsuragi in Disco Elysium
Disco Elysium rewards curiosity, but reckless curiosity can turn a simple conversation into a disaster. Kim Kitsuragi is more than your assigned partner in this RPG—he’s a steady source of context, reactions, and practical judgment while you learn how Martinaise works.

Kim's professional demeanor helps navigate complex social checks.
At the Whirling-in-Rags cafeteria, Kim Kitsuragi, a Precinct 57 lieutenant and your assigned partner, can help you interpret unfamiliar evidence, locations, and police procedure. Ask Kim for clarification before choosing an aggressive or irreversible response. Let him explain what you’re looking at, then use that information to decide whether the next step is questioning someone, examining a location, or putting an investigation lead aside for later.
When Disco Elysium presents a strange clue or unfamiliar place, pause and ask Kim what he knows before committing to a bold response. His explanation can prevent you from misunderstanding the situation.
Keep Kim present during difficult conversations with Martinaise NPCs whenever possible. Consult him when the dialogue allows it, and pay attention to his reactions: approval, hesitation, or disapproval can warn you that a choice may damage cooperation or make the exchange harder. Kim does not prevent every bad outcome, but his presence gives you another perspective before you lock yourself into a poor decision.
Kim is not a replacement for skill checks. He supplies context and reactions, but you still need to build skills, use modifiers, and manage checks yourself. Treat his advice as a warning system rather than an automatic solution—combine it with your character’s strengths, available equipment, and careful dialogue choices.
With Kim’s perspective guiding your early investigation, you’ll make fewer needless mistakes and understand Martinaise’s evidence more clearly. In Disco Elysium, a thoughtful partnership is often stronger than a dramatic answer—listen first, then act.
How to Investigate the Disco Elysium Corpse
In Disco Elysium, the hanging corpse in the Whirling-in-Rags courtyard is your first major investigation obstacle—and it’s more dangerous than a routine inspection. Don’t rush straight into the body; prepare for the physical interaction before you commit.

Disco Elysium mood art.
Reaching the Hanging Corpse
Head to the Whirling-in-Rags courtyard, the hotel rear courtyard in Martinaise behind the hostel. Speak with Kim Kitsuragi, the Precinct 57 lieutenant and your assigned partner, before examining the hanging corpse. He provides investigation context and helps you identify a safe way to proceed rather than treating the body as a simple conversation or quick environmental interaction.
Your objective is to examine the hanging corpse. Inspect the body and follow the available investigation steps, but pay attention to what each physical interaction requires. If a route forward looks unsafe, pause and look for another way to prepare instead of forcing the attempt.
⚠️ Watch out: Corpse investigation hazards are real. Physical interactions and failure can damage Health or prevent progress, so heal and save before attempting them.
If you fail or take damage, don’t panic—the investigation is still teaching you how dangerous the corpse can be. Keep Kim involved, make sure your Health is safe, and retry only when you’re ready. With a careful approach, you can turn the courtyard from a nasty surprise into your first solid lead in Disco Elysium.
How to Handle Disco Elysium’s First Dialogue Choices
Dialogue in Disco Elysium is rarely a simple path from question to answer. Every response can expose new evidence, invite a skill voice to interrupt, or open a branch that changes how the conversation develops—so slow down and read before committing.
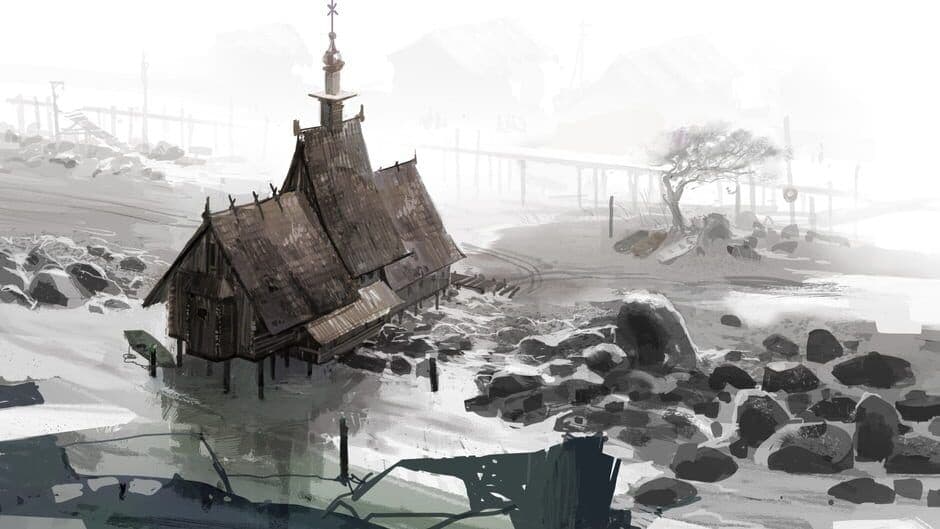
Martinaise is a city built on stories and secrets.
Read Every Dialogue Option
During a conversation, inspect every available response before choosing one. Dialogue tags and evidence can reveal clues, new subjects, modifiers, and future conversation branches, even when an option looks unrelated to your current objective.
Treat each response as an investigation tool. Ask follow-up questions, gather context, and look for choices that uncover more information before selecting an aggressive, strange, or potentially irreversible reply. This approach helps you understand how the conversation is developing and can reveal safer ways to proceed.
Don't rush toward the response that seems to advance the task fastest. In Disco Elysium, extra dialogue often provides the context or modifier that makes a later choice more useful.
Listen to Your Skill Voices
Your skills can interrupt or comment during conversations based on their values. These skill voices may offer information, point out details, or suggest alternative choices that you would otherwise miss. They can also encourage risky behavior, so their confidence is not always a reason to follow their advice immediately.
Read what each voice contributes, then compare it with the rest of the available dialogue. A skill comment can highlight an important clue, but you still control the final response. If a voice pushes you toward an impulsive answer, check whether another option lets you gather more information first.
These interruptions also make character development matter beyond checks. Raising a skill changes the information and possible reactions you receive in dialogue, giving different builds their own ways to interpret the same conversation.
Let Failure Move the Investigation Forward
Failure can create content in Disco Elysium. Failed checks and dialogue choices often continue the story with new information instead of blocking progress, so you don't need to reload every time a conversation goes badly.
Accept some failures when the consequence is manageable. A failed exchange may reveal a different perspective, produce an unexpected clue, or send the investigation in a new direction. Save caution for choices that could seriously damage your Health or Morale, harm your working relationship with Kim, or close off an important line of questioning.
The safest first-day rhythm is simple: read every response, listen carefully to skill voices, gather evidence, and accept useful failures. With that mindset, even awkward conversations become progress—and you’ll get much more out of Disco Elysium’s branching dialogue.
How to Use Disco Elysium Equipment and Clothing
Disco Elysium turns clothing into part of your build, not just a way to dress the amnesiac detective. A jacket, shirt, pair of gloves, or other piece can quietly decide whether a crucial conversation reveals new information—or sends you stumbling into failure.

The colorful cast of Revachol and their signature styles.
Change Clothing Before Important Checks
Open your inventory and character sheet to manage Clothing modifiers. Equip clothing to raise or lower specific skills, then remove unsuitable penalties before important checks. A piece that boosts the skill you need may also reduce another skill, so check the full effect rather than blindly wearing the item with the highest bonus.
This matters most when you know which skill a conversation or interaction will test. Before active checks, change clothing and held items to alter the relevant skill, then return to practical exploration gear afterward. That lets you tailor your detective for the moment without leaving yourself stuck with awkward penalties while walking around Martinaise.
Keep several clothing options available instead of selling them immediately. Even a normally unhelpful item can become valuable when it raises the exact skill needed for a difficult check.
Recheck White Checks After Changing Equipment
Changing gear can also improve a failed or unavailable white check. On the white-check interface, equip a skill-boosting item, revisit the check, and attempt it again if the updated target is favorable. This is one of the safest ways to use equipment bonuses because white checks can provide another opportunity after you improve the relevant skill.
Do not waste a useful bonus by attempting the check first and changing clothes afterward. Read the required skill, adjust your clothing and held items, then return to the interaction. If the target still looks poor, leave it for later rather than burning resources on an unfavorable attempt.
With careful clothing changes, Disco Elysium gives you more control over difficult skill checks than your starting build might suggest. Treat equipment as a temporary strategy tool, and you’ll be ready to reshape your detective whenever the next conversation demands it.
How to Use Disco Elysium’s Thought Cabinet
In Disco Elysium, your strangest ideas can become some of your strongest tools—or create complications you weren’t ready for. The Thought Cabinet turns discoveries from conversations and exploration into character-shaping choices, so don’t commit to every thought the moment it appears.
How the Thought Cabinet Works
The Thought Cabinet stores discovered thoughts during character progression. These thoughts can be internalized to grant temporary or permanent effects, giving you another way to shape your detective beyond ordinary skill upgrades. Read each thought’s description before committing, especially on Day 1, when you have limited resources and your build is still taking shape.
Thought internalization begins when you select a thought, spend an available slot, and wait for internalization to finish. You only receive the thought’s completed effect after that process ends, so committing to an idea is not the same as benefiting from it immediately. Plan around that delay rather than assuming every new thought will solve your next conversation or check.
Treat early thoughts as investments, not emergency buttons. If a thought’s effect doesn’t clearly help your current approach, keep it stored until you understand what you want your detective to become.
Managing Thought Slots
Thought slots determine how many thoughts you can commit to at once. When the Cabinet is full, spend skill points to unlock additional slots instead of discarding useful thoughts immediately. This competes with improving skills and raising learning caps, so compare the value of another slot with the value of your next upgrade before spending the point.
Day 1 in Disco Elysium is full of tempting ideas, but committing blindly can steer your character in an awkward direction or leave you waiting for an effect that doesn’t help with the problem in front of you. Review the thought, check whether you have an available slot, and internalize it only when the trade-off makes sense. With a little patience, the Thought Cabinet becomes a powerful part of your Disco Elysium build rather than another source of confusion.
How to Earn XP and Reach Learning Caps in Disco Elysium
In Disco Elysium, progress comes from more than winning dice rolls. Conversations, discoveries, tasks, and even failed story developments can push your level forward, so don’t panic when a check goes badly—the game often rewards the attempt with new information and Experience points.
How Experience Points and Leveling Work
You gain Experience points from conversations, discoveries, tasks, and successful or failed story developments. These points fill the level bar, and once it fills, you reach a new level.
Each new level grants a skill point. You can use that point to:
- Improve a skill.
- Unlock a Thought Cabinet slot.
- Enable another progression option, including a white-check retry when that option is available.
This gives every level-up a strategic choice. Raising a skill may help with future passive checks, while saving the point can let you reopen a difficult white check or prepare a useful Thought Cabinet investment.
Understanding Learning Caps
Each skill has a learning cap that limits ordinary upgrades. When a skill reaches its cap, you cannot keep increasing it through standard point spending until you raise that limit.
Increase the cap through the skill interface or relevant thoughts before investing beyond it. Check the cap before spending a point, especially when you are planning around a specific skill check. Otherwise, you may reach a new level expecting to improve a key skill and find that the game will not allow the upgrade yet.
Don’t spend every skill point immediately. If a failed white check matters to your investigation, keep a point available so you can use the white-check retry option instead of waiting for another level.
When to Save a Skill Point
Save a skill point when a white check has meaningful story value, a high chance of success after modifiers, or a route you want to reopen soon. Before retrying, review available clothing modifiers, relevant thoughts, and any other check adjustments you have already unlocked. If the check is not urgent, continue exploring and earning XP first—new conversations and discoveries may improve your position.
Failed checks are not automatically wasted attempts in Disco Elysium. They can produce XP, reveal different story developments, or open information that a success would not provide. Treat leveling as a resource-management system: improve skills when you need access now, raise learning caps when a skill is blocked, and save points when a white-check retry is the better payoff.
With this approach, every conversation and detour in Disco Elysium moves you forward, even when the dice refuse to cooperate.
How to Find Martinaise’s Essential Day 1 Locations in Disco Elysium
Martinaise opens up slowly in Disco Elysium, and the best Day 1 route is less about rushing toward one objective than learning which areas are accessible now. Start from the hotel, collect information and supplies nearby, then expand toward the fishing village before returning to investigate routes leading to the coast.
Start at the Whirling-in-Rags Cafeteria
The Whirling-in-Rags cafeteria sits on the hotel ground floor and serves as Martinaise’s central meeting place for Garte, Kim, and early conversations. Speak with Garte, the cafeteria manager and bill collector, when you need information about the hotel or nearby activity. Kim Kitsuragi, the Precinct 57 lieutenant and your assigned partner, is also an important source of investigation context, so keep him involved when you discuss unfamiliar people or locations.
Use the cafeteria as your first information checkpoint. Check available conversations, review anything new you learn, and search accessible objects nearby before heading farther out. This keeps your early investigation organized and may reveal which route or resident deserves your attention next.
Explore the Martinaise Fishing Village
The Martinaise fishing village lies on the east and southeast coast. Treat it as a later Day 1 exploration target after you have finished the most useful conversations around the hotel. The area contains residents, containers, and a route toward the coast, making it valuable for both supplies and new information.
Search accessible containers and loose objects as you move through the village, then speak with residents whenever conversation is available. You do not need to force progress through every blocked path immediately; record what you find and return after gaining a new clue, modifier, item, or skill point.
Explore the Martinaise fishing village before committing to a risky route elsewhere. Containers can provide useful resources, while residents may point you toward future objectives.
Save the Martinaise Coast for Later
The Martinaise coast is west of the fishing village and beyond early barriers. If you cannot reach it during your first pass, do not assume you missed a hidden entrance or that the game is bugged. Treat the barrier as a signal to continue investigating accessible areas and gather the information needed to open new routes later.
When you eventually reach the Martinaise coast, explore it for clues and optional interactions rather than expecting a single required objective. The game rewards returning to previously blocked areas once your investigation has developed, so keep the location in mind as a future destination.
With the Whirling-in-Rags cafeteria handled, the Martinaise fishing village searched, and the Martinaise coast marked for later, you have a clear Day 1 map of the essential locations. Follow the accessible leads first, and let new information—not locked barriers—set your next destination.
How to Use the Disco Elysium Map and Time System
Disco Elysium’s clock is always moving, even when you’re simply talking your way through Martinaise. Conversations and some interactions advance time, so treat each exchange as a choice about when to spend your day—not just what to say.
During world exploration, open the map to review discovered locations and routes. Use the available paths shown there instead of repeatedly probing locked exits; a blocked door or route usually means you need a key, conversation, skill check, or later story progress. The map won’t solve every problem, but it helps you stop wasting time circling the same barrier.
Inspect the environment before advancing time. In Martinaise exploration, search containers and speak with accessible NPCs first because some conversations or time windows are easy to overlook.
Plan important conversations around your priorities. Since NPC schedules and quest availability can change as time passes, search nearby objects and finish accessible interactions before starting a conversation that may move the clock forward. If a route closes or an opportunity changes, don’t panic—use the map to identify another discovered location, follow an available path, and return later when you have new information or story progress.
Once you treat time as a resource and the map as your route planner, Disco Elysium becomes much less confusing. Explore thoroughly before advancing the clock, then move deliberately instead of testing every locked exit—you’ll keep more options open and make steady progress.
How to Talk to Garte About the Disco Elysium Hotel Bill
The first bill conversation in Disco Elysium arrives before you can settle into the investigation. At the Whirling-in-Rags cafeteria counter, speak with Garte, the cafeteria manager and bill collector, who demands payment for the damaged room and unpaid lodging.
Garte reveals that the starting hotel debt is 130 réal. This 130-real bill must be handled through payment, negotiation, or finding money elsewhere. Choose every dialogue option carefully, since the conversation can clarify what Garte expects and give you a chance to address the debt before it becomes an immediate problem.
For the immediate hotel bill payment, speak with Garte at the cafeteria counter and obtain or raise the required money. Search accessible areas for réal, check containers and loose objects, and consider suitable valuables if you still fall short—but avoid selling anything that may be needed for an investigation, quest, or skill bonus. The pawnshop is a fallback if you need funds, though the detailed money route is covered separately.
Don’t ignore Garte after the first conversation. Keep the 130 réal target in mind while exploring, and check your inventory before selling anything. A little caution now prevents a painful shortage later.
Once you’ve paid, negotiated, or found another way to cover the debt, you can focus on the case with less pressure hanging over you. Disco Elysium gives you several ways to respond, so don’t panic if you lack the full amount immediately—keep exploring and return to Garte when you’re ready.
Best Ways to Pay the Disco Elysium Hotel Bill
The first-day bill in Disco Elysium feels impossible when you’re carrying almost nothing—but Martinaise has enough safe opportunities to get you moving. Search carefully, negotiate before paying, and treat selling items as a last resort rather than your opening move.
Search Martinaise Before Selling Anything
Your safest first-day strategy is to search Martinaise for money. During first day exploration, inspect containers, interact with loose objects, and collect every available réal before selling irreplaceable investigation items. Check your inventory after each sweep so you know what you actually have before making a sale.
The Cuno's shack and courtyard area, behind and near the Whirling-in-Rags courtyard, is an optional investigation location with relevant early interactions and possible money-related leads. Explore it when you can, but don’t force a route or risk your Health just to scrape together a few coins. You can also ask people around Martinaise for assistance, including Joyce Messier, the Wild Pines representative on a yacht northwest of the hostel, who may provide money after a successful Volition check.
If you reach Evrart Claire, the union leader in the harbor, he can offer a check for 25 reals that you can cash at Frittte. Lena, a woman in a wheelchair on the ground floor of the Whirling-in-Rags, can give you a pin to sell, though doing so starts the “Pay Lena back for pin” task. These options are safer than immediately sacrificing equipment or clues.
Speak with Garte about reducing the 130 réal bill before raising the full amount. Successful checks can lower the debt to 100 reals, 60 reals, 70 reals, or even 30 reals, depending on your dialogue choices and results.
Use the Pawnshop as a Fallback
Use the Crime and Punishment pawnshop as a fallback in Martinaise, west of the Whirling-in-Rags. Roy, the pawnshop proprietor at Crime and Punishment pawnshop, will buy suitable valuables, but check each item first to see whether it is needed for a quest, clue, or skill bonus. This is the key rule: sell disposable valuables, not anything that looks connected to the investigation.
If you are still short after searching, you can sell appropriate discoveries such as the “Production Schedule” Filament Memory for 50 reals or the Antique Belle-Magrave Rifle for 30 reals. Don’t sell these blindly, though—make sure you’re comfortable giving up the item’s investigation value before taking the cash.
The safest emergency option comes from Kim Kitsuragi, your Precinct 57 lieutenant and assigned partner. If the debt remains unpaid late in the day, he can let you take the Radiant Spinners from Kim’s car and sell them to Roy for 200 reals. Kim then gives you the amount needed for Garte, keeping any excess if you negotiated the bill down.
Avoid asking the police station for money through the radio in Kim’s car. Your colleagues refuse to send anything, Harry is ridiculed, and the exchange can lower Morale—making this the worst possible financial fallback.
Once you’ve gathered enough, return to Garte at the cafeteria counter and pay the reduced bill. Completing “Pay for damages” rewards 70 XP and unlocks your hotel room, but future nights cost 20 reals each until you find another place to sleep. Search first, negotiate second, and pawn only what you can safely spare—this approach keeps your money problems from damaging the rest of your Disco Elysium investigation.
How to Reach the Disco Elysium Pawnshop and Frittte
Martinaise’s early shops can turn a shaky first day in Disco Elysium into a manageable one. The Crime and Punishment pawnshop helps you convert selected valuables into cash, while the Frittte kiosk provides practical supplies and useful information close to your starting area.
Reaching the Crime and Punishment pawnshop
Follow the main street west of the Whirling-in-Rags to reach the Crime and Punishment pawnshop. Inside, speak with Roy, the pawnshop proprietor at the Crime and Punishment pawnshop in Martinaise, who appraises and buys selected items. He also sells useful items, so check what’s available before spending your money elsewhere.
Use the pawnshop as a fallback for the hotel bill or other urgent purchases, but don’t sell blindly. Keep anything that might be tied to an investigation, a clue, or a skill bonus until you’re sure it has no further use. Your inventory is worth checking before every sale—an item that looks like junk may still matter later.
Sell selected valuables rather than every item you own. Cash solves immediate problems, but keeping useful equipment and investigation-related objects gives you more options during Day 1 conversations.
Finding the Frittte kiosk
The Frittte kiosk is near the Whirling-in-Rags on the main street. This convenience shop sells supplies and provides early-world information, making it a useful stop before you commit to longer exploration around Martinaise.
Check the kiosk when you need practical supplies, then speak with the person there to gather information about the surrounding area. Treat the conversation as part of your investigation—not just a shopping trip. The details you learn can help you decide which accessible route or objective to pursue next.
Visit both shops before wandering too far from the Whirling-in-Rags. The Crime and Punishment pawnshop gives you a way to turn carefully chosen valuables into money, while the Frittte kiosk supports your supplies and local knowledge. With those two stops handled, you’re in a much safer position to continue your Disco Elysium investigation.
How to Collect Disco Elysium’s Early Items and Money
Martinaise looks short on cash, but Disco Elysium rewards you for slowing down and scavenging every accessible corner. Your early haul can cover essential purchases and contribute toward the hotel bill—provided you don’t sell something useful by mistake.
Start with Réal. Search Martinaise for currency in containers, loose objects, and NPC rewards, then keep track of what you collect before spending it. Réal is used for the hotel bill and purchases, so prioritize available money over unnecessary shopping while you’re still building your reserves.
Search Before You Sell
Container searching is your safest early routine in Disco Elysium. During Martinaise exploration, interact with every accessible container and highlighted object, then check your inventory before selling or discarding anything. This habit helps you separate spare valuables from items you may need for investigation, equipment, or recovery.
Pick up Consumable medicine whenever you find it in Martinaise shops, containers, and early rewards. Reserve Health- and Morale-restoring items for meter emergencies rather than treating them as ordinary loot; an unexpected failure or damaging interaction can leave you needing one immediately.
Search first, sort later. Collect everything accessible, check your inventory, and only then decide what can safely be sold or discarded.
With a steady scavenging loop, Disco Elysium’s early money pressure becomes much easier to manage. Gather Réal, protect your Consumable medicine, and treat every container as a possible source of progress.
How to Handle Disco Elysium’s Locked Routes and Barriers
Disco Elysium loves putting a tempting route just beyond your reach. On Day 1, some doors, paths, and objects require a key, conversation, skill check, or later story progress—so a barrier is usually a sign to investigate elsewhere, not a bug.
When an interaction fails or a route remains blocked, don’t keep hammering the same option. Note the clue or location, then pursue an accessible conversation or task and return after gaining a modifier, item, or skill point. Disco Elysium is built around revisiting problems with new information, equipment, or character development, so walking away can be the correct move.
Ask Kim Kitsuragi, the Precinct 57 lieutenant and assigned partner at the Whirling-in-Rags cafeteria, about unfamiliar locations whenever dialogue allows. His explanations, along with clues discovered during conversations, help you prioritize practical routes instead of wasting time testing every locked exit.
Use the map to review routes you have already discovered, but avoid repeatedly probing barriers that clearly cannot be opened yet. Let dialogue clues determine your next objective, complete what you can, and return when the game gives you a reason to try again. With that mindset, you’ll spend less of Day 1 fighting locked routes and more time making real progress through Disco Elysium.