How to Understand Skill Checks in Disco Elysium
In Disco Elysium, a conversation can turn into a high-stakes test in an instant. Active skill checks let Harry Du Bois resolve an obstacle through a dialogue choice or interaction option by comparing his skill total with a difficulty rating.
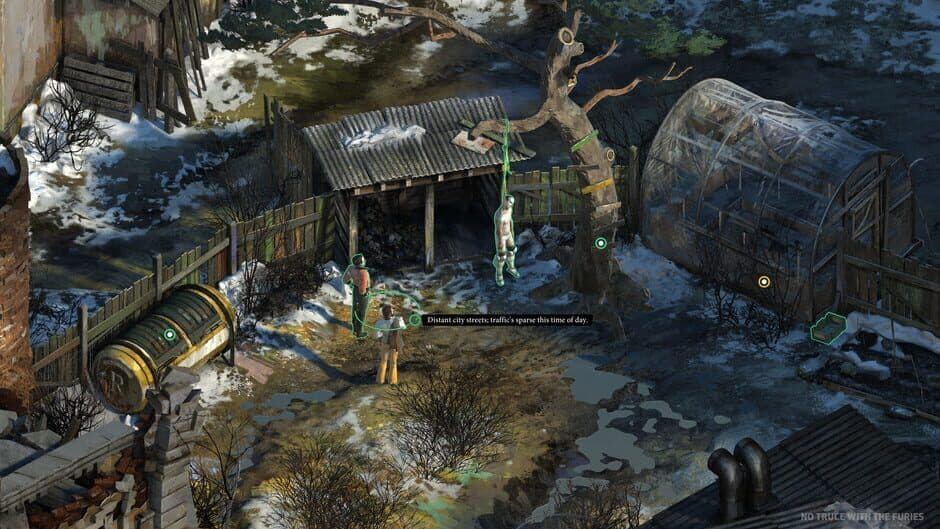
Interacting with the world often triggers various skill checks.
When an active check appears, select it and review its listed modifiers before rolling. The game calculates your result using:
Skill Level + Modifiers + 2D6 Dice Total
That total must equal or exceed the check’s difficulty for Harry to succeed. If the number looks too low, raise the relevant skill or collect bonuses before attempting the check whenever you have the opportunity.
Treat the check preview as a planning tool, not just a pass/fail prompt. Check the tooltip and study the modifiers before committing—sometimes a little preparation makes the difference.
Understanding Difficulty Ratings
Disco Elysium uses these difficulty bands for active checks:
- Trivial
- Easy
- Medium
- Challenging
- Formidable
- Legendary
- Heroic
- Godly
- Impossible
The displayed difficulty determines the target total you need. Inspect the check tooltip for the exact rating rather than guessing from the label alone. A Formidable check and an Impossible check demand very different preparation, even if both appear during the same investigation.
You also may notice that no active checks use difficulty values 6, 7, or 19. That absence is intentional, not a bug—don’t assume a missing rating means the game has displayed the check incorrectly.
Once you understand that every active check is a comparison between Harry’s prepared skill total and a target difficulty, the system becomes much easier to read. Review the option, inspect its modifiers and exact rating, then decide whether to roll now or improve your chances first. This foundation will make every later Disco Elysium skill-check strategy far less intimidating.
How 2D6 Dice Rolls Work in Disco Elysium
In Disco Elysium, every active roll is a small gamble: even a strong detective can be saved by the dice—or betrayed by them. Understanding the 2D6 system lets you judge whether to roll immediately or improve your odds first.
Active checks show the math behind your character's attributes and the dice result.
When an active check begins, roll two six-sided dice and add their combined result to your Skill Level and Modifiers. Calculate both dice before judging the outcome. The dice total ranges from 2 through 12, so compare your current skill-and-bonus total with the target and estimate how much help you need.
The totals are not equally likely:
| Dice total | Chance |
|---|---|
| 2 or 12 | 1 in 36 |
| 3 or 11 | 2 in 36 |
| 4 or 10 | 3 in 36 |
| 5 or 9 | 4 in 36 |
| 6 or 8 | 5 in 36 |
| 7 | 6 in 36 |
That makes 7 the most common result, while the extremes are rare. If your current total is just below the target, you have a reasonable chance of making up the difference; if you need an unusually high roll, expect the check to remain risky.
Before rolling in Disco Elysium, compare your current Skill Level + Modifiers with the target. If you are short by several points, add clothing, a Thought, a drug, a level, or another situational modifier first instead of trusting a lucky roll.
Critical Failures and Critical Successes
Rolling double ones on an active check causes a critical failure. It automatically fails even if your Skill Level + Modifiers would otherwise meet the difficulty. Treat it as a special exception to the normal target comparison, then follow the narrative result—Disco Elysium often turns failure into new dialogue rather than a dead end.
Rolling double sixes causes a critical success. It automatically succeeds even if your normal total would miss the target. In practical terms, double sixes are the rare comeback roll that can rescue an otherwise impossible-looking attempt.
The Precarious World can change these normal critical rules. When this Thought or world state modifies critical outcomes, double-one and double-six results may no longer trigger the usual automatic failure or automatic success. Check the active modifier text before assuming the standard rules apply.
The best approach in this RPG is to treat the dice as information, not fate. A roll of 2 through 12 is unpredictable, but your skill level, bonuses, and preparation determine how much that uncertainty matters. Plan around the likely result, respect double ones, and enjoy the occasional double six—your detective work is ready for the next check.
How to Pass White Checks in Disco Elysium
A failed roll in Disco Elysium doesn’t always mean the door is closed. When a check is displayed in white, the opportunity remains available—you just need to satisfy its reopening condition before trying again.
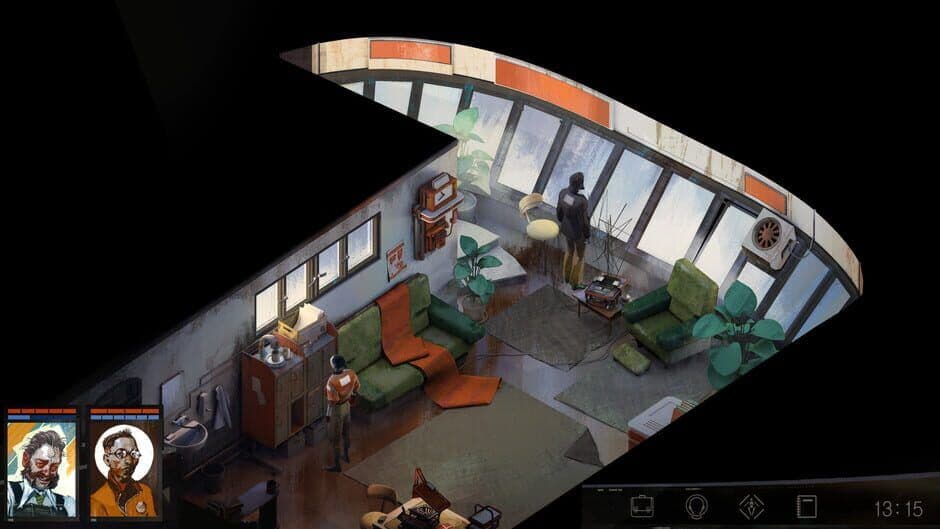
Understanding the UI is key to identifying repeatable White Checks.
After failing, check the relevant skill and look for the condition that unlocks the attempt. The most direct option is to spend a Skill Point on that skill, provided its learning cap allows the increase; doing so reopens the check immediately. If you’d rather save the point, you can often reopen it by exploring, completing another task, talking to characters, internalizing a Thought, or meeting the specific condition listed by the game.
Some White checks use a time condition instead. For these rare checks, let the required in-game time pass before returning to them rather than repeatedly clicking the locked check. The game may also reveal a new task or interaction that provides the intended route back in, so don’t panic if the retry option remains unavailable.
Before making another attempt, inspect the White check’s positive and negative modifier list. It can include prior dialogue choices, clothing, Thoughts, and drugs, and those bonuses or penalties may be the difference between another failure and a clean pass.
Don’t spend a Skill Point automatically. First explore the area, speak with available characters, and check for another task—Disco Elysium often hides a cheaper reopening condition nearby.
Treat every failed White check as a planning note, not a disaster. Raise the relevant skill when it makes sense, use the available modifiers, and return once the check reopens. With that habit, repeatable checks become opportunities to prepare rather than walls that stop your investigation.
How to Pass Red Checks in Disco Elysium
Red checks are Disco Elysium’s one-shot gambles: once you commit, the opportunity normally closes forever. That sounds harsh, but don’t panic—failure can create some of the game’s funniest, most revealing, and even surprisingly positive scenes.
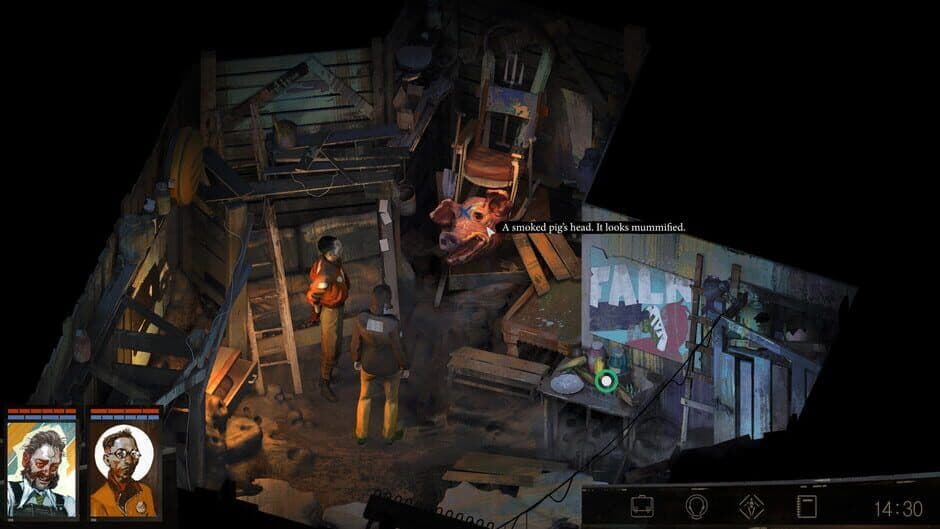
Every Red check attempt carries permanent weight in your story.
How Red Checks Work
When a check is displayed in red, treat it as a permanent attempt. Unlike a White check, you normally cannot reopen it after failing, so prepare every available modifier before selecting the dialogue option or interaction. Permanent does not mean unmodifiable: the game still applies the clothing, Thought, drug, and dialogue modifiers shown for that check.
Before rolling, pause and inspect the displayed chance carefully. If you can safely leave the conversation, investigate other leads, change your clothing, use a relevant Thought or drug, or uncover information that adds a dialogue modifier. You cannot rely on a later Skill Point to rescue a failed Red check, so make the attempt only after improving the total as much as you reasonably can.
⚠️ Watch out: A Red check is not the same as an automatically bad choice. If the odds are poor, consider whether the possible failure is more interesting than forcing a success.
Don’t Reload Every Red-Check Failure
After failing a Red check, continue the conversation instead of immediately reloading. Disco Elysium often turns failure into a different route: you may receive a positive consequence, a humorous scene, a new lead, or character-revealing dialogue. A failed roll is part of the investigation’s story, not necessarily a game over or a ruined playthrough.
This is the key difference when weighing White versus Red checks. White checks are repeatable after you meet their reopening condition, while Red checks are permanent after the attempt. That makes Red checks riskier, but failure can also be intentional or valuable—especially when the resulting scene teaches you something about Harry, another character, or the case.
In this RPG, the best strategy is simple: prepare fully, read the modifiers, and then accept the result. Whether your Red check succeeds or collapses spectacularly, Disco Elysium is usually ready with a consequence worth seeing.
How to Use Skill Levels and Learning Caps in Disco Elysium
Character creation in Disco Elysium quietly determines much more than your opening numbers. Your Attribute choices shape every related skill, while your Signature Skill can turn one branch of the detective’s mind into a genuine specialty.

The game's skills represent different parts of the detective's mind.
How Attributes Set Your Skill Levels
The game has four governing Attributes: Intellect, Psyche, Physique, and Motorics. Each Attribute governs six skills, so prioritizing an Attribute at character creation raises the starting value of every skill in that group and shapes your later check totals.
The twenty-four primary Skills are divided like this:
- Intellect: Logic, Encyclopedia, Rhetoric, Drama, Conceptualization, and Visual Calculus
- Psyche: Volition, Inland Empire, Empathy, Authority, Esprit de Corps, and Suggestion
- Physique: Endurance, Pain Threshold, Physical Instrument, Electrochemistry, Shivers, and Half Light
- Motorics: Hand/Eye Coordination, Perception, Reaction Speed, Savoir Faire, Interfacing, and Composure
At character creation, each skill starts at the value of its governing Attribute. For example, raising Intellect also gives you stronger starting values across Logic, Encyclopedia, Rhetoric, Drama, Conceptualization, and Visual Calculus. Later, you can raise individual skills by spending Skill Points rather than increasing the whole Attribute.
That’s why the three preset archetypes feel so different: Thinker gives you a broad Intellect foundation, Sensitive favors Psyche, and Physical emphasizes Physique. A custom build spreads those starting values according to your plan, but remember that every Attribute affects six skills—not just the one you expect to use most.
What Your Signature Skill Changes
During character creation, choose one Signature Skill. It receives an innate +1 bonus, and the learning cap for that skill’s entire Attribute increases by one. In practical terms, selecting an Intellect skill as your Signature Skill raises the learning cap for all six Intellect skills, not only the chosen specialty.
Use this choice to reinforce the kind of detective you want to play. A Signature Skill can push an important check higher immediately, while the Attribute-wide cap increase gives you more room to develop related skills later. The Signature Skill from your chosen archetype is already built around that archetype’s strengths, but a custom character can use the choice to patch a weakness or double down on a favorite line of investigation.
Pick a Signature Skill based on the whole Attribute, not just its +1. The extra learning-cap point can matter across six skills over the course of a full Disco Elysium playthrough.
How Learning Caps Affect Spending
Learning caps limit how far you can raise a skill. If a skill cannot be raised further, spending more Skill Points on it will not help until you increase its cap. Thoughts, drugs, and other effects can raise learning caps, so check for one of those options before pouring points into a skill that has reached its limit.
This creates an important progression rhythm in Disco Elysium: invest in a skill while its cap allows it, then look for a cap increase when development stalls. A Thought may raise one skill’s cap, an entire Attribute’s caps, or even unlock broader opportunities. Drugs can also affect caps, while other effects may temporarily or permanently change how much room a skill has to grow.
Don’t treat a cap as a sign that the skill is finished forever. It usually means you need to change your approach—explore, discover a Thought, or prepare another modifier—before returning to that skill. This is especially useful when you are building toward a difficult check rather than trying to maximize every stat at once.
Skill Level 4 and Internal Commentary
Around skill level 4, a skill begins contributing more substantial commentary during conversations. Higher levels can make that skill more present in Harry’s internal dialogue, giving you extra information, suggestions, and perspectives as you investigate.
That makes level 4 a useful conversational milestone even when you are not chasing the highest possible check total. A build with several skills near level 4 may produce a richer stream of internal advice, while a highly focused build can make a few selected voices much more dominant. Balance check odds against how much internal dialogue you actually want—more commentary is not always less confusing.
Protecting Health and Morale
Endurance is tied to Health, while Volition is tied to Morale. When Harry takes physical or emotional damage, the corresponding meter can fall along with the practical safety margin those skills provide. Heal the affected meter before relying on the reduced skill value for another dangerous interaction.
This matters because a strong Physique or Psyche build can still become vulnerable after taking damage. Keep an eye on Health after physical setbacks and Morale after emotional ones, then recover before attempting another demanding check. With your Attributes chosen deliberately, your Signature Skill supporting the right branch, and your learning caps managed instead of ignored, you can shape a Disco Elysium build that is both capable and full of personality.
How to Choose Archetypes for Skill Checks in Disco Elysium
Character creation quietly decides which voices—and which early opportunities—will speak up in Disco Elysium. Pick a preset based on the kind of detective you want to play, because your starting Attributes shape the early skill-check coverage you’ll see across Martinaise.

Archetypes like Thinker or Sensitive change your character's personality.
Thinker: Knowledge and Deduction
The Thinker archetype starts with 5 Intellect, 1 Psyche, 2 Physique, 4 Motorics, and Encyclopedia as Signature Skill. This setup favors knowledge and deduction checks, making it a strong choice if you want Harry to connect clues, recall Revacholian history, and analyze the murder investigation through information rather than force.
Thinker gives you broad early access to Intellect-driven conversations, especially around Logic, Encyclopedia, Rhetoric, Conceptualization, and Visual Calculus. Its 4 Motorics also provide useful support for noticing details and handling practical interactions, but the 1 Psyche and 2 Physique leave emotional and bodily checks less reliable at the start.
Sensitive: Emotional and Supernatural Insight
The Sensitive archetype starts with 1 Intellect, 5 Psyche, 4 Physique, 2 Motorics, and Inland Empire as Signature Skill. This build favors emotional and supernatural insight checks, so it’s ideal if you want Harry’s instincts, empathy, and strange perceptions to guide the investigation.
Its 5 Psyche gives you strong early coverage for Volition, Inland Empire, Empathy, Authority, Esprit de Corps, and Suggestion. The 4 Physique also helps with endurance and physical reactions, while the 1 Intellect makes knowledge and deduction checks more difficult until you invest in them later. If you enjoy following hunches and hearing Harry’s inner world argue with itself, Sensitive is a wonderfully unpredictable start.
Physical: Bodily and Precision Checks
The Physical archetype starts with 1 Intellect, 2 Psyche, 5 Physique, 4 Motorics, and Hand/Eye Coordination as Signature Skill. This setup favors bodily and precision checks, giving you a Harry who can push through physical obstacles, tolerate pain, and react quickly when situations become dangerous.
The 5 Physique supports Endurance, Pain Threshold, Physical Instrument, Electrochemistry, Shivers, and Half Light, while 4 Motorics keeps precision, perception, and interaction checks competitive. The tradeoff is clear: with only 1 Intellect and 2 Psyche, early deduction and emotional checks will be weaker. Still, this Disco Elysium archetype can open solutions that a more cerebral detective might never consider.
Custom: Build Around Your Priorities
The Custom archetype lets you distribute points manually instead of using a preset. Keep at least one point in each core Attribute and no more than six in one Attribute, then shape the spread around the checks you want to see most often.
This is the most flexible option, but it also demands more planning. A balanced Custom character can avoid the sharp weaknesses of the three presets, while a specialized one can push a favorite Attribute to its maximum starting value. You won’t get the same ready-made identity as Thinker, Sensitive, or Physical, so Custom works best when you already know whether you want to prioritize deduction, emotional insight, physical power, or precision.
Choose the preset that matches the kind of failures you’ll enjoy reading. Disco Elysium turns missed checks into story, so a “weak” Attribute can create memorable scenes rather than simply blocking your progress.
For a first playthrough, Thinker offers the clearest route through knowledge and deduction, Sensitive delivers the richest emotional and supernatural perspective, and Physical gives you strong bodily and precision options. Choose Custom when you have a specific skill-check plan in mind. Any of the four can succeed—the best archetype is the one whose failures and discoveries sound like your version of Harry.
How Clothing Modifies Skill Checks in Disco Elysium
In Disco Elysium, clothing can turn a risky roll into a comfortable success—or quietly sabotage a different skill. Before an active or passive check, open your equipment loadout and equip clothing or tools that raise the relevant skill, then re-open the check so the displayed total updates.
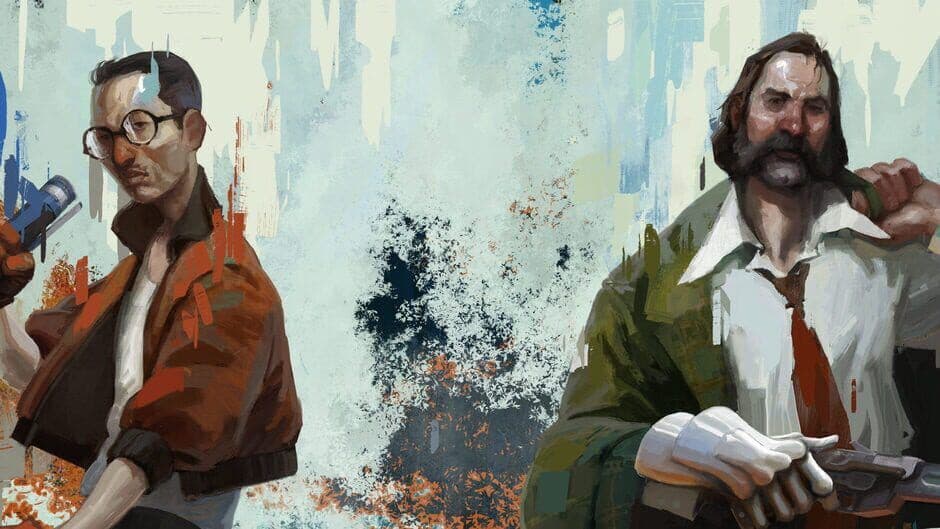
Different outfits reflect the diverse skill paths available to the player.
How Clothing Bonuses Work
Treat every outfit as a trade-off rather than a universal upgrade. A piece that boosts one skill can lower another, and you can only benefit from the items currently equipped. Before committing to a check, compare the full outfit bonus with any penalties affecting the same conversation or interaction.
If a check looks close, leave the conversation when possible, change your outfit, and return. This is often the cheapest way to improve your odds without spending a Skill Point.
These equipment options are especially useful:
- Mega-Bino's Prescription Lenses give +2 Encyclopedia and -1 Perception. Wear them for knowledge checks, then remove them when Perception is more important.
- Korojev Jacket gives +1 Logic. Equip it before Logic checks, but compare the bonus against any competing chest-slot modifier.
- Eight-Eyed Teratorn Tie provides +1 Inland Empire and +1 Volition. It is a strong choice for Psyche checks, but monitor what other option you lose from the same slot.
- Army Surplus Winter Scarf grants +2 Empathy and -1 Composure. Use it for Empathy conversations, then remove it for Composure checks.
- Man From Hjelmdall T-shirt adds +1 Physical Instrument and +1 Shivers, but imposes -2 Authority. Wear it for physical or city-sense checks only when the Authority penalty is acceptable.
- FALN "Faln" Windbreaker gives +1 Half Light and +1 Pain Threshold, while applying -1 Drama. Equip it for intimidation or pain checks, and avoid it for Drama.
Clothing also affects passive checks, so outfit changes are useful even when no dice roll appears. If you are about to enter a conversation where a passive skill may speak up, equip the relevant bonus first and re-open the interaction so the updated total can apply.
The trick is to dress for the check—not for the entire day. With the right loadout, Disco Elysium lets you turn discarded clothing into a precise skill-check setup, so compare bonuses and penalties before every important roll.
How Drugs and Consumables Modify Skill Checks in Disco Elysium
In Disco Elysium, drugs and consumables can turn a near-miss into a successful check—but they can also leave Harry worse off afterward. Use them as last-minute tools: check the temporary modifier, consider the Health or Morale risk, and only then commit to the roll.

Visualizing the detective's fractured psyche.
Using Drugs Before Skill Checks
Before an active check, consume a relevant drug to temporarily raise an Attribute or skill. The bonus applies only while the effect lasts, so confirm the resulting total before selecting the check. This matters most for a permanent Red check, where a temporary boost may be your final chance to improve the outcome.
Different consumables support different parts of Harry’s skill set:
- Smokes Astra or Smokes Tioumoutiri can provide a temporary Intellect-related modifier before an Intellect check. Account for the consumable’s drawback rather than treating the bonus as free.
- Pyrholidon provides a temporary Psyche-related boost before a Psyche check. If you have the Cop of the Apocalypse Thought, check the updated effect because it changes Pyrholidon’s effectiveness.
- Speed provides a temporary Motorics-related benefit before a Motorics check. Confirm the drug’s effect before committing to a permanent Red check.
- Potent Pilsner, Commodore Red, Pale-Aged Vodka, or Strike Brew can provide a temporary Physique-related modifier before a Physique check. Account for alcohol’s consequences before using it, especially if Harry’s other resources are already low.
⚠️ Watch out: A consumable’s temporary bonus is only half the calculation. If the effect risks Health or Morale, make sure Harry can survive the drawback before chasing a better check total.
Checking Drug and Thought Interactions
Thoughts can change how drugs and alcohol work, so never assume that every consumable keeps its default effect. When a Thought changes consumable effects, apply that Thought’s altered drug or alcohol rule instead.
For example, Revacholian Nationhood changes alcohol by granting +2 Physique when drinking, while nationalist dialogue options damage -1 Morale. Opioid receptor antagonist removes negative effects from alcohol and removes positive effects from drugs. Those changes can completely alter whether a consumable is worth using before a check.
Open the check information after consuming the item and verify the updated modifier. If the total still leaves the roll risky—or the drawback threatens Health or Morale—save the consumable and pursue another lead first.
Use drugs and consumables to bridge a specific gap, not as a default part of every conversation. With the right modifier and a quick check of the consequences, these temporary boosts can give your Disco Elysium detective the edge needed to take one more shot at a difficult check.
How Thoughts Modify Skill Checks in Disco Elysium
The Thought Cabinet is where Disco Elysium turns Harry’s latest obsession, realization, or bizarre conversation into a build decision. A Thought can rescue a weak skill check later—but during research, it may make the current investigation noticeably harder.

Interactions with others can unlock new slots in the Thought Cabinet.
Discovering and Researching Thoughts
You discover a Thought after specific dialogue, actions, or skill checks. Once it appears, accept the discovered Thought into the Cabinet, then decide whether its research effects fit the current investigation. You can research multiple Thoughts simultaneously, but check their temporary modifiers before committing to a difficult conversation.
While internalizing a Thought, you receive its temporary research bonus or penalty for the listed in-game time. You can pause the research if the penalty is hurting your immediate plans, but remember that sleeping does not advance research. For example, a temporary penalty to Perception can make exploration less reliable until the research finishes.
Start a long research project before handling lower-risk conversations or exploration. That way, the temporary penalty does its work while you gather information instead of sabotaging a crucial check.
After research finishes, you lose the temporary research modifier and gain the Thought’s permanent bonuses, penalties, cap increases, or special effects. These effects can raise a skill, improve passive information, unlock checks, change drug or dialogue interactions, or increase a learning cap. In other words, the research penalty is temporary, but the completed Thought can shape the rest of your Disco Elysium playthrough.
Thought Slots and Availability
At the start of a playthrough, Harry has 3 Thought slots. Unlock additional slots by spending one Skill Point per slot, allowing you to reach a maximum of 12 active slots. If all your slots are occupied, you can spend one Skill Point to forget an internalized Thought and permanently free the slot for that playthrough.
That choice is permanent for the current playthrough, so do not discard a Thought casually. You may discover a stronger option later, but you cannot internalize every possibility: 53 distinct Thoughts exist, and some are mutually exclusive. As a result, no single playthrough can internalize every Thought.
Hidden Thought Effects
Before a Thought is fully internalized, its final bonus may not be revealed. Choose based on the research penalty and the context in which you discovered it, or consult a reliable reference if you are planning a focused skill-check build. This is especially useful when you are deciding whether to endure a temporary penalty for a permanent cap increase or a specialized bonus.
Treat the Cabinet as a flexible long-term investment rather than an emergency button. Keep your current investigation in mind, pause research when a temporary penalty threatens an important check, and use spare Skill Points to expand capacity only when another Thought is genuinely worth carrying. With that approach, the Thought Cabinet becomes one of Disco Elysium’s strongest tools for turning failure, curiosity, and strange dialogue into lasting advantages.
How to Use Thought Bonuses for White Checks in Disco Elysium
Disco Elysium’s best Thought bonuses don’t just make one roll easier—they can reopen entire categories of repeatable checks. If a failed White check is blocking several opportunities, the right Thought can turn a locked skill into a much more flexible part of your build.
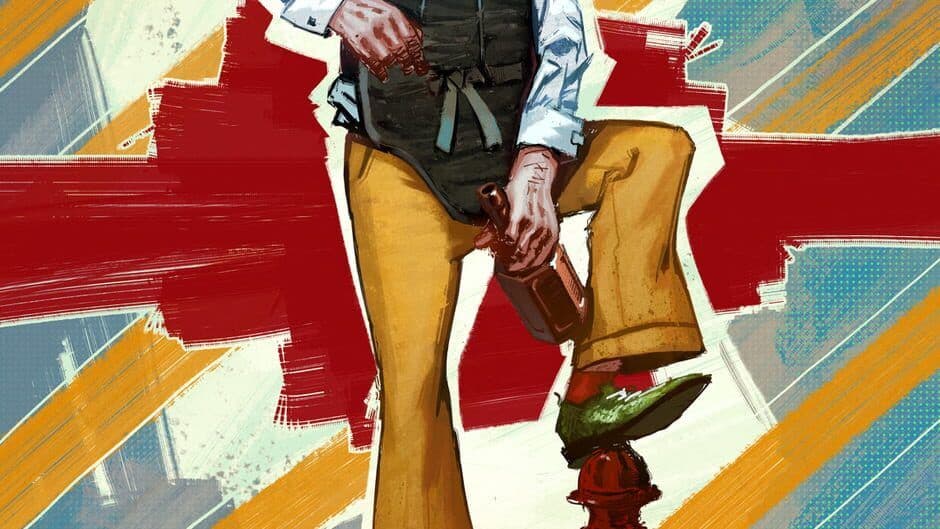
Detective skills and thought bonuses.
Thoughts That Unlock Entire White-Check Categories
These Thoughts are the most direct way to expand your retry options. They are especially useful when you want to explore more dialogue and side content rather than spending a Skill Point on every individual failed check.
- Torque Dork: After discussing motor carriages with Kim Kitsuragi, your detective partner, and meeting its Interfacing conditions, internalize this Thought to gain +2 Interfacing and unlock all Interfacing White Checks. It’s an excellent choice when you want more opportunities to retry locks, machines, and other technical interactions.
- Motorway South: After discovering and internalizing this Thought, you unlock all Intellect White Checks. Use it when several Logic, Encyclopedia, Rhetoric, Drama, Conceptualization, or Visual Calculus opportunities are locked behind failed attempts.
- One More Door: After discovering and internalizing this Thought, you unlock all Psyche White Checks. This is the broad solution for reopening checks tied to Volition, Inland Empire, Empathy, Authority, Esprit de Corps, and Suggestion.
- The Litany of Contact Mike: After completing its discovery condition, internalize this Thought to unlock all Physique White Checks. It can dramatically improve access to repeatable checks involving Endurance, Pain Threshold, Physical Instrument, Electrochemistry, Shivers, and Half Light.
- Arno van Eyck: After collecting its required posters or triggers, internalize this Thought to unlock all Motorics White Checks. That gives you more retry options for Hand/Eye Coordination, Perception, Reaction Speed, Savoir Faire, Interfacing, and Composure.
Don’t spend a Skill Point immediately after every failed White check. Check whether one of these Thoughts can unlock the whole skill category first—you may reopen several checks with a single investment.
A Thought for Low Learning Caps
Regular Law Official is useful before your build has room to raise several individual skills. After adopting the relevant law-oriented identity, it raises all learning caps to 3. That matters when multiple skills are blocked at low caps and you need a general upgrade path instead of one narrow bonus.
This Thought is less specialized than Torque Dork or The Litany of Contact Mike, but it can help stabilize an early Disco Elysium build. Use it when several White checks are out of reach because their associated skills have already hit their current limits.
How to Choose the Right Thought
Match the Thought to the checks you expect to revisit. If the game shows several locked technical opportunities, prioritize Torque Dork; if an entire Attribute has multiple failed checks, Motorway South, One More Door, or The Litany of Contact Mike offers broader value. Arno van Eyck is similarly strongest when you are actively exploring and want more Motorics retries across the district.
Remember that these bonuses affect access to White checks—they do not guarantee that every roll will succeed. Once a check reopens, combine the Thought with your other available modifiers and return when your total is stronger. With the right Thought Cabinet setup, failed checks in Disco Elysium become detours instead of dead ends.
How to Use Skill-Specific Thoughts in Disco Elysium
In Disco Elysium, the right Thought can turn a narrow skill build into a check-passing machine. These choices are especially valuable because they either raise a skill directly, increase a learning cap, or reward the passive checks you trigger while exploring.

The setting of Martinaise is filled with political and personal tension.
Thoughts That Reward Exploration and Progression
Actual Art Degree becomes available after choosing Art Cop dialogue and completing its research. During the research phase, it applies -1 Perception, so avoid starting it before an important Perception check if you can. Once completed, Conceptualization passives grant +10 XP and restore +1 Morale, making it a strong choice for players who want extra experience and emotional recovery throughout their Disco Elysium playthrough.
Jamais Vu (Derealization) follows discussions about reality with Lena and Joyce. After you finish researching it, every clicked orb grants +1 XP, while all Intellect learning caps rise by 1. This Thought is excellent for exploration-heavy runs: click orbs as you move through Martinaise, collect the extra experience, and use the raised caps to keep improving Intellect skills.
Wompty-Dompty Dom Centre is unlocked after speaking with Trant Heidelstam at Land's End, the NPC whose conversation provides access to this Thought. After researching it, Encyclopedia passives grant +10 XP and +2 reál. If your build already triggers plenty of Encyclopedia insights, this Thought effectively turns background knowledge into both progression and spending money.
Research Jamais Vu (Derealization) and Wompty-Dompty Dom Centre before a long exploration session. Their orb and Encyclopedia rewards compound naturally as you investigate, so you get more value without changing your dialogue strategy.
Thoughts for Specific Skill Checks
The Bow Collector requires meeting its Conceptualization requirement and completing its research. It grants +3 Shivers, a substantial boost for difficult Shivers checks. Save it for a run that leans into the city’s intuition and atmosphere, or internalize it before a known late-game Shivers check where every point matters.
Hardcore Aesthetic follows its Noid and Conceptualization discovery sequence. Once completed, it grants +1 Volition and +1 Endurance, helping stabilize both Morale and Health-related checks. It is a reliable all-purpose Thought when your build feels fragile in more than one way.
Rigorous Self-Critique becomes available after apologizing frequently and accepting the Thought. It restores +1 Morale after INT or PSY Red-check failures and +1 Health after FYS or MOT Red-check failures. It also raises the Pain Threshold cap to 6, giving failure recovery and future skill investment a useful connection.
Thoughts That Raise Learning Caps
Cop of the Apocalypse is tied to choosing apocalyptic dialogue. It raises the Inland Empire and Shivers learning caps to 6 and improves Pyrholidon, but imposes -1 Rhetoric. This is a focused trade: take it when you want stronger supernatural insight, Shivers checks, and Pyrholidon benefits, then accept that Rhetoric conversations may become harder.
Some Kind of Superstar follows Superstar Cop dialogue. It raises the Visual Calculus, Suggestion, Electrochemistry, and Composure caps to 6, while imposing a -2 Logic penalty. That makes it a powerful choice for a broad dialogue-and-investigation build, but a poor fit if Logic is carrying your current casework.
⚠️ Watch out: Learning-cap increases do not replace the skill points needed to raise those skills. Before committing to Cop of the Apocalypse or Some Kind of Superstar, check whether you have enough points to take advantage of the higher caps.
These Thoughts give Disco Elysium builds clear identities: exploration rewards from passive checks, stronger Shivers and survival tools, or higher ceilings for specialized skills. Choose the bonuses that match the checks you expect to face, and you’ll be ready to shape Harry into exactly the kind of detective your investigation needs.
How to Use Passive Checks in Disco Elysium
Passive checks are one of Disco Elysium’s best sources of hidden information—the skills in Harry’s head can notice things before you even choose a dialogue option. Unlike a dice-based check, a passive check happens automatically during dialogue or exploration when the relevant skill requirement is met.

Passive checks are a core pillar of the Disco Elysium experience.
How Passive Checks Work
When a passive check triggers, you automatically pass it without rolling. The successful skill may reveal lore, background information, a character’s motive, or a deeper understanding of what you’re seeing. It can also add a new dialogue option or reveal a task, so these quiet interruptions can meaningfully shape your investigation.
The passive-check formula is:
Skill Level + Modifiers + 6
Compare that total with the passive requirement. Clothing and Thought bonuses count as modifiers, so raising the skill itself isn’t your only option. If a passive seems just out of reach, equip a relevant item or use a bonus before returning to the conversation or area.
Passive checks reward broad preparation. A skill bonus can reveal information automatically, without spending time on a risky active roll.
Passive Difficulty Bands
The game presents passive requirements using the following difficulty bands:
- Trivial: 6 or 7
- Easy: 8 or 9
- Medium: 10 or 11
- Challenging: 12
- Formidable: 13
- Legendary: 14
- Heroic: 15
- Godly: 16 or 17
- Impossible: 18 or 20
There is no passive difficulty 19. Use the requirement as a target for Skill Level + Modifiers + 6, rather than expecting a dice roll to rescue a low skill.
Why Passive Checks Matter
Across the full game, there are 10,287 passive checks. Empathy has 899, while Hand/Eye Coordination has 115. That difference changes how often each skill speaks up, meaning your build affects not only which checks you pass but also how frequently certain internal voices provide commentary.
Failing a passive check—or never meeting its requirement—usually means missing flavor, context, or optional information rather than blocking main-story progression. Some passives can reveal tasks, however, so a missed insight may close off an extra lead or piece of background even when the central investigation continues.
Don’t panic if a passive doesn’t appear. Raise the relevant skill, add clothing or Thought bonuses, and revisit the area when possible. With the formula and difficulty bands in mind, you’ll know exactly what your build is uncovering—and what Disco Elysium is keeping just beyond Harry’s reach.
How to Handle Anti-Passive Checks in Disco Elysium
Anti-passive checks are Disco Elysium’s nasty little reminder that missing information can hurt. When Harry’s relevant skill falls below a required passive threshold, the game may trigger an anti-passive instead of the normal insight—often causing Health or Morale damage.
How Anti-Passive Checks Work
A standard passive check can reveal lore, clues, or a new task when your skill is high enough. An anti-passive appears when that requirement is not met, turning the failed threshold into a possible penalty rather than simply withholding information. You might lose Health or Morale, so don’t assume that a skill staying silent means the conversation or exploration was harmless.
There are 211 anti-passive checks across Disco Elysium. That number is large enough for the consequences to appear repeatedly during a playthrough, especially if you leave important skills underdeveloped. Endurance, Volition, Health, and Morale deserve extra attention because they help you withstand the punishment when an anti-passive catches you.
⚠️ Watch out: A missing passive is not always a neutral result. If a conversation feels risky, prepare before pushing through every dialogue option.
How to Prevent Anti-Passive Damage
Before entering risky dialogue or exploring an area where you expect skill commentary, raise the relevant skill if you can. Equip a clothing item or other modifier that supports it, and heal Health or Morale beforehand so one unlucky anti-passive does not leave Harry vulnerable. You can also return later after improving your build instead of forcing every interaction immediately.
This is where preparation pays off in Disco Elysium: the goal is not to trigger every passive, but to avoid being punished when you fail to meet a hidden requirement. Keep your defensive resources topped up, watch which skills repeatedly cause trouble, and treat unexplained silence as a reason to stay cautious—not proof that nothing happened. With that mindset, anti-passive checks become manageable rather than a surprise tax on your investigation.
How to Read Check Modifiers in Disco Elysium
A difficult check in Disco Elysium is rarely just your skill level plus a roll. The small green and red entries beside the check tell the story of everything you’ve done—or haven’t done—before committing.
How Modifiers Are Assembled
When a check displays green or red modifier entries, read each one before rolling. These entries can reflect previous dialogue choices, discovered information, clothing, tools, Thoughts, drugs, and other context from your investigation. Green entries improve your chances, while red entries reduce the total you bring into the check.
Positive and negative modifiers stack together. A check can show up to roughly ten separate bonuses or penalties, so don’t stop after spotting the first green bonus. Scroll through the full list and compare the combined effect—several small penalties can cancel out a promising bonus, while a few extra points can turn a risky attempt into a comfortable one.
Treat the modifier list like a checklist. If the game shows a context-based bonus, it’s often telling you which earlier conversation, clue, item, or choice mattered.
Go Modifier Shopping Before Rolling
Before committing to a difficult check, try modifier shopping. Leave the conversation when possible, investigate other leads, change clothes, internalize a useful Thought, consume a suitable drug, and return with a better total. This approach is especially valuable when the check is a one-time opportunity, but it also saves resources on repeatable checks.
The key is to change the situation before selecting the check again. A new piece of information or a different outfit may alter the displayed entries, while a Thought or drug can address the relevant skill or attribute directly. Disco Elysium rewards patience here: you’re not expected to brute-force every obstacle the first time you see it.
Use Novelty Dicemaker Assistance
After certain failed checks, the game may make assistance from the Novelty Dicemaker, the game’s dice seller, available. When that retry option appears, purchase the specific dice offered by the Novelty Dicemaker, then use the resulting modifier to reopen the check.
This option is not available after every failure, so check the retry choices instead of assuming that leveling up is your only route. Once the dice modifier is applied, review the check again and confirm that the new total and modifier entries have updated before rolling.
Read every green and red entry, stack the available advantages, and shop for better conditions before you commit. With that habit, Disco Elysium’s checks feel less like blind luck and more like puzzles you can prepare to solve.
How to Use Scripted Failures in Disco Elysium
This is one of Disco Elysium’s easiest traps: a miserable-looking roll can make you think you simply need better clothes, a drug, or another Skill Point. But some checks are marked “Inevitably failed,” meaning the roll cannot succeed permanently—or until you meet a specific condition. Recognize that label before spending resources on ordinary modifiers.
Checks You Cannot Force
At Land's End, the Interfacing Red check to open the depot door is impassable. Accept the scripted failure and pursue the intended route instead of repeatedly changing equipment or raising Interfacing. This Disco Elysium check is designed to block the door until the story provides another way forward.
During the tribunal, the Reaction Speed Red check to dodge the last bullet is also impassable. A normal build cannot change the outcome, so do not burn consumables or reload repeatedly expecting a higher Reaction Speed total to help. Read the resulting scene and continue—the failure is part of the sequence.
The approach to the Insulindian Phasmid has a specific requirement. Its Electrochemistry Red check cannot pass without pheromones from Morell the Cryptozoologist, who provides the required pheromones for this encounter. Obtain and apply the pheromones first; no ordinary skill investment or modifier shopping can replace them.
⚠️ Watch out: If a check names an item or story condition as the requirement, treat that condition as more important than your displayed percentage. A high number does not override a scripted gate.
Item-Gated and Forced Failures
When opening the ice cream maker, the Physical Instrument check cannot pass until Harry has the Kvalsund multitool. Find the Kvalsund multitool before relying on the dice roll. Until you have it, the check is not a test of your Physical Instrument build—it is a reminder to search for the required tool.
At the FELD building, the first Shivers check to listen to the wind cannot pass normally. Follow the later reopening condition instead of repeatedly changing gear, consuming drugs, or investing in Shivers. The initial failure is scripted, so let the scene point you toward what to do next.
These failures are not wasted opportunities in Disco Elysium. They are narrative locks: once you identify one, preserve your resources, follow the story condition, and return only when the game gives you a genuine path to success. Recognizing the difference between a difficult check and an “Inevitably failed” check will save you time—and keep your build ready for the checks that actually can be beaten.
How to Use Scripted Successes in Disco Elysium
Disco Elysium occasionally hides a safety net inside its most important conversations. These scripted successes are White checks designed to become more manageable after failure, so don’t burn resources or reload immediately—push the scene forward and let the story reveal its backup plan.
Titus Hardie’s Authority Check
Inside the Whirling-in-Rags, speak with Titus Hardie, leader of the Hardie boys, when you’re trying to prove your authority during the investigation. His Authority check is built to help you eventually reach the intended conversation outcome.
You can fail this check up to four times. After the fourth failure, ask Kim Kitsuragi, your police partner who assists you during the investigation, to step in. Kim’s intervention leads to an automatic task conclusion, allowing the conversation to progress even if Harry cannot win the check himself.
Titus Hardie’s Rhetoric Check
The second Titus Hardie scene uses a Rhetoric check when you’re trying to convince him that he is being manipulated. Like the Authority check, this attempt can fail up to four times before its assistance route becomes available.
After four failures, ask Kim Kitsuragi to step in. Kim will help continue the investigation, so repeated failure does not permanently derail this line of questioning. Treat the first attempts as part of the scene rather than as a final verdict on your build.
If either Titus Hardie check fails, keep reading the dialogue instead of reloading automatically. The assistance option is the intended recovery route, and you can save your resources for checks that genuinely remain permanent.
FELD Building Shivers Check
At the FELD building, the Shivers check has a more deliberate sequence. The first attempt is a forced failure, so even a successful roll cannot complete it at that stage.
Fail again to receive the Work with the Children of the Big Sea task. Complete that task, then the Shivers check reopens with an Encyclopedia modifier. Once it becomes available again, keep retrying until successful—the staged failure is there to send you elsewhere before the check can properly resolve.
This is one of the clearest examples in Disco Elysium of a failure acting as a quest instruction. Don’t waste time trying to overpower the first attempt; follow the new task, return to the FELD building, and use the Encyclopedia modifier on the reopened check.
Kim’s Suzerainty Suggestion Check
When trying to convince Kim Kitsuragi to play Suzerainty, the Suggestion check automatically reopens with an easier modifier after failure. You do not need to spend a Skill Point or search for a separate reopening condition.
If you fail the check twice, badger Kim until he agrees. The scene is designed to reward persistence, so continue the conversation and use the easier retry rather than abandoning the attempt.
These four scripted successes show how Disco Elysium turns failure into momentum: Titus Hardie eventually accepts Kim’s assistance, the FELD building sends you toward Work with the Children of the Big Sea, and Kim’s Suzerainty check becomes easier before persistence finishes the job. Follow the recovery route, and these story checks will stop feeling like roadblocks.
How Special Skills Affect Checks in Disco Elysium
In Disco Elysium, not every voice in Harry’s head is a skill you can upgrade. Some apparent skills belong to the game’s Special Skills system: they shape the narration, especially during sleep or unconscious scenes, but they never participate in active checks.
The Three Special Skills
Ancient Reptilian Brain provides internal commentary during sleep or unconscious narration. It is also known as Soul Brother or Limbic System, but it cannot be leveled or used in skill checks. Treat its lines as atmospheric narration and insight into Harry’s fractured mind—not as advice that raises your chances on a check.
Limbic System also appears during sleep or unconscious narration, offering its own internal commentary. It is also known as Sister or Ancient Reptilian Brain, and it cannot be leveled or used in skill checks. The overlapping names can be confusing, but the practical rule is simple: neither Ancient Reptilian Brain nor Limbic System belongs to the upgradeable pool of 24 primary Skills.
Spinal Cord provides internal commentary under its own name during sleep or unconscious narration. Like the other Special Skills, it cannot be leveled or used in skill checks. You won’t improve Spinal Cord with a Skill Point, clothing, a Thought, or a consumable.
When one of these voices speaks, listen for narrative meaning rather than a mechanical opportunity. Special Skills can reveal Harry’s instincts and inner state, but only the primary Skills affect check totals and passive requirements.
This distinction saves you from wasting resources. In Disco Elysium, Ancient Reptilian Brain, Limbic System, and Spinal Cord are narration voices—not hidden stats waiting for a level-up. Focus your build decisions on the 24 primary Skills, and let the Special Skills enrich the story as you investigate Revachol.
How to Manage Skill Voices and Passive Information in Disco Elysium
In Disco Elysium, your character sheet is also a committee of unruly voices. A high skill does more than improve a roll: it changes which thoughts interrupt conversations, what Harry notices, and how much of Revachol’s hidden context reaches you.
How Skill Voices Shape Dialogue
During conversations, each of the 24 primary Skills offers its own perspective and agenda. Logic may push for a deduction, Empathy may read someone’s feelings, and Inland Empire may suggest something stranger—but none of these interruptions is an objective instruction. Listen to or ignore the internal interruption based on your goal, the situation, and the kind of Harry you want to play.
As a skill level rises, that skill tends to interrupt more often and provide more dialogue. Maximizing every skill can therefore give you more insight, but it can also fill conversations with conflicting advice. A balanced build may leave some voices quieter, while a heavily invested skill can become one of Harry’s loudest—and sometimes least trustworthy—companions.
Treat skill voices as opinions, not commands. If a skill suggests a risky response, pause and consider what another voice—or your own judgment—might say before choosing it.
Why Passive Information Matters
When an internal voice succeeds, it can reveal lore, clues, background information, or a new dialogue option without replacing the active check system. These moments are automatic: the skill speaks because it has enough presence to notice something, while active checks still handle deliberate attempts to overcome an obstacle.
That makes skill investment valuable even when you are not raising a displayed check total. A stronger skill can open extra context, expose details about a character, or point you toward another line of questioning. The information may not solve the case by itself, but it can change which leads you recognize and which choices feel available.
Skill Voices in The Final Cut
In Disco Elysium: The Final Cut, all 24 primary Skills are voiced by Lenval Brown, while the three Special Skills are voiced by Mikee W. Goodman. This casting helps distinguish the roles: the primary Skills function as Harry’s competing internal specialists, while the Special Skills provide their own form of narration rather than participating as levelable skills or ordinary check voices.
Once you understand this, skill points become more than simple chances to pass checks. You are deciding which voices speak up, how frequently they interrupt, and what kind of information shapes Harry’s view of the world. In Disco Elysium, the best build is not always the one with the loudest skills—it is the one whose advice you know when to trust.
How to Recover From Failed Checks in Disco Elysium
In Disco Elysium, a failed check is rarely the end of the investigation. White failures usually give you a route back in, while Red failures often open a different piece of the story—so read the outcome before reaching for a reload.
Recovering From a Failed White Check
Use this repeatable process whenever a White check goes badly:
- Record the relevant skill immediately. Then inspect the Map or check panel for the condition that will reopen the opportunity. The game may point you toward a new task, conversation, location, or skill increase.
- Before retrying the failed White check, choose the cheapest available recovery route. You can spend a Skill Point, complete another task, explore, talk to an NPC, internalize a Thought, or wait if the check specifically allows it.
- Return to the check only after its reopening condition is met. Recheck the displayed chance, then decide whether the improved opportunity is worth taking now or whether another lead should come first.
Don’t spend a Skill Point automatically. If the Map or check panel shows that another task or conversation can reopen the White check, follow that route first and save the point for a more stubborn obstacle.
Recovering From a Failed Red Check
After a Red-check failure, do not reload automatically. Read the resulting dialogue and determine whether the failure creates a new lead, assistance route, or beneficial outcome. Disco Elysium frequently turns failure into new information, unusual character moments, or another way forward.
If a failed Red check blocks your preferred approach, continue through the alternate narrative branch. Red failures are not necessarily detrimental and often preserve progression, even when the immediate result looks embarrassing or inconvenient. Reload only when you genuinely want a different version of the scene—not because the game has ended.
Reset Your Resources Before Committing
Before any unrecoverable Red check or scripted condition, heal Health and Morale, change equipment, apply available modifiers, save when appropriate, and only then commit to the roll. This reset matters because a permanent failure can consume your best route through a conversation, while entering with depleted Health or Morale can create an avoidable second problem.
With this workflow, failed checks become information rather than disasters: recover White checks methodically, accept the story’s Red-check branches, and prepare carefully before anything irreversible. That mindset will carry you through the toughest moments in Disco Elysium without sacrificing the surprises that make the RPG special.
How to Plan a Skill-Check Build in Disco Elysium
In Disco Elysium, the best skill-check build isn’t the one that wins every roll—it’s the one that keeps opening useful options. If you’ve struggled with spreading points too thin or missing key information, don’t panic: a flexible plan will carry you much further than a hyper-specialized detective.
Prioritize the Main Investigation First
During the early Martinaise investigation, focus your points on skills connected to the Whirling, the union, the strike, and the murder case. These areas generate many of the checks that directly support your investigation, so strengthening relevant skills helps you uncover leads without abandoning the main thread.
Listen to Kim Kitsuragi in Martinaise, your lieutenant and investigation partner, when he comments on whether an activity is relevant to the case. His remarks are a useful filter: if Kim treats a conversation or task as connected to the investigation, it’s usually a better early priority than chasing every optional lead immediately.
Build for Exploration After Your Core Skills
Once your main investigation skills are stable, shift toward skills with many available checks. This approach is ideal when you want optional dialogue, passive information, and extra tasks rather than the fastest route through the murder case.
Use the Map to locate available White checks and identify which skills are currently creating opportunities. Instead of raising one skill blindly, look for clusters of available checks and invest where a single upgrade can unlock several conversations or discoveries. This makes your build feel broader without wasting points on skills that have nothing useful waiting for them.
Treat the Map like a to-do list for your build. If several available White checks point toward the same skill, that skill is usually a better investment than one isolated difficult roll.
Spend Skill Points at the Right Moment
After a failed White check or when a skill reaches its cap, pause before spending. First check whether a Thought, clothing item, drug, or alternate task can provide a cheaper modifier. A temporary boost or a new route may solve the problem while preserving your Skill Point for a more valuable permanent upgrade.
This timing matters because a skill at its cap is not necessarily a dead end. A Thought may raise the cap, clothing may provide the missing point, or another task may add a modifier before you return. In Disco Elysium, patience often beats immediate leveling.
Let Failure Shape Your First Playthrough
For a first playthrough, treat failed checks as valid narrative outcomes instead of repeatedly reloading. Disco Elysium frequently uses failure to reveal new dialogue, unexpected consequences, or a different side of Harry’s personality. Even when a result looks embarrassing, it can still move the story forward.
Save deliberate optimization for later runs. Once you know which checks matter to your preferred route, you can plan a focused build around them—but your first run is more rewarding when you allow the detective’s mistakes to become part of the case.
Budget Around Fixed Leveling Progression
When planning your experience, remember that level-ups consistently require 100 points. This fixed progression means side quests remain useful regardless of your current level; they continue contributing toward the next upgrade instead of becoming obsolete as Harry grows stronger.
Take that into account when choosing between rushing a skill and exploring. A side task can provide experience, reveal a modifier, or open another check, so it may be more valuable than forcing one difficult roll immediately.
With this Disco Elysium build strategy, prioritize the main investigation, use the Map to find high-value exploration opportunities, and delay Skill Point spending until you’ve checked every cheaper option. Keep your first run flexible, let failures stand, and use the fixed 100 points progression to turn side content into steady growth. That balance gives you enough specialization to solve the case and enough breadth to hear what Revachol has to say.