How to Find the Mercenary Tribunal in Disco Elysium
The Mercenary Tribunal is Disco Elysium’s unavoidable collision point between the murder investigation and Martinaise’s escalating violence. This opening guide section shows exactly how to trigger it, where it begins, and when you should have your major leads resolved.
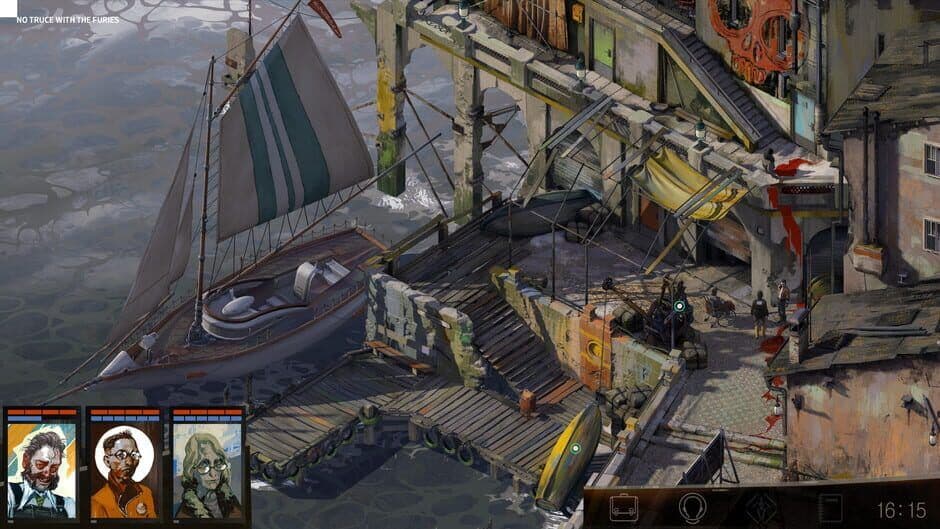
The Mercenary Tribunal is a pivotal confrontation in the game.
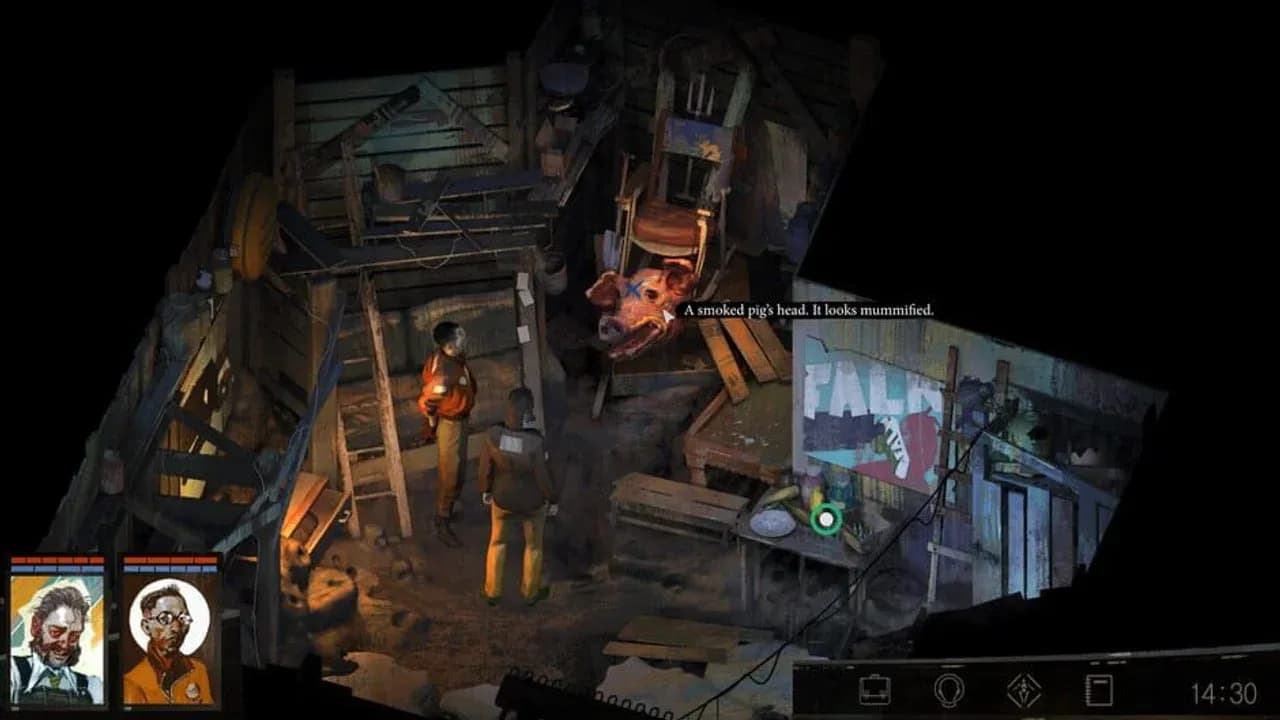
The trigger starts in Ruby's cave beneath the Feld building. Complete the Ruby encounter, then find and read her journal. After that, the game creates the Return to the Whirling-in-Rags task and requires you to travel back to the hostel on foot—fast travel unavailable.
Head toward the Whirling-in-Rags plaza in Martinaise, directly at the hostel entrance. When Harry returns after reading Ruby’s journal, the Tribunal cutscene triggers as he approaches. This is not a scene you can avoid through earlier dialogue choices: the mercenary standoff begins regardless of what you previously said or how you handled the investigation.
⚠️ Watch out: Save before approaching the Whirling-in-Rags plaza. Once the cutscene begins, the Tribunal’s chain of events starts immediately, so a save beforehand preserves your ability to revisit the approach.
The Tribunal usually takes place around Day 5 of the Martinaise investigation. Some warnings and fail-state windows can extend as late as Day 7, but you should treat Day 5 as the practical deadline and resolve your major leads beforehand. In Disco Elysium, the exact route to the confrontation can vary, but finding Ruby and reading her journal is the point of no return.
Once you return to the hostel, the mercenary standoff is underway. You cannot peacefully cancel it or walk away—prepare your investigation before entering the Whirling-in-Rags plaza, then let the Tribunal play out. Knowing the trigger means you can choose when to commit and avoid being caught unprepared.
How Previous Choices Shape the Mercenary Tribunal in Disco Elysium
The gunfire at the mercenary tribunal in Disco Elysium is the payoff to nearly every thread in the murder investigation. Your earlier conclusions, accusations, and conversations won’t prevent the standoff, but they can change what you understand, which dialogue options appear, and how prepared you are when the case finally turns violent.
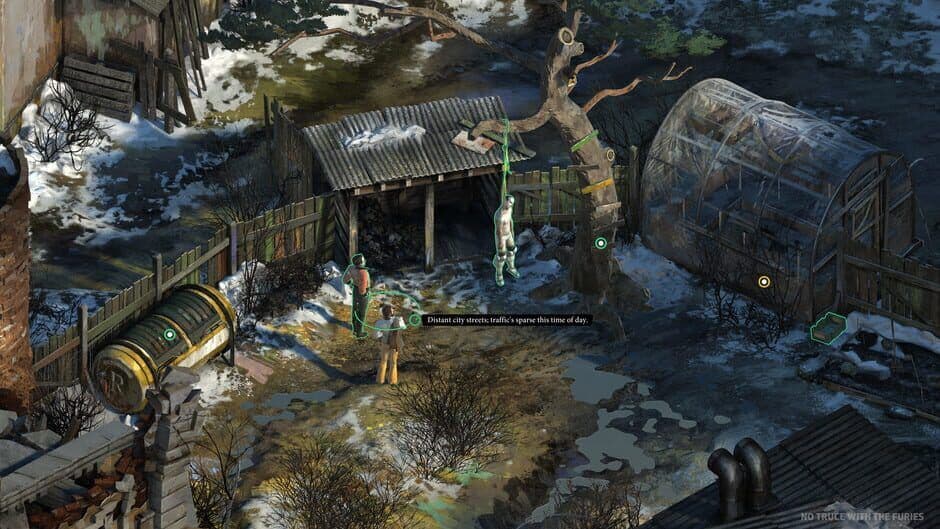
Your relationship with Kim Kitsuragi is vital during the game's late-game confrontations.
The Murder Case Sets the Tribunal’s Context
At the Whirling-in-Rags hanged-man courtyard, meet Lely, the murdered private mercenary whose death motivates the Tribunal. Early assumptions point toward the union and the people around the hostel, but the investigation gradually reveals that the killing is more complicated than the initial evidence suggests. The more thoroughly you examine the body, reconstruct the shooting, and question witnesses, the more useful information you carry into the confrontation.
Inside the Whirling-in-Rags hostel room, question Klaasje, Lely's lover who tampered with the scene and becomes a Tribunal-related suspect. Her story can steer your investigation toward the union, the mercenaries, or the ballistics evidence, depending on how you challenge her and what clues you have already found. Treat her testimony as a lead rather than a final answer—later discoveries can change how you interpret everything she told you.
On the Whirling-in-Rags hostel ground floor, speak with Titus Hardie, Hardie Boys leader who provides an alibi and leads the union side of the standoff. Your conversations with Titus and the Hardie Boys establish how the union responds when the mercenaries arrive. Earlier dialogue choices can also determine which arguments, accusations, and investigative conclusions are available when you try to explain what happened to Lely.
Evidence and Earlier Leads Matter
Your investigation preparation in Martinaise should connect the murder case leads, union, Klaasje, Ruby, ballistics, and the Fisherman's shack bullet before the Tribunal. The union and Klaasje provide competing explanations for Lely’s death, while Ruby and the ballistics trail push you toward the actual shape of the shooting. The Fisherman's shack bullet is especially important because showing it opens the route toward Ruby and gives the investigation a stronger foundation before the final confrontation.
Don’t stop investigating once the union gives you a plausible story. In Disco Elysium, contradictory evidence is often what unlocks the most useful dialogue later.
Your relationship with the people involved also reflects your earlier choices. Respectful, cooperative conversations with Kim can improve his opinion of you, while reckless accusations and needless hostility can make the investigation harder to manage. Likewise, how you handle Titus, Klaasje, Ruby, and the Hardie Boys affects the tone and information available around the standoff, even though the confrontation itself remains unavoidable.
The key takeaway is simple: the Tribunal is not a separate combat encounter—it is the investigation coming due. Follow the murder case leads, compare the union’s account with Klaasje’s story, pursue Ruby and the ballistics evidence, and show the Fisherman's shack bullet when the opportunity appears. With those threads connected, you’ll enter this Disco Elysium turning point understanding what is at stake instead of walking into the gunfire blind.
Best Save Setup for the Mercenary Tribunal
The walk back from the Feld building is your last clean safety window before the tribunal in Disco Elysium. Use it: create a manual save on the route back to Whirling-in-Rags, before you approach the hostel and trigger the confrontation.
Check your gear and skill points before initiating the save.
Keep this save as your main preparation point. If a critical check goes badly or the shootout produces casualties you want to avoid, you can reload and try a different dialogue choice, outfit, or skill setup without replaying the investigation. Trust me, saving before the approach is far less frustrating than discovering afterward that your only backup is too late.
💡 Save tip: Use multiple save slots in Disco Elysium before red checks and major conversations. Keep separate saves instead of relying on one autosave, especially for this sequence.
Don’t treat every failed roll—or every Tribunal casualty—as a game over. Failure is content in Disco Elysium: failed checks and different survival outcomes open alternate narrative branches, including scenes and consequences you may not see on a successful run. Keep one untouched save for safety, but consider letting at least some failures stand if you’re curious where the story goes.
With a manual save before approaching the hostel and several backup slots behind it, you can experiment freely while preserving every major outcome.
Best Party Setup for the Mercenary Tribunal
The Disco Elysium Tribunal is a three-person survival test: Harry takes the immediate danger, Kim provides crucial backup, and Cuno becomes the contingency plan if things go badly. Your goal isn’t to build a conventional combat party—it’s to preserve the strongest partner route after the shooting.
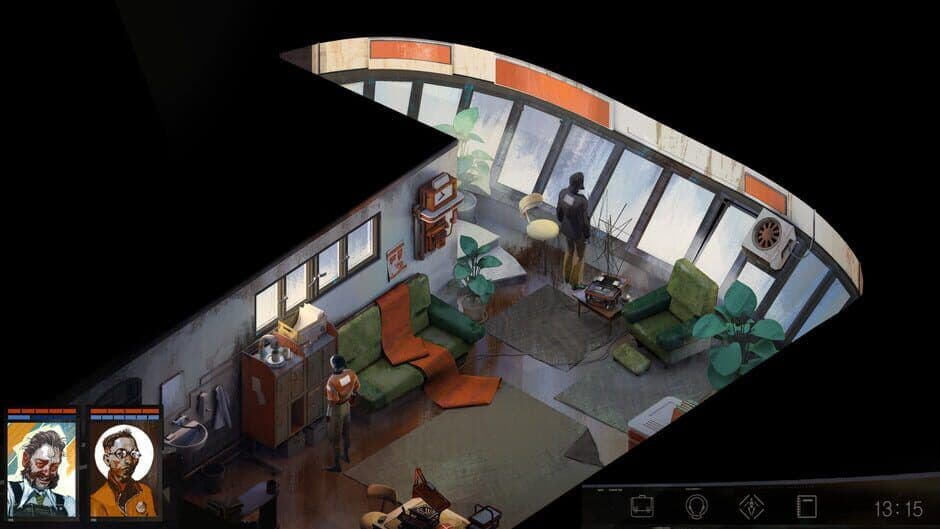
The bond between partners is tested during the Mercenary Tribunal.
Harry Du Bois: the frontline detective
Harry Du Bois, at Martinaise as the player detective, is the only character you directly control during the Tribunal. He can be injured but cannot be killed during the Tribunal’s character-targeting sequence, so expect Harry to absorb danger even when the exchange goes well. His role is to make the decisive interventions, protect Kim when the partner is targeted, and keep functioning after taking one or two gunshots.
Harry also determines which partner remains available afterward. A healthy Kim stays with him for the rest of the investigation, while a hospitalized Kim forces Harry to consider Cuno—or continue alone.
Kim Kitsuragi: your best partner
Kim Kitsuragi, at the Tribunal plaza as Harry’s partner, is targeted during the shootout. He can survive or be hospitalized depending on Harry’s Authority check, making him the most important party member to protect. If Harry succeeds, he can intervene when Kim is threatened, give Kim his weapon, or allow Kim to use his own weapon.
Keeping Kim healthy is the strongest outcome for most playthroughs. He offers reliable support and remains Harry’s partner, while losing him sends the investigation down a different route. Trust me, protecting Kim is worth prioritizing even if it means accepting a less favorable result elsewhere in the exchange.
Treat Kim’s survival as the main party objective. Harry can withstand the Tribunal’s danger, but Kim’s hospitalization changes who accompanies you for the rest of the case.
Cuno: the replacement route
Cuno, on the Whirling-in-Rags hostel grounds as a local youth and potential replacement partner, can step in if Kim is hospitalized—provided your earlier relationship with Cuno permits recruitment. He is not your first-choice party member for the Tribunal itself; he becomes relevant after the two-day recovery period, when Kim is unavailable.
If Kim is hospitalized and Cuno is eligible, Cuno accompanies Harry for the remainder of the investigation. If you refuse Cuno, Harry follows a solo route instead. That makes your party setup a simple priority order:
- Keep Kim healthy so he remains Harry’s partner.
- If Kim is hospitalized, accept Cuno if your earlier relationship permits recruitment.
- If you refuse Cuno, continue alone.
The safest Tribunal plan is therefore to prepare Harry to act as the frontline detective while preserving Kim as the main partner. Cuno is a valid fallback, but a healthy Kim gives you the most dependable continuation of the investigation.
Best Combat Skills for the Mercenary Tribunal
This is the point where Disco Elysium turns its dialogue-driven investigation into a life-or-death exchange. Your combat preparation should focus on four skills: opening the fight, surviving the return fire, protecting Kim, and finding the hidden equipment that improves those checks.

Internalizing skills to survive the Tribunal.
Hand/Eye Coordination: Land the Opening Shot
Hand/Eye Coordination determines whether Harry can shoot Kortenaer, the mercenary leader at the Tribunal plaza, before the standoff fully erupts. With a firearm equipped, passing this check hits Kortenaer and guarantees his death later in the sequence, making it one of the most valuable offensive checks in the entire encounter.
Aim for roughly 5–6 points in Hand/Eye Coordination after clothing or other bonuses. If the shot fails and ammunition remains, you can retry the check; otherwise, you can throw the weapon nonlethally or accept the outcome. This is your best chance to reduce the danger to Titus and the Hardie Boys before the mercenaries act.
Reaction Speed: Survive the Gunfire
Reaction Speed determines whether Harry avoids Ruud’s shot after the opening attack and whether he responds to Kortenaer’s later attack. Failing or refusing the Ruud check costs Harry 2 health points, while the later Reaction Speed check determines whether Harry avoids another gunshot.
There is one important catch: the final-bullet check is scripted to fail. In other words, even a heavily boosted Reaction Speed cannot turn every incoming shot into a clean dodge. Use the skill to reduce the damage you take earlier in the sequence, but keep Health recovery available for the gunfire that cannot be avoided.
⚠️ Watch out: Don’t treat Reaction Speed as a guaranteed escape route. The final-bullet check is scripted to fail, so enter the Tribunal with enough Health to survive the hit.
Authority: Keep Kim in the Fight
Authority is the key relationship-sensitive skill when Kim is targeted during the Tribunal. It determines whether Harry protects or warns Kim quickly enough, allowing Harry to give Kim his weapon or letting Kim use his own. Passing this check keeps Kim available for the rest of the case; failing it sends him to the hospital, where he remains unavailable.
Your previous choices can affect how favorable this check becomes, so Authority is more than a raw combat stat here—it is the skill that converts Harry’s relationship with Kim into immediate protection. If keeping Kim as your partner matters to you, prioritize every available Authority bonus before returning to the plaza.
Perception: Find the Preparation You Missed
Perception does not directly decide the Tribunal’s shooting sequence, but it helps locate hidden items, clues, and equipment that can improve your readiness. That makes it a useful late-game preparation skill, especially if you have been leaving unexplored objects or concealed evidence behind.
Be careful about dropping Perception to zero: doing so can hide interactive objects and leave you unable to recognize things you need to investigate. You do not need to build Perception as aggressively as Hand/Eye Coordination, Reaction Speed, or Authority, but keeping it functional can prevent you from missing the bonuses and gear that make those more important checks easier.
With roughly 5–6 points of Hand/Eye Coordination, strong Reaction Speed, enough Authority to protect Kim, and a functional Perception score, Harry is prepared for every major skill gate in the Tribunal. The gunfight is still dangerous, but this setup gives you the best chance to control its opening, limit the damage, and keep Kim beside you.
Best Gear Setup for the Mercenary Tribunal
The tribunal is where Disco Elysium’s equipment finally earns its keep. A firearm opens the best offensive option, while Fairweather armor can turn a deadly hit into a survivable one—so check your inventory before you walk back into the hostel.
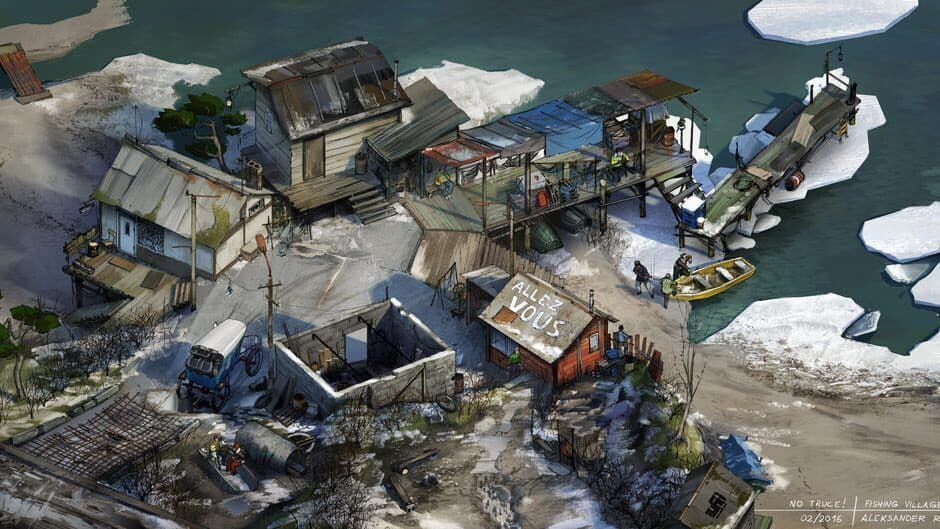
Character concept art.
Essential Tribunal Equipment
- Harry's firearm: Obtain it through Everett's questline in Martinaise from Wednesday onward, or recover it through the Pigs/Ruby routes. You need it equipped to attempt the opening shot against Kortenaer, making this the most important item for controlling the first exchange.
- Fairweather T-500 Cuirass: Acquire this through the 'Who put the clothes in the trash?' task in Martinaise. It prevents or reduces damage from Ruud's attack and grants +1 Pain Threshold and +1 Volition, though it applies -1 Empathy. That defensive effect matters if you fail or skip the Reaction Speed check and Ruud fires at Harry.
- Fairweather T-500 Greaves: Steal these from the hanged man at the Whirling-in-Rags. They grant +2 Authority and -1 Composure, making them especially valuable for the check that determines whether Harry can protect Kim.
- Fairweather T-500 Gauntlets: Find these near the sandcastle in Martinaise. They grant +2 Interfacing and contribute to general late-game equipment preparation. They do not directly improve the tribunal’s main combat checks, but they belong in your completed Fairweather setup before the event.
Equip the firearm before the tribunal begins, not during the opening dialogue. Then wear the Fairweather T-500 Cuirass and Fairweather T-500 Greaves together if you can accept their penalties—the damage protection and Authority bonus are more useful here than a perfectly balanced outfit.
The best setup combines the firearm for Kortenaer’s opening shot, the Cuirass for Ruud’s attack, and the Greaves for the Kim check. The Gauntlets round out your late-game equipment preparation, while healing consumables should already be stocked for the forced gunfire and any damage that gets through. With this gear ready, you give yourself the strongest chance to control the tribunal instead of simply enduring it.
Best Skill Bonuses for the Mercenary Tribunal
The tribunal in Disco Elysium can turn on a single roll, so squeeze every bonus you can from your wardrobe and Thoughts before you return to the hostel. The best setup focuses on Hand/Eye Coordination, Authority, Volition, and Pain Threshold—the skills that give you the most room for error during the shootout.
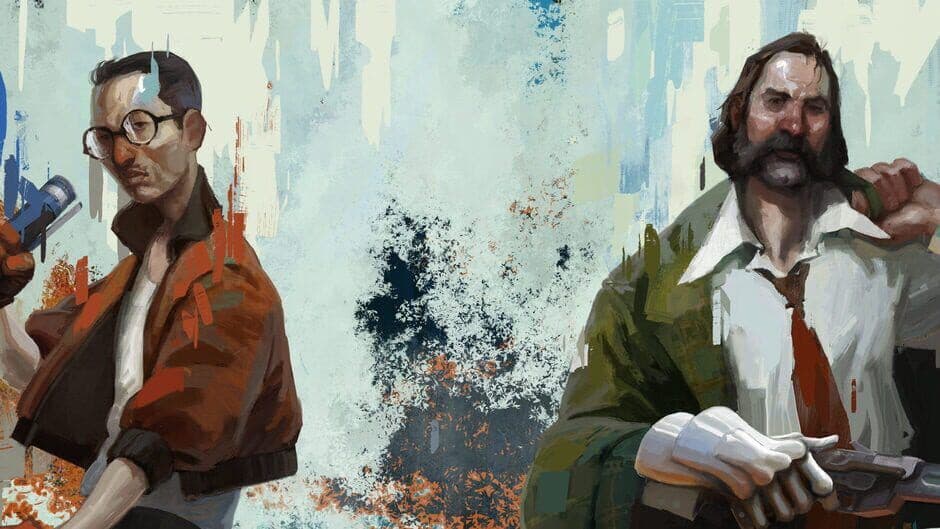
The setting of the Mercenary Tribunal.
Best Clothing Bonuses
FALN Ultra Series Sneakers are sold at Siileng's shop in Martinaise for 50 réal. They grant +1 Hand/Eye Coordination, making them one of the cleanest ways to improve Harry’s opening firearm check against Kortenaer.
At the Whirling-in-Rags, search the hostel interior for the Pinball Maker's Coat. It grants +1 Hand/Eye Coordination, so wearing it with the FALN Ultra Series Sneakers gives you another direct boost before attempting the shot.
The Fairweather T-500 Cuirass comes from the discarded clothing quest in Martinaise. It grants +1 Volition and +1 Pain Threshold, while penalizing Empathy by 1. That trade is worthwhile here: the Cuirass can protect Harry from Ruud’s attack, while its Volition bonus supports your mental survivability.
Dress for the check, not for appearance. Wear the Hand/Eye Coordination pieces before the opening shot, then prioritize Authority and protection for the later moments involving Kim.
Thoughts, Drugs, and Final Adjustments
Overproductive Honour Glands is internalized through honorable choices in Disco Elysium and raises the Authority learning cap to 5. If your Authority is capped before the tribunal, this Thought gives you room to invest another skill point and improve the check that determines whether Kim stays available.
Drugs can also raise related skill categories and their learning caps by one. Pyrholidon is especially useful when you need an extra Psyche boost, while the Fairweather armor pieces cover the physical and Authority bonuses that matter most during this encounter. Use these temporary advantages before the relevant check rather than consuming them casually earlier in the day.
Tools do not replace the key skill bonuses here, but your firearm remains essential because it unlocks the opening shot. Combine it with the FALN Ultra Series Sneakers, Pinball Maker's Coat, and any available Authority improvement, then keep the Fairweather T-500 Cuirass equipped for the incoming gunfire.
With these bonuses stacked, you are not relying on one lucky roll—you are giving Harry the strongest possible tribunal setup. Take a breath, check your outfit, and go in ready.
How Skill Checks Work in the Mercenary Tribunal
The Tribunal turns Disco Elysium’s dialogue system into a life-or-death gamble. The game still has no traditional combat system, but every displayed roll can change who survives, whether Harry takes damage, and whether Kim remains available.
The game's art style reflects its complex narrative themes.
How Tribunal Skill Checks Work
An active skill check is a visible roll you choose to attempt. The game rolls two six-sided dice, then adds your skill level and all applicable modifiers:
Skill level + modifiers + dice roll = your result
You pass when the total meets or exceeds the check’s difficulty. Rolling double ones is a critical failure, while rolling double sixes is a critical success—except under The Precarious World, which can alter those critical outcomes.
The Tribunal can also present passive checks, which happen automatically when your relevant skill reaches the required level. You do not roll for these; the skill quietly supplies information or a reaction. For the important decisions during the standoff, however, pay attention to whether the game labels the option as a white or red check.
Read the displayed modifiers before committing to a roll. A low base skill can become workable after clothing, Thoughts, drugs, clues, or prerequisite dialogue improve the calculation.
White Checks and Red Checks
A white check is a failed check that can reopen later during the same playthrough. Increasing the relevant skill can restore it, but so can finding a clue, having a new conversation, obtaining an item, internalizing a Thought, or triggering another modifier. If a white check closes during the Tribunal preparation route, do not assume the opportunity is gone forever—look for the condition that can reopen it.
A red check is different. It is a one-shot check tied to an irreversible choice, and failure permanently closes that check for the rest of the playthrough. You cannot simply raise the skill afterward and try again, so treat red Tribunal decisions as commitment points rather than routine attempts.
How to Raise Your Odds
Before attempting a Tribunal roll, improve the result in a deliberate order:
- Inspect the displayed modifiers and difficulty before spending a skill point.
- Change clothes to gain the most useful skill bonuses, even if the outfit looks ridiculous.
- Use drugs or internalize relevant Thoughts when their bonuses improve the check.
- Complete prerequisite dialogue and gather clues that add modifiers or reopen a white check.
- Spend skill points only after checking whether the earlier bonuses already give you a strong chance.
This approach matters most for a red check, because you cannot retry it after failure. For a white check, you can attempt the roll first and invest later if it fails—provided you have a way to increase the skill, uncover a clue, start a conversation, find an item, use a Thought, or gain another modifier.
With the dice system understood, you can stop treating every Tribunal roll as pure luck. Check the math, stack the available bonuses, and save your skill points for the decisions that truly cannot be repeated.
How Relationships Affect the Mercenary Tribunal in Disco Elysium
In Disco Elysium, Kim Kitsuragi’s fate after the Tribunal depends on more than one Authority roll. Your cumulative relationship with him determines whether he remains your partner, returns to his own precinct, or is replaced after the confrontation.
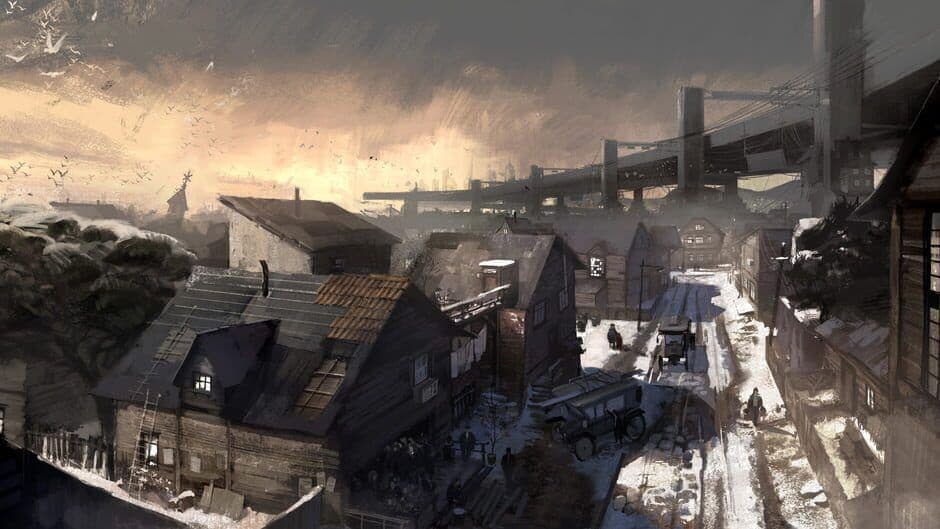
Martinaise serves as the backdrop for the pivotal Mercenary Tribunal.
How Kim’s Opinion Changes the Outcome
Kim’s reputation is built through your cumulative respectful, competent, and cooperative choices with Kim throughout the investigation. Treat him as a partner rather than a punchline, listen to his observations, and avoid repeatedly undermining his authority. This opinion affects later recruitment and debriefing outcomes, especially if Kim survives the Tribunal.
During the confrontation at the Tribunal plaza, Kim’s survival still depends on your Authority response when Kim is targeted. If the check succeeds, Harry gives Kim his weapon or Kim uses his own. Passing this response keeps Kim active for the remainder of the case; failing it sends him to the hospital, regardless of how strong your earlier relationship was.
Build Kim’s opinion before the Tribunal, but don’t assume a good relationship replaces the Authority response. You need both a strong reputation and a successful intervention to secure the best partner outcome.
Keeping Kim as Your Final Partner
To Recruit Detective Kim Kitsuragi, keep Kim uninjured and maintain sufficient opinion for Kim to join Precinct 41 at the conclusion. If Kim survives but your relationship is not strong enough, he may return to his own precinct instead of joining Harry’s. If Kim is hospitalized, Cuno can take his place, but that creates a different post-Tribunal path and changes the tone of the final debriefing.
Kim’s earlier involvement also improves the investigation before the shooting begins. In Martinaise, before midnight, conduct major interviews with Kim present because his passive checks and reactions add investigation context. He can provide useful observations and partner commentary that you miss when working alone, so schedule important conversations during the day whenever possible.
With a solid relationship and a successful response when Kim is targeted, you give yourself the best chance of keeping him beside you through the ending. That preparation makes the Tribunal’s aftermath—and the final debriefing—far more rewarding.
Mercenary Tribunal Phase 1: Opening Standoff and Dialogue
The opening of the Disco Elysium tribunal is a tense standoff, not a conventional combat encounter. At the Whirling-in-Rags, mercenaries led by Kortenaer, the hostile mercenary commander confronting the union group, face Titus Hardie and the Hardie Boys, while Harry and Kim are caught between both sides.
Martinaise landscape art.
The first moments play out as a largely non-interactive cutscene. The two groups trade threats and accusations over the hanged man, and the confrontation continues regardless of what you said earlier in the investigation. You are not choosing whether the tribunal happens—you are choosing how Harry presents himself before the shooting begins.
Choose How Harry Enters the Standoff
When Harry speaks at the tribunal plaza, you can identify himself as police or remain discreet. Announcing that you are police changes the opening presentation and the way the groups respond to Harry, but it does not prevent the confrontation. Staying discreet gives you a quieter entrance, though the mercenaries and union members still proceed toward violence.
⚠️ Watch out: This dialogue cannot peacefully end the tribunal. Treat these opening choices as role-playing and setup, not a way to cancel the standoff.
Use the Opening Dialogue Checks
The discussion about the hanged man and the union's role can produce a Rhetoric check before violence begins. This option lets Harry shape the argument and challenge the mercenaries' version of events, so read the available modifiers before committing.
A conversational approach can also produce a Suggestion check. It is another chance to influence the mood of the standoff before the shooting sequence starts, although it does not remove the confrontation. If either check fails, don't panic—Disco Elysium often turns failed dialogue into additional character writing rather than a dead end.
Once the discussion ends, the tribunal moves into its gunfire phases. Make your final dialogue choices, then be ready for the next prompt; the opening standoff is over, and the encounter becomes much less forgiving.
Mercenary Tribunal Phase 2: Shooting Kortenaer
The standoff is about to become a gunfight—in Disco Elysium, this is your last chance to seize the initiative. If you brought Harry's firearm, you can target Kortenaer at the Tribunal plaza, the mercenary leader, before the mercenaries act.
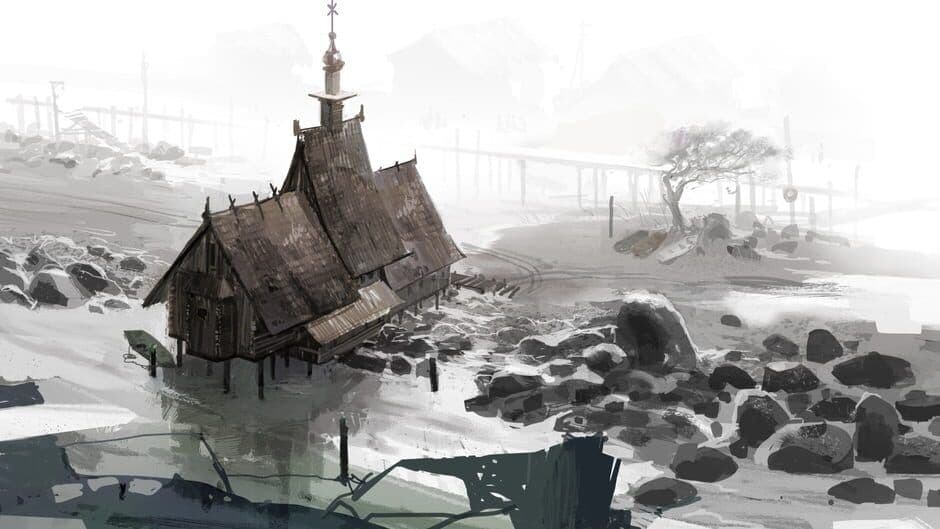
The mental state of the detective during the shootout.
Take the Opening Shot
During the Tribunal dialogue, choose the option to shoot Kortenaer. This triggers a Hand/Eye Coordination check. Pass it, and Harry fires before the opposing side takes its turn. Hitting Kortenaer guarantees that he will die later in the confrontation, making this the safest way to reduce the threat to the Hardie Boys.
The opening shot is optional, but it is the strongest offensive choice available in this phase. A successful hit changes the later casualty pattern in your favor.
If the Hand/Eye Coordination shot fails and ammunition remains, retry the check. If you cannot make another attempt, you can throw the weapon for a nonlethal result or accept the sequence and let the Tribunal continue without the opening hit.
The armed route has one firm requirement: before returning to the Whirling-in-Rags, obtain Harry's firearm. If Harry has no gun equipped, the option to shoot Kortenaer does not appear at all, and the mercenaries move first.
Make the decision deliberately: a successful shot guarantees Kortenaer’s later death, while a failed shot still gives you fallback options if ammunition remains. With Harry armed and the check prepared, you can enter the next phase with the best possible advantage.
Mercenary Tribunal Phase 3: Ruud’s Counterattack
The gunshot rings out—and in Disco Elysium, Harry’s opening attack immediately puts him in Ruud’s sights. This is a short but dangerous exchange: react quickly, or let your armor absorb the hit.

Artistic depiction of the game's narrative intensity.
At the Tribunal plaza, Ruud, a mercenary who targets Harry after Harry attacks first, responds immediately after Harry shoots Kortenaer. A Reaction Speed check appears, giving you the chance to avoid Ruud’s shot.
- Pass the Reaction Speed check: Harry avoids the incoming fire.
- Fail or refuse the check: Harry is shot and loses 2 Health.
- After Ruud fires: Kim’s expected return fire makes Ruud vulnerable, and Kim is expected to hit him. You do not directly control this response.
⚠️ Watch out: The check appears because Harry attacked first. If you fail or ignore it, the damage happens before the next phase of the shootout.
You can reduce the risk by equipping the Fairweather T-500 Cuirass before approaching the hostel. Its armor can prevent the incoming damage even when Harry is hit by Ruud’s shot, making it the safest way to absorb this exchange if your Reaction Speed roll goes badly.
Remember that the Health bar handles physical damage and is linked to Endurance. Reaching zero causes Harry to die, so losing 2 Health here can be serious if earlier injuries or other damage have already left him low.
The best response is straightforward: keep Harry’s Health above zero, wear the Fairweather T-500 Cuirass, and take the Reaction Speed check rather than accepting Ruud’s shot. Survive this counterattack, and the tribunal moves into Kortenaer’s more dangerous attack.
Mercenary Tribunal Phase 4: Kortenaer’s Attack
This is the most dangerous exchange in the Disco Elysium tribunal. After the opening shots, Kortenaer, the mercenary leader in the Tribunal plaza, launches another attack, and a difficult Reaction Speed check determines whether Harry avoids the next gunshot.
If you hit Kortenaer during the opening firearm check, that earlier wound guarantees his later death. This is the best outcome for the Hardie Boys because removing Kortenaer reduces the danger to Titus and the other union members during the exchange.
⚠️ Watch out: The Reaction Speed window is difficult, so don’t assume a strong setup makes the attack safe. Even a successful earlier response cannot eliminate every injury risk.
If Kortenaer was not shot—or if Harry missed the opening attack—the casualty pattern becomes worse. Kortenaer may shoot Titus, while Ruud may survive, leaving more danger on the Hardie Boys’ side. In other words, prioritize Kortenaer whenever you have the chance: passing the Hand/Eye Coordination check is not just about protecting Harry, but about controlling who remains alive after the gunfire.
There is also a final scripted failure hidden in the chaos. The Reaction Speed check to dodge the last mercenary bullet cannot be passed, meaning preparation cannot remove every injury risk in this phase. Keep your Health above zero and accept that Harry may still be hurt—the goal is to limit the damage and prevent the worst casualty pattern.
Once Kortenaer is down, the confrontation moves immediately toward the attack on Kim. Stay focused through the next dialogue prompt; the Authority response is your next chance to keep your partner out of the hospital.
Mercenary Tribunal Phase 5: Saving Kim Kitsuragi
In Disco Elysium, this is the tribunal’s decisive moment: Harry is close to losing consciousness, and Kim is suddenly exposed to enemy fire. The mercenary De Paule, a member of the tribunal force at the Tribunal plaza, can target Kim alongside Kortenaer, so your response here determines whether Kim stays available or spends the rest of the case in the hospital.
Pass the Authority Check to Save Kim
When Kim is targeted, the Tribunal Authority check appears. Pass it to intervene and protect him—Harry can give Kim Harry’s weapon, or let Kim use his own weapon. Success keeps Kim out of the hospital and preserves him as Harry’s partner for the investigation’s final stretch.
Treat this as your highest priority check. Raise Authority before returning to the Whirling-in-Rags by spending skill points, equipping the Fairweather T-500 Greaves, using Authority clothing, internalizing helpful Thoughts, and taking relevant drugs.
What Happens If You Fail
Failing the Authority check sends Kim to Precinct 57's infirmary for the rest of the case, but he does not die. The investigation continues, though Kim’s absence changes who accompanies Harry afterward and removes his reactions from the remaining scenes.
If Kim is hospitalized, Cuno can become Harry’s replacement partner if your earlier relationship with him allows it. Otherwise, Harry continues alone. The choice is permanent for this playthrough, so make sure your Authority bonuses are active before the check appears.
With the right preparation, this final intervention is manageable: boost Authority, keep the Fairweather T-500 Greaves equipped, and pass the check to keep Kim beside you.
Mercenary Tribunal Casualties and Survival Rules in Disco Elysium
The gunfire in Disco Elysium’s Tribunal can turn the Whirling-in-Rags plaza into a massacre, but the outcome is not fixed. Your opening shot, later responses, and a few character-specific checks determine who walks away.
Who Can Survive the Tribunal?
- Harry Du Bois survives the Tribunal’s character-targeting sequence. He cannot be killed by the event itself, but he can lose Health from one or two gunshots. Keep healing items ready afterward, especially if both attacks connect.
- Kim Kitsuragi can survive or be hospitalized. His fate depends on the Authority response when the mercenaries target him; failing it sends him to the infirmary, where he remains unavailable for the rest of the case.
- Kortenaer can die if Harry lands the opening shot. If Harry misses or never takes that shot, Kortenaer’s later attack creates a much more dangerous casualty pattern.
- Titus Hardie can die when Kortenaer is not shot or Harry misses the opening attack. In that outcome, Kortenaer may turn his weapon on Titus during the exchange.
- Elizabeth can be targeted during the exchange and die if the relevant response check fails.
Other Tribunal Casualties
Several members of both groups can also die during the confrontation:
- Among the Hardie Boys, Angus, Glen, Shanky, and Theo can be killed.
- Among the mercenaries, Ruud and De Paule can die. Ruud is exposed to Kim’s return fire after his counterattack, while De Paule can contribute to the sequence that puts Kim in danger.
⚠️ Watch out: Saving Harry does not mean the Tribunal went well. Harry is protected from death by the event’s character-targeting sequence, but one or two gunshots can still remove Health, and missed opportunities against Kortenaer can cost Titus or other members of the Hardie Boys their lives.
The safest casualty pattern is to land the opening shot on Kortenaer, respond successfully to the later attacks, and protect Kim when he is targeted. Even then, Disco Elysium treats the Tribunal as a consequence of the investigation rather than a clean victory screen, so some losses may still occur. With the key checks handled, you can at least keep Harry alive and give the people around him their best chance of surviving.
Mercenary Tribunal Aftermath: The Two-Day Recovery
The gunfire is over, but Disco Elysium doesn’t let you process it immediately. The tribunal cuts away from the chaos, and Harry wakes two days later with the consequences already decided.
At Harry's hotel room inside the Whirling-in-Rags, Harry wakes after the time skip. The investigation resumes from here, but your partner depends on the tribunal outcome:
- If Kim survived without being hospitalized, he remains available as Harry’s partner.
- If Kim was hospitalized, Cuno replaces him for the rest of the case.
Speak with the surviving or replacement partner in the hotel room to learn what happened during the parts of the tribunal Harry missed. This conversation also gives you context for the casualties and explains how Martinaise changed while Harry was recovering.
Don’t panic if the scene feels like it skipped information. Talking to Kim or Cuno is the fastest way to catch up on the tribunal’s outcome.
Completing the tribunal finishes the Return to the Whirling-in-Rags task and awards 70 XP. After that, the next investigation task begins: Inspect the window in Klaasje's bedroom.
Take a moment to speak with your new or returning partner, then start the window investigation. With the two-day recovery complete and your next lead active, you’re ready to push the case toward its final revelations.
Mercenary Tribunal World Changes in Disco Elysium
The shootout changes Martinaise in ways that reach beyond the casualties. In Disco Elysium, several investigation routes close permanently after the Tribunal, while one previously locked room finally opens.
Areas That Become Inaccessible
The Martinaise harbor interior becomes inaccessible after the Tribunal. You can no longer revisit Evrart or complete activities inside the inner harbor, so finish any harbor-related conversations, errands, and exploration before returning to the Whirling-in-Rags.
💡 Route tip: Treat the walk back to the hostel as your final harbor visit. If you still have an unfinished lead involving Evrart or the inner-harbor activities, resolve it before triggering the shootout.
There is one useful trade-off: Kim's hotel room inside the Whirling-in-Rags, the room adjacent to Harry's, becomes accessible after the Tribunal regardless of Kim's condition. This gives you a new room to inspect even if Kim was hospitalized.
NPCs Who Disappear
Joyce Messier, a harbor contact who can assist with the investigation and finances, is no longer encountered after the Tribunal. If you still need to speak with Joyce Messier at the Martinaise harbor, do it before the confrontation.
Lena and Morell, investigation contacts from the pre-Tribunal investigation locations, are also no longer encountered after the Tribunal. Make sure you've finished any conversations or clues involving them beforehand; once the shootout is over, you cannot rely on these NPCs to provide further information.
The safest approach in Disco Elysium is simple: complete optional harbor conversations and investigation threads before returning to the hostel. Afterward, inspect Kim's hotel room and continue with the leads that remain—your world has narrowed, but the case is still moving forward.
How to Prepare the Investigation Before the Mercenary Tribunal
The investigation’s final trail in Disco Elysium winds through Martinaise’s quieter corners before it throws you back into danger. Follow these leads in order, because the evidence you collect improves your understanding of the case and opens the route to the crucial late-game encounter.
- Fisherman's village lies across the Wednesday bridge. Search the village thoroughly: it contains loot, lodging, and story leads, including the Tribunal bullet evidence. The bullet is found in a shack, and you need to show it to unlock the route toward Ruby behind the mural.
- After showing the bullet, follow the newly available trail toward the Feld building. The route leads to Ruby's cave, the cave beneath the mural within the Feld building. Meet Ruby, a crucial late-game lead whose encounter can clarify the investigation and provide the next step toward the Tribunal.
- Complete the encounter with Ruby, then read Ruby's journal. You need both actions finished to trigger the return task that sends you back toward the Whirling-in-Rags. Don’t rush away after the conversation—missing the journal leaves the investigation’s next step unresolved.
Treat the Fisherman's village as a preparation stop, not just a shortcut to the next objective. Collect its loot, secure its lodging option, and finish any useful conversations before following the bullet trail.
This route gives your Disco Elysium investigation the context it needs before the confrontation: evidence from Fisherman's village, a completed Ruby encounter, and Ruby's journal read before you head back. Once those pieces are in place, you’re ready to continue the case with fewer loose ends.
Best Weapon and Armor Route for the Mercenary Tribunal
The tribunal in Disco Elysium is much less forgiving if Harry arrives without a firearm or protection. Finish your weapon route first, assemble the Fairweather armor pieces, then stock healing items before you cross the final stretch of the investigation.
Secure a Firearm Before the Tribunal Warning
You have two reliable routes for the gun:
- Confront the Pigs and get your gun back takes place in Martinaise during the late investigation route and recovers Harry's firearm. Having it equipped enables the opening shot against Kortenaer.
- Everett's gun route runs through the union questline, with the earliest firearm acquisition available on Wednesday.
The second route is especially useful if you want the gun before the investigation reaches its final stages. If you still do not have a weapon when Disco Elysium warns you that the tribunal is approaching, stop pursuing side content and finish one of these routes first.
Collect the Fairweather Protection Set
Build the tribunal protection set before returning to the hostel:
- Obtain the Fairweather T-500 Cuirass through the discarded-clothing quest. It can prevent damage from Ruud's attack and provides +1 Pain Threshold and +1 Volition, but applies -1 Empathy.
- Take the Fairweather T-500 Greaves from the hanged-man route. They grant +2 Authority and -1 Composure, making them particularly valuable for the check that determines whether Kim stays out of the hospital.
- Find the Fairweather T-500 Gauntlets near the sandcastle. Their +2 Interfacing bonus is less directly tied to the shootout, but they complete the armor route and can help with late investigation checks.
Equip the Fairweather Cuirass, Greaves, and Gauntlets before triggering the event rather than trying to change clothing during the confrontation. The game gives you very little room to react once the shooting begins.
Treat the Fairweather set as your tribunal loadout, not your everyday outfit. The Greaves' Authority bonus matters more here than keeping a balanced wardrobe.
Stock Tribunal Consumables
Visit the Frittte convenience store near the Whirling-in-Rags and buy cigarettes, booze, magnesium, painkillers, and other healing substances before you leave. These Tribunal consumables let you recover Health or Morale through the quick-select healing interface, which can save the run after gunfire or a damaging conversation.
Do not spend your last healing items casually on the approach. Keep both Health and Morale recovery available, and make sure the substances are accessible before you return to the hostel. With a recovered firearm, the complete Fairweather armor route, and a stocked Frittte inventory, Harry is ready to face the tribunal instead of entering it under-equipped.
How to Manage Health and Morale Before the Mercenary Tribunal
This is the last safety check before the tribunal turns conversation into gunfire. In Disco Elysium, a strong build helps, but entering with empty survival bars or no healing items can still end Harry’s case abruptly.
Keep Both Survival Bars Above Zero
Health represents physical damage and is tied to Endurance. Gunshots and other injuries reduce it, and reaching zero kills Harry. Morale is the mental bar linked to Volition; emotional damage from dialogue, realizations, and failures reduces Morale, and reaching zero also kills Harry.
That means a conversation can be just as dangerous as a bullet. Before returning to Whirling-in-Rags, check both bars and heal any damage rather than assuming the upcoming danger is purely physical.
Treat Morale as seriously as Health. A cruel remark or devastating realization at the wrong time can finish the run before the shooting even begins.
Stock Consumables Before You Return
Disco Elysium gives you a quick-select healing interface, so you can use stocked substances to restore Health or Morale during dangerous conversations. Keep healing items ready instead of leaving them buried in your inventory; cigarettes, booze, magnesium, and painkillers can all matter when a check or gunshot pushes one of your bars toward zero.
Buy a small supply at the Frittte convenience store before the tribunal. You do not need to consume anything preemptively if your bars are healthy—just make sure the relevant items are available when the dialogue and gunfire start.
Pay the Hostel Before the Tribunal
After the first night, you must pay $25 each night to stay at the hostel. Set aside that money before spending on clothing or other bonuses, because failing to pay can trigger a premature game over. If funds are tight, use alternative lodging such as Cuno's shack or the Fisherman's village shack instead.
Before you make the final return, take this short checklist:
- Heal Health and Morale so both bars are above zero.
- Confirm that healing items are stocked in the quick-select healing interface.
- Keep $25 available for the hostel, or arrange alternative lodging.
- Save your strongest consumables for the forced gunfire and the conversations immediately around it.
With full bars, emergency healing ready, and your lodging secured, you remove the most avoidable ways for the tribunal to end Harry’s investigation. The dice may still surprise you—this is Disco Elysium, after all—but you’ll face the final stretch prepared rather than one bad conversation away from disaster.