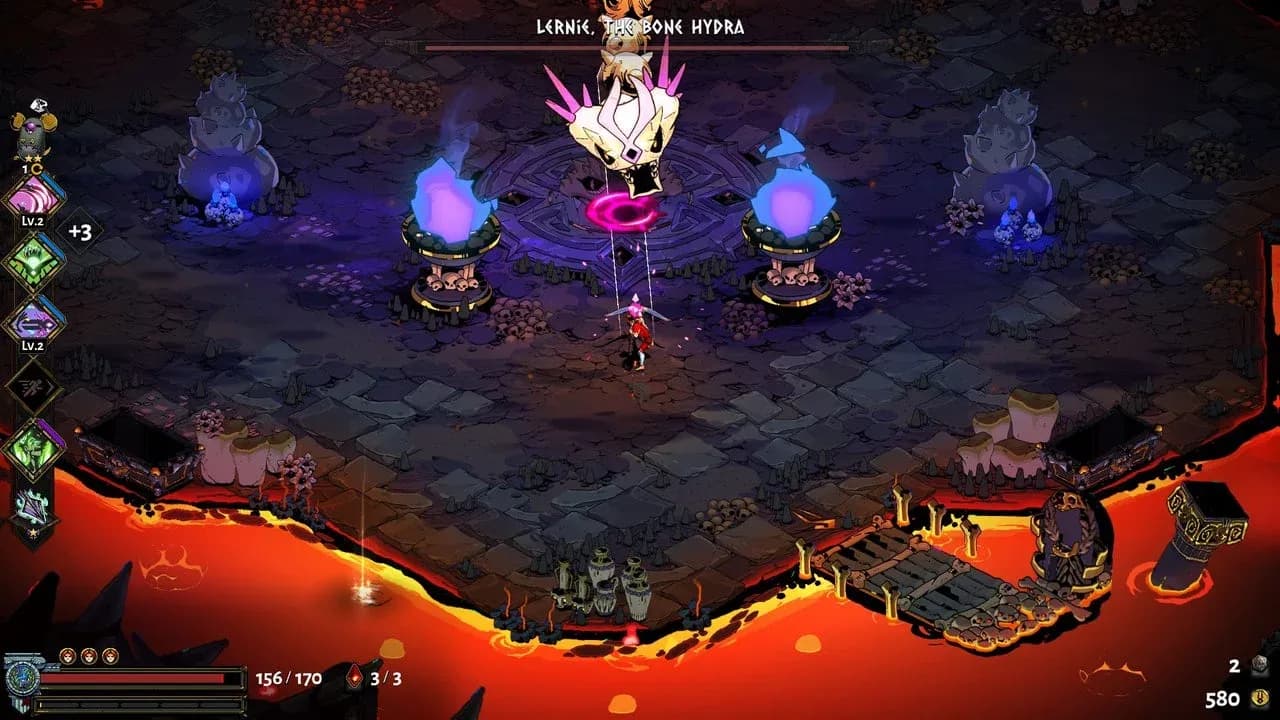
How to Find and Prepare for Lernie the Bone Hydra in Hades
Alright, you’ve beaten the Fury Sisters and the lava-flooded chambers of Tartarus—now, Hades throws its next big challenge at you. The path to Elysium is blocked by a monstrous guardian in the fiery pits of Asphodel, and this guide will make sure you’re ready for it.
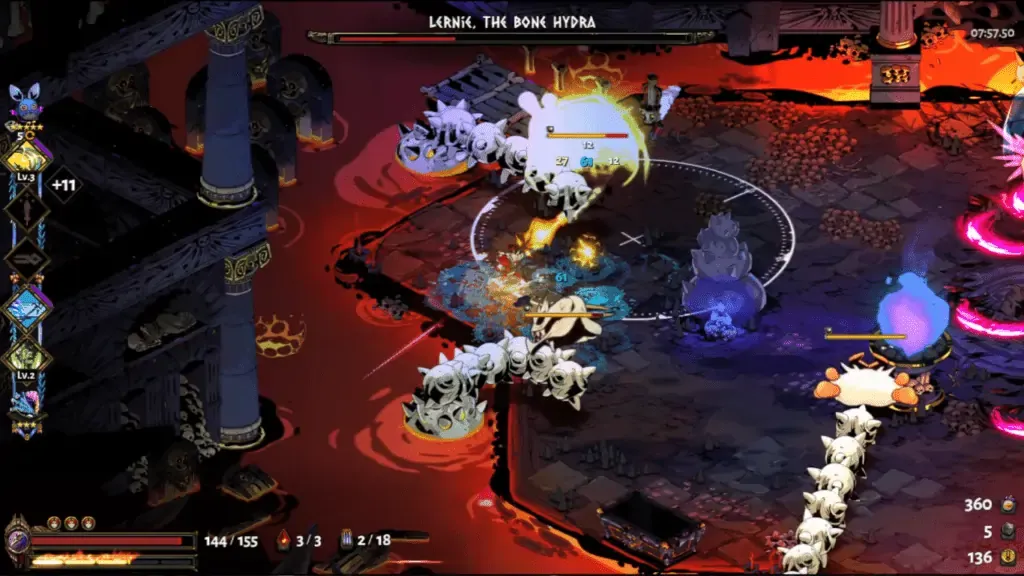
Lernie's multi-phase battle involves managing lava hazards.
Finding the Lernaean Bone Hydra
Your showdown with the Lernaean Bone Hydra, affectionately nicknamed Lernie by the community, takes place in the final chamber of Asphodel, specifically Chamber 24. You’ll know you’re there when you drop onto a small islet completely surrounded by bubbling magma. This is it—the last obstacle before the beautiful, but brutal, fields of Elysium.
The arena’s perimeter is pure lava, dealing constant damage. Your dash is your best friend here for repositioning; always keep an eye on your footing.
Gearing Up: Your Best Weapons for the Fight
Since Lernie is anchored in place, you can leverage weapons that let you control the fight from a safe distance or offer strong defense. Here are your top picks from the Arsenal Room in the House of Hades:
- The Shield of Chaos (Aegis): This is arguably the safest choice. Holding [X] (or your primary attack button) blocks all frontal damage, letting you safely weather Lernie’s projectile volleys. It’s a fantastic crutch while you learn the patterns.
- Varatha, the Eternal Spear: If you prefer poking from a distance, the spear’s long-range attacks let you stay mobile and avoid the worst of the lava and head slams.
- The Adamant Rail (Exagryph): For pure, consistent ranged damage, the Rail can’t be beat. You can focus entirely on dealing damage and dodging without ever needing to enter the hydra’s melee range.
Essential Keepsake: An Extra Life
If you’ve struggled here before, you’re not alone—the adds in later phases can overwhelm you. That’s why your starting Keepsake should be Skelly's Lucky Tooth. You get it by gifting your first Nectar to Skelly in the House of Hades. This keepsake provides one extra Death Defiance, effectively giving you a free refill of one life at the start of the fight. Trust me, that safety net makes all the difference when you're learning the chaotic second and third phases.
With your weapon chosen and Skelly’s gift equipped, you’re prepped and ready to step onto that fiery islet. Let’s go meet Lernie.
Best Build and Boon Setup for the Bone Hydra Fight
You’ve arrived at the fiery heart of Asphodel, and Lernie awaits. This is where your build truly gets tested—the Bone Hydra fight in Hades is a marathon, not a sprint. You need a setup that can handle a single, tough main head and then quickly clear the multiple skeletal heads it summons. The right boons and mirror upgrades turn this chaotic brawl into a manageable, methodical takedown.
Poseidon boons provide excellent crowd control and wall-slam damage for the Hydra arena.
Core Strategy: Control and Status Effects
Your number one priority for this fight is the Mirror of Night upgrade Privileged Status. Located in Zagreus’s room, this talent grants a massive +40% damage bonus to enemies afflicted with two or more status effects. Lernie and its summoned heads count, so building to apply two different curses (like Weak and Chill, or Hangover and Doom) is your fastest path to melting their health bars. This isn't just a nice-to-have—it’s the single strongest damage amplifier in your permanent toolkit.
To trigger Privileged Status reliably, you need boons that apply those effects. For survivability, nothing beats Athena's Divine Dash. Pressing your dash button to deflect projectiles trivializes the Hydra’s volley attacks and the wave bursts from Purple variant heads. It’s your essential defensive pick. For offense, lean into gods that offer strong area damage or crowd control to handle the adds.
Top Boon Picks for Lernie
While many boons can work, these are consistently effective against the Hydra’s multi-target phases:
- Ares' Blade Dash or Slicing Shot: These create whirling blades that deal rapid area-of-effect damage. They’re perfect for clearing the clustered skeletal heads or the mobs summoned by Green variant heads.
- Zeus' Lightning Strike: This adds chain lightning to your attack, letting you clear summoned Bloodless enemies quickly and chip damage multiple heads at once. It’s especially strong on fast-hitting weapons like the Twin Fists or the Adamant Rail.
- Demeter's Frost Strike or Mistral Dash: Applying Chill is a game-changer. It slows skeletal heads by 4% per stack (up to 10 stacks), making their telegraphed attacks much easier to avoid. This crowd control is invaluable when six heads are active.
Don’t sleep on Dionysus’s Hangover effects either. The damage-over-time stacks quickly on the stationary main head, and when combined with another status like Aphrodite’s Weak, it effortlessly activates your Privileged Status bonus.
Weapon and Aspect Synergy
Your weapon choice dictates which boons shine brightest. Refer back to the builds from your research:
- Shield of Chaos (Aspect of Zeus): Throw your shield and let it bounce with Zeus’s Lightning Strike on attack. You can focus on blocking and dodging while the shield does the work.
- Adamant Rail (Aspect of Eris): Use the special at your feet, dash in for the +75% damage buff, and unload. Pair with Aphrodite’s Attack for high base damage and Weak.
- Heart-Seeking Bow (Aspect of Chiron): Tag the main head with your attack, then let your homing special arrows seek it out. Ares’s Special for Doom or Dionysus’s Special for Hangover work beautifully here.
- Stygian Blade (Aspect of Nemesis): Dash in, use your special for the +15% crit chance, and unleash with an Artemis Attack boon. The high single-target crits are great for burning down individual heads.
Trust me, if you’ve struggled with the add phases before, it’s often a build issue. With Privileged Status active and a boon loadout designed for both single-target and area damage, you’ll cut through Lernie’s phases with newfound efficiency. Let’s lock in your build and move on to the attack patterns.
Lernie Phase 1: Main Head Attack Patterns
This is it—the final chamber of Asphodel in Hades. You step onto the central islet, the Lernaean Bone Hydra (or Lernie) anchored before you, and the arena's perimeter is pure, damaging lava. Phase 1 is about learning its rhythm and avoiding the magma while you whittle down its health bar. Let's break down the main head's opening moves so you can enter this fight with confidence.
Combat in Hades requires quick reflexes and positioning.
The first thing to manage is the arena itself. The entire perimeter is surrounded by lava, which deals continuous damage if you stand in it. Your primary defense is your [Dash]—use it to stay on solid ground and reposition, but be mindful of your dash trajectory to avoid accidentally landing in the fire.
Lernie's Main Head has three core attacks you'll see repeatedly:
- Lunge: When you're at a medium distance, the head will lunge forward up to half the arena's length. The counter is to [Dash] diagonally through the attack or toward the outskirts of the island, being careful not to dash into the lava.
- Volley: From a distance, Lernie will fire a stream of 5 slow-moving dark projectiles. The safest counter is to hold your shield ([X]) to block them all. If you have Athena's Divine Dash, this is the perfect time to use it—dashing into the projectiles will deflect them right back at the boss.
- Ground Slam: If you get too close beneath its head, Lernie will perform a Ground Slam, slamming its skull into the ground. A white circle briefly appears as a tell; as soon as you see it, [Dash] away to avoid the area-of-effect damage.
Lernie has brief idle periods between attacks. This is your prime window to unleash your most damaging combos. Dash-strike in, get a few hits, and dash out before the next attack tell begins.
Your goal in Phase 1 is straightforward: deal damage until you hit the 66% Health Threshold. Once Lernie's health drops to this point, the main head becomes invulnerable behind a glowing force field, signaling the start of Phase 2 and the summoning of three additional skeletal heads.
Master these three attacks and lava management, and you'll consistently enter Phase 2 with most of your health intact—setting you up perfectly for the chaos to come.
Lernie Phase 2: Managing the First Wave of Skeletal Heads
Alright—you've weathered Lernie's opening volleys. Now comes the chaos. In Hades, when the Bone Hydra's health hits 66%, it retreats behind an invincible shield and summons its first wave of reinforcements. This is where the real test begins: you're no longer fighting one head, you're managing a battlefield.
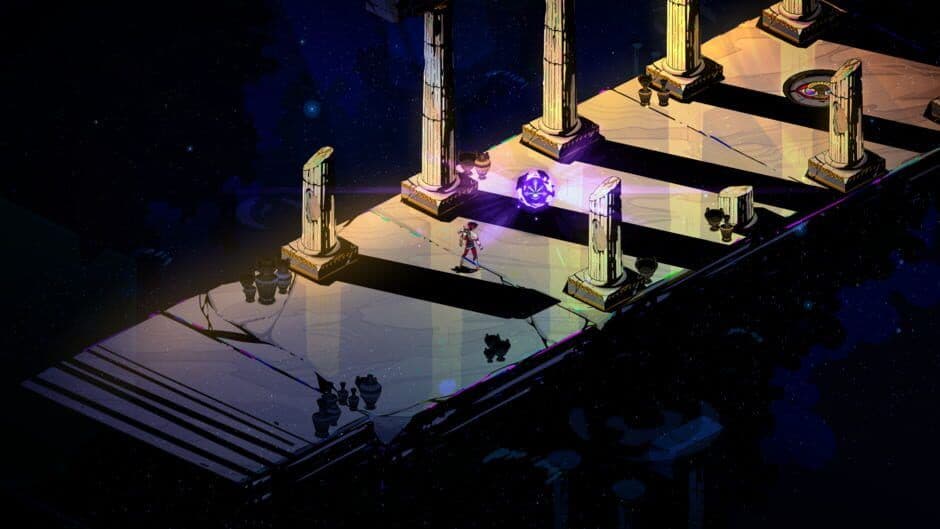
Standard combat encounter in Hades.
The Four Variants and How to Crush Them
The main head is untouchable now. To break its shield, you must destroy all three skeletal heads that spawn around the Asphodel Arena. Each has a unique, deadly specialty. Your priority target depends on your build, but your survival depends on knowing what each one does.
First, the White/Blue Slammer Head. This variant uses a Triple Ground Slam, causing rubble to fall from the ceiling. Don't try to tank it—[Dash] away from the falling rubble immediately and wait for the slams to finish. It's vulnerable for a moment after its combo, so that's your window to strike.
Next is the Orange Magma Spittle Head. It spits 3-5 fireballs that create lingering, damaging magma circles on the floor. Your movement is key here: constantly strafe and dash to avoid the initial shots, and never stand in the orange patches afterward. This head is often a top priority because its attacks clutter the arena and limit your safe space.
The Green Super Hydra Head is a summoner. It spits glowing bone eggs onto the field. If you don't destroy them with a quick [Attack] within 5 seconds, they hatch into armored Bloodless enemies that will swarm you. Trust me, clearing these eggs instantly is non-negotiable—a crowded arena is a dead Zagreus.
Finally, the Purple Wave Head is arguably the most dangerous. It launches unavoidable wave bursts that cover huge swaths of the arena. You can't block them with pillars. Your only options are to perfectly time a [Dash] through the waves (which gives you a few frames of invincibility) or, if you're lucky enough to have it, deflect them with an Athena boon like Divine Dash.
A fantastic piece of community wisdom for this phase is to use positioning at 6 o'clock. Imagine the circular arena as a clock face, with you starting at the bottom (6). When a big attack comes, [Dash] to 11 or 1 o'clock. This simple maneuver will help you avoid a huge percentage of the incoming fireballs, waves, and falling rubble.
Your goal isn't just to survive—it's to systematically dismantle this wave. Take out the biggest threats to your playstyle first (e.g., the Green Head if you're melee, the Purple if you're slow), clear the eggs, and keep moving. Once the last skeletal head falls, that shield around Lernie's main head shatters, and you can get back to dealing real damage. Handle this wave cleanly, and you're set up for the final, frantic stand.
Lernie Phase 3: Surviving the Bullet Hell and Final Stand
This is it—the final phase of your battle with the Lernaean Bone Hydra in Hades. You’ve weathered the first waves, but now, at the 33% Health Threshold, Lernie digs in for a desperate last stand. The main head becomes invulnerable behind a shield and summons six skeletal heads around the arena’s edge. This is where the fight transforms from a brawl into a bullet hell, demanding sharp positioning and quick target prioritization.
Isometric combat in Hades.
Navigating the Six-Head Onslaught
The six summoned heads are color-coded variants of the ones you faced in Phase 2, but they are now more aggressive. Your priority is to clear them quickly while managing their upgraded attacks. Here’s what you’re up against:
- White/Blue Slammer Head: This variant now uses the Super Ground Slam, performing 1 to 6 slams in quick succession. Each slam causes 10-40 pieces of falling rubble—dashing directly away is your only safe move. Don’t get greedy; wait for the attack to finish before engaging.
- Orange Magma Spittle Head: It will spit more fireballs that create damaging magma pools on the floor. Keep moving to avoid getting cornered by the lava.
- Green Super Hydra Head: It can now spit multiple bone eggs that hatch into Bloodless Bone-Rakers if not destroyed within 5 seconds. Clear these eggs immediately with any attack.
- Purple Waves Head: It fires rows of unavoidable wave attacks. You must dash or deflect through them; blocking with the Shield of Chaos works too.
- Standard Heads: These will use a weaker version of the Pin Missile attack, adding to the screen clutter.
Use the stone pillars in the arena for Pillar LoS (line-of-sight). They can block Seeking Flames, volleys from the Orange heads, and even some waves, giving you a crucial moment to breathe and plan your next dash.
While you’re cleaning up the adds, the main head isn’t idle. Its Pin Missile attack becomes a true 'bullet hell' pattern, filling the screen with faster projectiles. This is where your defensive boons shine—Athena’s Divine Dash to deflect, or simply using the pillars for cover, is essential.
The Enraged Finale
Once you destroy all six skeletal heads, the main shield drops and Lernie enters an Enraged State. It attacks more rapidly, chaining lunges and slams with little downtime. This is not the moment to stand still.
The winning strategy here is constant, controlled aggression. Use Dash-Strikes to stay mobile—dash in, land a few hits, and dash out before the next attack lands. The enraged phase doesn’t last long; a few solid combos are all you need to finish the job. If you’ve struggled here before, you’re not alone—the sheer number of attacks can feel overwhelming. The trick is to focus on one head at a time, use the environment, and trust your dash.
With the six heads gone and Lernie enraged, stay mobile, keep up the pressure, and you’ll claim your victory in the fiery heart of Asphodel.
Bone Hydra Rewards and Post-Game Variants
Defeating the Lernaean Bone Hydra is a major milestone in Hades, and the rewards are your ticket to unlocking the game’s deeper power systems. With Lernie vanquished, you’ll be one step closer to the surface and your arsenal will get a significant boost.
Battle encounter in Hades.
Your victory lap yields one of two key resources, depending on your run. On your first victory with a specific weapon or at a higher heat level from the Pact of Punishment, you’ll earn a Diamond. This rare gem is used by the House Contractor, the NPC stationed near Hades' desk in the House of Hades, to unlock new construction options and permanent upgrades. If you don't meet that first-time condition—like on repeat victories with the same weapon at the same heat—you’ll instead receive 80 Darkness crystals to fuel your Mirror of Night upgrades.
Your first Diamond feels great, but don't sweat the follow-up Darkness. You'll always need more Darkness for mirror talents, and it helps you get stronger for future runs.
Post-Game Variants: The Pact of Punishment
Once you’ve conquered the base game, Hades truly begins with the Pact of Punishment. This is where the Lernaean Bone Hydra fight gets a brutal, dynamic makeover.
The most significant change comes from the Extreme Measures condition. At Rank 2, this Pact modifier completely redesigns the Asphodel boss arena. The space shrinks considerably, and Lernie’s main head becomes mobile, positioned menacingly in the center. While it retains all its standard and skeletal head attacks, the reduced room to maneuver combined with the spawning adds creates an intense bullet-hell scenario. Trust me, your positioning and crowd control become ten times more important here.
⚠️ Watch out: Don't jump straight into high heat. Practice the new, smaller arena on a low heat level first to learn the new spacing without the pressure of other punishing Pact conditions.
Your reward for conquering these harder versions remains the same—Diamonds for first-time weapon/heat clears, Darkness for repeats. These resources, along with the Titan Blood you earn from other bosses, are the lifeblood of your progression. Titan Blood unlocks powerful Weapon Aspects like the Aspect of Zeus for the Shield of Chaos or the Aspect of Eris for the Adamant Rail, fundamentally changing how you play.
With Lernie mastered and your reward in hand, you’re ready to face the legendary heroes of Elysium. Each victory makes you stronger, and each resource brings new power within reach. Keep pushing forward.