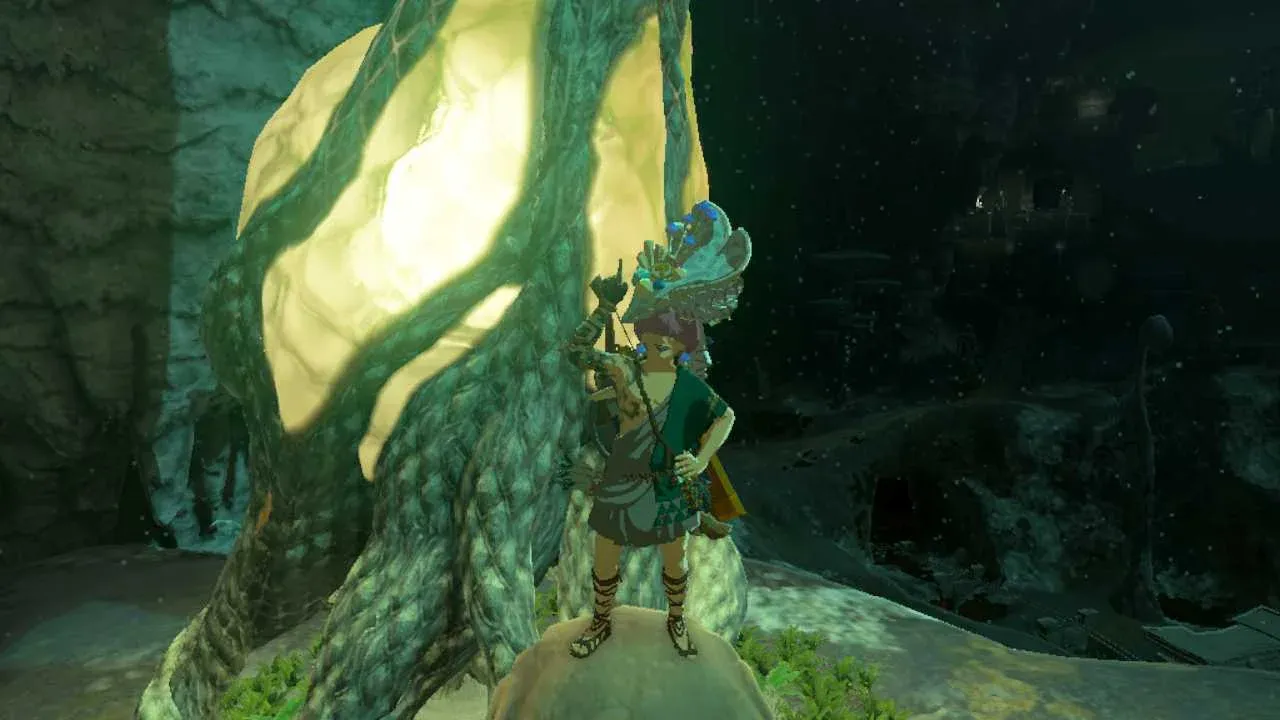
How to Access and Navigate the Depths in The Legend of Zelda: Tears of the Kingdom
Beneath the sunlit fields and towering peaks of Hyrule lies a world of perpetual night—The Depths, a vast underground realm waiting to be explored in The Legend of Zelda: Tears of the Kingdom. Venturing here is a core part of the adventure, but it demands a shift in mindset. This isn't just another cave; it's a pitch-black, hostile environment where the rules of the surface no longer apply. This guide will get you geared up, lit up, and ready to take your first steps into Hyrule's haunting underworld.
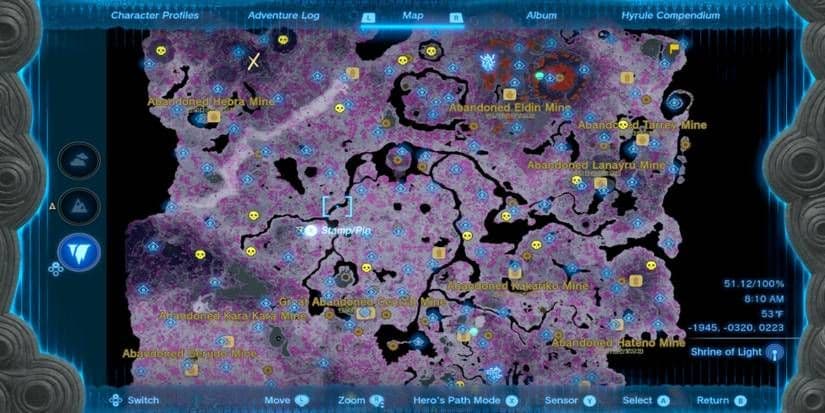
Use maps to locate abandoned mines and Zonaite deposits.
Your gateway to this subterranean world is through the ominous red-mist Chasms scattered across Hyrule's surface. When you find one, take a leap of faith—jumping in is the only way down. The initial freefall is breathtaking, but the landing zone presents your first major challenge: the Pitch-Black Environment. Unlike dark caves on the surface, the Depths are almost completely devoid of natural light. You won't be able to see terrain, enemies, or resources more than a few feet in front of you without bringing your own illumination.
This is where Brightbloom Seeds become your best friend. You'll find these glowing seeds on vines and in patches throughout the Depths. To use them, hold [ZR] to aim, press [D-pad Up] to select a seed from your inventory, then press [R] to throw it onto the ground. For long-range lighting, fuse a seed to an arrow by selecting it and pressing [A] before firing. A single seed can create a surprisingly large, permanent pool of light, making them essential for safe navigation.
Don't be shy with Brightbloom Seeds. Toss them frequently to mark your path and create safe zones of light. It’s much better to have a well-lit retreat than to be caught in the dark by an enemy you never saw coming.
The darkness is only half the battle. The very ground of the Depths is corrupted by Gloom, a sinister purple-black substance that saps your vitality. Standing on Gloom-covered terrain (or being hit by certain enemies) will temporarily reduce your maximum health. Affected hearts turn grey and cannot be restored by normal food or potions—they only regenerate slowly over time or by seeking out specific cleansing effects. This mechanic forces you to be cautious with your positioning and makes every encounter more perilous.
Trust me, that first descent can feel overwhelming. Between the oppressive dark and the creeping Gloom, it's easy to feel underprepared. But with Brightbloom Seeds in hand and an awareness of the environmental hazards, you've got the foundational knowledge to start mapping the unknown. Light your way, watch your step, and a vast new world of challenges and rewards will open up beneath your feet.
The Importance of Lightroots and Fast Travel in the Depths
The Depths in The Legend of Zelda: Tears of the Kingdom are a vast, intimidating darkness, but you don't have to wander blind. Your key to conquering the underworld lies in a network of radiant beacons called Lightroots. These aren't just pretty lights—they are your map, your fast-travel network, and your sanctuary from the ever-present Gloom. Understanding how to find and use them is the single most important step for efficient exploration.
Exploration in Tears of the Kingdom.
Your Beacons in the Dark: Lightroots
Scattered throughout the pitch-black landscape, Lightroots are massive, glowing plants that burst with light when activated. Here’s the trick most guides miss: each one is directly beneath a Shrine on the surface world. If you find a Shrine in Hyrule, drop straight down into the nearest chasm, and you’ll find its corresponding Lightroot waiting in the dark below. This connection is your secret map.
To activate one, simply walk up to its base and press [A]. The root will erupt in a brilliant, permanent glow that illuminates a huge area of the terrain, banishing the darkness and revealing any hidden threats or resources. Crucially, it also reveals that section of your Depths map, turning a void of black into navigable geography. Once activated, it also becomes a Fast Travel point, letting you zip back to it from anywhere on the map. Trust me, you’ll want to unlock these as soon as you land in a new area.
When planning a trip to a specific point in the Depths, first find the surface Shrine directly above it on your map. Then, head to the Lightroot beneath that Shrine first—it gives you a safe, well-lit starting point for your journey.
The Ultimate Safe Haven
Beyond mapping, Lightroots provide a critical survival function. Standing under the soothing glow of an activated root will slowly restore any greyed-out heart containers you’ve lost to Gloom damage. This is a free, unlimited healing source for your maximum health. If you’ve taken a few hits from a Frox or stumbled into a Gloom patch, don’t waste your precious Sundelion meals—just retreat to the nearest Lightroot and catch your breath. It’s your home base in a hostile land.
With a network of Lightroots activated, the terrifying expanse of the Depths transforms into a manageable, even rewarding, expedition zone. You’ll have safe zones to heal, clear paths to travel, and a reliable way to bounce between hunting grounds. Light up the darkness, and the whole underworld opens up to you.
Best Preparation and Gear for Depths Exploration
Stepping into the Depths of The Legend of Zelda: Tears of the Kingdom is like entering a hostile, living shadow. The air saps your vitality, and unseen creatures lurk in the dark. To thrive down here, especially when hunting the formidable Frox, you need more than courage—you need the right gear. Here’s how to prepare for the gloom and the monsters that call it home.
Preparing the right gear is vital for long expeditions.
Essential Armor: The Gloom-Proof Suit
Your first and most important line of defense is the Armor of the Depths. This three-piece set (Hood, Tunic, and Gaiters) is sold by the Bargainer Statues you’ll find scattered throughout the underground. When worn as a full set, it grants you multiple stacks of Gloom Resistance, which is absolutely critical. This resistance prevents the Depths’ signature gloom from permanently disabling your heart containers on contact. Without it, a single misstep can leave you dangerously weakened for the rest of your expedition. Trust me, farming for this armor is your top priority before any serious Frox hunting.
Food and Elixirs: Your Consumable Lifeline
Even with the best armor, you’ll need backup. This is where cooking becomes your best friend for two key purposes:
- Restoring Lost Hearts: If gloom does get through and turns your hearts grey, standard food won’t help. You need meals made with Sundelions. These bright flowers are found primarily on the Sky Islands on the surface. Cook them into a dish, and they’ll restore those gloom-damaged hearts back to normal.
- Boosting Your Resistance: For an extra layer of protection, especially before a tough boss fight, cook meals with Dark Clumps. You can purchase these from the same Bargainer Statues that sell the armor. Meals made with Dark Clumps provide a temporary Gloom Resistance buff, stacking with your armor for near-total immunity.
Cook five Sundelions together for a potent “Sunny” meal that fully restores a large chunk of gloom damage in one go. Always keep a few in your pocket.
Tracking Your Prey
Wandering blindly in the dark hoping to stumble upon a Frox is a recipe for frustration. Instead, enlist some tech support. Head to Hateno Village and visit the Research Lab to meet Robbie, the eccentric researcher. Complete his side quest to upgrade your Purah Pad with the Sensor+. Once you have it, take a picture of a Frox (even a defeated one), and set the sensor to track it. The next time you’re in the Depths, it’ll beep when you’re near one, turning a daunting search into a guided hunt.
General Exploration Kit
Beyond the gloom-specific gear, a well-stocked adventurer should bring:
- Plenty of Arrows & Bomb Flowers: For stunning Frox by shooting their eyes or tossing bombs into their mouths.
- Brightbloom Seeds: Fuse them to arrows to light up massive areas, making navigation and combat much safer.
- High-Defense Meals: Cook with Ironshrooms or Armoranth for temporary defense boosts against physical attacks.
- A Strong Bow: Critical for landing those precise eye shots to stun your target.
With the Armor of the Depths equipped, your pouch full of restorative Sunny meals, and your Sensor+ pinging away, you’ve transformed from a vulnerable explorer into a master of the dark. You’re now ready to seek out the Frox on your own terms.
How to Find and Identify Frox Variants in the Depths
Deep in the gloom of Hyrule's underworld, the ground itself can roar to life and try to eat you. In The Legend of Zelda: Tears of the Kingdom, the Frox are massive, frog-like bosses that patrol the darkness, and knowing which type you're facing is the first step to a successful hunt. There are three distinct variants, each tougher than the last, and they're distinguished by one key feature: the color of their glowing eyes.

Tears of the Kingdom environment.
The Three Types of Frox
First, the standard Frox. These are your entry-level encounters, marked by their orange eyes. They hit hard, but they're the baseline. You'll find 13 of them scattered across the Depths. Key locations include the area near the Kawamit Lightroot in the northeast and the region surrounding the Kohsustu Lightroot in the far south.
Next up is the Obsidian Frox, a significant step up in challenge. You'll recognize them by their piercing green eyes. There are 15 of these tougher bosses to track down. Notable hunting grounds include the territories near the Yisuayam Lightroot in the north and the Nikakik Lightroot, also in the northern reaches of the Depths.
Finally, the apex predators of the species: the Blue-White Frox. These are the most dangerous foes in the Depths, boasting the highest health and damage output, and their red eyes are a dead giveaway. Tread carefully when seeking out their 13 locations, such as the areas around the Nupisoyuat Lightroot in the northwest and the Worihas Lightroot in the north-central region.
If you've completed the Rito regional phenomenon, bring the Avatar of Tulin along. His ability to provide a mid-air gust with [X] is invaluable for staying airborne if a Frox bucks you off its back, letting you glide right back into the fight.
Remember, these are living creatures that can wander a bit. If you arrive at the general coordinates and don't see one immediately, check the surrounding cliffs and valleys—they might be on the move. With these identifiers locked in, you're ready to seek out any specific variant and claim its rewards.
Frox Combat Strategy: Stuns and Weak Points
You’ve found your Frox in the dark of The Depths. Now comes the fun part: systematically dismantling it. In The Legend of Zelda: Tears of the Kingdom, every Frox fight follows the same satisfying rhythm: stun, climb, and smash. Master this loop, and these massive bosses become a predictable, rewarding hunt.

The rocky terrain of the Depths.
The Core Combat Loop: Stun and Smash
Your entire strategy hinges on creating an opening to attack the Frox’s true weak point. You cannot damage its skin; all damage must come from its large, glowing eye or the ore deposits on its back. Here’s the step-by-step breakdown.
First, Create the Opening (The Stun)
You have two reliable ways to stun a Frox, and both are about precision timing.
- Shoot the Eye: The most straightforward method. Hold [ZR] to aim your bow, line up a shot on its big yellow eye, and press [A] to fire an arrow. A direct hit will cause the Frox to collapse, stunned.
- Counter the Inhalation: When the Frox rears back and opens its mouth, it’s trying to suck you in. Instead of running, face it. Hold [ZR] to aim, press [D-pad Up] to select a Bomb Flower, and fire it with [A] directly into its open mouth. The explosion will stun it instantly. This is often faster than waiting for a clean eye shot.
Fuse a Keese Eyeball to your arrow for homing shots. This makes hitting the eye trivial, especially when the Frox is moving.
Next, Claim Your Prize (Mount and Attack)
The moment the Frox is stunned, sprint toward it and press [X] to jump onto its back. You’ll see the ore deposits—those large black chunks of stone. This is your target.
Equip a blunt, two-handed weapon like a Cobble Crusher or a Traveler’s Claymore fused with a rock. Stand on the Frox’s back and hold [Y] to unleash a charged spin attack. This will shatter multiple deposits quickly. You’ll typically break 2-3 before the Frox recovers and bucks you off.
Finally, Reset and Repeat
Once you’re thrown off, create distance. The Frox will likely use a body slam or charge—sidestep or sprint away from these. Then, set up your next stun. Repeat this process until all ore deposits are destroyed, which will defeat the Frox.
Key Attacks and How to Evade
While you’re setting up your stuns, stay mobile. Two attacks are especially dangerous:
- The Charge/Body Slam: The Frox will rear up and slam down. Don’t try to dodge-roll through it at close range—just sprint laterally or away.
- The Inhalation: We’ve covered how to counter it for a stun, but if you’re out of Bomb Flowers, just sprint in the opposite direction. It has a limited range.
⚠️ Watch out: Avoid trying to Flurry Rush or stay in melee range. Their attacks have huge hitboxes, and the safe windows for direct damage are virtually non-existent. Your fight happens at arrow range and on their back.
Bringing the Right Tools for the Job
Having the right gear makes this loop smooth. Here’s what to focus on mid-fight:
- For Stunning: A sturdy bow and plenty of Arrows. Bomb Flowers and Keese Eyeballs are your best fuse materials for this phase.
- For Smashing: Have at least 2-3 dedicated ore-breaking weapons ready. Blunt force is all that matters here. Swords and spears won’t cut it.
If you have the Avatar of Tulin with you, his gusts can help you close distance after a stun, and he might even land an arrow in the Frox’s eye for you.
Stick to this rhythm—stun with an arrow or bomb, mount and spin-attack the deposits, then disengage and reset. Do this two or three times, and even the mighty Blue-White Frox will fall. Now, let’s talk about the best hammers for the smashing part.
Best Weapons and Fusions for Breaking Frox Ore
You've stunned the Frox and climbed onto its back—now comes the moment of truth. In The Legend of Zelda: Tears of the Kingdom, that big glowing ore on its spine isn't going to break itself, and swinging the wrong weapon will leave you frustrated and empty-handed. This is all about brute force.

Official gameplay screenshot
Your goal is to shatter those mineral deposits as quickly as possible before the Frox bucks you off. Forget swords and spears; you need pure, unadulterated blunt power. Here’s how to build the ultimate ore-crushing toolkit.
The Ultimate Ore-Breaking Arsenal
For maximum efficiency, you want a high-durability, two-handed hammer. The top-tier choice is the Boulder Breaker, a legendary Goron weapon obtained from the 'Soul of the Goron' quest in Goron City. Its immense durability lets you unleash multiple charged spin attacks without fear of it breaking mid-fight.
If you're still working toward that, a fantastic and more accessible alternative is the Cobble Crusher. You can find this reliable blunt weapon in various locations in the Depths and on the Surface. It has great swing speed for a two-hander and gets the job done reliably.
Hold down the [Y] button for a charged spin attack once you’re on the Frox's back. This lets you sweep across multiple ore deposits in one glorious, shattering whirl.
Fuse for Maximum Impact
The weapon itself is only half the equation. To turn it into a true Frox-wrecker, you need the right Blunt Fusions. Fuse Large Rocks or Zonaite Ore to a sturdy two-handed claymore base, like a Traveler's Claymore. This combination delivers the maximum ore damage per hit. Sharp fused materials are completely useless here—they'll just bounce off the mineral deposits.
An even better fusion material comes from the Frox themselves. Frox Fangs, dropped by every Frox you defeat, are exceptional for this. Fusing one to your weapon adds a hefty +14 attack power and, crucially, provides a blunt-force bonus that makes breaking those back deposits significantly faster. It’s the perfect cycle: use a Frox's own fang to hunt its brethren.
Stock Up and Swing
Weapons degrade quickly under the strain of breaking solid Zonaite. Don't walk into a fight with just one hammer. Stock at least 5+ fused weapon combinations per major encounter, as deposits can sometimes respawn, and you don't want to be caught empty-handed. Trust me, scrambling to fuse a rock mid-fight while a stunned Frox is getting back up is a recipe for disaster.
With a Boulder Breaker or a well-fused Cobble Crusher in hand, you’ll watch those tough ore chunks crumble in one or two spins. This setup turns the most tedious part of the fight into the most satisfying. Now you're not just surviving the Frox—you're farming it.
Zonaite Farming and Frox Rewards in Hyrule's Underworld
Your hunt through the darkness is about to pay off. The Frox of the Depths aren't just formidable challenges—they're walking treasure troves, and the loot they drop is the key to some of The Legend of Zelda: Tears of the Kingdom's most powerful upgrades. Here’s what you’re fighting for and how to put it all to use.

Official Zelda artwork.
The Ultimate Loot: Zonaite and Crystallized Charges
The most common and crucial reward from any Frox is Zonaite. You’ll find this glowing green ore scattered in mining camps, but defeating these giant bosses is a fantastic way to farm it in bulk. This resource isn't for fusing or selling; its true value is in processing. Take your Zonaite to any Construct Forge (like the one at Lookout Landing) to have it converted into Crystallized Charges.
These charges are the currency for expanding your Energy Cell, the battery that powers all your Zonai devices. For a major boost, keep an eye out for the rare Large Crystalized Charge. This special boss drop is worth a whopping 20 units toward your Energy Cell upgrades, drastically cutting down the grind. More battery means longer flights, bigger builds, and unstoppable automation.
Focus your farming runs on areas with multiple Frox close to Lightroots. The region beneath the Gerudo Desert is notoriously rich, letting you chain several fights with minimal travel time in the dark.
Essential Armor Upgrade Materials
Beyond Zonaite, each Frox defeat showers you with monster parts vital for gearing up. You’ll consistently collect Frox Fangs, Frox Fingernails, and Frox Guts. These aren’t just for selling (though they do go for 40 Rupees each). Their primary purpose is upgrading the Depths Armor Set and other high-level gear at Great Fairy Fountains.
Here’s the breakdown of what you need and why it matters:
- Frox Fangs (+14 Fuse Attack): The standard fang is a great fusion material for blunt weapons, but it's also a key ingredient for early armor upgrades.
- Obsidian Frox Fangs (+24 Fuse Attack): These green-eyed variant drops are specifically required for higher-tier upgrades of the Depths armor, offering better ore-breaking power when fused.
- Blue-White Frox Fangs (+35 Fuse Attack): The ultimate prize from the toughest Frox. This red-eyed variant's fang provides massive attack power and is essential for completing top-level armor sets.
- Frox Guts: This common drop might seem mundane with its +1 Fuse Attack, but don’t underestimate it. Frox Guts are a mandatory component for many of the final upgrade tiers at the Great Fairy Fountains, making them a critical farming target.
The Infinite Farm: Blood Moon Respawning
Worried about running out of Frox to hunt? Don’t be. Like all monsters in Hyrule, every single one of the 41 Frox bosses respawns after a Blood Moon. This cycle occurs like clockwork approximately every 168 minutes of active gameplay. When the crimson moon rises and the haunting music plays, it completely repopulates the Depths. That Frox you defeated three hours ago? It’s back, fully healed, and ready to be farmed again for another round of Zonaite and fangs. This mechanic makes the Depths your permanent, renewable resource farm for endgame upgrades.
Putting Your Haul to Work
With your inventory full, here’s your action plan:
- For Power: Convert all Zonaite into Crystallized Charges at a forge, and trade them to a Construct to max out your Energy Cell. Hunt specifically for Obsidian and Blue-White Frox to get their powerful fangs for your best weapons.
- For Defense: Take your stockpile of Frox Fangs, Fingernails, and Guts to a Great Fairy. You’ll need them, especially the Frox Guts, to fully upgrade the Depths Armor Set for maximum Gloom resistance and the Ancient Hero’s Aspect for its unique stat boosts.
- For Wealth: Sell any excess monster parts you don’t need for upgrades; they provide a steady stream of Rupees.
Your mastery of the Depths is now complete. You can navigate the darkness, conquer its greatest beasts, and harvest their rewards to become truly unstoppable. This cycle of combat and collection is the endgame of Tears of the Kingdom—now go out there and claim your power.