
1. How to Use the Fuse Ability in Tears of the Kingdom
Welcome to Hyrule’s ultimate power-up. Before we dive into the eight essential fusions that will carry you from the Great Sky Island to the Depths, you need to master the fundamental mechanic that makes it all possible: the Fuse ability. This isn't just a combat gimmick; it's the core system that redefines progression in Tears of the Kingdom. While the weapons you find scattered across Hyrule are often in a decayed, weakened state, Fuse is your direct response, transforming Link from a scavenger into a craftsman.
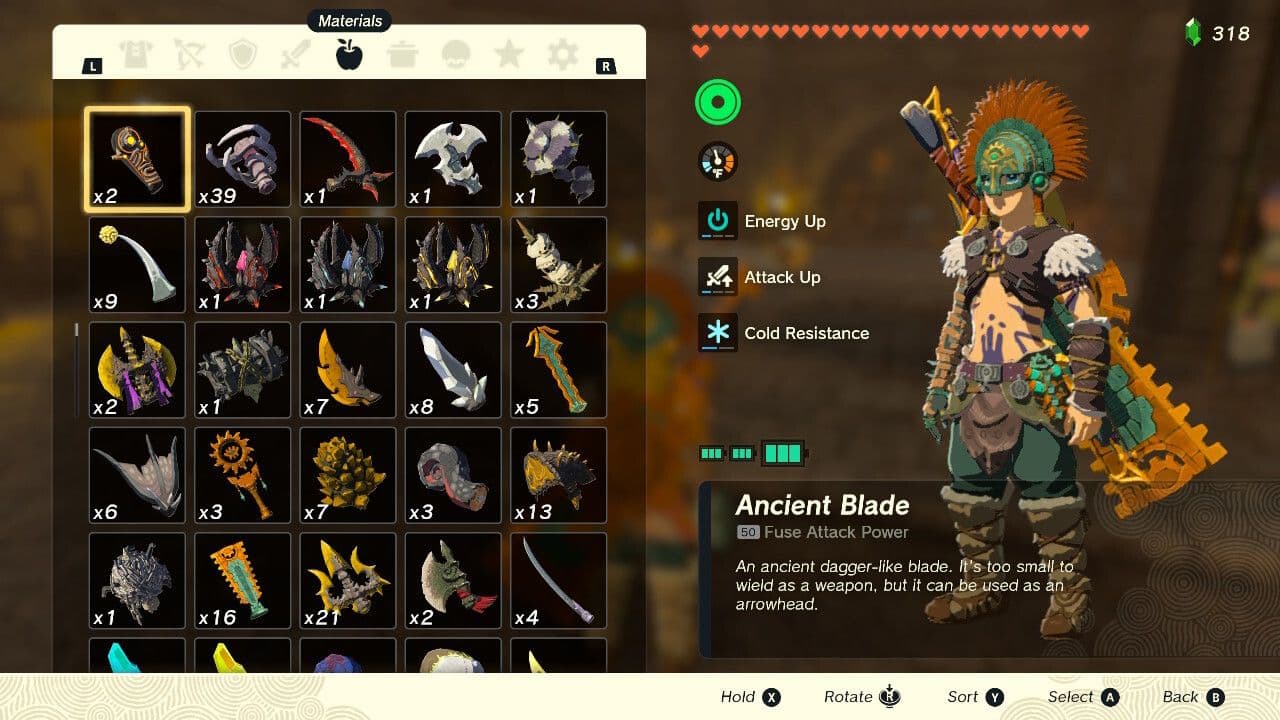
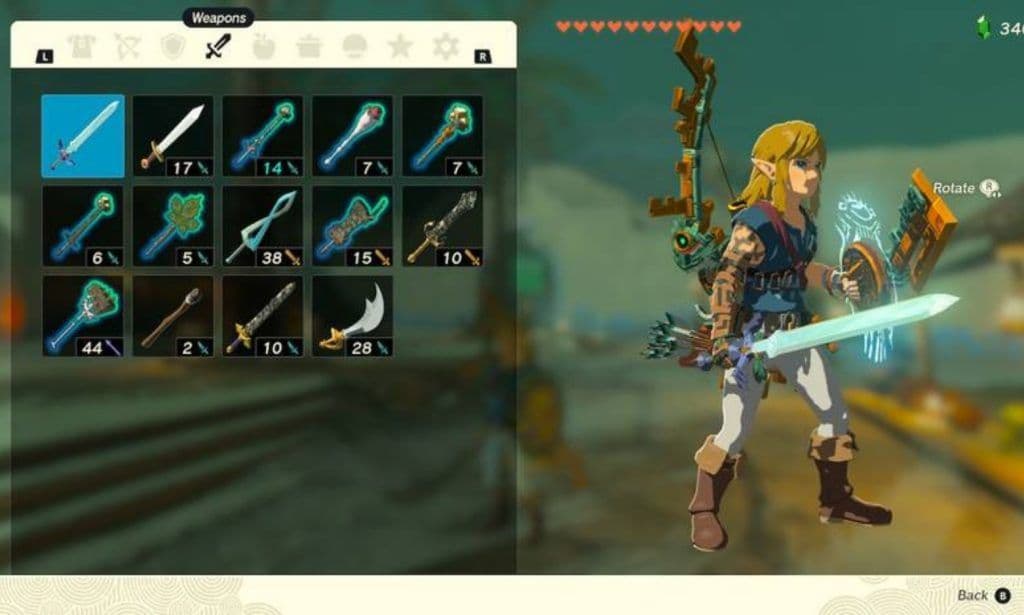
Checking the Fuse attack power in the inventory menu.
Unlocking and Activating Fuse
Your journey begins on the Great Sky Island. After completing the In-isa Shrine, the spectral sage Rauru grants you the Fuse ability. To use it, hold the L button to bring up your ability wheel, then press down on the D-pad to select Fuse. This opens the Fuse menu, allowing you to attach virtually any material in your inventory or environment to a weapon, shield, or arrow. For melee weapons, press Y while holding the item. For shields, use ZL. For arrows, aim with ZR and press up on the D-pad to select a material mid-draw. This on-the-fly customization is key to adapting to any threat.
Managing Fused Items and Inventory
Fusing does more than just change aesthetics; it fundamentally alters an item's stats. Crucially, fusing adds bonus durability to weapons. Most base weapons gain an extra 25 durability points from the fused material, which is depleted before the weapon's own durability wears down. This makes fusion a survival tool, extending the life of every sword and spear you find. To manage your arsenal, you can check a material's Fuse Attack Power directly in your inventory. When viewing a weapon, the stat screen will show the combined power of the base item and its attachment. You can also sort your Materials tab by "Fuse Attack Power" (using the Y button) to instantly identify your most potent components.
When you want to remove a fusion, you have two choices. In your inventory, selecting a fused item and choosing "Destroy Fused Material" will break down the attachment. Alternatively, for a 20-rupee fee, the NPC Pelison at the Break-a-Part Shop in Tarrey Town can safely separate them, preserving the material for future use. This is invaluable for recycling rare monster parts.
Our Ranking Philosophy
The eight fusions featured in this list were selected based on two consistent criteria: Accessibility and Impact. We prioritized combinations that use materials readily available within the first few hours of play, ensuring they are practical for any player starting their adventure. Furthermore, each fusion offers a significant, tangible benefit—whether it's a massive damage boost, a unique utility function, or a transformative combat style—that provides a clear advantage over unfused gear or less optimal combinations. This list is your curated toolkit to master Hyrule's new rules of engagement.
The Takeaway: Fuse is not optional. It is the essential response to a world filled with decayed gear. Mastering its activation, inventory management, and strategic application is the first and most important step toward conquering Tears of the Kingdom. Now, let's build your first arsenal.
1. The Rock Hammer (Traveler's Claymore + Rock)
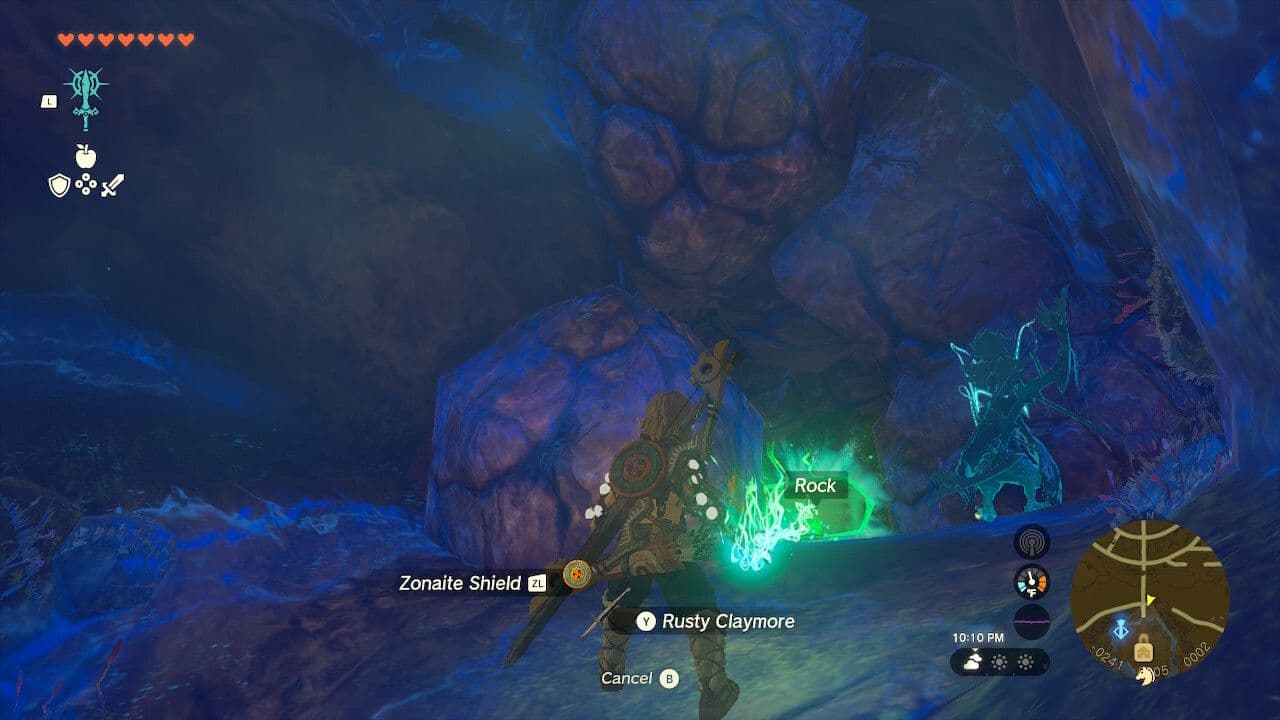
Fusing rocks to weapons creates a hammer for mining and clearing paths.
1. The Rock Hammer (Traveler's Claymore + Rock)
Why it's here: This is the quintessential early-game utility fusion, transforming a common but weak weapon into a specialized multi-tool for resource gathering and obstacle clearing. While other fusions focus on combat, the Rock Hammer solves fundamental exploration and progression problems you'll face within the first hour of leaving the Great Sky Island.
Detailed Breakdown: The fusion is simple: attach any Rock or Boulder to the base of a Traveler's Claymore. This combination is superior to using a weaker base like a stick or a club because the Traveler's Claymore, while not a powerhouse, has better durability. The rock adds +3 damage, but its real value is changing the weapon's damage type to blunt.
Pros and Cons:
- Pros:
- Essential for Mining: It becomes the most accessible "hammer" for smashing ore deposits (containing Amber, Flint, Opals, etc.) and rare stone talus ore nodes. Swords and spears are ineffective here, making this fusion mandatory for early Rupee and material farming.
- Obstacle Clearing: Effortlessly breaks the cracked rock walls blocking caves, tunnels, and the bases of many Skyview Towers (like the Sahasra Slope tower).
- Armor Breaking: Effective against armored enemies like Stone Talus or Bokoblins wearing rudimentary armor, as blunt force is key to breaking their defenses.
- Ubiquitous Materials: Rocks are literally everywhere, and Traveler's Claymores are common drops from early-game constructs and enemies.
- Cons:
- Poor Combat Weapon: The attack speed is slow, and the +3 damage boost is negligible compared to fusing a monster horn. It's a tool first, a weapon only in a pinch.
- Durability Drain: Smashing numerous rocks and ore deposits will wear down the base claymore relatively quickly. It's wise to have a backup rock and a spare claymore.
Specific Use Cases:
- Exploration: Never enter a cave or approach a suspicious rock wall without one. It's your key to unlocking new areas and loot.
- Resource Economy: Instead of wasting Bomb Flowers or weapon durability on mining, use this dedicated, renewable tool.
- Early Bosses: Invaluable for your first Stone Talus fight, allowing you to quickly break its ore weak point after climbing on.
Guidance on Using Blunt Weapons: The game doesn't explicitly tell you that slashing weapons bounce off ore deposits. The rule of thumb: if it looks like a mineral node or a breakable stone obstacle, you need a blunt weapon. The Rock Hammer is the earliest and most reliable way to meet this need. Fusing a rock to a spear can also work for a faster, less damaging "poke" at deposits, but the Claymore's two-handed spinning attack clears clusters of breakables far more efficiently.
Takeaway: Craft this immediately upon finding your first Traveler's Claymore. It is not for your primary weapon slot but should be a permanent fixture in your inventory as your dedicated "problem-solver" for the environment. Its utility in enabling progression and funding your early adventures through mining makes it the most important fusion to master from the start.
2. The Fire Stick (Tree Branch + Red Bokoblin Horn)
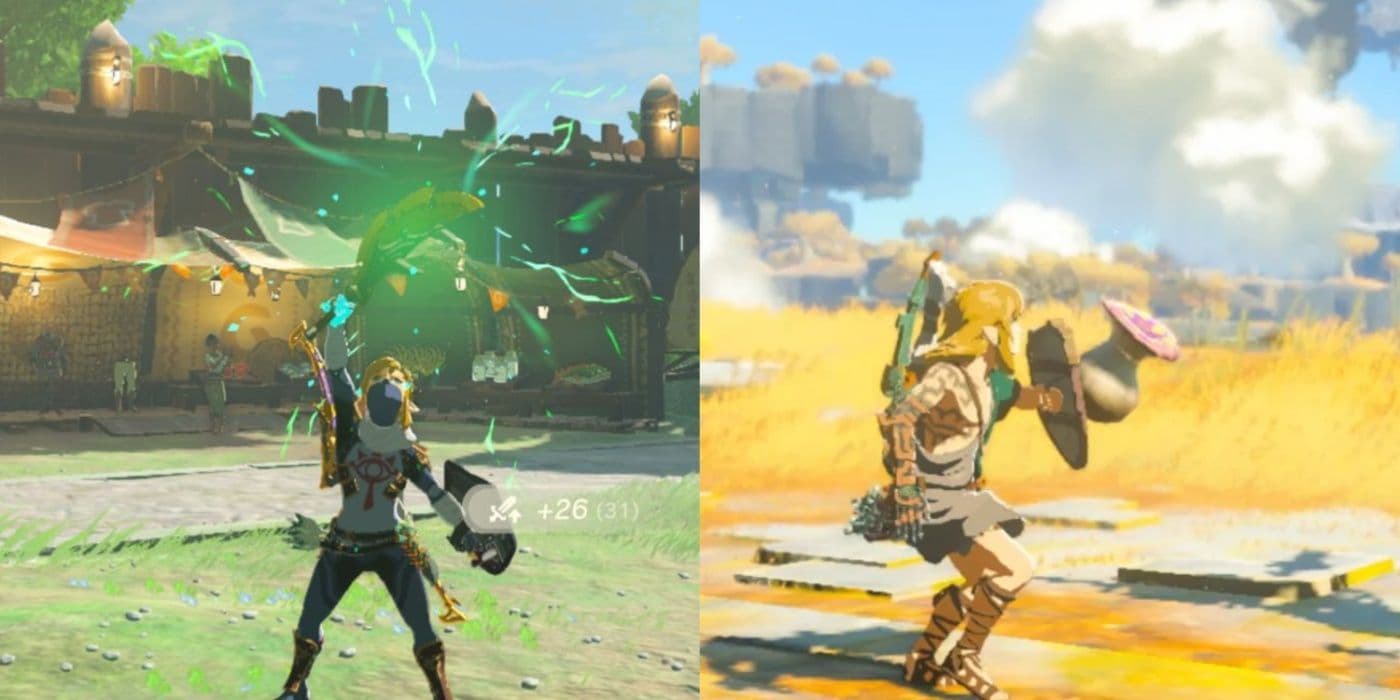
Early game fuse combinations are essential for survival.
2. The Fire Stick (Tree Branch + Red Bokoblin Horn)
Why it’s here: This is the quintessential early-game elemental fusion, transforming the most basic weapon into a tool of fiery destruction. While later sections cover spears for safety and arrows for utility, the Fire Stick showcases the immediate, high-impact power of Fuse for direct melee combat. It’s a masterclass in efficiency, turning disposable starting materials into a weapon that can carry you through the first hours of your adventure.
The genius of the Fire Stick lies in its raw value-to-effort ratio. You’re combining two items you’ll trip over in the opening minutes: a ubiquitous Tree Branch and a Red Bokoblin Horn, dropped by the most common enemy in Hyrule. The result is a weapon that adds a flat +8 to +10 Attack Power to the base branch. More importantly, it gains the Fire elemental attribute. This dual benefit—solid damage and a powerful effect—immediately outclasses simply fusing a rock or another basic horn.
This brings us to a key strategic comparison: melee vs. ranged elemental fusion. While you can fuse a Fire Fruit to an arrow for a single fiery shot, the Fire Stick provides a persistent, reusable source of flame. Every swing applies burn damage, which is a damage-over-time effect that whittles down enemy health bars even after your initial hit. This makes it exceptionally efficient for clearing early camps, as a few pokes can ignite a Bokoblin and let the fire do the rest of the work while you retreat. It’s a stamina-saver and a durability-saver compared to purely physical weapons.
The elemental property is where this fusion truly shines, particularly against ice-based enemies. In the chilly regions of Hyrule, like the Hebra mountains, you’ll encounter Ice Chuchus, Frost-Breath Lizalfos, and other frozen foes. The Fire Stick is your perfect counter. Not only does it deal significant bonus damage to them, but landing a hit will also instantly melt frozen enemies and negate their ice attacks, turning a dangerous encounter into a manageable one. Furthermore, the fire can burn away enemy wooden armor and shields, breaking their defenses and leaving them vulnerable.
Final Verdict: The Fire Stick is your first and best lesson in elemental superiority. It’s a reliable, farmable, and incredibly effective fusion that teaches the core combat strategy of Tears of the Kingdom: exploit weaknesses. Before you chase rare gems or complex Zonai devices, master this combination. It’s the fiery foundation upon which your early-game arsenal is built.
3. The Long Poke (Rusty Spear + Soldier's Spear)
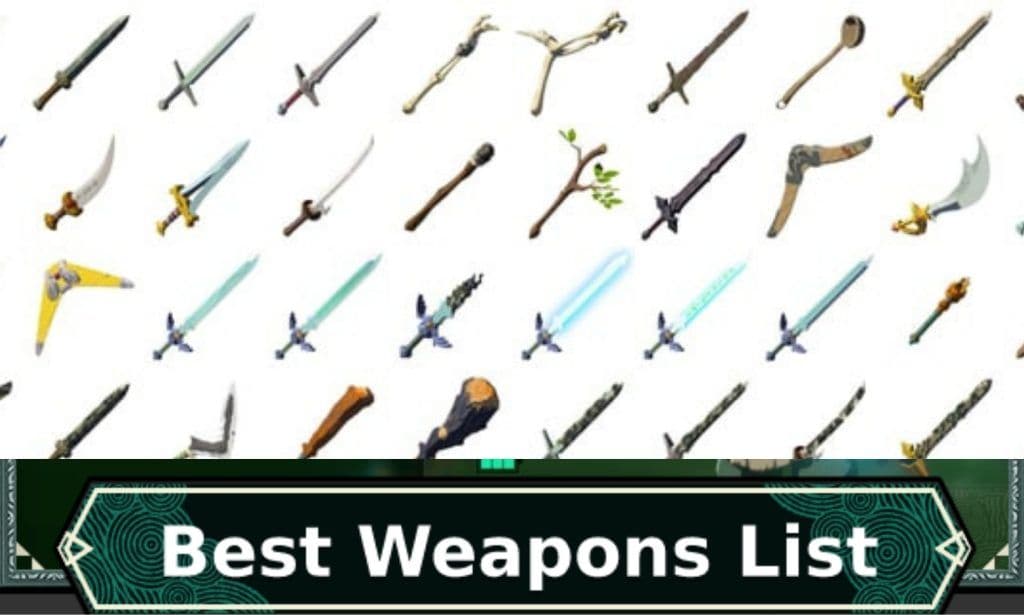
A variety of weapon builds including long-reach spear combinations.
3. The Long Poke (Rusty Spear + Soldier's Spear)
Why it's here: In the perilous opening hours of Tears of the Kingdom, where hearts are few and weapons are brittle, survival often means not getting hit at all. The Long Poke is the definitive early-game fusion for players who prioritize safety, transforming two mediocre spears into a single, exceptionally long-ranged poking stick that lets you engage threats from a distance where they can't touch you.
Safety Through Superior Reach: The core philosophy of this fusion is simple yet brilliant: by attaching one spear (like a Soldier's Spear) to the end of another (like a Rusty Spear), you create a weapon with nearly double the standard melee range. This isn't just a minor upgrade; it's a tactical shift. You can stand outside the swing arc of a Bokoblin's club or the lunge of a Moblin and consistently land hits with the very tip of your weapon. This allows you to whittle down enemy health with near impunity, making it the perfect tool for players still mastering dodges and parries or for conserving precious healing items. Compared to the close-quarters risk of a Flame Blade or the slow wind-up of a Rock Hammer, the Long Poke offers a controlled, low-risk combat style.
Best Scenarios for Safe Poking: This fusion excels in specific, common early-game situations. It is unbeatable against single, melee-only enemies like Bokoblins and Moblins found across Hyrule Field. You can methodically poke them to death while backpedaling. It’s also highly effective for environmental kills; a few pokes can knock an enemy off a cliff or into deep water for an instant victory. Furthermore, it provides a safe way to deal with constructs or enemies with predictable attack patterns, as you can strike during their recovery frames without ever entering their danger zone. While it lacks the raw power of a Bone Clubber or the elemental utility of other fusions, its defensive utility is unparalleled for its cost.
The Verdict: Don't judge this fusion by its modest +4 to +6 attack power bonus. Its value is measured in hearts saved, not damage dealt. For any player feeling overwhelmed by early combat or who simply prefers a strategic, keep-away style, crafting a Long Poke is one of the smartest first investments you can make. It’s the training wheels of Hyrule’s harsh combat—and sometimes, you never really need to take them off.
4. The Homing Arrow (Arrow + Keese Eyeball)
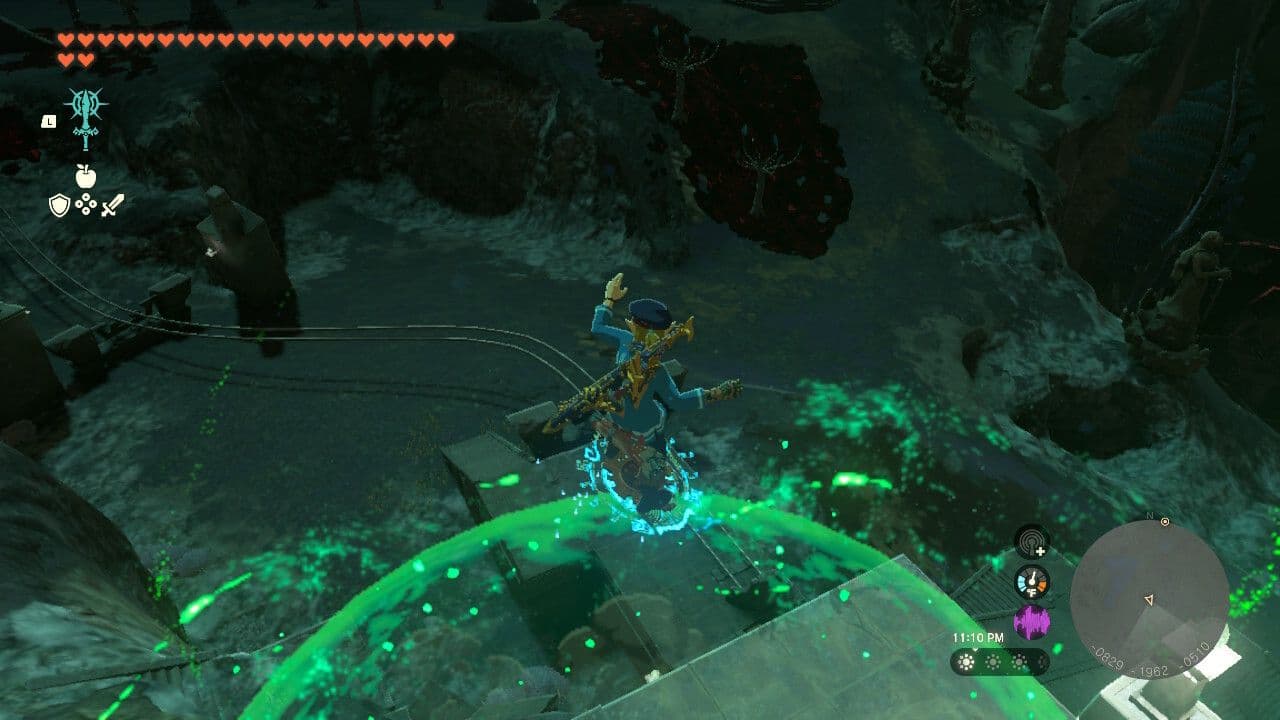
Combining aerial slow-motion with homing arrows makes hitting fast targets much easier.
4. The Homing Arrow (Arrow + Keese Eyeball)
This combination is the ultimate solution for players who struggle with fast-moving or airborne targets, transforming a standard arrow into a guided missile. While other arrow fuses add elemental damage or area-of-effect blasts, the homing arrow’s primary benefit is guaranteed accuracy. It’s the great equalizer, turning frantic, missed shots into reliable hits. This is not just a quality-of-life upgrade; it’s a strategic tool that conserves precious arrows and allows you to focus on positioning and timing rather than pixel-perfect aim.
Why it's here: In the chaotic dance of combat, especially against swarming Keese, diving Aerocudas, or the erratic movements of bosses like Flux Constructs and Gleeoks, landing a critical shot can be the difference between victory and a reload. The homing arrow removes the guesswork. When fused, the projectile will actively curve in mid-air to strike the targeted enemy. This is invaluable for hitting weak points on mobile foes or for ensuring that a single elemental arrow (like one fused with a Fire Fruit or Shock Fruit) connects with its intended target to apply a crucial status effect. Compared to a standard Bomb Flower arrow, which requires direct impact or precise ground placement, the homing arrow ensures your payload—be it damage or an effect—finds its mark.
Farming & Inventory Management: Keese are your primary source for this fusion. They swarm at night or in caves; a single well-placed arrow or area-of-effect attack can net you multiple Keese Eyeballs. For elemental variants (Fire, Ice, Electric Keese Eyeballs), seek out the corresponding elemental caves or regions. Aerocuda Eyeballs, found by defeating the flying lizard-like enemies, offer a stronger +4 Fuse Attack Power and are excellent for mid-game homing arrows. The key to inventory management is to sort your Materials tab by "Fuse Attack Power" (press Y). This will group your eyeballs together, making it easy to see your stock of regular vs. elemental variants. Don’t hoard them—use them strategically against the foes that need them most. Pairing a Keese Eyeball with a Bomb Flower creates a homing explosive, a premier combination for guaranteed damage on a single, tough target.
Strategic Applications: This fuse shines brightest against specific high-priority threats. Use it to effortlessly snipe Aerocudas before they can drop Bokoblin archers on your head. Against the multi-phase bosses in the Temples, a homing arrow can reliably stun a fast-moving boss or hit a distant weak point, saving you immense frustration. It’s also the perfect tool for clearing out annoying Keese swarms with a single shot, as the arrow will chain between targets if they are close enough. For players who favor a stealthy or tactical approach, this is a non-negotiable part of the arsenal.
Takeaway: The Homing Arrow is less about raw damage and all about precision and efficiency. It turns your bow into a surgical instrument for enemy removal. Always keep a stack of Keese Eyeballs on hand for when you encounter any enemy that won’t stand still.
5. The Rocket Shield (Shield + Zonai Rocket)
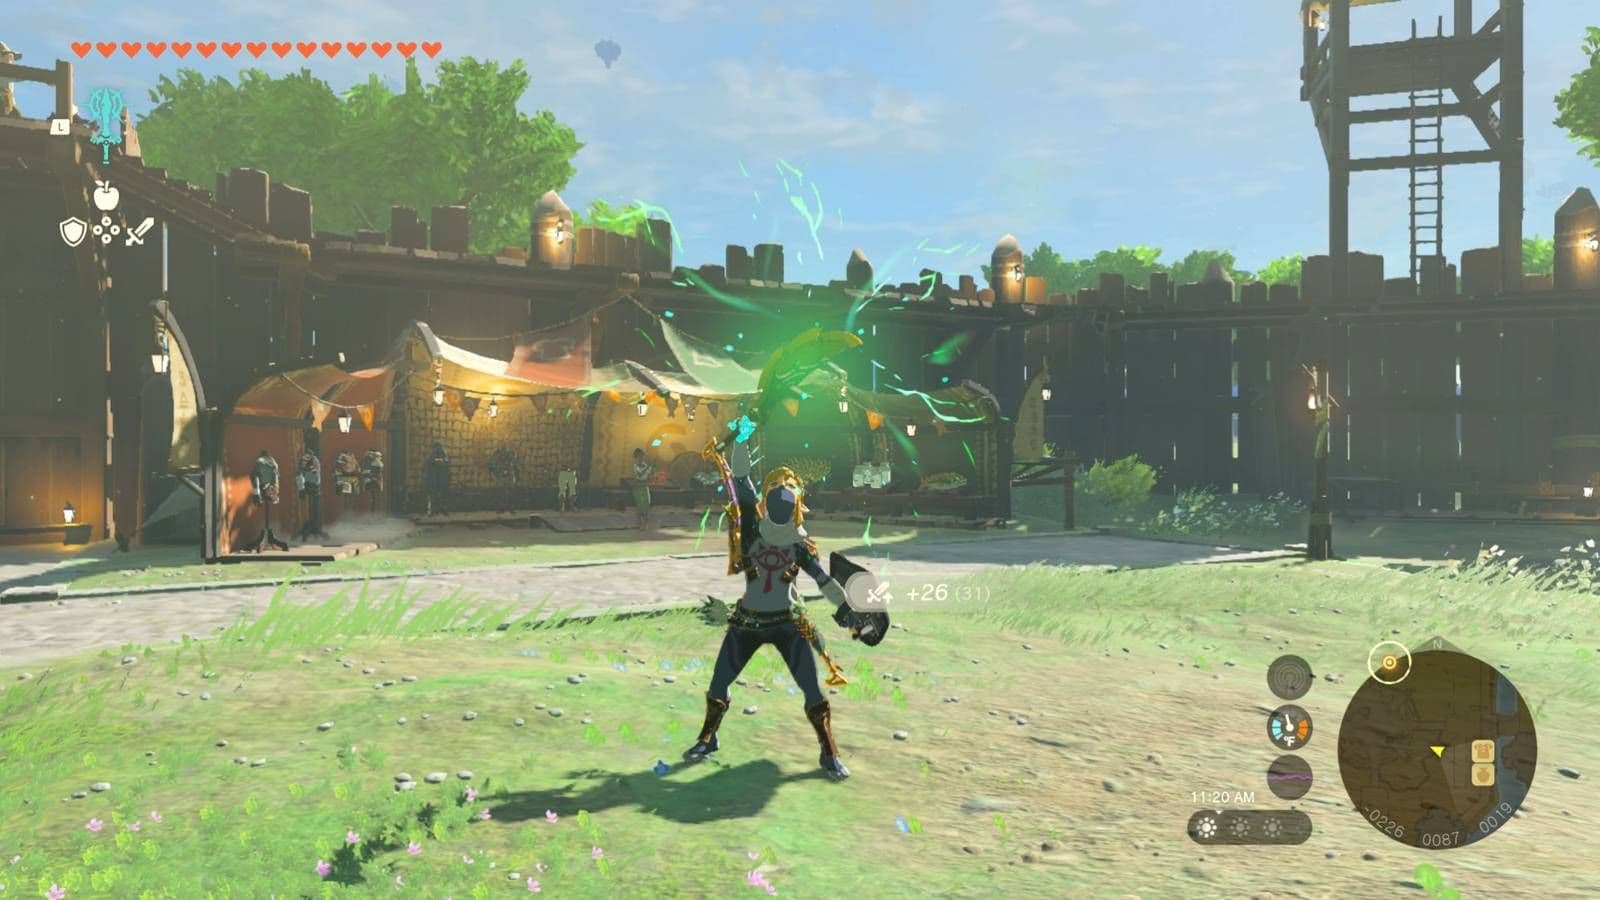
Zonai devices can be fused to equipment for various tactical advantages.
5. The Rocket Shield (Shield + Zonai Rocket)
While many early fusions focus on brute force or elemental damage, the Rocket Shield is the definitive tool for redefining your approach to Hyrule's geography. This combination is here not for its attack power (it has none), but as the single most transformative utility fusion you can master in the opening hours. It turns a basic piece of defensive gear into a personal launch platform, solving vertical puzzles and creating offensive opportunities that are otherwise locked behind late-game stamina upgrades or complex Zonai device builds.
Why it's here: The core benefit is instantaneous, effortless vertical mobility. By fusing a Zonai Rocket to any shield and holding ZL (block), you are propelled straight up into the sky. This is the premier early-game solution for scaling cliffs, accessing high ledges in shrines, or reaching the tops of towers and ruins that seem just out of climbing reach. Unlike the Fire Fruit arrow's updraft—which requires fuel and a flat, flammable surface—the Rocket Shield works anywhere, on demand. It is your first true taste of the vertical freedom that defines Tears of the Kingdom.
This launch capability seamlessly translates into a potent combat technique: the rocket jump. The ascent triggers slow-motion archery, allowing you to paint multiple targets with fused arrows before you even begin to fall. This is far more controlled and immediate than jumping off a high ledge. Pair this with a homing Keese Eyeball arrow (from Section 4) or a Bomb Flower, and you can safely decimate an enemy camp from a position of total safety. It’s a classic case of the fusion system’s synergy, where a utility tool (the rocket) and a combat tool (your bow) become exponentially more powerful when used together.
However, this power comes with a key durability trade-off. Using a Zonai device on a shield consumes that shield's durability as if it were blocking a hit. Each rocket launch counts as one such "hit." Therefore, this fusion is best used on shields with higher durability you don’t mind expending, or reserved for critical moments of exploration or combat initiation. It’s not for frivolous use, but when you need to bypass a daunting cliff face, escape a swarm of enemies, or gain a decisive high-ground advantage in a fight, no other early-game fusion compares. It is the ultimate "get out of jail free" card and exploration key, rolled into one ingenious package.
6. The Bone Clubber (Wooden Club + Bokoblin Bone)
High-damage weapon builds often rely on specific material fusions.
6. The Bone Clubber (Wooden Club + Bokoblin Bone)
Why it's here: To present a high-damage, low-durability glass cannon option that is perfect for deleting early-game mini-bosses.
While many early fusions offer utility or elemental effects, the Bone Clubber is built for one purpose: raw, explosive damage. The math is simple but devastating. A common Bokoblin Bone, a material you’ll start collecting within minutes of leaving the Great Sky Island, provides a massive +20 attack power boost when fused to a melee weapon. Fuse it to a readily available Wooden Club, and you’ve instantly created a weapon that can hit harder than anything else in your early arsenal. This isn't a weapon for whittling down a camp of Red Bokoblins; this is your "boss killer" button.
However, this power comes with a critical, non-negotiable caveat: extreme fragility. Bone-based fusions are notoriously brittle. The fused material itself doesn't have durability, but the base weapon's durability will be consumed rapidly with each swing. The Wooden Club is not a durable base to begin with, meaning your Bone Clubber is a true glass cannon—it will deal catastrophic damage but likely shatter after felling a single tougher foe like a Blue Bokoblin or a Boss Bokoblin. This is why it’s crucial to save this fusion for ideal use cases against early mini-bosses. Enemies like the Flux Construct I, a Talus, or a particularly troublesome camp leader are perfect targets. The strategy is to pull this weapon out for the fight, unleash its high-damage flurry to end the encounter quickly, and not mourn its loss when it breaks. You’ve traded one fragile weapon for valuable loot and progress.
The Takeaway: The Bone Clubber is your early-game equalizer. Don't hoard Bokoblin Bones; use them aggressively to craft this disposable powerhouse. It teaches the valuable TOTK lesson that sometimes the best weapon is the one you’re not afraid to break. Save it for the big threats, swing for the fences, and pick up a new club and bone for the next one.
7. The Smoke Screen (Shield + Puffshroom)
7. The Smoke Screen (Shield + Puffshroom)
While other fusions focus on raw power, elemental effects, or explosive mobility, the Smoke Screen carves out a unique and masterful niche: it weaponizes stealth. This isn't about dealing damage directly; it's about controlling the battlefield and unleashing the game's most devastating single-target attack—the Sneakstrike—on demand. Fusing a Puffshroom, a fungus commonly found in the Depths, to any shield transforms a defensive tool into an offensive enabler, making this one of the most tactically powerful and resource-efficient combinations in Link's arsenal.

Tears of the Kingdom gameplay.
The Mechanics of Mayhem: Creating Your Own Cover
The function is elegantly simple. When you block an enemy's attack with a Shield + Puffshroom, the mushroom detonates on impact, creating a large, opaque cloud of smoke. This cloud instantly breaks enemy line-of-sight, causing them to enter a confused, non-aggressive state as they try to figure out where you went. Crucially, you are not blinded by your own smoke, granting you perfect vision within the cloud. This immediate disengagement tool is far superior to simply running away, as it resets the combat encounter in your favor. It's the ultimate "panic button" against overwhelming odds or a precise tool for isolating a single strong foe from a pack.
Unlocking the 8x Damage Multiplier: The Sneakstrike
The true power of the smoke screen is realized when you understand Sneakstrike mechanics. Attacking an unaware enemy from behind with a melee weapon triggers a Sneakstrike, which deals a colossal 8 times the weapon's listed damage. The Puffshroom's smoke cloud makes every enemy inside it "unaware," allowing you to chain these devastating blows. Walk up to a befuddled Bokoblin or even a fearsome Lynel (if you're brave enough to get close), and you'll see the "Sneakstrike" prompt. A single well-placed block can thus set up a series of fight-ending attacks, turning the tide against enemies that would otherwise shred your health and weapons in a straight fight.
The Ultimate Weapon Conservation Strategy
This leads to the Smoke Screen's second, perhaps more valuable, benefit: massive durability conservation. A Sneakstrike does not consume your weapon's durability. Let that sink in. You can use a fragile but high-damage weapon like a Gloom Sword or a Royal Guard's Claymore to deliver an 8x damage hit without costing it a single point of durability. This fusion allows you to preserve your most powerful weapons for the moments that truly matter, effectively "banking" their damage for critical encounters. Compared to the Bone Clubber (Section 6), which hits hard but shatters quickly, the Smoke Screen strategy lets you wield glass-cannon weapons without the cannon breaking.
Tactical Comparison & Crowd Control
How does this stack up against other fusions? The Flame Blade (Section 8) controls space with fire, and the Homing Arrow (Section 4) picks off single targets. The Smoke Screen, however, offers unrivaled crowd control. A single blocked attack in the middle of a camp can shroud a dozen enemies, letting you pick them off one by one with silent, guaranteed strikes. It's a safer, more controlled alternative to the area-of-effect chaos of a Bomb Flower Arrow. Furthermore, while the Rocket Shield (Section 5) offers vertical escape, the Smoke Screen offers horizontal and tactical escape, letting you reposition, heal, or plan your next move without taking damage.
Why It's Here: The Smoke Screen fusion is the definitive choice for the tactical, resource-conscious player. It bypasses the need for brute force, instead leveraging game mechanics to achieve maximum effect with minimum expenditure. It turns any encounter into a stealth puzzle, rewards patience and positioning, and is arguably the most efficient way to deal with high-health targets in the game. For mastering combat through cunning rather than pure strength, no other fusion compares.
The Takeaway: Don't just block attacks—orchestrate them. Keep a Shield + Puffshroom on hand to create instant opportunities for massive damage and to protect your most valuable weapons from decay. It’s the smart fighter’s ultimate ace in the hole.
8. The Flame Blade (Traveler's Sword + Fire Fruit)

Exploring the world of Hyrule
8. The Flame Blade (Traveler’s Sword + Fire Fruit)
While many fusions in Tears of the Kingdom are about maximizing raw damage or durability, the Flame Blade is a masterclass in tactical, on-demand utility. This combination, which attaches a common Fire Fruit to a one-handed sword like the Traveler’s Sword, exemplifies the genius of the Fuse system: transforming a basic weapon into a versatile tool for immediate problem-solving. It’s not just a weapon; it’s a swiss army knife for environmental manipulation and crowd control.
Why it's here: The Flame Blade earns its spot by providing a powerful, temporary elemental effect that other early-game fusions can’t match. While the Fire Stick (Tree Branch + Red Bokoblin Horn) offers a persistent flame, the Flame Blade’s effect is instant and area-based. Each swing doesn't just add a bit of fire damage; it ignites the ground and enemies in a small radius. This creates three distinct tactical advantages that are crucial for beginners and veterans alike. First, it’s perfect for detonating explosive barrels from a safe distance—a single slash towards a camp’s red keg can clear a group of Bokoblins without ever getting close. Second, the ignition effect on grass or dry brush creates a temporary updraft, allowing you to immediately activate your paraglider for a quick aerial escape or to line up a slow-motion arrow shot. This is a more controlled and weapon-efficient method than hoping for a natural fire or using a precious fire arrow. Finally, it provides excellent elemental crowd control, particularly against ice-based enemies like Frost Breaths or in cold regions, where it can both deal damage and provide a warming effect.
Key Feature Comparison: Don't confuse this with simply using a Fire Fruit on an arrow. While a Fire Fruit arrow is a single-target projectile, the Flame Blade turns your melee zone into an area-of-effect hazard. It’s also a more resource-conscious choice than fusing a rare Ruby for a constant flame effect, as Fire Fruits are abundant in Hyrule’s caves and on certain trees. The trade-off is its temporary nature—the flame effect lasts for a limited number of hits before the fruit is consumed—but this encourages smart, situational use rather than mindless swinging.
The Verdict: Keep a Flame Blade in your inventory not as your primary damage dealer, but as your go-to tactical tool. When you see a cluster of enemies around explosives, need a quick vertical boost, or face a pack of ice monsters, this fusion provides an immediate and elegant solution. It teaches the invaluable lesson that in Tears of the Kingdom, the best weapon isn’t always the one with the highest number—it’s the one that gives you the most options.