If your Valheim group is split across Steam, Xbox or Microsoft Store, and the platforms announced for 1.0, the important decision is not simply who clicks Host. A player-hosted session is a peer-to-peer game session, while a dedicated server is a separate process that keeps the shared world available without tying it to one player’s session. That difference makes dedicated hosting the sensible foundation for a persistent group world—but the server still needs to run on the documented PC, Linux, or other supported server environment.
This guide uses Iron Gate’s current dedicated-server manual for the operational steps and treats the 9 September 2026 1.0 announcement as a separate confirmation layer. 1.0 confirms all-platform crossplay and a 1–10-player scope, but it does not yet replace the server manual with a new syntax or publish a complete achievement-safety matrix. You will choose the backend, launch the server, apply bounded modifier flags, find the control files, and build the admin list from the exact IDs the server reports—then leave a clear checklist for what to verify after launch.
A dedicated server separates the world from the player host
The choice is about where the multiplayer session lives. Starting multiplayer from Valheim creates a public or private peer-to-peer session through the game, tied to the player who starts it. The Valheim Dedicated Server application instead launches a separate process for a persistent world. That process can keep the world available while the usual in-game host is away, provided the machine running it is online and the server process is running; it is host-independent access, not a guarantee of uptime.
| Hosting model | What your group is organizing around |
|---|---|
| Player-hosted session | The in-game host starts the public or private P2P session, so access follows that host’s session. |
| Dedicated server | A separate application runs the persistent world, allowing players to return without the normal host starting a multiplayer session. |
For a ten-player group split across Steam, Microsoft/Xbox, and the platforms announced for 1.0, the difference is practical. If the usual host plays only in the evenings, a player-hosted session makes the group’s schedule depend on that person. A dedicated server running on a supported PC, Linux machine, or other server environment gives the group one world process to keep available instead. Plan around Valheim’s 1–10-player server scope; dedicated hosting does not expand that capacity.
The console boundary matters before you choose the machine. Xbox cannot host the dedicated process from the console, although Xbox players can join a dedicated server when the Crossplay path is enabled. Keep the server application on the supported PC/Linux/server environment and treat the backend choice as a later setup decision. Once that operating model is chosen, install the official server application and verify that its process has launched before configuring how players will connect.
Install and launch the current server application
Put the server process on the PC, Linux machine, or other supported server environment you chose for the world. In Steam, install or locate Valheim Dedicated Server, open its local files, and use the launch file for that operating system. This is the point where the hosting decision becomes a real server process; leave backend selection and the rest of the startup configuration until the process can launch cleanly.
On Windows, open the Dedicated Server folder and run start_headless_server.bat. On Linux, run ./start_server.sh from the server directory. The current manual lists libatomic1, libpulse-dev, and libpulse0 as Linux dependencies, so install those before launching the script on a Linux Steam setup. In either case, watch the command window rather than treating the file opening as proof that the server is ready: wait for the log to report Game server connected.
For a Windows installation from the Microsoft Store, use its separate Server folder at C:\XboxGames\Valheim\Content\Server and launch StartHeadlessServer.bat there. That is a different PC installation path for the server application, not evidence that an Xbox console can host the dedicated process.
When you are finished, stop the process with Ctrl+C in the command window. Do not close the window with its X, which does not follow the documented shutdown path. The dedicated-server package also includes a Docker script, but Docker and provider-specific deployment are outside this vanilla setup: get the documented application running first, then choose the backend that will govern how players connect.
Choose the backend that matches the group’s join path
Once the server process is running, its backend determines who can see it and which connection route the group should use. The choice is straightforward:
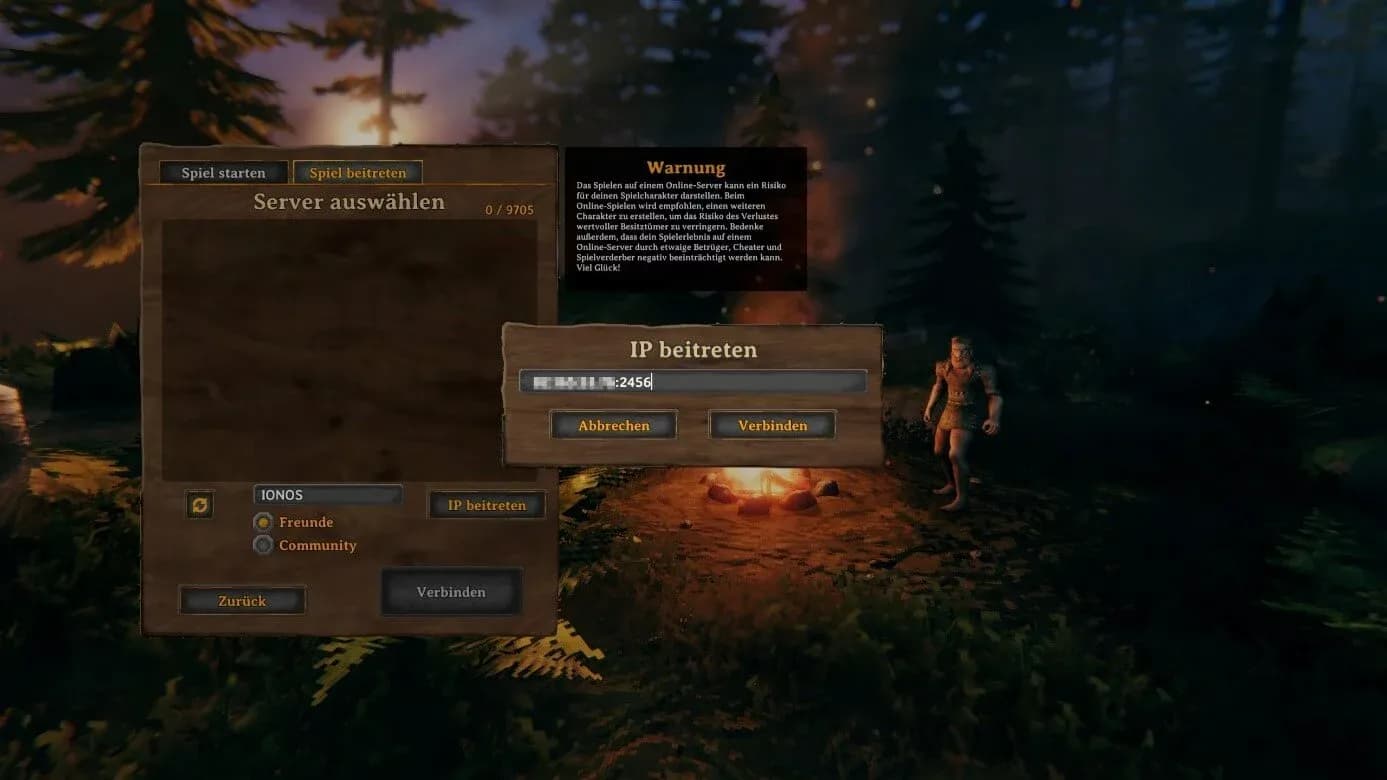
Historical server-selection and IP-join example; Crossplay join codes and server-browser behavior should be checked against the live build.
| Group | Startup choice | Connection requirement |
|---|---|---|
| Steam-only | Omit -crossplay |
Make the default Internet-accessible port range 2456–2457 available to the server; Steam players can then find and join it through the Steam backend. |
| Mixed platforms | Add -crossplay |
Use the PlayFab Crossplay relay, then join through a public IP and port, a join code, or the server list. |
If you omit -crossplay, Valheim uses the Steam backend. Visibility and joining are limited to Steam users, and the server’s default port range is 2456–2457; those ports need to be reachable from the Internet. That is the sensible path for a Steam-only group, and it keeps the group on the Steam identity path when you later configure administration.
For a group split across Steam, Microsoft/Xbox, and the platforms announced for 1.0, add -crossplay. This selects the PlayFab Crossplay backend and sends outside traffic through its relay, so you do not need to configure router port forwarding for that path. Players can use the server’s public IP and port, paste a join code through Join Game, or select the server from the browser. The port is still useful when several servers share one public IP, because it distinguishes the individual server even though the relay handles the outside connection.
Match the test to the route you selected. A Crossplay server that works from a join code or the server browser but fails when you try the server machine’s LAN address or 127.0.0.1 is behaving as documented: Crossplay joins do not accept a local IP or loopback address. Give mixed-platform players the join code or browser route instead of debugging an expected failure as if it were a port-forwarding problem.
Only add -instanceid when multiple servers use the same port on the same machine or MAC address. In that case, give each server a unique value—-instanceid "1" is one example—so the Crossplay service assigns them distinct PlayFab IDs. With one server on the machine, leave this exception out. With the backend decision complete, the next step is to compose the startup command and apply the documented preset/modifier precedence.
Compose startup flags in the order the server reads them
With the backend choice settled, add the core identity and world flags and use the documented modifier settings described below. The core flags give the process a name, port, world, password, and visibility:
| Flag | What it controls |
|---|---|
-name "My server" |
The name shown in the server list. |
-port 2456 |
The server port. |
-world "Dedicated" |
The world to create or load. |
-password "Secret" |
The server password. |
-public 1 |
Shows the server in the browser. Use -public 0 to hide it and leave Join IP as the route. |
For the mixed-platform group in this guide, keep the previously chosen -crossplay flag in the command. A complete modifier-focused example can therefore look like this:
-name "Valheim 1.0 group" -port 2456 -world "Dedicated" -password "Secret" -public 1 -crossplay -preset hard -modifier resources more -setkey nomap
Preset precedence. -preset establishes a baseline and overwrites previous world modifiers. If you also need one standalone change, put -modifier after the preset so the explicit group/value pair is applied afterward. In the example, the server starts from the Hard preset and then overrides Resources with more; it does not let the preset overwrite that later choice.
The documented preset names are:
Normal, Casual, Easy, Hard, Hardcore, Immersive, and Hammer.
Standalone modifiers are narrower than a general world-key namespace. Use only these group/value combinations:
| Modifier group | Accepted values |
|---|---|
Combat |
veryeasy, easy, hard, veryhard |
DeathPenalty |
casual, veryeasy, easy, hard, hardcore |
Resources |
muchless, less, more, muchmore, most |
Raids |
none, muchless, less, more, muchmore |
Portals |
casual, hard, veryhard |
Accepted modifier values. The syntax is the group followed by its value, as in -modifier resources more. Do not substitute a value that merely sounds plausible, such as normal for a group whose documented list does not include it. If the group needs more than one explicit adjustment, keep each -modifier within its published group/value set and make the resulting command readable enough to audit before the world is used.
Startup -setkey boundary. -setkey is a separate, constrained startup option. The official server documentation lists only four startup keys: nobuildcost, playerevents, passivemobs, and nomap. The compact example -setkey nomap is valid; arbitrary names from the broader Global Keys namespace are not thereby documented as valid startup arguments. The in-game setkey developer command is a different mechanism, and enabling devcommands does not expand this startup allowlist.
Maintenance flags. You can add the documented operational flags around this configuration when you need them: -logFile, -saveinterval (the default is 1,800 seconds), -backups (four automatic backups by default), -backupshort (two hours by default), and -backuplong (12 hours by default). Keep those maintenance choices separate from the modifier decision so the world settings remain obvious in the batch file or Linux launch script.
Before the world is used. Copy the structure into the launch file, choose the world name, password, and visibility once, and settle the modifier state before players build in the world. Treat the startup -setkey list as a documented four-key boundary, and do not describe an arbitrary preset or modifier combination as universally achievement-safe while the complete eligibility matrix remains unpublished.
Locate the save directory and separate access control from world data
The launch command now defines which world the server loads and which modifiers it applies. Keep that world state separate from the files that decide who can manage or enter the server. Before editing any permissions, identify the save directory that this particular server process is using.
| Environment | Default save directory |
|---|---|
| Windows | ../%USERPROFILE%/AppData/LocalLow/IronGate/Valheim |
| Linux | ~/.config/unity3d/IronGate/Valheim |
| Custom location | The path supplied with -savedir [PATH] |
If the launch configuration includes -savedir, use that location instead of searching the operating system’s default path. Apply the same -savedir choice consistently whenever you start or maintain the server; otherwise it is easy to inspect one directory while the running process is reading another. Confirm the active location first, then make a backup of the world and its control files before changing access policy.
The access-control files live in that save path, or in the path selected with -savedir:
| File | Effect |
|---|---|
adminlist.txt |
Grants server administration to the listed Platform User IDs. |
bannedlist.txt |
Blocks the listed Platform User IDs. |
permittedlist.txt |
Restricts admission to the listed Platform User IDs when the file is non-empty. |
Each file takes one Platform User ID per line. That shared format does not make the files interchangeable: adminlist.txt controls server-management access, bannedlist.txt controls exclusions, and a populated permittedlist.txt deliberately turns the server into an exclusive list. Leave permittedlist.txt empty unless you intend to run a whitelist; otherwise a player who is not listed will be refused even if the server is reachable through the correct join route.
These files govern access around the world; they are not world-modifier settings or a substitute for the world data itself. Changing the administrator list does not apply a preset, alter a startup -setkey, or migrate the save. Treat the world content and the access policy as two maintenance concerns that happen to live under the same active save directory.
Finding adminlist.txt is only half of administration. The next step is to determine which exact identity string each player must contribute, then distinguish the server-management access that list provides from the separate native cheat boundary.
Build adminlist.txt from the IDs the server reports
The file is only useful if each line contains the identity the selected backend actually recognizes. For a Steam-only server, use the player’s 17-digit SteamID64. For a Crossplay server, use the complete platform ID shown by the game or server, not a Steam ID you converted or a number you guessed.
| Player path | Value to place in adminlist.txt |
|---|---|
| Steam-only | The player’s 17-digit SteamID64. |
| Crossplay | The full platform ID from the F2 panel or server log, such as Xbox_2433224801742044. |
The Crossplay value follows the case-sensitive [Platform]_[User ID] pattern. Preserve the prefix, underscore, digits, and capitalization exactly as emitted. In particular, do not reduce Xbox_2433224801742044 to 2433224801742044, and do not assume Xbox is the only platform prefix that can appear as more platforms join the Crossplay path.
Use this capture workflow for the group:
- Let each player connect to the server once. For Crossplay, make sure the player joins through the Crossplay route selected earlier.
- Read that player’s full ID from the in-game F2 panel or the server log.
- Paste one unchanged ID on each line of
adminlist.txt. - Save the file, then restart or reload the server as required by the environment before testing the new access.
This makes the list auditable: a Steam-only entry is visibly a 17-digit SteamID64, while a Crossplay entry retains the platform information the server reported. If an entry fails, recapture it from F2 or the log instead of normalizing its spelling or trying another ID format. Once the file is active, the documented server-management commands include Kick PLAYERNAME, Ban PLAYERNAME, Unban PLAYERNAME, and Banned; current community references also list commands such as save, setworldmodifier, setworldpreset, and resetworldkeys, but that extended list should not be treated as a complete official command catalog.
Being listed as an admin does not grant native cheat access. On a vanilla dedicated server, adding an ID to adminlist.txt does not enable devcommands or make spawn, god, fly, or the in-game setkey command available. Those cheats belong to the separate single-player or manually hosted command path; administration manages the server and, where supported, its world settings. Verify the list with a non-destructive server-management action your environment supports, and keep that distinction in place when evaluating the server’s achievement implications.
Treat the 1.0 world as a migration decision, not a guaranteed continuation
That distinction becomes important when the server you have just administered crosses into 1.0. Iron Gate has announced 1.0 for 9 September 2026, with Windows, Linux, Mac, Microsoft Store, Xbox One, Xbox Series X|S, PlayStation 5, and Nintendo Switch 2 support, plus crossplay across all platforms. The announcement keeps the game at 1–10 players, but it does not replace the server process you configured with a new hosting contract: the current dedicated-server manual remains the operational source for this guide.
Generic Valheim launch artwork from the 1.0 FAQ; it does not depict server hosting or save migration.
Your first decision is whether the existing world is worth carrying forward. Iron Gate says existing worlds remain available after the update, but new biome generation works correctly only in areas that no player explored before 1.0. Its definition of unexplored is strict: no player has set foot within roughly 500 metres. The same FAQ recommends starting over, so a fresh world is the safer choice if the group wants the intended generation of the new Deep North content. Reusing the current world preserves the group’s buildings, routes, and accumulated work, but it may leave areas already approached before launch with the old generation boundary.
These are the two legitimate server strategies:
| Choice | What you gain | What you accept |
|---|---|---|
| Reuse the current world | The shared base, explored routes, and existing progression remain available. | Previously visited areas may not generate new biome content correctly, and you are declining Iron Gate’s fresh-world recommendation. |
| Start a fresh 1.0 world | New biome generation begins from a clean map and follows the launch recommendation. | The group must rebuild its base and repeat progression rather than carrying the existing world forward. |
Do not confuse that world decision with cross-platform save portability. Players can join the same Crossplay server and share its world without their individual save files synchronizing between platforms. The 1.0 FAQ says cross-platform save-file sync is not generally available; Xbox-to-PC save access is limited to launching through the Microsoft Store. In other words, -crossplay answers “can these players enter this server?” It does not answer “can every platform freely open and transfer this world or character save?” Keep the authoritative world on the server process and do not promise a portable copy as part of the setup.
The hosting assumption also remains narrower than the platform announcement. Xbox cannot host the dedicated process from the console, and the checked 1.0 material does not establish that PlayStation 5 or Nintendo Switch 2 can host it. Keep the server on the documented PC, Linux, or other supported server environment until Iron Gate publishes an explicit console-hosting path. The new platforms may join the shared Crossplay world; that fact alone is not evidence that they can run the dedicated-server application.
Treat achievements as another launch boundary. Achievement tracking starts when the 1.0 version is downloaded. Iron Gate says most cheats and some world modifiers, including Hammer-mode, can block eligibility, but it has not published the complete modifier matrix. Avoid Hammer-mode, and do not label an arbitrary -preset, -modifier, or -setkey combination achievement-safe merely because the server accepts it. A vanilla dedicated server removes the normal client-side cheat path, but that is not an official guarantee that every world configuration remains eligible. There is also no Public Test Branch for 1.0, and mods have no official support, so neither a staged test branch nor a modded compatibility promise can substitute for checking the live release.
The current operational reference is therefore a pre-1.0 boundary, not a permanent contract. The supplied stable marker is version 0.221.12, published on 19 February 2026, while the 1.0 FAQ does not republish dedicated-server syntax for a new server binary, port behavior, admin-ID examples, or a complete modifier eligibility list.
Before launch, record this checklist:
- Choose whether to reuse the shared build or create a fresh 1.0 world.
- Keep the server on the documented PC/Linux/server process.
- Schedule a post-launch verification pass. After 9 September 2026, recheck the current-manual assumptions this guide carries forward:
-crossplay; Steam-backend default ports2456–2457; PlayFab relay behavior; accepted join routes, including the public IP/port, join-code, and server-browser paths; modifier names and ordering; startup-setkeyvalues; platform-ID formats; save paths; admin commands; console-hosting support; and achievement eligibility. - Do not present the setup as 1.0-final until those checks are complete.