How to Manage the Army Supply and Provision System in War of the Three Kingdoms
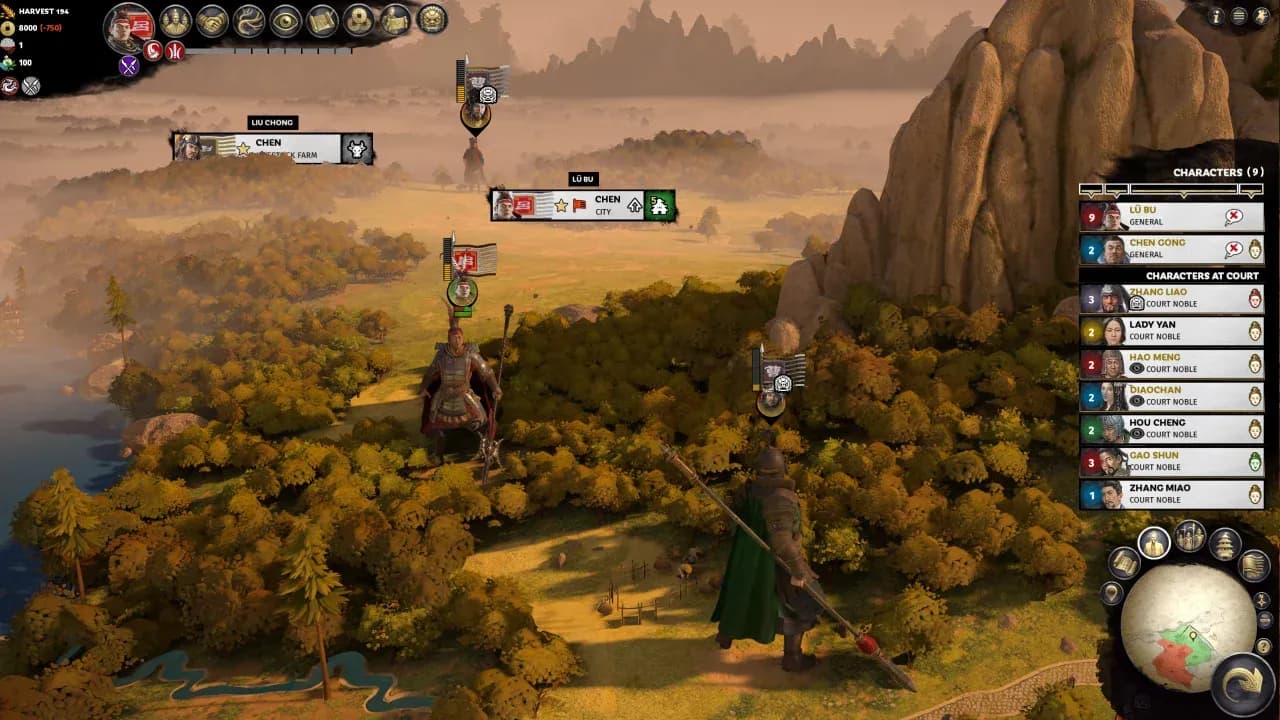
In War of the Three Kingdoms, your armies can conquer vast territories, but their true strength is measured by the thin green bar on their unit card—their military supplies. This isn't just a number; it’s the lifeblood of your campaigns. Trust me, ignoring this system is the fastest way to watch your elite troops wither away from attrition far from home. This guide will break down the fundamentals of supply and provision, the invisible logistics that dictate every move you make on the campaign map.
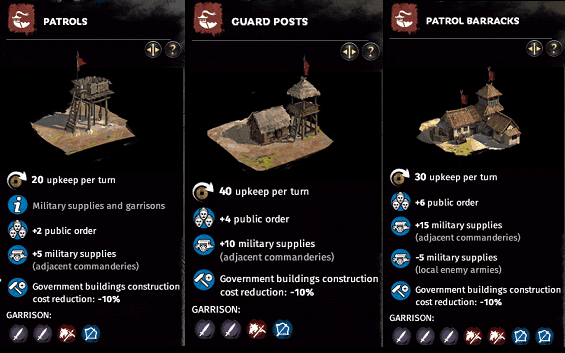
Military structures impact army supply levels and upkeep costs.
Your army’s operational range and sustainability are tracked by the military supplies bar, a visual indicator in the Army Panel. A full bar means high morale and steady replenishment; a dwindling one spells disaster. This supply level is dynamic, constantly shifting based on where your army is and what it's doing.
Armies primarily gather supplies while stationed in friendly or allied territory. The rate isn't uniform—it's determined by the local Commandery Reserves, which are directly tied to that region's Food Production. A fertile commandery with upgraded Farms and Granaries will refill your stocks quickly, while a war-torn or barren province will leave your men hungry. Think of it as your army living off the land, and the land needs to be bountiful.
Before launching a deep offensive, spend a few turns idling your army in your most developed food-producing commandery. You’ll start the campaign with a full supply buffer, buying you precious extra turns in enemy lands.
The moment you cross into enemy territory, the equation flips. Your army begins consuming supplies with every step and every turn spent besieging a settlement. Extended sieges are especially brutal, as your forces eat through their reserves while cut off from friendly supply lines. If you’ve ever had a powerful army slowly disintegrate before reaching its target, low supplies were the silent culprit.
This leads to a crucial distinction: Local Supply versus Regional Supply. Local Supply is the immediate availability from the specific settlement or patch of land your army occupies. Regional Supply, however, is the broader network across multiple commanderies—it’s the reason why controlling connected, fertile provinces creates a resilient logistical backbone for your empire. An army might drain the local supply quickly, but if it’s within a rich region, it can move to the next commandery and continue resupplying.
Mastering these four concepts—tracking your military supplies bar, understanding supply gathering in friendly lands, managing supply consumption on the march, and leveraging Local vs. Regional Supply networks—is how you transition from reactive campaigning to proactive conquest. You’re not just moving armies; you’re extending a sustainable pipeline of power. Get this foundation right, and you’ll have the confidence to plan campaigns that stretch across the map.
How to Prevent Attrition and Morale Loss in War of the Three Kingdoms
Watch your army's military supplies bar dip into the red, and you'll see the campaign map tell a grim story. In War of the Three Kingdoms, an army without food isn't just weakened—it's actively dying, with soldiers collapsing on the march and morale crumbling. This is the brutal reality of attrition, and ignoring it will lose you wars. Let's break down exactly how it works and, more importantly, how to stop it.
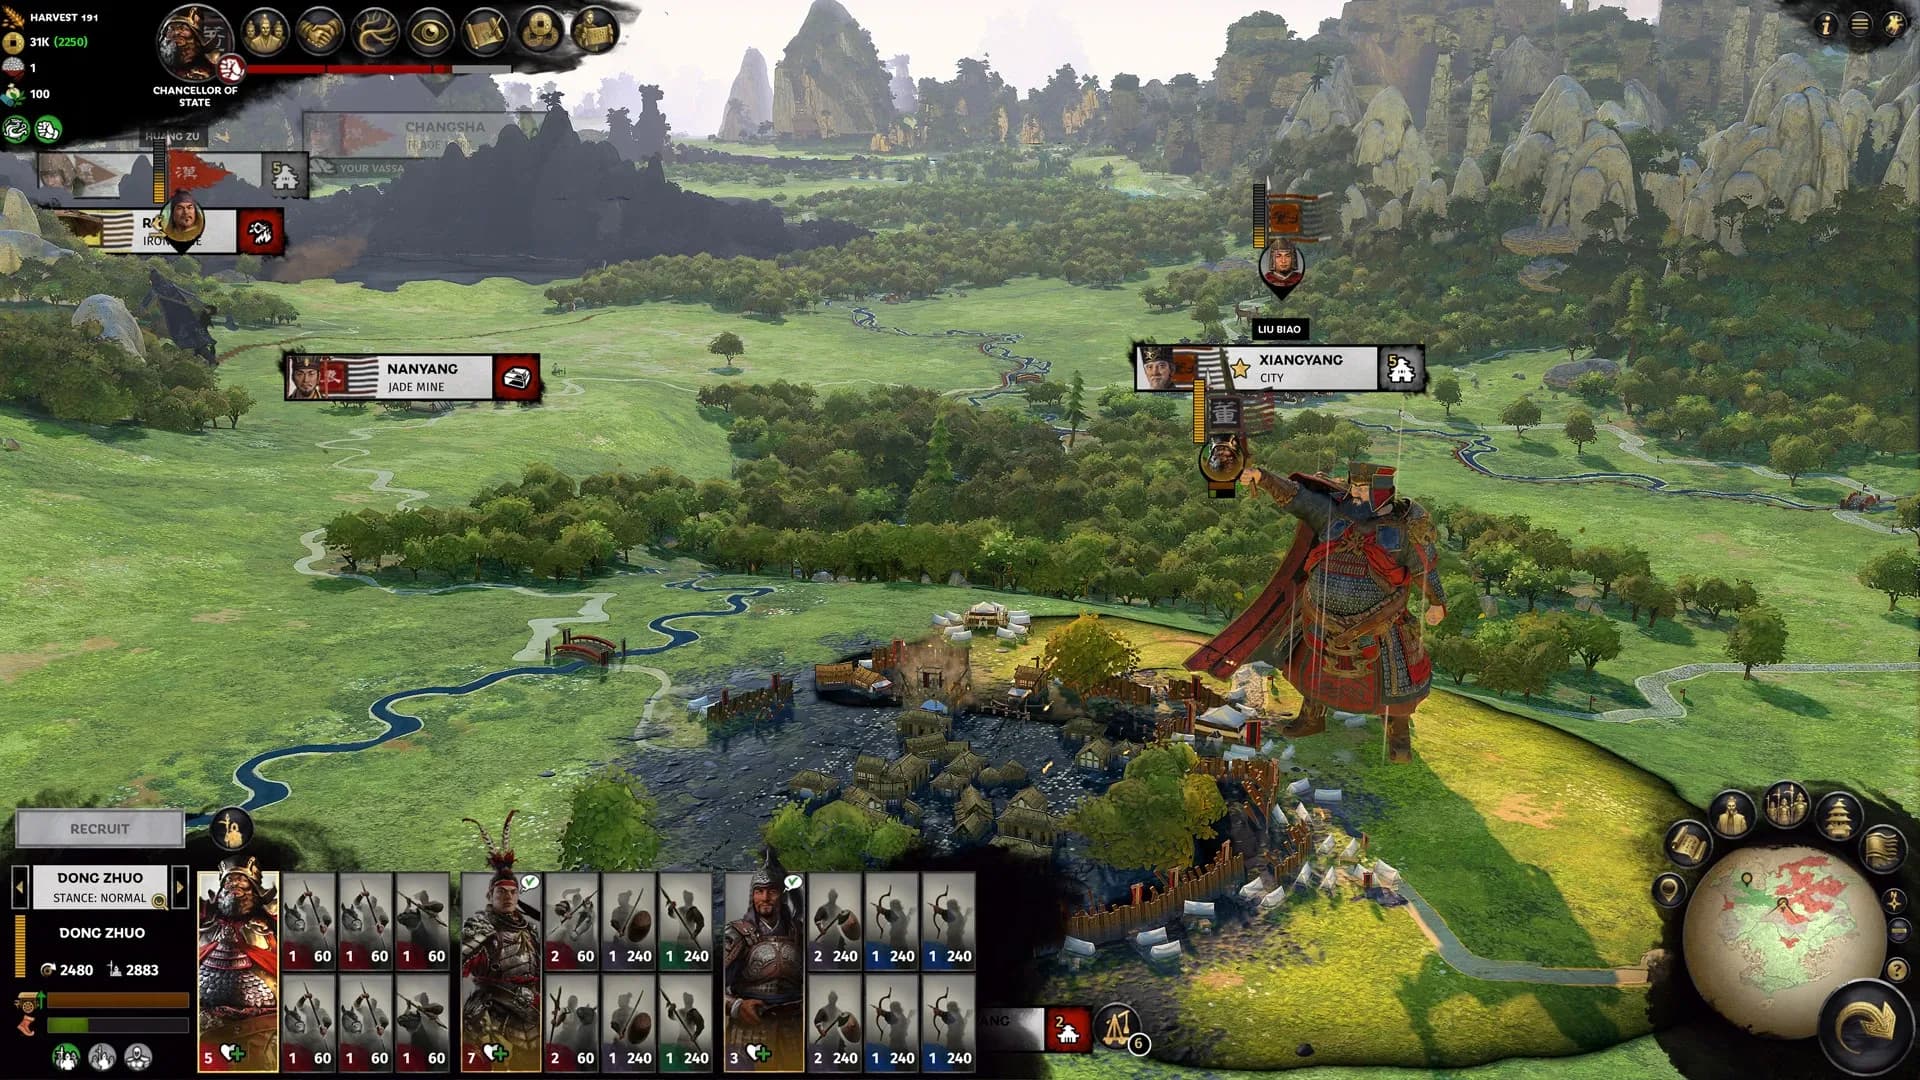
Managing army supplies on the campaign map to prevent attrition.
The Dire Cost of Low Supplies
When your army runs low on supplies, it suffers from attrition. This isn't just a stat penalty; you'll see it happen on the campaign map as visual shadows of soldiers falling away from your force. This represents two punishing effects happening every turn:
- Damage Over Time: Your units lose health, weakening them before a battle even begins.
- Morale Penalties: Troops become demoralized, making them more likely to rout during combat.
Let this situation deteriorate, and you risk unit desertion. If your supplies reach zero, you don't just take damage—you can permanently lose entire units from your army. This isn't a setback; it's a campaign-ending disaster.
Keep one eye on your army panel and another on the terrain ahead. Moving through mountains or deserts drains supplies faster, and winter turns northern campaigns into a brutal fight for survival.
Your Defensive Toolkit: Stances to Stop the Bleeding
Thankfully, you have powerful tools to counteract these effects. Your first and best friend in hostile territory is the Encampment Stance. In your Army Panel, click the Stance Button and select it. It costs 50% of your army's Action Points (AP) and prevents movement for the turn, but the payoff is huge: it generates bonus supplies and, crucially, enables replenishment for damaged units even when you're far from home. Use this whenever you need to pause a long march to heal up and resupply.
For a more aggressive approach, consider the Raid Stance. Also selected via the Stance Button, this stance lets your army replenish a small amount of its own supplies by scavenging from the land. However, it does so by damaging the enemy economy in that region, lowering public order and provoking a military response. It's a high-risk, high-reward tool perfect for harassing enemy heartlands or squeezing out a few more turns of operational range during a deep strike.
Putting It All Into Practice
So, what does this look like in a real campaign? You're pushing into enemy territory to besiege a key city. After a few turns of movement, your supplies dip into the warning zone. Don't press on and watch your elite units wither—that's how campaigns fail.
Instead, right outside the enemy's zone of control, activate Encampment Stance. Spend a turn stationary, letting your army recover its strength and stockpile from what it carries. Once you're healthy, begin the siege. If the siege drags on and supplies run low again, you might switch to Raid Stance to eke out more supplies from the occupied lands, accepting that you'll anger the local population. The key is proactive management. Attrition doesn't give second chances.
Mastering these stances and respecting the attrition mechanic transforms your campaigns. You'll no longer fear long marches or extended sieges. You'll see a depleted supply bar not as a crisis, but as a signal to deploy a calculated response, keeping your armies strong and ready to claim victory.
Best Logistics Infrastructure and Buildings for Army Supplies
Your army can have the best generals and finest troops in the land, but without a solid backbone of infrastructure, they’ll starve before they ever see the enemy. In War of the Three Kingdoms, a campaign isn't won on the battlefield alone—it's won in the commanderies you develop, where every building choice fuels your war machine or leaves it stranded. This section is about constructing that unbreakable logistical spine.

Campaign map view of regional infrastructure.
Think of your territory as a network of supply arteries. The heart of this system is food production, which directly translates into the military supplies your armies consume. Your primary sources are Farms and Livestock Farms. Constructing these in a commandery doesn't just feed the local populace; it fundamentally increases the regional supply pool. This is the raw fuel your armies gather when stationed in friendly territory. A province rich with upgraded farms becomes a vital breadbasket, allowing your forces to operate farther and longer without fear of attrition.
Food is only half the equation. You also need efficient storage and distribution to get those supplies where they're needed. This is the role of Granaries. Building a Granary in a commandery improves supply storage, distribution, and, most importantly, the local reserves that determine how quickly your armies replenish their stocks. A network of granaries across your heartland ensures that even your frontier armies can draw from a deep, reliable well of provisions.
Place your Granaries and food-producing buildings in commanderies that are central to your empire or along expected campaign routes. This creates a "supply highway" that keeps your advancing armies in the green.
Of course, all the food and supplies in the world won't help if your economy is bleeding resources to inefficiency. Corruption is a silent campaign killer that siphons off your hard-earned income. To combat this, two key administrative buildings are non-negotiable. First, the State Workshop into Grand Treasury Mint. This industrial chain is a powerhouse because, when upgraded, it provides a –15% Adjacent Corruption reduction. Placing this strategically in a cluster of commanderies creates a protective aura, safeguarding the resource income of your entire core region and accelerating its growth.
Second, you must build the Administration Office into Office for Archives and Seals. This building chain is crucial for minimizing corruption on a commandery-specific level and maximizing your overall resource efficiency. It directly counters the corruption that naturally scales with your empire's size. Think of it as the administrative grease that keeps your economic engine running smoothly, ensuring more of the gold from your mines and commerce actually reaches your treasury to fund armies.
Here’s the trick most guides miss: these buildings work together. Your Farms and Livestock Farms produce the raw supply. Your Granaries store and distribute it. Your Grand Treasury Mint and Office for Archives and Seals protect the economic output that pays for it all. Neglect one pillar, and your entire logistical chain weakens.
By prioritizing this core infrastructure—food, storage, and anti-corruption—you transform your territory from a collection of settlements into a true empire capable of sustaining endless campaigns. Your armies will march on full stomachs, funded by a robust treasury, ready to conquer the map.
How to Use Strategic Items and Characters to Boost Supplies
Think of your armies in War of the Three Kingdoms as living, breathing entities. They need food, rest, and strong leadership to thrive. While farms and granaries provide the fuel, it’s your characters and their gear that transform a ragtag force into a well-oiled, self-sufficient machine. This is where logistical mastery shifts from a passive chore to an active, character-driven strategy.

Managing unit deployment is essential for minimizing attrition.
Your Generals: The Quartermasters and Strategists
The most direct way to boost your army's staying power is through your characters themselves. Your first stop should be the Character Panel. Here, you can assign the invaluable skill Quartermaster, which directly increases your army's supply efficiency and reduces attrition rates. This skill is a game-changer for long campaigns, letting you operate in hostile territory for longer without your soldiers starving or deserting.
Next, consider the composition of your army's leadership. The Strategist class is more than just a requirement to recruit powerful Artillery or Siege Engines—though those units do consume high supplies. A high-level Strategist in your army provides critical bonuses to campaign movement range and replenishment rates, ensuring your forces can march further and recover faster after a battle. Pairing a Strategist with a Commander who has the Quartermaster skill creates a leadership duo that virtually eliminates your supply worries.
The Power of Bonds and Belongings
Logistics isn't just about individual skills; it's about teamwork. Pay close attention to the Guanxi system in the Army Panel. Positive relationships between your generals do more than just prevent infighting—they tangibly improve army cohesion and logistical efficiency. Armies where the commanders are friends or sworn siblings will suffer less from the strains of a long march, maintaining higher supplies and morale. It’s a subtle but powerful force multiplier.
Then there’s the gear. Don't just hoard those rare items in your treasury. Supply-Related Ancillaries in your Character Inventory are tools to be used. Equip a general with a Horse that increases campaign movement range, a Seal that boosts replenishment, or a Tome that extends supply duration. These aren't just stat sticks; they are essential components of a long-range campaign. An administrator-general governing a frontier province should have ancillaries that boost local income and public order, directly feeding the war effort.
Actively manage your ancillaries. That +10% supply range horse is far more valuable on a general leading your main invasion army than sitting in the inventory of a governor back home. Cycle gear to the characters on the front lines where they provide immediate benefits.
Building a Logistical Dream Team
So, how does this all come together? Let's build an example. Your main invasion force should be led by a Commander with the Quartermaster skill and equipped with a movement-range ancillary. Add a Strategist to the army to enable siege engines and boost replenishment. Fill the third slot with a Vanguard who has a strong Guanxi bond with your Commander, further solidifying the army's efficiency. This trio, properly geared, can strike deep into enemy lands, sustain themselves, and recover quickly to fight again.
By viewing your characters and their items as active logistical assets, you move beyond simply reacting to supply bars. You proactively engineer armies that can go farther, last longer, and hit harder than your rivals'. In the grand campaign of War of the Three Kingdoms, the best-supplied army often wins the war, not just the battle.
Strategic Logistics for Long-Distance Campaigns in War of the Three Kingdoms
The map is vast, and your ambitions are boundless. But in War of the Three Kingdoms, the true test of a warlord isn't just winning a single battle—it's sustaining a war machine across hundreds of miles of hostile territory. A powerful army can be reduced to a starving, demoralized mob if its supply lines are a single, fragile thread. Here’s how to build a logistical network that can support your grandest campaigns.

The user interface tracks essential logistics for distant armies.
Plan Your Heartland and Corridors
Your first strategic move for any long-distance war happens long before you declare it. By turn 50, you should have defined and fortified your heartland: a core of 4-6 fully developed commanderies. This isn’t just your richest land; it’s your logistical anchor. These provinces should be optimized for maximum income and food production, following the building templates discussed in earlier sections. From this secure base, plan your expansion along clear, defensible corridors—like the river valleys south of Xuchang or the mountain passes into Shu. Controlling these natural chokepoints allows you to project power while protecting your vital supply routes from being easily severed.
The Strategic Value of Vassals
One of the most powerful tools for managing a sprawling empire is the strategic vassal. Instead of conquering every territory directly, identify a weaker, friendly faction on a vulnerable border and subjugate them. This buffer state absorbs the brunt of raids and invasions, buying you time. More importantly, their territory becomes friendly territory for your armies to gather supplies in, creating crucial resupply points deep in what would otherwise be hostile land. You can even feed them territory you don’t want to manage, letting them handle the public order while you focus your administrative capacity on your heartland.
Navigate Environmental Hazards
The terrain and seasons in War of the Three Kingdoms are not just backdrop—they are active threats to your logistics. Always check the movement cost before you [Click] to move an army. Entering mountains or deserts costs significantly more Action Points, slowing your advance to a crawl and dramatically escalating supply usage. Plan your campaign routes along roads and through grasslands whenever possible.
⚠️ Critical Warning: Winter attrition is a campaign-ender for the unprepared. When winter sets in, especially in northern regions, it drastically increases supply consumption and attrition rates. An army that could operate for weeks in autumn might start losing troops to starvation and cold in a matter of turns. Never begin a major northern offensive as winter approaches unless you have secured a chain of friendly settlements for shelter.
The Encampment Stance is Your Best Friend
When you’re far from home and supplies are dipping, your army’s Encampment Stance is a lifeline. For 50% of your army’s Action Points, it halts movement but generates bonus supplies and enables replenishment. Use it proactively when you need to pause and consolidate, or reactively when caught in a bad position. Think of it as building a fortified supply depot on the march.
Proactive Supply Line Management
Finally, be proactive. Before launching an expedition, use your diplomacy screen to sell surplus food for gold, funding the campaign. Equip your commanding general with ancillaries that boost supply range or reduce attrition. And always have a plan for retreat—a pre-planned corridor back to your heartland or a vassal’s lands where your battered army can recover.
Mastering these concepts transforms your faction from a regional power into an empire capable of sustained conquest. You’re not just moving armies; you’re extending a web of support that ensures they fight at full strength, no matter how far from home they roam.
How to Disrupt Enemy Supply Lines and Logistics
Think you’ve mastered your own supply lines? Great. Now it’s time to turn that knowledge into a weapon and dismantle your enemy’s. In War of the Three Kingdoms, the most decisive victories aren’t always won on the battlefield—they’re won by starving the opposing army before the first sword is drawn. This final piece of the logistical puzzle is about shifting from defense to offense, using your enemy’s own logistics as their downfall.

Interacting with enemy supply lines.
Target Their Supply Hubs
Your first and most direct move is to strike at the source. An army in the field draws its military supplies from the Commandery Reserves in the territory it occupies. To cripple those reserves, you need to target the infrastructure that generates them. March into enemy territory and prioritize capturing or raiding key settlements containing Granaries and Farms. Destroying these buildings doesn’t just hurt their economy for a turn; it cripples the local supply pool, making it impossible for enemy armies to operate in that region without suffering immediate attrition. A well-timed strike on a rich agricultural commandery can force multiple enemy stacks to retreat or dissolve before you ever meet them in combat.
Control the Roads and Choke Points
An army can’t eat gold or fight on an empty stomach. This is where the Zone of Control becomes your best friend for interception. Every army and settlement projects a black-ink radius on the campaign map that blocks enemy movement. Use this strategically. Position your armies to block trade routes and sit on key roads between the enemy’s heartland and their front lines. By doing so, you physically prevent supply caravans (represented by the flow of resources) from reaching their armies. You can also use the Ambush stance within this zone to hide your army and ambush supply transports or vulnerable armies as they pass by, cutting their lifeline in a single, devastating strike.
Let Your Enemies Exhaust Each Other
Why bleed your own men when you can make two rivals bleed each other dry? Master the art of the Proxy War. Through Diplomacy, you can instigate conflicts between rivals to deplete their military supplies without direct engagement. As Cao Cao, this is a signature move. Find two factions bordering each other, sow distrust, or pay one to declare war on the other. As they march their armies back and forth, besieging each other’s cities, their supplies will drain rapidly. You sit back, manage your economy, and watch their once-formidable forces wither from attrition and morale loss, leaving them easy pickings for your fresh, well-supplied troops.
Isolate and Destroy Overextended Armies
When you do commit to battle, make it count. Look for enemy armies that have ventured too far from friendly territory or are low on supplies—their unit cards will show a depleted supplies bar. To prevent their allies from saving them, trigger a Night Battle. When you start a battle at night, it disables enemy reinforcements. This is the perfect tool for picking off overextended supply-heavy armies one by one. A large, supply-starved stack is clumsy and weak; a night attack with your elite force can eliminate it entirely before its nearby allies can march to the rescue, creating a sudden and catastrophic hole in their frontline defense.
The Raid stance is a dual-purpose tool here. Not only does it damage the local enemy economy and lower public order, but it also lets your army replenish a small amount of its own supplies while hurting theirs. Use it when camping on a key enemy trade route.
Waging war on logistics turns the entire campaign map into your battlefield. By targeting supply hubs, using Zone of Control to strangle routes, sparking Proxy Wars, and finishing isolated armies with Night Battles, you shift the war from a contest of brute force to one of cunning and endurance. Master this, and you won’t just defeat your enemies—you’ll ensure they collapse from within long before they reach your gates.