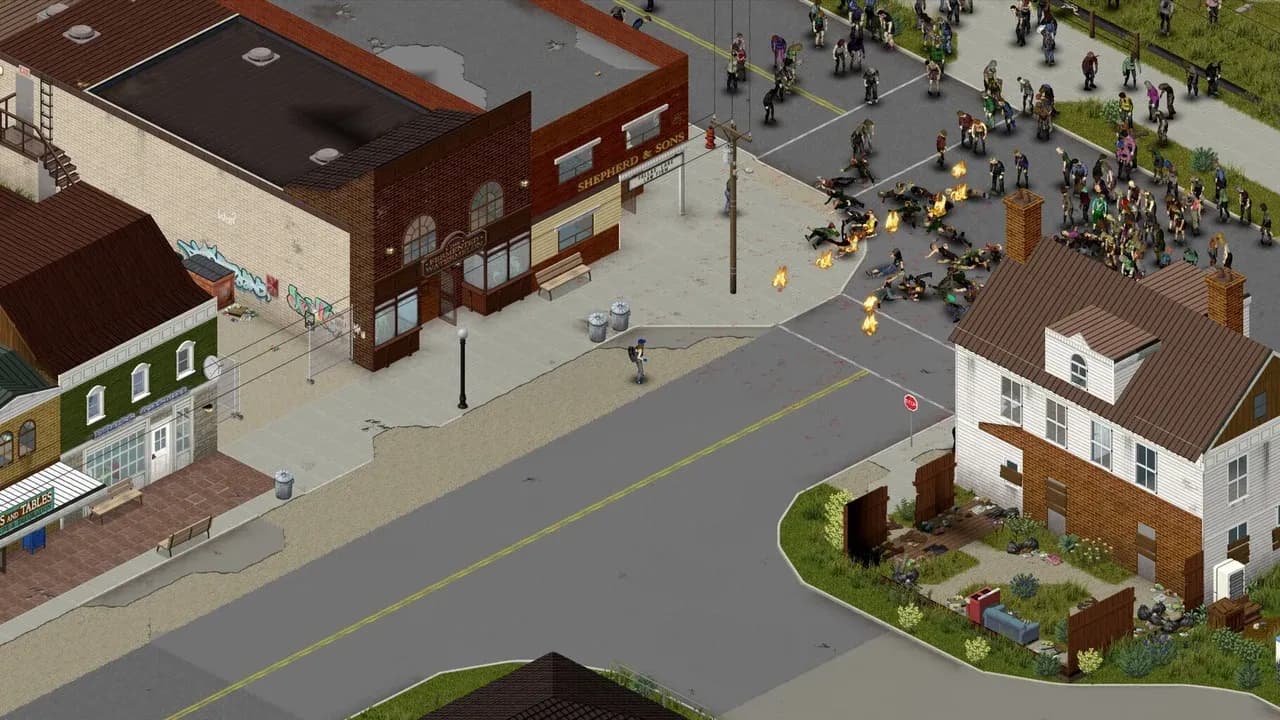
Put the health bars side by side and the answer looks settled. Four planks across a window, hammered up by a Carpentry 10 survivor, is 6,000 points of health. A log wall built by that same survivor is 1,000. Six to one, and most guides stop there and tell you to board the window.
The window still goes down first. Not because those figures are wrong — they are right, and this guide prints all of them — but because health is the smaller half of the comparison. A player-built wall and a barricaded opening are attacked by two different pieces of code, and the code decides how fast each pool drains. One of them reads the Zombie Strength setting you chose before the world existed. The other has never read it, and cannot lose more than a single point to any swing, from any zombie, in any preset you play.
So the question at each opening is not which structure is stronger. It is which function is attached to the tile in front of you, what feeds that function, and what you are left holding when the tile finally fails. Everything below is Build 42.20.0, the first stable release of Build 42, which landed on 29 July 2026 — and one line buried in its patch notes puts a shelf life on part of the answer.
A Wall and a Barricade Take Damage by Two Different Rules
The two functions have names, and knowing them is most of the fight. Everything you put down yourself — walls, floors, fences, crates, and the doors you craft rather than find — is an IsoThumpable, and a zombie hitting any of it runs IsoThumpable.Thump. A barricade is not an IsoThumpable and never becomes part of one. Planks or steel fixed across a door or window are an IsoBarricade, a separate object with its own Thump method, and beyond the shared name the two have almost nothing in common.
Start with the wall, because it is the stranger of the two. The first thing IsoThumpable.Thump does is count bodies. It takes the square the attacking zombie is standing on, adds the four squares orthogonally around it — five tiles in a plus shape — and totals getMovingObjects() across all of them. That is a census, not a headcount of attackers. A zombie shuffling in place two tiles behind the one at your wall is in the total. So are you, if you are standing close enough on the other side of it. Nothing in the count asks whether a body is swinging, facing the wall, or even aware of it.
That total is then compared against a property called thumpDmg, and the name is the single most misleading thing in this whole subject. thumpDmg is not an amount of damage. It is a threshold — the number of bodies the census has to reach. Meet or exceed it and the object loses exactly one point of health. Fall short and it loses nothing whole: the code instead adds count / thumpDmg to a running float called partialThumpDmg, and only once that accumulator crosses 1 does it take a point off and carry the remainder forward. Both branches are then scaled by a fast-forward multiplier, and so is the barricade path — which is why it cancels out of every ratio in this guide, and why the comparison can be made at all. Its value has never been published, so read every absolute figure below — every point, every call, every swing — as counted at a single unit of it. Whatever the multiplier inflates, it inflates on both sides at once.
The consequence is a ceiling built into the shape of the code. Meeting the threshold yields one point. There is no branch that yields more. Whatever is happening outside your wall, a single execution of that function cannot remove more than a single point of health from it — the crowd term feeds the threshold check, and the threshold check has exactly two outcomes.
Now read the line that is not there. Nowhere in IsoThumpable.Thump is the zombie's strength field accessed. Not in the count, not in the comparison, not in the subtraction. The variable that describes how hard a zombie hits is simply not part of the arithmetic that decides how fast your wall dies. Whatever you set it to when you made the world, a wall does not know about it.
And thumpDmg is a per-object property, not a global. Build 42's own Lua sets it to 8 by default for every buildable object in ISBuildingObject:init — that is where the wall's eight-body threshold comes from — but it is overwritten wherever the game wants a different one. Player-built doors and double doors get 5, on both the legacy build path and Build 42's newer entity path, which overrides the default whenever the placed object is a door. Traps get 1. So the threshold is a property of the tile, not a rule of the game, and the difference matters: a group of five or six bodies still trickling fractions of a point into a wall's accumulator is already clearing the threshold on a crafted door in the same wall, taking a full point every time the function runs. And a trap, at a threshold of 1, is at full rate the moment a single zombie stands next to it.
IsoBarricade.Thump is shorter, and the brevity is the point. It checks whether the barricade is already destroyed, checks that the thumper is a zombie, and then calls Damage(strength × fastForwardMultiplier). That is the whole damage path. No neighbourhood count. No threshold to clear. No accumulator. No ceiling, and no special case for any particular strength setting. Whatever number strength holds in your world, that number comes straight off the barricade, every swing, from the first zombie to arrive.
Put one zombie in front of one of each and the asymmetry is a single line: against your wall, its swing removes at most one point, and would still remove at most one point if it were the strongest zombie the sandbox can produce and had brought a street full of friends. Against your barricade, the same zombie removes exactly strength — the raw value, unscaled, uncapped, unmodified by anything standing near it. One structure has a ceiling. The other has a dial, and the dial was set before your character existed.
One honest caveat about where all of this comes from. The only published bodies of these methods are decompiles of Builds 41.53, 41.65 and 41.78 — there is no public Build 42 decompile or javadoc, and the official modding documentation is a Build 41 artefact that predates Masonry entirely. What is confirmed for Build 42 is the Lua side: the thumpDmg values above were read straight out of a June 2026 Build 42 snapshot of the game's Lua, and a community API dataset committed two days after Build 42 went stable still shows the classes, the fields and both Thump methods present and intact. So treat the Java above as the last published version of code the game is still running — which is also exactly how PZwiki describes the barricade side of it — rather than as a Build 42 listing, because nobody has one.
Which is why the practical move is to stop comparing health bars at all until you know which function is attached to the tile. A number on a wall and a number on a barricade are not the same kind of quantity, because they are divided by different things: one by a threshold that caps its own output, the other by a value you chose from a dropdown. The health figure only becomes meaningful once you know the divisor.
And only one of those two functions has ever read that dropdown.
Zombie Strength Is a Barricade Setting, Not a Wall Setting
The dropdown is called Strength, it sits in the zombie lore block of the sandbox screen, and the game wiki's sandbox reference describes it as governing how hard a zombie hits when damaging "both the player and world objects". Four options hang off it — Superhuman, Normal, Weak and Random — but the game keeps only three numbers behind them. A zombie spawned into a Superhuman world carries a strength of 5. Normal is 3. Weak is 1. Random is not a fourth value; it rolls among them, so a Random world hands you a mixed population rather than a middle setting.

That integer is the entire variable, stamped onto each zombie at spawn. And the description on that sandbox page is honest about the player half and quietly wrong about the world half: it is true of your character, true of every board you have nailed across a window, true of the front door of the house you are standing in — and false of every wall you have ever built.
Most players never open that dropdown, because the preset sets it for them. A Build 42 specialist comparison of the four presets — a guide reading the presets rather than a direct read of the preset files, which is worth knowing before you build a plan on it — puts Apocalypse and Outbreak at Normal, Rising at Weak, and Extinction at Superhuman, alongside tough zombies and a slice of sprinters. Those are the only strength values in ordinary play, and across the four presets they read 3, 3, 1 and 5.
Now take a base you have already built and move it between them, changing nothing else. From Apocalypse to Extinction, strength goes from 3 to 5. Because a barricade's damage path is flat strength per swing with no crowd term, no threshold and no cap, every plank face and every steel face in that base is now chewed through 67% faster — not on average, not under some conditions, but on every swing from every zombie, including the first one to arrive. The walls in the same base are not slightly better off. They are untouched, exactly, because the number that changed is not in the function that damages them. Run it the other way, from Apocalypse to Rising, and strength drops from 3 to 1: every barricade in the base becomes three times as durable per swing, and the walls again do not move a point. One dropdown, one operand, one side of the base.
There is one more twist on the barricade side, which is that Superhuman gets no special handling there at all. The barricade path has no branch that asks which strength setting you chose — it simply multiplies by whatever strength holds. Superhuman zombies hit barricades harder only in the sense that 5 is larger than 3.
The branch that does name Superhuman lives in a third function entirely, and it belongs to the doors you did not build. Every pre-built door already standing in Knox County — the front doors, the interior doors, the ones you close behind you — runs IsoDoor.Thump, which is neither of the two functions above. It counts moving objects across the same five-square neighbourhood a wall does, and then applies two rules a wall does not have. Below a count of two it does nothing whatsoever — and that count is the same census as a wall's, moving objects rather than attackers, so a lone zombie at a pre-built door takes nothing off it only while nothing else shares those five squares. Stand behind your own front door with one shambler outside and the count is already two. At two or more it applies strength per call, the same flat rate a barricade takes. And if the world is set to Superhuman, it applies a second helping on top, equal to twice that census count. That makes a pre-built door the only structure in this comparison whose incoming damage rises with the size of the crowd standing at it. On Extinction, the ordinary house door is the worst tile of the three by some distance — and on any setting, it is the only one a lone wanderer cannot scratch, provided you are not the second body standing on your side of it. Both of those rules come from the same Build 41-published body as the rest of the damage code, with the same caveat attached.
Before any of this is a live concern in your save, two other switches decide whether zombies attack your structures at all — and both come from the sandbox option page the game wiki still carries under a Build 41 banner, so treat the wording as current and the preset behaviour as separately sourced. The first is Damage Construction, which governs whether zombies can destroy player constructions and defences. It defaults to On, and a Build 42.19 audit of the presets found it enabled in all five, Apocalypse through Extinction and Six Months Later included. Turning it off does make your own constructions immune — but the same audit is careful to note that it does not make every door, window, vehicle and map object invulnerable, so the pre-built door in your hallway stays a target either way.
The second is Environmental Attacks, which decides whether zombies that have not seen or heard you can attack doors and constructions while roaming. It defaults to Off. That single default is what turns most of the arithmetic in this guide into a conditional rather than a constant: with it off, a crowd wandering past your perimeter does not start on your walls out of curiosity, and the damage math does not begin until something draws them. Zombies also prefer to path around obstacles rather than through them, thumping only when there is no route available — which means a boundary with a deliberate way through it takes fewer swings than a sealed box does — while a noise pulls them along the most direct line to its source, with no regard for whose walls are in the way. Read together, those two behaviours put your wall's real lifespan downstream of your noise discipline before it is ever downstream of your Carpentry level.
The presets therefore sort your openings for you, before you ever pick up a sledgehammer. In an Extinction world the dial that punishes barricades is at its maximum and the wall does not feel it, so sledging an opening out and building a wall pays better there than anywhere else. In a Rising world the same dial is at its minimum, a plank face is at its most durable, and the pre-built doors you never got around to reinforcing are nearly inert as long as nothing else — a second shambler, or you — is standing in those same five squares. Apocalypse and Outbreak sit in the middle at 3, which is the value every barricade figure in this guide is quoted against. And whatever preset you started from, open the sandbox screen and check Environmental Attacks in your own save before you plan around any of it — a custom world may not match the preset it came from.
With strength out of the wall's equation and the per-call cap fixed by the code, only one thing is left that decides how long a wall stands: the size of the health pool the cap is draining. That number has not appeared yet.
What a Log, Wooden or Metal Wall Is Actually Worth
Build 42 works it out once, and never again. When a construction is finished, the game reads three things off the recipe and the survivor holding the hammer — a base health, a bonus health, and the highest skill level relevant to that recipe multiplied by a per-level value — adds them together, and writes the total into the tile as both its health and its maximum health. That is the number the cap from the last section is draining. It was decided the moment the tile went down, and nothing in the game recomputes it afterwards. Note which skill gets read: the highest relevant one for that recipe, which is Carpentry for a wooden wall and Welding for a metal one, and which in multiplayer means the segment should be finished by whoever on the team has the most levels in it, not by whoever happens to be standing there.

There is a sandbox option that looks like it exists to move that number, and it is worth disposing of early. Player-Built Construction Strength sits in the same menu as the Zombie Strength dropdown, is described as determining the hitpoints of structures the player has built, and runs from Very Low to Very High as a multiplier of ×0.5, ×0.7, ×1.0, ×1.3 and ×1.5. But look at where the multiplier lands in the formula: it is applied to the bonus-health term only, never to the base and never to the skill term. And every complete wall tile in Build 42 — all nine of them, Carpentry through Welding through Masonry — declares no bonus health at all. Multiply zero by 1.5 and you still have zero. A Build 42.19 specialist source states this outright, and it is exactly what the shape of the code predicts: the option still moves things that do carry a bonus term, including several window frames and the sandbag wall, and it moves no wall in this guide by a single point. If you have been running High or Very High under the impression that your perimeter is tougher for it, it is not.
That leaves skill as the only lever. Here is where each tile lands.
| Tile | Skill needed | Base | Per level | At unlock | At skill 10 | Cost per tile |
|---|---|---|---|---|---|---|
| Wooden Wall Frame | Carpentry 2 | 50 | 20 | 90 | 250 | 2 planks, 2 nails |
| Wooden Wall L1 | Carpentry 2 | 450 | 20 | 490 | 650 | 2 planks, 4 nails |
| Wooden Wall L2 | Carpentry 4 | 550 | 20 | 630 | 750 | 2 planks, 4 nails |
| Wooden Wall L3 | Carpentry 6 | 650 | 20 | 770 | 850 | 2 planks, 4 nails |
| Log Wall | none (uses Carpentry) | 500 | 50 | 500 | 1,000 | 4 logs, 4 bindings |
| Metal Wall L1 | Welding 3 + recipe | 700 | 20 | 760 | 900 | 3 small steel sheets, welding rods, torch |
| Metal Wall L2 | Welding 5 + recipe | 800 | 20 | 900 | 1,000 | 4 small steel sheets, welding rods, torch |
The recipe those two metal rows ask for is Welder Monthly – June 1993; the welder occupation counts instead of reading it.
Those figures are worth more than most numbers you will find for this game, because they were arrived at three separate ways that agree cell for cell: PZwiki's Log Wall, Wooden Wall and Metal Wall pages, all bannered to a Build 42 version; a specialist Build 42.19 wall table derived independently; and a player reading durability straight out of Tile Debug in 42.19, who measured 850 on a wooden wall, 1,000 on a log wall and 1,000 on a metal wall — the skill-10 column, confirmed by watching the game rather than reading it. Three derivations, one answer.
The log wall row is the one that rewards a second look, and it is also the row where the build boundary bites. Build 42 gives it 500 base and 50 per Carpentry level. The surviving Build 41 Lua computes a log wall as 400 plus fifty per level, which puts it at 400 for a survivor with no Carpentry at all. That hundred-point shift is a Build 42 change with no documented reason attached, and it is why a log wall figure copied out of an older guide will be low by exactly 100 at every skill level. It also means the log wall carries the steepest per-level slope of any Carpentry or Welding tile — 50, against 20 for everything else — so it gains more from every level you earn than the walls that made you earn levels to unlock them.
Wooden and metal walls come with a structural condition the log wall does not have: they cannot be placed directly. You build a frame first and finish a wall tier onto it, and the frame is its own object with its own health — 50 base, 20 per level, 90 HP for the Carpentry 2 survivor who just unlocked it. More importantly, a frame is not a wall in any sense a zombie recognises. Zombies path through unfinished openings and treat bare frames as non-walls, so an opening with a completed frame and nothing finished on it is, for defensive purposes, an opening. That matters for sequencing: you do not have to climb the tiers in order, and a Carpentry 6 builder can put Wooden Wall L3 straight onto a fresh frame, but the tile is a hole until the finish step actually completes. Frames also cross materials — a wooden wall can be finished onto a metal frame, which is the one place where the frame under your wall is a genuine decision rather than a formality.
Put two survivors at the same ground-floor opening and the whole table collapses into one comparison. The first has Carpentry 2. She sledges the window out, lays a wooden wall frame for 2 planks and 2 nails, then finishes Wooden Wall L1 onto it for 2 more planks and 4 more nails — 4 planks and 6 nails all told, two build actions, and a 490 HP wall at the end of it. The second has Carpentry 0, has never touched a hammer, and drops a log wall into the same hole in a single action for 4 logs and 4 bindings: 500 HP. The unskilled survivor's wall is worth more, went up in one step instead of two, and was never briefly a hole in the wall while the frame stood there waiting for planks. What she paid instead is weight — logs are 9.0 units each, so those four are 36 units of hauling before anything else goes in the bag.
Run both to Carpentry 10 and the gap widens rather than closing. The wooden builder's best tile, L3, tops out at 850. The log wall reaches 1,000, ties the best metal wall in the game, and cost no skill gate, no frame, no nails and no Welder Monthly – June 1993 to get there. Across the entire Carpentry and Welding range, from 490 to 1,000, the spread is barely a factor of two — and the tile at the top of it is the one available on day one.
Two things in this section's evidence are genuinely unsettled, and they are worth naming rather than papering over. The first is the metal wall frame. A Build 42.19 specialist source puts its base health at 100; the 120 figure comes from a Build 41.55 breakdown, a build behind. PZwiki's own trivia line about the strongest possible wall in the game — a maxed metal wall on a metal frame — only adds up arithmetically under the older 120 reading, which is presumably why the wiki tags that claim for verification itself. So whether the frame beneath a finished wall contributes to the finished wall's health, and by how much, is an open question and not a plan to build around. The second is the Handy trait. PZwiki's Handy page and its Log Wall page both say Handy grants +100 HP to some constructions and that log walls are the only place it applies. Against that: Build 42's entity construction path computes health without ever calling the function that grants the bonus, and a 42.19 specialist source states flatly that the trait adds no construction-strength bonus in Build 42. Nobody has resolved it, so do not plan a wall around the extra hundred and do not assume it is absent either. The trait's other effects are not what is in dispute; only that one number is.
The practical shape of all this is narrow, which is the point. Place your best tile at your best skill level, because the health is stamped in at that moment and there is no sandbox switch that will come back and raise it later. If you are early in a run, the log wall is not the beginner's compromise it looks like — it is the strongest thing you can put in that hole, it needs nothing you have to unlock, and it stays competitive right up until Welding 3 puts metal on the menu or Masonry 5 changes the conversation entirely.
Because that band tops out around 1,000, and 1,000 was the ceiling for the entire lifespan of Build 41. Build 42 quietly added two wall families that go four times higher.
Build 42's Masonry Walls Rewrote the Ceiling
Both of them belong to Masonry, a skill Build 41 did not have, and both are built from things you process rather than things you find — a stone wall is six Stone Blocks, two units of concrete and a trowel you keep. They run through the same machinery as everything in the last section: base plus skill term, computed once when the tile goes down, with no bonus-health term for Player-Built Construction Strength to multiply. What changed is the numbers fed into it.
| Tile | Skill needed | Base | Per level | At unlock | At Masonry 10 |
|---|---|---|---|---|---|
| Brick Wall L1 | Masonry 2 | 500 | 70 | 640 | 1,200 |
| Brick Wall L2 | Masonry 5 | 800 | 70 | 1,150 | 1,500 |
| Stone Wall | Masonry 2 | 0 | 400 | 800 | 4,000 |
Read the stone row's base column again, because it is not a typo. Zero. A stone wall has no inherent health at all; every point of it is the Masonry level of the survivor who laid it, multiplied by 400. That is the steepest per-level figure in the game by a distance — eight times what a log wall gains from a Carpentry level — and it means the recipe is not really a wall, it is a container for whatever skill you happen to be carrying at the moment you fill it.
Which produces the sharpest timing decision in Build 42's building system. A stone wall placed on the day it unlocks is 800 HP: less than what a maxed carpenter gets out of four logs and four bindings, and well short of the 1,150 that Brick Wall L2 arrives at. The identical recipe, the same six stone blocks, laid by the same survivor at Masonry 10, is 4,000 — four times the ceiling the entire Carpentry and Welding ladder tops out at. Nothing about the materials changed between those two walls. Only the date did, and as the last section established, the game works the total out once and never revisits it. Stone blocks spent at Masonry 2 are frozen at a fifth of what they were worth.
Brick behaves like an ordinary wall by comparison, and that is its argument. A real base plus 70 a level means an early brick wall keeps most of its eventual value — L1 unlocks at 640 and maxes at 1,200, a spread under two — so building it on a schedule costs you comparatively little. And L2's 1,150 at Masonry 5 is already more than any wooden, log or metal tile reaches at skill 10, which makes brick the first wall in this guide that is genuinely stronger than the old ceiling rather than crowding it.
Both tables were machine-generated from the game's own scripts and independently reproduced by a Build 42.19 wall table, and the skill-10 column of each was then read straight out of Tile Debug during that build — 1,500 on brick, 4,000 on stone. These are measured numbers, not just tabulated ones.
The practical shape of it is not "brick or stone" at a given level, because stone wins that comparison at every Masonry level it is available: 800 against brick L1's 640 at Masonry 2, 2,000 against brick L2's 1,150 at Masonry 5. The real question is whether the perimeter can wait. If the wall has to exist this week, brick is the family that does not punish you for it, and Brick Wall L2 is the tile worth pushing to Masonry 5 for. If the wall can wait, then every Masonry level you earn before you commit stone to a tile is worth 400 HP on that tile, permanently — so level the skill on things you do not mind rebuilding, and save the stone blocks for the segments that matter. Unlock stone early; lay it last.
That is every wall figure Build 42 has. The comparison this guide set out to run needs its other operand, and that is where the assumptions start going wrong — because a barricaded opening's health is not attached to what most guides think it is attached to.
A Barricaded Opening Has No HP Underneath It
Pull the boards off a window and look at what they were nailed to. In mid-July 2026 a player put Build 42.19 into Debug Mode, let zombies work on structures, and read durability straight off the tiles — the same single-tester run that produced the measured column in the wall tables above. An existing map window returned no durability value at all. Not a low number. No field. The game does not appear to track health for a window it placed itself.
That is consistent with how a window fails. A zombie does not grind a pane down over hundreds of swings, it smashes it, and the game wiki puts that at as little as 20 in-game minutes on an unbarricaded one. That figure describes the act of breaking glass, not a pool draining at some rate per hit, because there is no pool to drain.
So the moment you hammer a plank across that window, you have not reinforced anything. There was nothing underneath to reinforce. The barricade is the entire health pool of that opening, brought into existence by you, and it is the only thing standing between the crowd and an empty frame.
The same testing run went looking for a backing plate and did not find one either. A barricade on an existing map window, a barricade on a crafted window set into a log frame, and a barricade on a crafted window set into a brick frame all read identically — the surrounding structure made no difference to the number. And while the window was being attacked, the frame beneath it lost no durability of its own. The barricade's health is its own property, independent of whatever it happens to be bolted to. That is a single tester on 42.19 rather than a published formula, so hold it a little more loosely than the wall tables, but it is the only measurement anyone has taken and it is internally consistent across three different mountings.
There is a second half to that independence, and it runs the other way. A barricaded door or window takes no damage at all until its barricades are entirely destroyed. The two pools do not share; they stack, and the outer one is spent to zero before the inner one is touched at all.
Now put one ground-floor opening through three states and the whole picture resolves.
State one, bare map window. No durability value, nothing to whittle, and a documented reputation for going down fast once something starts on it. Everything about this tile's survival is borrowed from whatever you put on it.
State two, four planks on the outer face. Here is where Tile Debug misleads, and it is worth understanding why. Read a window with one plank and read the same window with four, and the durability figure does not change — which led the tester to conclude that 42.19 uses a fixed value per barricade type rather than counting planks. The array explains that much, though not everything he flagged as unclear about the readout. A barricade side holds up to four planks in an int[4], and each of those four is destroyed individually. The readout is showing one slot; it never sums them. So a four-plank face is genuinely four separate pieces deep, and the real pool is a multiple of the number on screen — which the next section will put an actual figure to. The important part here is what that pool is made of: nothing but the boards you installed, in a structure that had no health of its own an hour ago.
State three, a crafted wooden door in the same hole. This is the one opening you can place that brings a real pool with it. Debug measurement on 42.19 found every crafted door and gate — wooden and metal, across all four quality tiers — reading a flat 3,000 HP, more raw health than any Carpentry, Welding or brick tile reaches at level 10, and beaten only by stone at high Masonry. Treat that 3,000 as a high-Carpentry figure rather than a universal one, because the sources disagree about what happens below max skill: PZwiki's door table, which carries the oldest Build 42 banner of anything in this guide, reads as a flat 300 per Carpentry level, which would put a Carpentry-3 door at 900 rather than 3,000. The tester found no damage difference by quality either and said plainly that he could not rule out a hidden modifier he had not measured. Nobody has resolved it. Build the door at the best Carpentry you have and do not plan around the low-skill numbers in either direction.
Two things about that door are settled, though. It carries a thumpDmg of 5 rather than a wall's 8, so as section one established, the threshold it has to clear for a full point of damage is lower than a wall's on the same census. And if you board it, you cannot open it — barricading a door removes the ability to use it until the barricade comes off. Its 3,000 sits safely behind the planks, untouched, and so does your route through it.
Which sorts your openings in a way the HP tables cannot. You cannot make a barricaded opening tougher by improving the wall around it, so do not spend stone blocks or brick on a segment in the hope that it will carry the window sitting in it — the wall and the boards are separate objects with separate pools, and the crowd at that window is only ever spending one of them. Board the openings you have written off using; leave the one you actually walk through unboarded, or accept that reinforcing it means sealing it. And on any opening you do board, remember what you are budgeting for: not a bonus on top of something sturdy, but the whole of that tile's resistance, installed by hand, one plank at a time.
That is both operands defined: a wall is a pool with a hard cap on how fast it drains, and a barricaded opening is a pool with no cap at all, sitting on nothing. Time to put numbers through them.
Wall vs Barricaded Face, Counted in Swings
Start with what the boards are worth, because the barricade side is built out of parts rather than read off a table. A plank is 1,000 points of base health and four fit on a side. A steel sheet is 5,000. Those figures are then multiplied once, at the moment of installation, by a skill modifier that runs from 1.0 to 1.50 — keyed on Carpentry for wood, and for metal keyed on Welding, falling back to the Carpentry ladder only when Welding is 0 or 1. Like a wall's health, that multiplier is stamped in on the day and never recalculated. Unlike a wall's health, it is capable of going down.
Here is what both sides of the comparison look like for a survivor at skill 10, in an Apocalypse or Outbreak world where strength is 3.
| Tile at skill 10 | Health pool | Damage taken | To breach |
|---|---|---|---|
| Wooden Wall L3 (Carpentry 10) | 850 | ≤1 per thump call | ≥850 calls; 6,800 against a lone attacker |
| Log Wall (Carpentry 10) | 1,000 | ≤1 per thump call | ≥1,000 calls; 8,000 against a lone attacker |
| Metal Wall L2 (Welding 10) | 1,000 | ≤1 per thump call | ≥1,000 calls; 8,000 against a lone attacker |
| Brick Wall L2 (Masonry 10) | 1,500 | ≤1 per thump call | ≥1,500 calls; 12,000 against a lone attacker |
| Stone Wall (Masonry 10) | 4,000 | ≤1 per thump call | ≥4,000 calls; 32,000 against a lone attacker |
| Four planks, one side (Carpentry 10) | 6,000 | 3 per swing | 2,000 swings |
| Steel sheet, one side (Welding 10) | 7,500 | 3 per swing | 2,500 swings |
| Steel rods, one side (Welding 10, as measured) | 7,500 | 3 per swing | 2,500 swings |
| Steel sheet, one side (Carpentry 10, Welding 2) | 5,500 | 3 per swing | 1,833 swings |
The barricade column is plain division, and that is the whole reason it can be stated as a single number. Four maxed planks are 4 × 1,500, which is 6,000, and every swing that lands on them removes 3. Six thousand divided by three is two thousand, and there is nothing else in that calculation — no threshold to clear, no accumulator, no crowd term to make the twentieth zombie's swing worth more or less than the first one's. Two thousand swings is not an estimate of the barricade's lifespan; at a single unit of that multiplier it is the barricade's lifespan, measured in the only unit that damage path recognises.
The wall column cannot be collapsed the same way, and the shape of the number is the point. A 1,000 HP log wall loses at most one point per execution of its damage function, so it absorbs at least 1,000 of them. That figure is a floor, not a forecast — the code has no branch that takes more than a point, so no arrangement of bodies outside can make it smaller. The ceiling is eight times that. A single zombie standing at your wall with nothing else in the five-square census — no second shambler, no you on the other side of it — puts the count at 1 against a threshold of 8, which feeds an eighth of a point into the accumulator each time. Eight calls per point, 8,000 calls for the pool. And with exactly one attacker there is no daylight between a call and a swing, so that is 8,000 swings against a four-plank face's 2,000. Six times the health, a quarter of the endurance.
Where a real wall lands between its floor and its ceiling is the next section's problem. What is settled here is the band, and the band is wide enough that the barricade's raw health advantage never buys what its size implies.
The steel rod row needs its qualification stated out loud, because the declared value and the practical one disagree. The official constant table gives METAL_BAR_HEALTH = 3000, and that is genuinely what the class declares. But the installation path assigns 3,000 and then immediately overwrites it with the sheet's 5,000 whenever an inventory item is supplied — and an item is always supplied, because the barricade action consumes three Steel Rods to do the job. The Build 42.19 debug read confirms the outcome in a live game: barricaded windows with metal bars sit at the sheet's figure, which is why the table's rod row reads 7,500 and not 4,500. Plan against the practical number, and treat it as the kind of figure a patch can take away.
Now the row at the bottom of the table, which is the most useful thing in it. Take one survivor with Carpentry 10 and no Welding at all. His metal multiplier falls through to the Carpentry ladder and comes out at 1.50, so a steel sheet he installs is 7,500 — 2,500 swings. He then earns two Welding levels. The multiplier is keyed on Welding first, and the Welding-2 entry is 1.10, so the identical sheet, installed by the identical survivor with the identical torch, is now 5,500. He has spent two levels to lose 2,000 points of barricade and 667 swings. The same trap sits at Welding 6, whose 1.16 is worse than Welding 5's 1.22. Both matter more than they should because the multiplier is fixed at install: every face you boarded on the way up keeps the modifier you were carrying that day. The full barricade strength modifier ladder — and the plank barricade, steel sheet barricade and metal bar barricade comparison it decides — is a subject of its own and is treated separately; all this table needs from it is the two figures above.
One more input scales the same figures before the skill multiplier does: the condition of the material. A barricade's health is scaled by the installed item's condition against its maximum, and the boarding action copies the equipped item's condition onto the piece it consumes first, so a battered plank makes a weaker board than a fresh one and the table above quietly assumes full-condition material throughout.
What none of this converts into is time, and the reason is worth knowing rather than assuming. Both damage paths are multiplied by ThumpState.getFastForwardDamageMultiplier(), a value that has never been published. Because it multiplies both, it cancels out of every ratio on this page — the wall-to-barricade comparison is unaffected by it, which is precisely why the comparison can be made at all. But it does not cancel out of a wall-clock figure, and without it there is no path from a swing count to a number of minutes. That is not a gap this guide is choosing to leave open; it is why no time-to-breach figure exists for Build 42 anywhere, why the Build 42.19 wall source says outright that no reliable "hours until a horde breaks it" number can be given, and why the Build 42.19 barricade guide warns against converting its own durability figures into seconds. Anything you read that puts an hour count on a wall or a boarded window is an invention. Count swings.
So you can price your own tile yourself, before you spend the materials. For a barricaded face, take the base — 1,000 a plank, 5,000 for a sheet or a rod set — multiply by your install modifier, multiply by four if you are boarding four planks, and divide by your world's strength. That quotient is swings, exactly. For a wall, take the health straight off the tables in the earlier sections: the calls it will absorb start at that number and top out at eight times it, and no sandbox option and no later skill level will move either end. And before you touch a torch, check your Welding level against your Carpentry level, because the metal ladder reads Welding first and locks its answer the moment the barricade goes up.
Every figure above either assumed one attacker or stated a floor. The moment a crowd is standing at the tile, the wall's side of the arithmetic stops being straightforward — and the published code stops answering.
Where the Crowd Changes the Answer, and Where the Code Stops Answering
Here is the honest position, stated before the arithmetic rather than after it: nobody can currently tell you whether a wall gets relatively better or worse as more bodies pile onto it. Two readings of the same short block of code are available, both defensible, and they point in opposite directions.

The disagreement is not about what the function does once it runs. It is about how often it runs. IsoThumpable.Thump takes a single thumper as its argument and builds the five-square census from that thumper's square — which reads like a function called once per swinging zombie, each swing carrying its own count. Read that way, six zombies at a wall is six executions per round of swings, each one finding six bodies against a threshold of eight and feeding three-quarters of a point into the accumulator. The wall's total intake rises with the crowd until the census hits eight, at which point every call is taking a full point and the wall is losing health as fast as the code permits.
The other reading comes from the source that published the method body in the first place. Its own summary describes the outcome as the zombies together causing one point of damage — 0.125 each, to a maximum of 1 if eight or more gang up. That is one call, one census, one point, regardless of how many arms are moving. Under that reading a wall's intake is flat: eight zombies remove a point per round and so do eighty, while every one of those zombies is taking a full strength off a barricade in the same moment. The wall's margin does not shrink as the crowd grows. It widens.
The author of that post is not hedging by accident, either. He closes it by asking readers to correct him, and singles out the exact point at issue — especially, he writes, if it is about multiple zombies thumping on a single target. No later source resolves it. No Build 42 artefact exists to check it against.
So take the code-literal reading first, and label it as that while you read it. Under it, a wall's calls-to-breach is its health multiplied by eight and divided by the census, capped once the census reaches eight; a barricade face's is simply its health divided by strength. Setting those equal on Apocalypse, where strength is 3, puts the crossover at 24 × wall health ÷ barricade health — the crowd size at which the boarded face starts outlasting the wall. Read every figure in the table as a census rather than a headcount: it counts moving objects in the plus-shaped neighbourhood, which includes zombies milling about behind the one at your wall and includes you if you are standing on the other side of it, so the number of arms actually swinging at the tile is usually smaller than the number the column asks for.
| Wall at skill 10 | Barricade face compared | Crossover census, Apocalypse |
|---|---|---|
| Wooden Wall L3, 850 | Four planks, Carpentry 10, 6,000 | about 3.4 |
| Log Wall, 1,000 | Four planks, Carpentry 10, 6,000 | 4 |
| Brick Wall L2, 1,500 | Steel sheet, Welding 10, 7,500 | about 4.8 |
| Stone Wall, 4,000 | Steel sheet, Welding 10, 7,500 | 12.8 — unreachable |
Read the stone row as the special case it is. Its crossover sits at 12.8, and the census stops mattering at 8, because that is where the threshold is met and the wall's intake is already at its ceiling. A crossover above the cap is a crossover that never arrives: at eight bodies or eight hundred, a maxed stone wall still absorbs 4,000 calls against a maxed steel sheet's 2,500 swings. Every other row crosses somewhere a real yard can produce.
Now move the world setting, and the whole table slides. On Extinction, where strength is 5, the barricade side of every comparison drains faster and the wall needs a bigger crowd before it loses the argument: the log wall against four planks crosses at about 6.7 instead of 4, and stone against a steel sheet goes to roughly 21 — which is to say, never, by an even wider margin than before. On Rising, where strength is 1, it moves the other way and moves hard. The log wall against four maxed planks crosses at about 1.3, so from two bodies at the tile onward, the boards outlast the wall.
And then set all of that aside for a moment, because under the crowd-shared reading not one of those crossover points exists. There is no census term dividing the wall's endurance, no 4, no 4.8, no 6.7. A wall absorbs at least its health in calls at any crowd size, the barricade face beside it drains at strength per zombie per swing, and the gap between them opens wider with every body that arrives.
What survives both readings is worth stating plainly, because it is the part that applies to most tiles most of the time. Zombie strength never touches a wall under either interpretation. A wall's damage per call is capped at 1 under either interpretation, and a barricade's is capped at nothing under either. At a census of one the two readings produce identical numbers — 8,000 calls for a maxed log wall against 2,000 swings for a maxed four-plank face — because with a single body there is no difference between one call per zombie and one call for the crowd. And through one, two and three bodies, every wall tier in the table is still ahead of every comparable barricade face: by a wide margin at one or two, and still ahead at three even for wooden L3, the weakest wall on the list and the first to cross. The one pairing that breaks earlier is off the table: wooden L3 against a Welding-10 steel sheet crosses at about 2.7, so from three bodies on, that sheet outlasts that wall.
So the reading only matters for a specific kind of tile. If the opening you are pricing faces lone wanderers and the occasional pair — a back fence, an upstairs window, a side of the building nothing routes past — the wall is the better tile and the ambiguity is academic. Build it and stop thinking about it. If the opening faces a place where a crowd can gather and stand, treat the crossover figures as the pessimistic case rather than the answer: assume the wall loses its advantage somewhere around four or five bodies on Apocalypse, and choose accordingly, knowing you may be giving up an advantage that was never actually in danger. What you should not do is pick a reading because it flatters the tile you already built.
Even a clean number here would only tell you how long the tile stands. It says nothing about the second it does not — and on that axis, the two options are not close.
A Breached Wall and a Breached Window Fail Differently
Picture the moment. You are inside, the noise on the far side has stopped being a rhythm and turned into splintering, and the tile gives. What happens in the next few seconds is decided almost entirely by what you were standing behind — and the two answers are not two versions of the same event.
Take the boarded window first. When the last board goes, the barricade does not leave a doorway behind it. It leaves the window that was there before you ever picked up a hammer, and a window is not a way in that you walk through. The game wiki is explicit that both players and zombies get through an open or smashed window by climbing it, and a zombie crossing a window or a low fence topples on the far side and spends a moment on the floor getting back up. That behaviour is worth reading up on properly, because it is the basis of every funnel worth building — a body that has just come over is a free stomp at no endurance cost, provided you land it before the thing on the floor lunges at your ankles. What matters here is narrower: the breach delivers the crowd into that behaviour rather than past it. The opening is one tile wide, the climb occupies one body at a time, and each of them arrives prone.
Now the wall. A wall that fails does not hand back an opening it was covering, because it was never covering one — you either sledged the window out and built in the hole, or you built where there had been nothing at all. What it hands back is a gap in the building, and a gap has no crossing behaviour attached to it. Nothing to climb over, nothing to topple off, nothing to get up from. They walk through it on their feet at walking pace, and the second one is not waiting on the first one to stand.
So run the same crowd at the same moment against two survivors standing in the same room. The first is behind a boarded ground-floor window. Her barricade lasted less time, and when it goes she is looking at a frame with one zombie halfway through it and the rest stacked behind, each of them buying her a beat on the floor as it lands. She is fighting a queue she did not have to build, in an order the geometry chose for her. The second sledged that window out and walled it, and his tile stood longer — every swing that hit it took off less, and it absorbed more of them than her boards ever could. But when it finally opens, he is looking through a clear hole at everything that was on the other side of it, arriving upright and continuously, in the arrangement they were already standing in.
That is the trade, and it runs the opposite way to the rest of this guide. The wall's superior damage resistance is spent buying time in front of the worse failure. The barricade's inferior resistance buys less time in front of the better one. No health figure on any table above expresses that, because it is not a property of the pool — it is a property of what the tile leaves behind when the pool is gone.
Hold this one a little more loosely than the numbers, though, because it is a qualitative argument and it is sourced like one. The mechanics underneath it are documented — zombies climb through open and smashed windows, and a zombie crossing a window goes down on the far side. The conclusion drawn from them is not measured; it comes from players, stated independently by three of them in the same discussion thread, and nobody has put a figure on how much a knockdown at the frame is worth against a wall's extra endurance. It is a real axis and a real reason to hesitate before you sledge. It is not an arithmetic result.
Which gives you a way to sort a perimeter that no HP figure can. Wall the tiles you never intend to fight at — the back of the building, the side nothing routes past, the segment you want to stop thinking about. Board the tiles where you would rather the fight happen if it comes to that, and put them where you can reach them and see them. The counterintuitive case falls out of it directly: a ground-floor window on the side you actually defend from is arguably better left boarded than sledged out and walled, even though the wall would stand longer. You are not choosing the tile that survives. You are choosing the shape of the fight on the other side of it.
All of which rests on the assumption that the damage figures underneath every one of these comparisons still describe the build sitting on your hard drive.
Which of These Numbers 42.20 May Have Moved
Two dates decide how much of this guide you should still be holding.
The first is 17 July 2026. A player put Build 42.19 into Debug Mode, let zombies work on structures he had built, and read durability off the tiles as they came down. His readings are the measured column quoted throughout the wall tables above — 850, 1,000, 1,500, 4,000, and a flat 3,000 on every crafted door and gate. But he wrote down something else in the same run, and it is the part nobody has explained: zombie damage of 2 HP per hit on player-built walls, and around 3 per hit on crafted doors, rarely 4.
No reading of the damage function produces those numbers. The two interpretations held side by side in the last section disagree about how often Thump is called; they agree completely about what one call does. The branch that clears the threshold subtracts exactly one point. The branch that falls short subtracts a fraction. At a single unit of the fast-forward multiplier there is no path through that code to 2, and none at all to 4. Nor can the multiplier be quietly blamed for the gap: it scales walls and crafted doors by the same factor, and no single factor turns a capped one point into 2 on a wall and 3 on a door. Whatever 42.19 was doing to walls, it was not what the published function describes — and the ambiguity from the last section does not rescue those measurements, because both halves of it forbid them.
The second date is twelve days later. On 29 July 2026 Build 42.20.0 — the first stable release of Build 42, the build this guide is scoped to and almost certainly the one on your hard drive — shipped with a single line in its fix list: "Fixed an issue causing zombies to deal excessive thump damage." That is the entire public record. No numbers. No before and after. No list of which objects were affected, and since thumpDmg is a per-object property with walls, crafted doors and traps all carrying different values, "which objects" is not a detail you can wave through. The sentence tells you one thing and one thing only: direction. Something was doing too much, and afterwards it was doing less. Where it landed is not in the patch note, and it is not anywhere else either.
That is the provenance problem from the opening of this guide arriving at the worst possible moment. You cannot diff a patch note against source you do not have. The method bodies quoted here are the last ones anybody published, and they are Build 41 — so there is no listing of 42.19 to show what broke, and no listing of 42.20 to show what replaced it. Twelve days of measured behaviour that contradicts the documented formula, one sentence of patch note, and nothing readable on either side of it.
Now the part that survives, which is most of this guide. The health figures are in an entirely different position, and they are worth trusting for two different reasons.
The wall tables are Build 42-native. PZwiki's five wall pages all banner Build 42, and the brick and stone ones are machine-generated from the game's own scripts; a specialist Build 42.19 table derived the same values independently, and the debug run above confirmed the skill-10 column by watching tiles take damage rather than by reading files. Three derivations that agree cell for cell, all from Build 42, and nothing in 42.20's notes goes near construction health. The barricade figures are solid for the opposite reason: PZwiki states outright that the barricade recipes and HP are still the Build 41 values and are "planned to be revamped to Build 42 at a later date." They are not stale by oversight — they are unconverted, on the record, and both the Build 42.19 barricade guide and the debug run reproduce those base values in a live Build 42 game. The catch is in the same sentence: a revamp has been announced. When it lands it lands on the barricade side, not the wall side, so of every number in this guide the plank and steel figures are the ones most likely to be deliberately replaced.
It also gives you a way to grade any page you land on, this one included, because the version banner is the first thing to read and the pages disagree:
- Build 42, a few point releases back: the Log Wall, Wooden Wall, Metal Wall, Stone Wall and Brick Wall pages all banner 42.12.3, with Handy at 42.13.2, Building at 42.11.0 and Sledgehammer at 42.10.0. Current enough to build on.
- Early Build 42 unstable: the Door page, at 42.3.1 — the shakiest source in this guide, and, not coincidentally, the one whose crafted-door table disagrees with what anyone has since measured.
- Still Build 41: Barricade, Window and Custom Sandbox, all 41.78.x. The sandbox option definitions and the barricade code in this guide come from that tier, which is why both were flagged where they were used.
So here is what to carry forward. Trust the health tables — every one of them was derived from Build 42 or is documented as an unconverted Build 41 value the game is still running. Trust the shape of the two damage functions, because the ratios in this guide only ever depended on that shape: a barricade taking flat strength per swing against a wall whose per-call loss is capped, which is why the comparison was counted in swings rather than in absolutes. But treat any absolute damage-per-hit figure you read for 42.20 as unverified — every guide written before 29 July 2026, including the ones quoting the biggest damage numbers and including the ones that look most authoritative, is describing the build that got fixed. Nobody has re-measured since. This guide is not going to hand you a replacement figure either, because there isn't one to hand over.
If you want a number for your own world, there is exactly one way to get it, and it is the same method that produced everything reliable in this section: Debug Mode, Tile Debug on the object you care about, and watch the durability figure move as it takes hits at your preset and your skill level. Read it off a wall rather than a boarded window — as the plank array showed earlier, the barricade readout shows you one slot and never sums the rest, so a wall is the honest instrument.
One property of a tile is left that no patch note can quietly rewrite. Not how much health it has, and not how fast that health drains — but whether you can put health back into it once it starts coming off.
Build the Tile You Can Still Repair
For almost everything you can put in an opening, the answer is no.

Barricade health is decided at the moment of installation and never revisited. The wiki that publishes the barricade table says it in as many words: a barricade's health cannot be upgraded or repaired, and the only route to a higher number is to strip the barricade off entirely and put a fresh one up at a higher skill or with better material. That is not a repair, it is a replacement, and for a metal face it is a replacement with a gap in the middle of it — a steel sheet or a set of rods cannot be topped up at all, and the only way to get one off is a Welding Torch. Standing at the opening with a torch, cutting away the thing that was holding it, is not an operation with a crowd on the other side.
Walls are worse, and it is worth being exact about how. There is no wall-repair action in vanilla. Not a slow one, not an expensive one, not one gated behind a skill you have not reached — none. A segment at half health stays at half health until you take it down and build a new one in the same hole. The one consolation is that the new one is computed the way every construction is computed, from the skill you hold on the day you build it rather than the skill you held when you placed the original, so a wall you rebuild after two hundred hours of Masonry is genuinely a better wall. But look at what the procedure starts with. To replace a damaged segment you first have to remove it, and removing it means the tile is an opening again for as long as the rebuild takes. Wall maintenance is structurally a between-sieges job. It is not something you do while the thing you were worried about is outside.
So exactly one defence in this comparison can be fed while it is being attacked, and it is the humblest one on the list.
A plank face is four separate boards in four separate slots, and when a board is destroyed its slot does not close — it goes empty. The install code writes a new plank into the first slot whose health has dropped to zero or below, which means the action that put the face up in the first place is also the action that repairs it. One plank and two nails buys back a quarter of the face while the other three boards are still standing and still taking swings. You never open the opening to do it. The face is never briefly a hole. There is no other tile in this guide you can say that about.
The costs of feeding it are real but small, and you should know all three before you rely on it. Hammering makes noise at radius and volume 20, scaled by your character's hammer sound modifier — modest against the game's louder events, but not silent, and you are making it repeatedly at a spot where zombies are already gathered. The nails do not come back: pulling a wooden barricade returns the plank, but nails are gone for good, so a face you feed through a long night is a slow drain on the one material you cannot cut off a tree. And you have to be able to reach the opening from the inside while it is under attack, which quietly disqualifies every window you boarded from a ladder or across a gap.
The skill side of it is the part that surprises people. Plank barricading has no skill gate whatsoever. Carpentry does not unlock it, it only shortens it — the action runs 100 ticks minus five per Carpentry level, with Handy taking a further 20 off — so a survivor who has never picked up a hammer can board a window today, and a maxed carpenter is doing the same job in half the ticks. Metal is the opposite: Build 42's build panel gates both metal barricade recipes behind Welding 3, printed in red on the entries themselves, and the metal action is slower to begin with at 170 ticks minus five per Welding level. And you cannot read your way past it quickly, because barricading grants its experience without any multiplier — 3 Woodwork per plank, 6 Welding per metal install — so a skill book that doubles or triples every other source of carpentry XP does nothing for this one. The maintainable defence is the one available on day one, and the one nothing in your progression ever takes away.
Two tool checks before any of this is a plan. For boarding: the hammer has to be one that actually opens the menu, which means a Claw Hammer, Ball-peen, Stone or Smithing Hammer — a Club Hammer will not do it and neither will a Sledgehammer, despite both being hammers in every sense except the one that matters. Your nails have to be loose in the inventory; a closed box of nails does not count until you open it. And carry a Claw Hammer or a Crowbar for teardown even if you boarded with something else, because a Ball-peen can put planks up and cannot pry them off. On the metal side, one piece of good news against older guides: Build 42.19 wants only the Welding Torch and the material, with no Welder Mask in the requirement strip at all. For sledging: Destroy is exclusive to the sledgehammer. No axe, no crowbar, no amount of Carpentry substitutes for it, and it takes the tile out instantly when you use it. So "wall this window instead" is not a decision you can act on unless a sledgehammer is already in the bag.
Put a brand-new survivor at a ground-floor window and the whole thing comes down to two lines. She has Carpentry 0. She can build exactly one wall — the log wall, no skill gate, 500 HP, four logs and four bindings — and only if she has a sledgehammer to clear the window first. Or she can board it: four planks and eight nails, no gate, no tool she is unlikely to own, and a 4,000 HP face for the trouble. Whatever the two damage paths do to those pools, one difference is not in dispute. When the log wall starts coming off, she cannot touch it; when a board on the plank face goes, she nails another one into the empty slot and the face is whole again. She can maintain one of these two tiles. Not both.
Now run the same survivor forward. Carpentry 10, Welding 3, a torch and a stack of steel. The tile choice has genuinely changed — metal walls are on the menu, her planks go up in half the ticks and carry the install multiplier her Carpentry has earned, and a steel face is a bigger pool than anything she could put in that hole on day one. The maintenance asymmetry has not changed by a single point. The metal wall cannot be patched. The steel face has to be torched off before it can be replaced. The plank face is still the only thing on the wall she can feed with the crowd outside, and it is still costing her one plank and two nails to do it.
So walk the perimeter once, before the next crowd arrives, and sort every opening into one of two piles. Defend and feed: the ones you can reach from inside, the ones you would rather the fight happened at, the ones worth carrying planks and loose nails for — board those, and keep the spare boards where you will be standing. Written off and sledged: the ones you never intend to fight at, never intend to reopen, and never intend to repair, because repairing them is not on the menu — those are the tiles the sledgehammer is for, and the tiles to put your best wall in at your best skill, once, and walk away from.