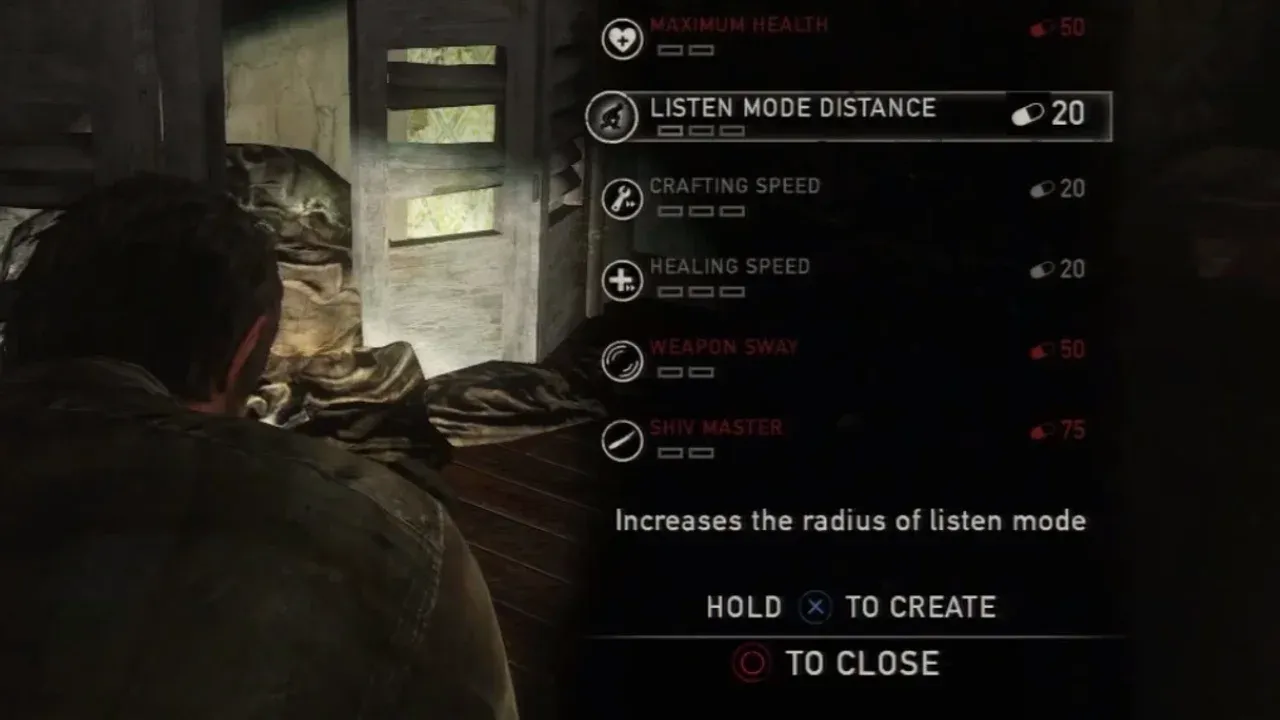
How to Unlock All Characters in The Last of Us Part II No Return
The thrill of The Last of Us Part II's No Return mode is discovering how each survivor changes the game, but you start with a limited roster. This guide will get you the full lineup of ten unique characters, opening up every wild playstyle the roguelike has to offer.

Ellie is the first character available in the No Return mode.
Here’s the deal: when you first boot up No Return, only Ellie and Abby are available. Everyone else is locked behind two straightforward, sequential unlock chains tied to their respective factions. You progress by completing encounters—individual combat scenarios within a run—while playing as specific characters.
Unlocking the Ellie Faction
To unlock everyone on Ellie’s side of the conflict, you must play through characters in a specific order, with each new fighter requiring you to complete a set number of encounters as the previous one.
- Ellie > Complete 2 encounters > Unlock Dina
- Dina > Complete 3 encounters > Unlock Jesse
- Jesse > Complete 3 encounters > Unlock Tommy
- Tommy > Complete 4 encounters > Unlock Joel
Unlocking the Abby Faction
Abby’s crew follows the same sequential pattern. Start with her and work your way down the line.
- Abby > Complete 2 encounters > Unlock Lev
- Lev > Complete 3 encounters > Unlock Yara
- Yara > Complete 3 encounters > Unlock Mel
- Mel > Complete 4 encounters > Unlock Manny
Special Unlocks: Marlene & Bill
The April 2025 update added two more survivors, Marlene and Bill, who are unlocked through in-game objectives rather than the faction chains.
- Marlene is unlocked by completing 5 Gambits (optional side objectives during encounters).
- Bill is unlocked by completing 3 Dead Drops (special scavenger caches found in levels).
How Encounter Progress Works
Your progress is tracked per character in your Hideout. Press the [Touchpad] to view the encounter board and see your current counts. An "encounter" means finishing one fight—you don’t need to complete an entire multi-stage run. If you’re just grinding for unlocks, you can play the required encounters with a character and then let them die to end the run; this still counts your progress and is necessary for unlocking other features like the Daily Run.
Letting your character die at the end of a run counts your progress. Intentionally quitting to the menu does not, so see those failed runs through to the end!
With these paths clear, you’re ready to efficiently unlock every survivor in The Last of Us Part II’s No Return. Once you have the full roster, the real fun begins—figuring out which powerhouse fits your style. Let’s get to it.
Best Joel Build and Skill Tree Priority in No Return
You've finally unlocked Joel in The Last of Us Part II's No Return mode, and it's time to unleash that iconic, unstoppable power. His Unstoppable playstyle is a high-risk, high-reward powerhouse, built around overwhelming force and brutal efficiency. The trade-off is that Joel, like his brother Tommy, cannot dodge ([L1] is disabled), but his sturdier against melee trait and devastating starting gear more than make up for it.

Joel's starting loadout in No Return includes a custom revolver and shiv.
Your foundation is his incredible Joel Starting Loadout. You begin every run with a fully-upgraded Custom Revolver (saving you a fortune in Parts), a Shiv, the Shiv Recipe, a Short Gun Holster, and a 3-durability Upgraded Plank. This means you're combat-ready from the first second, capable of handling any threat at any range.
Mastering the Shiv Upgrade Branch
Joel’s unique power comes from his Shiv Upgrade Branch. This is your primary skill tree and should be your absolute priority for spending Supplements. Unlock the stages in this order for maximum impact:
- Grabbed Enemy Movement Speed: This first upgrade lets you move faster while holding a human enemy hostage from behind. It’s a game-changer for positioning—you can quickly drag a shield into cover or reposition for a cleaner stealth kill without being spotted.
- Craft More Shivs: The core of the build. This lets you craft three shivs for the cost of one, letting you stockpile these silent takedown tools. You can hold up to six, turning you into a stealth executioner.
- Faster Stealth Kills: The final piece. This gives you a +100% speed on stealth kills and makes you far less likely to be detected while performing them. Combined with your shiv stockpile, you can clear rooms of human enemies with terrifying speed.
Shivs aren't just for stealth. Keep one handy as an "oh crap" button—if an enemy grabs you, you can instantly kill them with it, which is a lifesaver since you can't dodge away.
The Optimal Joel Combat Loop
Your strategy in The Last of Us Part II No Return should flow between stealth and controlled aggression. Here’s the ideal Joel Combat Loop:
- Stealth Open: Use your shivs and the environment. With your upgrade path, you can safely and quietly eliminate most human threats before a fight even starts.
- Mid-Range Domination: When stealth breaks or against Infected, your Custom Revolver is your best friend. Aim with [L2] and fire with [R2] for powerful, accurate shots. It’s a one-hit kill on many standard enemies with a headshot.
- Melee Clean-Up: When enemies get close, don’t panic. Switch to your Upgraded Plank and press [Square] to swing. Remember, you take reduced melee damage, so trading a few hits to finish a wounded enemy is often a valid tactic. Just be mindful of your durability.
This loop makes you adaptable: silent when you need to be, and an immovable object when the fight goes loud. With your shivs upgraded, revolver fully modded from the start, and enhanced melee durability, you're built to dominate entire encounters. Trust me, once you get this rhythm down, Joel feels every bit as unstoppable as his name promises.
Best Mel Build and Healing Upgrade Priority
In The Last of Us Part II's unforgiving No Return mode, survival often comes down to a sliver of health and a desperate escape plan. If you thrive on that high-wire act of healing under pressure and turning recovery into aggression, Mel is your character. This guide will break down her medic-focused build and show you how to leverage her unique speed boosts to control the battlefield.

Mel's starting loadout and medic traits in No Return.
Unlocking Mel and Her Playstyle
You’ll find Mel in Abby’s faction. To unlock her, you first need to complete 2 encounters as Abby to unlock Lev, then 3 encounters as Lev to unlock Yara, and finally 3 encounters as Yara. Once she’s yours, you’ll step into the role of a true field Medic.
Mel’s playstyle is all about sustainability and forgiveness. She starts each run with a Revolver and, crucially, 2x Med Packs already in her inventory. This gives you a significant buffer for mistakes right out of the gate. Her defining trait is Speed Boost from Healing, meaning every time you use a health kit, you get a temporary burst of mobility. This isn't just a nice bonus—it’s the core of her survival strategy.
The Healing Upgrade Branch: Your Path to Dominance
Mel’s personal skill tree, the Healing Upgrade Branch, is where you should invest your hard-earned Supplements. Prioritize these upgrades in this order to maximize her potential:
- Double Health Kits: This should be your first purchase. For the same crafting cost (1 Rag, 1 Alcohol), you’ll produce two kits instead of one, dramatically improving your resource efficiency.
- Health Kit Recycling: Next, grab this upgrade. After using a health kit, you’ll get 0.25 alcohol and rag returned to you. This creates a powerful loop, allowing you to sustain yourself through longer runs.
- Increased Health (+25%): Round out the tree with this final upgrade. A larger health pool means each med pack heals for more, and it synergizes perfectly with her other survival tools.
Don’t sleep on the recycling perk. It effectively reduces the cost of each health kit over time, letting you heal more often and trigger your speed boost more frequently.
Mastering Mel’s Combat Mobility
This is where Mel separates herself from other supports. Her gameplay loop revolves around intentional aggression and tactical retreats.
- Create the Opening: Don’t be afraid to take calculated damage to thin enemy ranks. Her extra starting med packs afford this risk.
- Heal to Reposition: When you need to disengage, press [Up on the D-pad] to select a Med Pack, then hold [R2] to heal. The moment the healing finishes, you’ll get that Speed Boost from Healing.
- Capitalize on the Advantage: Use this burst of speed to instantly flank enemies, escape a closing circle in Hunted encounters, or sprint to a safer vantage point. It turns healing from a vulnerable pause into an aggressive repositioning tool.
Completing Mel’s Challenges
To earn her exclusive skins, you’ll need to complete two character-specific challenges:
- Craft 8 Health Kits in One Run: With the Double Health Kits upgrade active, you only need to craft four times. Focus on scavenging Rags and Alcohol, and this will unlock the Aquarium Skin.
- Heal 80 Health from One Health Kit: You’ll actually want to complete this challenge as Ellie, not Mel. Invest in Ellie’s Increased Health skill (from the Close Quarters tree) and her Improved Health Kits upgrade (from Perseverance). Once you have a large enough health pool, get badly injured and use a kit to heal the massive amount, unlocking the Seattle Skin.
While she’s often placed in B-tier by the community due to her less flashy offensive options, a well-played Mel is nearly unkillable. By mastering the rhythm of damage, healing, and speed-boosted repositioning, you turn her into a resilient, mobile force that can outlast any encounter The Last of Us Part II throws at you.
Best Abby and Manny Builds: The Powerhouse Duo
Forget subtlety—the Abby branch in The Last of Us Part II’s No Return mode is all about overwhelming force. While Ellie’s crew has its specialists, Abby and her final unlock, Manny, are the high-health, high-damage brawlers who solve problems by walking right through them. This guide breaks down how to maximize their powerhouse potential.

Abby's starting loadout in No Return focuses on melee power.
Abby: The Regenerating Brawler
Abby’s Close Combat playstyle is brutally effective. Her defining trait, Heal on Melee Kill, is a game-changer. Every stealth takedown or hammer swing that ends an enemy restores a chunk of your health, letting you sustain through waves that would cripple other survivors. She starts with a Military Pistol and a Hammer, but the melee weapon is your bread and butter.
Her unique Brawler Upgrade Branch is your priority path. Unlock the Melee Upgrade Recipe first—this lets you press [Square] at a workbench to enhance your hammer’s durability and damage, turning it from a tool into a primary weapon. Further upgrades in this branch can grant health on any melee hit, making you nearly unstoppable in a fistfight.
Use stealth kills early and often. They trigger the Heal on Melee Kill trait without risk, letting you stockpile health for the inevitable brawls later in your run.
Manny: The Walking Armory
Unlocking Manny requires completing 4 encounters as Mel, capping off the Abby branch. He’s worth the grind. His Armory playstyle is built for firepower and endurance: he boasts 150% Max Health and earns 50% More Parts from encounters. This makes him incredibly tanky and lets you upgrade weapons faster than any other character.
His starting loadout is fearsome: a Hunting Pistol (one of the game's most powerful sidearms) and a Semi-Auto Rifle. His unique Munitions Upgrade Branch should be your first stop. Prioritize the Semi-Auto Rifle Ammo Recipe, which lets you craft precious bullets for your primary gun by pressing [Square] in the crafting menu, mitigating ammo scarcity.
However, there’s a critical catch: Manny has No Health Kit Recipe. You cannot craft them. This is the price of his raw power. You must rely entirely on health kits found in the environment or purchased from the Trading Post.
⚠️ Watch out: Manny’s lack of a health kit recipe means you must play more cautiously than his tank stats suggest. Never pass up a med kit in a level, and consider buying them whenever they appear at the Trading Post.
Putting It All Together
With Abby, you’re an aggressive, regenerating force—close the distance, upgrade your hammer, and never stop swinging. With Manny, you’re a fortified weapons platform—use your extra health as a buffer, leverage your parts to fully upgrade your guns, and control engagements with superior firepower.
Both characters excel in The Last of Us Part II's most chaotic encounters by refusing to play it safe. Choose Abby for sustainable aggression or Manny for durable firepower, and you'll crush the competition.
Best Jesse and Dina Builds: Resource and Crafting Mastery
Welcome to the economic engine room of The Last of Us Part II's No Return mode. While other characters focus on raw power or healing, Jesse and Dina are your master strategists, turning scarcity into abundance through superior resource management and trap-based control. If you love bending the game’s economy to your will and controlling the battlefield, this duo is your ticket to consistent, high-difficulty success.
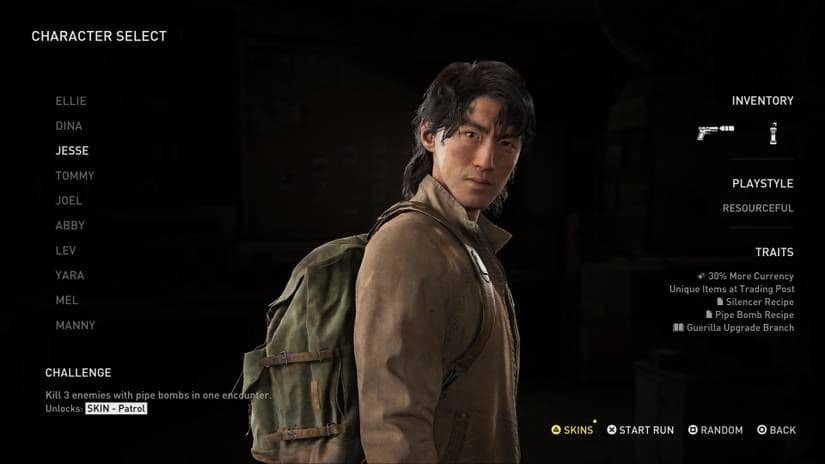
Jesse's starting loadout includes a silenced pistol and pipe bombs.
Mastering Jesse: The Ultimate Economist
Your journey with Jesse begins with a massive advantage: his Resourceful playstyle. He starts every run with a Military Pistol (with Silencer) and a Pipe Bomb, but his true power lies in his traits. The 30% More Currency boost means every kill and scavenge yields more parts, and his ability to perform Unlimited Trading Post Re-rolls lets you cycle the shop until you find exactly what you need.
Your first stop in any safe room should be the Trading Post. Use [Triangle] to re-roll aggressively until you find game-changers like the Flamethrower or a Fully-Kitted Weapon. This is the core of the Jesse Economic Snowball—invest early to dominate late.
His Guerrilla Upgrade Branch is your path to sustained stealth and explosive power. Prioritize it in this order:
- Silencer Recipe: Craft additional silencers to keep your pistol quiet for longer, preserving your stealth advantage.
- Pipe Bomb Recipe: Ensure you always have explosives on hand for crowd control or tough enemies. Craft them with [Square] in your menu.
- Further upgrades enhance your guerrilla tactics, making you a nightmare for any faction.
With more money, the best shop access, and tools for every situation, Jesse is widely considered one of No Return's most powerful characters for players who understand how to leverage the economy.
Optimizing Dina: The Crafting Specialist
Unlocked after just two encounters with Ellie, Dina offers a different kind of mastery through her Crafting playstyle. She begins with a Revolver and bonus crafting components, but her signature abilities are the Trap Mine Recipe and Stun Bomb Recipe, which she knows from the start—no purchase required.
Her true potential unlocks with the Double-Craft Upgrade Branch. This skill tree allows her to create two items for the price of one, dramatically extending your resources on long runs. Where others might run out of mines or bombs, Dina can keep her inventory stocked.
⚠️ Watch out: Dina’s strength is proactive setup. In Holdout or Capture encounters, use the time between waves to litter choke points with Trap Mines and blind corners with Stun Bombs. If you play reactively, you’re missing her biggest advantage.
While she doesn’t have Jesse’s raw economic power, Dina’s guaranteed trap access and crafting efficiency make her exceptionally reliable. She turns every environment into a deadly maze for your enemies, perfect for methodical players who prefer control over chaos.
Strategic Synergy and When to Choose
So, who should you pick? Here’s the breakdown:
- Choose Jesse when you want to dictate your own luck. His economic control lets you build towards specific, powerful loadouts, making him ideal for tackling the hardest mods and boss encounters.
- Choose Dina when you know the encounter layouts well or are facing modes like Holdout. Her ability to fortify a position is unmatched, providing a safety net that can carry entire runs.
Both characters excel by planning ahead. Stockpile resources, craft between waves, and always play to their economic strengths. With Jesse’s infinite shop rolls or Dina’s double-output crafting, you’re not just surviving No Return—you’re mastering its systems.
Best Lev and Tommy Builds: Long-Range Stealth and Sniping
If you prefer to pick off your enemies before they even know you’re in the room, The Last of Us Part II No Return mode offers two distinct flavors of long-range lethality. Whether you’re ghosting through the shadows with a bow or holding a high-vantage overwatch with a heavy rifle, Lev and Tommy are your go-to specialists for keeping the infected—and the WLF—at a comfortable distance.

Lev's starting loadout focuses on archery and stealth.
Lev: The Silent Hunter
Lev is the ultimate shadow in The Last of Us Part II, built entirely around a Playstyle: Stealth. He hits the ground running with a Bow and a Semi-auto Pistol, and he’s the only character who begins with the Bow Draw Speed Upgrade already active. To make him truly effective, you need to lean into his Improved Listen Mode, which allows you to track enemy movements through walls with much greater precision.
When spending your supplements, prioritize the Archery Upgrade Branch. Your first goal should be Priority: Arrow Crafting efficiency, as being able to replenish your own silent ammo is what keeps Lev’s run alive. In combat, remember the rhythm: use [R2] hold to draw to build power, and if you find your aim swaying, use [L3] hold to steady aim for that perfect headshot.
Lev’s small stature makes him harder to spot in tall grass, but he lacks brute strength. If things get loud, don't try to brawl—use your superior speed to vanish and reset the encounter.
Tommy: The Marksman Elite
Playing as Tommy feels like a completely different game. His Playstyle: Sniper is built for raw power and precision, but it comes with a massive catch: he has [L1] dodge disabled. You cannot weave out of the way of a Clicker’s lunge, so you must rely on the fact that he is sturdier against melee and, more importantly, that nothing should get close enough to touch him.
Tommy starts with a Military Pistol and his signature Custom Sniper Rifle, a weapon capable of stopping almost any threat in a single shot. His growth is tied to the Marksman Upgrade Branch, which further refines his stability and fire rate.
Tommy Positioning Strategy
In Assault Encounters, your primary goal is to Find high ground immediately. Tommy is at his best when he can overlook the entire map, away from the reach of melee attackers. Once you've secured a perch, use [L2] + [R3] to scope to zoom in on distant targets. From this distance, you can One-shot standard enemies with ease, thinning out the herd before they can even locate your position.
⚠️ Watch out: Because Tommy can't dodge, Hunted encounters can be a nightmare. If you find yourself in a tight space, swap to the Military Pistol and keep your back to a wall so you aren't flanked.
Whether you’re choosing the silent recursion of Lev’s bow or the thunderous crack of Tommy’s rifle, mastering these two will turn the most daunting arenas into your personal shooting gallery. With these setups, you're ready to dominate from the shadows. Let's go.
Best Marlene and Bill Builds: Risk-Takers and Smugglers
Ready to shake up your No Return runs? The April 2025 update for The Last of Us Part II introduces two wild new survivors who play by their own rules: Marlene and Bill. Forget balanced approaches—these characters are all about embracing extremes, offering thrilling, high-stakes gameplay for veterans who want to push their luck or control the battlefield.
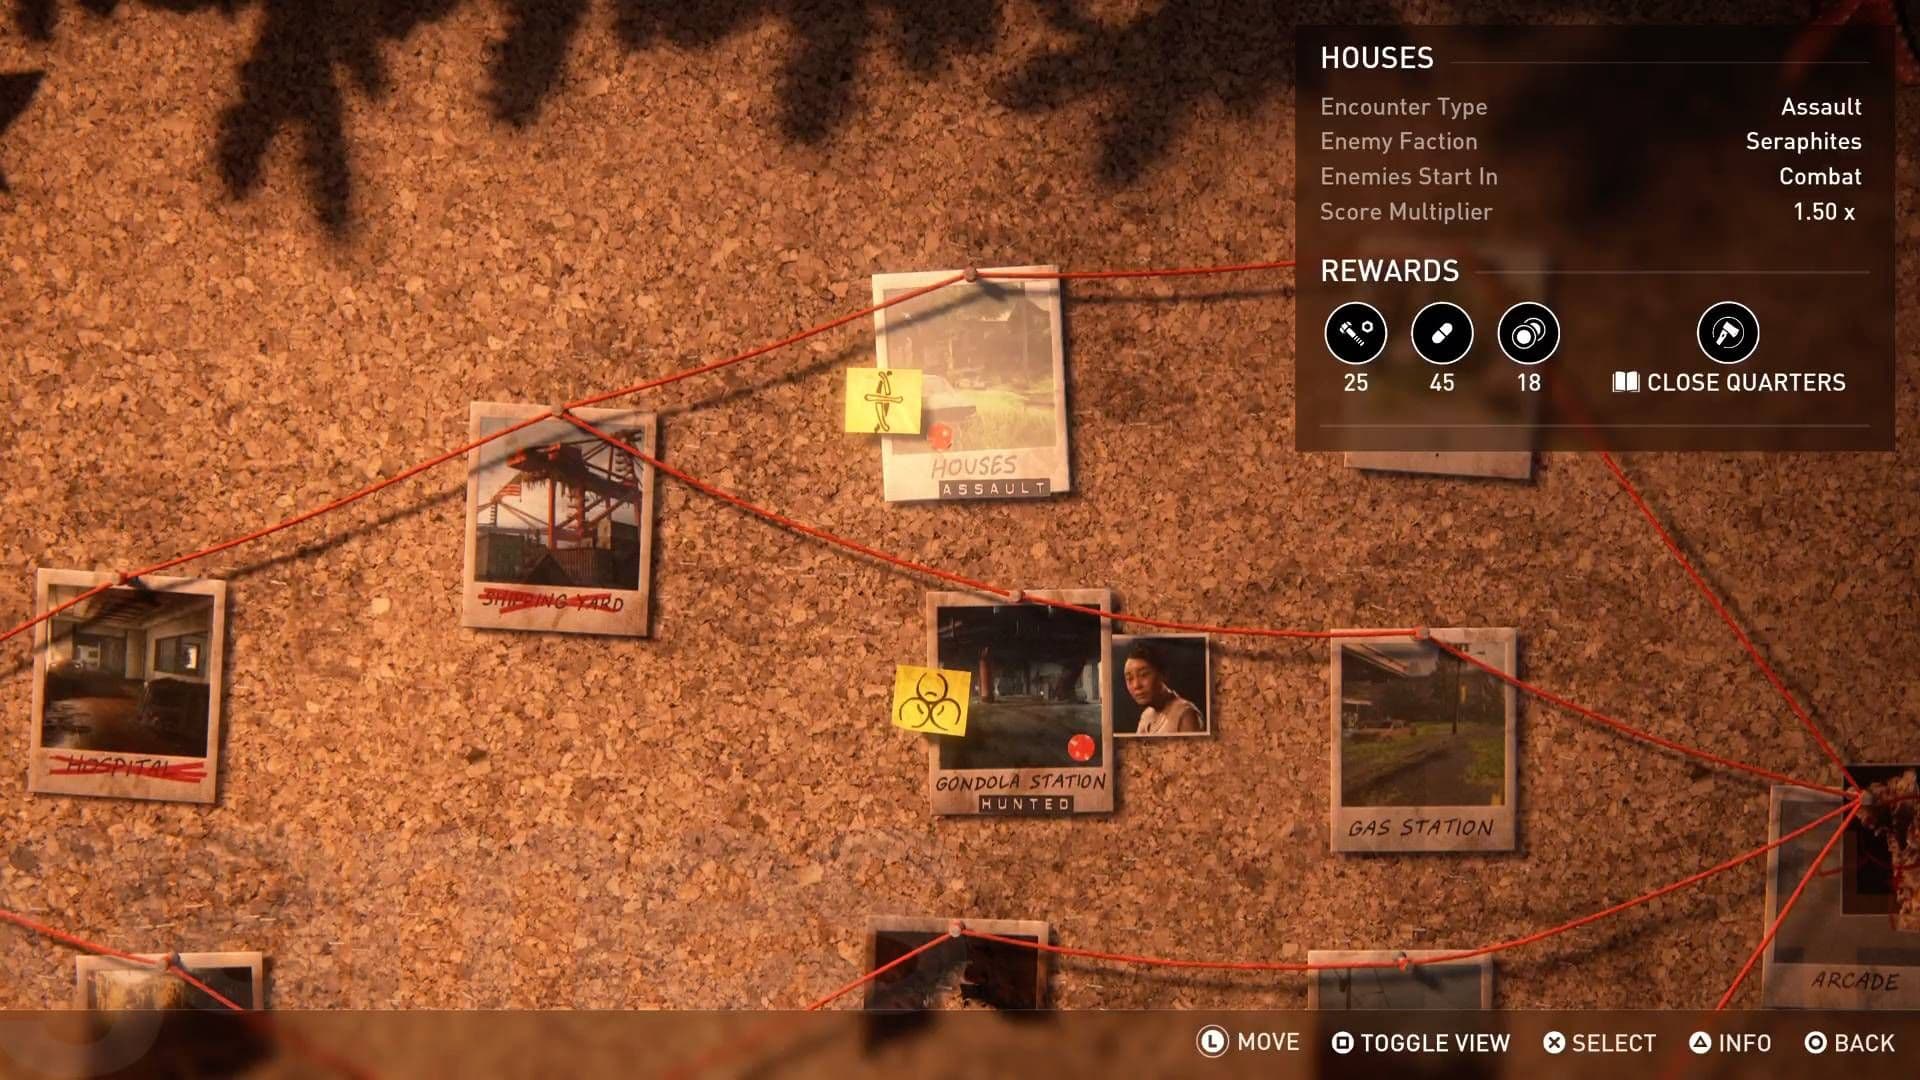
Choosing upgrade paths for unique character builds in No Return.
Marlene: The High-Roller
Marlene is the ultimate Risk Taker. Her entire playstyle revolves around chasing optional objectives, and the rewards—or penalties—are absolute. If you thrive on pressure and smart gambles, she’s your pick.
Her starting loadout gives you a powerful tool right away: an Assault Rifle as her primary, making her the first No Return character with automatic fire, backed up by a standard pistol. The rifle packs a punch but has noticeable recoil, so fire in short bursts for accuracy.
Her unique traits define her high-wire act:
- One-Time Path Reroute: Once per run, you can completely change your upcoming path on the encounter map. Use this to dodge a faction you hate or steer toward a vendor when you’re desperate for supplies.
- All or Nothing Gambits: This is the core of her risk-taking. When you attempt a gambit (those optional side objectives), you only get the reward if you complete it. Fail, and you get nothing—no partial credit. This makes every decision critical.
Her Calculated Upgrade Branch is designed to massively reward successful gambit runs. Prioritize it to unlock:
- Gambit Reward ×3: Triples the currency you earn from completed gambits, letting you snowball your economy.
- Endure: Allows Marlene to survive a killing blow with 1 HP once per encounter. This is your emergency lifeline when a gamble goes south.
- Unlimited Item Rolls: At the Trading Post, you can re-roll the available items as many times as your parts allow, letting you hunt for the perfect gear.
Only attempt gambits when you’re stocked on ammo and health. The “all or nothing” penalty is brutal, so never start one you’re not confident you can finish. Save your Path Reroute for when you’re low on resources or staring down a run-ending combo of encounters.
Bill: The Prepared Survivalist
If Marlene is about bold plays, Bill is the methodical Smuggler. He excels at scavenging, setting traps, and controlling the flow of combat from a fortified position. He’s perfect for players who love Ellie’s trap-playstyle but turned up to eleven.
He starts with a Pistol and a Machete, but his real opening advantage is the Trap Mine Recipe, which is unlocked from the get-go. His key trait is Double Dead Drop Rewards, making him the best character for hunting those hidden caches. Complete enough dead drops, and you’ll be rewarded with a Custom Shotgun—a powerful pump-action variant ideal for close-quarters defense.
A significant drawback, shared with Joel and Tommy, is that Bill Can’t Dodge. He is, however, Sturdier Against Melee, which helps mitigate the danger when enemies get close. Your strategy must focus on keeping distance and controlling engagement points.
His Prepper Upgrade Branch enhances his defensive, trap-focused kit. Focus on:
- Faster Crafting: Get your traps down quickly between waves.
- Trap Mine Inventory (3 to 4): Carry an extra mine for more coverage.
- +50% Blast Radius on Trap Mines: Turns your traps into area-denial wonders, capable of catching multiple enemies.
⚠️ Watch your corners: With no dodge, positioning is everything. Use your traps in doorways, hallways, and other choke points to control where fights happen. Always scout with Listen Mode first.
Mastering Marlene means learning when to push your luck, while dominating with Bill is about patience and preparation. Both add fantastic, deep new strategies to The Last of Us Part II's No Return mode, proving there's always a new way to survive.
Optimal Weapon Upgrades and Trading Post Strategy
Your arsenal is the final piece of the puzzle in The Last of Us Part II's No Return mode. While characters define your playstyle, smart weapon upgrades and Trading Post strategy define your survival. This isn't just about finding a gun—it's about building a loadout that turns a desperate run into a dominant victory.
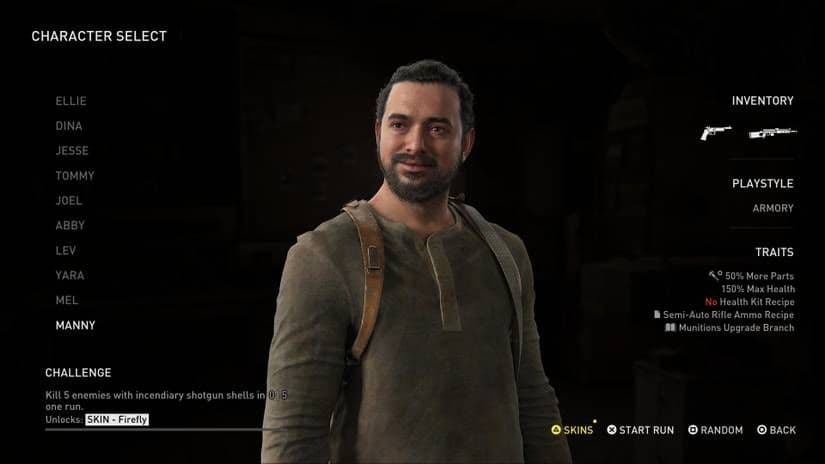
Manny's starting loadout benefits significantly from the Munitions upgrade path.
Weapon Upgrade Priority
When you're staring at a workbench with limited parts, the choice matters. Here's how to spend for maximum impact.
The Hunting Pistol is a powerhouse sidearm you'll frequently see at the Trading Post. It's devastating against tougher foes like Shamblers and Clickers, making it a perfect ammo-conservation tool for your main weapon. Prioritize upgrading its Damage first to ensure it one-shots standard enemies, then invest in Stability for more reliable follow-up shots.
For close-quarters chaos, the Double-Barrel Shotgun is non-negotiable. It's essential for crowd control and shredding through groups in Hunted or Holdout encounters. Your first upgrade should always be Reload Speed—when you're swarmed, that extra second saved is everything. After that, pump everything into Damage to make sure every blast counts against bosses.
If you prefer to engage from a distance, the Bolt-Action Rifle is your best friend. It’s generally easier to find than the bow and delivers high-damage, accurate shots. Focus on Stability first to keep your aim steady under pressure, then upgrade Damage to achieve one-shot headshots on regular enemies.
Match your primary weapon upgrade to your character's specialty. Tommy wants his rifle maxed, Abby benefits more from melee upgrades, and Jesse can afford to upgrade everything thanks to his bonus currency.
Trading Post Mastery
The Trading Post is your lifeline between encounters. Its stock is random, but your strategy shouldn't be.
Always check for Fully-Kitted Weapons. These are rare, maxed-out versions with superior damage, stability, reload speed, and durability. Finding one that fits your playstyle—whether it's a tricked-out rifle or a souped-up shotgun—can single-handedly carry a run. They appear as high-cost purchases or very rare enemy drops.
For characters without unlimited re-rolls, be decisive. Ammo for your current main weapon always takes priority over a shiny new gun you can't feed. Health kits are a must-buy if you're low, especially on characters like Manny who can't craft them.
Putting It All Together
Your endgame strategy looks like this: enter an encounter, assess your ammo and health, hit the Trading Post with a clear priority list, and upgrade deliberately at the next workbench. A Hunting Pistol for elite threats, a Double-Barrel Shotgun for close calls, and a Bolt-Action Rifle for picking apart the battlefield—this trio covers every scenario No Return can throw at you.
With the right weapon in your hands and a smart upgrade path, you're not just surviving encounters; you're controlling them. Now go finish that run.