
How to Unlock All Characters in The Last of Us Part II No Return
Your journey through The Last of Us Part II's brutal No Return mode begins with a small, familiar crew. But the real power of this roguelike lies in its cast—a roster of 10 survivors, each with unique skills that can completely reshape your strategy. Unlocking them all is your first and most important meta-progression goal, and here’s the exact, no-nonsense path to get everyone on your team.
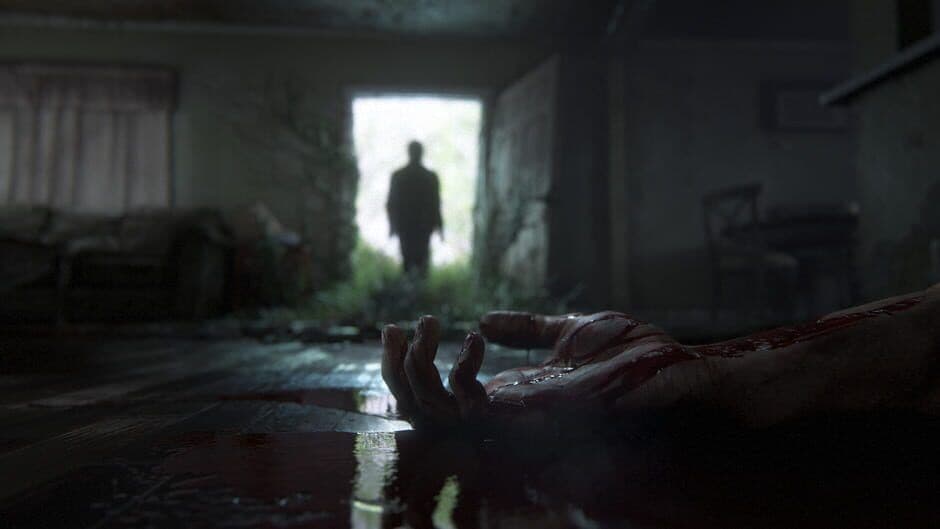
Experience the brutal combat of No Return with ten different survivors.
The Unlock Chain: Play to Progress
Think of No Return like a relay race where each character passes the baton to the next. You don't unlock characters by chance or secret challenges; you unlock them by simply playing a set number of encounters as the most recently unlocked character. This creates a clear, sequential path for both factions.
Here’s the trick most guides miss: you must complete the encounters, not just start them. A successful run that ends at the boss will unlock the next character in your chain, but so will playing individual encounters across multiple runs. The game tracks your progress, so don't feel pressured to finish a full run every time if you're just grinding unlocks.
Team Ellie: The Jackson Crew
This group focuses on stealth, precision, and resourcefulness. Your starting point is Ellie, the stealth and ranged specialist available from the very start.
- Dina, the crafting and support specialist, unlocks after you complete 2 encounters as Ellie. She’s your gateway to better resource management.
- Jesse, the resource and item specialist, unlocks after you complete 3 encounters as Dina. He excels at making the most of the Trading Post.
- Tommy, the long-range sniper specialist, unlocks after you complete 3 encounters as Jesse. If you prefer picking off enemies from a distance, he’s your man.
- Finally, Joel, the close-quarters combat specialist, unlocks after you complete 4 encounters as Tommy. He brings raw, seasoned survivability to the fight.
Team Abby: The Salt Lake Crew
This faction leans into aggression, resilience, and direct confrontation. Your anchor here is Abby, the melee powerhouse and resilience specialist who is also unlocked from the start.
- Lev, the precision and agility specialist, unlocks after you complete 2 encounters as Abby. He’s a master of the bow and silent movement.
- Yara, the companion-based combat specialist, unlocks after you complete 3 encounters as Lev. She uniquely brings Lev along as an AI ally in certain encounters.
- Mel, the healing and survival specialist, unlocks after you complete 3 encounters as Yara. She’s crucial for runs where you need to stretch your health resources.
- The final unlock is Manny, the heavy weaponry and upgrade specialist, who becomes available after you complete 4 encounters as Mel.
With all 10 survivors unlocked, you have the ultimate toolkit for tackling No Return's randomized challenges. Now you can match a character's unique strengths to any encounter the mode throws at you. Let's go.
Best Build and Character Traits for No Return Runs
Your success in The Last of Us Part II's No Return mode hinges on who you bring to the fight. Every character isn't just a different face—they're a distinct playstyle with unique starting gear and skill trees that define your entire run. Choosing the right character for your approach can turn an impossible run into a victory lap.

Combat encounter in No Return.
Here’s a breakdown of the core traits that define the major players, so you can build a strategy that fits how you want to play.
Team Ellie: Stealth and Precision Specialists
The characters aligned with Ellie excel at controlled, tactical engagements, favoring stealth and resourcefulness over brute force.
- Ellie is your quintessential stealth and ranged expert. She starts every run with the Molotov Recipe and extra supplements, letting you craft powerful explosives and upgrade your skills faster. Her skill tree heavily focuses on enhancing Stealth and Listen Mode, allowing you to plan attacks with near-perfect information and move through environments undetected. She’s built for players who like to pick their battles and eliminate threats quietly.
- Joel embodies the seasoned, self-sufficient survivor. He begins with a Revolver and a Pipe, giving you reliable tools for both ranged and melee encounters right out of the gate. His skill tree emphasizes weapon upgrades and melee damage, making him incredibly durable in close-quarters combat. He’s a fantastic choice for runs where you plan to stand your ground and make every shot count.
Team Abby: Brute Force and Resilience
If subtlety isn’t your style, Abby’s crew brings overwhelming power and sustainability to the forefront.
- Abby is the melee powerhouse. She starts with the Melee Upgrade Recipe and, critically, heals on melee kills. This trait makes her exceptionally resilient, rewarding aggressive play. Her skill tree further bolsters her Melee and Explosives proficiency, turning her into a walking tank that can clear rooms with her fists and throwables. If you like to get up close and personal, Abby is your character.
- Lev offers a unique hybrid of precision and agility. He is proficient with the Bow and Arrow, providing silent takedown capability from the start. His skill tree enhances bow accuracy and movement speed, perfect for players who favor a hit-and-run or tactical archer playstyle. He lets you control engagements from a distance while staying mobile.
- Yara provides a completely different tactical advantage: a permanent partner. She always spawns with Lev as an immortal NPC ally. This means you have a competent, unkillable fighter drawing enemy fire and dealing damage in every encounter. The trade-off is that she lacks other unique character benefits, so your strategy must revolve entirely on leveraging your two-versus-one advantage.
For grinding runs or learning the mode, start with Abby. Her built-in healing from melee kills provides a safety net that other characters lack, letting you recover from mistakes and sustain through longer engagements.
With this understanding of each character's core identity, you can stop fighting against your kit and start building a run that plays to your—and your character's—unique strengths. Pick your specialist, and let’s build a run.
How to Master Game Modes and Randomized Mods in No Return
Here’s the heart of every No Return run—the moment you leave the Safe House and step into chaos. In The Last of Us Part II, each encounter is a unique puzzle of survival, defined by its Game Mode and twisted by Randomized Mods. Master these, and you’ll transform from a survivor into a strategist.

Randomized mods can significantly change how you approach combat.
The Four Core Encounter Modes
You’ll face one of four mission types on your path to the boss. Each demands a different approach, so knowing the rules is half the battle won.
Assault Mode is your classic wave defense. You must defeat 3 waves of enemies, with each wave growing in size and threat. Here’s the trick most guides miss: after clearing a wave, loot all corpses before opening the reward cache. The next wave often starts the second you grab that cache, so scavenge first, then get to cover.
Hunted Mode is a pure test of endurance. Endless enemies spawn, and you just need to survive until a timer expires. If you’re overwhelmed, use the terrain to your advantage. Hold [Circle] to go prone behind cover or on elevated surfaces to break line of sight and buy precious seconds.
Holdout Mode shifts the objective to protection. You and an NPC ally must defend against waves of infected. Your ally can fight, but if they take too much damage, you fail. For the related trophy and optimal rewards, focus on keeping ally health above 70% by eliminating threats before they can close in.
Capture Mode is a race against the clock. You must open a safe before a timer expires, all while enemies guard it. Stealth is your best weapon here. Use listening mode to plot a path, silently take out isolated guards, and sprint to the safe once the coast is clear.
In Capture Mode, the safe can only be opened if you are not in combat. If you’re spotted, break line of sight and hide until the “searching” status clears, then make your move.
Navigating Randomized Mods
As if the modes weren’t enough, Mods are gameplay-altering conditions that can help or hinder you dramatically. Some are blessings, like Melee Kills Restore Health. Others will test your adaptability to the extreme.
The Invisible Enemies Mod is a classic challenge. Since foes cannot be seen, you must rely entirely on sound and intuition. Hold [R1] to use Listen Mode to track the vague outlines of their movement and listen closely for their groans and footsteps to pinpoint locations.
Then there’s Molotov Rain Mod, where fire literally falls from the sky. This one is brutal but manageable. Constantly reposition and watch for the fiery ground indicators before they land. Don’t get caught in a corner or a lengthy animation.
Perhaps the most disorienting is the Thick Fog Mod. It severely reduces visibility and, critically, disables Listen Mode. You’re stripped of your primary tracking tool. In this mod, your ears become your eyes. Pay acute attention to audio cues—the shrieks of infected, the shouted commands of human enemies, and the direction of footsteps are your only guides.
⚠️ Watch out: Some mods, like Long Guns Locked or Reloading Discards Ammo Left, fundamentally change your resource calculus. Always check the mods on the encounter map in the Safe House before you commit to a path.
Putting It All Together
Your strategy in the Safe House hub is crucial. Before each encounter, press [Triangle] to open the Trading Post to spend coins, and press [X] to use the Workbench for upgrades. But first, always study the encounter map. See the mode, check the mods, and choose the path that best suits your current loadout and confidence.
With a firm grasp on these four modes and the most punishing mods, you can anticipate the challenge ahead and adapt on the fly. This knowledge turns random chaos into a winnable game. Let’s go.
Best Weapon Upgrades and Resource Management Strategy
Your survival in The Last of Us Part II’s No Return mode hinges on one critical choice: how you spend your limited coins and weapon parts. A single impulsive purchase or a wasted upgrade can be the difference between a triumphant boss kill and a frustrating run reset. This section breaks down the smartest investments to make your resources work for you.

A well-balanced loadout is the result of smart spending.
The Trading Post: Your Strategic Lifeline
Between each encounter, you’ll return to the Safe House and its most important feature: the Trading Post. This is where you convert the coins you earn from kills and Gambits into power. The key rule here is patience. The Trading Post’s inventory rerolls after every encounter, so a weapon you desperately want might appear later. Don’t blow all your coins on the first pistol you see. Save them for game-changing purchases like new holsters (to carry more weapons) and the high-tier firearms that will carry you through the final boss.
Must-Buy Weapons and Their Upgrades
When you do spend, focus on weapons that offer the highest return on investment. Here’s a breakdown of the best tools for the job, all found at the Trading Post.
The Double Barrel Shotgun is your go-to for overwhelming firepower. Its high burst damage is perfect for when you’re cornered and essential for shredding larger threats like Bloaters and Seraphite Brutes. When upgrading, prioritize Damage first to maximize its stopping power. For early-game flow, Reload Speed is a fantastic first upgrade to keep you in the fight.
The Hunting Pistol is an elite killer. This single-shot sidearm can delete tough enemies and chunk boss health bars with precision. Its main drawback is the single round, so every shot must count. Always upgrade Damage first to ensure each bullet hits as hard as possible, followed by Stability to make those critical shots easier to land.
The Bow is the stealth specialist’s best friend. It allows for silent takedowns without alerting a room, and crafting explosive arrows later makes it a boss-wrecking tool. Its weakness is close-quarters panic. The most impactful upgrade is Draw Speed, letting you get shots off faster in tense moments. After that, invest in Stability for better aiming precision.
The Bolt-Action Rifle dominates long-range engagements. Its high damage and accuracy let you pick off threats from a safe distance, a huge advantage in many arenas. For this weapon, Stability is the top priority—it’s essential for lining up those perfect headshots. Damage is your second upgrade, especially valuable for turning those headshots into one-hit kills against tougher enemies.
A “fully-kitted” weapon (pre-upgraded) from the Trading Post or a Dead Drop is always a top priority. It gives you a massive power spike for zero upgrade parts, letting you save your resources for other gear.
Maximizing Free Resources: Dead Drops and Gambits
Beyond the Trading Post, two mechanics provide crucial free gear and currency.
Dead Drops are special encounters where you’re asked to deposit specific items (like a health kit or a bottle). Press [X] to deposit the requested items during the encounter. If you succeed, you’ll receive a reward—often a powerful weapon or a new crafting recipe—back at the Safe House. It’s almost always worth fulfilling these requests if you have the spare items.
Gambits are random mini-challenges that pop up in encounters (like “Get 3 headshot kills”). Press the [Touchpad] to view your active Gambit and its progress. Completing them rewards you with bonus coins and sometimes ammo or health—resources you didn’t have to spend at the Trading Post. Always try to complete them; the extra coins snowball into better gear for later.
Smart Resource Management Strategy
Here’s your action plan for a successful run:
- Early Run (Encounters 1-2): Be frugal. Loot thoroughly, complete Gambits, and stash your coins. Only buy essentials if your starting gear is failing you.
- Mid Run (Encounters 3-4): Invest. Now is the time to buy a primary weapon like the Double Barrel Shotgun or Bolt-Action Rifle. Start applying weapon parts to your main gun, focusing on the key upgrades mentioned above.
- Late Run (Encounter 5 & Boss): Consolidate. Spend any remaining coins on ammo, health kits, or a final weapon upgrade. Enter the boss fight with a full stock of crafted Molotovs and pipe bombs—they are devastating against all boss types.
If you’ve ever lost a run feeling underpowered, this strategy is your fix. By knowing what to buy, when to save, and how to leverage free rewards, you’ll enter every boss arena in The Last of Us Part II feeling prepared and powerful.
How to Defeat All 6 Bosses in The Last of Us Part II No Return
Here’s the final challenge waiting at the end of every run in The Last of Us Part II’s No Return mode: the boss fight. Your entire journey—the scavenging, the upgrades, the tense encounters—culminates in one of six brutal showdowns. You’ll face them in a fixed order at first, but trust me, beating them all unlocks the real endgame chaos: Randomized Bosses. Let’s break down how to unlock and dismantle each one.

Mastering combat is required to defeat all six bosses.
Unlocking the Boss Chain
You start with access to only the Arcade Bloater. Each victory unlocks the next boss in the sequence, creating a clear progression path as you complete runs with new characters. Here’s the exact unlock chain:
- Arcade Bloater → Unlocked from the start.
- Theatre Infestation → Unlocked by defeating the Arcade Bloater.
- Rattler Captain → Unlocked by defeating the Theatre Infestation.
- Garage Bloater → Unlocked by defeating the Rattler Captain.
- Seraphite Elite → Unlocked by defeating the Garage Bloater.
- Rat King → Unlocked by defeating the Seraphite Elite.
Once you’ve beaten the Rat King, all future runs can end with a Randomized Bosses modifier, meaning you won’t know which of the six you’ll face until you get there. It’s a brutal but fair system—you master them one by one before the game mixes them up.
Boss Breakdown: Strategies for Survival
Each boss demands a different approach. Human bosses play like intense, high-stakes skirmishes, while the infected require raw firepower and constant pressure.
Arcade Bloater
This is your introduction to No Return’s big bads. The Arcade Bloater is a massive, armored infected that spews poisonous spores. Your strategy is straightforward but tense: keep your distance, use high-powered weapons like the Bolt-Action Rifle or Hunting Pistol, and target its exposed, fungal growths for maximum damage. Save your explosives—Molotovs and pipe bombs—for when it gets too close. This fight is about resource management and precision under pressure.
Theatre Infestation
Unlocked after the Arcade Bloater, the Theatre Infestation is a chaotic swarm. You’re not fighting one enemy but a writhing mass of Clickers and Shamblers fused into a single, aggressive entity. Don’t waste ammo on the smaller infected buzzing around it—all your focus should be on the main Clicker-like amalgamation. Its movements are unpredictable, so use your environment for cover and lay down sustained fire. A Double Barrel Shotgun or Flamethrower can clear the room quickly if you’ve saved one.
For the Theatre Infestation, ignore the adds. Pour every bullet and bomb into the central mass. Trying to clear the smaller infected first will just drain your resources and get you overwhelmed.
Rattler Captain
After the infected chaos, the Rattler Captain feels almost like a breather. You’ll find him in the Rattler's camp, identifiable by his skull mask, among other armed enemies and dogs. Treat this like a standard human encounter, just more intense. Prioritize the captain himself—a few well-placed Shotgun blasts or a Hunting Pistol headshot will take him down fast. After he’s down, you still need to clear the remaining camp, so don’t let your guard drop.
Garage Bloater
The Garage Bloater is similar to its arcade cousin but fought in a semi-flooded parking space. The arena is your biggest advantage here, as it’s often filled with other regular infected. Use Area of Effect (AoE) weapons like Molotovs or the Flamethrower to damage the bloater and clear the crowd simultaneously. Lure it near groups of enemies before tossing an explosive for maximum efficiency.
Seraphite Elite
This human boss fight in Seraphite territory pits you against a duo: a melee brute and a ranged, intelligent enemy who calls for reinforcements. Your priority is the melee brute—take him out fast with headshots or explosives before he closes the distance. The ranged enemy is dangerous but more predictable. Weapons like Tommy's sniper can potentially one-shot with a headshot. Use cover and pick them off methodically.
Rat King
This is it—the ultimate test. The Rat King is widely considered the hardest boss in The Last of Us Part II's No Return mode. You fight it in a dark hospital section with limited visibility, and it can spawn Infestation enemies from its body mid-fight. It’s also notably resilient to fire. You need every advantage: save all your most powerful weapons and explosives for this fight. Keep moving, listen for audio cues in the dark, and burst it down before the adds overwhelm you.
⚠️ Watch out: If your Daily Run features the Rat King or a Bloater as the boss on Grounded difficulty, consider waiting for a new day. These fights are brutally unforgiving with one life.
With these strategies, you’re ready to take down every boss No Return throws at you. Remember, once they’re all defeated, the real challenge begins with random bosses at the end of each run. Good luck—you’ve got this.
How to Complete a Daily Run on Grounded Difficulty
This is it—the final challenge. In The Last of Us Part II, completing a Daily Run on Grounded difficulty is the ultimate test of everything you’ve learned in No Return. It’s the path to the 'May Your Death Be Swift' trophy, and it demands patience, precision, and a few clever tricks. If you've struggled here, you're not alone—this is the hardest hurdle in the mode.

Before you even launch your run, head to the Accessibility settings. This is non-negotiable. Under Combat Accessibility, enable Invisible While Prone: ON. This lets you hold [Circle] to go prone and become invisible to enemies, a lifesaver in modes like Hunted. Also enable Slow Motion: WHILE AIMING, which triggers when you aim with [L2] and is perfect for lining up critical headshots under pressure. Finally, under Navigation and Traversal, turn on Enhanced Listen Mode: ON. This lets you press [R1] + [Circle] to ping enemy locations and items even on Grounded, where normal Listen Mode is disabled.
Your strategy for a Grounded Daily Run is one of conservation and stealth. The moment you load into the Safe House, preview every node on the encounter board. Chart a route that avoids Holdout modes—defending an ally against waves of infected is a huge resource drain—and sidestep encounters with detrimental mods like Invisible Enemies or Molotov Rain. Plan your path to conserve ammo and health for the final boss.
In dark areas, press [L3] to turn off your flashlight. Human enemies can spot the light, breaking your stealth instantly. Most areas are navigable without it.
Play your life. This isn't the time for heroics. Use your enhanced stealth tools to pick off enemies quietly, save explosive ammo for the boss, and always, always use the environment to your advantage. If you get overwhelmed, go prone and let the enemies pass. The goal is simply to survive.
When you finally reach the boss, you’ll be glad you saved your best gear. Whether it's a human boss like the Seraphite Elite or a terrifying infected like the Rat King, you’ll need every Molotov, pipe bomb, and shotgun shell you’ve hoarded. Stay calm, keep your distance, and focus fire.
With these strategies, you’ve turned the game’s hardest challenge into a calculated, winnable mission. You’ve mastered the mechanics, you know the tricks, and you’re ready. Take a deep breath, and go claim that trophy.