How to Prepare for the Rat King in The Last of Us Part II
You’re about to face the most terrifying entity in The Last of Us Part II—the Rat King. This grotesque amalgamation of the oldest infected in Seattle won’t give you a second chance to prepare. Before you trigger the fight by grabbing those medical supplies, you need to make Abby a walking arsenal. Here’s exactly how to stock up and upgrade so you’re not scrambling when the screaming starts.
Official gameplay screenshot.
Your final prep window is Seattle Day 2, inside the hospital. After your friend Nora, who provides key information and access to the lower floors, sends you down to find surgical supplies, you’ll face a gauntlet of Clickers and environmental puzzles. This is where resource discipline is critical, especially on Grounded difficulty, where every bullet and blade counts. Conserve ammo in all prior encounters; sneak past or stealth-kill whenever possible to save your heavy firepower for the main event.
Your crafting menu is your lifeline. Before you enter the ambulance that triggers the boss, hold [L1] to open the menu and prioritize two items:
- Health Kits: Craft at least three. You’ll need them to survive the Rat King’s devastating hits and the toxic spore clouds.
- Pipe Bombs: Max out your stock using every canister and scrap of black powder you’ve hoarded. These are your highest burst-damage option and are crucial for staggering the boss.
Don’t craft everything at once. Make one Health Kit and a Pipe Bomb, then scavenge for more materials as you explore the hospital’s lower floors. This lets you top up your inventory right before the point of no return.
Next, seek out any Workbench you’ve passed in Seattle Day 2. Your upgrade priorities are non-negotiable:
- Double Barrel Shotgun: Prioritize damage upgrades. This turns it into your primary boss-melter, especially when paired with Incendiary Shells.
- Hunting Pistol: Unlock or upgrade the scope. You’ll need this precision to hit the Rat King’s pustules from a safe distance during the chaotic first phase.
With your kits crafted, bombs stocked, and weapons upgraded, you’ve done all you can. Head to the ambulance, grab the supplies, and get ready to run. Trust me, with this preparation, you’ve just turned an impossible fight into a manageable—though still horrifying—challenge. Let’s go.
How to Survive the Rat King Chase Sequence in Ground Zero
The ground zero of the pandemic awaits. In The Last of Us Part II, after you grab the surgical supplies from the ambulance, the true horror of the Hospital Basement in Seattle's Ground Zero reveals itself. This isn't a fight yet—it's a desperate, scripted flight for your life where a single mistake means a gruesome game over.

Navigating the dangerous corridors of the Seattle hospital.
This is the Run Phase. Your only job is to run. Hold [L3] to sprint forward and don't look back. The Rat King is right behind you, and its Instant Death Grab triggers instantly if you slow down or get too close. Follow the yellow exit arrows painted on the walls—they are your lifeline through the twisting, dark corridors. Trust me, you'll want to keep moving constantly.
The audio cue is your best friend here. Listen for the Rat King's roar and the sound of breaking walls—if it sounds close, you need to be sprinting.
You’ll eventually reach a door with a Fire Axe embedded in it. This triggers a scripted event where the Rat King grabs Abby. Don’t panic—mash the [Square] button rapidly to break free. This momentary struggle is your only reprieve before the floor gives way beneath you. This floor collapse sends you both tumbling into the lower-level arena, marking the Arena Entrance and the official start of the combat phase.
If you've wiped here before, you're not alone. The tight timing and pressure can be overwhelming. But by focusing solely on sprinting, following the yellow arrows, and mashing through the grab, you'll survive the chase every time. With the initial escape behind you, you're ready for the real fight.
Best Weapon Loadout for the Rat King Boss Fight
This is it—the moment you’ve been preparing for. After surviving the harrowing chase, you’re trapped in the arena with the Rat King, The Last of Us Part II’s most terrifying creation. On Grounded difficulty, where every bullet counts, your weapon choices aren’t just preferences; they’re your lifeline. Here’s the arsenal that will get you through.
The dark corridors of the Seattle hospital.
Your absolute best friend in this fight is the Flamethrower. Trust me, you’ll want to save every ounce of fuel for this boss. It’s not just for damage; the continuous stream of fire will consistently stagger the Rat King, slowing its relentless advance and buying you precious seconds to reload, heal, or reposition. This area control is invaluable when you need to create separation in the tight hospital basement.
For close-range devastation, nothing beats the Double Barrel Shotgun. Its raw stopping power is perfect for punishing the Rat King after you dodge its charge. The real game-changer, however, is pairing it with Incendiary Shells. You can craft these in your [L1] hold menu. They not only deal massive initial damage but also inflict a burn damage-over-time effect, letting you chip away at its health even while you focus on staying alive. This is especially brutal against the Bloater half later on.
Don’t just spray and pray with the Flamethrower. Use it in short, controlled bursts through doorways or around pillars to maximize the slow effect while conserving fuel.
When you need precision from a distance, the Hunting Pistol is your tool. Aim for the glowing pustules on the Rat King’s body or its multiple heads—these weak spots deal significantly more damage and can cause the boss to stagger, opening a window for your heavier weapons. This is crucial for the initial phase where maintaining distance is everything.
Finally, don’t overlook utility items. While Pipe Bombs (which you should have maxed out) are your primary explosive, Smoke Bombs have a strategic role. If you get cornered or need to reload in a tight spot, tossing a Smoke Bomb at the Rat King’s feet will stun it briefly, creating the exact distance you need to escape a fatal grab.
With the Flamethrower for control, the Double Barrel Shotgun with Incendiary Shells for burst damage, the Hunting Pistol for precision, and utility items to create breathing room, you have a loadout built to dismantle this monstrosity. Let’s talk about how to use them.
Rat King Phase 1: Kiting and Environmental Tactics
The floor has collapsed, and you're face-to-face with the fused horror in its own lair. This is it—Phase 1 of the Rat King fight in The Last of Us Part II, a brutal test of movement and precision where your primary goal is to whittle down the unified boss while managing your precious Grounded resources.
Using the environment to maintain distance.
Your survival hinges on mastering The Circuit Route. The arena is a large, open circuit, and your best strategy is to keep moving in wide circles. Use the concrete pillars and other debris to constantly break the Rat King's line of sight. This buys you crucial seconds to reload, craft a Pipe Bomb, or apply a Health Kit. Trust me, stopping in the open is a death sentence.
The Rat King is relentless and will use the environment against you with its Wall Break ability. It can and will charge through walls and obstacles to reach you. While this can sometimes create unexpected new paths, it actively reduces your available cover, forcing you to keep adapting your lap around the arena.
Listen for the audio cue—a guttural, loud scream—to anticipate the Charge Attack. When you hear it, immediately press [L1] to dodge laterally. A successful dodge not only saves you but often leaves the boss momentarily stunned, creating your best opening to attack.
When you do attack, Pustule Targeting is your key to efficiency. Aim for the glowing, bulbous weak points on the Rat King’s massive body. Landing shots on these pustules deals significantly more damage and will cause the creature to stagger, giving you an even larger window to unleash your heaviest weapons or create more distance.
Be mindful of its ranged threat: Toxic Spore Bombs. The Rat King will hurl acidic clouds that create a damaging area on the ground. The key here is to never linger—these spore clouds last much longer than those from standard infected. If you see one land near your planned route, immediately change direction.
This phase is about endurance. Kite, dodge the charge, target the weak points, and avoid the spores. Every shot on a pustule brings you closer to the critical moment when this nightmare finally splits apart. Stay mobile, stay focused, and you'll make it to the next phase.
Rat King Phase 2: How to Beat the Stalker Half on Grounded
This is it—the moment the Rat King fractures. In The Last of Us Part II, this terrifying amalgamation reaches a 50% HP threshold, triggering a gruesome Phase Transition. A writhing Stalker tears itself from the boss’s right side, leaving the bloated mass behind. Suddenly, you’re fighting two enemies in the dark.

Maintaining awareness during the Stalker phase.
Your priority is absolute: Stalker Prioritization. Kill the detached Stalker immediately. It’s faster and will relentlessly flank you while the slower, heavier half remains a constant threat. Leaving it alive complicates the fight exponentially, as it can attack from blind spots and leave you vulnerable to a fatal grab.
The moment the Stalker detaches, hit [R1] to activate Listen Mode. This lets you track both enemies through walls simultaneously, preventing any nasty surprises while you focus on the agile target.
The Stalker has a nasty trick: Stalker Smoke Bombs. It will hurl these at your feet, creating a damaging cloud. When you see the throw, be ready to press [L1] to dodge away and retreat from the area entirely. Getting caught in the smoke not only hurts but also blocks your vision—a death sentence with the other half still lumbering toward you.
For Ammo Efficiency, remember you have options. If your Shotgun or Hunting Pistol ammo is running low, don’t waste precious rounds. A well-timed [R2] melee attack with your Machete can finish the Stalker off. It’s riskier, requiring good dodging, but it conserves bullets for the bloated half waiting in the wings.
With the Stalker down, the arena feels less claustrophobic. You’ve eliminated the flanking threat and can now turn your full, undivided attention back to the original monstrosity. One half of the nightmare is over.
Rat King Phase 3: Hunting the Final Stalker in the Vents
You’ve survived the chase, endured the split, and finally put down the Bloater half. In The Last of Us Part II, the horror isn’t over until you’ve silenced the last scream. Don’t let your guard down—the final, most personal fight is about to begin.

Exploring the hospital basement.
Hunt and Kill the Clicker Segment
With the main mass defeated, the agile Clicker segment—the Stalker that detached earlier—scuttles away through a blocked door. Your goal now is simple: hunt it down and finish the job. Follow it through the dim corridors until you reach the Exit Vent within the arena. Crawl inside.
Before you enter the vent, do a quick sweep of the main arena. Grab any last bits of ammo or crafting supplies you missed. You’ll want everything you have left.
Inside the vent, you’ll trigger The Vent Ambush. The Clicker segment attacks from the darkness, grabbing Abby. Mash [Square] to fight it off. This is a scripted sequence—succeed, and you’ll both tumble out into a final, claustrophobic space.
This is your Final Stand. The arena is gone; it’s just you and this relentless creature in tight corridors. Your strategy here is brutal and direct: unload all your remaining ammunition into it. Keep moving to avoid its lunges, and use your Shotgun to maintain distance and deal heavy damage. If you’re out of ammo, don’t panic—dodge its attacks and retaliate with fists or a melee weapon. This smaller segment can be killed with accumulated melee damage, though it’s riskier.
Once the Clicker segment falls, the relentless tension of The Last of Us Part II’s most infamous boss fight finally breaks. Your Reward: Story Progression is immediate. With the Rat King dead, you can finally escape the hospital basement to the surface and deliver the vital medical supplies to Mel and Yara.
You did it. You faced the oldest horror in Seattle and walked away. Take a breath, gather yourself, and step back into the rain—you’ve earned it.
The Last of Us Part II Grounded Accessibility Tips
Grounded difficulty in The Last of Us Part II turns the Rat King into a brutal test of patience and precision. If you’ve hit a wall, know this: the game’s own accessibility and difficulty settings are powerful, sanctioned tools designed to help you push through. This isn't cheating—it's using the tools Naughty Dog provided to tailor the experience so you can enjoy the story and conquer the challenge.
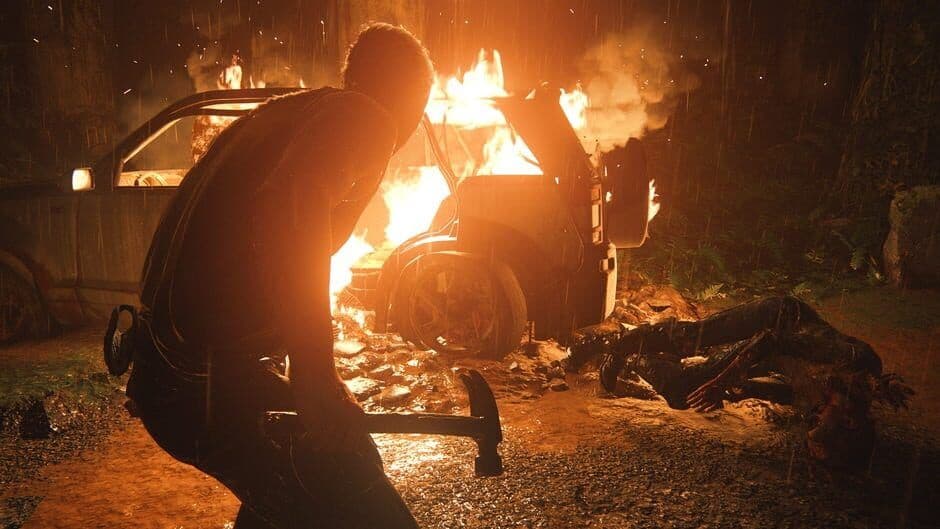
Navigating complex combat arenas.
Customize Your Chase and Combat
The initial Run Phase through the dark hospital corridors is disorienting and punishing. To make navigating this terrifying chase easier, enable Navigation Assistance. You can find this in the Options menu; simply press [L3] during the chase to highlight the correct path with a glowing trail. This takes the guesswork out of fleeing and lets you focus purely on sprinting and timing those crucial jumps.
When you drop into the main arena, the combat’s speed can be overwhelming. Here, two key Combat Accessibility options are game-changers. First, enable Slow-Motion. This lets you slow down time while aiming, giving you precious extra seconds to line up perfect Hunting Pistol headshots on the Rat King’s pustules or track the detached Stalker. Second, increase the Dodge Duration. Located in the accessibility menu, this extends the invincibility window of your dodge, making those close-quarters evasions against the Rat King's swipes and the Stalker's lunges significantly safer.
Combine Slow-Motion with your Listen Mode to calmly track both the Bloater and Stalker halves during Phase 2. It turns a chaotic scramble into a manageable tactical puzzle.
Adjusting the Challenge
If, after tweaking the accessibility settings, the fight still feels insurmountable, remember that the Difficulty Adjustment is there for you. You can lower the setting to 'Light' at any time from the Options menu. The only requirement is restarting the encounter from the last checkpoint—there’s no penalty to your progress or trophies. On 'Light', the Rat King’s health pool shrinks, its attacks become less aggressive, and your resources go further, letting you learn the fight’s rhythms without the constant pressure of instant death.
Don’t view these settings as a compromise, but as your toolkit. Whether you need a clearer path, more time to react, or a slightly gentler learning curve, The Last of Us Part II gives you the control to experience its most harrowing moments your way. Configure these options, take a breath, and step back into the darkness—you’ve got this.